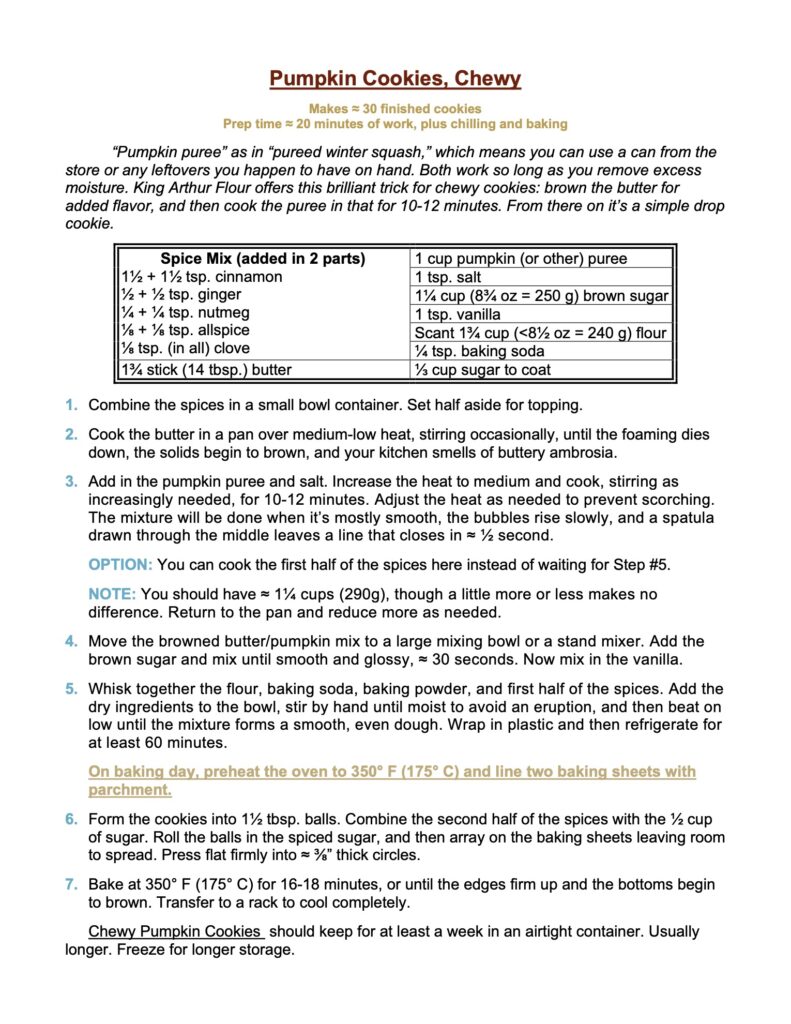
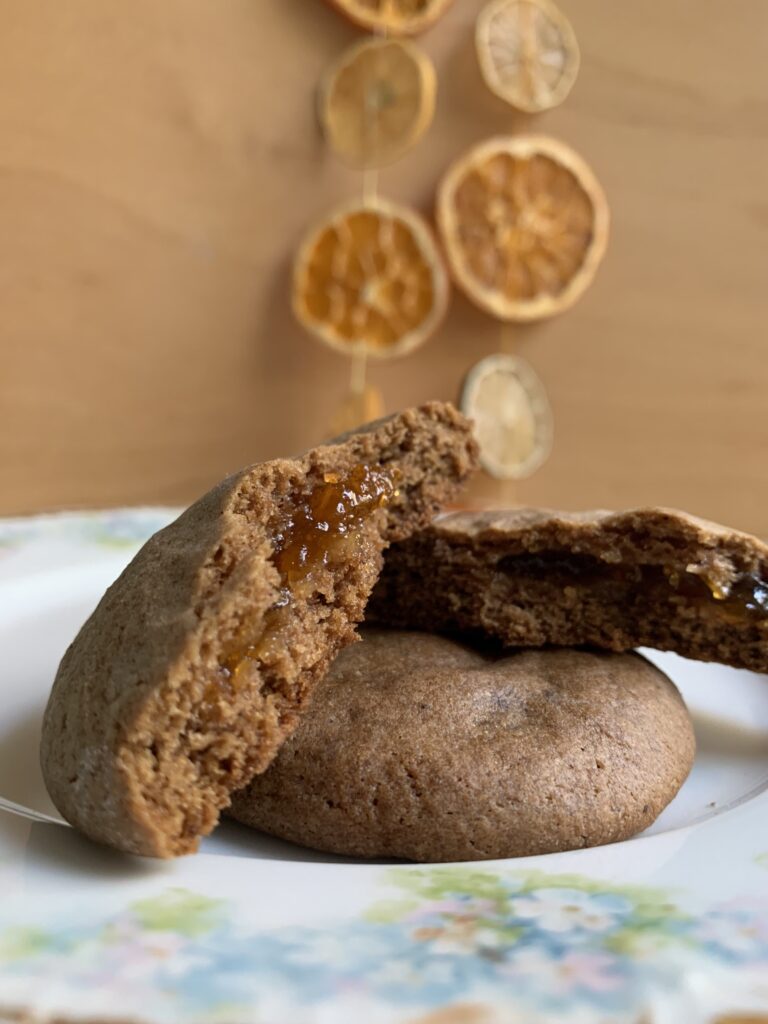
Browned butter, pumpkin, and the child of their love
Pumpkins aren’t just for Halloween!
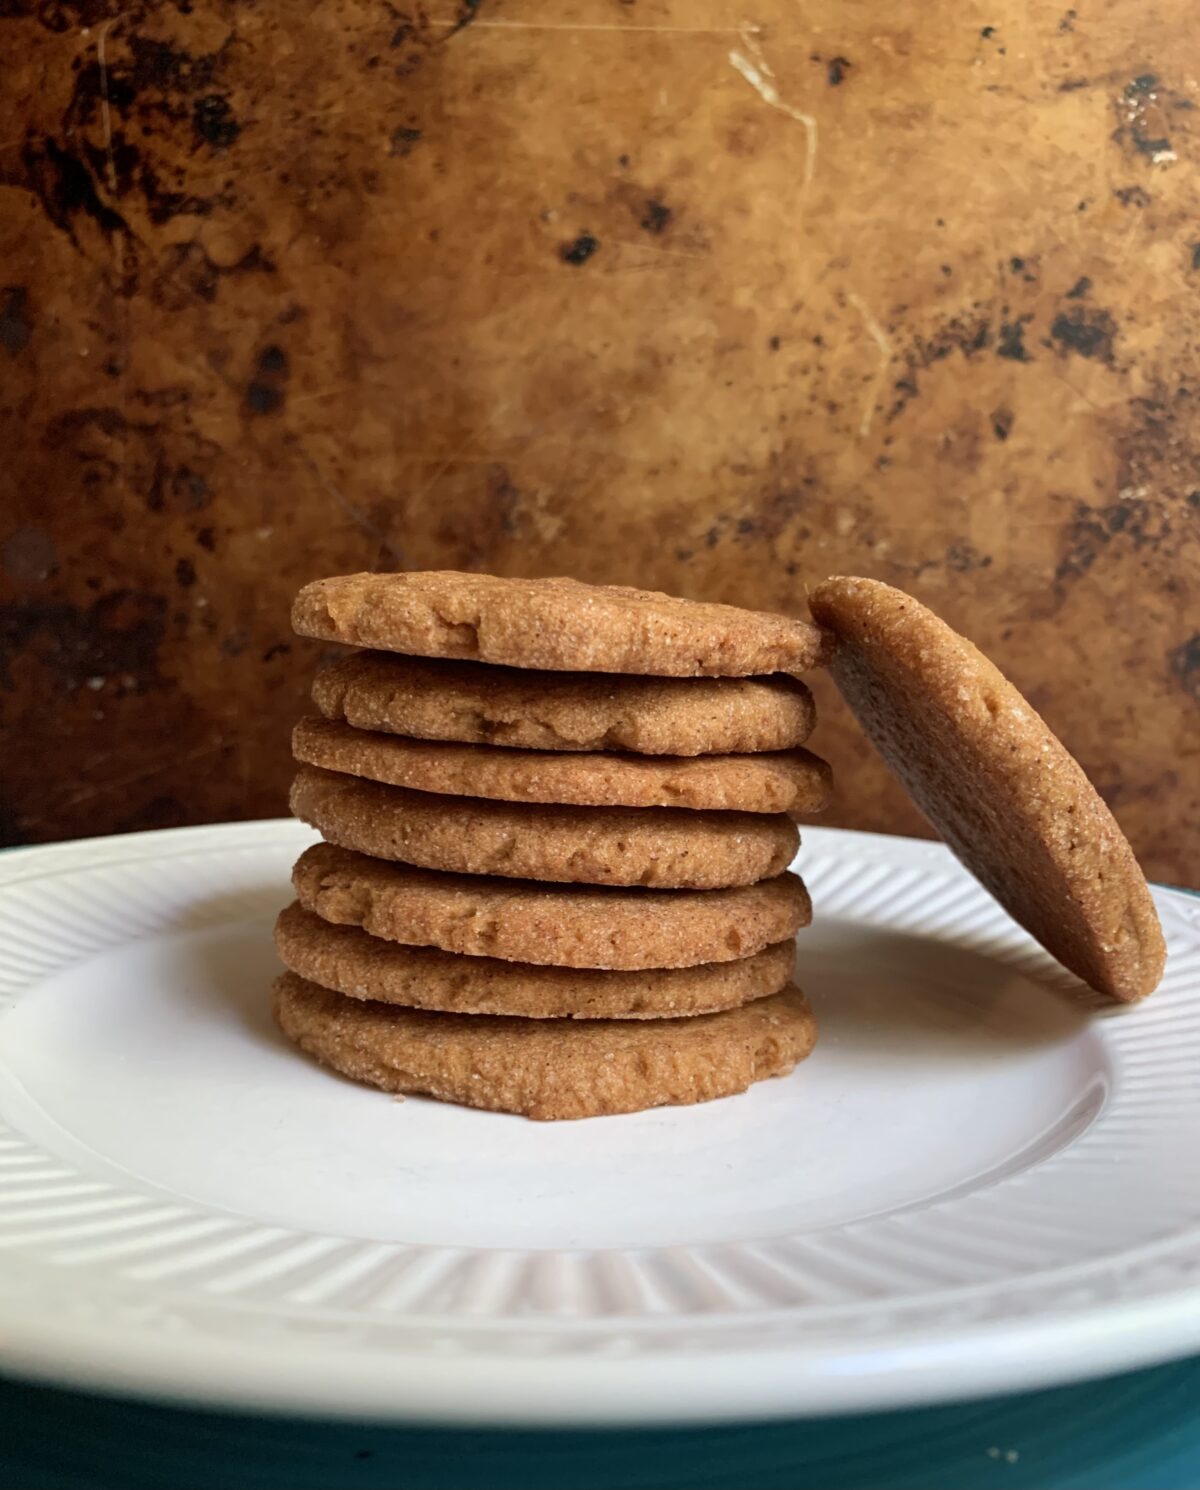
Pumpkin cookies have become an American classic. European readers who wonder why need do so no longer. The pumpkin flesh inside the dough ensures the cookies hold their texture for a very long time, and also adds a surprisingly elegant flavor with character and depth that play against a gentle spice mix. They are just plain good.
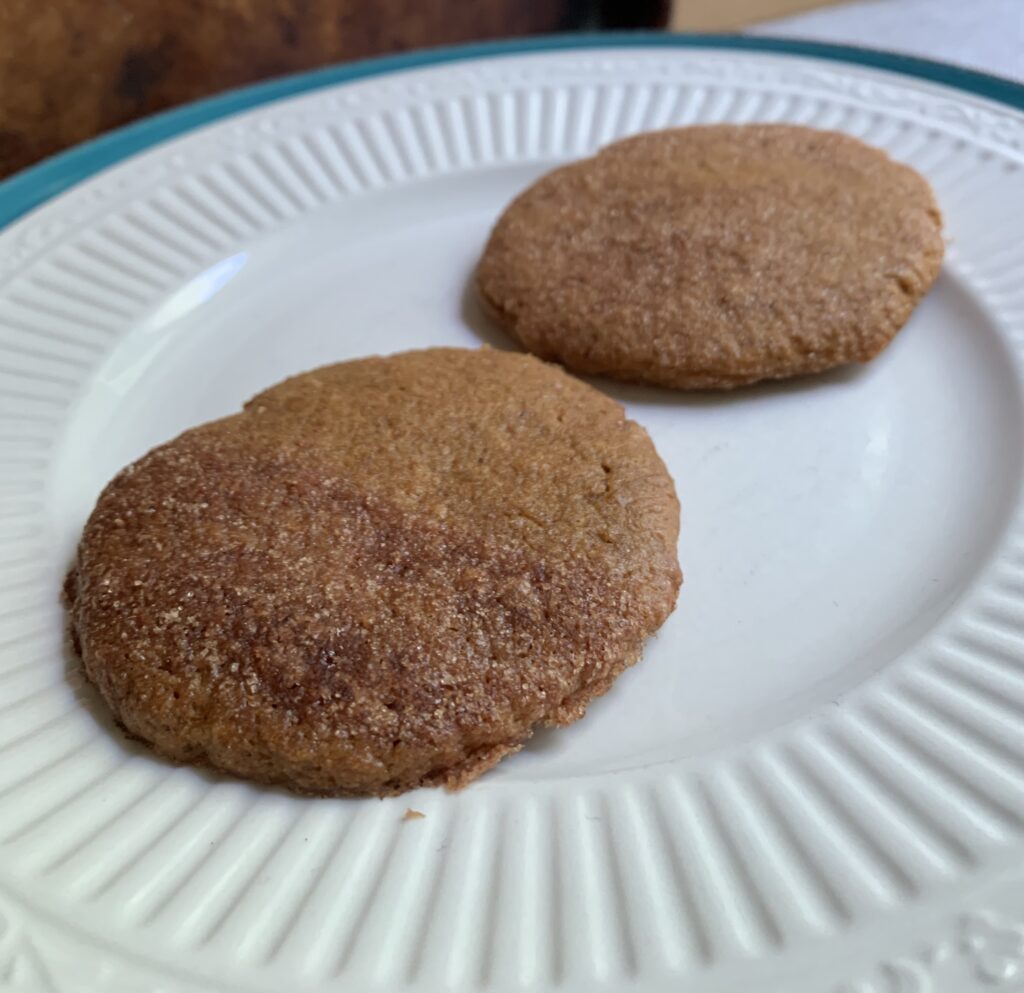
Pumpkin cookies come in two kinds: there is a cakey product similar to many Italian cookies. That recipe will follow in a week or two. We like to add some maple icing to make it extra unique. And then there’s this version: a soft, somewhat chewy drop cookie with a deeper flavor that stands on its own. Both cookies are wonderful for eating out of hand, as well as for coffee and tea. This one you can also dunk!
NOTE FROM KATE: This might be my favorite casual cookie, especially in the fall! But I do have something to add about my new hobby horse: different kinds of flour. A high-gluten bread flour would yield a very different cookie in this case. For comparison, I tried our recipe with a lower-and-weaker-gluten Einkorn flour. They came out flatter, which is not a surprise, but they also had a maltier, more complex taste that complemented the flavor profile. You might not think it, but this is a case where the flour’s actual flavor can make a big difference.
I have now set out to test several of our favorite holiday cookies with Einkorn, sometimes with the addition of rice flour, for those of us who do better on a more low-key gluten approach. Stay tuned.
Hats Off To King Arthur Flour.
King Arthur Flour is one of the oldest continuing millers in the U.S. Some sources say it’s the oldest. But the company really came into prominence for us in the 1980s when it led the nation toward new, higher quality flours and production methods. The company website includes some very good recipes too; including the inspiration for our approach to Chewy Pumpkin Cookies. We’ve tweaked their recipe a bit, but credit should go where credit is due. Here’s a tip of the hat and a courtly bow to Ms. Sarah Jampel. Well done.
The Big Trick To Pumpkin Cookies.
Pumpkin in the dough will keep a cookies moist, but it can also make them downright wet. Even unpleasant. Thus every good recipe for pumpkin cookies starts with an all-important first step: drive off as much water as you can. Wet pumpkin in your dough is B.A.D.
Honor thy father and thy mother. Love thy country. And get the [ahem]ed water out of thy pumpkin before turning it into a dough! Thou hast been warned.
Cakey Pumpkin Cookies start with creamed (beaten until white and fluffy) butter. So that recipe starts by putting a can of pumpkin in a fine sieve and then blotting it with paper towels top and bottom. Stir and repeat until basically dry.
Ms. Jampel found a way to skip that for Chewy Pumpkin Cookies. Dense, chewy cookies often start from melted butter anyway. That was going to be our initial plan. She went one step further and asked, “If water’s the problem, why not brown the butter instead of just melting it?”
Full pause. Execute face palm maneuver. “Doh!”
So we tested it, and here’s your answer: “Brown the butter and your cookies will improve in every way.” Hence recipe instruction #1: Cook enough butter to give you ¾ cup (6 oz = 17t ml) of liquid ambrosia, and then cook the pumpkin in that heavenly substance to drive off all the extra water. Simple.
NOTE FROM KATE: Oh, I totally agree. Especially with Einkorn flour! This approach gives you a nice browned edge and a cookie that’s fabulously rich and yet kind of wholesome at the same time.
NOTE FROM SCOTT: “Kind of wholesome?!” It’s a cookie! Virtue points and cookies are not a good match… [Ow!]… Of course dear. Yes dear. Never yuck the yum.
A Note On Substituting For The Pumpkin
We happened to make both acorn squash and butternut squash over the weeks when this cookie was on the development schedule. Scott claimed all leftovers to test as supplements/substitutes for canned pumpkin.
Cookies From Leftovers, Lesson #1: What you make for dinner has FAR too much moisture to ever blot dry like you’d need to do for the Cakey Pumpkin Cookies. But it will dry out if you toss the leftover squash into browned butter and cook it until the extra water is gone. Leftovers work in the chewy version.
Cookies From Leftovers, Lesson #2: The flavor was exquisite. Better than canned pumpkin by far, at least in my opinion. But the texture was a bit problematic, and required a quick blitz in the food processor or blender. Problem solved. Yes, that creates an extra thing to clean, but c’est la vie.
SNARK FROM SCOTT: Kate thinks the extra flavor wasn’t worth the effort, but she did no complaining about the cookies. You know: the “kind of wholesome” cookies now made extra virtuous by recycling food from an older meal.
NOTE FROM KATE: Make that “very wholesome, and practically a health food.”
Cookies From Leftovers, Lesson 3: It’s a little hard to calculate the volume of pureed squash you’ll end up with, and this is a recipe where volume matters more than weight. It’s smart to have a can of pumpkin ready on the side in case you need to add some in.
Cookies From Leftovers, Lesson 4: I worried about whether the butter in our initial dinner squash would throw off the ingredient ratios for the cookie. It wasn’t a problem.
Add The Spices In Two Parts
The first part of the spice mix goes into the dough during either the cook-the-pumpkin-down stage. If you forget, the mix it all together stage works almost as well. The difference between the two was extremely subtle.
The rest of the spice mix works best as a spiced sugar coating on top of the dough, though again: adding it before baking did not change the result in a really noticeable way. Take your pick of method.
Just Dump And Stir; But Avoid That Egg You’re Thinking About
Step 1: Cook the squash/pumpkin in browned butter. Step 2: Cool enough so your baking soda won’t trigger, and then mix everything together. Simple drop cookie 101.
The only question came with whether to add some egg into that dough. A clear majority of online recipes include at least one and often two egg yolks. We tested both so you won’t have to. The conclusion? Don’t bother.
Whole eggs turn out to be essential for cakey cookies because they help to create the right texture. General baking principles say that egg yolks fit well in denser baked goods. So the idea of using egg yolks for this recipe makes sense. But tests proved that the pumpkin itself adds all the structure you needs. If anything, the egg yolks got in the way.
Working On The Spice Mix
Obsessively compulsive bakers, like a certain husband in a certain house that produces an excessive number of cookies, will insist on making every spice mix from scratch. And long suffering wives in such households learn quickly that rolling ones eyes does nothing to make the process smoother. [The foregoing speaks in generalities only. We, of course, have no direct experience in this regard.]
NOTE FROM KATE: Just go with it, friends. When dealings with husbands who describe commercial spice mixes with words like ‘heresy’, one quickly learns that helpful efforts to streamline a process will only prolong it. If the cookie will be the same anyway, why wait longer than you have to? 🙂
Ahem. But it is only fair to note that this particular mix is a standard pumpkin pie formula downsized to preserve the buttery, caramely, pumpkin notes at the heart of the flavor profile. The actual spices you choose matter less than using the right amount to achieve that balance.
Einkhorn flour (half-spiced) on the lower left. All purpose flour (unspiced) on the upper right
Conclusion
Every person in our household, and our extended group of tasters, had the same reaction to this cookie. It’s homey; it’s comfortable; it couldn’t go better with a cup of coffee; and the presence of an actual, real life vegetable means you can enjoy them for breakfast without any guilt. Or at least maintain a straight face when you say that to a third party. It’s a cookie everyone will like, no one will dislike, and lovers of the genre will view as a masterpiece.
The only drawback comes down to faint praise. Make these for your kids. Make these for the cookie raffle. Make these to share with all and sundry. And make these to keep in the freezer for times when you’ve earned that limited-guilt treat to go along with your coffee. There isn’t a cookie out there that defrosts better.
The only place they might not fit? An elegant holiday tray. Chewy Pumpkin Cookies are folk music played on a fiddle. December Extravaganzas involve fancy violins and string quartets. At least in our house.
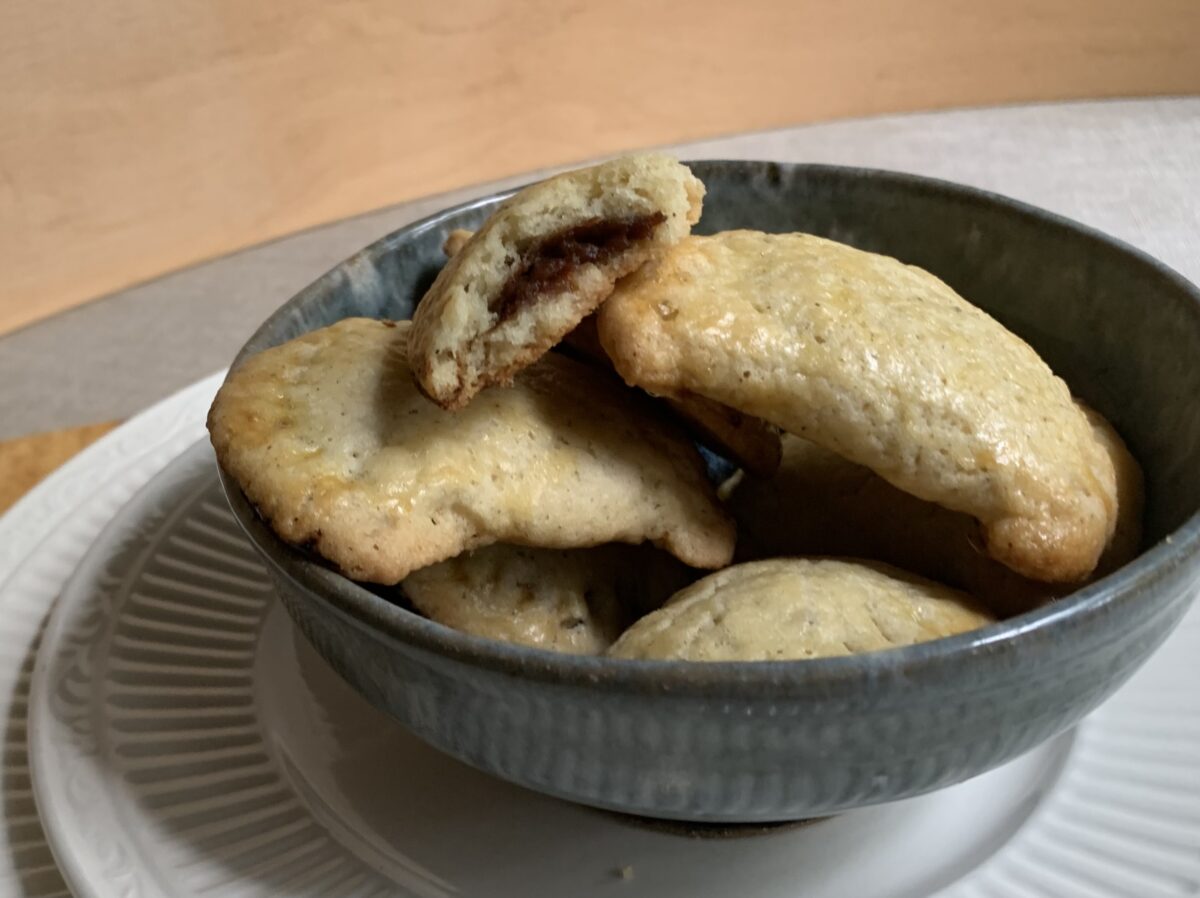
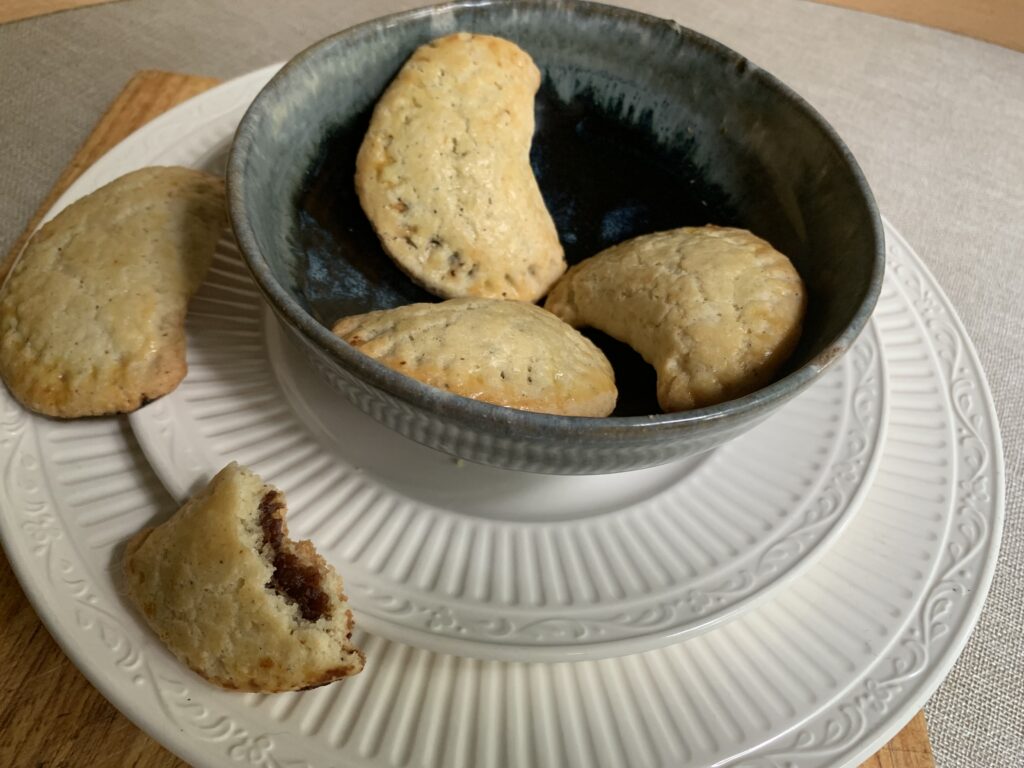
Fruit filled, cardamom spiced cookies from Iceland
Behold the annual Christmas dilemma! We have more than 400 well tested cookie recipes to chose from. We typically end up with somewhere around 20 by the end of the Holiday baking spree. Five or ten of those are all but mandatory because the family would mourn if we “forgot” them. New recipes that “must” be tested raise that to a solid ten. We usually ends up with something like 20 in all. Thus there’s room for no more than 10-12 “others” from that enormous list of possibilities.
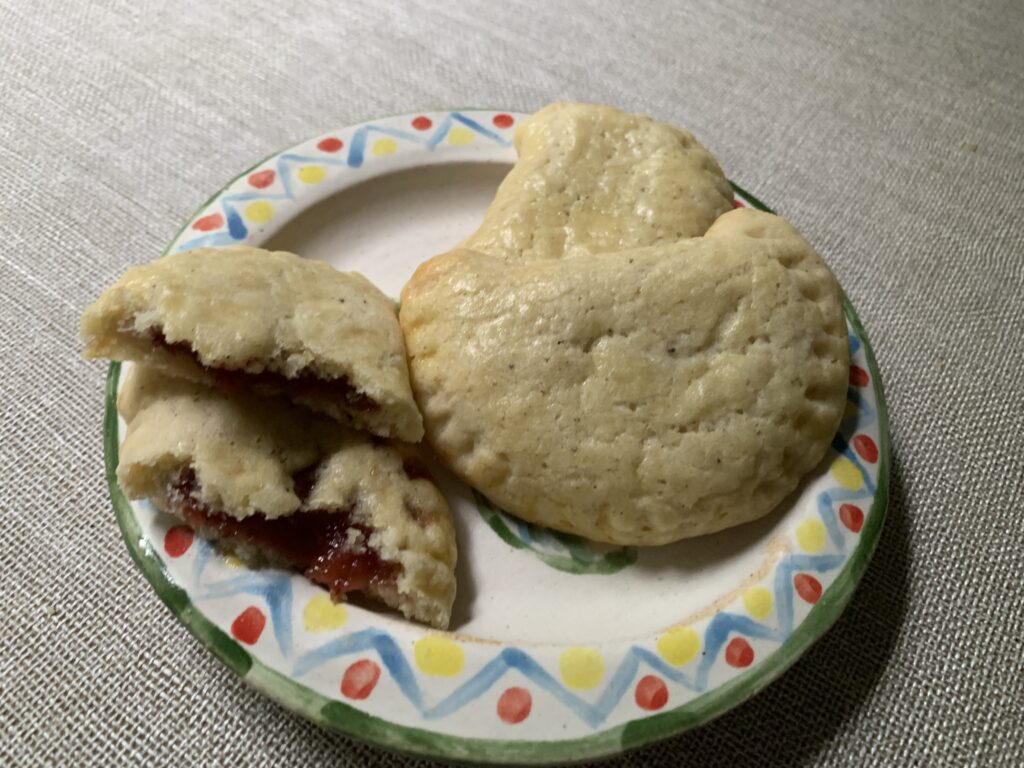
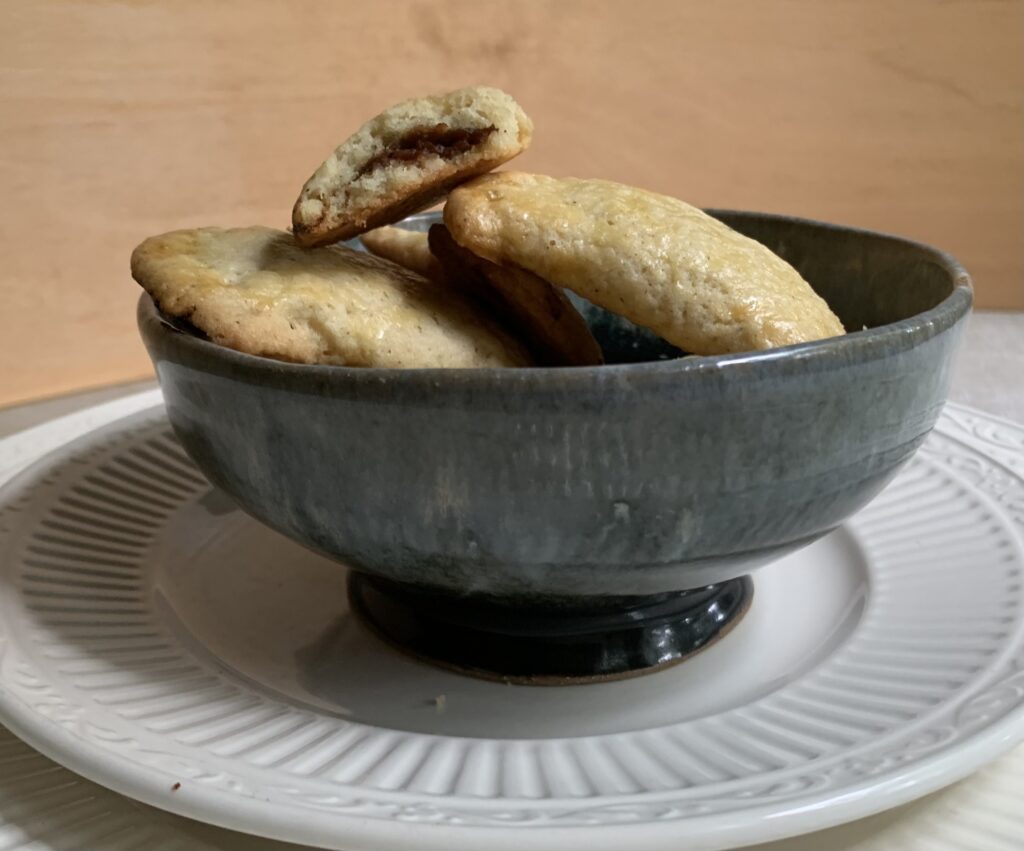
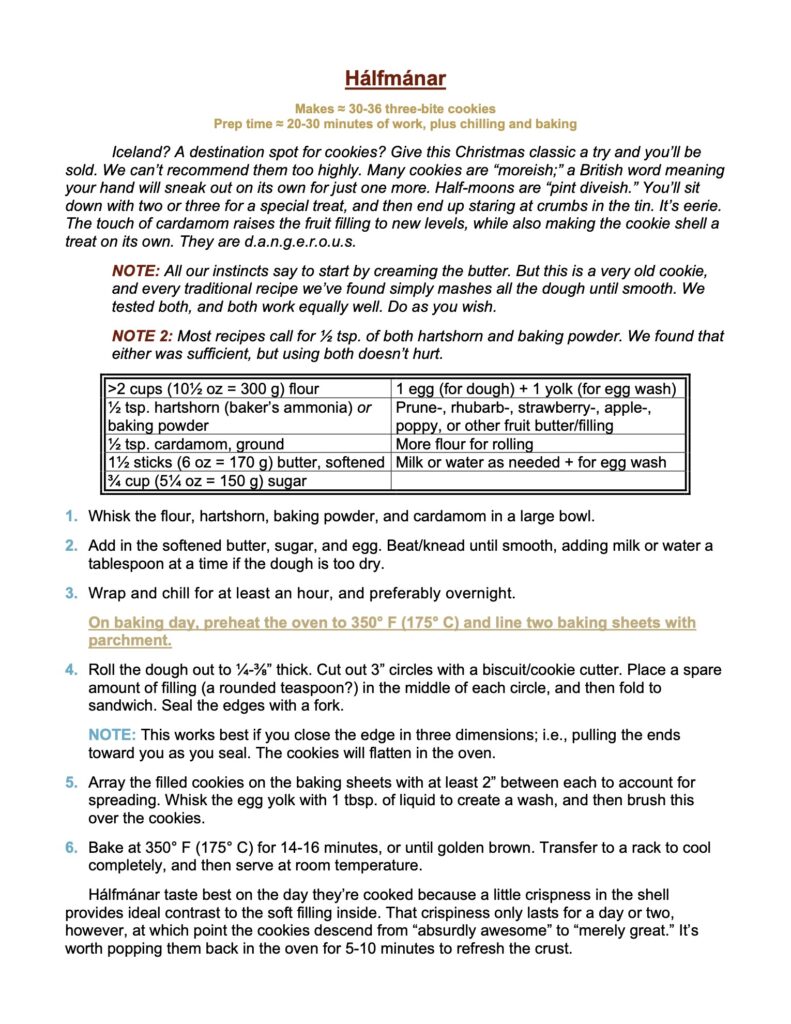
Icelandic Hálfmánar are going to make that final cut at least 75% of the time from now on. This, ladies and gents, is an extraordinary treat. One of the best you’ll ever make, and sure to be loved by all ages. Wow. Wow. And wow again.
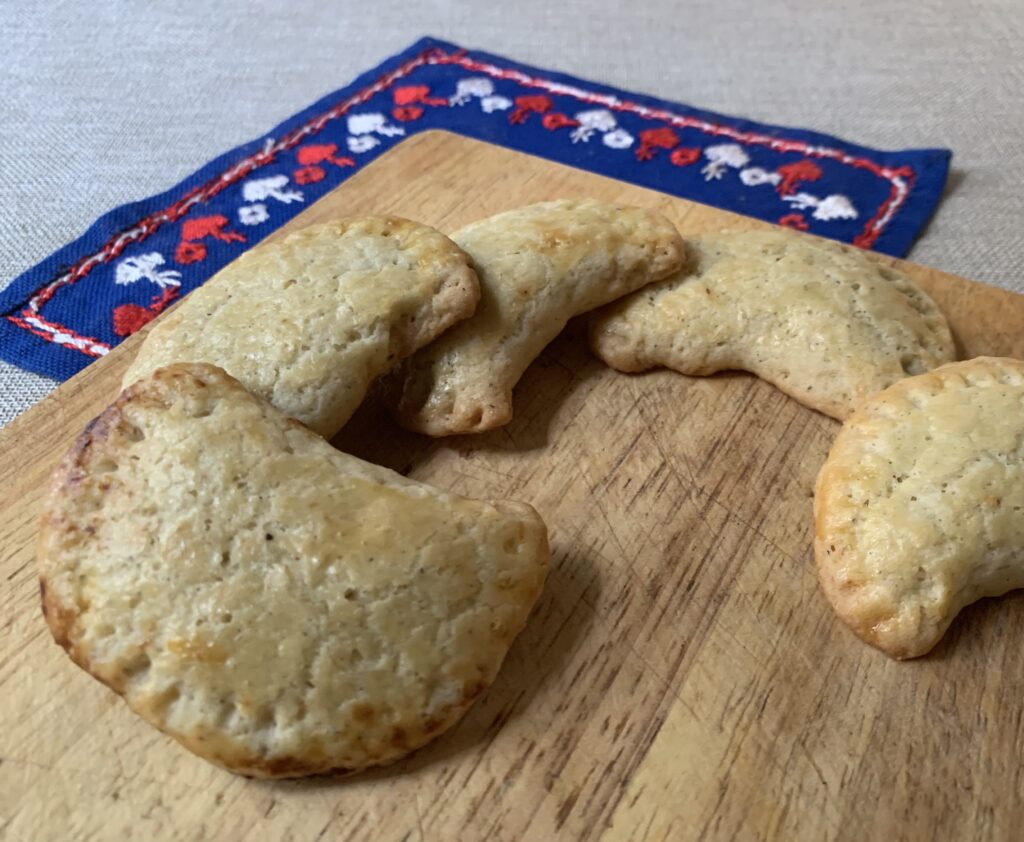
Hálfmánar are somewhat soft, well leavened, delicately crisped (see below) butter cookies with a perfect amount of cardamom in the dough. That dough gets wrapped around your choice of filling and then baked into a 3-bite cookie. Plum butter (povidla a/k/a lekvar) is the classic, but we have now tried fillings made from apple butter, strawberries, peaches, rhubarb, and Kate’s old favorite poppy seed. Every one was eye popping. Apricot, cherry, sweet cheese, and others will follow in turn. No stone unturned, right?
But that simple description doesn’t do this cookie justice, because the whole is exponentially better than the sum of those very delicious parts. Consider: We have a Czech friend named Barbora who bakes an array of holiday cookies that puts even our efforts to shame. We hold our own on variety and flavor. Heck, we may even win on those fronts. But appearance? Not a chance. Barbora and her mom are sensational decorators as well as great bakers, and Barbora could earn a good living on her photography alone.
The point being, she’s as tough an audience as you could ever find.
Barbora happened to be in town when I finished up our final Hálfmánar test batches, so I brought a pair over (plum and rhubarb) and asked her to test the cookies out. She rolled her eyes a bit, and promised that she’d get to them later. But I insisted on seeing her reaction, so she sighed and took a small bite.
Her eyes got wide, and a second bite followed immediately. Both samples were gone within a minute, and she was literally licking her fingers at the end – a thing that Czechs simply do not do.
Her verdict? “My mom will say they’re too big for Christmas cookies, but I want that recipe! Vánoce isn’t the only time we’re allowed to bake. Wow. I mean, like, WOW. Those were g.o.o.d.”
A Perfect Balance Of Flavors.
There’s a lot of cookies that gild the lily in an effort to be special. Most of the time that’s a mistake. And to be honest, we thought the cardamom in Hálfmánar dough would be yet another example. Think about it. You’re starting with a soft, buttery dough wrapped around densely flavored fruit butter! Why mess around in a search for something “extra?”
Man, were we ever wrong.
Freshly ground cardamom has a historic love affair with fruit of all kinds. This recipe includes the perfect amount to add some Scandinavian culture to the cookie, while simultaneously elevating the whole into something that glitters as much as it glows.
Do Not Overfill.
You’ll be tempted, but this is a case where balance adds more than you’d get from the extra filling. Trust us on this. Scott graduated summa cum laude from the school of More-Is-Better, and even he agrees. We call for a rounded teaspoon inside a 3″ diameter circle. You could fit in more, but don’t.
Kate’s homemade rhubarb filling on a plate she made herself.
Any Filling Will Do.
Prune butter (povidla a/k/a lekvar) is the most traditional filling across the recipes we researched. We adore it, and we happen to have several jars in the pantry. So we tried that first, and… wow.
But we couldn’t stop there! A friend hooked us up with a rhubarb farmer this spring, which led to jars of strawberry/rhubarb pie filling for the pantry. That went into test batch #2. Wow and wow again. Finger licking fabulous. (Just ask Barbora, lol).
Scott: “We’ve got to try this with apple butter!”
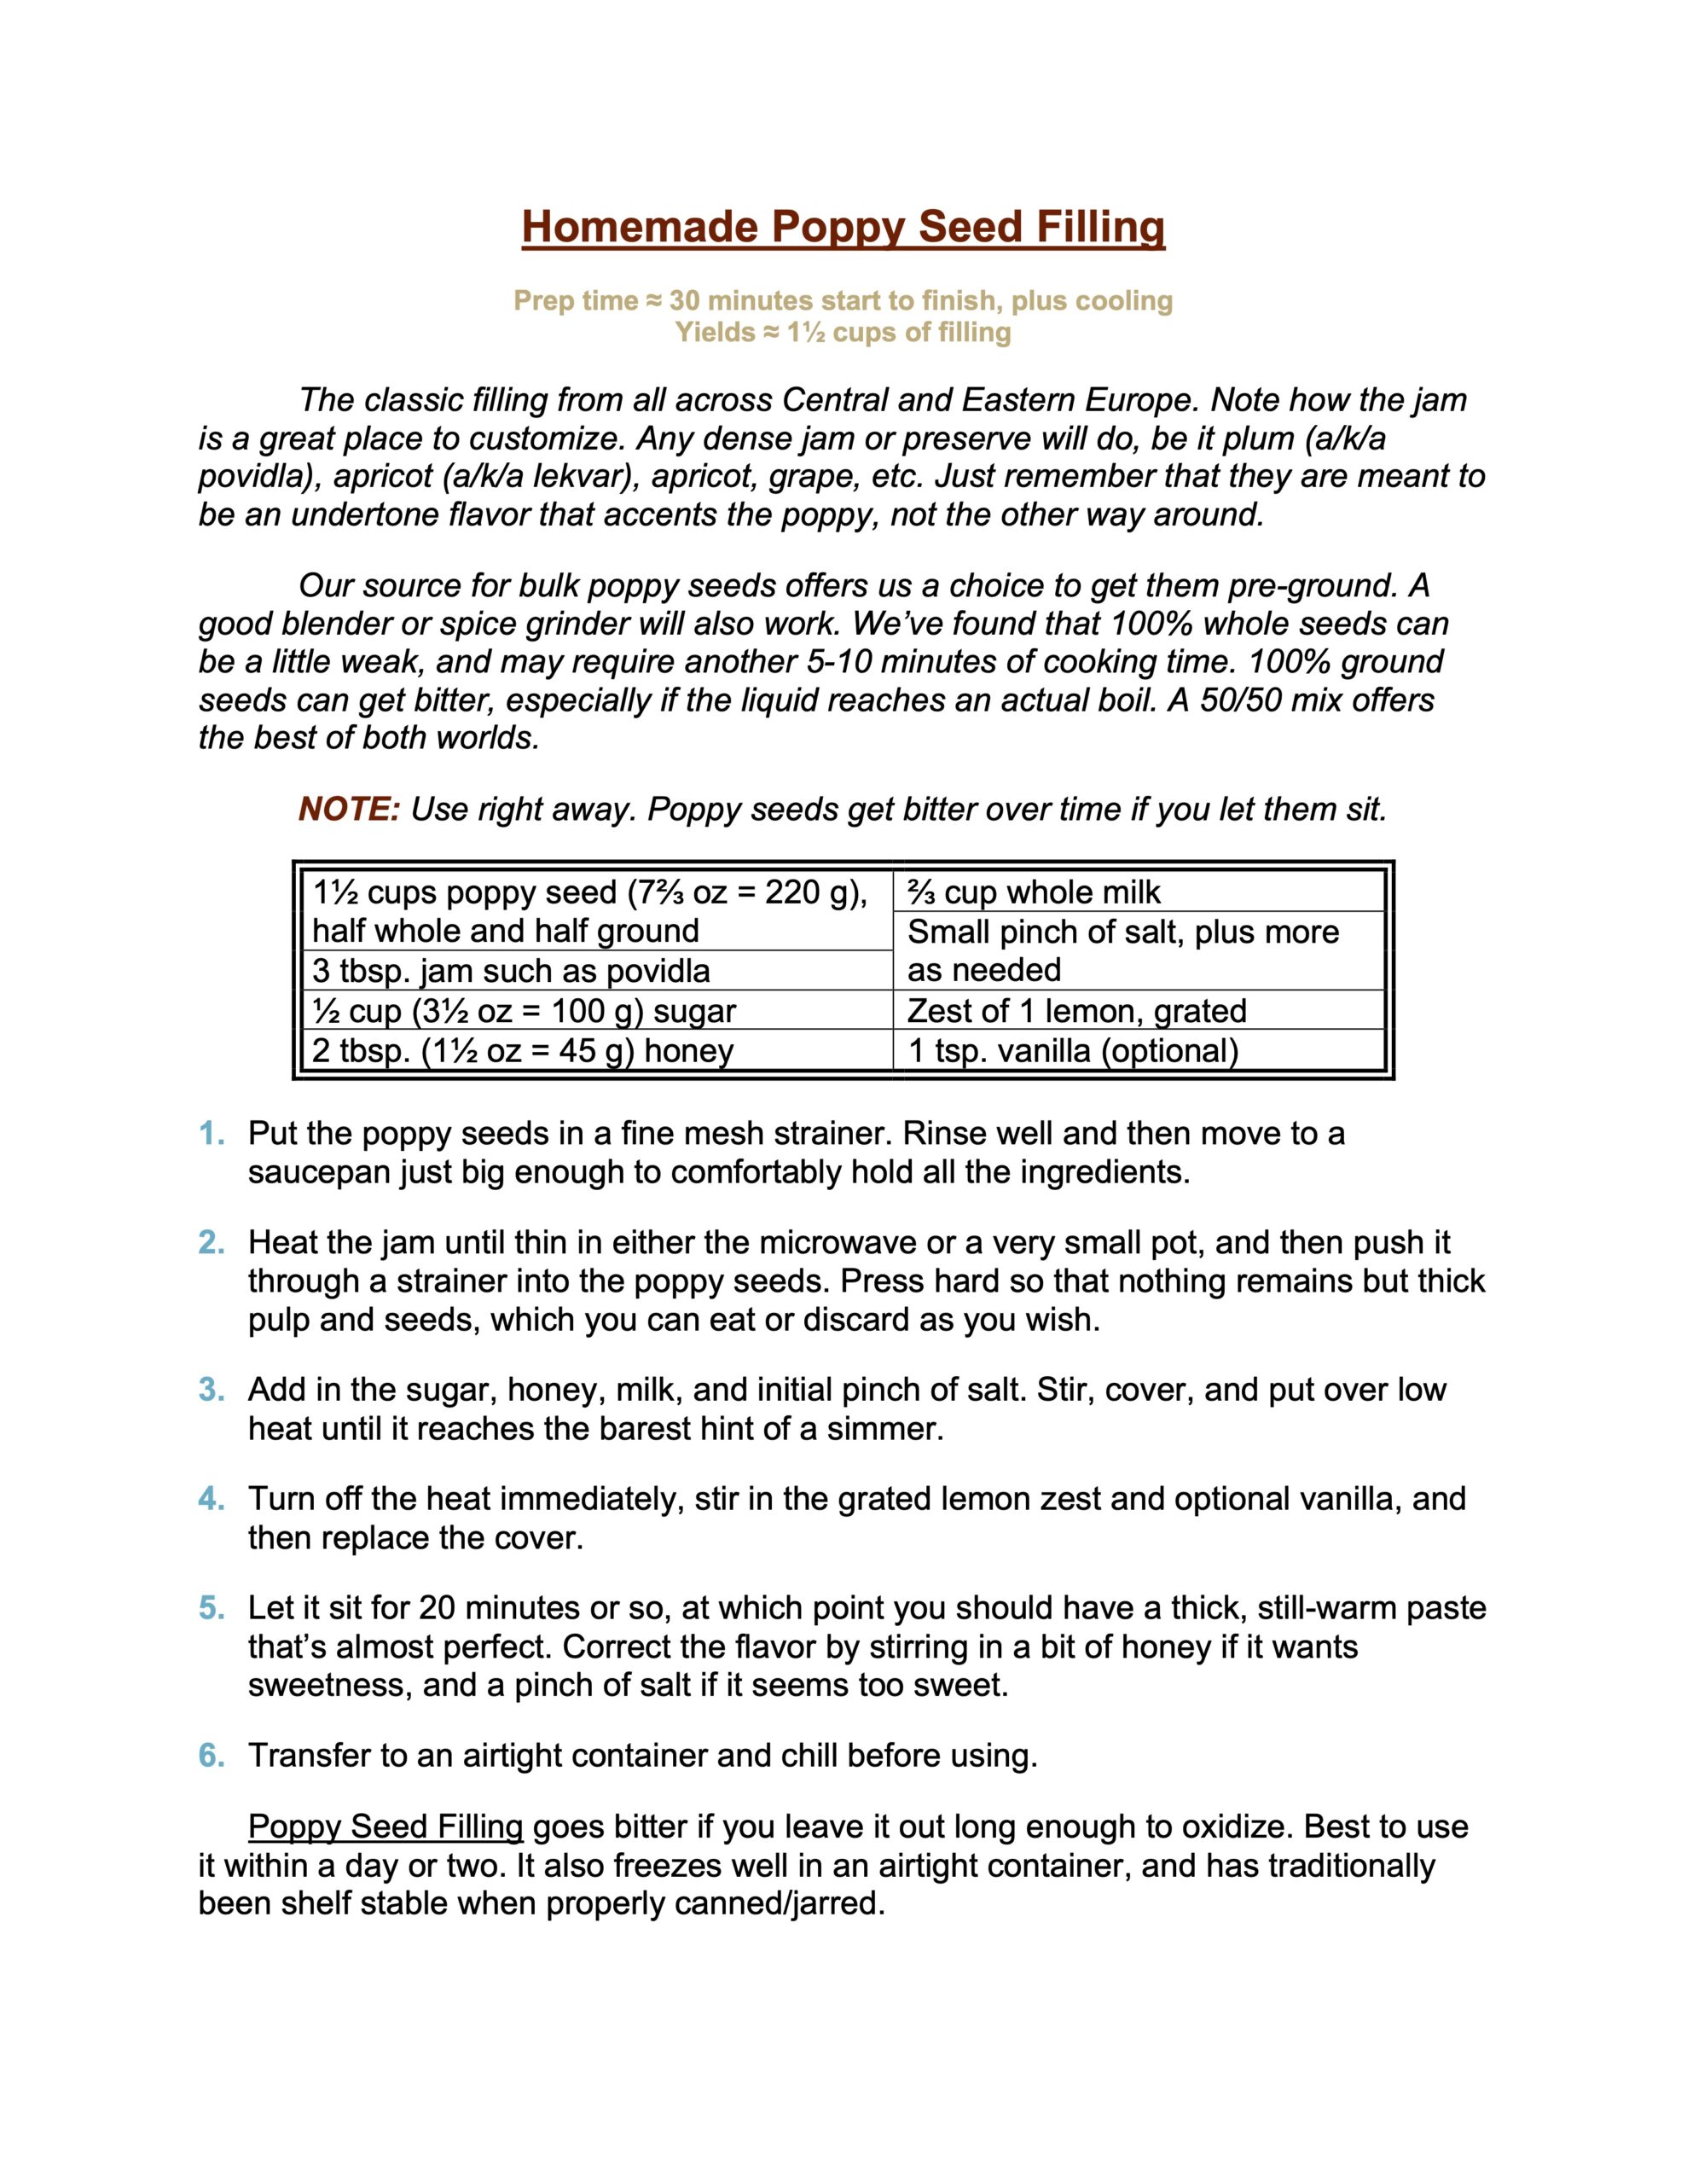
Kate: “Go ahead. But I’m going to test out poppy seed filling!”
Check. And check. And so it went. Take your fruit filling, cook it down to a dense fruit butter, and proceed.
NOTE FROM KATE: This was my first time putting up rhubarb strawberry pie filling for the winter. We used a half-pint jar for half of the dough. If you’re working with a pie filling, blend it first (I used an immersion blender in a Pyrex cup), and then cook it down. Adjust with a small amount of starch or ClearJel as needed. Then put a bit on a plate and quick-cool to test. If it’s too thick, add extra fruit. If it’s still too loose, simmer it down a bit more. This adjustment can be done while your dough is resting in the fridge. (The poppy seed was canned, and it worked out great!)
ANOTHER NOTE FROM KATE: We brought these cookies to a camping trip and shared them out. One of the lucky recipients had been to Iceland, and said that bakeries sell them in a variety of flavors. Thus, let your imagination take flight! Personally, I just might make extra cranberry sauce this Thanksgiving and cook down the leftovers for Hálfmánar.
About The Size.
This is a full, three-bite cookie because making them smaller would multiply the effort. 3″ circles – a standard biscuit cutter – already seems fussy for someone with full-sized fingers. Feel free to shrink them if you can, but for us, the extra cookies weren’t worth the extra effort. It’s up to you.
NOTE FROM KATE: Scott also tried the Asian dumpling crimper, which usually leaves a decorative edge. These cookies baked up into little football shapes, and their edge decorations didn’t hold up with this dough. It was, however, a lot faster.
[ADMISSION FROM SCOTT. I might have overfilled. Slavish instinct and long training being a thing.]
[KATE CONTINUING] The advantage of filling the cookies by hand is being able to shape them to a true half-moon, as their name indicates. The fork-tine edges aren’t much different from the dumpling crimper. We found that it helped to squeeze the middle of the circle first, and work toward the edges. The elasticity of the dough allowed us to make moon-shapes with better curves. It also made extra space for the filling. FYI, it’s faster in a team of two.
We do note that this particular size also fits the Icelandic tradition. We care about that kind of thing. Your mileage may vary.
Shouldn’t I Cream The Butter?
Confession time. Scott made a big deal about this being an ancient, ‘just mix it all together’ recipe in the initial test version… and then promptly forgot about that instruction when the butter came out of the fridge. That first batch used the standard creaming method by force of habit. Batch #2 followed the actual rules. [Sigh]. But at least this gave us a chance to compare!
The creamed-butter batch spread a bit more and might have been a tiny bit lighter, but no one would have noticed if they weren’t looking to find a problem. Dump-and-stir works every bit as well so long as your butter is soft enough to mix in without lumps.
Texture is the Persian flaw. Refresh Before Serving.
Legend says that ancient carpet weavers deliberately put small flaws in all their products because only God should make something perfect. Half-moons are darned close to perfect, but they do have that Persian flaw. The crust has a faint, utterly delightful crispiness on baking day, but humidity will kill that in a day or two. Three days at the very most.
Make no mistake. Softened Hálfmánar are still delicious, and no one would even dream of complaining. But this is one of those cases where “delicious” amounts to faint praise compared to what they’re like on the first day.
Kate discovered an easy fix. Pop the cookies back in a 250° F (120° C) oven for 5 minutes before putting them on the table. The gentle crispiness will return, and all will be scrumdiddlyumptious. That isn’t enough time to get the filling hot or to cause more browning. It merely refreshes the crust.
CONCLUSION
This is the best cooked-fruit cookie that either of us has ever had. Full stop. And that includes traditional favorites like filled gingerbreads, hamentaschen, and other famous cookies.
It’s described as the great Christmas cookie of Iceland. And it deserves to be. But Barbora is probably right for cookie arrays the size of ours. Three biters are definitely on the large size for a holiday tray that emphasizes variety as well as quality. That said, something this delicious is worth some extra space on the tray!
It should also be said that Hálfmánar are so very, truly awesome that it’s a shame to limit their use to the holiday season alone. These cookies are down in our family code as a year-round, fall back dessert for any season with an excess amount of fruit. Considering a pie? Keep Hálfmánar in mind as an elegant, just-as-easy alternative.
A revolutionary war cookie from coastal Massachusetts.
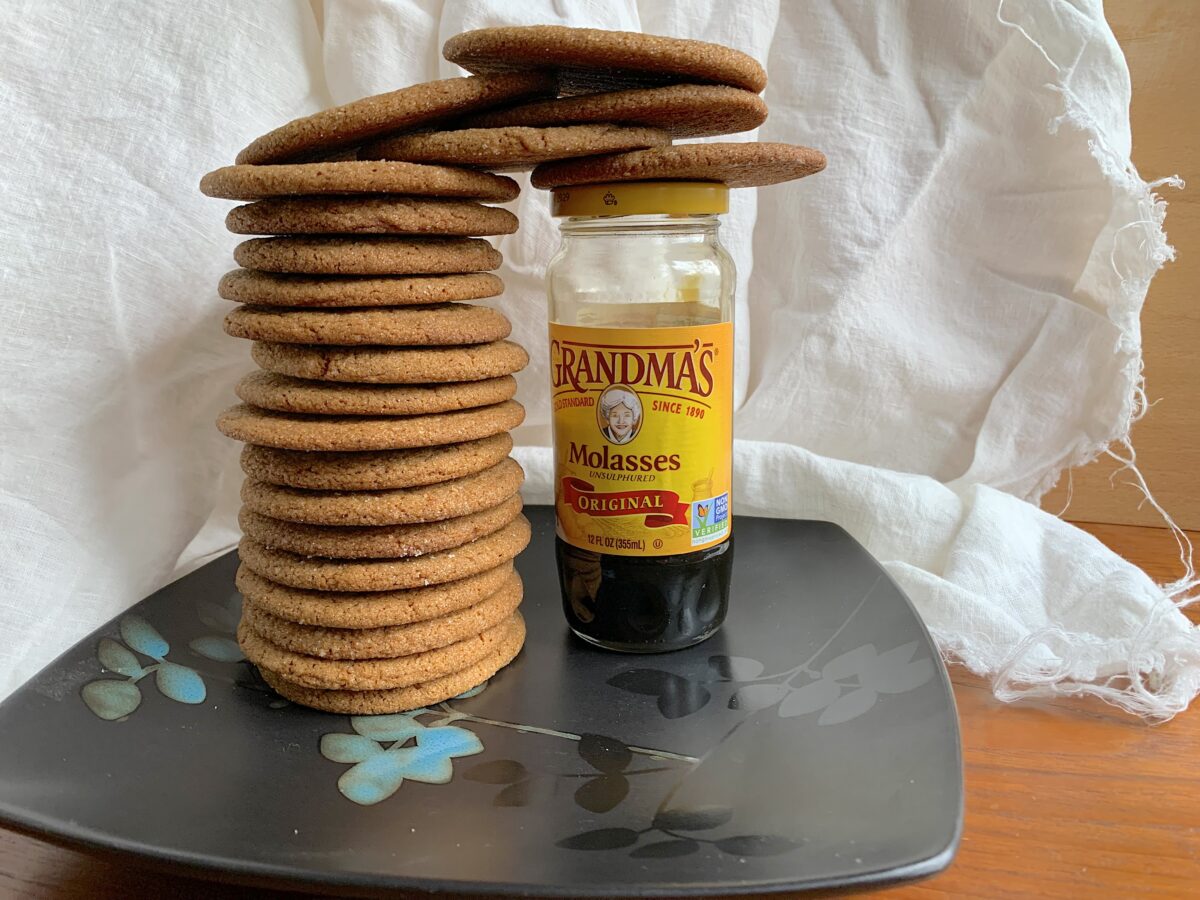
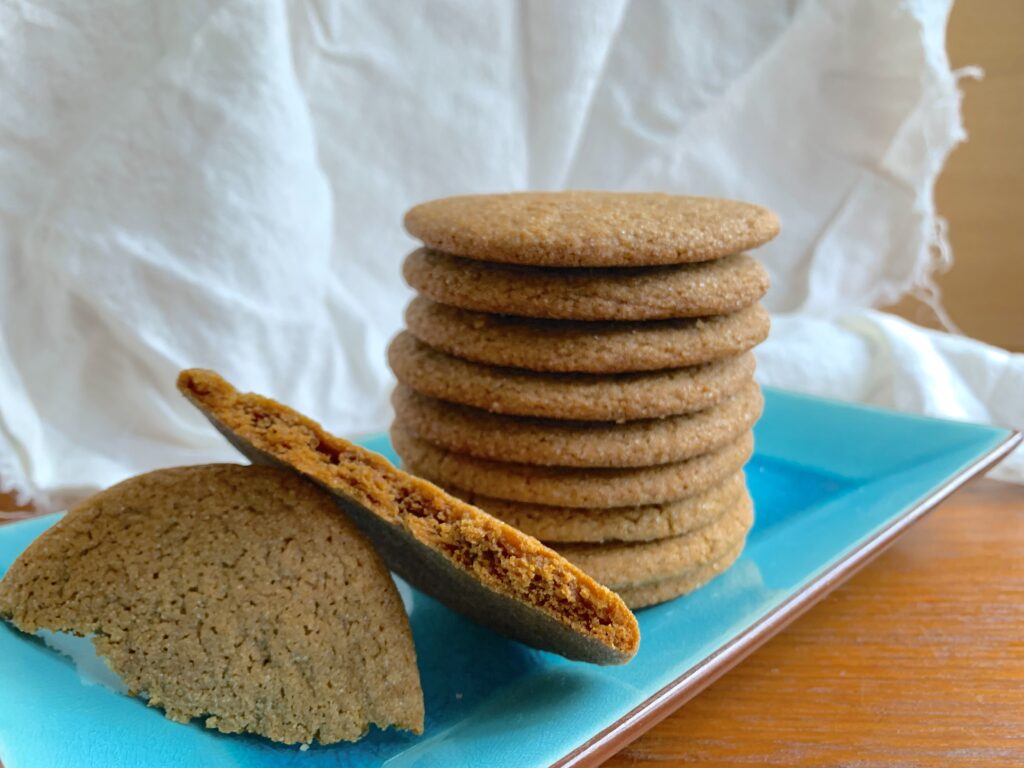
Imagine an arm around your shoulders and friendly voice saying, “Hi. I’m a cookie.” Then add in this quote from one of our tasters: “That’s the biggest, softest, easiest going ginger snap I ever tasted! Or is it gingerbread?” And then triangulate with sailors on a clipper ship singing in the sunlight, “Ho, ho, ho and a bottle of rum!” Somewhere in that intersection you’ll find Joe Froggers, a cookie created right after the Revolutionary War at a Marblehead Island inn outside of Boston, Massachusetts.
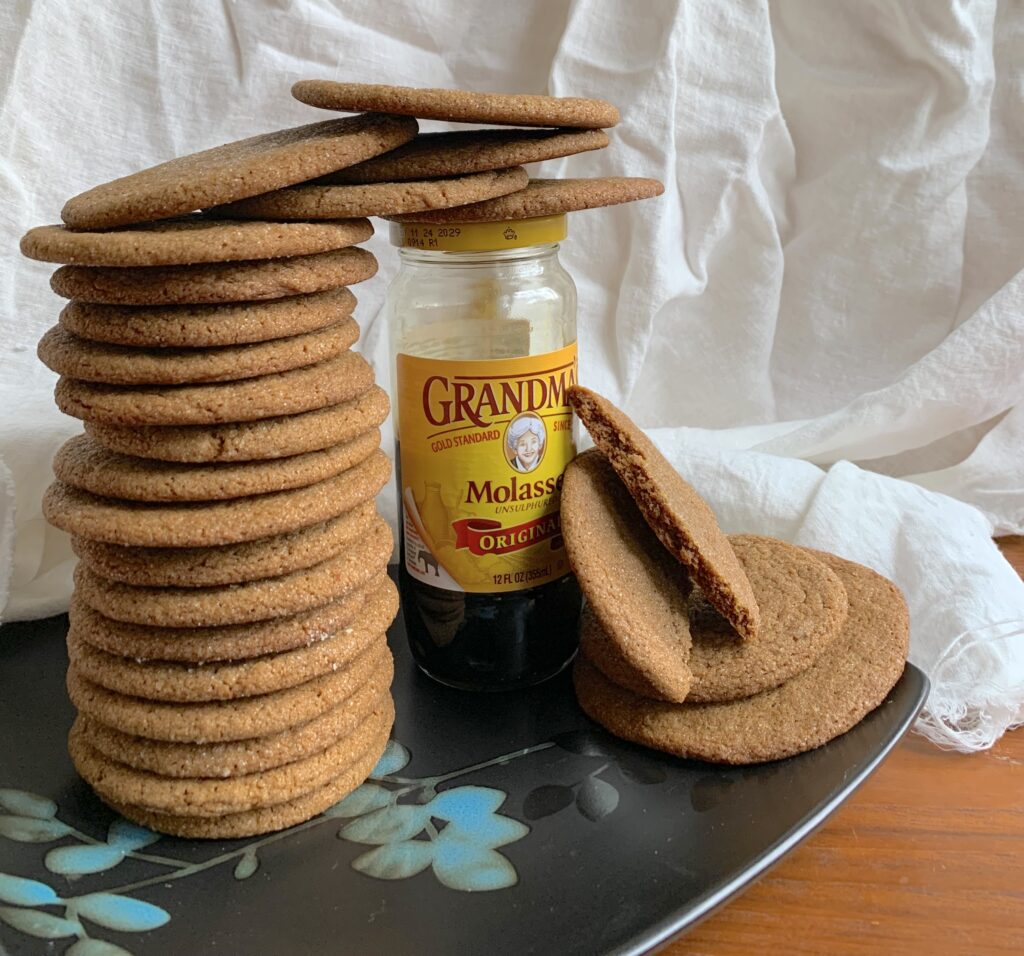
Joe Froggers are a soft, gently spiced molasses cookie with a nice finish from a tot of dark rum in the dough. The cookies were designed and intended for grownups, but they’re also as kid friendly as a cookie can be. The texture is plush and easy; the flavor simple, familiar, and a bit raisiny from the molasses; and they’re about the width of a small child’s face (4″-6″ across), which guarantees the ‘eyes light up with delight‘ reaction.
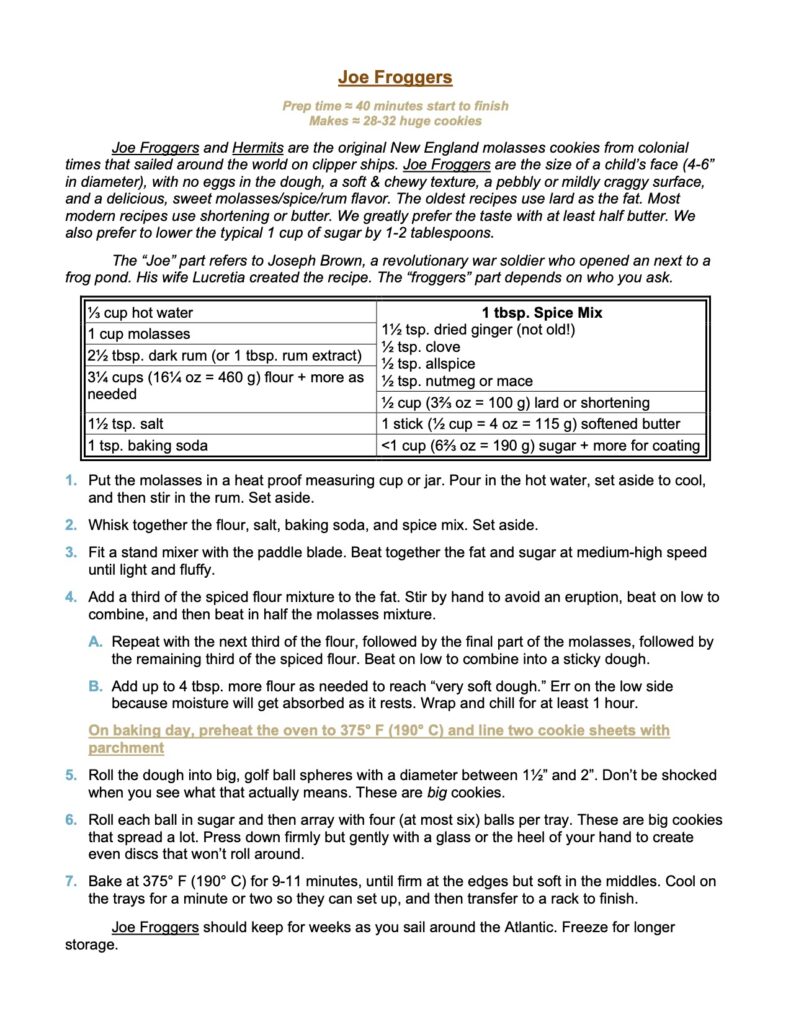
The earliest versions were made with lard. Most modern recipes call for shortening. Butter tastes best of all, of course, but you give up a bit in the way of texture. We make them with a 50/50 mix of butter unless there’s a special reason to be historically accurate.
NOTE FROM KATE: I felt a need to be historically accurate, so Scott made the first batch with lard. This beautiful cookie is friendly and cheerful, but I felt like I had to work against the unfamiliar flavor of lard after the third bite. This particular fat’s texture sticks to the mouth a bit more than butter or shortening. Not a familiar sensation. Next time I’d go with half lard and half butter. Despite its undeniable culinary advantages, I don’t particularly like shortening, as it’s an ultra-processed food, but YMMV. I can see this one becoming a family favorite!
That’s about all you need to know. It’s a big old, friendly, arm around your shoulders cookie.
“Joe Froggers?” A Taste Of History
The general outline of the story is well known and documented, with its own page at the Marblehead Museum website. The story goes like this.
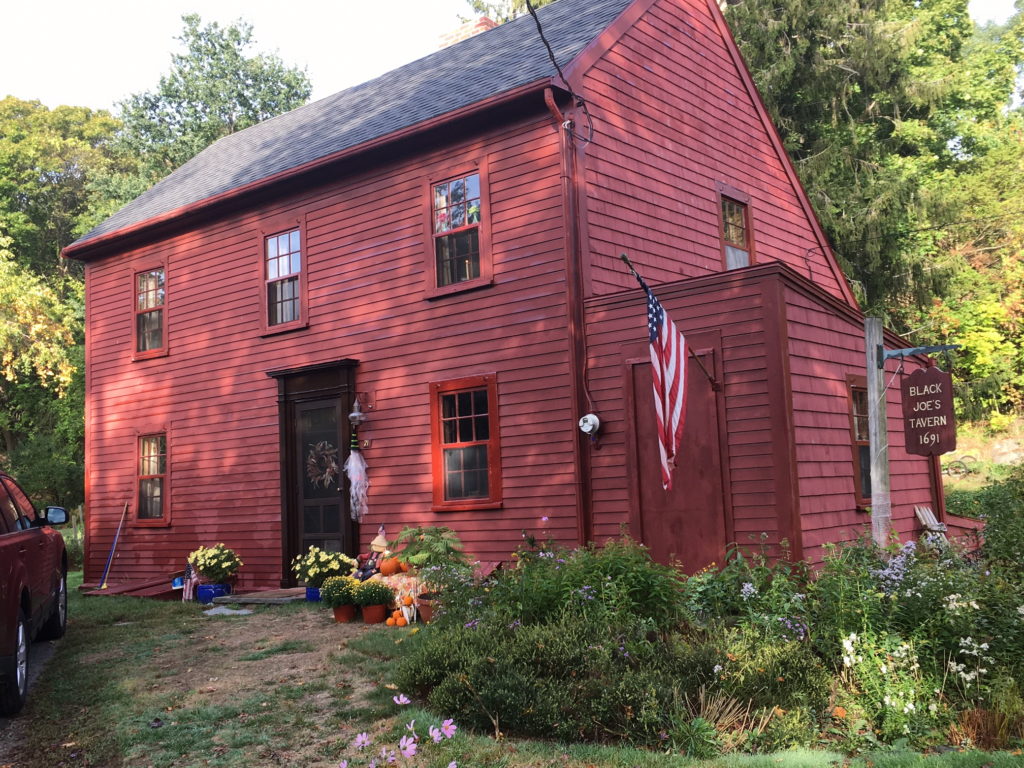
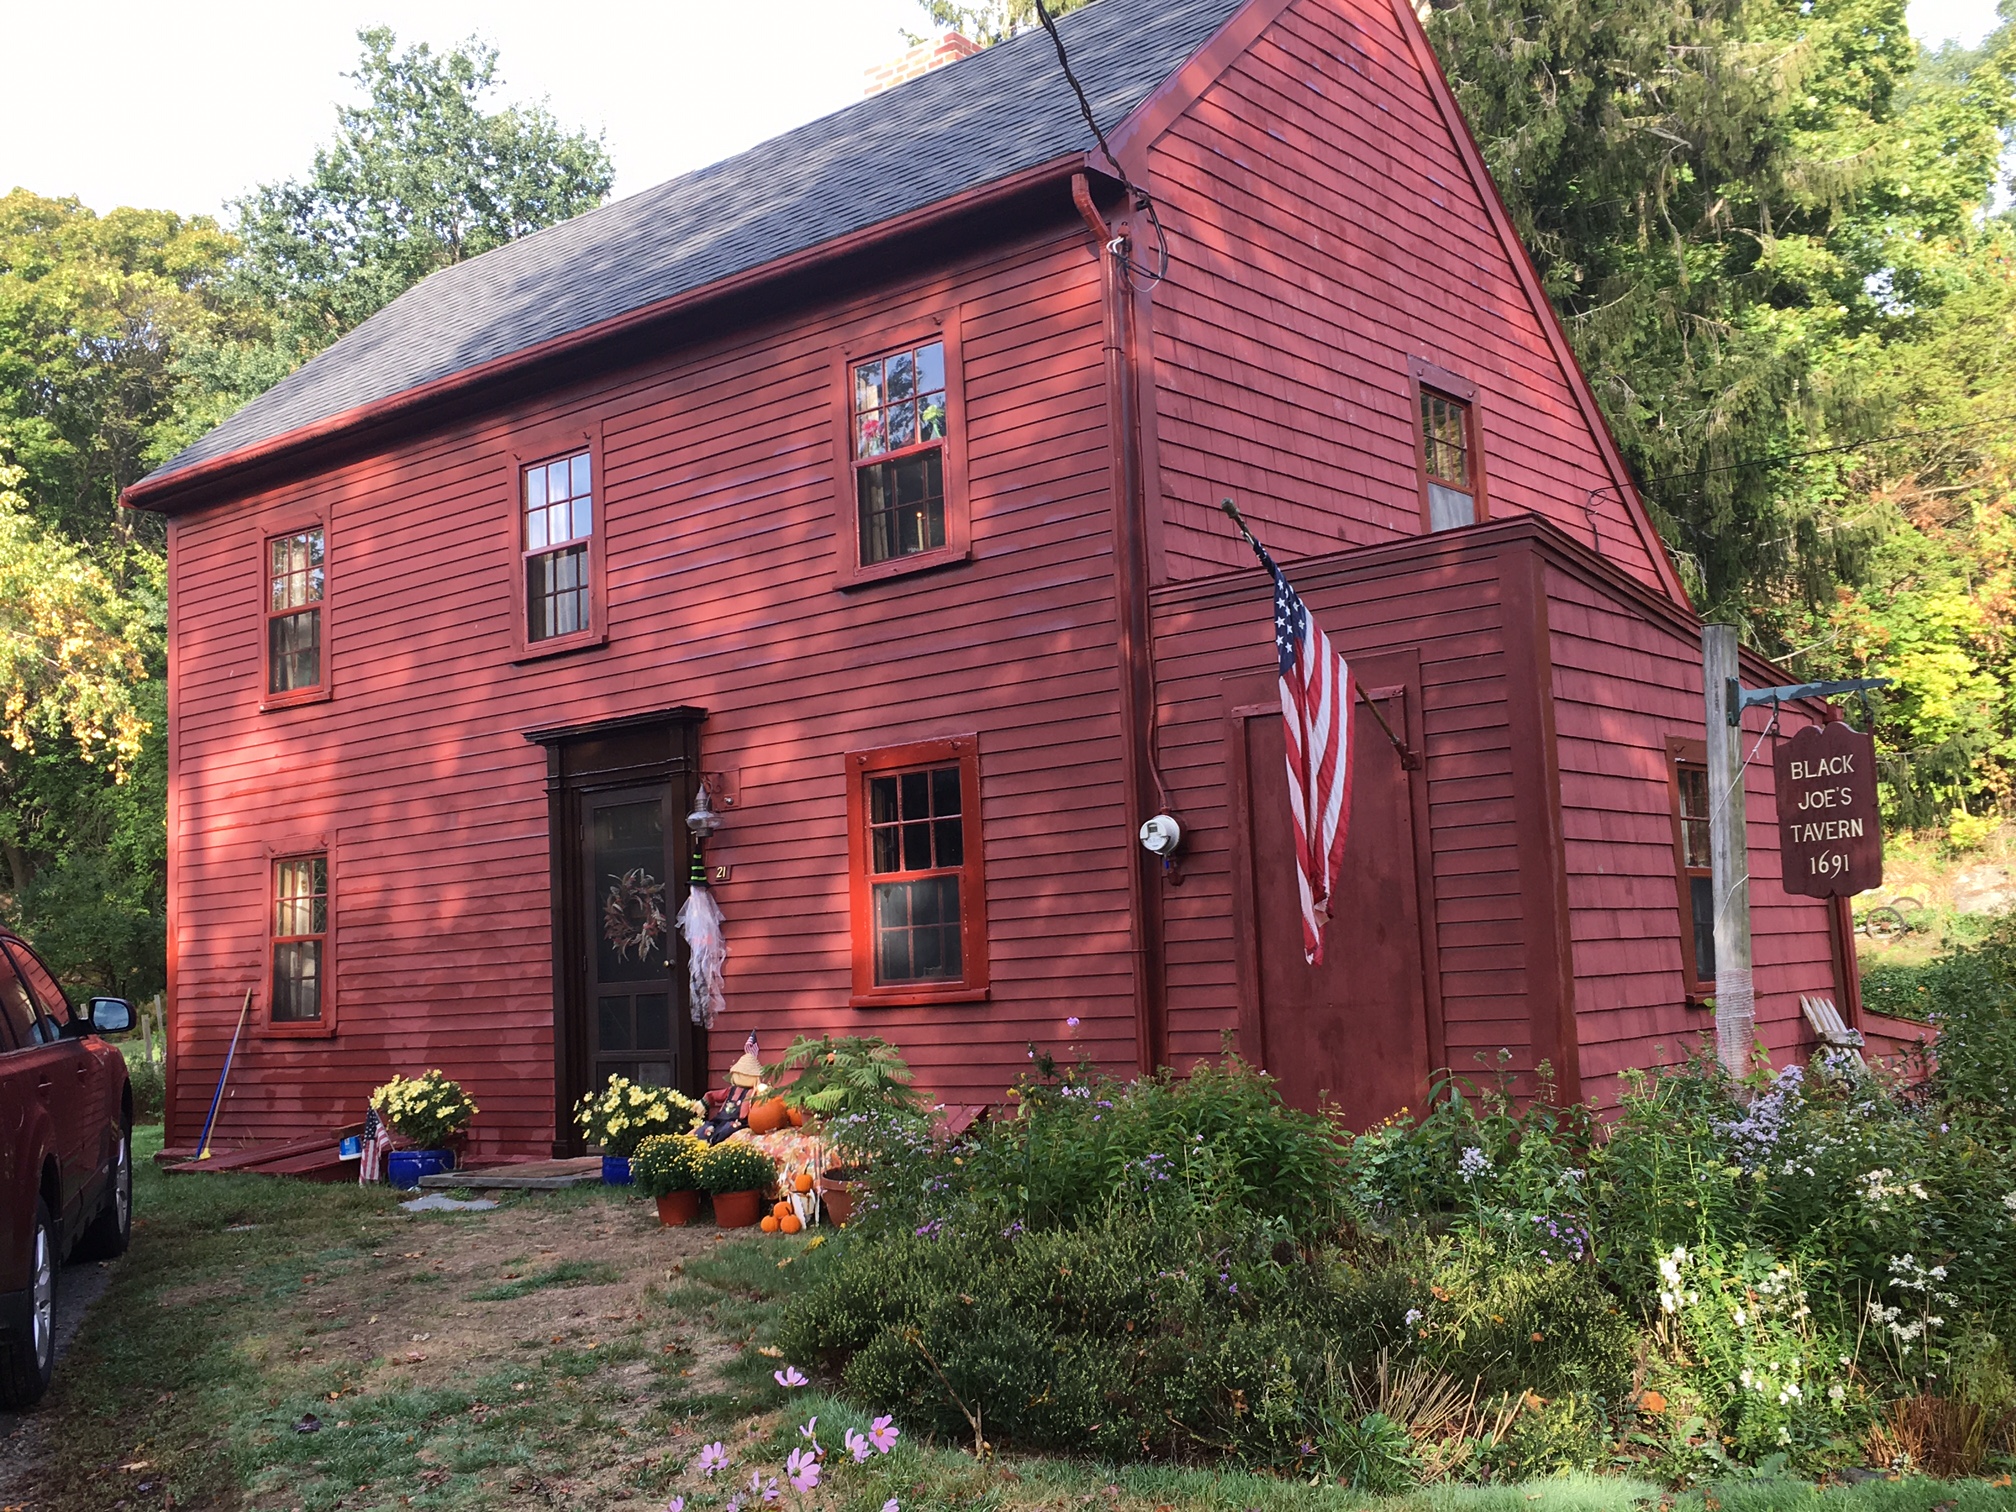
Once upon a time there was a Revolutionary War veteran named Joseph Brown, son of an enslaved, African-American mother and a Wampanoag father. He and his wife Lucretia opened an inn on Marblehead Island after the war, right next to a local frog pond.
Lucretia invented the cookie, and it became something of a sensation. They’re not only delicious, but they also have enough molasses to keep for a very long time. The revolutionary era Massachusetts economy centered on fishing, trade, and other maritime activities. Marblehead was a major seaport and shipbuilding center, so much so that it’s also known to history as “the birthplace of the American navy.” That fame would only grow as the young nation built its vast fleet of clipper ships.
Joe Froggers (and Hermits) quickly became the treats of choice to send off on long voyages around the Atlantic, and later around the world. Small, tasty, long lasting, and relatively inexpensive because much of the nation’s molasses and rum trade came through Massachusetts ports.
The name itself is more debatable, with every source we’ve found claiming to have the one true answer. It’s certainly related in some way to the pond out back. And the “Joe” part certainly comes from Joe Brown. Others note that Lucretia Brown (“Aunt Creese”) originally made these on a skillet, like extra chewy pancakes, and everyone who’s done such things will know how often the neat, round shapes you’re after come out looking vaguely like a frog. Others argue for the lily pad idea.
Decide as you like. This is me hoppity hop hopping away from all such debates. It’s probably some combination of them all, plus the fact that the name itself is so fun.
Moving on, Brown’s Inn grew into an immensely popular community center for celebrations of all kinds. Joe became the town fiddler, with his own set of local legends. And Lucretia’s breads, buns, cookies, and cakes were the best one could find. The couple eventually grew into local legends in their later years, and then expanded into lore and myth after their deaths, with the details ebbing and flowing with whoever told the tale.
For our purposes the bottom line is this: “Black Joe” and “Aunt Creese” were real people, who owned a real inn, and really were well known and loved across the island of Marblehead, Massachusetts. Lucretia Brown really did invent and popularize the cookie now known as Joe Froggers. Joe Froggers really did become a “thing” both during and after their lives, traveling around the world on the Bay State and American Navy fleets. And they remain a “thing” across eastern Massachusetts even now, in the 2020s.
Many cities around the country have “their” cookie. This is the one belonging to Boston – complete with the inevitable carping about how Boston undeservingly managed to absorb all of maritime New England under its umbrella. You’ll make a friend if you acknowledge that injustice to a native of Marblehood, Lynn, Gloucester, or the other seafaring centers of the era. Just acknowledging their claim will make a difference. And Bostonians won’t care in the slightest. It’s all Greater Boston from their point of view. They’re city folk.
An Aside (Sort Of) – The Great Molasses Flood Of 1919
I spent a few hours walking Pittsburgh’s Strip District in search of enough testers to keep us from devouring dozens of these huge cookies on our own. It was a real danger! We each accounted for at least half a dozen when the other wasn’t looking because they are heartbreakingly moreish. The molasses flood must have come up in conversation close to ten times.
It has no direct connection to Joe Froggers beyond “Massachusetts” and “Molasses,” but it’s one of those fascinating events that everyone’s heard about but never remembers until prompted. And then they remember how much they love the story in a guilty kind of way. 20 people drowned in molasses?! The smell lingering on summer days for decades?! Massive and enduring changes to building codes across the nation? Baking ingredients shutting down a city?! Wow.
This goes to a link from the city website Boston.gov if you want to refresh your memory. Here is a fun Wikipedia link that tells the story better, albeit with less authority.
Notes For Fellow Bakers
The rum adds an interesting note you don’t really taste unless you know it’s there. But it does matter. First, because it’s a part of the history, and that’s part of what makes this cookie so fun. But also because the rum rounds out the spices to create a whole that isn’t quite gingerbread, and isn’t quite ginger snap, but something unique within the family.
Rum extract should work just fine, though we haven’t tried it. We used Gosling’s Black Seal Bermuda Dark Rum because we also keep around the house just for drinking. Good stuff!
The fat makes a difference because you can taste it in the final product. Lard and shortening add something to the texture, however, which is why we recommend a 50/50 mix of butter to other. But it’s truly up to you.
Purely by chance, I happened to use up my old jar of molasses while making a test recipe. That jar became the perfect vehicle for combining the (topped off) cup of molasses with the hot water and rum. Put it all in the jar, screw down the lid, and shake until it’s all smooth and liquid.
This is a really, really sticky dough that’s just over the line from being a batter AFTER it cools and sets in the fridge. Account for that as you get the dough mixed. You want just enough flour to reach that point. Any more will start to toughen the cookies. Remember: you can always mix in more, but cannot take any out.
Some recipes will merely sprinkle the pre-baked balls with sugar, but we ended up rolling them simply to make the sticky dough balls easier to handle. This is why we removed 1-2 tablespoons of sugar (⅓ oz = 10 g) from full 1 cup usually listed for the dough.
You want to press the balls down to keep them from rolling, but there’s no need to really squish them. The dough will spread all on its own.
Speaking of which, a golf ball sized sphere is really big compared to what you probably make with other recipes. That is the minimum size for true Joe Froggers. They’re supposed to be big enough that children will gape in awe at the wealth. Skimp if you must, but please do it on purpose because regular sized cookies don’t leave the same emotions in their wake. We fit only four cookies per standard baking tray, with six slightly smaller ones on the final tray because that’s what was left in the bowl.
Adding the flour and liquid in stages works best. Everything gets smoothly and evenly incorporated. But it isn’t essential unless you’re working by hand.
This is a no-eggs recipe. That isn’t a typo. It’s a feature, not a flaw.
Honey, orange, cinnamon, and clove in an ancient waybread cookie
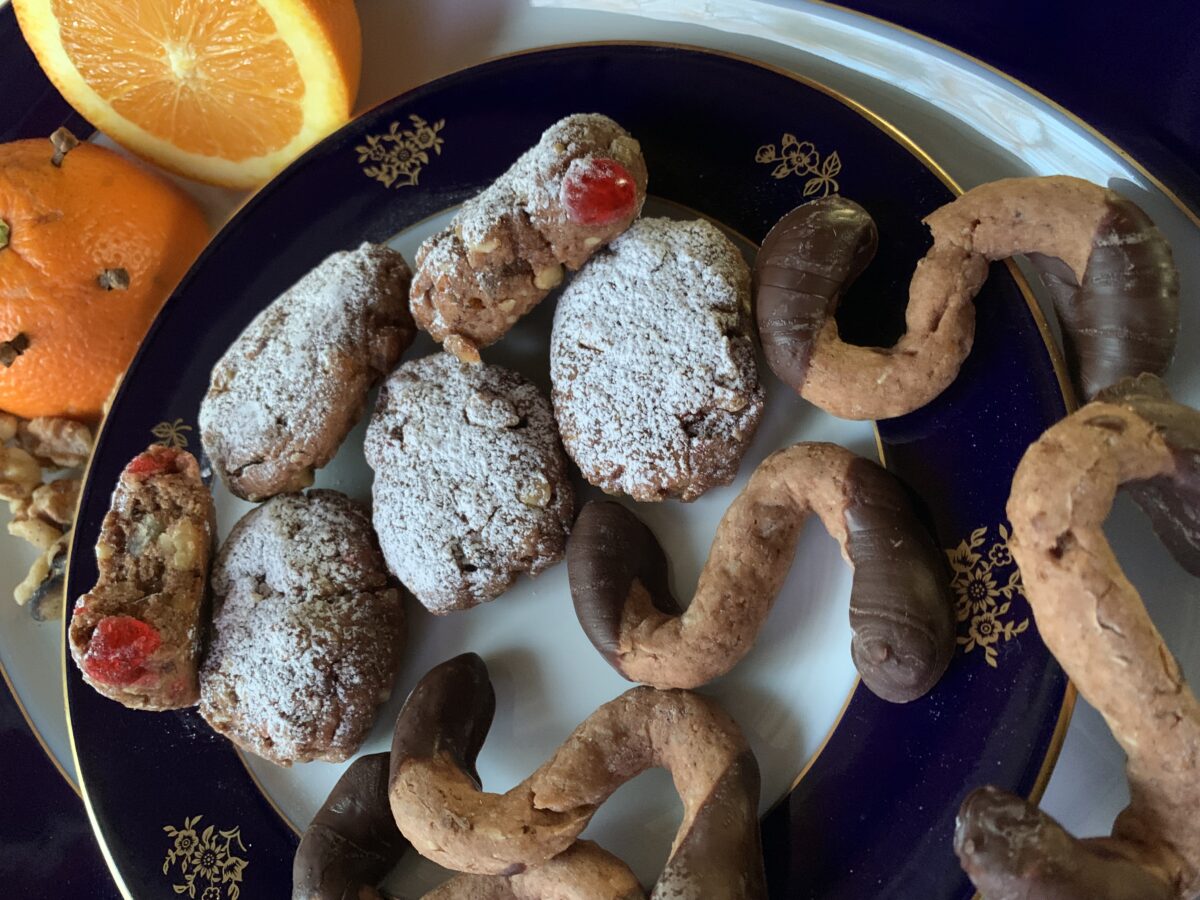
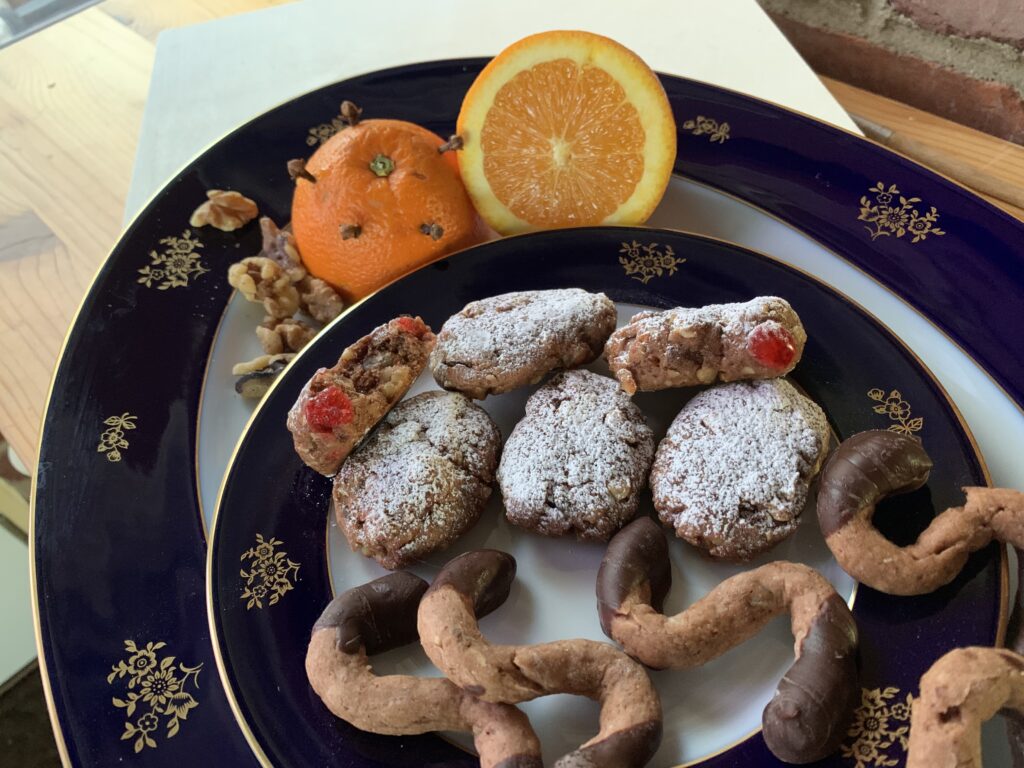
After researching a few recipes from the Eastern shores of the Mediterranean, our attention turned toward an interesting Spanish/Portuguese cookie… only to be diverted again by this much loved Italian cookie from Calabria, the “toe” of Italy right across the straits from Sicily. It’s a fun recipe, in part because there really is no single recipe. Nor any two. Nor any three. It’s basically a fill-in-the-blank name for any cookie made with the classic, southern Italian flavor profile of honey, orange, cinnamon, clove, and nutmeg-or-mace, offset by a bitter element, which can be cocoa powder, a bitter chocolate coating, or some molasses in the dough (a “difference” that typically changes the name from Susumelle to Mostaccioli di Napoli).
Susumelle vary much more than most cookies, ranging from dense and chewy, to light and crispy, and topped with either chocolate or a powdered sugar glaze. But there are a few constants that ought to catch your attention as much as they did ours:
This is an ancient cookie with roots going back well into medieval times, and it seems to have some connection back to the culture of Greece. I don’t think anyone would be surprised if ancient Roman recipes turned up.
The main sweetener is honey, which means they have a very, very long shelf life, and did not require the boost from Age of Exploration sugar crops that caused so many new cookies to be born from the 1500’s on.
Most versions include neither eggs nor fat, which makes them much less tender than other cookies. We’re told that some versions are crunchy enough to use as teething biscuits for babies! [See the safety note at the bottom of this article] But this isn’t a rule. Some recipes do include eggs, and others have oil, though we’ve yet to find any with butter.
Almost every version includes some orange in the dough; zest for sure and often juice, but this can vary off to liqueurs, water, or even wine. Orange and honey! That’s a winning combination every time! Especially when paired with…
A healthy amount of cinnamon, a small touch of clove, and usually an equally small touch of nutmeg or mace. This combination is everywhere in what used to be called the Kingdom of Naples from the 1200’s into the 1800’s. Think “Italy south of Rome and the papal states.”
A bitter counterpart to offset the sweet honey. Cocoa powder is extremely common, and the one used in this recipe. Regions nearer to Naples tend to use molasses instead, with a name change to “Mostaccioli.”
Finally, Susumellealways get coated in something, but that can range from dark chocolate (the most common), to white chocolate, to a powdered sugar glaze, to simple powdered sugar (especially for unleavened versions).
After that you get to the endless variations. And I do mean endless. Hundreds of years of variation yield more differences than consistency. It gets even more confusing as you go back in time! According to this tourist website, back in the old days natives acknowledged three separate categories of Susumelle based on the type of flour: white flour for the wealthy, poverty flours like whole wheat and acorn for the commoners, and “a third called ‘del buon cammino,’ made with good ingredients and destined for priest and friars.”
Does The Name “Susumelle” Provide Any Clues?
Well… not really. First, the word itself means multiple things in modern Italy. If you say “un Susumelle,” you almost can’t be wrong. It means anything that fits the broad category of a dessert made with honey, cinnamon, and clove. If you say “real/proper/etc. Susumelle,” or just “Susumelle” with no adjective, it means either (a) the cookie that Grandma made, with yours and everyone else’s being an abomination, or (b) a commercial version totally unlike Grandma’s but nevertheless real because you can see it in a store.
That same tourist website offers two potential name origins. The first is a combination of the Greek words sesamum (sesame) and mel (honey), which makes more sense than you might think because Calabria is right on the ancient trade routes, and there is are extremely common Levantine and Greek cookie/biscuit recipes with that profile. The other theory also traces to Greek, but is based on the word “susumeda,” meaning food that had gone bad that was given to the poor as charity. It is a Christmas cookie after all…
But that’s not all. Another theory says the name has to do with a local word for ‘una carezz’ (a caress). And I’ve even seen websites and videos claiming the name comes from the often-traditional “S” shape.
Then there’s the eternal category, “all of the above.” When many names work, people love to make puns that can work from multiple directions. And then they love to argue about it even more… but that’s a whole other story.
Does that sound vague, maddening, and designed to make researchers “wrong” no matter what they do? Welcome to my world, friends. Welcome to my world.
Wait A Second… Isn’t This A Waybread?
Frustrated? Me? Heck yeah. But then I realized that this particular kind of frustration rang some bells.
Isn’t exactly the same thing true for Lebkuchen recipes in German-speaking countries? Indeed it is! And for Molasses Gingerbread recipes across Northern Europe? Y’know, that’s true too. Honeycakes/Honey-Gingerbreads in Central and Eastern Europe? A pattern emerges.
And aren’t all those cookies remarkably similar in the big picture, being ancient recipes made with lots of honey, a spice mix, and often a healthy portion of dried fruits and/or nuts? Aha! The penny drops. This is the Southern Italian honey based waybread cookie, with every bit as much variation as its northern cousins.
Time To Treat It As A Master Recipe
After breaking my brain with no less than seven (7!) test versions, I finally realized the problem. I was trying to use one name for at least four different cookies. For our purposes we can break them up into the following variations:
Super hard, use-your-molars crispy examples. These typically have no additions to the basic dough except ground nuts, which only appear on occasion anyway. Molars-hard Susumelle usually include a moderate amount of the ancient leavening agent Hartshorn a/k/a Baker’s Ammonia, and are almost always (a) coated with chocolate, (b) shaped into “S” cookies, or (c) left uncoated for baby to teethe on.
Hard, light, and crispy eating cookies formed into ropes for an “S” shape, or rolled to normal (around ¼”) thickness and then cut. This version has a lot of hartshorn, but baking powder works too because they cook until fully hardened. Nuts are almost required (powdered, chopped, or coarsely chopped), but may be replaced with sesame seed. Light-and-crispy Susumelle always get a chocolate coat, usually dark but also ranging through milk and down to white.
A hard and crispy biscotti version. Take #2 and form it into a single rectangle. Bake for a long time (25 minutes is typical), and then slice into biscotti-shaped pieces. The pieces can be baked a second time, but many don’t bother.
Moderately crispy eating cookies, which can be either hand formed or treated as an extra-thick (around ½”) roll-and-cut. The same as #2 yet again, but with something added to interrupt the texture. That ‘something’ usually includes (a) baking powder rather than hartshorn, supplemented by (b) chopped, candied fruit, (c) chopped, dried fruit, (d) coarsely chopped nuts, and/or (e) eggs or oil added into the dough. This version also requires a coating, but it can vary from any kind of chocolate all the way through any kind of powdered sugar glaze.
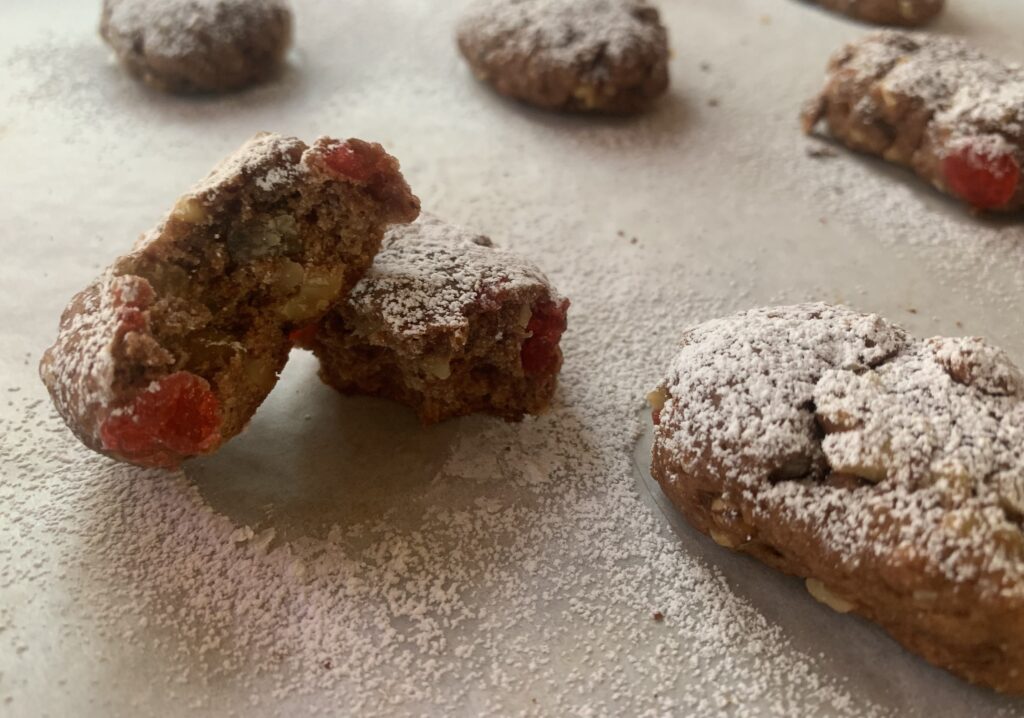
Chewy waybread cookies comparable to Siennese Cavallucci. This version usually has little to no leavening, and is loaded with chopped fruit (candied or dried) and/or nuts. They’re also at least ½” thick, and large enough to be 3-4 bites each. Look for (a) large, roll-and-cut ovals, (b) hand formed egg shapes that settle into ovals inside the oven, or (c) thick ropes formed into an “S” shape. All three shapes are always served with powdered sugar on top.
Option 2 – Light and crispy, with walnuts
Option 5 – Unleavened, with nuts and candied fruit
A Rose By Any Other Name
We published a basic version of a cookie called Mostaccioliin Heritage Cookies of the Old and New World Volume 1. It’s a straightforward combination of chocolate and clove.
The research for this cookie shows that Mostaccioli is actually a broader category than we thought, and amounts to the slightly-more-northern version of Susumelle common in Campania (the shin) and Apulia (the heel) rather than Calabria (the toe) or Sicily (the stone being kicked). You can convert Susumelle to Mostaccioli by reducing the amount of honey, increasing the amount of sugar to compensate, and adding a significant portion of molasses and/or chocolate into the dough as a bitter counter-element. After that it’s the same orange/cinnamon/clove/nutmeg core, with infinite variations. [NOTE FROM SCOTT: I should probably work on a revised version of that recipe…]
Then there’s a third cookie, or more properly a Not Quite A Cookie, called Rame di Napoli; an extra-thick chocolate cake batter with the same basic flavor profile. These get baked in egg-sized mounds, coated in dark chocolate, and sprinkled with chopped pistachios. It’s a specialty of the city itself (Naples), and baked for Italy’s version of Halloween. If you’re interested, the word “rame” means “copper,” and the “cookie” is supposed to resemble an old Neapolitan copper coin. The pistachios represent green oxidation.
NOTE FROM KATE: when Scott develops a recipe, we can generally agree the point at which I can reserve cookies for the photo shoot. This time, the cookies kept arriving. I did enrobe a few of them in chocolate, but I never took photos. Too many variations, and too many baking variables, kept tripping up our decision-making process and every time Scott consulted either blogs or people, more local variations came out of the woodwork!
Now that he has his several varieties sussed out, it’s time to set up a project chart. Variety names, leavening status, textural additions, spice combinations, textures, glazes, shapes. Phylogenetically speaking, it’s as though Sussumelle was a cookie genus, and all these varieties were separate species. I care about the shapes and the glazes more than he does. As our mycologist friends like to insist, species concepts really work better when they are morphologically distinct.
CONCLUSION
Our recipes tend to focus on cookies with a story. Susumelle turned out to be a saga. Batch, after batch, after batch, trying to find the essence beneath all the recipes. We’ve rarely worked on a more frustrating project, until the penny finally dropped and we realized that something close to half a dozen different cookies all go by the same name, with only the main ingredients (honey, cocoa, cinnamon, clove, and nutmeg) as the unifying principle. That may sound mad at first, but only until you realize that much the same holds true for the similarly ancient honey-and-spice waybreads in Central and Northern Europe. Time and popularity equal endless variations.
Which is our personal favorite? Kate can vote for herself, and none are bad, but mine would be the one with no leavening at all, and all those beautiful bits and bobs inside. It’s a Lebkuchen or Honeycake done Southern Style, with a delicious flavor palate unique to these particular regions.
Of course, that opinion might change if we still had teething babies around!
A NOTE ON FEEDING HONEY TO BABIES: The bottom line is this: don’t. Honey harbors a bacteria called “Clostridium” that can on rare occasions cause infant botulism. Bad juju! The risk diminishes as the infant grows, becoming less dangerous around 6 months, safer still after 9 months, and more or less safe after 12; at least according to Doctor Internet. Babies usually start to teeth around 6 months, though some start earlier.
Susumelle recipes cook the honey and the sugar, which you’d think would reduce the risk, but it doesn’t eliminate it. So tradition be damned. Follow your doctor’s advice. The fact that people with no concept of germ theory almost always got away with the risks does not make it the smart thing to do. Do you really want to be the exception?
NOTE FROM KATE: look up the USDA guidelines for killing Clostridium botulinum, compare the temperature and time requirements, and let your comfort level be your guide. Now look up sugar, carb, and oral health guidelines for young children. Seriously dude, teething on hard biscuits is a dentist’s nightmare! The whole idea reminds me of a “teething remedy” my grandmothers used to employ: unripe poppy seeds simmered in sweetened milk, and then used as a soaking liquid for soft bread wrapped in a handkerchief and tied off with string. “It helps the babies slept better,” they both said, “but don’t use it all the time. Poppy makes kids stupid, so it’s a last-resort option.”
A delightful, aromatic, not-too-sweet cookie adored across the entire Middle East
This classic, crispy Middle Eastern tea cookie appears all over the levant, but those from Lebanon are acknowledged to as the best even in this famously competitive part of the baking world. So we set out with a question: what features make them so special, and how do they differ from all the other anise cookies that dominate the Mediterranean shores?
Have oil or clarified butter in the dough rather than plain butter; and
Have a dry, crispy, but well spiced flavor that pairs up perfectly with a cup of potent tea or coffee.
Ladokouloura are the Greek version. They feature olive oil, sesame, and orange. These Yansoon Cookies are all about the anise (“yansoon” = anise in Arabic) with sesame as the supporting note and a mysterious other lurking behind. Kate remains torn, but I like this one better.
NOTE FROM KATE: I love anise. My grandma used to make a low-butter type shortbread that had to age well before being served, and those were possibly my most favorite Christmas cookies. They never caught on with Scott. He fell in love with richer fare, so I never bothered making the “anyzky” just for myself. But maybe I should’ve, because this recipe has reminded me what I’ve been missing! These, too, are leaner than your standard butter cookies, but you won’t miss the fat because of their crispy texture. If anise is your jam, definitely give these a try!
What Do You Need For A Great Yansoon Cookie?
My research uncovered three main points:
Hartshorn a/k/a baker’s ammonia makes a major difference because it creates a unique texture that particularly suits cookies in this category (tea- and coffee biscuits intended for dunking.
Yes, there are online recipes that use baking powder instead, but the authors almost always say that with regret because it just isn’t the same. The baking powder versions lack that characteristic, next-level crispiness.
See that crisp, honeycomb inside? The magic of hartshorn
Vast amounts of anise, and a generous amount of sesame seeds.
Multiple tablespoons seemed like a lot, but testing proved they achieved a nice, balanced flavor – particularly with the mix both ground and whole anise.
NOTE FROM KATE: I believe the amount of air inside this cookie tends to dilute the flavor, which explains why even this level of spice won’t feel excessive.
Variation rules more than consistency after the sesame and anise, but every recipe includes a gentle touch of some aromatic extras to create roundness and nuance.
Which “extras” work best? Sorry folks, but that is the sort of question that generates outright feuds among proud grandmas across the region. I’ve been married for long enough to keep my nose faaaaar away from that kind of debate! Besides, it doesn’t seem to really matter so long as they amount to just an evocative murmur in the background.
Our recipe includes 10 separate ideas for mixing-and-matching, but in the end it’s the sort of thing you should customize to taste.
NOTE FROM KATE: Don’t be afraid of “weird” spices. When I was making my test batch, I opted for a slightly savory take on this cookie: All the anise and lemon oil, but also black caraway (nigella) and cumin. The latter two gave the cookie an earthier, slightly savory vibe. It’s my favorite combination so far. Who knows what you will discover?
Any Shape Will Do
In the end we liked the simpler shapes best. The sticks were amazingly snackable. The rings are just so classic. And others work too if you want to get fancy.
An early test with complicated shapes (and no nigella seed)
The Testing
This recipe involved a huge amount of online research, but our initial recipe was almost dead on point. Testing provoked only one real change: my first effort split the leavening agent 50/50 between hartshorn and baking powder. It was good – very good! – but Kate and I agreed that hartshorn alone worked even better because it creates a more pleasant and crispier texture.
FWIW, the Extra Touch Flavors in that first effort were ⅛ tsp. of orange oil, ⅛ tsp. of lemon oil, and ½ tsp. each of almond and vanilla extract. Why those? I had no citrus on hand for zesting (hence the oils), and no mahlab on hand for roundness (hence the extracts). Native testers confirmed both authenticity and delectability… though Grandma’s were of course said to be better.
Kate went savory with our next batch by adding a 1 tablespoon of nigella seed and ½ tsp. of cumin. The cookies tasted good, but were far too savory, and the main flavors got buried. The updated recipe reduces those amounts to 1 tsp. and ⅛ tsp. respectively. Remember: background hints and murmurs.
The Sugar Level
Read the recipe carefully and you will note a surprisingly low amount of sugar. It’s not a typo, and in fact it is typical of the region. Sweetness gradually increases as you travel from Lebanon up to Greece, increases more as you go west over to southern Italy, and then goes up yet again as you enter into the Italian mountains. It’s a matter of regional taste as much as anything else.
But there’s an added factor for Yansoon Cookies. Think about it: doesn’t anise have a sweet note to go along with its aromatics? Just like citrus flavors, almond flavors, and vanilla? Lebanese bakers acknowledge this by cutting back on the sugar in favor of those more ephemeral equivalents. Trust me on this one. Lebanese Yansoon Cookies are supposed to have relatively little sugar compared to other treats. Don’t mess with this aspect until you have made them as intended. After that it’s baker’s choice.
Brown on top, or brown on the bottom, there must be brown
Crispy, toasty, anise & sesame goodness
Bake Until Brown
The cookie crisps up nicely in 15 minutes, but we liked them better with a bit of browning on top. That meant 17-20, which left them a little too dark on the bottoms. We plan to bake future batches on a silicone mat instead of parchment, or with doubled sheet pans to provide some insulation.
Spinning the trays halfway through helps to prevent distinctive differences between top and bottom, and from side to side. We don’t usually bother, but this time it makes a difference.
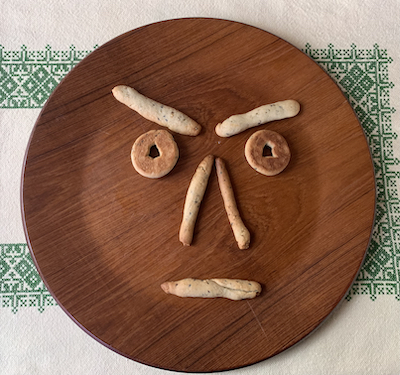
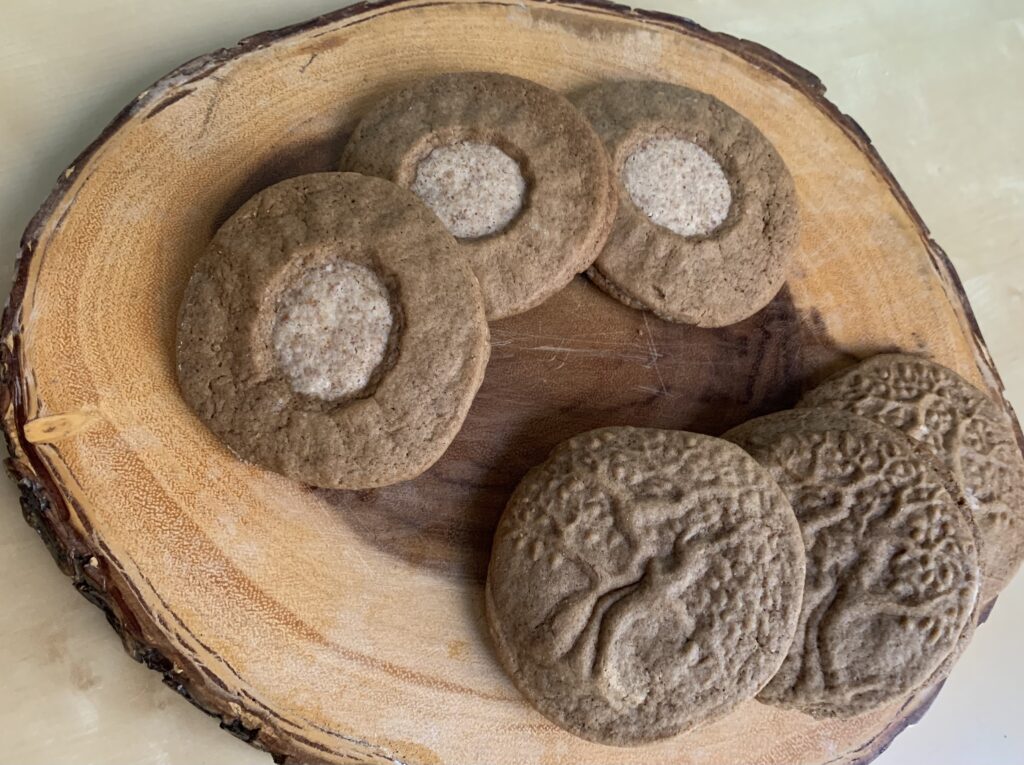
A PHOTOGRAPHIC NOTE FROM KATE: One rule of food photography is to never look for the faces. Once you see a face in your photo, you cannot unsee it, and this will force you to change your whole setup. It can add hours of work. However, once you get done shooting your cookies, and just a few are left, and there’s a round, wooden plate, sometimes the cookies just insist. How could I not use this golden opportunity to have some fun? If you’re not having fun, you’re doing it wrong.
FUN FACT: Poor Scott expected me to AirDrop him a batch of cookbook-worthy Yansoon Cookie photos. I sent him a batch of cookie emojis first! (No worries, the more appropriate images soon followed.)
Conclusion
Kate and I both like anise in general, but neither of us would qualify as special enthusiasts. I feel the same about sesame (Kate is a bigger fan). And yet we couldn’t be any happier with this new recipe despite the copious use of both. Yansoon Cookies will feature prominently if we’re ever asked to cater a tea party, and won’t be rare in the household cookie jar at any time of the year.
Who’da thunk it? Soldiers like to trade amongst themselves, particularly when different groups have different supplies. In World War II the U.S. GI’s were the source for chocolate and smokes. The English always had tea. And the Canadians? They marched into the trading wars armed with cookies that no one else could match – the ones you’ll see below.
Click Here if you only want the recipe without the discussion
The basic recipe comes from the 1946 Canadian Army Cook’s Manual, as published in the Canadian Government website. All we did was test it, which turned out to matter because the volume-to-weight ratios on that page are a little bit off. Following the weights yields a thick drop cookie dough, while the volume measurements (cups) give you a very soft slice-and-bake result. We went with the second one because the instructions specifically mention slicing off pieces before baking. Our version below has corrected weights according to our tried and true conversion tables. Please note, however, that some ingredients (particularly flour) can vary a lot depending on both grind and protein content.
NOTE FROM KATE: When I tested this recipe, I used the scale with an expectation of tidy, slice-and-bake logs. I got a goopy mess of a drop cookie dough, and a discussion ensued along the lines of “You know, this cookie has a HUGE proportion of molasses!” Scott did some recalculating, et voila! The next try yielded slice and bake logs. The cookies bake and taste the same, but I prefer the tidy handling of the logs. It makes for an easier cleanup.
We made only two changes aside from that tweak. (1) The original recipe calls for sour milk, which we successfully replaced with both buttermilk and with fresh milk soured in the kitchen by adding some vinegar/lemon (a standard workaround). Yogurt ought to work too, though we haven’t tested it. And (2) We added raisins and extra spices as optional ingredients. Those might be too expensive for army-level production, but they do yield a tastier result for home cooks making dozens instead of thousands.
So what does it taste like? We found a few dozen tasters for this recipe and got a pretty standard reaction: “Entirely inoffensive with a finger on the scale toward good.” Call it a universal 6 out of 10, with no one going higher than an 8 or lower than a 4. They’d also be a 6 if you had a 1-10 scale from savory to sweet. Add the optional raisins and both scores go up by a notch. Extra spices push it up another.
NOTE FROM KATE: I admit to being spoiled by molasses cookies that bite back. You know, the memorable ones, loaded with spices from the obvious cinnamon to the expensive cardamom, with pepper and ginger for good measure. This is not that kind of a cookie. This is like a mild dish from a famously spicy cuisine. It’s still delicious but it defies your expectations.
People who like spicy cookies will notice a certain lack in this one, while mild food eaters should be thrilled to have a cookie that goes well with both coffee and tea. The restraint on the spice end of things was likely a result of not only preference, but also economy. Spices are expensive, and that matters once you multiply their cost by making enough for the entire Canadian army!
Soft or crunchy?
It’s entirely a matter of baking time and personal taste. Kate prefers these with a bit of residual chew. Scott likes them better when crispy. Choose for yourself. 15-20 minutes gives you one or the other, with all the stages in between.
NOTE FROM KATE: Despite my chew preference, I find that even dry cookies, which sat out for a few days, tasted good! Surprisingly, they didn’t go stale, and they had a nice crisp. Even though the low spice level took me aback at first, this eminently practical cookie grew on me and has now become a part of my “easy and travels well” repertoire!
Turn your favorite chocolate-and-spice bars into exquisite cookies
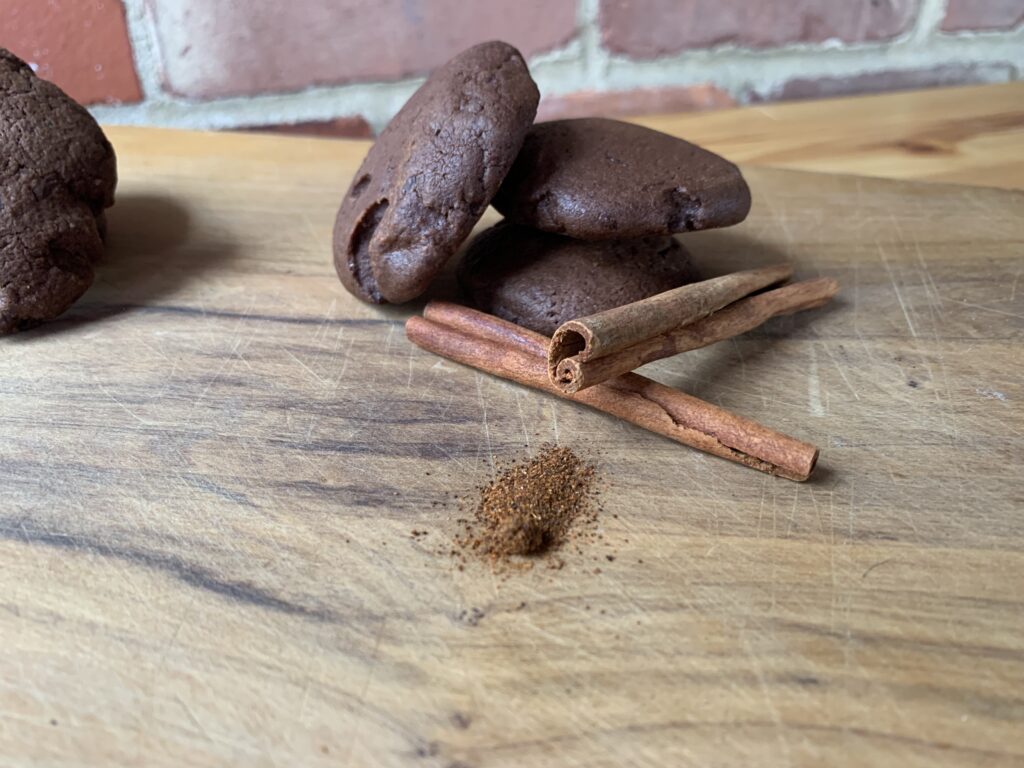
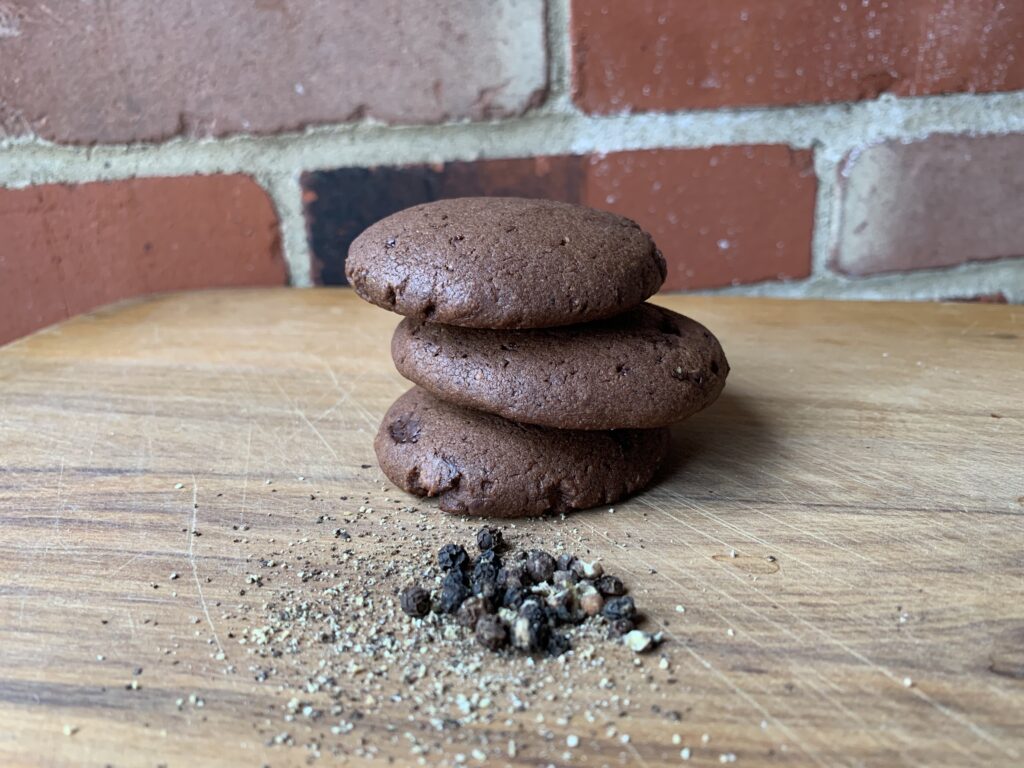
“Infinite Temptation” may make more sense in the title than “Infinite Delights.” The testing began with a Chocolate Black Pepper cookie, and the batch looked good as it came out of the oven. Thirteen nice, hefty, 2½” pieces. I tasted one, and liked it. A lot! So I duly brought them out to my beloved, and left them there on a plate so she could try one too. Then I went off do some work on another project.
I strolled back in about 30 minutes later. There were 4 cookies left on the plate. Our pup had been with me in the office. Kate had been left alone with the plate, parked on the sofa with her laptop.
13-1 = 12. 12-4 = the sort of math that wise old husbands forgot how to do a great many years ago. Make that wise and generous husbands, since I immediately ate three more and was kind enough to leave her the last.
Batch #2 got made when we hosted a dinner for our daughter and niece. Miranda had the will power to resist, thanks to a bit too much spice for her taste. Amanda? Amanda ate so many that I don’t have the heart to rat her out in public. Let’s just say that we now have testimony to how well the cookies go with a glass of wine, and with a glass of water, straight out of hand when no one seems to be looking, and with coffee too.
Get it? Got it? Good. These really are all of that; as simple as can be, absurdly rich, and with just enough of a twist to always be unique.
NOTE FROM KATE: One whole pound of chocolate, divided into only four dozen cookies. That’s a lot of antioxidants per cookie! So these aren’t just delicious, they are a regular health food! [Yay! That’s my story and I’m sticking to it!]
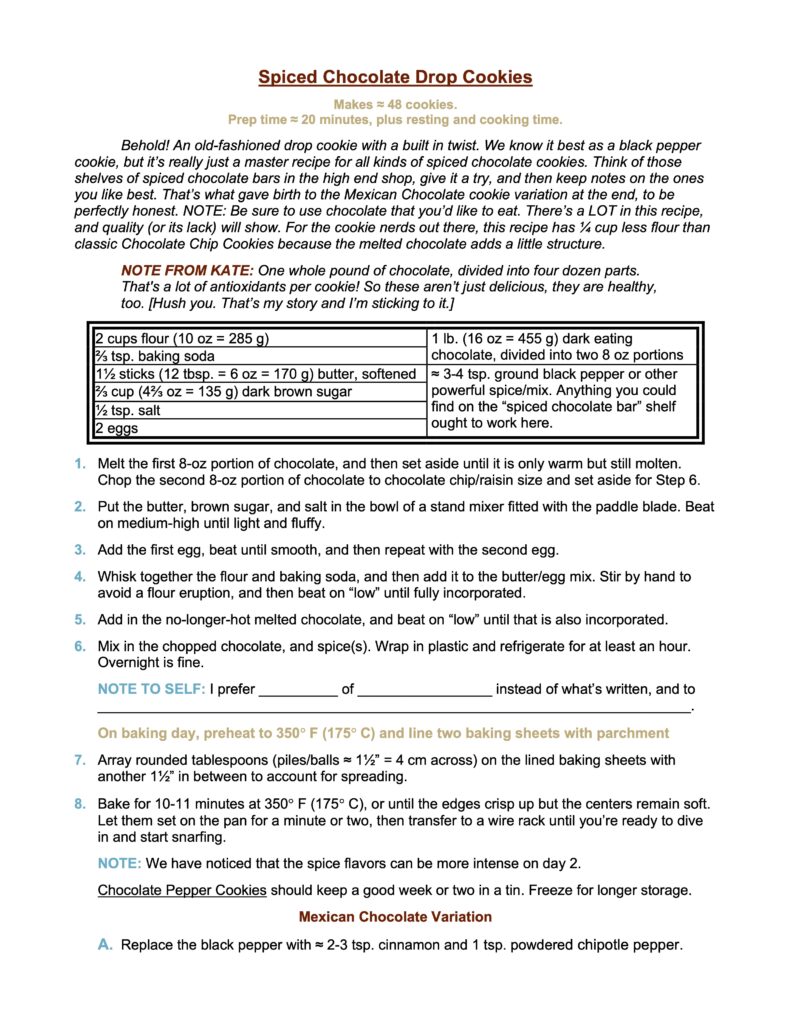
This is a fairly standard drop cookie, so there’s no need to bore you with the chemistry. Go look at a regular Chocolate Chip Cookie recipe. Subtract ¼ cup (1¾ oz = 50 g) of flour, and replace it with half a pound (8 oz = 225 g) of melted chocolate. Bing, bang, boom, you’ve got it. The chocolate adds back the structure you lost by removing that bit of flour.
Add another half pound of chopped chocolate (or really good chips), the spice du jour, and you’re done. The only tricky part comes with the baking time. It’s easy to overbake a cookie this dark, and doing means sharing chocolate essence with the air, so we limited the baking time just to be on the safe side. 10-11 minutes instead of the more normal 10-12.
Just make sure to use a good chocolate. There is a full pound of chocolate in every batch. The flavor comes through, and cheap chocolate will show.
NOTE FROM KATE – ABOUT CHOCOLATE: Some of you might’ve seen articles about chocolate with elevated heavy metal levels. Long story short: which risk factor do you want to go with on a given occasion: chocolate or chardonnay?
Development
Chocolate is great. Chocolate is awesome. But the special part here comes from the spice.
Please note that I didn’t actually create this cookie. We publish heritage cookies not mind numbingly good original creations. That said, the accusation has been made and so I feel the need to defend my process.
I began the project looking to highlight a black pepper cookie. Think about it: all those spice snaps, with flavors ranging from across the map, and yet almost no one remembers to try the one spice that’s in basically every kitchen across the breadth of Western civilization. It couldn’t be right… and it wasn’t. Examples abound. And I may get back to them idea later on. But the thought of chocolate black pepper cookies could not be resisted, and thus I went a little sideways.
A Google search for the term “chocolate spice cookies” comes back with a bit more than 68 million results! Italian recipes lead the way, but U.S. versions (like this one) aren’t far behind. There’s one from South Africa with just black pepper… there are a few based on Mexican chocolate… Viennese chocolate pepper cookies (a roll out)… It doesn’t end. This isn’t an original idea, just my version of one that every baker across the world has thought about from time to time.
So what did I do? (A) I elected to go with a U.S.-style drop cookie, and (B) I made it so good that all the other 67,999,999 are stuck with trying to come in second.
NOTE FROM KATE – ON FLOUR: We had a batch where we ran out of AP flour (11.7% gluten) and ended up using pizza flour (14% gluten) for about a quarter of the required amount. Those cookies didn’t spread. They had so much more structural integrity that if you made a little pyramid, it would probably look like a little mountain upon baking. The cookies in the photos are made with regular AP flour, and they did spread some but not very much. This begs the question, would a softer flour yield a more traditional cookie with more spread? Would substituting some starch for 10% of the flour do the trick? If you try it, let us know on our eponymous FaceBook group.
FYI, there was nothing wrong with the pyramidal cookies went came to taste. Their centers remained soft and may even have held on to moisture better. High levels of either cocoa or chocolate will suck moisture out of any baked good, and this is a great example of the phenomenon.
The Spice Part
The first test batch stuck with black pepper. Four teaspoons of it! The result was superb, but it did push right up against that line between “right” and “too much.” The recipe accordingly says 3-4 now. But the big Aha! moment came when we realized that black pepper was just the tip of this particular iceberg.
Go out to your favorite chocolate shop and you’ll find a whole shelf of well spiced options. Chocolate flavored with cinnamon. Chocolate flavored with cinnamon and chili (the Mexican chocolate profile). Chocolate flavored with cayenne, garam masala, ginger, nutmeg, star anise, cloves, gingerbread mix… It’s endless! I mentioned this to Kate and her eyes lit up with an evil gleam.
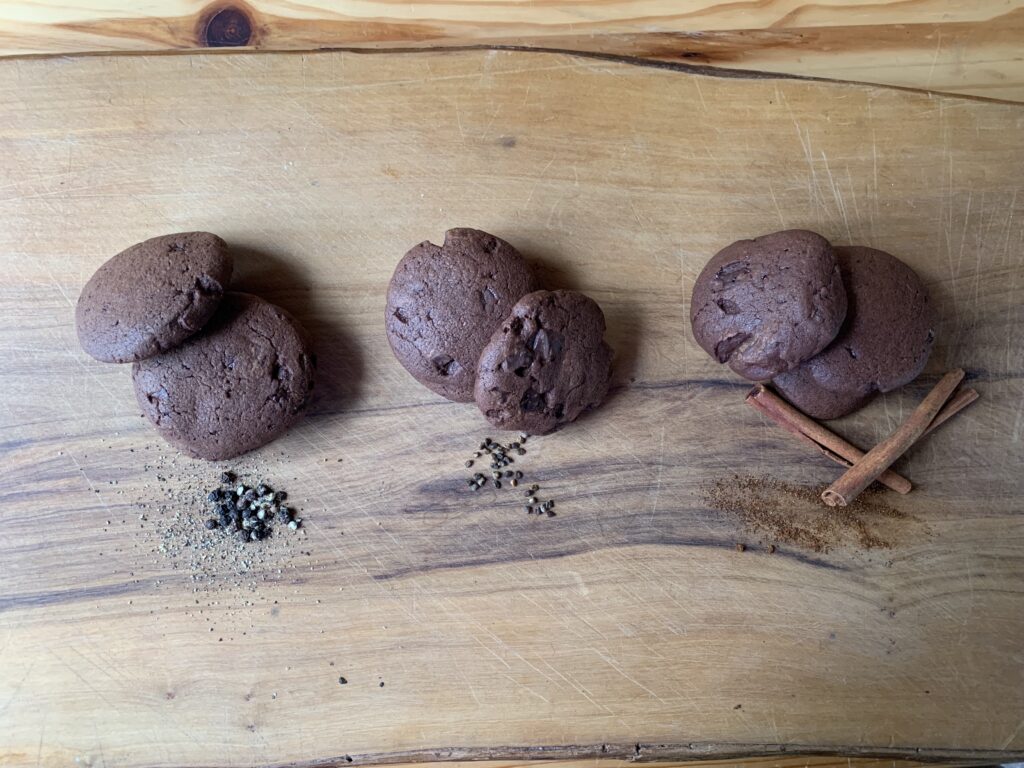
Every single one of those would work in this recipe. Just compare the potency of your chosen spice to the designated 3-4 tsp. of black pepper in this master recipe, and keep notes so that Version B will be perfect. Bing, bang, boom.
NOTE FROM KATE: I prefer more spice. The cookie doesn’t have to bite back, but higher spice level helps the flavor linger. The pepper version is warming and makes you raise an eyebrow in surprise (use fresh-ground for best effect.) The cinnamon-chipotle one is familiar, with a long and warm finish. Cardamom alone didn’t have the same bite, but the high floral notes carried beautifully, and I plan to see how that spice would play well with black or spicy pepper or to attain an extended note.
One whole recipe gives you approximately 1,200 grams of dough. I divided it into four bowls with 300 grams each, rounding them off to get even weights. (The exact amount of each batch will vary depending how much dough you use for “quality control,” how hard you pack your brown sugar, the size of your eggs, etc.). Then I added proportionate amounts of spices, getting 15 cookies of each per cookie sheet. Label your baking parchment so you know which is which. These are mystery cookies. They all look the same, the first bite keeps you guessing, but by the second bite you know.
NOTE FROM SCOTT: That might even be a fun game. Make several versions with different spices, and then let the party figure out what’s what...
Let us know your favorites so we can give them a try. I might even get to try a few myself before the invisible cookie gremlins get hold of the dozen I left on the plate. Deaf, dumb and blind, thy name is husband of 30+ years.
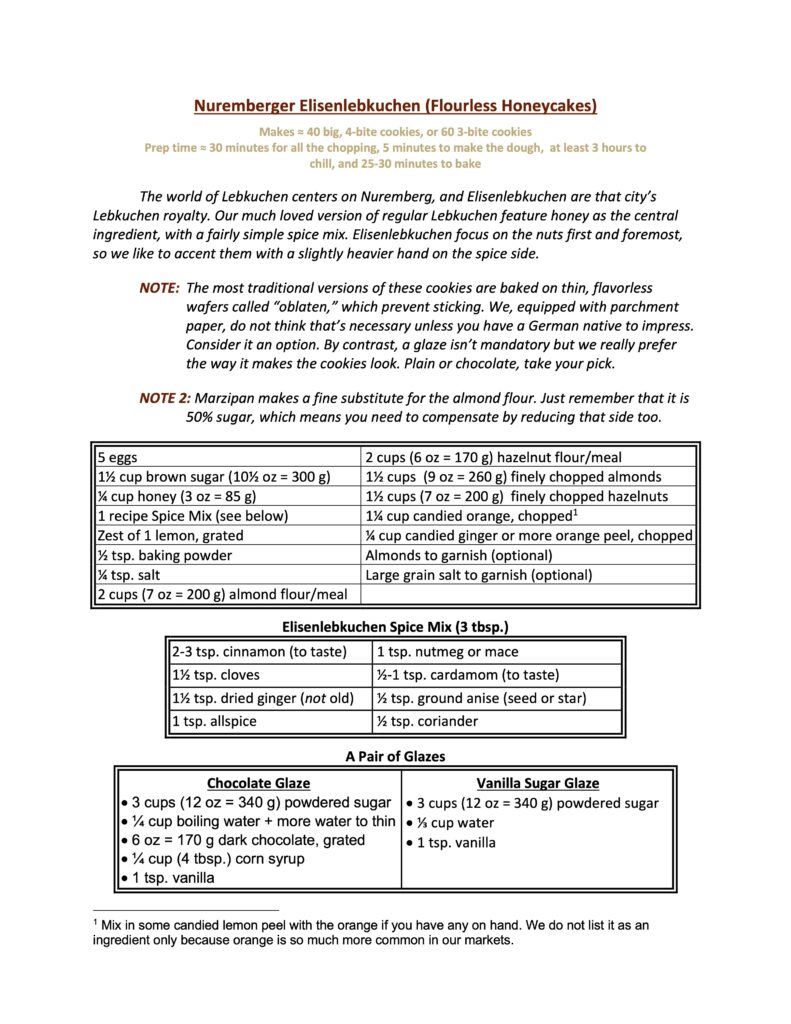
Here’s a funny but true: we love our classic Lebkuchen recipe so much that we hesitated to work on this one out of pure loyalty. We’ve amassed a great number of honey gingerbread recipes (a/k/a “Honeycakes”), but Lebkuchen remains the a family favorite. Christmas wouldn’t be Christmas if we left them off our tray.
It turned out to be a misplaced loyalty. Elisenlebkuchen bear very little resemblance to regular Lebkuchen when push comes to shove. Our old favorite is a classic built on a flour-based dough that’s jam packed with nuts, fruits, a bit of spice, and a whole lot of honey to act as the binder. Elisenlebkuchen have even more nuts, no flour at all, and instead rely on both honey and a full five (5!) eggs to act as the binder. They are two very different experiences.
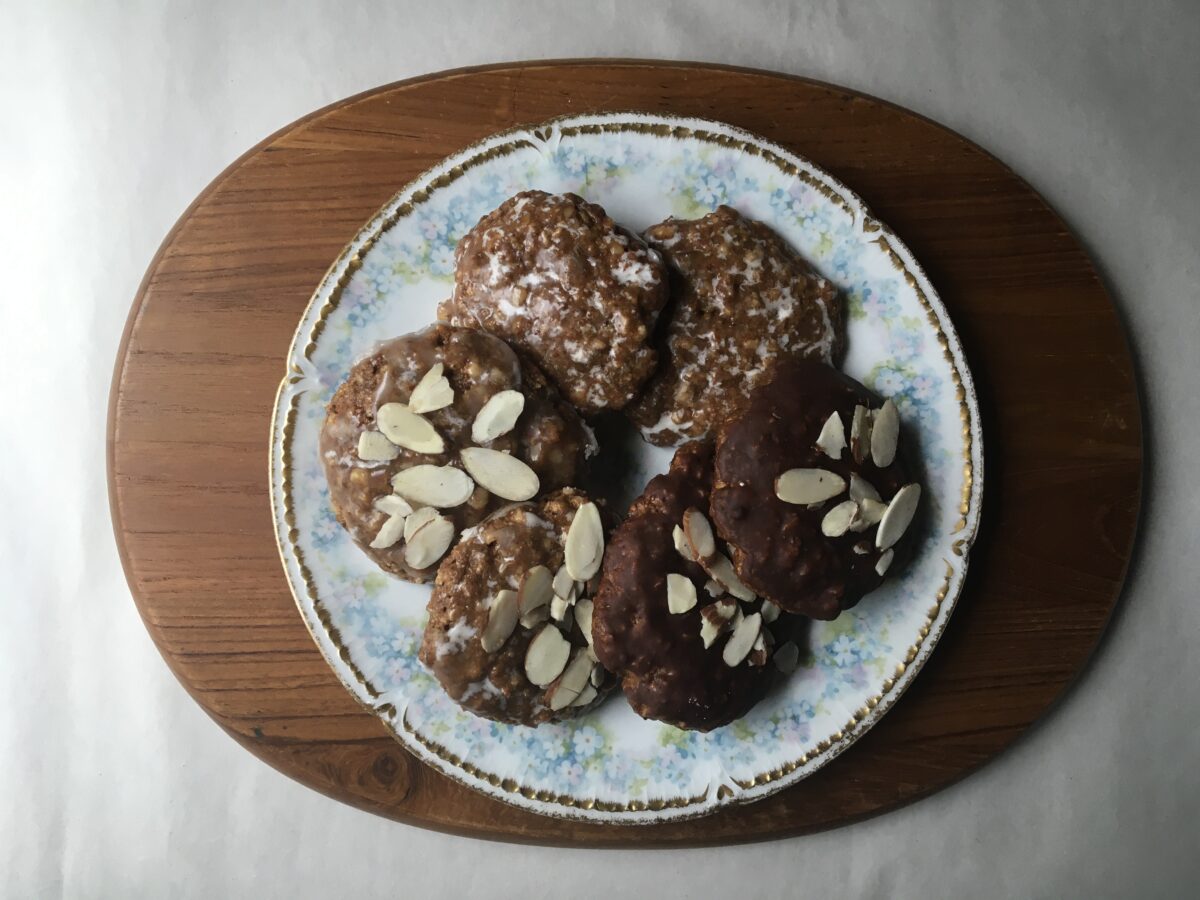
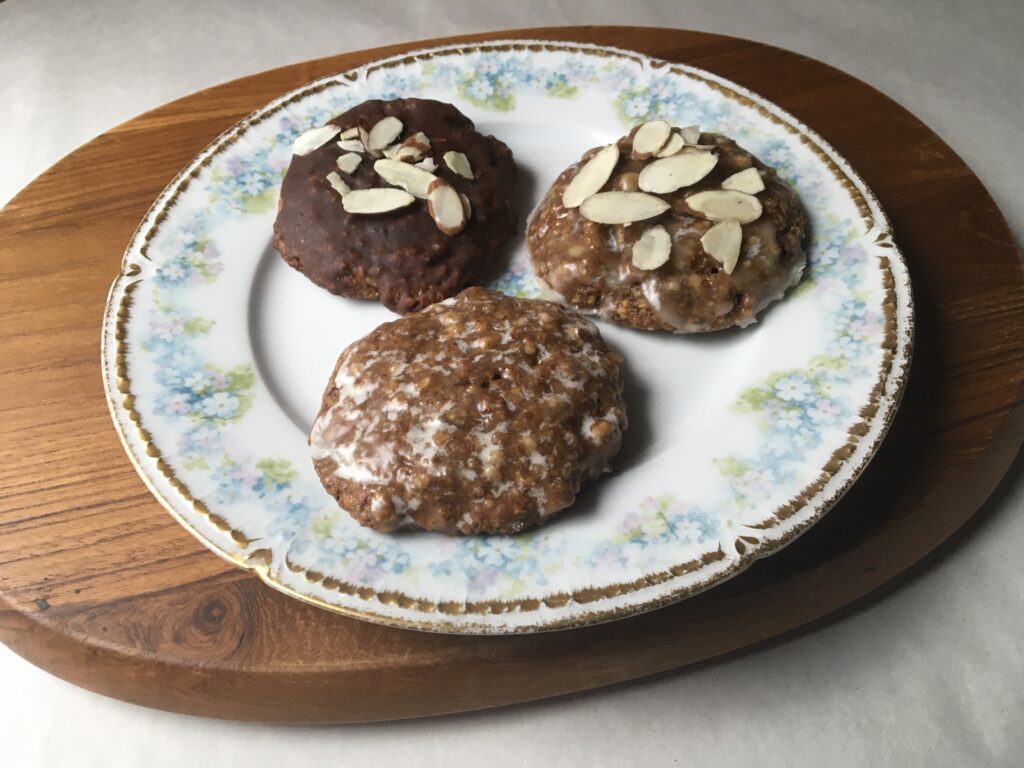
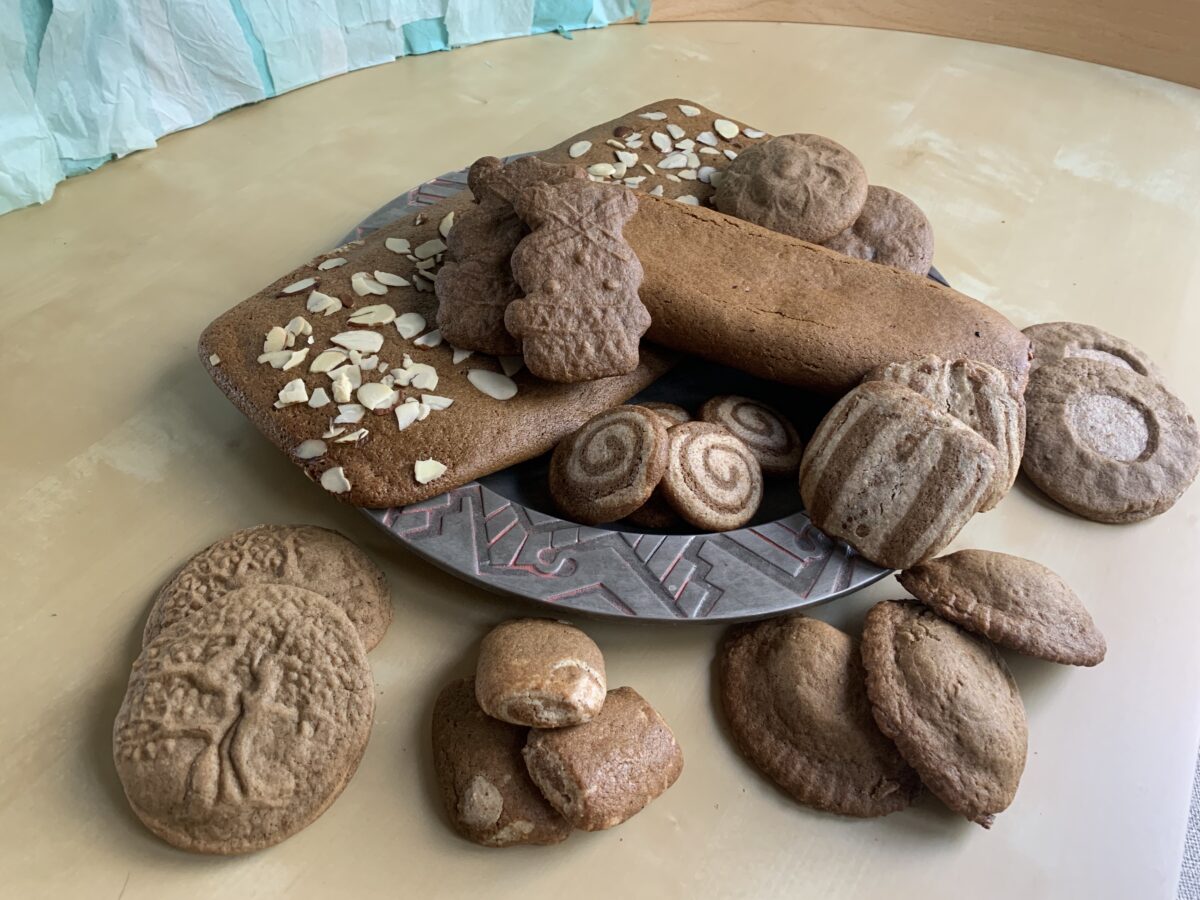
On the Upper Left: chocolate glaze with sliced almonds. On The Upper Right: vanilla glaze with sliced almonds. On The Bottom: vanilla glaze only. Use whichever you think is prettiest.
NOTE FROM KATE: These cookies are horribly deceptive in their overall “goodness.” That is, with the exception of the brown sugar, they are a “whole food,” so what could go wrong, right? I’ll have to do a caloric breakdown one of these days. Let’s just say, they contain more energy than meets the eye. If you were riding across the mountains and had to choose a fabulous, long-lasting food source for the extra space in your saddle bags, these would be it. They remind me of Panforte in their composition, but have eggs for eggstra protein. [Insert eye roll from Scott] The good news? With eggstra protein and the good-for-you fat from the nuts, the sugar in the brown sugar and honey won’t hit your bloodstream too fast. A cookie or two could hold you for hours.
Best of all? Of all our cookies and especially waybreads, these are the closest to the Lembas the elves made famous in the Lord of the Rings. Toss in an apple, and you got yourself a balanced diet for the day! (Shh…don’t tell Scott!)
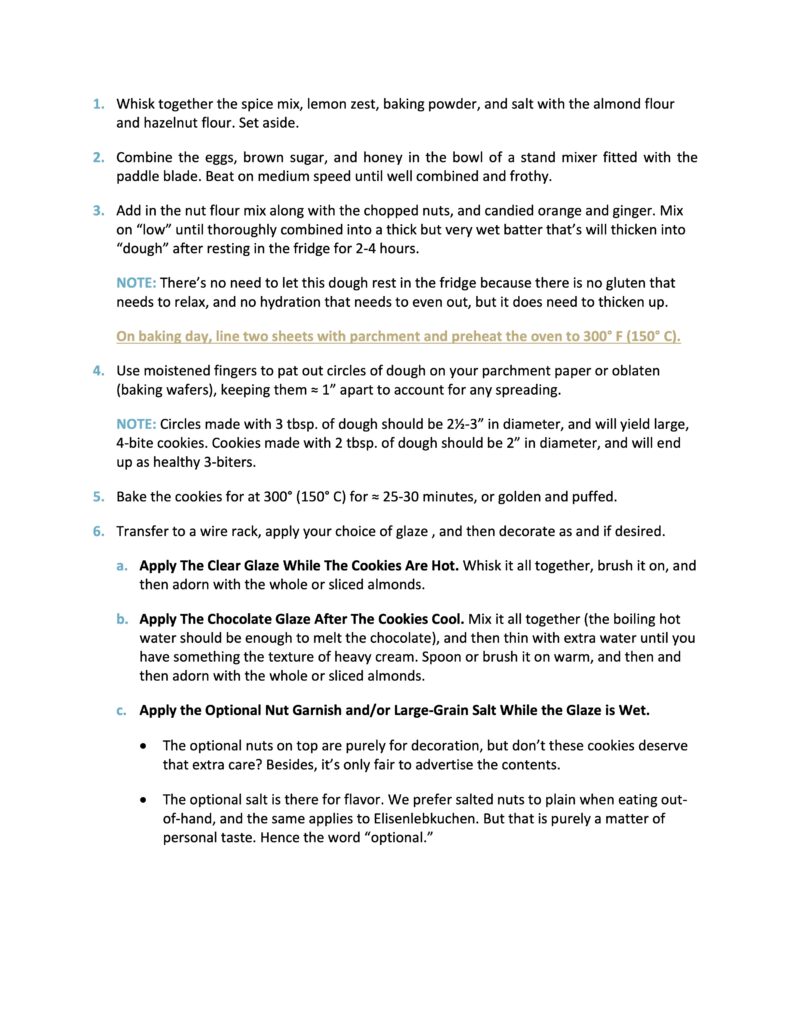
The recipe explains itself, and includes an extensive Cookie Nerd Moment with extra background material, so I will only take the time to discuss a few of the decision points you’ll face when trying this out on your own:
Should I use marzipan or ground nuts? It’s entirely up to you, and makes very little difference. Just remember that Marzipan has almost as much sugar as nuts (our recipe has a ratio of 4:5), and usually has some extra sweetness lurking in the background. If you make this substitution, do it by weight and assume the Marzipan is actually a 50/50 mix. You need to reduce the amount of both almonds and sugar accordingly.
Can I play with the spices? Of course you can! But we do recommend that you (a) stick to the basic, quite generous amount of overall spice, and (b) think of the spices as an accent to bring the best out of your chosen nuts.
Can I substitute in other nuts? Yes, but these are the classics used in Nuremberg. Be aware that you’ll be departing off road from the One True Tradition.
Should I glaze the cookies? Yes. That was easy enough. The glaze definitely enhances the overall look, especially since the bottoms are not glazed.
Should I use the vanilla glaze or the chocolate? Tradition allows for either one, so it’s entirely up to you. Both are thin enough to be only an accent flavor. This cookie is all about the nuts, and even I, a lifelong chocoholic, don’t want to mess with that purity.
Should I add the nut garnish on top? As you wish. They are only there for the sake of appearance and fair warning to anyone who sees them lying there on your tray.
Should I add the optional salt? And why specify “large grain” salt? This is a nontraditional option that we liked so much that we felt obliged to share. Both Kate and I have a strong preference for salted nuts over plain when we snack on them out of hand. The optional salt creates that effect in a light way. We recommend large grain salt sprinkled on top of the glaze because that is the best way to give a salty highlight. The base recipe also contains some salt, but that is more of a bare minimum that the cookie would suffer without.
That’s it folks. Enjoy!
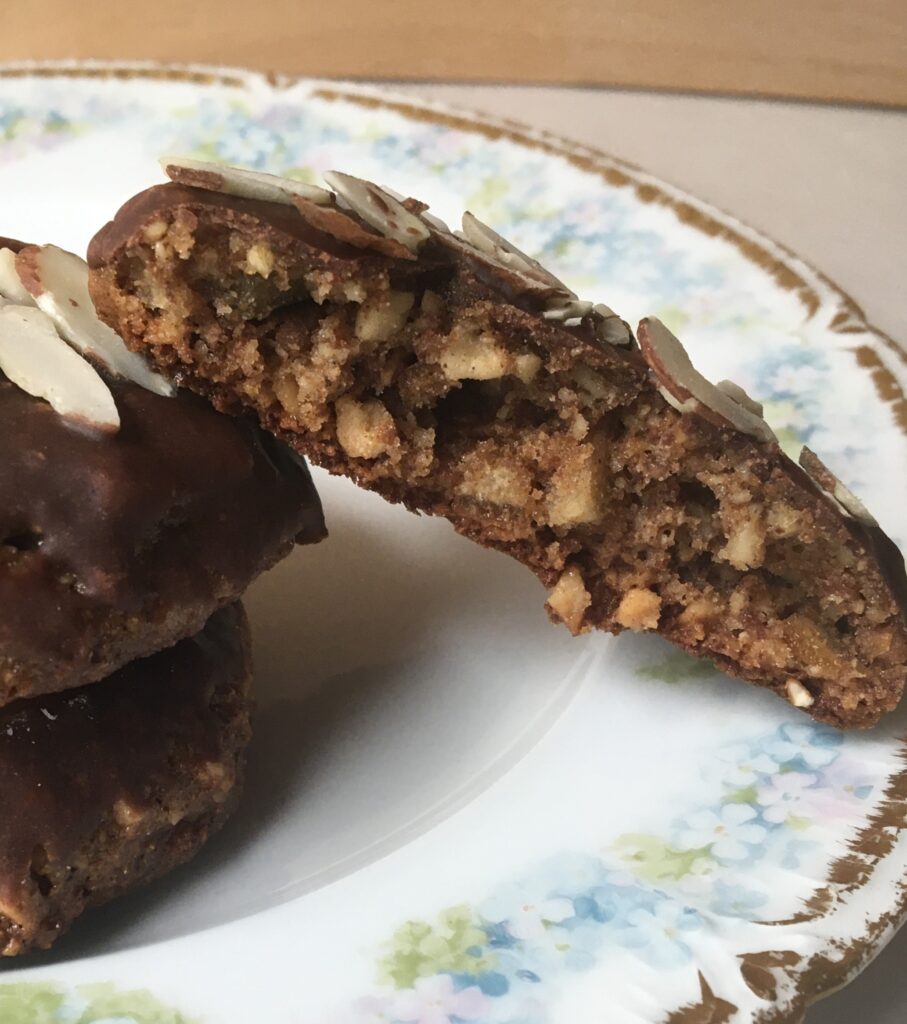
Nuts, nuts, nuts, and fruit. The only other things inside this cookie are honey and eggs as the binder.
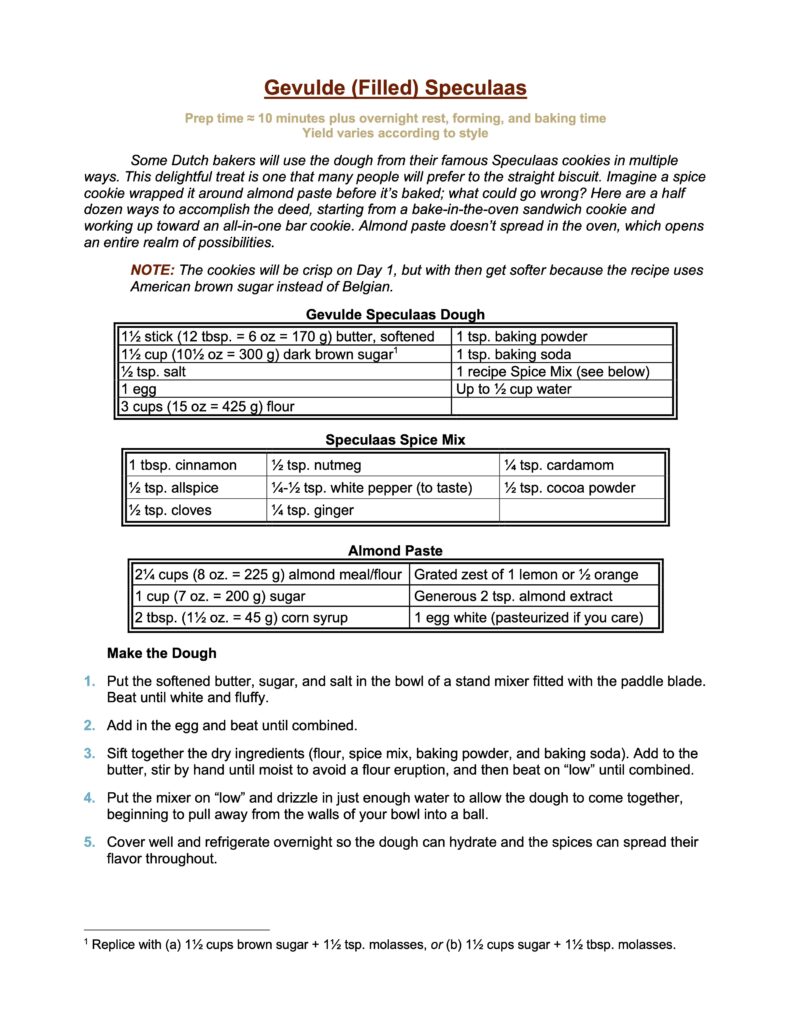
Speculaas filled with almond paste? Thank you Mom, can I have another?
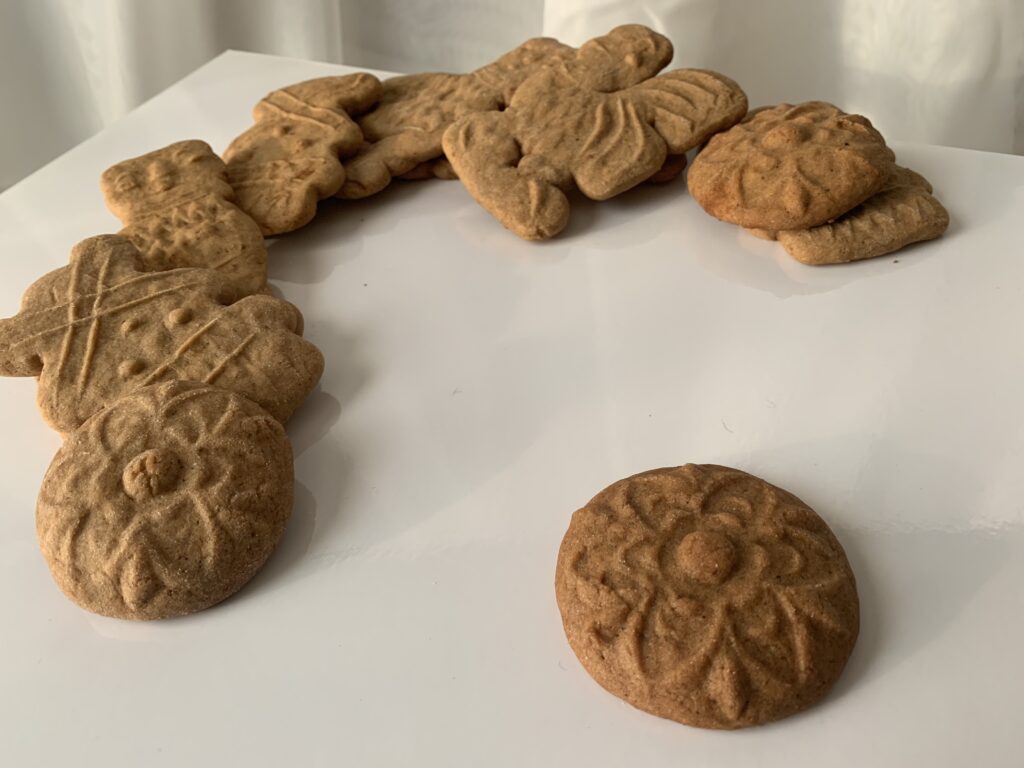
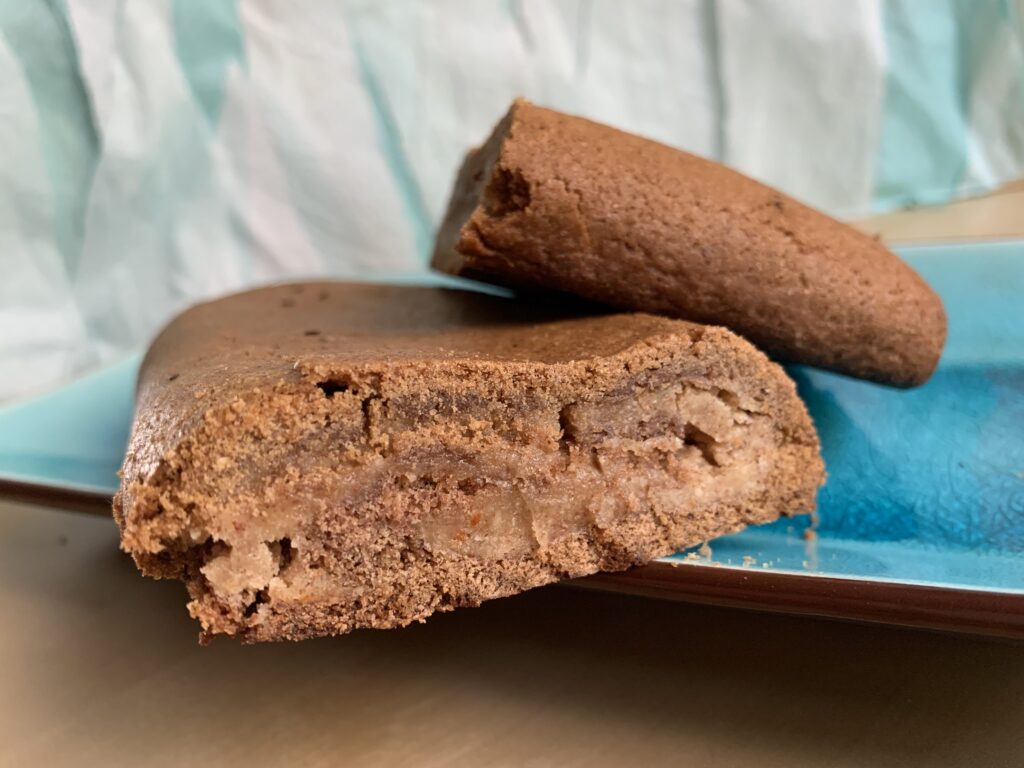
Our published book, Heritage Cookies of the Old and New World, has a wonderful recipe for Nut Dough Speculaas, which offers up a soft, tender version of the famous Dutch spice cookie. This recent article is all about the ultra-authentic, thin-and-crispy version, featuring a recipe straight out of Belgium. Our research for that article accidentally revealed a third style that is immensely popular next door in Holland (a/k/a the Netherlands): Speculaas dough filled with almond paste.
The Nut Dough recipe makes an extra tender version. The 100% Authentic recipe comes out thin and crisp. This is the one in the middle; toothsome, gently spiced, and made with U.S. pantry ingredients. Take that and fill it with homemade almond paste? [Finger Kiss]
As always, you can skip to the bottom if you want the recipe alone. The discussion of our stumbles and revelations along the way is going to take some time.
A SIMPLE, PANTRY-FRIENDLY SPECULAAS DOUGH
Easy peasy, I promise. Yes, this is a top shelf American version of a very European cookie, but that doesn’t make it complicated. The approach couldn’t be more standard. Cream the butter and sugar, beat in an egg, and then mix in the flour, leavening, and spices. Cover and refrigerate overnight so the flour can hydrate and the spices even out. Form and bake however you wish.
The only potential complication lies in the hydration part. You are after a drier dough with only enough moisture to hold together when squeezed. (the Almond Paste filling will add any richness you think is missing). That means the base recipe is likely to be too dry outside of a humid environment. You solve that by adding extra water a tablespoon or two at a time until it holds when squeezed. One or two is usually enough, though it could take as many as six to eight.
Just go sparingly! It is much easier to add more water in than to take any out. I did one batch with the full eight tablespoons (½ cup), and had to double the batch in order to avoid throwing the whole thing out. Tripling would have worked even better. Fortunately, the recipe has enough flexibility to have saved me from that extreme.
THE ALMOND PASTE FILLING
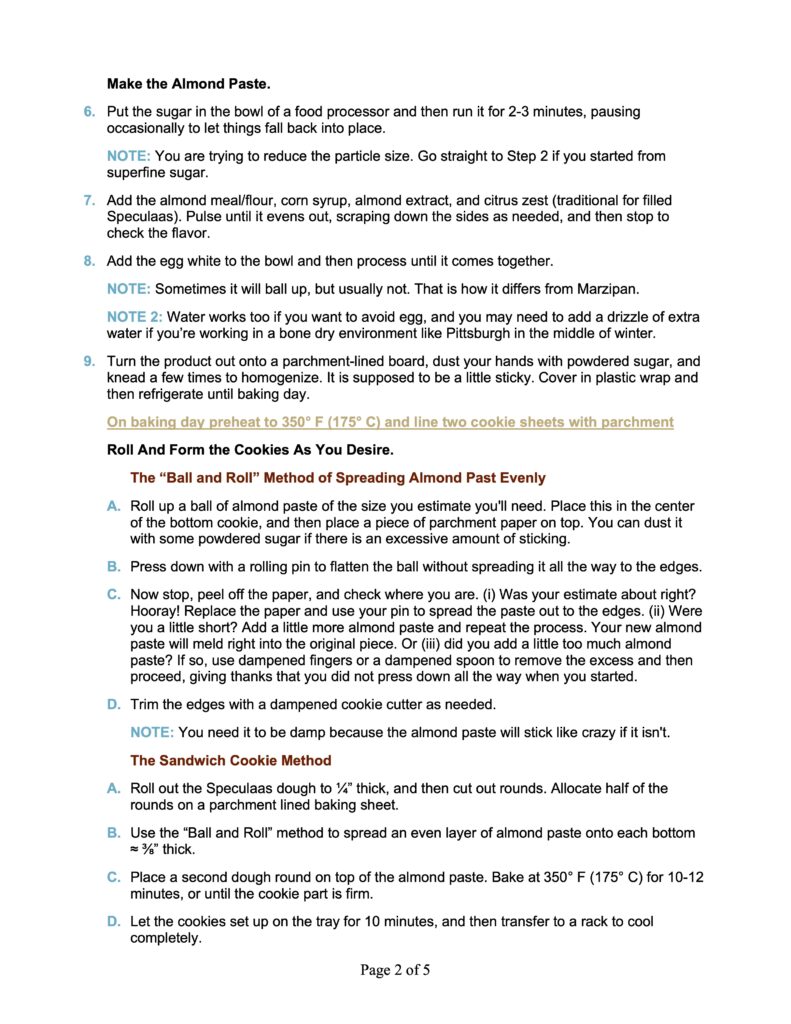
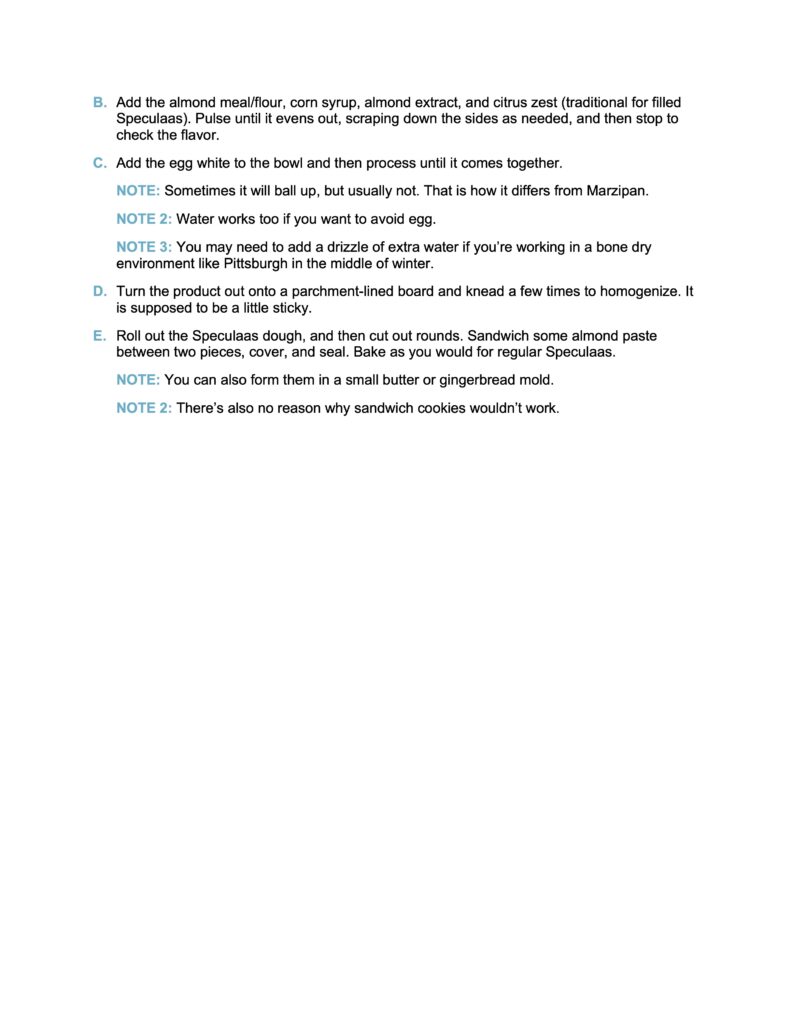
No need to waste a lot of time on this piece either. Almond Paste is super easy to make, and we have a whole discussion of it in the article on Marzipan. The only difference for this purpose is the subtle addition of some citrus zest to help it meet and marry with the flavors of the dough.
We include instructions for the almond paste in the cookie recipe down below. I’ve added our recipe for Marzipan and Almond Paste too, as a free bonus. [NOTE FROM KATE: I love anything resembling marzipan, and the orange notes in this paste have a delicious more-ishness to it. So much so that Scott had to keep chasing me away as I tried to execute numerous rounds of diligent quality control.]
THE MANY DIFFERENT SHAPES
And now we get to the long part. But not because the shaping is hard! It isn’t. The dough is friendly, too, and the techniques are all straightforward. The length comes from the sheer number of options. This article lists a full dozen (12!) possibilities, and you don’t have to stop there. Jam and fruit fillings spread in the oven, searching for any crevice where they can leak out to create black and bitter disaster on your cookie sheet. Almond Paste does not. That feature opens up your options to basically any cookie shape you can imagine.
Bar Cookies? We Don’t Need No Stinking Bar Cookies!
Honesty compels me to admit that most people make Gevulde Speculaas as a bar cookie. You simply coat the bottom of the baking dish with one layer of cookie dough, spread a thick layer of almond paste on top (it should be noticeably thicker than the dough), and then cover that with a second layer of dough. Bake at 350° F (175° C) for about 18-25 minutes, or until the cookie part on top has set by the edges but is still a little soft in the center.
We, however, have a rule: no bar cookies! (Read the article on Chocolate Fudge Cookies if you insist on knowing why). That changes the focus to all those infinitely more interesting options, such as…
Sandwich Cookies!
Roll out the dough to 3/8″ thick. Cut out your choice of shape (we used larger rounds) and mark half of them with whatever you want for the top (we did a cutout for one, and a cookie stamp for a second.
Array the bottoms on a lined baking sheet (or two), keeping 1″ between each piece to account for spreading. Coat the bottom of the cookie with almond paste,* and then place the tops on top. Bake at 350° F (175° C) for about 12-15 minutes, or until the edges have set and the cookie has puffed up.
* Our favorite way to spread the almond paste goes like this:
Roll up a ball of almond paste of the size you estimate you’ll need. Place this in the center of the bottom cookie, and then place a piece of parchment paper on top. You can dust it with some powdered sugar if there is an excessive amount of sticking.
Press down with a rolling pin to evenly flatten the ball without spreading it all the way to the edges.
Now stop, peel off the paper, and check where you are. (A) Was your estimate about right? Hooray! Replace the paper and use your pin to spread the paste out to the edges. (B) Were you a little short? Add a little more almond paste and repeat the process. Your new almond paste will meld right into the original piece. Or (C) did you add a little too much almond paste? If so, use dampened fingers or a dampened spoon to remove the excess and then proceed, giving thanks that you did not press down all the way when you started.
Trim the edges with a dampened cookie cutter as needed. NOTE: You need it to be damp because the almond paste will stick like crazy if it isn’t.[NOTE FROM KATE: I was way too impatient, so I made a ball of almond paste and squished it with the bottom of a wet glass. It’s messier, I admit I had to sop up extra water off a cookie or two. It was fast though, even enough, and got the job done.]
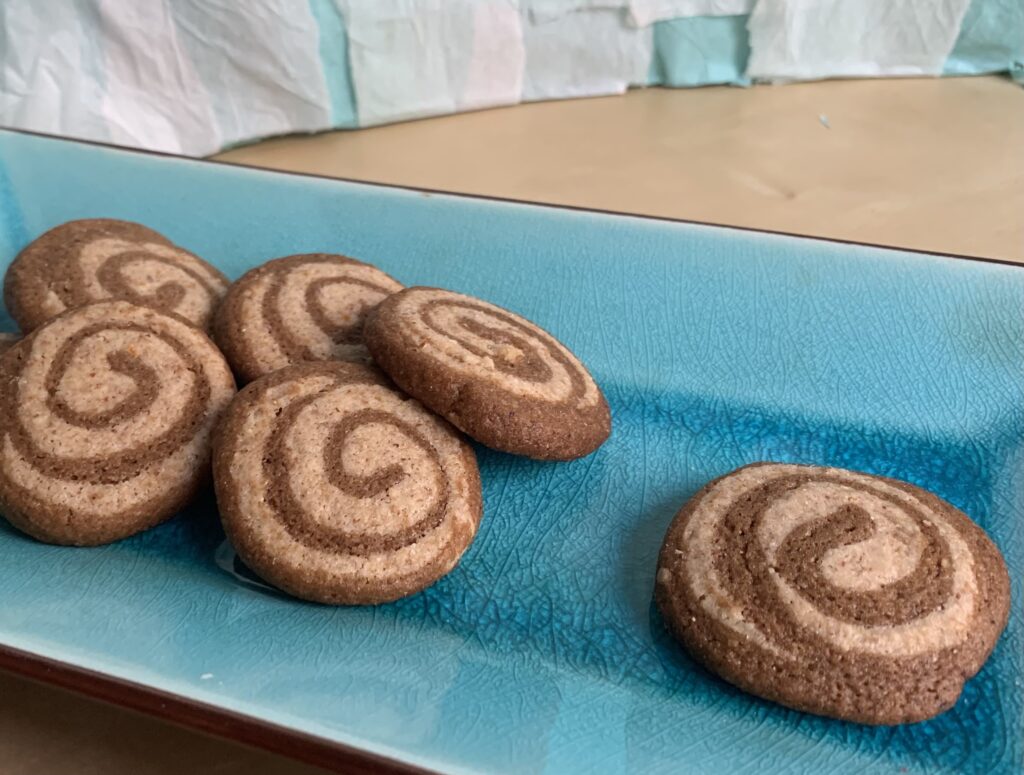
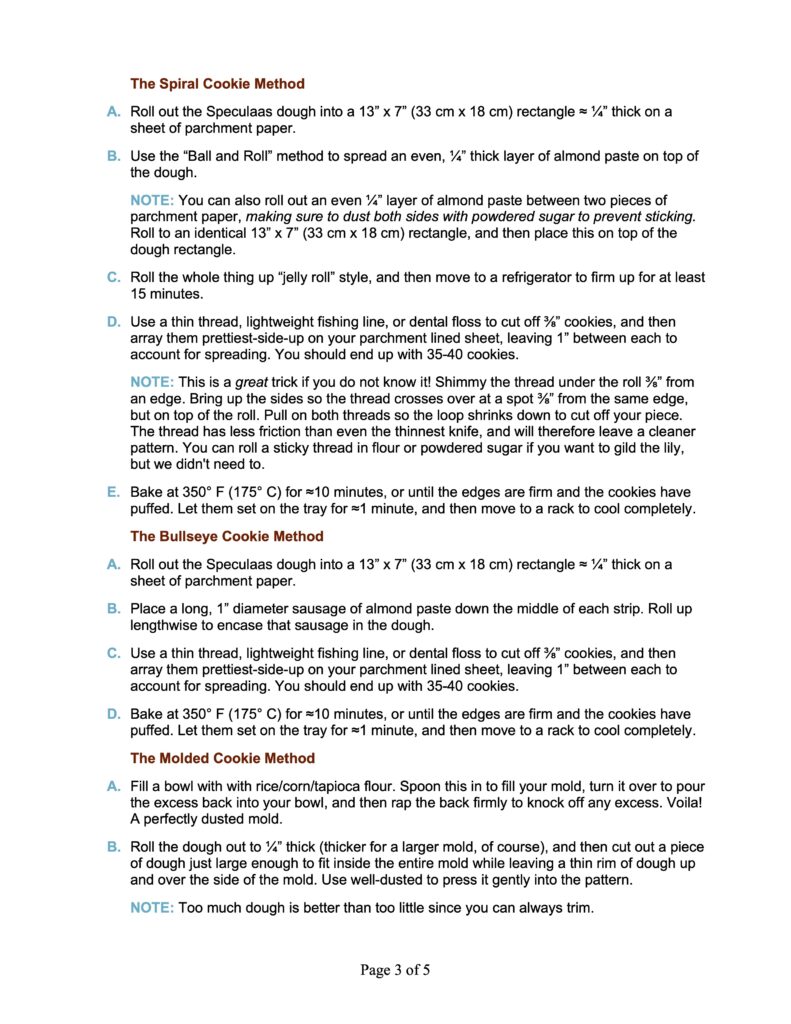
Spiral a/k/a Pinwheel Cookies!
Roll out the Speculaas dough into a 13” x 7” (33 cm x 18 cm) rectangle ≈ ¼” thick.
Use the “balls of almond paste” trick described above in the sandwich cookie section to create an almond layer that is also ¼” thick on top of the dough layer. Making it as even as possible will yield the best patterns in the end.
Roll the whole thing up “jelly roll” style, and then move to a refrigerator to firm up for at least 15 minutes.
Use a thin thread, lightweight fishing line, or dental floss to cut off ⅜” cookies, and then array prettiest-side-up on your parchment lined sheet, leaving 1” between each to account for spreading. You should end up with 35-40 cookies. NOTE: This is a great trick if you do not know it! Shimmy the thread under the roll ⅜” from an edge. Bring up the sides so the thread crosses over at a spot ⅜” from the same edge, but on top of the roll. Pull on both threads so the loop shrinks down to cut off your piece. The thread has less surface area than even the thinnest knife, and will therefore leave a cleaner pattern. You can roll a sticky thread in flour or powdered sugar if you want to gild the lily, but we didn’t need to.
Bake at 350° F (175° C) for ≈10 minutes, or until the edges are firm and the cookies have puffed. Let them set on the tray for ≈1 minute, and then move to a rack to cool completely. NOTE: The baked tops should show a distinct pattern, but the bottoms against the tray will turn into an almost uniform brown.
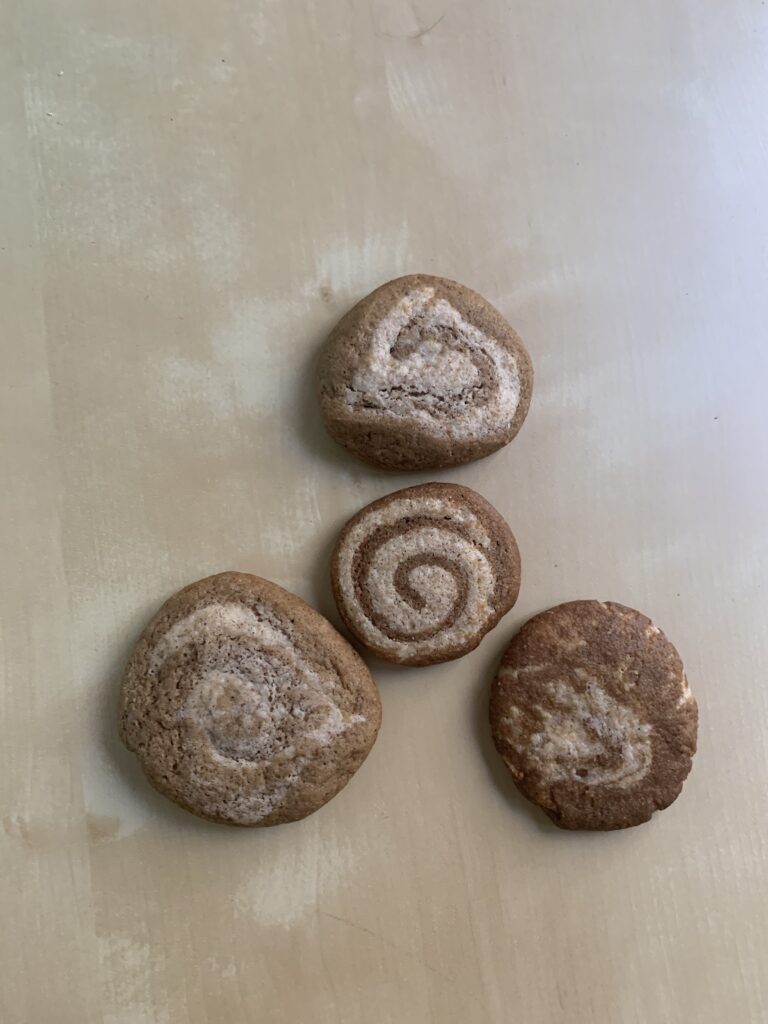
The ends are never as pretty, especially when you need to press down to flatten the odd shaped pieces out. This shows three end pieces surrounding one middle piece.
Bullseye Cookies! [NO PHOTOS]
Roll out the Speculaas dough into a 13” x 7” (33 cm x 18 cm) rectangle ≈ ¼” thick on a sheet of parchment paper.
Place a long, 1” diameter sausage of almond paste down the middle of each strip. Roll up lengthwise to encase that sausage in the dough.
Use a thin thread, lightweight fishing line, or dental floss to cut off ⅜” cookies, and then array them prettiest-side-up on your parchment lined sheet, leaving 1” between each to account for spreading. You should end up with 35-40 cookies.
Bake at 350° F (175° C) for ≈10 minutes, or until the edges are firm and the cookies have puffed. Let them set on the tray for ≈1 minute, and then move to a rack to cool completely.
Tubes and Lengthwise Lines!
Roll out a thinner spiral and cut it into 2” lengths. Starting with a 13” x 6” (33 cm x 15 cm) rectangle should do it.
For tubes, bake at 350° F (175° C) for ≈11-12 minutes, or until the outside is firm and the cookies have puffed. NOTE: The tubes will settle into being flat on the bottom. We haven’t figured a way around that.
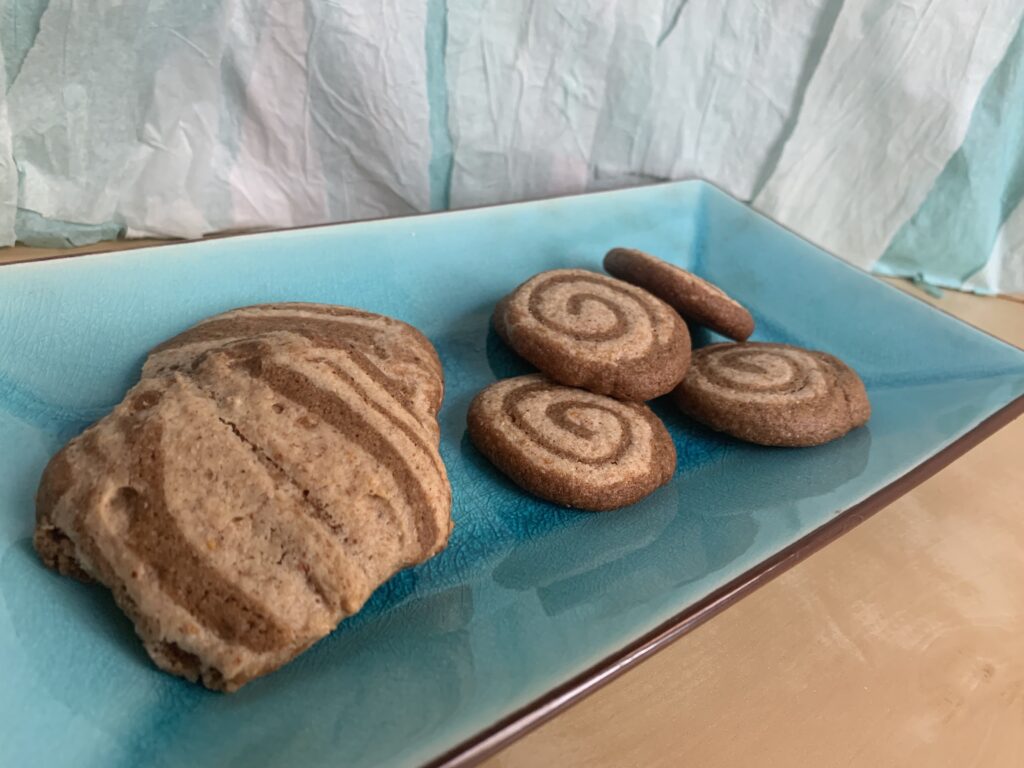
For Horizontal lines, use a thin paring knife or a long thread to cut through the top from end to end. Array these curved side down on the baking sheet. What would have been spirals when viewed from the edge in will appear as lines when the roll is cut lengthwise. NOTE: you can also use the paring knife to cut almost all the way through, leaving only a thin piece at the bottom to connect the two halves. Unfold this like an opening flower and you’ll have a double-width line cookie. Bake these at 350° F (175° C) for ≈9-11 minutes depending on thickness.
Let the baked pieces set on the tray for a few minutes, and then move to a rack to cool completely.
Line cookies on the left, spirals on the right. It’s basically the same pattern, but in one case you cut across to reveal the spiral, and in the other you cut lengthwise to reveal straight lines.
NOTE: You can use the “Bullseye” method here as well, or make the final shape a little thinner and broader by creating a filled rectangle instead of a filled tube.
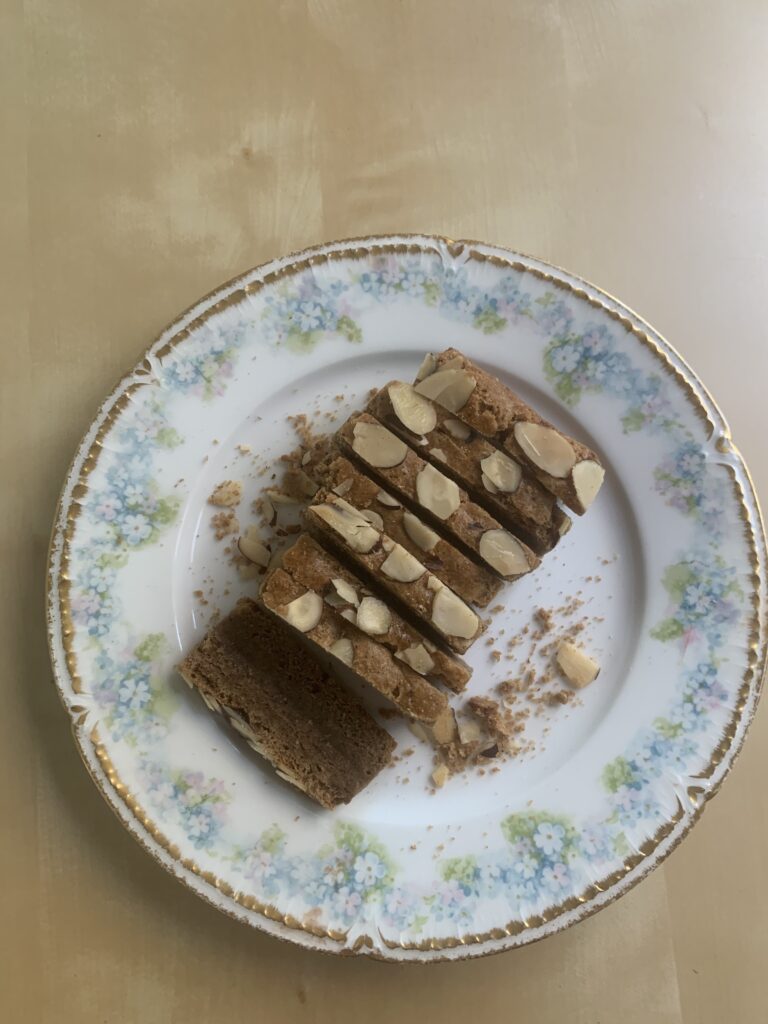
NOTE #2: For Tube Cookies it’s it’s often worth decorating the top of the tube/cake with slices almonds. See the photos of the “Bake And Slice” method down below.
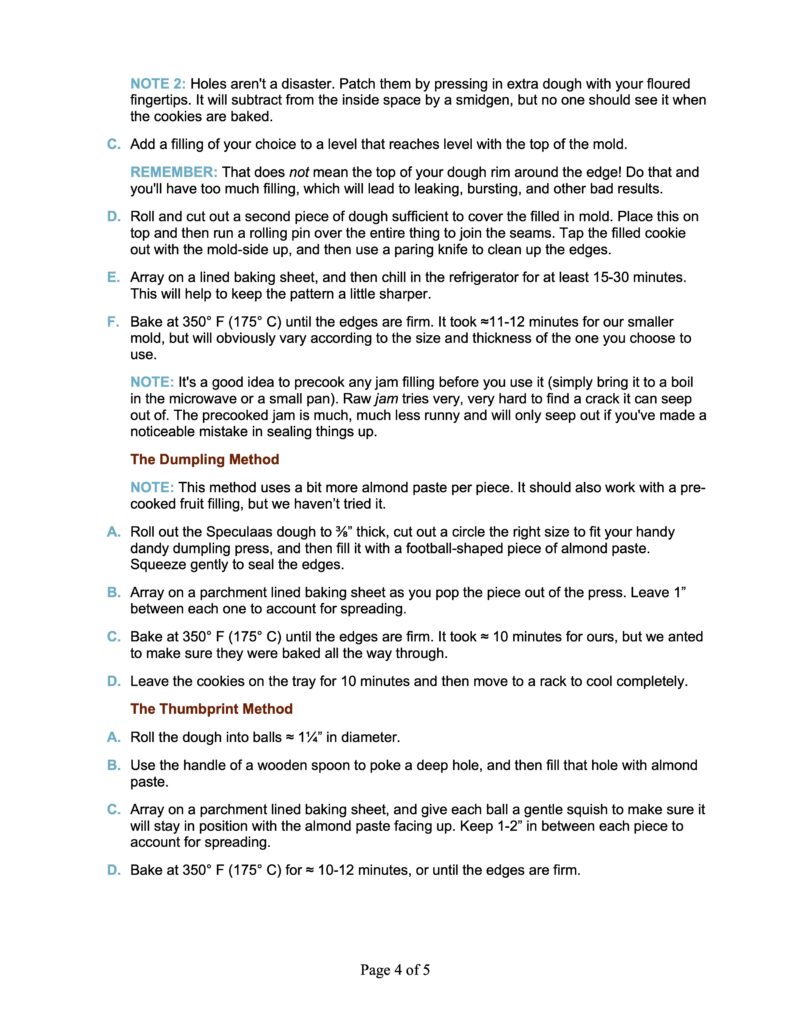
Molded and Filled Speculaas (Works With Jam Too)!
Apricot jam for the filling worked great, but we lost the pattern on top because I forgot to chill before baking.
Filled and plain Speculaas using the 100% authentic, Belgian Brown Sugar dough instead of this U.S. Brown Sugar dough. That time I did chill before baking.
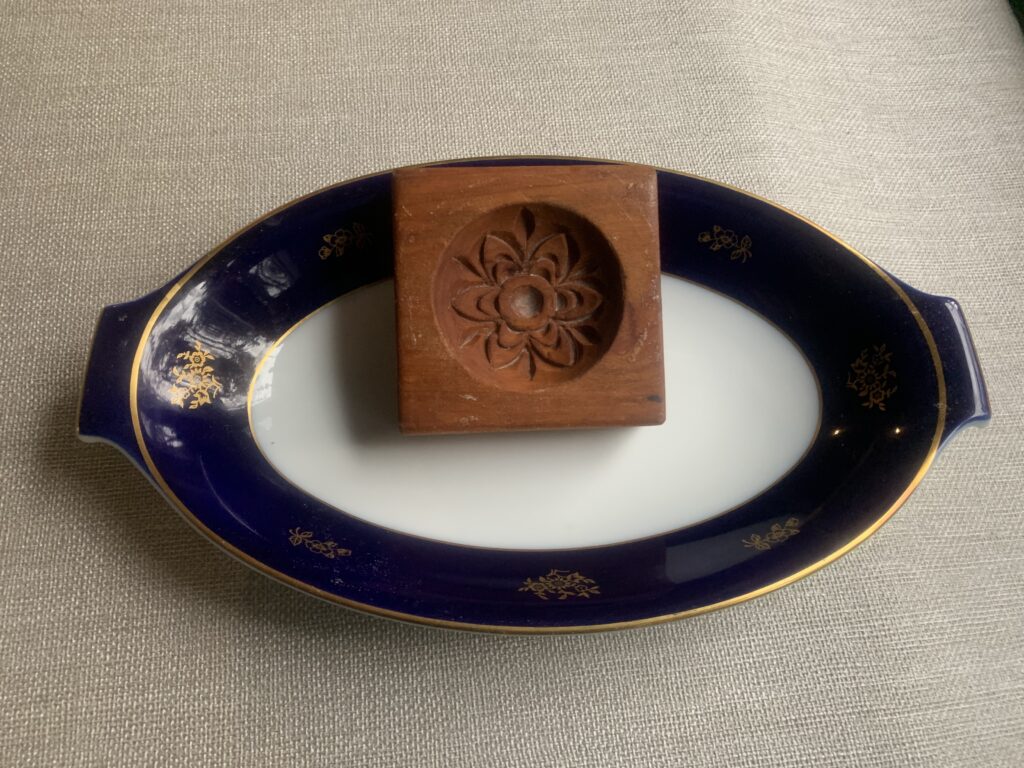
Our favorite mold for individual Filled Speculaas (and gingerbreads of all kinds). We bought it at an actual castle on a trip to visit family in the Czech Republic! It was actually called a “butter mold” rather than a cookie mold, not that it makes any difference.
This Ma’amoul mold would have also worked, but can you imagine the amount of almond paste in each cookie?
Fill a bowl with with rice/corn/tapioca flour. Spoon this in to fill your mold, turn it over to pour the excess back into your bowl, and then rap the back firmly to knock off any excess. Voila! A perfectly dusted mold. (See the articles on the Speculaas Master Class and Filled Gingerbread cookies for more variations and details). FYI, we used this mold to make individual portions:
Roll the dough out to ¼” thick (thicker for a larger mold, of course), and then cut out a piece of dough just large enough to fit inside the entire mold while leaving a thin rim of dough up and over the side of the mold. Use well-dusted to press it gently into the pattern. NOTE: Too much dough is better than too little since you can always trim. NOTE #2: Holes aren’t a disaster. Patch them by pressing in extra dough with your floured fingertips. It will subtract from the inside space by a smidgen, but no one should see it when the cookies are baked.
Add a filling of your choice to a level that reaches level with the top of the mold. REMEMBER: That does NOT mean the top of your dough rim around the edge! Do that and you’ll have too much filling, which will lead to leaking, bursting, and other bad results.
Roll and cut out a second piece of dough sufficient to cover the filled in mold. Place this on top and then run a rolling pin over the entire thing to join the seams. Tap the filled cookie out with the mold-side up, and then use a paring knife to clean up the edges.
Array on a lined baking sheet, and then chill in the refrigerator for at least 15-30 minutes. This will help to keep the pattern a little sharper.
Bake at 350° F (175° C) until the edges are firm. It took ≈11-12 minutes for our smaller mold, but will obviously vary according to the size and thickness of the one you choose to use.
NOTE: It’s a good idea to precook any jam filling before you use it (simply bring it to a boil in the microwave or a small pan). Raw jam tries very, very hard to find a crack it can seep out of. The precooked jam is much, much less runny and will only seep out if you’ve made a noticeable mistake in sealing things up.
Cookie “Dumplings” and “Ravioli”!
Note the extra thick amount of almond inside
Our handy dandy dumpling press, last used when we were working up the recipe for Croatian Rafioli
NOTE: This method uses a bit more almond paste per piece. It should also work with a pre-cooked fruit filling, but we haven’t tried it.
Roll out the Speculaas dough to ⅜” thick, cut out a circle the right size to fit your handy dandy dumpling press, and then fill it with a football-shaped piece of almond paste. Squeeze gently to seal the edges.
Array on a parchment lined baking sheet as you pop the piece out of the press. Leave 1” between each one to account for spreading.
Bake at 350° F (175° C) until the edges are firm. It took ≈ 10 minutes for ours, but we anted to make sure they were baked all the way through.
Leave the cookies on the tray for 10 minutes and then move to a rack to cool completely.
Thumbprints! [No Photo]
Duh. I can’t believe I didn’t think of this in time to get some done for the photo shoot. Bad baker. Bad, bad, bad. No biscuit for you.
Roll the dough into balls ≈ 1¼” in diameter.
Use the handle of a wooden spoon to poke a deep hole, and then fill that hole with almond paste.
Array on a parchment lined baking sheet, and give each ball a gentle squish to make sure it will stay in position with the almond paste facing up. Keep 1-2” in between each piece to account for spreading.
Bake at 350° F (175° C) for ≈ 10-12 minutes, or until the edges are firm.
Bake-And-Slice Rolls and Rectangles!
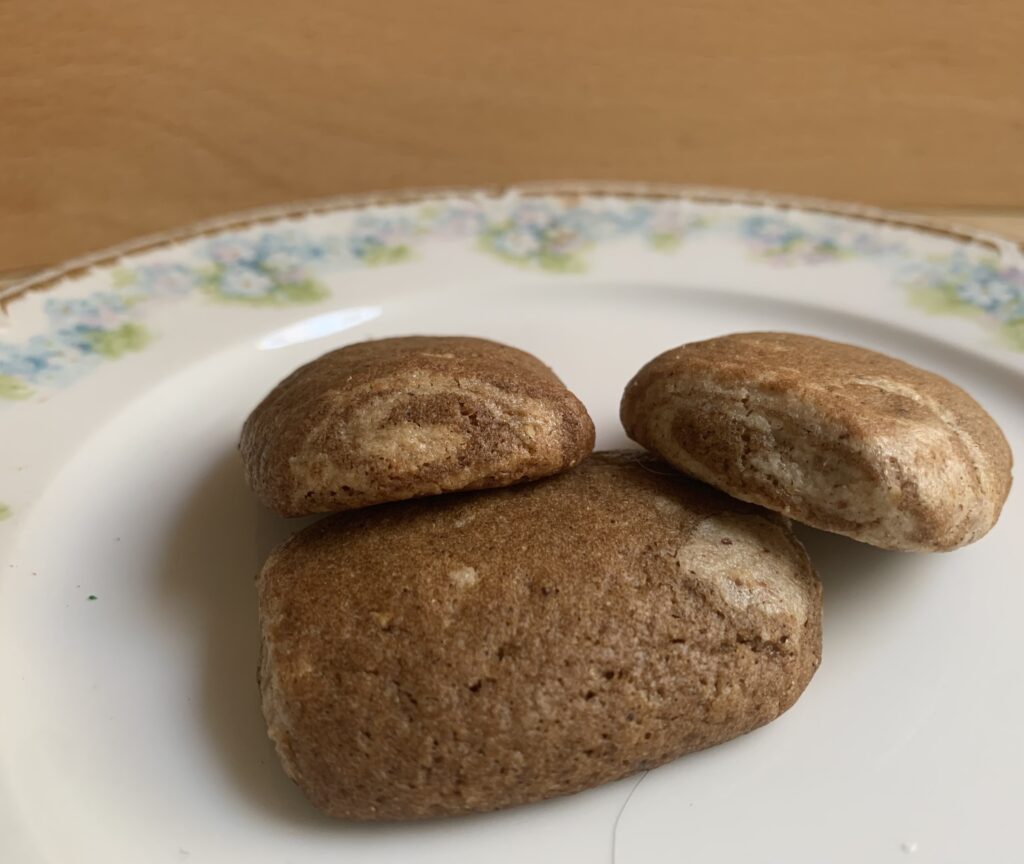
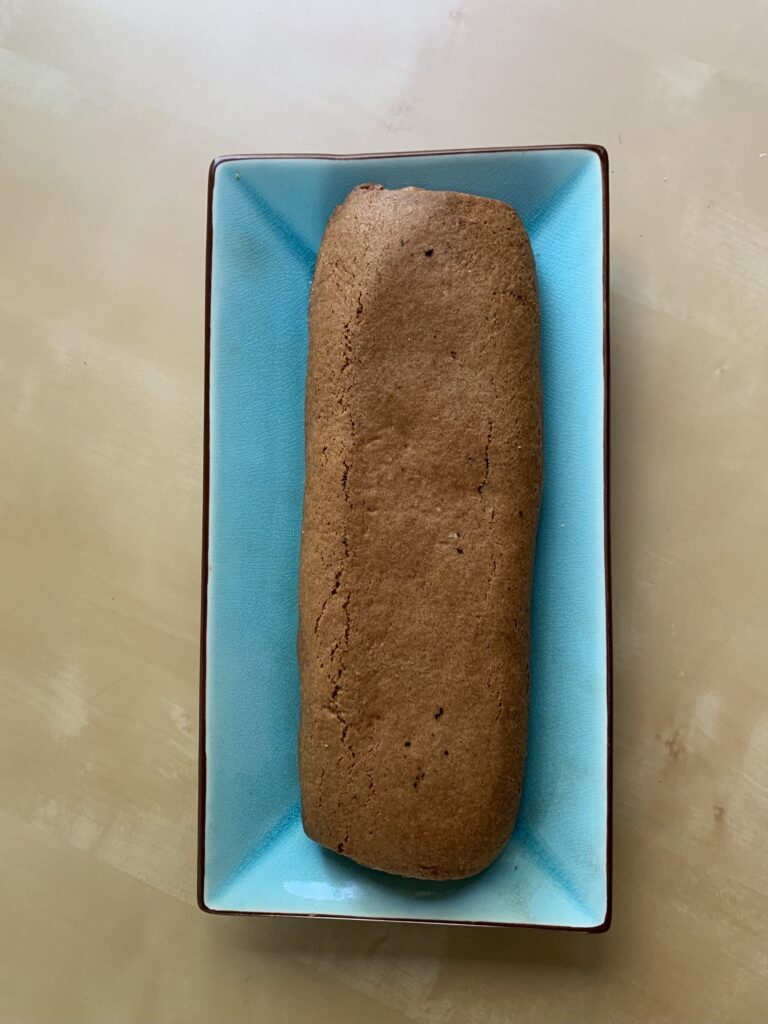
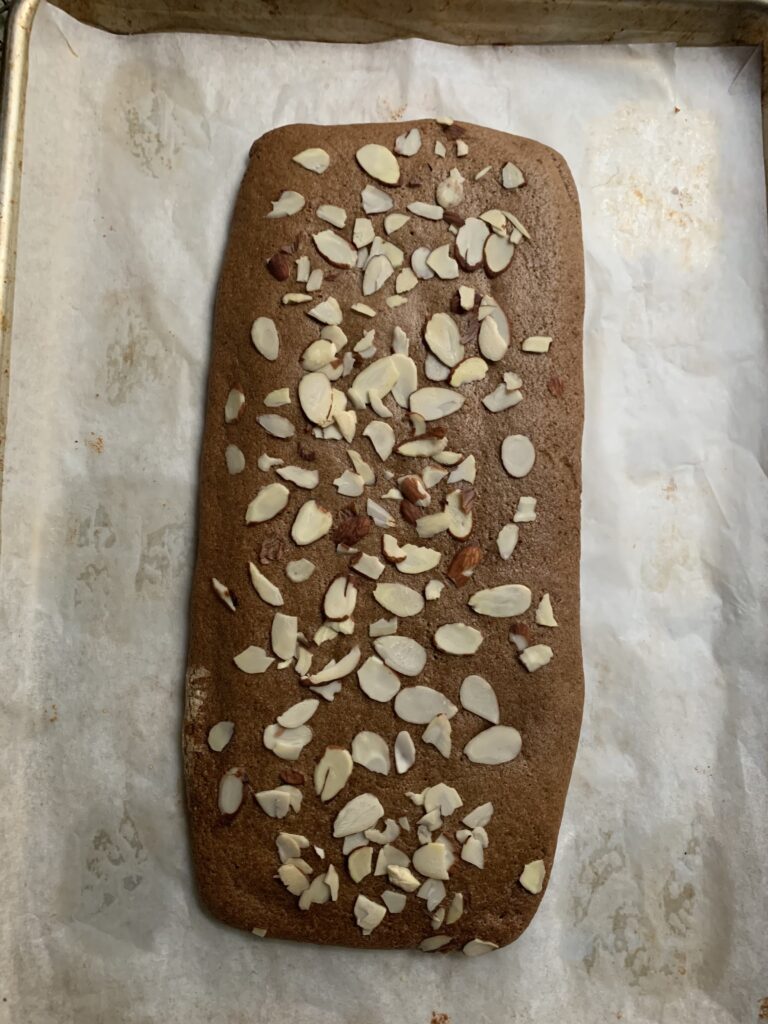
This began it’s life as a Spiral Cookie roll. It was baked before slicing, which allowed it to slump into a rectangle.
The flattened spiral from a baked-before-slicing roll.
Make a roll as described above for Spiral or Bullseye cookies, but a little thicker. You achieve this by starting with a 13” x 8” (33 cm x 21 cm) rectangle.
Bake at 350° F (175° C) for ≈20 minutes, or until the outside is firm, the tube has slumped down into a rectangular “cake”, and cookies have puffed.
Let this set on the tray for ≈5 minute, and then move to a rack to cool completely. Slice with a thin, sharp, serrated knife after it’s completely cool. You will end up with elongated, almost-rectangular spirals.
A “Bullseye Cookie” bar decorated with almond slices. We tried to have this one start as a filled rectangle instead of a roll, but that only enhanced the slumping. Still tasty, and kind of nice if you want the sharper edges in the end.
Don’t Bother To Fill At All
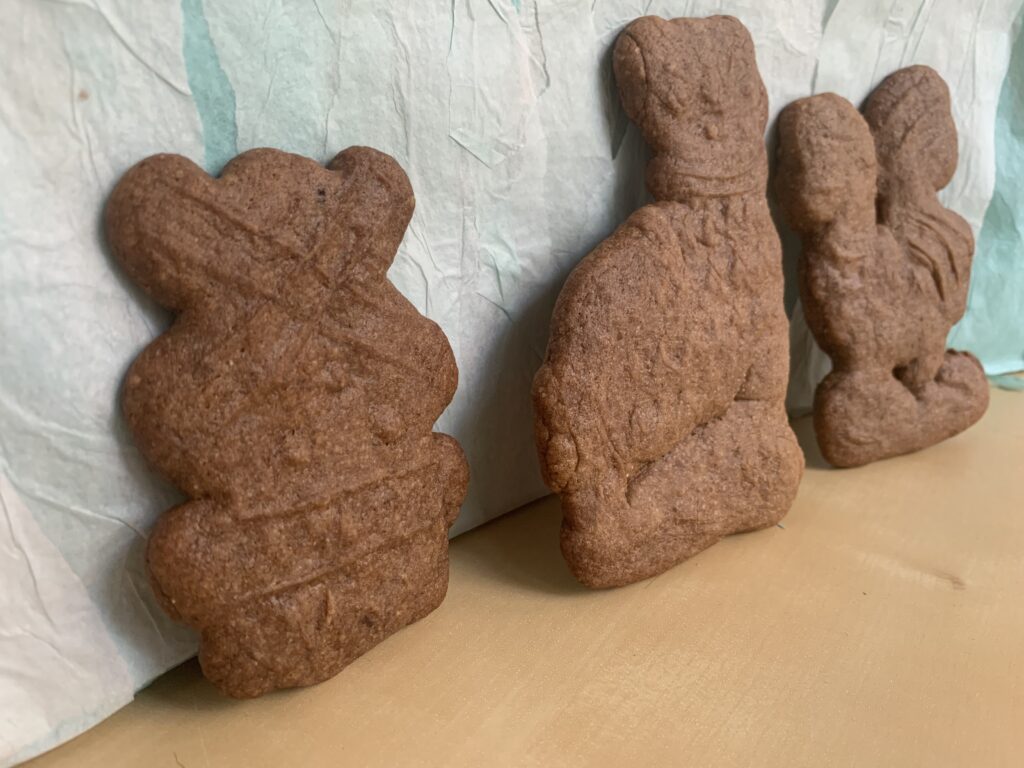
Straight, unfilled Speculaas made from this dough. Not bad, are they?
The dough works fine as a plain old Speculaas cookie pressed into a mold. It doesn’t hold patterns quite as well as the 100% Authentic Speculaas, but it’s pretty darned close. Bake according to the instructions in that article using 350° F (175° C) instead of 375° F (190° C). The molasses in the U.S. brown sugar apparently makes them cook just that little bit faster.
NOTE: You may (may, not will) want to knead in a small amount of extra flour or starch if the dough is particularly soft and sticky. That’s a useful characteristic for the many methods described above, but can result in either sticking or unreliable patterns for straight-out molded cookies. Be judicious, as it won’t take much.
CONCLUSION
The dough is standard and easy. The almond paste is standard and easy. The shaping is fun and interesting once you pick a method (and get used to liking off almond paste from your fingers). And the flavor is just about perfect if you want the world’s friendliest, most accessible, spice cookie treat.
What’s not to love?
We urge you to give it a try. If you do, there’s basically no way it’s ever going to leave your repertoire. They are, as our English friends say, intensely “more-ish.”
Enjoy!
IMPORTANT: You want to make Almond Paste for Gevulde (Filled) Speculaas, not marzipan
A thin, crispy, addictive, and not-too-sweet spice cookie that everyone will adore.
This will be a long post, so please take our standard suggestion seriously:
As always, skip to the bottom if you are only here for the recipe. The discussion of our stumbles and revelations along the way is going to take some time.
INTRODUCTION
I began this research with a simple enough goal. Heritage Cookies of the Old and New World has a recipe for Nut Dough Speculaas, but doesn’t have one for the light, thin, crispy version. This was because I couldn’t get them right enough to meet our somewhat extreme standards.
That has now been remedied thanks to the Specifically Spectacular Speculaas Facebook Group. What follows is my tale of working through all the details in the 100% authentic recipe shared by one of that group’s guiding stars: a fantastic Dutch baker named Luc Longin.
Luc’s recipe features some hard to find ingredients which actually matter (see below), and has methodologies for both the dough and the shaping that were new to my experience. Still, it was a recipe that’s worked for hundreds of people over dozens, if not hundreds of years. All I had to do was work it through, keeping some careful notes. Right? Yeah. Sure.
This article ends with a slightly adapted version of Luc’s recipe (we had to cut the leavening by a hair), but getting there turned out to be quite the adventure. I had to tweak our much-loved Speculaas spice mix. I had to bone up on my chemistry to understand how Belgian Brown Sugar differed from its peers, and why it acted differently in a cookie. Then came a comparison of Luc’s recipe to those in our book, the America’s Test Kitchen files, the Seriouseats.com formula, and an English version from Yotam Ottolenghi. After that came the study of Luc’s technical tricks. And then developing half a dozen different ways to make Gevulde (Filled) Speculaas; a Dutch (but not Belgian) holiday treat that will get its own article. All while compiling a list of sources for key ingredients and other materials.
Why can’t anything be simple? [Sigh]
That’s the “fair warning” part. The advertisement is this: all of that was absolutely fascinating, a joy to learn, and has made us better bakers. And, of course, produced some decidedly awesome (specifically spectacular?) recipes. So as that other [ahem] hefty man used to say, And awaaay we go!
HOW DO YOU DEFINE “SPECULAAS” IN THE FIRST PLACE?
Speculaas a/k/a Speculoos have a range that centers on Belgium and the Netherlands, and spreads out into the greater Rhineland, parts of northern France, and specialty shops across the continent. The feature a cinnamon-heavy spice mix that can be used in multiple ways, with several commercial versions and even more that are made at home. All those versions differ in their details, but share a common root; they are “friendly,” “accessible,” “easy to like,” and “familiar.” This spice mix explains why Speculaas are the place to start if you want to hook someone on the basic idea of a spice cookie. They are the cookie that doesn’t bite you back.
Standard Speculaas (those that don’t require an adjective in the name) are also thin, light, and crispy. Most will be formed in a wooden mold before baking (the name comes from the latin word “speculum,” meaning “mirror”). And those molds are shallower than Springerle molds, tend to be less detailed, and are also relatively large.
Have you ever seen those photos of a child clutching a person-shaped “cookie” almost as big as they are? That will be a Speculaa. Even the normal ones are relatively big. Our pussycat mold (see below) makes a cookie just short of 5″across. You know those “monster sized” chocolate chip cookies that mall stores used to tout? 3″ diameter, or 4″ at the most. OTOH, the actual volume isn’t that high because Speculaas are so thin.
Finally, the dough cannot be overly sweet, and must have some caramel notes. In sum, the purest definition would describe a thin, crisp, only-sweet-enough, child-friendly spice cookie formed in a shallow wooden mold. The tree branches out from there.
Our three molds: the pussycat, the windmill, and the rooster
One easy and common path avoids the molds in favor of a large, thin, roll-and-cut cookie. Try decorating the top with some almond slices held on by egg wash just to fancy them up. Another limb leads off into filled Speculaas, which can be a bar cookie, a sliced roll similar to Fig Bars, something that can be done as a Molded Gingerbread Cookie, or almost any other type of filled cookie. Almond paste does not spread as it bakes, which opens up a vast range of possibilities.
A third branch will shrug and either accept or embrace a soft texture, like the Heritage Cookies recipe that uses regular brown sugar with some nut flour. There are probably fourth and fifth branches too, though I can’t think of them off the top of my head.
The further you get from that light, thin, and crispy molded cookie, the more a purist could complain that you are “wrong.” But we are bakers, not professors! Kate and I will argue that nothing is out of bounds so long as you know where the trunk of the tree lies, and add a description to the name. Chewy Speculaas, Filled Speculaas, Nut Dough Speculaas, and maybe even Cinnamon Spice Speculaas are all legitimate since they give fair warning that you’ve headed out into the suburbs.
LUC LONGIN’S RECIPE
NOTE: This recipe originates with Mssr. Luc Longin of Belgium, and I hope you will join me in a nod of grateful thanks for his generosity. This goes to examples of Luc’s work, including both cookies and specialty molds. Video #1 (multiple small figures) and video #2 (one huge figure) demonstrate the molding tricks I will try to describe in words down below. Luc’s American counterpart, Andrea Hampton, also provided invaluable assistance as both an inspiration and a bouncing board. She owns the Sweet Impressions Bakery in upstate New York, between Rochester and Syracuse to the north of the Finger Lakes. You won’t find anyone on this continent who’s better, and I’m honestly not sure about anyone, anywhere.
You may also want to know that the two of them collect, refurbish, and sell high end, often historic molds. There are plenty of cheap ones out there (like our old tourist pieces), and also some modern knockoffs, but Luc and Andrea are the place to go for potential heirlooms if this article gets you hooked.
Okay, so here is the original Luc Longin recipe that set me off on this deep dive into the ocean of authenticity:
Read that through and you’ll see a number of ingredients that aren’t exactly common in a U.S. supermarket.
UNDERSTANDING THE INGREDIENTS, AND HOW THEY MATTER
“Type 00” flour.
“Type 00” refers to a super-fine grind, not to a protein content. We tested a few different products and found that “Type 00 pizza flour” worked better than “pasta flour”. King Arthur Flour sells a good product that is easy to find online. We bought ours down at Penn Mac in Pittsburgh’s Strip District, which supplies a lot of our Italian community.
All purpose flour will also work until you get to that last 5%. The difference only becomes apparent when you employ a traditional cookie mold. The finer “Type 00” yields slightly sharper features. Just be aware that “Type 00” weighs a little bit less than AP! Substitute by weight, not volume.
ADDITIONAL NOTE: Speculaas fan Carolyn Koss Kasten adds: “Pizza flour is more successful in speculaas than pasta flour due to the use of soft wheat in most commercially available pizza flour blends. Soft wheat has a lot of extensibility without the enhanced elasticity of modern hard wheats. This results in much better impression retention and very little deformation of the cookies as they bake. If you search my name in the [Specifically Spectacular Speculaas] group, you can see some extensive flour testing and discussion about that.
Belgian Dark Brown Candi Sugar
This is the elephant in the pantry.
Belgian brown sugar is not the same thing as U.S. brown sugar. The American version is made by adding molasses back into white cane sugar (pure sucrose) at a ratio of 1 tbsp. per cup for light brown sugar, and 2 tbsp. per cup for dark. Belgian brown sugar, a byproduct of the candy making industry, differs in several aspects:
It is made from “invert sugar,” meaning sucrose that has been treated with an acid to break a portion of it down into glucose and fructose. Those two component sugars, added together, end up being a little less sweet than pure sucrose. Reason #1 why Speculaas seem less sugary.
The invert sugar (sucrose, glucose, and fructose) is then caramelized to a medium or dark brown color as desired. The darker the caramel, the deeper the flavor and the lower the level of sweetness. Reason #2. FWIW, Luc recommends the darker brown, least sweet version.
Belgian brown sugar also starts from beet sugar instead of cane, but that becomes an imperceptibly subtle distinction after going through the inversion and caramelization steps.
‘But Scott, what if I only want to get close enough to the real thing without going to all the effort of finding this kind of specialty ingredient?’
Fair point. We have found three alternatives, in descending order of preference:
The inestimable Stella Parks of Seriouseats.com, a self avowed Speculaas fanatic, likes to make a “toasted sugar” facsimile of Belgian Brown Sugar. Spread your desired weight out on a tray, and roast it at 300°F (150°C) for 4-5 hours, stirring occasionally, until you get the color you want. Grind the result in a food processor to break up the clumps, and proceed. Toasted sugar differs from the real thing because it is caramalized sucrose rather than caramelized invert sugar, but it is the closest alternative we know of.
America’s Test Kitchen suggests ground turbinado sugar as an easier alternative. Chemically, turbinado is the same thing as American light brown sugar with half as much molasses; i.e., 1 tbsp. for two cups of sugar instead of 1:1. It’s also made with vastly larger crystals, a feature that alters the way it behaves in baked goods. The fine folks at ATK found that finely ground turbinado gave the required hit of caramel flavor without making their cookies too soft. We haven’t tried it, but that is a very reliable group of test cooks and I’m willing to take their word for it.
Plain, old brown sugar from the supermarket is the least desirable substitute. Make no mistake: it will make you a truly delicious cookie! There are just two issues. First, it is noticeably sweeter, and this is a cookie that should be only sweet enough. And second, the hygroscopic powers of the molasses will quickly soften the cookies as you store them. In other words, they’ll be crisp when they come out of the oven, but will soften by the next morning. We use brown sugar for Gevulde (Filled) Speculaas and our Nut Dough Speculaas, but cannot recommend it for making the thin and crispy version that requires no disclaimer in the name.
Hartshorn, a/k/a Baker’s Ammonia, a/k/a ammonium chloride, a/k/a smelling salts is an old frenemy we discussed at length in Heritage Cookies Volume 1, our study of the ultra-leavened Hungarian Kvircedli, and most recently in a page on this website devoted to the whats, whens, hows, and whys of chemical leavening agents in general. It makes sense to use it here because hartshorn yields a finer, more even aeration than other chemical leavening agents. Combining it with baking soda yields the exact crumb you want for truly authentic Speculaas.
Baking soda alone will work, but the cookies will lose some definition. Not a problem unless you use a mold, since cookies without Hartshorn will rarely have good, sharp features. Certainly not reliably sharp.
In fact, the only change we recommend to Luc’s recipe is to lower the amount of baking soda by ¼ tsp. It may be altitude (our home sits at around 1,150 feet above sea level), or it may be some other subtlety, but we found that we lost some resolution when using the recommended 1¾ tsp. of baking soda along with 2 tsp. of hartshorn. Cutting back to 1½ tsp. of baking soda fixed that. I would experiment with even lower amounts if we used molds with finer features.
Good Butter
Both Andrea and Luc started their advice with a warning that I really, really needed to replace American supermarket butter with a high end European product like Ireland’s Kerrygold brand. Nor were they the only ones! The online community of cookie nerds unanimously echoed the point: Use The Best Butter That Money Can Buy! Still, that is a pretty major expense and so I decided to test it. Would the the luxury product really make a difference? How big a difference?
The experiment went like this. First, I made a single batch of dough containing everything but the butter. I used a scale to divide that dough into three equal parts, all of which were too dry to stick together, and then mixed in different butters to each portion in order to complete the dough. For the first I put in Kerrygold; the second got Land O’Lakes; and the third got Land O’Lakes enhanced by the ¼ tsp. of ghee required to give it exactly the same butterfat content as Kerrygold (¾ tsp. would have been needed for a full recipe).
I baked each batch with a secret, only-known-to-me appearance change, and then asked no less than fifteen (15) taste testers to give me their opinion. Skill levels ranged from expert bakers to cookie consumers who don’t know one end of a baking pan from the other.
The result? Everyone loved the cookie. Speculaas are a huge crowd pleaser! A clear majority also commented on the lack of sweetness, saying it was a relief compared to “normal” cookies. But the butter? No one – not a single person! – could tell any difference. Two people preferred the Kerrygold; two preferred the Land O’Lakes; one preferred the enhanced Land O’Lakes; and ten of the fifteen thought I was playing some kind of trick by giving them identical products. Which may say something about how people view me… but never mind.
Take from that what you will. Experts in the field say that luxury butter makes a very noticeable improvement. Experiments in the field said the opposite. Me? I just want another cookie.
THE TECHNIQUE WAS A REVELATION
Admission time: I tried several things to “improve” on Mssr. Longin’s seemingly blunt instructions. Every single change I made hurt the final product. And I mean those words literally. Every change made an actual difference, and that difference made the cookie a little bit worse in some way or another.
How To Make The Dough
Go back and read the recipe. Luc mixes together the butter, egg, and water, and then kneads in the sugar and the dry ingredients. That’s it. Period.
I figured things might work better if I creamed the butter and sugar together before adding in the other ingredients. That’s standard Cookie Making 101, right? Wrong. The cookies came out almost fluffy, with next to no definition, and a distinct lack of the all-important crunch. The experiment earned me nothing but egg on my face rather than egg in the bowl.
On the left, made with creamed butter. On the right, simply mixed.
Same thing. Too much leavening or creamed butter, vs. simply mixed
And a third time. Don’t cream the butter, and don’t add too much leavener!
Do as I say, not as I did. Just get it all combined and proceed from there. Don’t cream the butter first. And don’t even think about cutting in cold butter in some sort of abortive effort to enhance things with crispy layers. Go simple.
I got saved from blunder #2 because I had the smarts to talk about blunder #1 with the experts, Andrea and Luc. When they got done e-snickering, e-chiding, and e-eye rolling at my expense, they dropped a pearl that saved me from another wasted batch. Letting the dough sit in the fridge for 1-3 days is not a matter of convenience, nor of relaxing the gluten. This dough is carefully calibrated to have just enough moisture to hold together with very little more, and it has a lot of flour. That long wait allows the spice flavors to meld, while giving the flour particles a chance to hydrate evenly.
How To Use A Speculaas Plank
Blunder #3 came from trying to do a shortcut in the molding process. Luc’s videos start with a wide bowl or tray of rice flour. He uses that to fill the mold all the way up, dumps that powder back into the bowl, and then knocks on the back of the mold to remove the excess. The result? A perfectly dusted mold every time, without any need for buttering or oiling.
It occurred to me that I had extra, powder-fine, “Type 00” flour on hand, and might as well use it up. Efficiency matters, right? [Sigh] Yes, it worked well enough. The figures released with a single whack. Two at the most. But they were just a little… unfocused, even before baking. Their trip through the oven only enhanced that, leaving me with shapes rather than figures.
The next time through I pulled rice flour from the pantry and used that. Presto changeo! The figures came out even more easily, and were that much sharper. I haven’t tested it, but we are convinced that corn starch, tapioca starch, and similar powders should work equally well.
These are Gevulde (Filled) Speculaas, but make the point. The one on the left was done in a flour-dusted mold with extra leavening. The one on the right was dusted with rice starch and the reduced amount of baking soda.
Blunder #4 happened because I am a knife geek. Luc fills each powdered mold with softened dough, rolls it to fill in all the nooks and crannies, and then cuts off the excess to leave the cookie backs exposed. The videos clearly use a serrated slicing knife to cut off the extra dough. Clearly and obviously.
Did you know that every knife is actually a serrated knife? When you get down to the microscopic level, even the keenest blade is actually made of tiny teeth that saw through their target. This is why you use a slicing motion when using a kitchen knife instead of pressing straight down. That motion amounts to pushing and drawing the “saw.”
I keep my knives very, very sharp. The dullest one is the bread knife, because large serrations are that much harder to hone. A nice, thin, extra sharp blade would obviously work even better than the bread knife. Right? It’s nothing but physics in action! Right?
The answer is, “no.” Our thinnest, sharpest blades caught on the dough no matter what, and kept pulling pieces out of the mold. Our serrated bread knife worked far better, especially when used in very small back-and-forth sawing motions.
Some people never learn.
OTHER NOTES
None. Well, almost none. We developed an excellent Speculaas Spice Mix while working on recipes for Heritage Cookies Of the Old And New World. I use it all the time as my “starter mix” when making a spiced cookie for children and other tender palates. With all this testing, however, Kate began to find the mix a little cloying and simplistic. I solved this by doubling the amount of pepper from ½ tsp. up to a generous 1 tsp., and using white pepper instead of black. That gave it just enough bite to satisfy a grownup palate too.
The recipe below includes the higher amount. Feel free to cut it back if you’re targeting younger appetites.
CONCLUSION
This has been an exceptionally long journey for what’s actually a simple cookie. Yes, a lot of that came from experiments to confirm or belie the importance of European ingredients that can be hard to find here in the U.S., and more came from testing out different substitutions. But some of the wasted time came from me trying to gild the lily. Don’t waste time doing anything more than mixing the ingredients together, and don’t look for false economies like using extra fine flour instead of starch when you’re dusting the molds.
Do follow the very simple instructions, including the extended wait time between making the dough and using it.
What you’ll get is a really special cookie that is light, crisp, delicately spiced, and only as sweet as they need to be. Sort of like a big old grin from your favorite Uncle as you pop in for a holiday. You just can’t help but smile back, and that is the magic of genuine, ultra-authentic Speculaas.
That link will take you to the follow-up article, which includes a recipe for dough made with standard U.S. ingredients, a customized recipe for almond paste filling, and looooong instructions on a full dozen different ways to shape the filled Speculaas to maximum effect. As in…