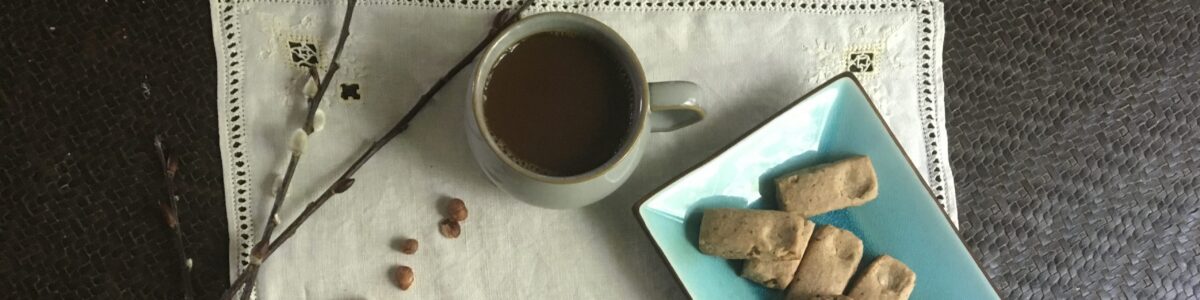
Imagine the esthetic behind Danish Modern furniture: minimal, sleek, efficient, elegant, useful, classically beautiful, and easy to customize. Now take that esthetic and design a cookie to match. We’ve got you covered.
Click here for the recipe without the discussion
Minimalist: Six ingredients: nuts, butter, sugar, salt, an egg, and baking powder. No more, no less.
Sleek and Efficient: Beat it all together, divide into balls, and bake. There’s no flour to hydrate, and thus no actual need to chill in advance (though I will admit it makes the dough less sticky).
Elegant: How about we kick up the baking temperature to ensure a golden brown, extra-toasty bottom that enhances the basic nut flavor? Clever! And let’s add just enough baking powder to keep the cookie from ever feeling dense or pasty.
Useful: Unexpected guests? Need a moment of self-reward? I’ve yet to meet a cookie that freezes better, and they’re delicious right out of the chill chest.
Classically Beautiful: This is the girl next door of Cookieville, and you wouldn’t be reading this if you didn’t love the type.
Easy to Customize: Want your cookie textured and noshable? Done. Use ground nuts, and remember to bar your door against the likes of my wife. Want something firm but soft, like a shoulder to rest on? Grate the nuts to meal, and do not bar your door because I may be dropping by for a surprise inspection. Want to go all out, and make something that melts on the tongue like almost-liquid flavor? Pulse the grated meal all the way down to flour. Or play with a different nut. Or a mix of nuts. Or… You get the idea.
(A NOTE FROM KATE: I would like to point out that aside from being naturally gluten-free, this cookie is, with the exception of sugar, a “whole food.” Nuts are good for you, eggs are good for you… and why say no to just a bit of sugar? In fact, I predict that cookies such as these will become a new health food trend!)
NOTES ON PROCESS AND PROCEDURE
There isn’t much to say. This really is as simple as it sounds.
(NOTE FROM KATE: To be fair, I did find that the pre-roasted hazelnuts were just a bit too hard for the rotary grinder. Husband + food processor = easy solution.
Do I really need to roast the nuts…? For heaven’s sake, most stores sell them pre-roasted! But if you bought fresh, unroasted nuts, the answer is yes. Roasting develops the hazelnut flavor, which is what you’re after in the first place. Cookies made with raw nuts will work just fine, but the same can be said of furniture no one’s bothered to varnish.
“I’m so confused? Where do I get ground nuts? Or hazelnut meal? Or hazelnut flour? Who carries that?” [Sigh] Start with whole nuts. Then:
For ground, put them in a food processor and pulse until you arrive at rough, finely pebbled, ground-nut sand; i.e., the stage right before they start to turn into nut butter. Remember to scrape the sides of the food processor bowl as you go in order to (a) release any fine particles, and (b) check see if you are getting too close to the nut-butter stage.
For nut meal, pull out a rotary grater with a middle-fine wheel. Put the nuts in and proceed until you have a light and fluffy meal. Food process coarsely if you need to break down the whole nuts first.
For nut flour, pulse the grated nut-meal a few times in the food processor.
Besides, this ability to customize is part of the fun! Some recipes have no room for wiggle. This recipe has wiggle room built into its bones, which is nothing but a plus if your family is anything like ours.
Kate has a strong preference for using ground nuts. She considers that the purest example of what hazelnuts really are, and a nice change from all the shortbreads of the world that melt in the mouth without thought. Yours truly is a softaholic. “Melt in the mouth” is a good thing for me, though I will grant that this cookie benefits from the rustic appeal of nut meal rather than whole scale flour.
In a pastry shop, for elegant tea time nibbles? Okay, now we’re back to proper nut flour, probably with each cookie halved in size for the sake of proper, lace linen daintiness.
You cannot lose. It’s all about how you choose to win on this particular day, for this particular situation. Asset, not hurdle.
(NOTE FROM KATE: I enjoyed the coarser texture of the machine-ground nuts for its rustic appeal. They look good, and the one hazelnut reserved for the top is very cute, albeit a bit fussy to position nose-up. I admit, however, that fine-textured hazelnut drops would be just as lovely, yet… slightly different.
Here is some good tricks to keep in mind:
We don’t use cookie scoops (not enough room in the drawers), so I like to weigh a few dough balls until I have the size right. It keeps a consistent result every time.
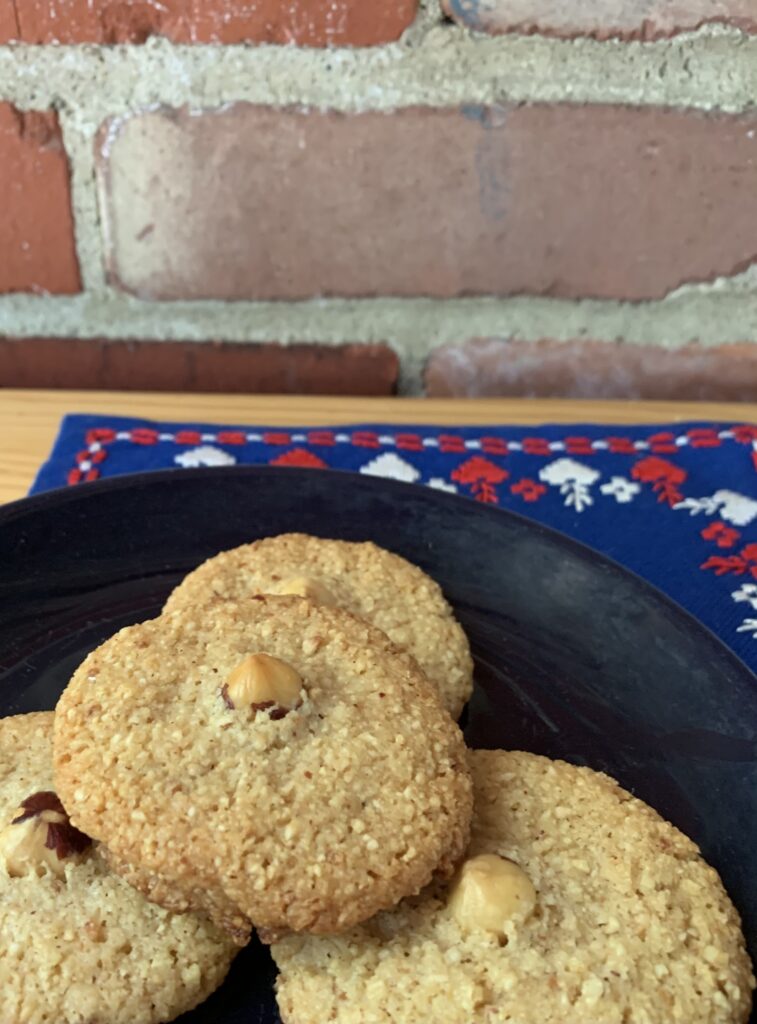
When forming, give each ball a gentle squish with the heel of your hand to prevent rolling, and garnish with one hazelnut each. These nuts have a pointy “nose,” which I like to aim in the same direction every time.
If you want a fine nut meal, start with raw nuts, then toast the flour on a cookie sheet in the oven at 400 degrees Fahrenheit for 4 minutes. Pull out, stir gently, then toast for another few minutes until its scent JUST begins to develop.
Unroasted nuts blanch better, so you will have tidier nut toppers. I tried blanching store-bought roasted nuts and almonds, but to my surprise, the skins wouldn’t slip off!
The big note from Scott? At some point you are going to make the dough and then wonder, “Maybe I should add in some vanilla, or spice, or a tough of extract…” You can, and it will be good, but do us a favor and try it straight up the first time. Lilies look best before they’re gilded.
In all honesty, I very seriously considered a preemptive addition of vanilla before our first test batch. After all, vanilla and hazelnut have a historic love affair, and the dough didn’t have as big a flavor hit as I imagined it would. She Who Must Be Heeded prevailed on me not to, and I’m glad to say she was right. The high temperature oven triggers a lot of browning on the bottoms, which adds the exact thing I had been missing.
CONCLUSION
These really are the Danish Modern of cookie baking. Minimal, sleek, efficient, elegant, easy to customize, and absolutely luscious. Plain old cookies just don’t get any better.
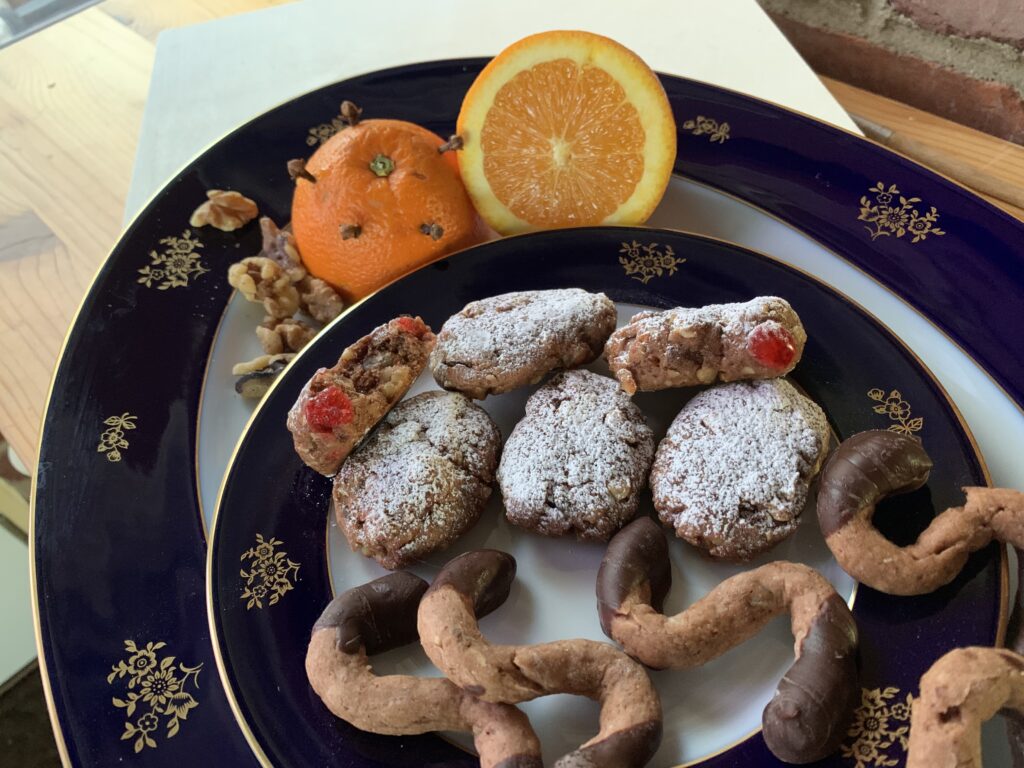
Honey, orange, cinnamon, and clove in an ancient waybread cookie
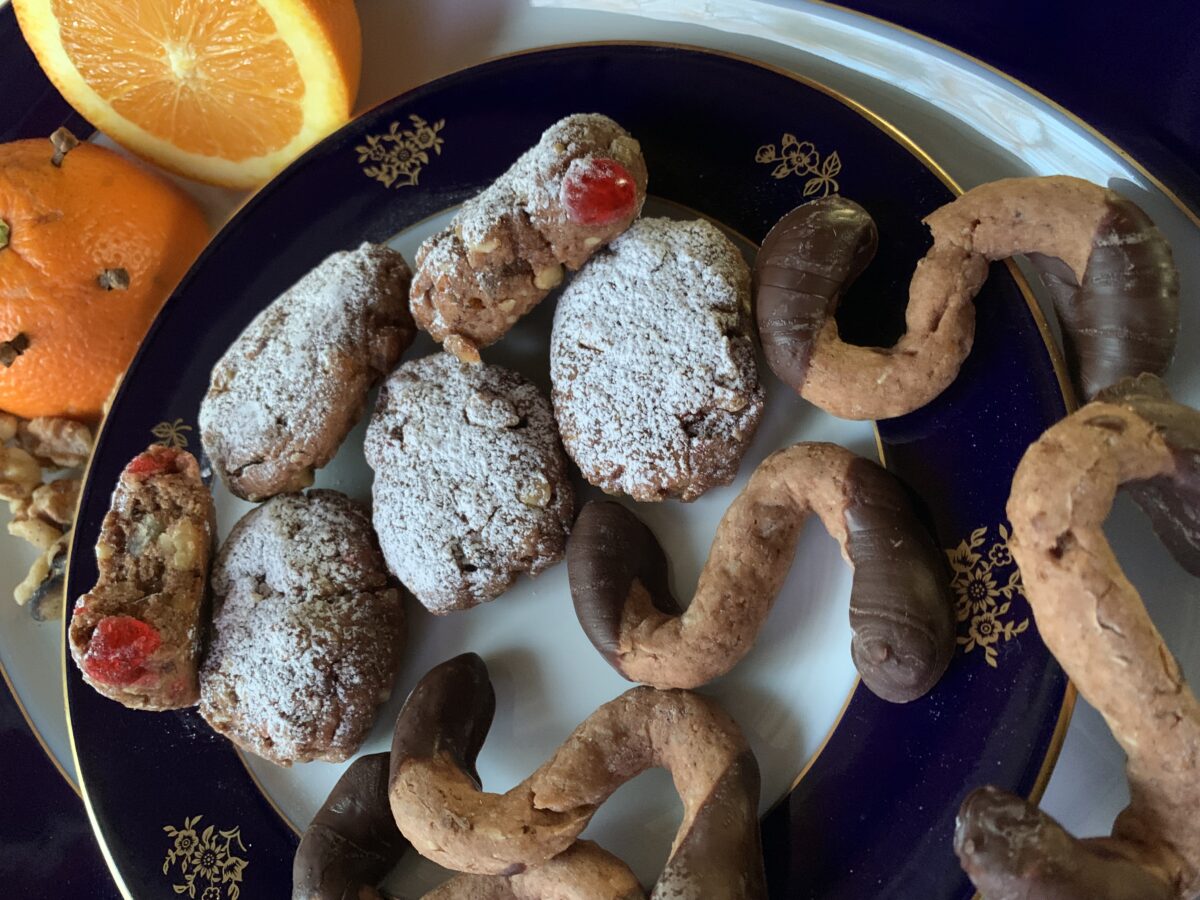
After researching a few recipes from the Eastern shores of the Mediterranean, our attention turned toward an interesting Spanish/Portuguese cookie… only to be diverted again by this much loved Italian cookie from Calabria, the “toe” of Italy right across the straits from Sicily. It’s a fun recipe, in part because there really is no single recipe. Nor any two. Nor any three. It’s basically a fill-in-the-blank name for any cookie made with the classic, southern Italian flavor profile of honey, orange, cinnamon, clove, and nutmeg-or-mace, offset by a bitter element, which can be cocoa powder, a bitter chocolate coating, or some molasses in the dough (a “difference” that typically changes the name from Susumelle to Mostaccioli di Napoli).
Susumelle vary much more than most cookies, ranging from dense and chewy, to light and crispy, and topped with either chocolate or a powdered sugar glaze. But there are a few constants that ought to catch your attention as much as they did ours:
This is an ancient cookie with roots going back well into medieval times, and it seems to have some connection back to the culture of Greece. I don’t think anyone would be surprised if ancient Roman recipes turned up.
The main sweetener is honey, which means they have a very, very long shelf life, and did not require the boost from Age of Exploration sugar crops that caused so many new cookies to be born from the 1500’s on.
Most versions include neither eggs nor fat, which makes them much less tender than other cookies. We’re told that some versions are crunchy enough to use as teething biscuits for babies! [See the safety note at the bottom of this article] But this isn’t a rule. Some recipes do include eggs, and others have oil, though we’ve yet to find any with butter.
Almost every version includes some orange in the dough; zest for sure and often juice, but this can vary off to liqueurs, water, or even wine. Orange and honey! That’s a winning combination every time! Especially when paired with…
A healthy amount of cinnamon, a small touch of clove, and usually an equally small touch of nutmeg or mace. This combination is everywhere in what used to be called the Kingdom of Naples from the 1200’s into the 1800’s. Think “Italy south of Rome and the papal states.”
A bitter counterpart to offset the sweet honey. Cocoa powder is extremely common, and the one used in this recipe. Regions nearer to Naples tend to use molasses instead, with a name change to “Mostaccioli.”
Finally, Susumellealways get coated in something, but that can range from dark chocolate (the most common), to white chocolate, to a powdered sugar glaze, to simple powdered sugar (especially for unleavened versions).
After that you get to the endless variations. And I do mean endless. Hundreds of years of variation yield more differences than consistency. It gets even more confusing as you go back in time! According to this tourist website, back in the old days natives acknowledged three separate categories of Susumelle based on the type of flour: white flour for the wealthy, poverty flours like whole wheat and acorn for the commoners, and “a third called ‘del buon cammino,’ made with good ingredients and destined for priest and friars.”
Does The Name “Susumelle” Provide Any Clues?
Well… not really. First, the word itself means multiple things in modern Italy. If you say “un Susumelle,” you almost can’t be wrong. It means anything that fits the broad category of a dessert made with honey, cinnamon, and clove. If you say “real/proper/etc. Susumelle,” or just “Susumelle” with no adjective, it means either (a) the cookie that Grandma made, with yours and everyone else’s being an abomination, or (b) a commercial version totally unlike Grandma’s but nevertheless real because you can see it in a store.
That same tourist website offers two potential name origins. The first is a combination of the Greek words sesamum (sesame) and mel (honey), which makes more sense than you might think because Calabria is right on the ancient trade routes, and there is are extremely common Levantine and Greek cookie/biscuit recipes with that profile. The other theory also traces to Greek, but is based on the word “susumeda,” meaning food that had gone bad that was given to the poor as charity. It is a Christmas cookie after all…
But that’s not all. Another theory says the name has to do with a local word for ‘una carezz’ (a caress). And I’ve even seen websites and videos claiming the name comes from the often-traditional “S” shape.
Then there’s the eternal category, “all of the above.” When many names work, people love to make puns that can work from multiple directions. And then they love to argue about it even more… but that’s a whole other story.
Does that sound vague, maddening, and designed to make researchers “wrong” no matter what they do? Welcome to my world, friends. Welcome to my world.
Wait A Second… Isn’t This A Waybread?
Frustrated? Me? Heck yeah. But then I realized that this particular kind of frustration rang some bells.
Isn’t exactly the same thing true for Lebkuchen recipes in German-speaking countries? Indeed it is! And for Molasses Gingerbread recipes across Northern Europe? Y’know, that’s true too. Honeycakes/Honey-Gingerbreads in Central and Eastern Europe? A pattern emerges.
And aren’t all those cookies remarkably similar in the big picture, being ancient recipes made with lots of honey, a spice mix, and often a healthy portion of dried fruits and/or nuts? Aha! The penny drops. This is the Southern Italian honey based waybread cookie, with every bit as much variation as its northern cousins.
Time To Treat It As A Master Recipe
After breaking my brain with no less than seven (7!) test versions, I finally realized the problem. I was trying to use one name for at least four different cookies. For our purposes we can break them up into the following variations:
Super hard, use-your-molars crispy examples. These typically have no additions to the basic dough except ground nuts, which only appear on occasion anyway. Molars-hard Susumelle usually include a moderate amount of the ancient leavening agent Hartshorn a/k/a Baker’s Ammonia, and are almost always (a) coated with chocolate, (b) shaped into “S” cookies, or (c) left uncoated for baby to teethe on.
Hard, light, and crispy eating cookies formed into ropes for an “S” shape, or rolled to normal (around ¼”) thickness and then cut. This version has a lot of hartshorn, but baking powder works too because they cook until fully hardened. Nuts are almost required (powdered, chopped, or coarsely chopped), but may be replaced with sesame seed. Light-and-crispy Susumelle always get a chocolate coat, usually dark but also ranging through milk and down to white.
A hard and crispy biscotti version. Take #2 and form it into a single rectangle. Bake for a long time (25 minutes is typical), and then slice into biscotti-shaped pieces. The pieces can be baked a second time, but many don’t bother.
Moderately crispy eating cookies, which can be either hand formed or treated as an extra-thick (around ½”) roll-and-cut. The same as #2 yet again, but with something added to interrupt the texture. That ‘something’ usually includes (a) baking powder rather than hartshorn, supplemented by (b) chopped, candied fruit, (c) chopped, dried fruit, (d) coarsely chopped nuts, and/or (e) eggs or oil added into the dough. This version also requires a coating, but it can vary from any kind of chocolate all the way through any kind of powdered sugar glaze.
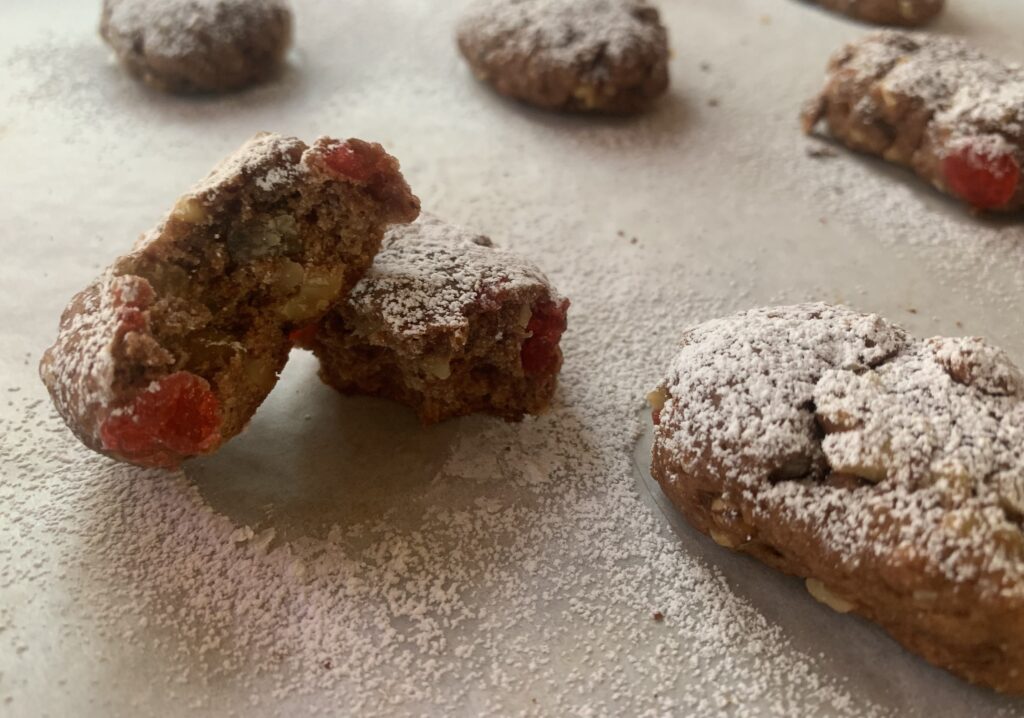
Chewy waybread cookies comparable to Siennese Cavallucci. This version usually has little to no leavening, and is loaded with chopped fruit (candied or dried) and/or nuts. They’re also at least ½” thick, and large enough to be 3-4 bites each. Look for (a) large, roll-and-cut ovals, (b) hand formed egg shapes that settle into ovals inside the oven, or (c) thick ropes formed into an “S” shape. All three shapes are always served with powdered sugar on top.
Option 2 – Light and crispy, with walnuts
Option 5 – Unleavened, with nuts and candied fruit
A Rose By Any Other Name
We published a basic version of a cookie called Mostaccioliin Heritage Cookies of the Old and New World Volume 1. It’s a straightforward combination of chocolate and clove.
The research for this cookie shows that Mostaccioli is actually a broader category than we thought, and amounts to the slightly-more-northern version of Susumelle common in Campania (the shin) and Apulia (the heel) rather than Calabria (the toe) or Sicily (the stone being kicked). You can convert Susumelle to Mostaccioli by reducing the amount of honey, increasing the amount of sugar to compensate, and adding a significant portion of molasses and/or chocolate into the dough as a bitter counter-element. After that it’s the same orange/cinnamon/clove/nutmeg core, with infinite variations. [NOTE FROM SCOTT: I should probably work on a revised version of that recipe…]
Then there’s a third cookie, or more properly a Not Quite A Cookie, called Rame di Napoli; an extra-thick chocolate cake batter with the same basic flavor profile. These get baked in egg-sized mounds, coated in dark chocolate, and sprinkled with chopped pistachios. It’s a specialty of the city itself (Naples), and baked for Italy’s version of Halloween. If you’re interested, the word “rame” means “copper,” and the “cookie” is supposed to resemble an old Neapolitan copper coin. The pistachios represent green oxidation.
NOTE FROM KATE: when Scott develops a recipe, we can generally agree the point at which I can reserve cookies for the photo shoot. This time, the cookies kept arriving. I did enrobe a few of them in chocolate, but I never took photos. Too many variations, and too many baking variables, kept tripping up our decision-making process and every time Scott consulted either blogs or people, more local variations came out of the woodwork!
Now that he has his several varieties sussed out, it’s time to set up a project chart. Variety names, leavening status, textural additions, spice combinations, textures, glazes, shapes. Phylogenetically speaking, it’s as though Sussumelle was a cookie genus, and all these varieties were separate species. I care about the shapes and the glazes more than he does. As our mycologist friends like to insist, species concepts really work better when they are morphologically distinct.
CONCLUSION
Our recipes tend to focus on cookies with a story. Susumelle turned out to be a saga. Batch, after batch, after batch, trying to find the essence beneath all the recipes. We’ve rarely worked on a more frustrating project, until the penny finally dropped and we realized that something close to half a dozen different cookies all go by the same name, with only the main ingredients (honey, cocoa, cinnamon, clove, and nutmeg) as the unifying principle. That may sound mad at first, but only until you realize that much the same holds true for the similarly ancient honey-and-spice waybreads in Central and Northern Europe. Time and popularity equal endless variations.
Which is our personal favorite? Kate can vote for herself, and none are bad, but mine would be the one with no leavening at all, and all those beautiful bits and bobs inside. It’s a Lebkuchen or Honeycake done Southern Style, with a delicious flavor palate unique to these particular regions.
Of course, that opinion might change if we still had teething babies around!
A NOTE ON FEEDING HONEY TO BABIES: The bottom line is this: don’t. Honey harbors a bacteria called “Clostridium” that can on rare occasions cause infant botulism. Bad juju! The risk diminishes as the infant grows, becoming less dangerous around 6 months, safer still after 9 months, and more or less safe after 12; at least according to Doctor Internet. Babies usually start to teeth around 6 months, though some start earlier.
Susumelle recipes cook the honey and the sugar, which you’d think would reduce the risk, but it doesn’t eliminate it. So tradition be damned. Follow your doctor’s advice. The fact that people with no concept of germ theory almost always got away with the risks does not make it the smart thing to do. Do you really want to be the exception?
NOTE FROM KATE: look up the USDA guidelines for killing Clostridium botulinum, compare the temperature and time requirements, and let your comfort level be your guide. Now look up sugar, carb, and oral health guidelines for young children. Seriously dude, teething on hard biscuits is a dentist’s nightmare! The whole idea reminds me of a “teething remedy” my grandmothers used to employ: unripe poppy seeds simmered in sweetened milk, and then used as a soaking liquid for soft bread wrapped in a handkerchief and tied off with string. “It helps the babies slept better,” they both said, “but don’t use it all the time. Poppy makes kids stupid, so it’s a last-resort option.”
Chinese immigrants in America, from a cookie’s point of view
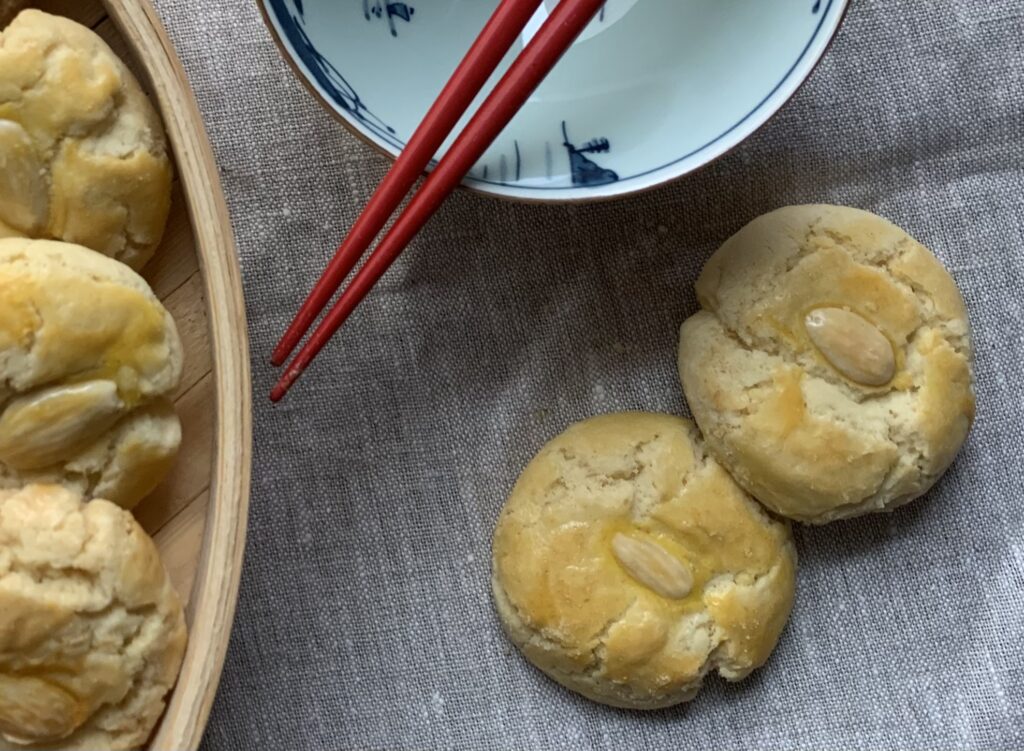
You may have noticed that many Chinese restaurants in the U.S. have an out of place dessert tucked away on the menu: a peculiarly tender almond cookie. Research (a/k/a the 2020 Nom Wah Cookbook) shows an interesting history.
The oldest Chinese restaurant in New York, Nom Wah Tea Parlor, began in 1920 as a bakery focused on standard American fare like cakes, tarts, and of course cookies. These Almond Cookies were a popular creation of the Chinese immigrant owners. Matters changed because that little bakery had a sideline operation selling tea and various traditional savory snacks from Hong Kong; small plates that sparked the NYC love affair with Dim Sum. The sideline restaurant business swallowed up the bakery, and the rest is history. But this particular cookie was too popular to die! It may have stood out like an American sore thumb against all that traditional fare, but the customers insisted. They wanted all those little dumplings, noodle dishes, skewers, soups, and meats most of all… but they wanted Almond Cookies too. It survived every challenge.
Your customers insist!
Other restaurants ran into the same issue when they began to copy the Nom Wah success story. ‘In the know’ customers simply wouldn’t go if a Dim Sum restaurant wasn’t [ahem] authentic enough to include Chinese Almond Cookies on the menu. Never mind that the recipe had no Asian roots.
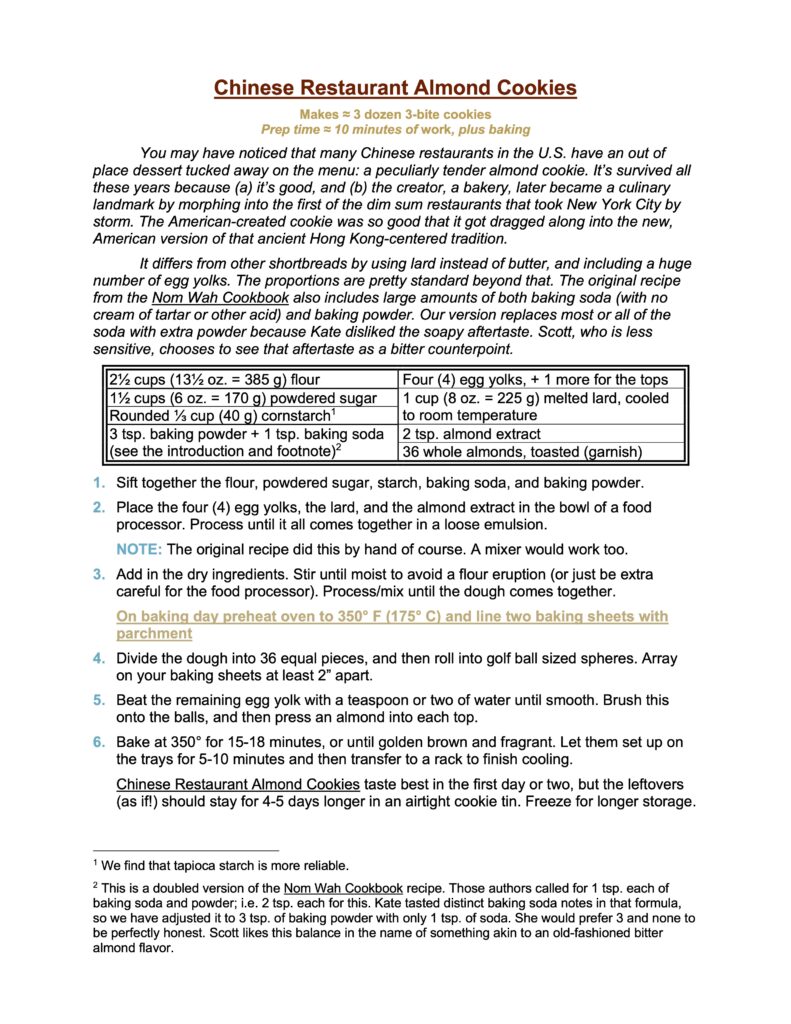
The cookie itself is a simple shortbread that uses lard instead of butter, a lot of almond extract, and an exceptional number of egg yolks. The proportions are pretty standard beyond that. It’s the history, texture, and flavor that make this cookie such a different, delightful, and (to certain Pavelle family females) indispensable treat.
“Melted” Means Melted
Kate, a long time aficionado of almond cookies, handled the testing on this one. It’s a very old and very well established recipe, so she only ran into two challenges.
First, a certain husband of hers who shall remain nameless, blameless, and in all ways sacrosanct, wrote “lard at room temperature” in the first version instead “melted lard cooled to room temperature.” This made the dough extremely stiff and hard to work with.
Consider yourself warned.
NOTE FROM KATE: Now that I have tried the melted method, the dough seems less “short” and easier to handle. Before, I had to add a teaspoon of water, thinking that our flour became extra dry over the winter. Surprisingly, the end product has the same, identical texture! The only catch: I found it best to let the lard melt ¾ of the way, and then take it off the heat as I prepared the other ingredients. It finished melting in the residual heat, and then cooled just enough to start solidifying again when I was ready to use it. The food processor will handle the solid bits – just make sure you don’t inadvertently cook the egg yolks that are already waiting! (Barely melted lard is warm to touch, but not hot.)
The cookie forming goes like this:
Divide dough in half.
Divide each half into 18 portions (I like to square up the dough using my bench scraper, then I eyeball the sections.)
Roll each portion into a ball in your hands, press the almond into the center, and then squish lightly. Don’t worry about fixing small cracks, it will bake up nicely and the texture, highlighted by the yellow egg wash, is part of cookie’s appeal.
To Soda Or Not To Soda, That Is The Question
We decided to write this up as a doubled version of the recipe in the Nom Wah Cookbook. Those authors called for 1 tsp. each of baking soda and powder; i.e. 2 tsp. each for our version.
Kate tasted distinct baking soda notes in that formula, though Scott (who is much less sensitive to bitter flavors) was willing to give it a pass. So we tried a second version, with two teaspoons of cream of tartar to react with the baking soda byproduct. Those cookies still tasted a bit soapy to her extra sensitive palate, and were a bit too puffy for Scott – a fact which proved she was correct in tasting unreacted baking soda still in the dough.
Do you know that story about the recipe testers who met up with Goldilocks?
Four teaspoons of baking powder with no soda would have eliminated the soapiness for sure, but now we had to deal with the unwanted extra rise. And so we settled 3 tsp. of baking powder. Except… A certain angelic, blameless, and nameless husband pointed out that almond extract originally came from purifying bitter almonds to remove the cyanide. So maybe that baking soda flavor was actually a feature instead of a flaw? Was it possible that a certain recipe tester was being too sensitive? [NOTE TO SELF: Married men should know better than to use the words “too” and “[you-know-what]” in close proximity. Thank goodness the nameless and blameless husband at issue would never, ever make such a rookie mistake.]
NOTE FROM KATE: Scott may be onto something with that touch of bitter almonds. The batch below (3 tsp baking powder, 1 tsp baking soda) leavened about the same (the cookies puff up and deflate a bit with cooling.) A side-by-side taste test revealed that the “soapier” cookie is more authentic! It has that certain something. I like it toned down a bit, but not all the way. But now you have options and see how “soapy” a cookie you prefer.
Suffice it to say that we leave things up to you. It’s a matter of taste. Do you want the bitter edge? Or do you find it revolting enough to point fingers at your entirely innocent spouse, who only wrote down what the original authors required? Almond, or bitter almond? Tradition, or improved?
Dense nutty shortbread with an apricot filling and chocolate coating. What’s not to love?
“There is a tide in the affairs of bakers. Which, taken at the flood, leads to cookies of legend.”
Williamnot Shakesthepan, ‘Julius Eater’
The bakers of Imperial Austria were always good, but immortality escaped them until the creation of a series of desserts in the 1800’s. Yes, Linzer Tarts date back to at least the 1600’s. But nailing it? Pre- and post-French Revolution. One example is Sachertorte, created in 1832; a dense, extremely chocolatey layer cake with a generous amount of apricot jam on the inside. Ischler Cookies are another.
This particular cookie was created for Emperor Franz Joseph I in 1849 at the spa town of Bad Ischl. Look with care and you’ll see a marriage of the first two; the buttery, nutty, Linzer shortbread sharing the stage with apricot filling and dark chocolate counterpoints.
Exquisite.
As always, skip to the bottom if you are only here for the recipe. Most of this article concerns the choices we made to get there.
MORE A “PROFILE” THAN A “RECIPE”
A search for “Ischler Cookies Recipe” yields somewhere in the area of 2,000 recipes in English alone, and another 10,000 in German, Czech, Slovak, Hungarian, and any number of other languages. Plus books, of course. I’ve scanned maybe a hundred in all, with close study of several dozen, and all the work done on ours. On that authority I feel confident about the [lack of a] target definition:
A sandwich cookie made from a tender, nut-heavy shortbread;
An apricot filling, which often gets varied in the name of creativity;
And a densely chocolate element, which can take any form that human ingenuity can contrive.
This cookie has been around for more than 170 years, and the recipe now has all but infinite variations. If you insist, I will admit to a belief that the original cookie used a lot of hazelnuts, had an apricot filling, and was enrobed in chocolate, but that is based purely on inference and guesswork. Why hazelnuts? Because it pairs so very well with chocolate. Why enrobed instead of sandwiched? Well, if I was a pastry chef, and I wanted to impress an Emperor, that would be my default.
Sensible? Yes. A statement of fact? Not exactly.
So here’s the bottom line. Our version of this recipe is as good as any, better than most, and is 100%, capital-R Right. But that doesn’t mean that other recipes are capital-letter Wrong. They aren’t. We’re looking at a flavor profile, not a fixed recipe. Everything is “right” so long as it has the nutty shortbread, jam filling, and distinct hit of chocolate.
THE NUTTY SHORTBREAD
I spent years refining the proportions in my nutty Linzer Tart dough to perfection, and there is no reason to mess with success for this one. Here is the basic formula:
≈ 1 cup (7 oz = 185 g) of fine nut meal, ideally from gently toasted nuts;
2 sticks (1 cup = 8 oz = 225 g) of butter;
2 cups (10 oz = 185 g) of flour;
One large or XL egg yolk;
A small amount of baking powder; and
A healthy pinch (¼ tsp.) of salt.
Tests pushed us to add an extra half cup of flour to the dough, plus a little beyond that for oily walnuts, but that’s basically where we ended up.
What Nuts To Use? Any. Most modern American recipes tend toward almonds as the nut of choice. Modern recipes from Austria tend to use hazelnuts (filberts). The Hungarians often favor walnuts. Kate and I usually recommend a mix of nuts, but it had to be tested. We did so. And the result was clear: It doesn’t really matter.
NOTE FROM KATE: I figure the preferred nut may have also been a function of availability. The Hungarian versions favor walnuts, which they grow locally. In Bohemia (and I believe Austria) you can find hazelnuts bushes growing prolifically near every village, much to the delight of both youngsters and squirrels. So they make more sense for where I grew up. That said, the 1924 Sandtnerova cookbook uses almonds for almost everything, including her version of Ischler Cookies, and Austria sat in the middle of all these trade routes during Imperial times. Thus the Bad Ischl bakers would have had ready access to all three.
The photos in this post vary from examples that are pure walnut through pure hazelnut, 2:1 hazelnuts and almonds, and 3:1 hazelnuts and walnuts. They look the same, and while a devoted taster can tell one from the other (especially when the nuts are toasted), every variation was just as delicious as the last. So choose what you wish according to personal taste, budget, and pantry.
“What about oddball nuts like pecans, peanuts, macadamia, etc.?” Yes, that’s valid too. Look at the definition! “Nut meal” it says, and that is all it means. You’ll just be making another of those infinite and delicious variations. The only change is the obvious one: walnuts and other oilier nuts create a looser dough, which you’ll need to compensate for by adding some extra flour during the rolling phase. (NOTE FROM KATE: Macadamias would be interesting. They are the oiliest nut in existence and would produce a very short dough. I can already taste a Hawaiian take on the Ischler, with a tropical jam filling and a white chocolate coating on top!)
What Texture of Nuts? This one is more defined. Use nut meal nut flour, without any significant chunks of the sort you’d want if we used the word “chopped.” Yes, many people prefer to have little pops of crunchy nuts in their cookies. And yes, it adds some texture while also being convenient. After all, that is what you can get from a food processor. It just isn’t capital-R Right, because food processors did not exist in 1849. Bakers used table mounted grinders instead. Kate’s Grandma Kandler had one that looked a lot like this:
Image shows a 1930’s version from the Czech company Porkert
(NOTE FROM KATE: Scott has this part only half right. Grandma used one like this for poppy seed, and only occasionally for walnuts (which she used in her zimtsterne-like meringue sticks). She didn’t have a nut grinder for hazelnuts or the oh-so-rare almonds. Those she ground on the Czech equivalent of a box grater, one nut at a time, while listening to the radio and cursing. That works fine if you use the small slicing openings, but it’s laborious and does a job on your manicure.
You might ask, “Why didn’t she have the menfolk do it?” The answer is twofold: 1. The menfolk were busy pounding regular sugar into powdered sugar using a brass mortar and pestle. 2. She didn’t trust the menfolk not to eat the nuts. They were hard to obtain during the product shortages of the communist era, and she often had to visit numerous stores with hours-long lines just to get two small baggies of hazelnuts. For a great tool we can use now, keep reading.)
We have gotten by for 30 years with a much smaller and more familiar device:
Image shows the Oxo Rotary Grater, often used for Parmesan cheese but just as effective with nuts.
Both of those grinders inhale whole nuts and breathe out either fine shreds or powder, depending on which grating blade you insert. They do not produce “chopped” nuts. Thus we believe that (a) nut meal is almost certainly the texture used in the 1849 version of this cookie; (b) it’s a texture we prefer to eat; and therefore (c) it is the texture this recipe recommends. [NOTE: Almond flour and meal have started to become available in U.S. markets. Hazelnut and walnut meal are a lot harder to find, at least in 2022.]
As for chocolate inside the dough… see below.
Can I add some spice to the dough? Absolutely! Linzer Tarts have a hint of spice, and these can too. Just be judicious. Ischler Tarts have a strong, three-legged theme that every good recipe needs to balance; nutty shortbread, chocolate, and jam. Spices that enhance this balance do nothing but help. Spices that add a fourth layer will throw things awry. We didn’t do a whole lot of experimenting along these lines, but experience suggests that the best approach would focus on a spice that works with your central nuts. E.g., walnuts love to pair with ground cloves and coffee; vanilla, cinnamon, and nutmeg pair to perfection with hazelnuts; almonds get along cinnamon or an oddball spice like pepper.
THE APRICOT FILLING
Yes, apricot. We defunded the cookie police before publishing this article, so no one’s going to arrest you for using something else. There are, however, a number of reasons to start with this particular fruit:
Apricot and chocolate are a classic Austrian combination, as shown by the much loved Sachertorte;
Raspberry has its own cookie in Linzer Tarts; and
All accounts seem to agree that the original, 1859 recipe did indeed use apricot and not any other fruit.
QED.
Apricot cookie fillings come in two basic versions. The first is slow-cooked puree or compote a/k/a apricot butter, povidla, lekvar, etc. We prefer these fillings for recipes that bake the filling, but with this one – filled after the fact – we recommend the easier route; a modified apricot jam.
Jam fillings present two issues, both of which are easy to solve. #1 is excess moisture that can soak into the cookies and limit their lifespan. #2 is availability, since our stores only carry “apricot preserves,” and that product has enough chunks to detract from your ideal result.
Cookies made with unstrained preserves. See how the bits of fruit hold the two halves apart? It doesn’t hurt the taste at all, but it’s less perfect than what you can do with only a little more effort.
Same cookies, same presentation, but without the chunks of fruit.
We prefer this cookie with a smooth jam instead, and ideally one that’s just a little drier. You can address both concerns by (a) heating preserves until loose, (b) pushing the hot goo through a sieve, and then (c) spiking it with a squeeze of fresh lemon juice or apricot brandy for that certain je ne sais quoi. Apricot perfection with just the texture you want.
I did try to sieve the jam without preheating, hoping to avoid the danger of handling something so hot. Alas, even a coarse sieve wouldn’t do the job. Preserves are just too hefty, and it did nothing about the moisture concern. Thus you are hereby warned about the danger, and we recommend doing it anyway.
THE CHOCOLATE
Yes, a chocolate component is essential. That is what separates this cookie from being a mere variation on Linzer Tarts. Same genus; different species.
What kind of chocolate? That is a matter of some debate. Look at those 12,000 recipes on line and you’ll see that different bakers try to incorporate the chocolate element in every possible way. And I do mean every. We found recipes based on:
Grated or melted chocolate mixed into the dough. This produces a wonderful cookie on its own merits, and it’s the simplest approach.The drawback? It doesn’t have the same ‘Wow’ factor as a chocolate filling or topping, and it adds flavor without texture.
Cocoa powder mixed into the dough. Again, it’s a wonderful cookie on its own, but it lacks in both Wowness and mouthfeel.
A chocolate ganache filling paired with the apricot filling. This is the most common solution in American recipes because it’s simple, tasty, has a great mouthfeel, and is easy to pack. The drawback? It looks good but not great, and too much of either layer will make your filling squirt out the sides.
A ring of chocolate ganache filling with the apricot placed inside. This is a neater variant on #2, because the piping process enforces exactly the sort of filling-discipline you need. The downside? “Piping” is #1, because many people find it fussy and hard. Visual appeal comes in again as #2. There’s nothing wrong with looking at chocolate, but seeing the jam adds a flash of appealing color. #3, I think it messes too much with the balance of flavors, though Kate disagrees. (NOTE FROM KATE: I have a higher tolerance for bitter than Scott, and find the ring of darker chocolate ganache very pleasant. This is especially true for when used with the sweeter chocolate fondant icing – see below. Also, YMMV.)
Chocolate ganache spread or piped over the top. A great compromise, but the ganache can look a little messy if you don’t pay attention, and it makes for a very sticky top. There’s no way at all you could hope to pack it in a tin. Right idea; wrong solution.
Chocolate buttercream cake frosting piped on top. Think of these sandwich cookies as a tiny cupcake made from shortbread instead of batter. Now go ahead and frost that cupcake. Taste: check. Texture: check. Appearance: check. The drawbacks? (A) It moves us away from “cookie” and into “confection,” (B) no one could even dream of packing them in a tin, and (C) there are better answers yet to come.
A chocolate glaze. Looks fine and packs like a charm, but glazes never have the desired mouthfeel, and almost always lack something on the flavor side too.
Melted chocolate a/k/a why get weird? Alas, but the texture is wrong. The cookies wants a coating that feels dry to the fingers, but gives way to the teeth without any effort. The ‘snap’ of actual chocolate turns from asset to issue in this particular case.
Chocolate melted with butter, and then either poured over the top or used as a dip. This is an ideal solution for taste, appearance, and texture, but it also softens at room temperature, which makes it a mess to eat and impossible to ship unless you heroically cut a piece of parchment as protection.
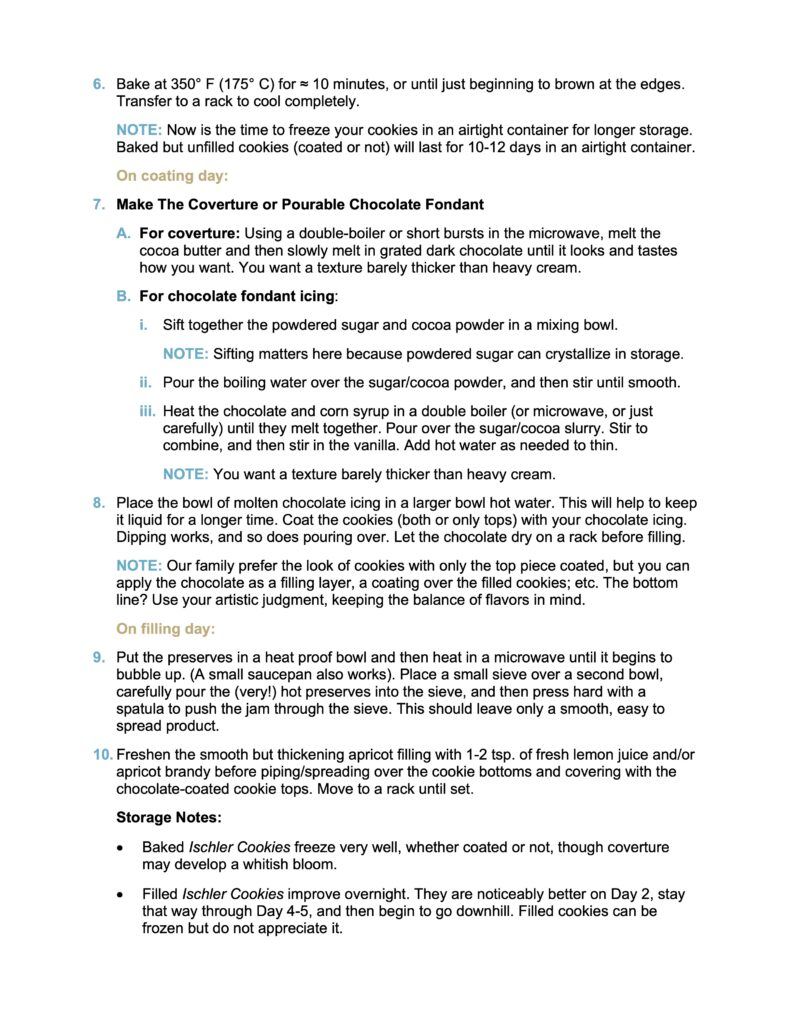
Coverture a/k/a chocolate melted with extra cocoa butter, used as either a coating or a dip. Ding! This is the best solution of all… if you keep cocoa butter on hand, or have access to specialty stores that sell ready made coverture. If you don’t…
A pourable chocolate fondant used as either a coating or a dip. Ding ding! We have finally arrived at our #1 solution for everyday pantries! Looks perfect; thick enough to give an ideal, luscious mouthfeel; dries enough to pack in a tin without worry; and the flavor is exactly as you want, since it can be varied to taste. It’s even pretty easy… or would prove to be after we figured it out.
Want chocolate icing that flows over your cookies, settles into a coating with some heft, is dry to the touch, but melts in your mouth? Pourable fondant is where it’s at.
THE ICING ODYSSEY
You may find this hard to believe, but we really did try every one of the first nine approaches (other than the frosting). See this parallel article on coverture and pourable fondant. Which one do we recommend? It’s chocolate, people! Chocolate wrapped around rich, nutty shortbread that encases a lively hit of bright apricot filling! Don’t stress. This is the very definition of a no-lose situation.
If you keep cocoa butter on hand, go with coverture. If you don’t, whip up a pourable chocolate fondant.
“But should I pour the coating over? Dip the cookies in? Cover only part of the cookies? Apply decorative stripes or some such?
[Sigh] Do what you prefer. We happened to be testing these just in time for Thanksgiving, which led to an extended family vote in favor of coating only the tops with as smooth a layer as possible. Hence the photos. But we can promise that all the others work too. Once again, you cannot lose, so do not stress.
CONCLUSION
Ischler Cookies can hold their own on any cookie tray in the world. They really are that good, and that full of history and heritage.
Are they actually better than all the other cookies in the world? Well, that one’s up to you. They call it taste for a reason, and I cannot speak for yours any more than you can speak for mine. But I can promise you this. Wise men and women will do a lot of careful tasting and re-tasting before reaching any decision.
“I better have just one more to be sure…”
A FEW FINAL NOTES
On storage:
The dough freezes as well as any other so long as you seal it in plastic wrap or an equivalent.
Baked halves keep as well as any others. Just remember that they are fragile, and do best in an airtight container like a cookie tin.
Baked and coated halves freeze well too, but coverture can sometimes develop a whitish bloom (which doesn’t alter the taste, but does detract from their beauty). Fondant made with actual chocolate can do that too, but less so. Fondant made with only cocoa powder doesn’t mind freezing at all.
Filled cookies freeze ‘okay,’ but not ‘well’ because the added moisture of the jam creates a number of potential problems. Better to freeze before filling.
On lifespan:
Ischler Cookies are a little hard if eaten right after they’re filled; remain perfect for up to a week if kept in a tin; and then go downhill.
Here’s a funny but true: we love our classic Lebkuchen recipe so much that we hesitated to work on this one out of pure loyalty. We’ve amassed a great number of honey gingerbread recipes (a/k/a “Honeycakes”), but Lebkuchen remains the a family favorite. Christmas wouldn’t be Christmas if we left them off our tray.
It turned out to be a misplaced loyalty. Elisenlebkuchen bear very little resemblance to regular Lebkuchen when push comes to shove. Our old favorite is a classic built on a flour-based dough that’s jam packed with nuts, fruits, a bit of spice, and a whole lot of honey to act as the binder. Elisenlebkuchen have even more nuts, no flour at all, and instead rely on both honey and a full five (5!) eggs to act as the binder. They are two very different experiences.
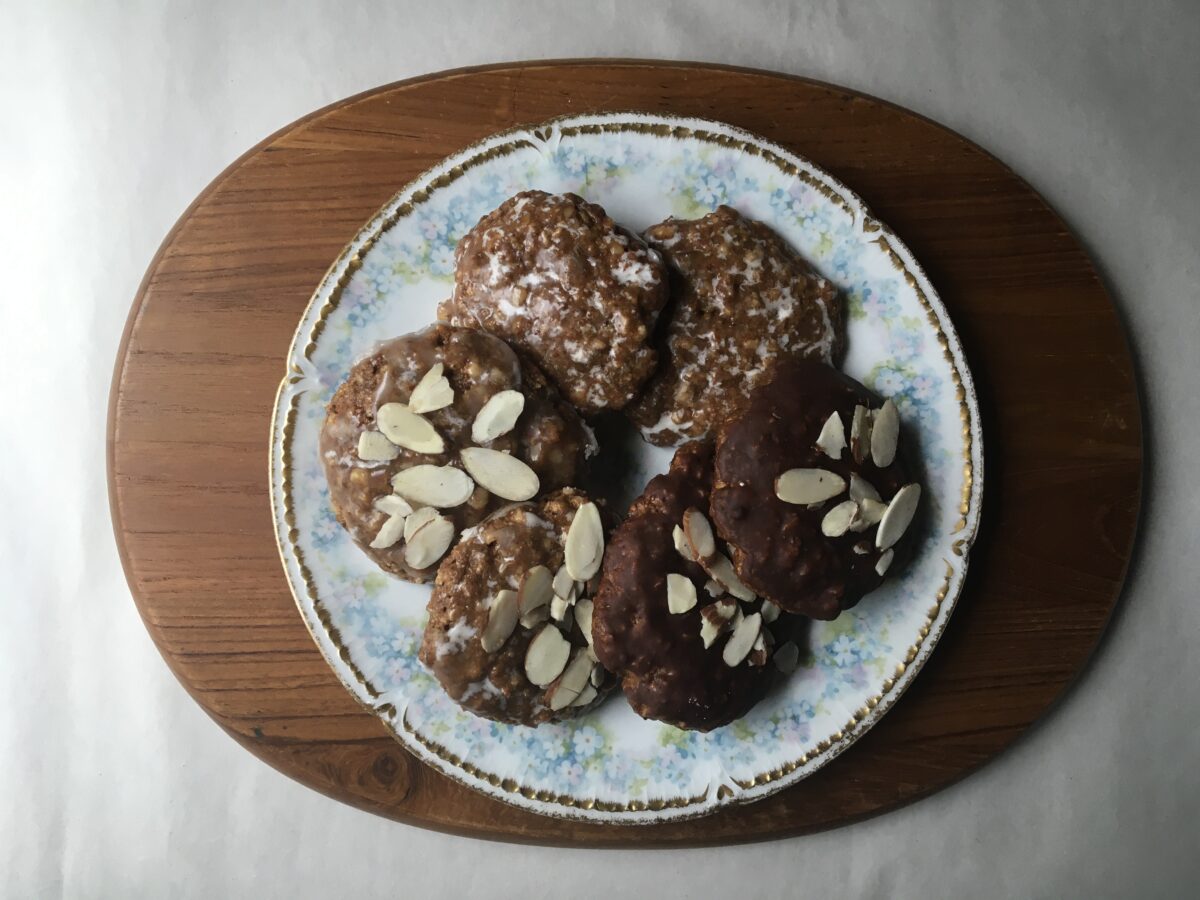
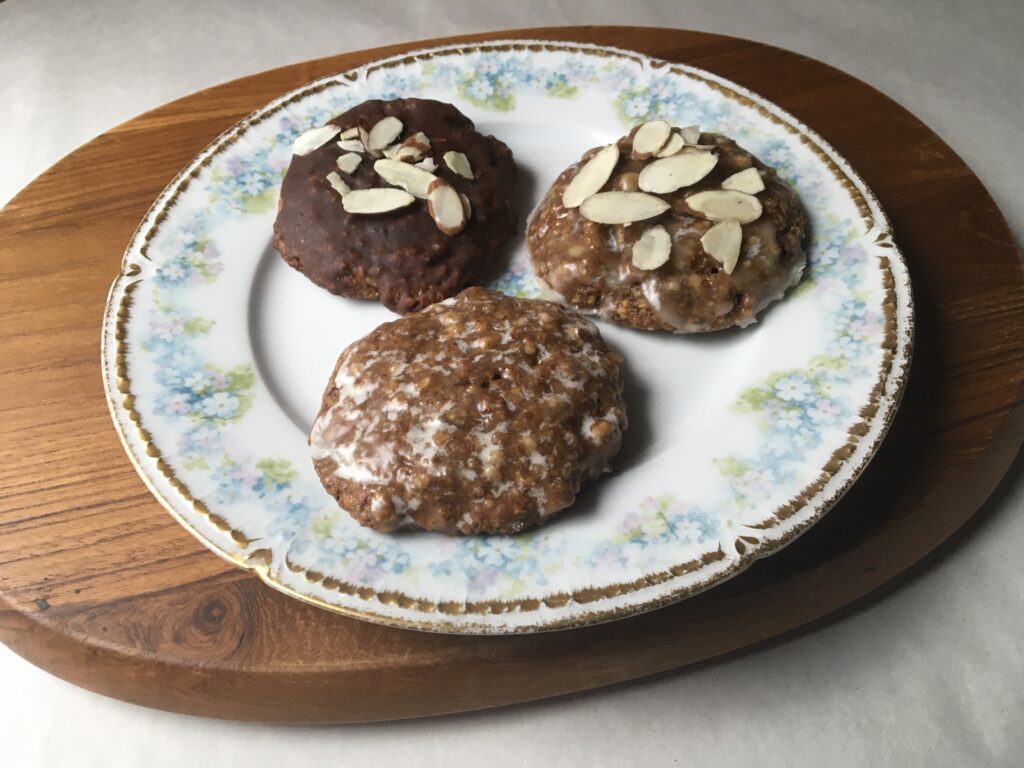
On the Upper Left: chocolate glaze with sliced almonds. On The Upper Right: vanilla glaze with sliced almonds. On The Bottom: vanilla glaze only. Use whichever you think is prettiest.
NOTE FROM KATE: These cookies are horribly deceptive in their overall “goodness.” That is, with the exception of the brown sugar, they are a “whole food,” so what could go wrong, right? I’ll have to do a caloric breakdown one of these days. Let’s just say, they contain more energy than meets the eye. If you were riding across the mountains and had to choose a fabulous, long-lasting food source for the extra space in your saddle bags, these would be it. They remind me of Panforte in their composition, but have eggs for eggstra protein. [Insert eye roll from Scott] The good news? With eggstra protein and the good-for-you fat from the nuts, the sugar in the brown sugar and honey won’t hit your bloodstream too fast. A cookie or two could hold you for hours.
Best of all? Of all our cookies and especially waybreads, these are the closest to the Lembas the elves made famous in the Lord of the Rings. Toss in an apple, and you got yourself a balanced diet for the day! (Shh…don’t tell Scott!)
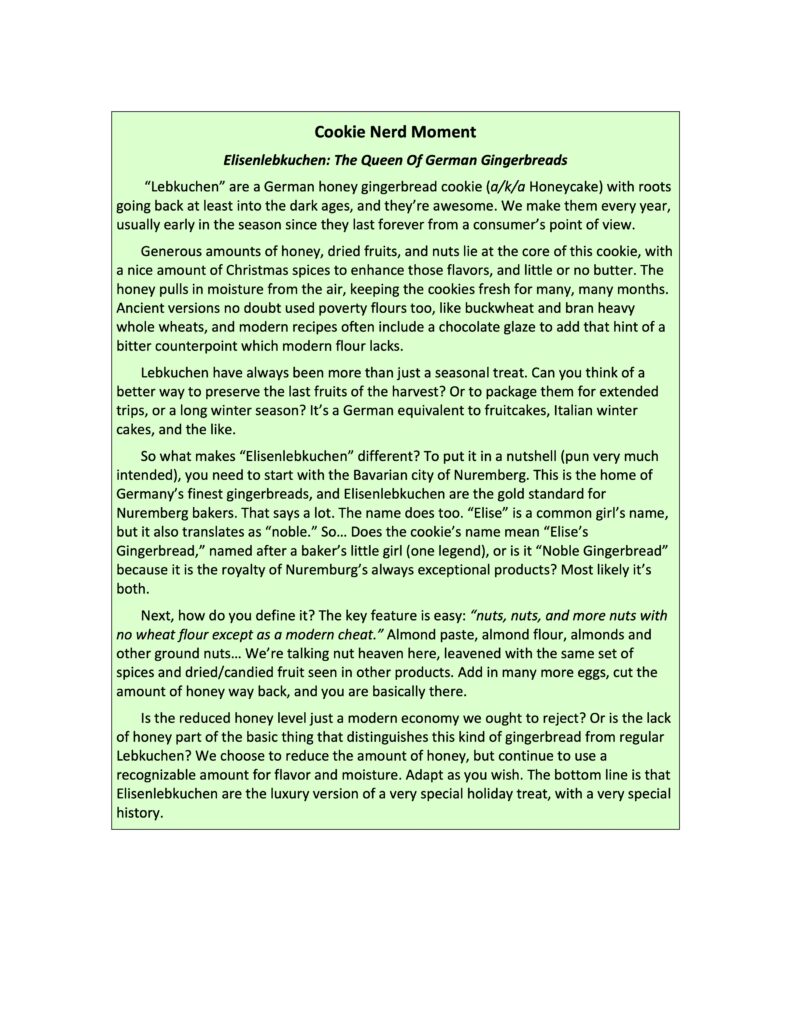
The recipe explains itself, and includes an extensive Cookie Nerd Moment with extra background material, so I will only take the time to discuss a few of the decision points you’ll face when trying this out on your own:
Should I use marzipan or ground nuts? It’s entirely up to you, and makes very little difference. Just remember that Marzipan has almost as much sugar as nuts (our recipe has a ratio of 4:5), and usually has some extra sweetness lurking in the background. If you make this substitution, do it by weight and assume the Marzipan is actually a 50/50 mix. You need to reduce the amount of both almonds and sugar accordingly.
Can I play with the spices? Of course you can! But we do recommend that you (a) stick to the basic, quite generous amount of overall spice, and (b) think of the spices as an accent to bring the best out of your chosen nuts.
Can I substitute in other nuts? Yes, but these are the classics used in Nuremberg. Be aware that you’ll be departing off road from the One True Tradition.
Should I glaze the cookies? Yes. That was easy enough. The glaze definitely enhances the overall look, especially since the bottoms are not glazed.
Should I use the vanilla glaze or the chocolate? Tradition allows for either one, so it’s entirely up to you. Both are thin enough to be only an accent flavor. This cookie is all about the nuts, and even I, a lifelong chocoholic, don’t want to mess with that purity.
Should I add the nut garnish on top? As you wish. They are only there for the sake of appearance and fair warning to anyone who sees them lying there on your tray.
Should I add the optional salt? And why specify “large grain” salt? This is a nontraditional option that we liked so much that we felt obliged to share. Both Kate and I have a strong preference for salted nuts over plain when we snack on them out of hand. The optional salt creates that effect in a light way. We recommend large grain salt sprinkled on top of the glaze because that is the best way to give a salty highlight. The base recipe also contains some salt, but that is more of a bare minimum that the cookie would suffer without.
That’s it folks. Enjoy!
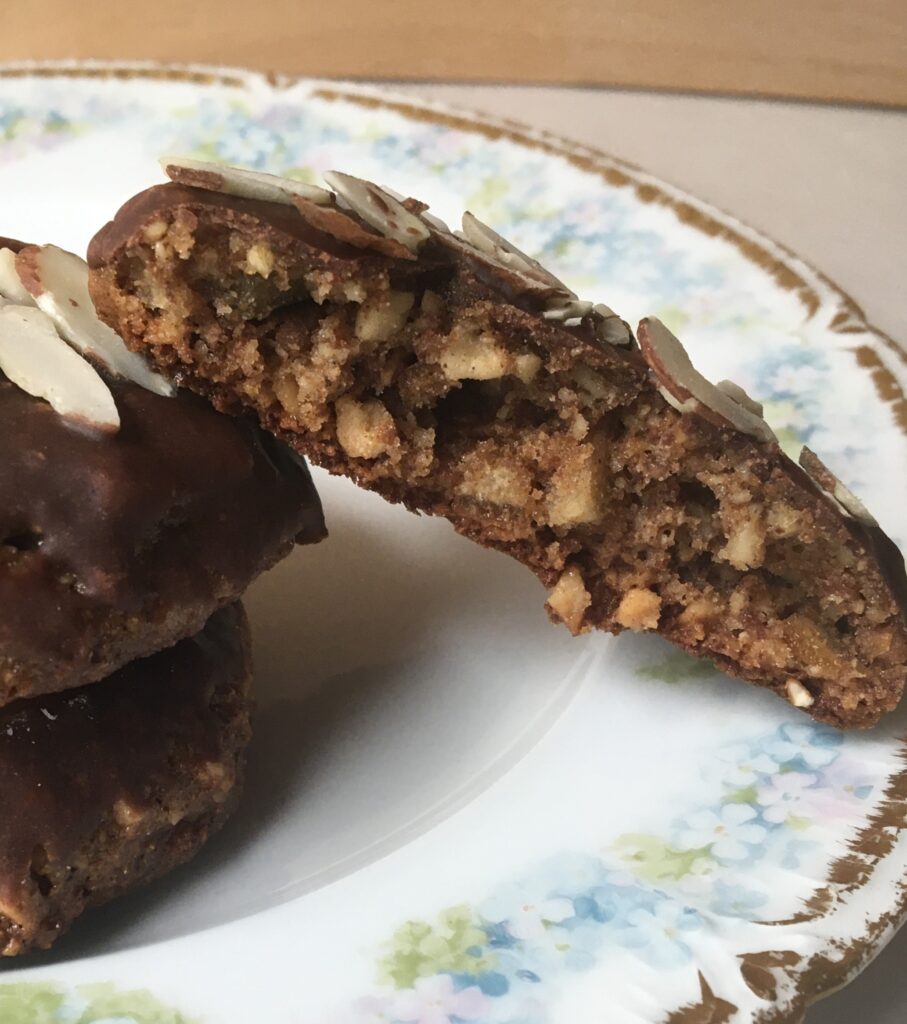
Nuts, nuts, nuts, and fruit. The only other things inside this cookie are honey and eggs as the binder.
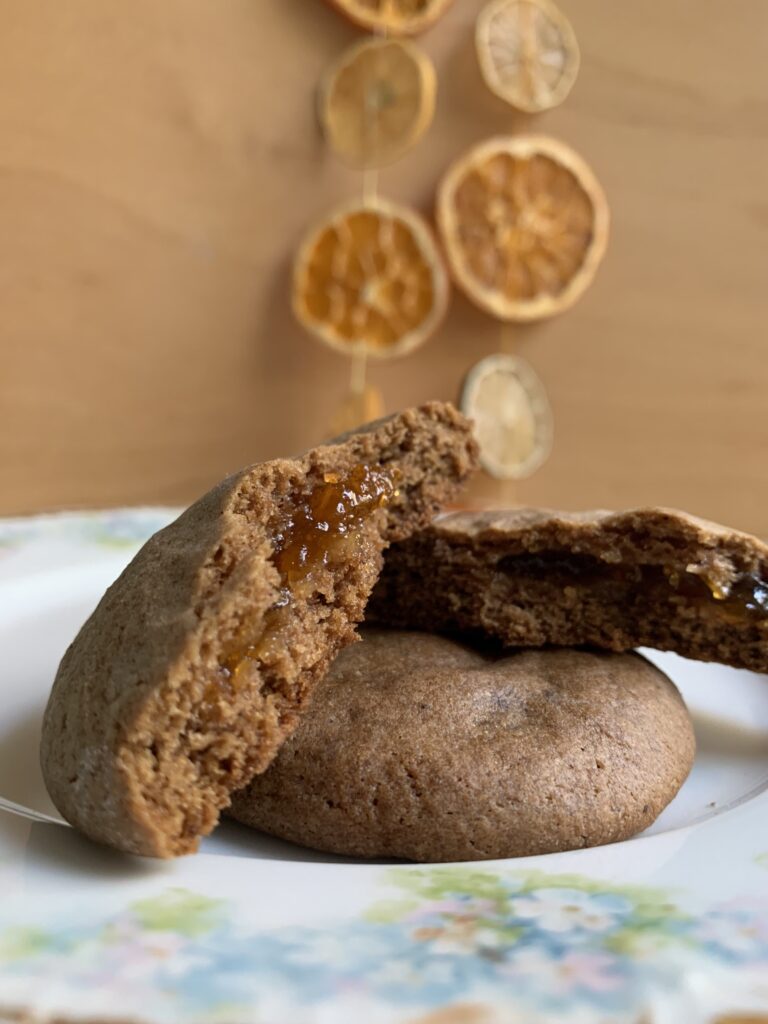
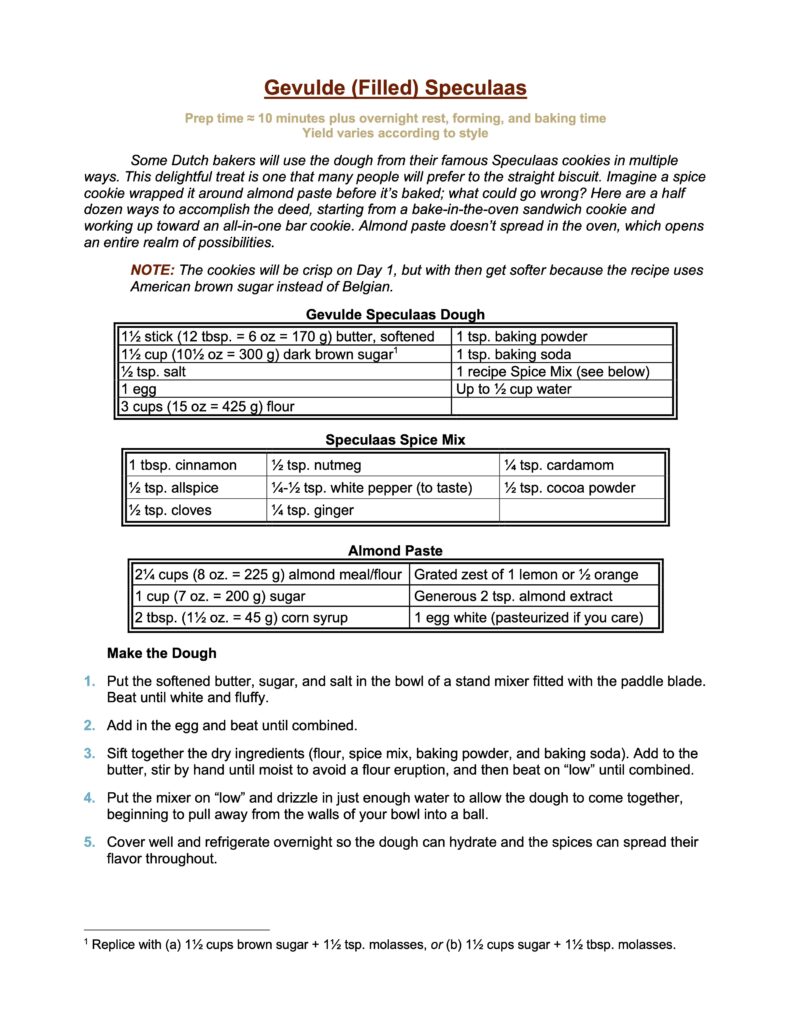
Speculaas filled with almond paste? Thank you Mom, can I have another?
Our published book, Heritage Cookies of the Old and New World, has a wonderful recipe for Nut Dough Speculaas, which offers up a soft, tender version of the famous Dutch spice cookie. This recent article is all about the ultra-authentic, thin-and-crispy version, featuring a recipe straight out of Belgium. Our research for that article accidentally revealed a third style that is immensely popular next door in Holland (a/k/a the Netherlands): Speculaas dough filled with almond paste.
The Nut Dough recipe makes an extra tender version. The 100% Authentic recipe comes out thin and crisp. This is the one in the middle; toothsome, gently spiced, and made with U.S. pantry ingredients. Take that and fill it with homemade almond paste? [Finger Kiss]
As always, you can skip to the bottom if you want the recipe alone. The discussion of our stumbles and revelations along the way is going to take some time.
A SIMPLE, PANTRY-FRIENDLY SPECULAAS DOUGH
Easy peasy, I promise. Yes, this is a top shelf American version of a very European cookie, but that doesn’t make it complicated. The approach couldn’t be more standard. Cream the butter and sugar, beat in an egg, and then mix in the flour, leavening, and spices. Cover and refrigerate overnight so the flour can hydrate and the spices even out. Form and bake however you wish.
The only potential complication lies in the hydration part. You are after a drier dough with only enough moisture to hold together when squeezed. (the Almond Paste filling will add any richness you think is missing). That means the base recipe is likely to be too dry outside of a humid environment. You solve that by adding extra water a tablespoon or two at a time until it holds when squeezed. One or two is usually enough, though it could take as many as six to eight.
Just go sparingly! It is much easier to add more water in than to take any out. I did one batch with the full eight tablespoons (½ cup), and had to double the batch in order to avoid throwing the whole thing out. Tripling would have worked even better. Fortunately, the recipe has enough flexibility to have saved me from that extreme.
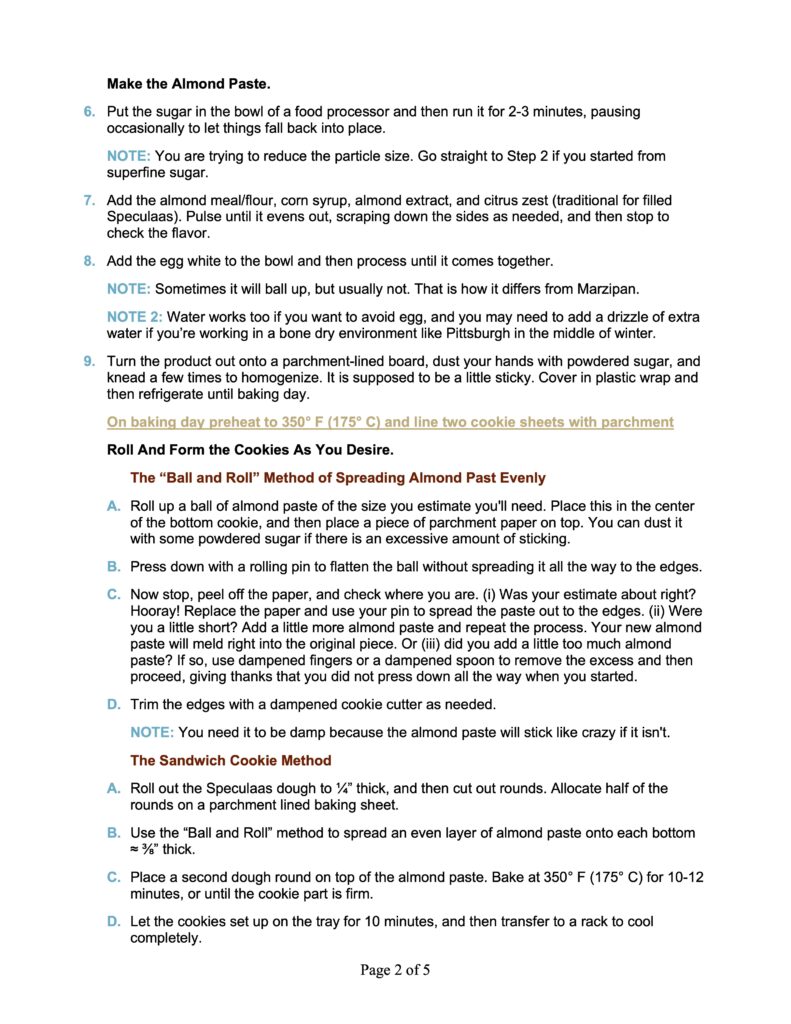
THE ALMOND PASTE FILLING
No need to waste a lot of time on this piece either. Almond Paste is super easy to make, and we have a whole discussion of it in the article on Marzipan. The only difference for this purpose is the subtle addition of some citrus zest to help it meet and marry with the flavors of the dough.
We include instructions for the almond paste in the cookie recipe down below. I’ve added our recipe for Marzipan and Almond Paste too, as a free bonus. [NOTE FROM KATE: I love anything resembling marzipan, and the orange notes in this paste have a delicious more-ishness to it. So much so that Scott had to keep chasing me away as I tried to execute numerous rounds of diligent quality control.]
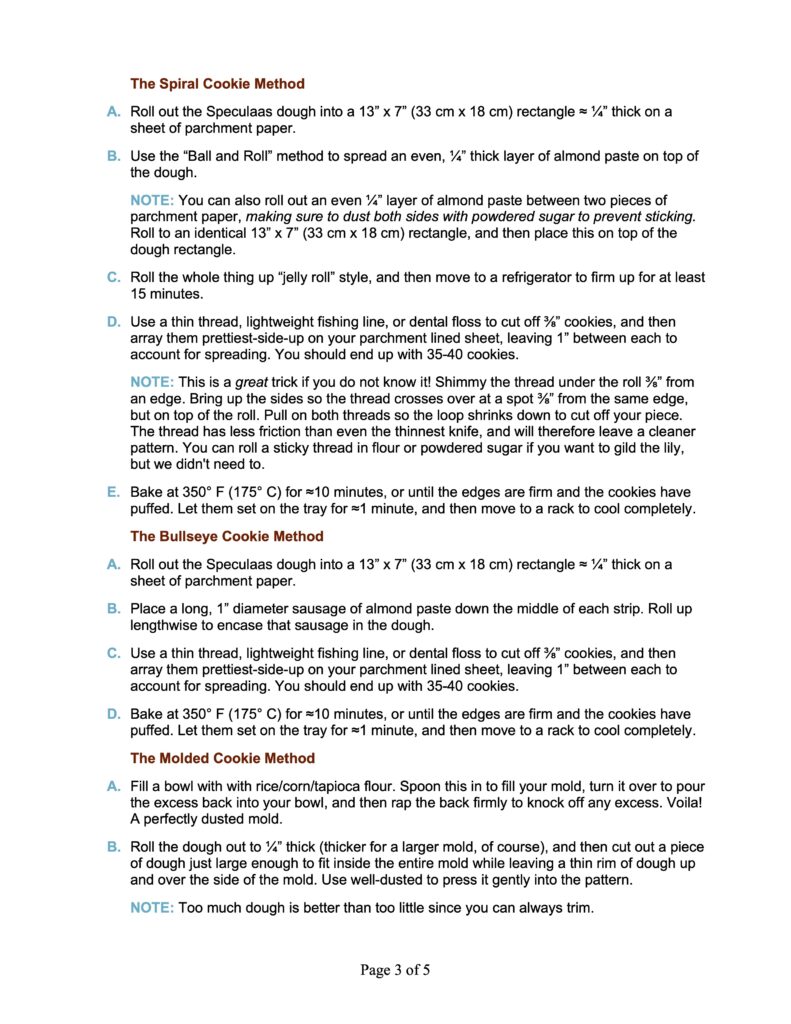
THE MANY DIFFERENT SHAPES
And now we get to the long part. But not because the shaping is hard! It isn’t. The dough is friendly, too, and the techniques are all straightforward. The length comes from the sheer number of options. This article lists a full dozen (12!) possibilities, and you don’t have to stop there. Jam and fruit fillings spread in the oven, searching for any crevice where they can leak out to create black and bitter disaster on your cookie sheet. Almond Paste does not. That feature opens up your options to basically any cookie shape you can imagine.
Bar Cookies? We Don’t Need No Stinking Bar Cookies!
Honesty compels me to admit that most people make Gevulde Speculaas as a bar cookie. You simply coat the bottom of the baking dish with one layer of cookie dough, spread a thick layer of almond paste on top (it should be noticeably thicker than the dough), and then cover that with a second layer of dough. Bake at 350° F (175° C) for about 18-25 minutes, or until the cookie part on top has set by the edges but is still a little soft in the center.
We, however, have a rule: no bar cookies! (Read the article on Chocolate Fudge Cookies if you insist on knowing why). That changes the focus to all those infinitely more interesting options, such as…
Sandwich Cookies!
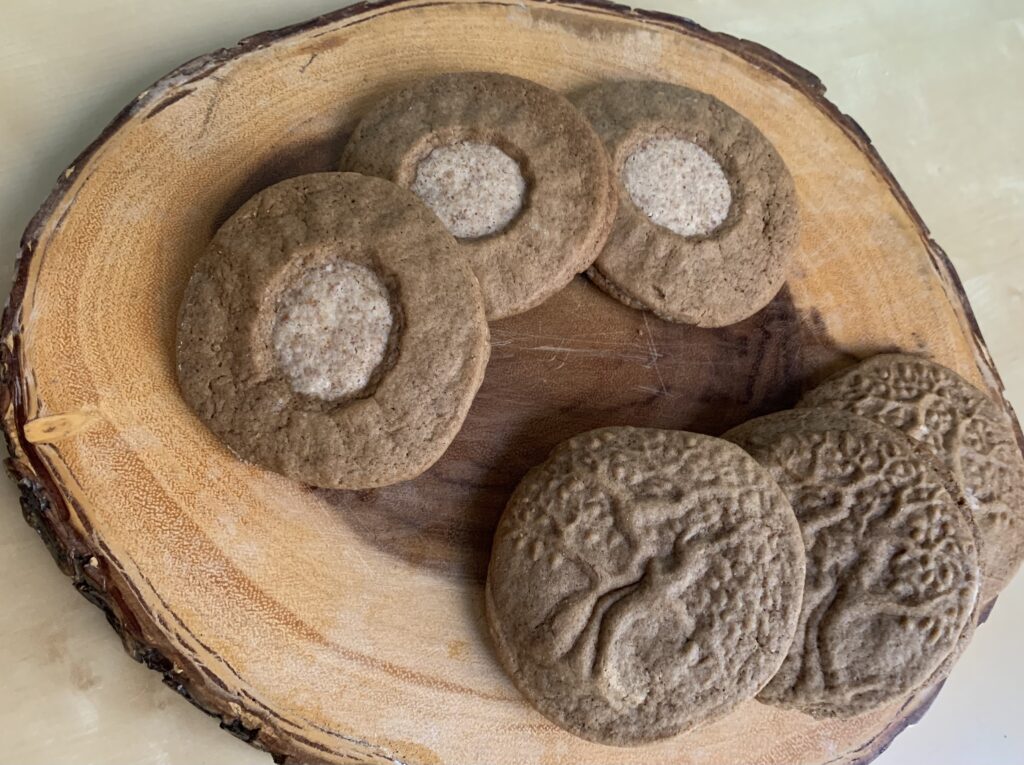
Roll out the dough to 3/8″ thick. Cut out your choice of shape (we used larger rounds) and mark half of them with whatever you want for the top (we did a cutout for one, and a cookie stamp for a second.
Array the bottoms on a lined baking sheet (or two), keeping 1″ between each piece to account for spreading. Coat the bottom of the cookie with almond paste,* and then place the tops on top. Bake at 350° F (175° C) for about 12-15 minutes, or until the edges have set and the cookie has puffed up.
* Our favorite way to spread the almond paste goes like this:
Roll up a ball of almond paste of the size you estimate you’ll need. Place this in the center of the bottom cookie, and then place a piece of parchment paper on top. You can dust it with some powdered sugar if there is an excessive amount of sticking.
Press down with a rolling pin to evenly flatten the ball without spreading it all the way to the edges.
Now stop, peel off the paper, and check where you are. (A) Was your estimate about right? Hooray! Replace the paper and use your pin to spread the paste out to the edges. (B) Were you a little short? Add a little more almond paste and repeat the process. Your new almond paste will meld right into the original piece. Or (C) did you add a little too much almond paste? If so, use dampened fingers or a dampened spoon to remove the excess and then proceed, giving thanks that you did not press down all the way when you started.
Trim the edges with a dampened cookie cutter as needed. NOTE: You need it to be damp because the almond paste will stick like crazy if it isn’t.[NOTE FROM KATE: I was way too impatient, so I made a ball of almond paste and squished it with the bottom of a wet glass. It’s messier, I admit I had to sop up extra water off a cookie or two. It was fast though, even enough, and got the job done.]
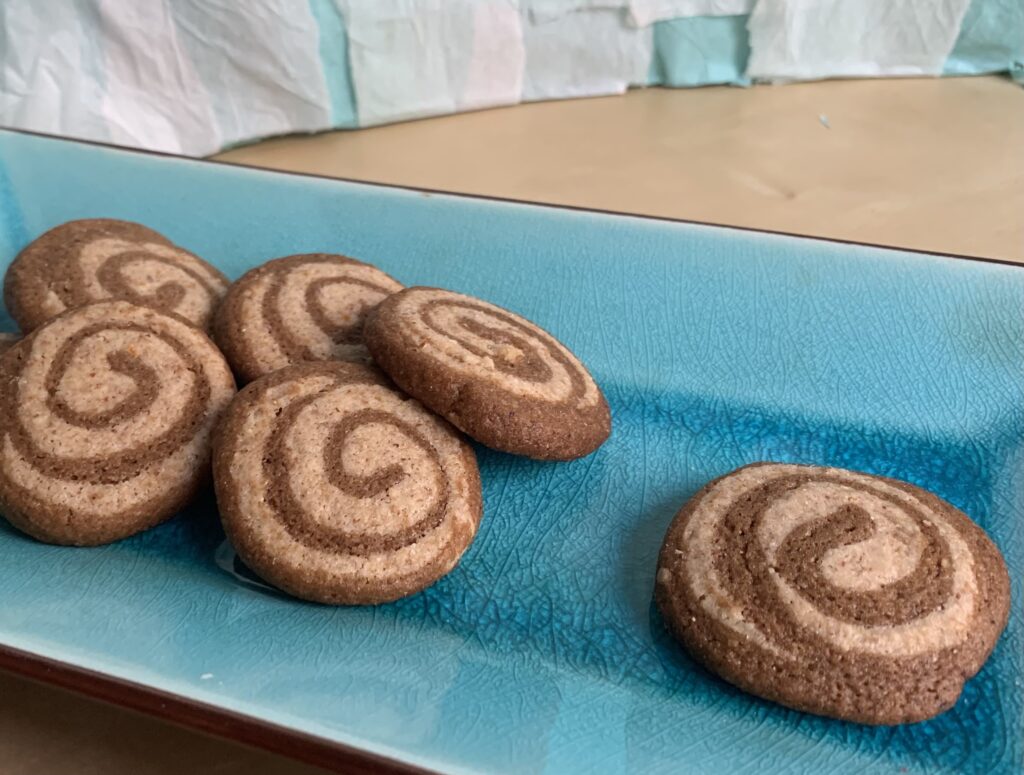
Spiral a/k/a Pinwheel Cookies!
Roll out the Speculaas dough into a 13” x 7” (33 cm x 18 cm) rectangle ≈ ¼” thick.
Use the “balls of almond paste” trick described above in the sandwich cookie section to create an almond layer that is also ¼” thick on top of the dough layer. Making it as even as possible will yield the best patterns in the end.
Roll the whole thing up “jelly roll” style, and then move to a refrigerator to firm up for at least 15 minutes.
Use a thin thread, lightweight fishing line, or dental floss to cut off ⅜” cookies, and then array prettiest-side-up on your parchment lined sheet, leaving 1” between each to account for spreading. You should end up with 35-40 cookies. NOTE: This is a great trick if you do not know it! Shimmy the thread under the roll ⅜” from an edge. Bring up the sides so the thread crosses over at a spot ⅜” from the same edge, but on top of the roll. Pull on both threads so the loop shrinks down to cut off your piece. The thread has less surface area than even the thinnest knife, and will therefore leave a cleaner pattern. You can roll a sticky thread in flour or powdered sugar if you want to gild the lily, but we didn’t need to.
Bake at 350° F (175° C) for ≈10 minutes, or until the edges are firm and the cookies have puffed. Let them set on the tray for ≈1 minute, and then move to a rack to cool completely. NOTE: The baked tops should show a distinct pattern, but the bottoms against the tray will turn into an almost uniform brown.
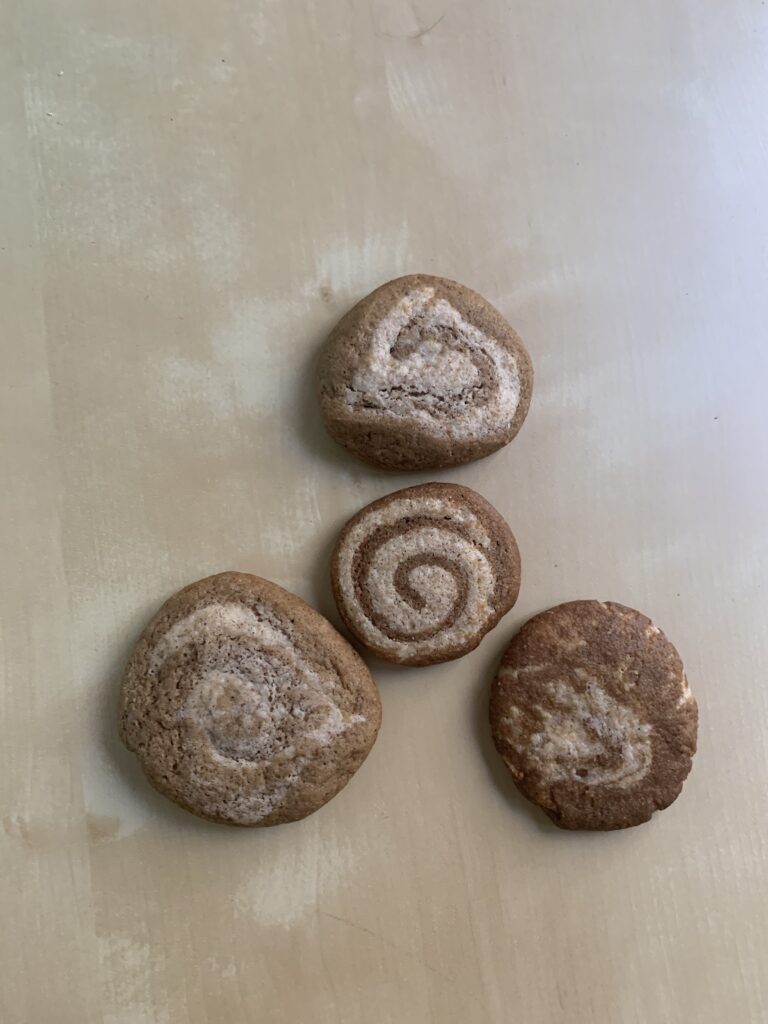
The ends are never as pretty, especially when you need to press down to flatten the odd shaped pieces out. This shows three end pieces surrounding one middle piece.
Bullseye Cookies! [NO PHOTOS]
Roll out the Speculaas dough into a 13” x 7” (33 cm x 18 cm) rectangle ≈ ¼” thick on a sheet of parchment paper.
Place a long, 1” diameter sausage of almond paste down the middle of each strip. Roll up lengthwise to encase that sausage in the dough.
Use a thin thread, lightweight fishing line, or dental floss to cut off ⅜” cookies, and then array them prettiest-side-up on your parchment lined sheet, leaving 1” between each to account for spreading. You should end up with 35-40 cookies.
Bake at 350° F (175° C) for ≈10 minutes, or until the edges are firm and the cookies have puffed. Let them set on the tray for ≈1 minute, and then move to a rack to cool completely.
Tubes and Lengthwise Lines!
Roll out a thinner spiral and cut it into 2” lengths. Starting with a 13” x 6” (33 cm x 15 cm) rectangle should do it.
For tubes, bake at 350° F (175° C) for ≈11-12 minutes, or until the outside is firm and the cookies have puffed. NOTE: The tubes will settle into being flat on the bottom. We haven’t figured a way around that.
For Horizontal lines, use a thin paring knife or a long thread to cut through the top from end to end. Array these curved side down on the baking sheet. What would have been spirals when viewed from the edge in will appear as lines when the roll is cut lengthwise. NOTE: you can also use the paring knife to cut almost all the way through, leaving only a thin piece at the bottom to connect the two halves. Unfold this like an opening flower and you’ll have a double-width line cookie. Bake these at 350° F (175° C) for ≈9-11 minutes depending on thickness.
Let the baked pieces set on the tray for a few minutes, and then move to a rack to cool completely.
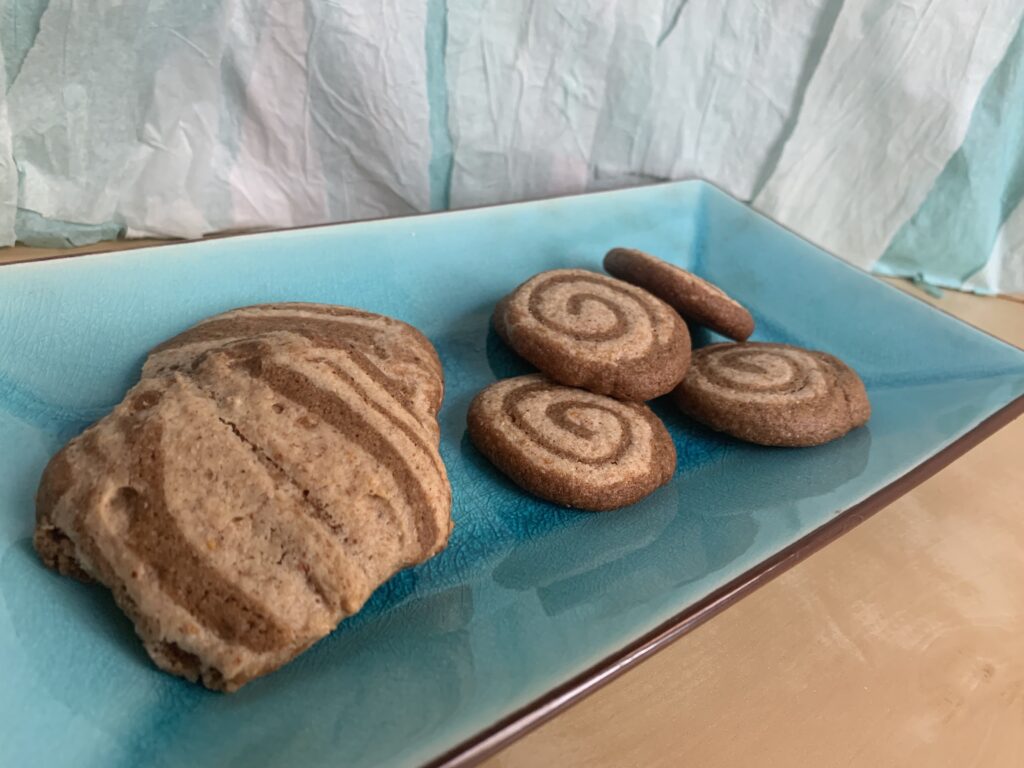
Line cookies on the left, spirals on the right. It’s basically the same pattern, but in one case you cut across to reveal the spiral, and in the other you cut lengthwise to reveal straight lines.
NOTE: You can use the “Bullseye” method here as well, or make the final shape a little thinner and broader by creating a filled rectangle instead of a filled tube.
NOTE #2: For Tube Cookies it’s it’s often worth decorating the top of the tube/cake with slices almonds. See the photos of the “Bake And Slice” method down below.
Molded and Filled Speculaas (Works With Jam Too)!
Apricot jam for the filling worked great, but we lost the pattern on top because I forgot to chill before baking.
Filled and plain Speculaas using the 100% authentic, Belgian Brown Sugar dough instead of this U.S. Brown Sugar dough. That time I did chill before baking.
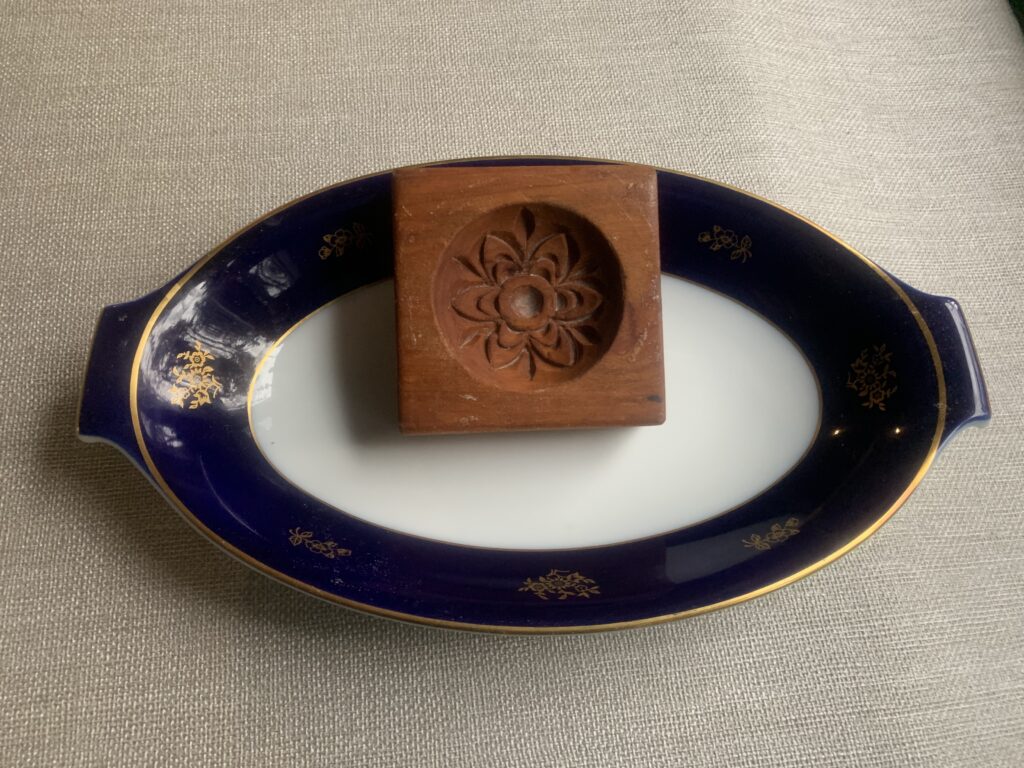
Our favorite mold for individual Filled Speculaas (and gingerbreads of all kinds). We bought it at an actual castle on a trip to visit family in the Czech Republic! It was actually called a “butter mold” rather than a cookie mold, not that it makes any difference.
This Ma’amoul mold would have also worked, but can you imagine the amount of almond paste in each cookie?
Fill a bowl with with rice/corn/tapioca flour. Spoon this in to fill your mold, turn it over to pour the excess back into your bowl, and then rap the back firmly to knock off any excess. Voila! A perfectly dusted mold. (See the articles on the Speculaas Master Class and Filled Gingerbread cookies for more variations and details). FYI, we used this mold to make individual portions:
Roll the dough out to ¼” thick (thicker for a larger mold, of course), and then cut out a piece of dough just large enough to fit inside the entire mold while leaving a thin rim of dough up and over the side of the mold. Use well-dusted to press it gently into the pattern. NOTE: Too much dough is better than too little since you can always trim. NOTE #2: Holes aren’t a disaster. Patch them by pressing in extra dough with your floured fingertips. It will subtract from the inside space by a smidgen, but no one should see it when the cookies are baked.
Add a filling of your choice to a level that reaches level with the top of the mold. REMEMBER: That does NOT mean the top of your dough rim around the edge! Do that and you’ll have too much filling, which will lead to leaking, bursting, and other bad results.
Roll and cut out a second piece of dough sufficient to cover the filled in mold. Place this on top and then run a rolling pin over the entire thing to join the seams. Tap the filled cookie out with the mold-side up, and then use a paring knife to clean up the edges.
Array on a lined baking sheet, and then chill in the refrigerator for at least 15-30 minutes. This will help to keep the pattern a little sharper.
Bake at 350° F (175° C) until the edges are firm. It took ≈11-12 minutes for our smaller mold, but will obviously vary according to the size and thickness of the one you choose to use.
NOTE: It’s a good idea to precook any jam filling before you use it (simply bring it to a boil in the microwave or a small pan). Raw jam tries very, very hard to find a crack it can seep out of. The precooked jam is much, much less runny and will only seep out if you’ve made a noticeable mistake in sealing things up.
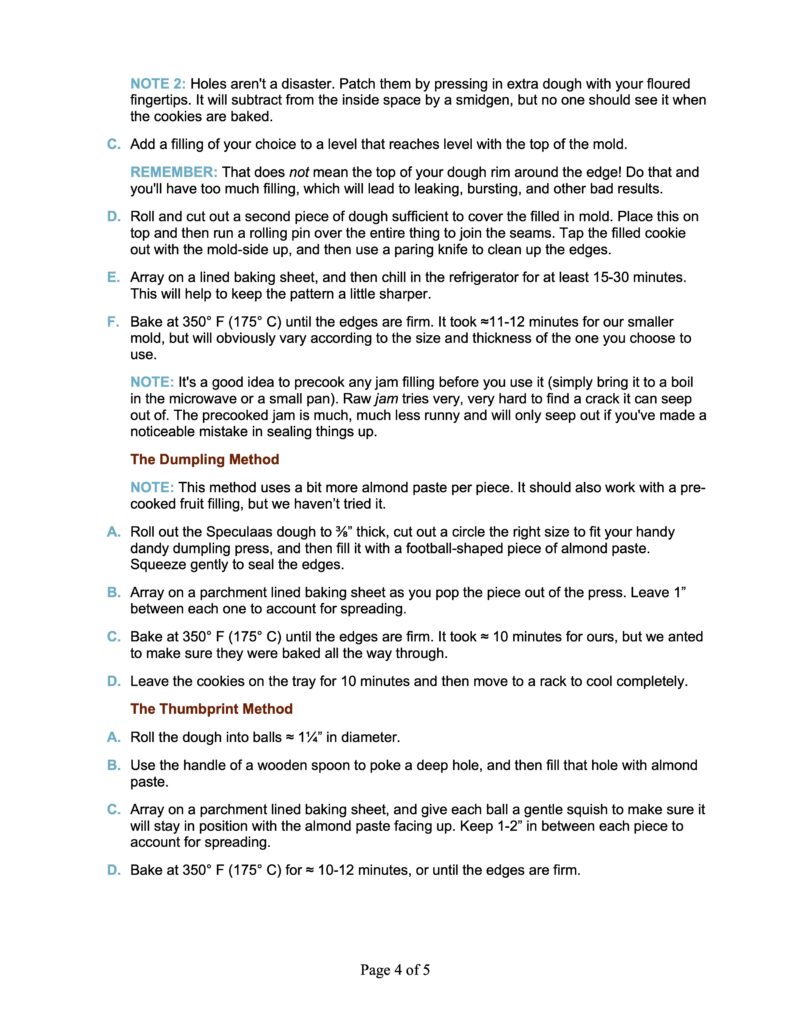
Cookie “Dumplings” and “Ravioli”!
Note the extra thick amount of almond inside
Our handy dandy dumpling press, last used when we were working up the recipe for Croatian Rafioli
NOTE: This method uses a bit more almond paste per piece. It should also work with a pre-cooked fruit filling, but we haven’t tried it.
Roll out the Speculaas dough to ⅜” thick, cut out a circle the right size to fit your handy dandy dumpling press, and then fill it with a football-shaped piece of almond paste. Squeeze gently to seal the edges.
Array on a parchment lined baking sheet as you pop the piece out of the press. Leave 1” between each one to account for spreading.
Bake at 350° F (175° C) until the edges are firm. It took ≈ 10 minutes for ours, but we anted to make sure they were baked all the way through.
Leave the cookies on the tray for 10 minutes and then move to a rack to cool completely.
Thumbprints! [No Photo]
Duh. I can’t believe I didn’t think of this in time to get some done for the photo shoot. Bad baker. Bad, bad, bad. No biscuit for you.
Roll the dough into balls ≈ 1¼” in diameter.
Use the handle of a wooden spoon to poke a deep hole, and then fill that hole with almond paste.
Array on a parchment lined baking sheet, and give each ball a gentle squish to make sure it will stay in position with the almond paste facing up. Keep 1-2” in between each piece to account for spreading.
Bake at 350° F (175° C) for ≈ 10-12 minutes, or until the edges are firm.
Bake-And-Slice Rolls and Rectangles!
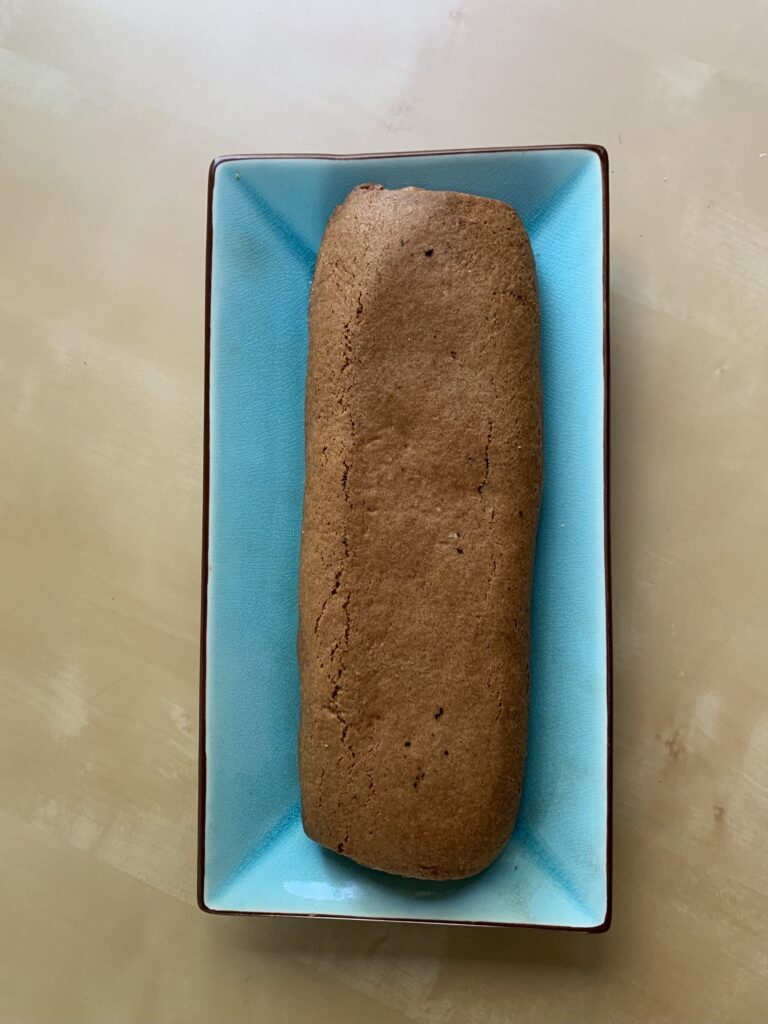
This began it’s life as a Spiral Cookie roll. It was baked before slicing, which allowed it to slump into a rectangle.
The flattened spiral from a baked-before-slicing roll.
Make a roll as described above for Spiral or Bullseye cookies, but a little thicker. You achieve this by starting with a 13” x 8” (33 cm x 21 cm) rectangle.
Bake at 350° F (175° C) for ≈20 minutes, or until the outside is firm, the tube has slumped down into a rectangular “cake”, and cookies have puffed.
Let this set on the tray for ≈5 minute, and then move to a rack to cool completely. Slice with a thin, sharp, serrated knife after it’s completely cool. You will end up with elongated, almost-rectangular spirals.
A “Bullseye Cookie” bar decorated with almond slices. We tried to have this one start as a filled rectangle instead of a roll, but that only enhanced the slumping. Still tasty, and kind of nice if you want the sharper edges in the end.
Don’t Bother To Fill At All
Straight, unfilled Speculaas made from this dough. Not bad, are they?
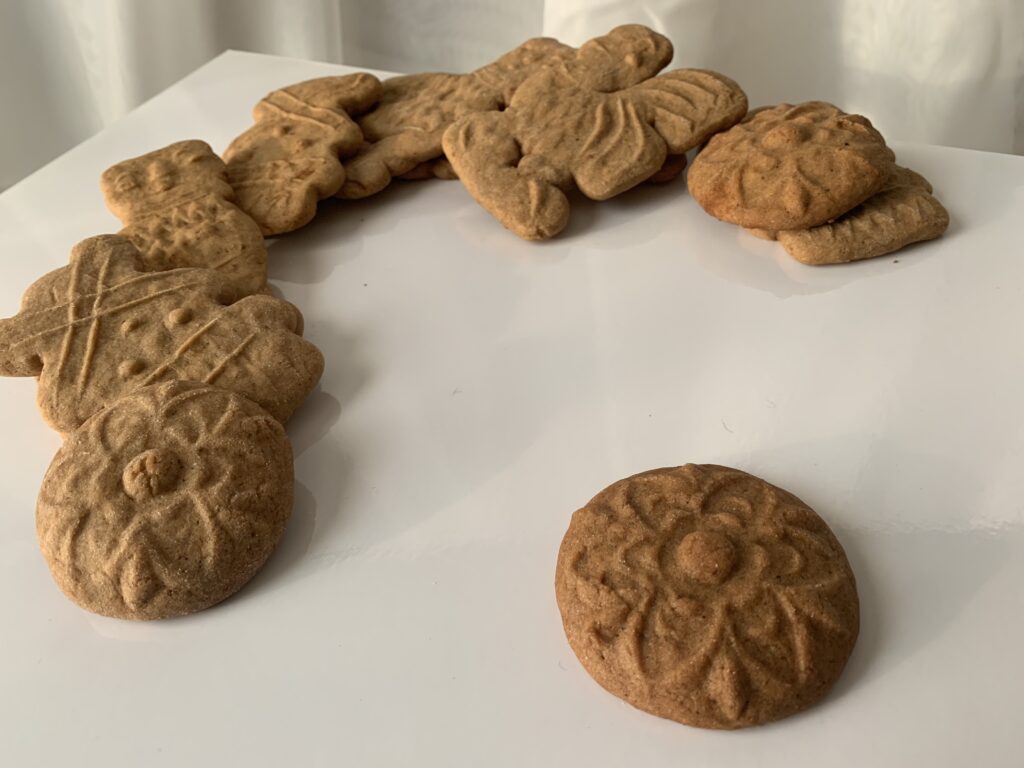
The dough works fine as a plain old Speculaas cookie pressed into a mold. It doesn’t hold patterns quite as well as the 100% Authentic Speculaas, but it’s pretty darned close. Bake according to the instructions in that article using 350° F (175° C) instead of 375° F (190° C). The molasses in the U.S. brown sugar apparently makes them cook just that little bit faster.
NOTE: You may (may, not will) want to knead in a small amount of extra flour or starch if the dough is particularly soft and sticky. That’s a useful characteristic for the many methods described above, but can result in either sticking or unreliable patterns for straight-out molded cookies. Be judicious, as it won’t take much.
CONCLUSION
The dough is standard and easy. The almond paste is standard and easy. The shaping is fun and interesting once you pick a method (and get used to liking off almond paste from your fingers). And the flavor is just about perfect if you want the world’s friendliest, most accessible, spice cookie treat.
What’s not to love?
We urge you to give it a try. If you do, there’s basically no way it’s ever going to leave your repertoire. They are, as our English friends say, intensely “more-ish.”
Enjoy!
IMPORTANT: You want to make Almond Paste for Gevulde (Filled) Speculaas, not marzipan
A traditional Central European Christmas treat. They require some patience because the special molds need to be filled one by one, but they are unbelievably rich, unbelievably good, and unbelievably charming.
Two things happened right after I published our recipe for Oreshki, the Eastern European faux-nut cookie made with a light, crispy shortbread crust and a luscious dulce de leche filling. First, all our Ukrainian, Russian, and other Eastern European friends descended like a pack of starving hyenas on a fat old antelope with a limp. Don’t worry, we got out of the way in time to avoid injury. The show was magnificent!
Second, our Czech, Polish, and other Central European friends said, “Those are really cool, but it’s not the ‘Molded Nut’ cookies I grew up with. You should work on those too!”
Oh? Kate had only a vague memory of Ořechy from her childhood. Grandma Kandler had the molds, but never made the cookies. “Too much hassle.” So I set to researching and uncovered four – only four! – fairly consistent recipes. It took some tweaking to get them right, but Oh…My…Heavens! We will not have a Christmas tray again that does not feature these ridiculously rich, tender, and flavor filled nutty-mocha treats. They are a hassle, yes. But they are also unique, and unbelievably good.
NOTE ABOUT THE NAME: The Eastern and Central European faux-nut cookies have the same name, languages and spelling aside. It’s pronounced “OH-RZHE-ch-ee”, more or less, with a rolling “r” and the “zh” combined into a single sound that English doesn’t possess, and the “ch” being that guttural, back of the throat sound like the Yiddish name Chaim. English doesn’t have that sound either. The “ee” sound at the end denotes a plural, like putting an “s” at the end of an English word. It technically translates as plain old “nuts”, but in context it’s understood to mean “walnuts;” and that is the shape of the mold. You’ll get it wrong if you try to pronounce it properly, especially since there are small variations between the different Slavic tongues. But who cares? You’ll get credit for trying, and everyone will know what you mean.
The name is the same; but the two cookies could not be more different. The Eastern European one is plain, crunchy, and child friendly. It rings the same chimes as Alfajores in South America, Millionaire’s Shortbread in England, and Stroopwafels in the Low Countries.
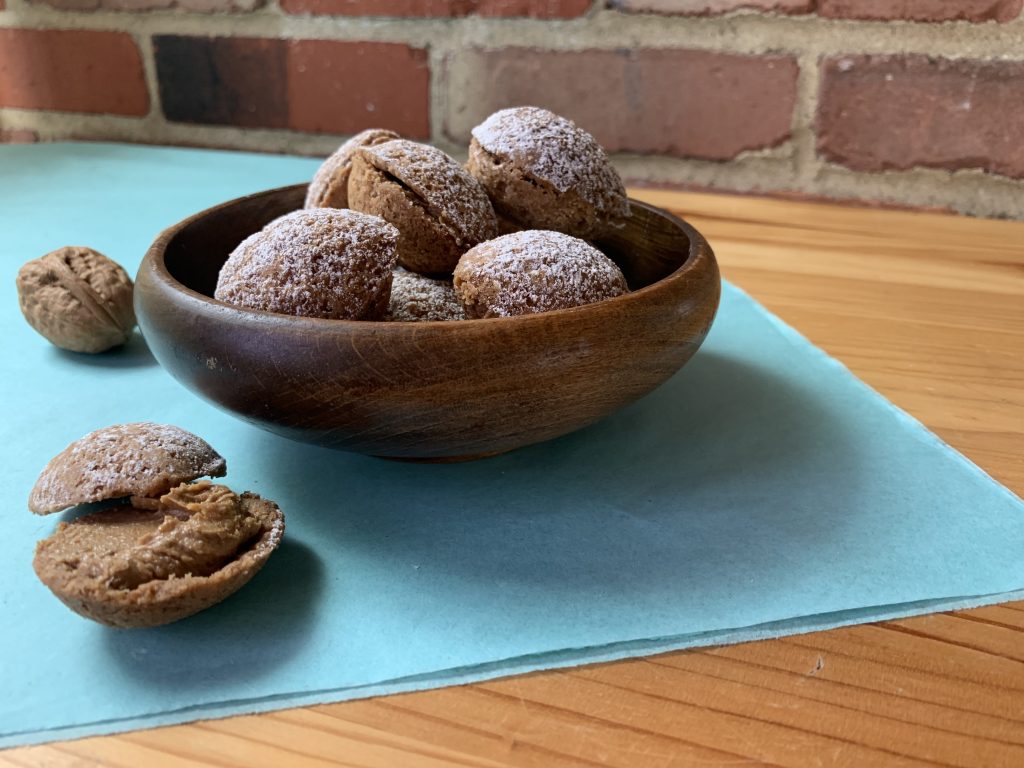
The Central European cookie (this one) is a sophisticated flavor bomb aimed at knocking adults on the seat of their pants in rapture. The shell is a walnut cookie so tender you have no choice but to eat them in one big bite. They’ll crumble under your teeth if you try to stretch it to two. The filling is less “buttercream” than a “whipped, flavored butter” redolent with coffee and rum. It’s so rich that we include an instruction to use it sparingly!
The final flavor becomes mocha because the cocoa in one part and the coffee in the other combine into a single unit in your mouth. It doesn’t matter which part (shell or filling) gets the cocoa powder, and which one gets the coffee, so long as each side is only half the final flavor. The recipe below goes with cocoa in the shell and coffee in the filling, but both ways work great.
The Dough Is Easy; The Molding Takes Patience
The dough is simple to make; a straightforward creaming method approach. Beat together the butter and sugar until light and fluffy, beat in an egg with an optional touch of extract and/or spice, and then mix in the dry ingredients. The only complication is that one of those ingredients is a large amount of grated walnuts. We’ve yet to see walnut meal in a market, but it’s easy enough to make. Toast whole walnuts for 8-10 minutes in a 350° F (175° C) oven until they’re fragrant. Remove, cool, and then grate down to meal.
NOTE: A rotary hand grater is by far the best tool for this task. Food processors get dicey because walnuts go from “chopped” to “nut butter” in a heartbeat, much faster than almonds or even peanuts. On the plus side, it doesn’t need to be flour-fine. Grating them is plenty good enough.
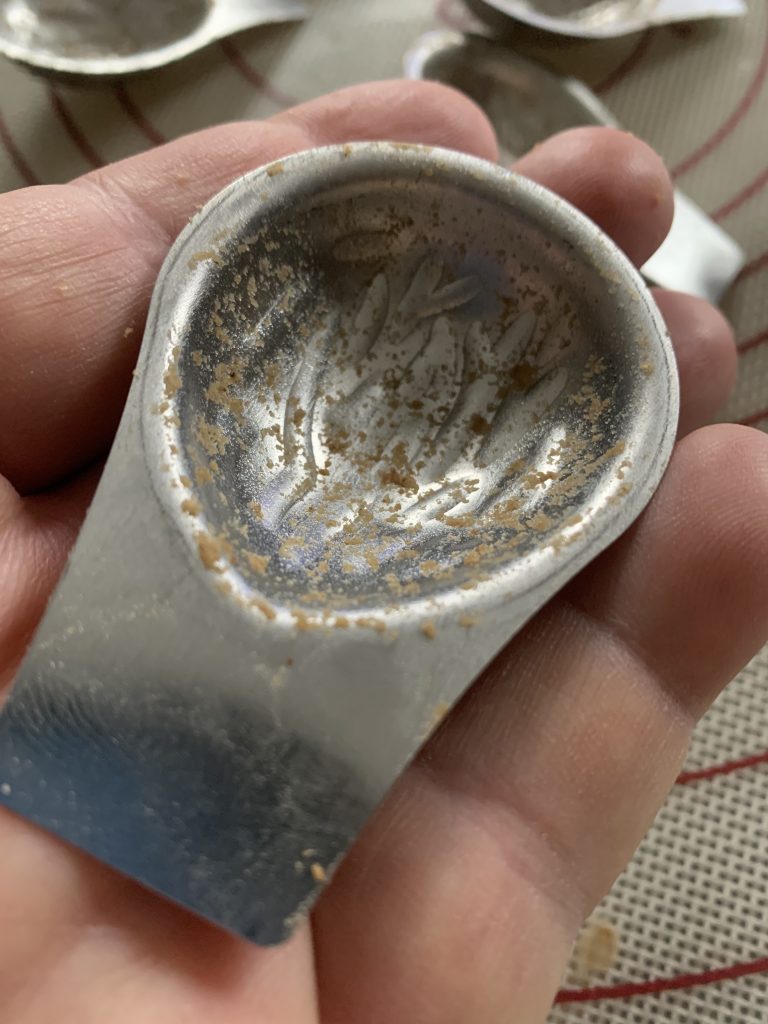
Then comes the filling of the molds, which is indeed a fidgety chore. Where the Eastern European version is baked in a unique stovetop mold, Central European Ořechy get formed in thin, individual metal molds that go in the oven so the cookies will keep their shape. It isn’t hard, just time consuming because you need to go one by one.
This is the Central European mold. Notice those crumbs? Don’t clean them off until you are done! That residue from earlier bakes saves you from needing to butter and flour the molds every time you fill them.
First you coat the inside with a bit of butter, then you dust it with flour, and then you press the dough in with your thumbs until it coats the entire inside of the mold with a layer that’s maybe 1/8″ thick. [NOTE: You only need to butter-and-flour on the first batch. The remaining crumbs from that batch will be enough to prevent sticking on the second, the second for the third, and so on.] Then you scrape off the excess with a flat tool like a metal spatula or bench scraper, and then move onto the next one.
The dough will soften significantly as you work it. That makes the molding easier, and causes no issues. Incredibly tender doughs will do that. The process isn’t hard, just time consuming.
But you aren’t ready to bake just yet!
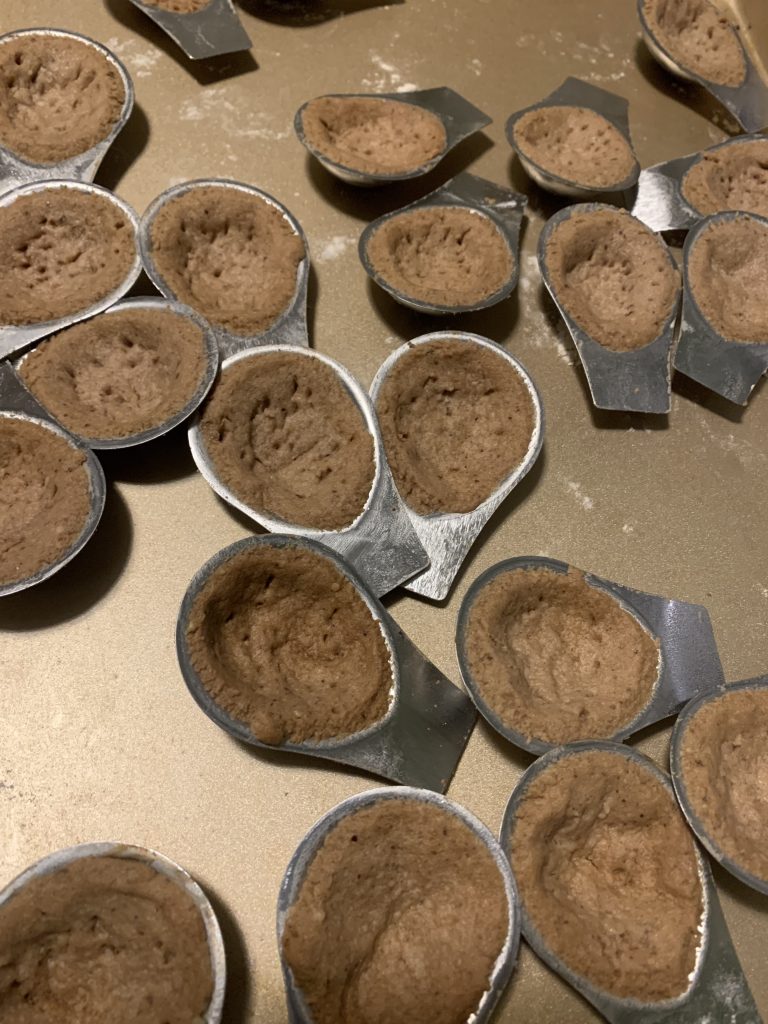
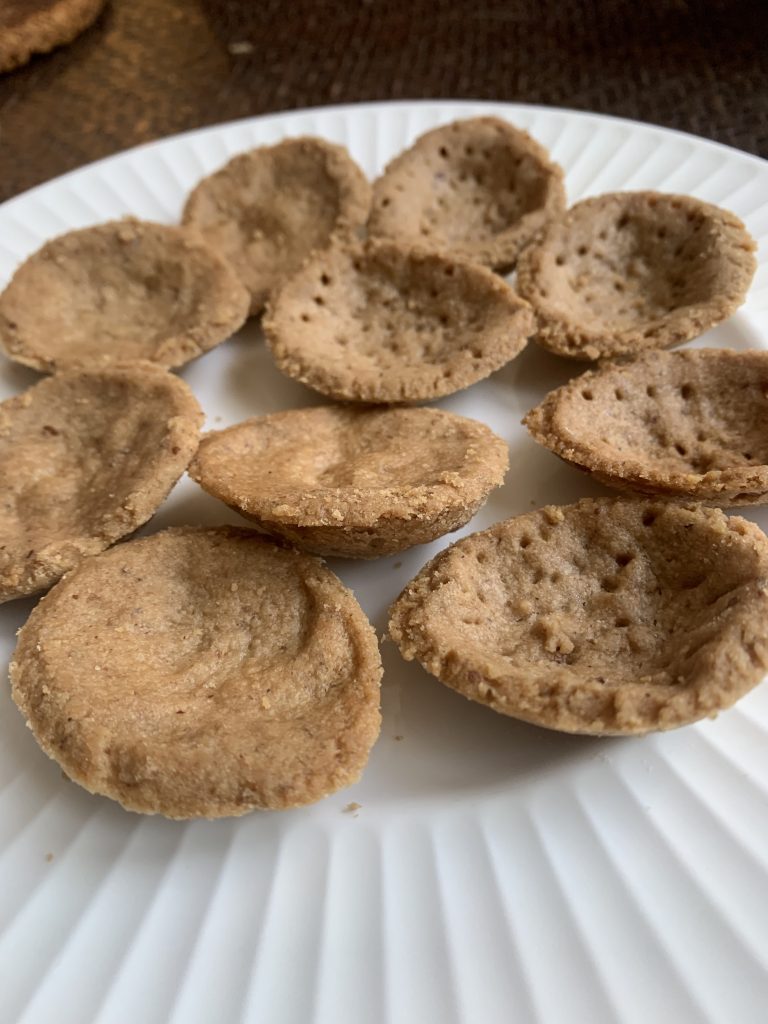
Trick #1. Freeze or dock the dough baking. We learned the hard way that Ořechy will puff up to be almost level if you put them right into the oven after shaping. It leaves you with a dent more than a cavity.
Our first batch came out of the oven with no room for the filling!
You can prevent this by (A) poking in holes in the dough with a fork (“docking”) as you would with a pie crust; or (B) freezing the dough in the molds before baking. Both work, and both leave plenty of room in the final product for your incredibly rich filling.
Docked and frozen before baking = generous cavities for filling. Too much room if you use the traditional whipped-butter filling.
Version 1 versus Version 2. Either too little room, or too much!
Trick #2. Freeze or dock, but don’t do both. Docking combined with freezing will give you full sized cavities inside your “nuts,” suitable for a normal buttercream, frosting, caramel product, or any other typical filling. Bit the traditional filling for this cookie? A half-teaspoon or so is all you want. As one baker friend said, “a knob the size and shape of an almond.” That’s just about the amount of room that’s left over if you freeze the shells before baking and so nothing else. Docking creates a little bit of extra room. The combination creates too much.
Extra room won’t kill you, of course, The cookies taste just fine with a cavity that’s got some empty space.
Fresh out of the oven. These were frozen but not docked. A nice, noticeable cavity that has just the right amount of room for a super-rich filling. [P.S. I feel your pain if you’re groaning at that poor sheet pan! It was recently used for roasting bones, and then vegetables right after. A few more trips through the elbow grease sink with Barkeeper’s Friend ought to help.]
Trick #3. Ignore both #1 and #2, and then press a hole in to the flat cookies when they are warm from the oven. So you have molded cookies that puffed up in the oven. You pull them out and say, “Oh no! They have no room for filling!”
Not a disaster. Simply press the warm and still-soft center with your asbestos thumb, and you’ll have a dent you can work with. Yes, it is hot, and yes, you can get a minor burn if you have human skin instead of baker’s asbestos. But beauty can be expensive. Even when it’s only beautiful cookies.
On To the Whipped Butter Filling. This couldn’t be any simpler. Whisk the butter until it’s soft and fluffy, and then whisk in the other ingredients: powdered sugar, more grated walnuts, instant espresso/coffee powder, and a good hit of dark rum. That’s it. What you get is a flavor bomb that carries the essence of Prague. If America is the land of cinnamon and sugar, and Scandinavia of cardamom, Prague’s heart belongs to a mix of mocha, nuts, and rum. Utterly scrumptious. Just use it with care because we aren’t kidding about how rich it really is!
Place an almond-sized piece of whipped butter filling between two shells. Close carefully so you don’t shatter the tender pieces. Dust with powdered sugar to complete the illusion, and enjoy. They will improve overnight, hit their peak on Day 3, and be good for another two days after that.
Be prepared for “Wow!”
CONCLUSION
Ořechy require some patience because the special molds need to be filled one by one, and they only last for a week or so after they get filled. That makes them a special occasion treat. But you know what? They are also spectacular enough to be a star entry on famous dessert trays in any top coffee house of Prague, Warsaw, Vienna, Budapest, or any of the other great cities of central Europe. They’re the sort of food that tourists taste, gape at, and then go home to tell stories about.
We won’t be making them on any kind of a regular basis. Not even for guests. But you’d better believe we’ll be making them for the holiday tray! They’re just too cute and too fantastically delicious to pass by. The whole family would pine at the loss now that they know what we’d be missing.
Yes, they are that good. And cute, too. Wouldn’t you agree?
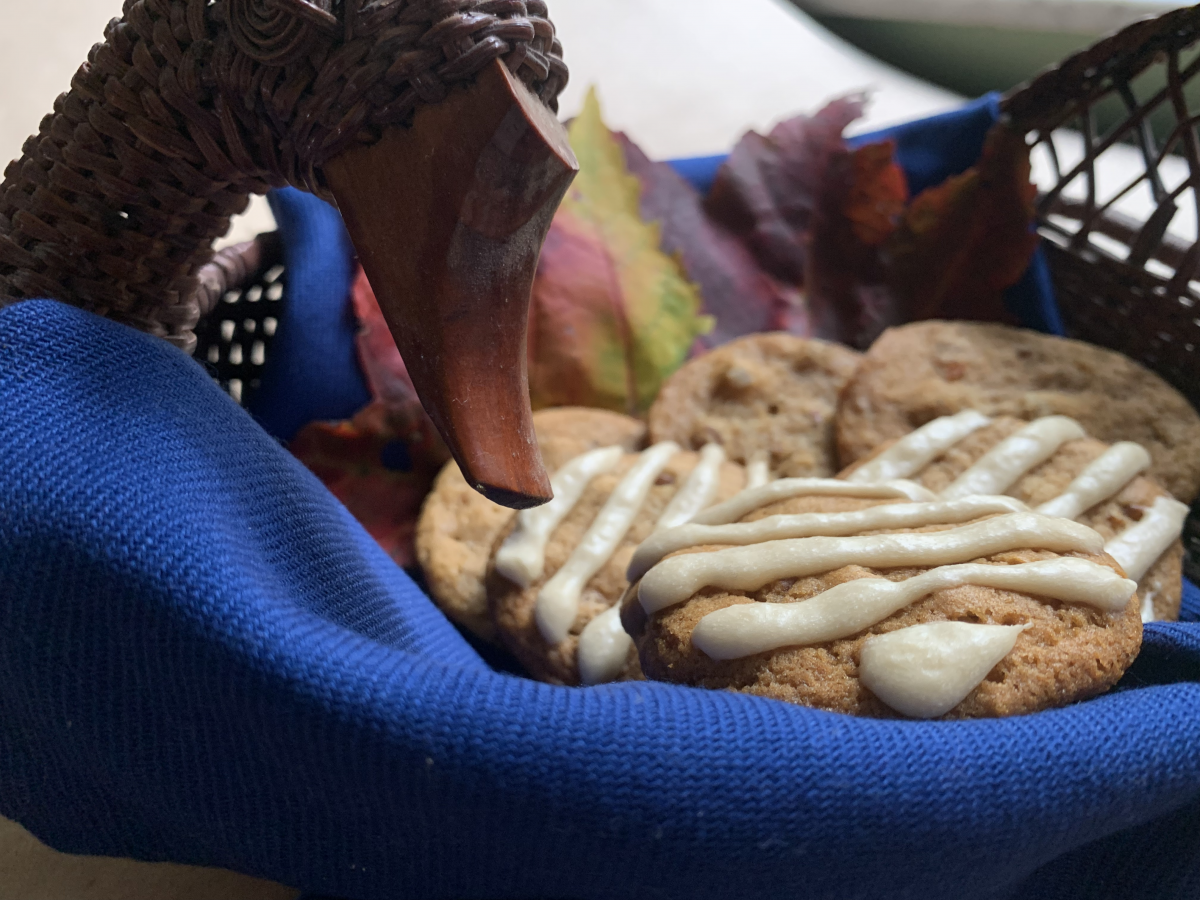
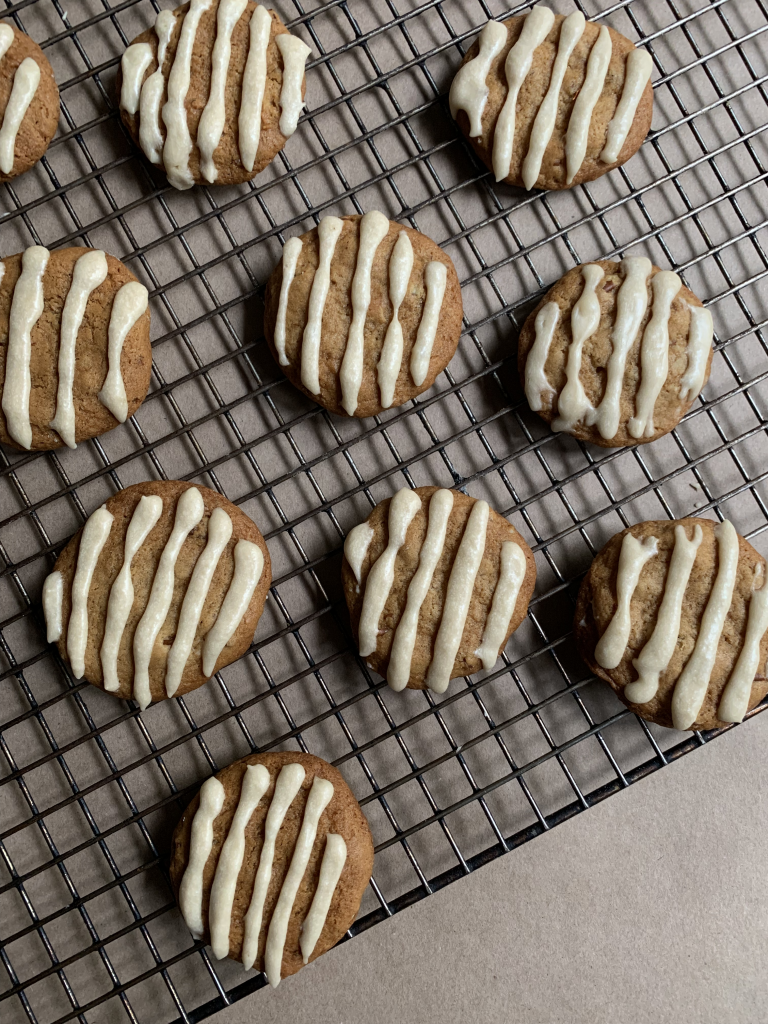
This is the cookie you see in every high end farmer’s market and orchard store across the country. Which is only proper! No one should ever buy a Halloween pumpkin without facing a maple cookie temptation. Alas, but many of those versions aren’t up to par and sometimes (gasp!) they aren’t even available. So here you go.
It is a simple enough recipe, but one that takes a lot of fidgeting to nail down just… exactly… right. This one’s nailed. Is it ever. The only thing to add are the nuggets of experience you’ll want for making your own adjustments.
1. Pecans and maple really do love each other as much as we always think. I tried the cookie with walnuts, and it worked, but it just wasn’t the same. A “7” instead of a “10”.
2. There’s no getting around the maple extract because syrup alone won’t provide the requisite oomph. I’d be curious to try a recipe with maple sugar, and even more curious to use the darker Grade B syrup, but neither are easy to find in my part of the country.
NOTE: We only use natural maple syrup in our house, and that is what we used in the testing. I have no idea how the cookie would work with the flavored corn syrup “artificial” version. Let us know if you do the experiment.
3. That final hit of maple high notes in the glaze/icing/frosting are what send this up to the next level. Don’t leave it out. These photos show a frosting, i.e. the thickest version, but that’s really just a matter of what you want.
NOTE: Give it 24 hours and the topping will dry out enough to pack in a tin without real worry.
4. We’ve gone back and forth on the salt level. My personal preference would be an extra quarter-teaspoon (call it a full 1 tsp. of kosher salt), but Kate thought that gave the cookies a little too much edge, especially before you add the topping.
5. Molasses really helps the flavor by broadening the base of the pyramid. Don’t be tempted to skip it. This amount translates to basically the same thing you’d get from using (a) dark brown sugar in place of the specified white, or (b) light brown sugar plus a single tablespoon of molasses.
That’s about it. Simple cookie, great flavor, with almost no fuss, muss, or bother. Enjoy!
This is a sample drawn directly from our book Heritage Cookies of the Old and New World. The first part is our favorate “Cookie Nerd Moment” of the entire tome. This is where we stop and take the time to discuss particular tricks, tips, and historical bits that provide a lot of the “why” behind the recipe’s “what.”
Anyone who makes 20 or 30 different cookies each Christmas gets used to two common questions: “What are your favorite cookies” and “What is the favorite cookie in general?” There is no answer. Everyone has his or her own favorite and there isn’t a single cookie that would touch the 10% mark if we kept track of who voted for what.
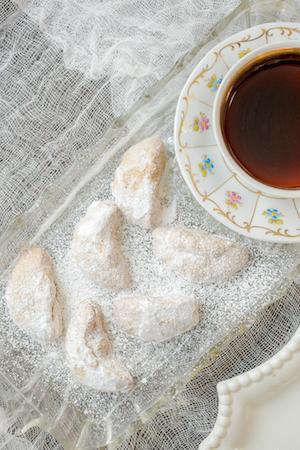
You probably could have guessed those two if you’d given it a bit of thought. But the third most common question might surprise you: “Do you know how to make [Nut Horns]?” We put that in brackets because the same basic cookie is loved with fervor and devotion across a huge part of the world with very minor changes. In Central Europe the cookie’s known by some word that translates as either Nut Horns or Nut Crescents (Kipferl in Austria and Hörnchen in Germany are two examples). Eastern European bakers shape them into balls, often with a heavier percentage of walnuts, and call them Russian Tea- or Wedding Cookies. Move south and west and the name turns into Italian Wedding Cookies, also ball shaped but with a tilt toward almonds. The south and east features ball-shaped Greek Kourambiedes, which have slightly fewer nuts but include some brandy. The New World knows them best as Mexican Wedding Cookies, which usually feature pecans. We could go on.
Simplicity plays a big part in the cookie’s charm. It’s all about the nuts, with vanilla to heighten their impact. Powdered sugar goes on top – a heavy coat that may also have a hit of vanilla. The Greeks stand out by adding a single whole clove for decoration.
There’s also a common structural theme: you’re after a cookie so tender that it will shatter to fragments at the slightest excuse, and will dissolve in your mouth with a burst of buttery, nutty goodness. That’s the hard part – getting them just tough enough to wait for an excuse without losing that meltiness.
We spent many years fidgeting and playing with this recipe to get it just right. The final product incorporates a number of subtle tricks that will add up to make the best [Nut Horns] you’ve ever eaten. Better even than Grandma’s!
TRICK #1 (for flavor): Toast the nuts in advance. It gives you a longer, deeper flavor.
TRICK #2 (for texture): The textures from your nuts matter as much as the flavors. We strongly prefer to mix that texture up to give the full experience from meltingly soft in most parts to recognizable bits sprinkled here and there. We always start by using a rotary grater to reduce at least half the nuts to a point just short of where you’d start calling them “nut flour.” Maybe even a little short of “nut meal.” The other half should be a mix of textures ranging from “finely ground” to “finely chopped”. If push comes to shove we suggest a 50/50 mix of nut flour for the first half and ground nuts for the second. Grandma may have ground all the nuts for convenience but even she would agree that mixing the textures adds something extra.
TRICK #3 (for flavor and texture): We also favor a mix of nuts. This particular trick may cause Grandma to start muttering about upstarts and heretics when you mention it, but trust us: a little hint of walnut will make your pecans taste more “pecany”, just as some almond and hazelnuts will make your walnuts more “walnutty.”
TRICK #4 (for flavor): A hefty pinch of salt also enhances the nut flavors. Just make sure to use so little that no one can tell it’s there.
TRICKS #5.a to 5.c (to counter fragility): Our recipe hovers right on the edge of falling apart into a 50% casualty rate from being too tender. There are several tricks and options designed to pull it back from that horizon. You’re going to need at least one of them:
A spoonful of water in the flour adds just enough gluten to hold it together. This trick doubles as a way to customize for your particular kitchen and flour.
An egg yolk in the dough works too and is more traditional, but can make the cookies caky if it goes too far. This was the “cheat” that Grandma used in secret because her best friend, the one she wanted to bake like, didn’t need to.
Working the dough as you form the crescents can also add a little gluten, but it comes with a real warning: the heat of your hands can melt the butter in your dough, which turns the cookies oily and guarantees they’ll be too tender.
TRICKS #6.a to 6.c (to counter toughness): Our recipe uses so many nuts that fragility tends to be the bigger problem, but sometimes you have to go the opposite way. We ran into this when we lived in Boston and used the high protein King Arthur as our house default. Here are some techniques that will add tenderness without changing the basic formula:
Remove any extra water or flour from your dough.
Refrigerate the cookies on their tray for 30 minutes before baking. This will relax any built-up gluten.
Remove a tablespoon of flour from the recipe.
TRICK #7 (for flavor): It’s a little counterintuitive but this particular cookie actually tastes better if you narrow the “horns” of your crescents toward the ends. Yes, the easiest way to make a crescent is to form the dough into a rope and then bend it in the middle. Yes, that is a typical way to ensure even baking by creating an even thickness. Yes, you can even treat this as a roll-and-cut cookie with fine results. But this isn’t a typical cookie. Having some parts toastier and others tenderer will only add to the sense that you’re eating something made from [nuts!!!].
TRICK #8 (the post-oven danger zone): You must cool these cookies on the tray until they are only warm. They are ridiculously fragile when hot from the oven and will fall apart if you even stare too hard.
TRICK #9 (for a final touch): We aren’t big believers in fancy chancy “touches” like scenting the powdered sugar for a few days with a more-expensive-than-gold vanilla bean bought for the purpose. This is the one recipe where we sometimes make an exception. Not always… but sometimes. There’s something about the wafting smell of vanilla that seems to stimulate a person’s specialized nut detector taste buds. [What, you never heard of those? Try a proper Nut Horn and you’ll see the proof for yourself!]
TRICK #10 (coating with enough powdered sugar): Warm cookies are fragile cookies, but nevertheless you must coat them with the powdered sugar while they are warm because the outgassing steam helps the sugar to stick. Kate likes to move the whole sheet of parchment onto a cooling rack, dust them there, wait 5 minutes, and then turn them over to dust what had been the bottoms.
Ma’amoul is the cookie of the Middle East; the one that crosses every cultural division. Muslim, Christian, or Jew, it doesn’t matter. One cannot celebrate Eid, Easter, Purim, or any other big ceremony without this treat any more than you could stage a U.S. wedding without a cake.
What you have here is a very good Ma’amoul that replaces some Mediterranean baking staples (mastic, mahlab, and sandalwood powder) with readily available American substitutes (vanilla, almond, anise, and ginger). The result is an amazing cookie that everyone adores – at least if you’ll accept the testimony of close to 100 taste testers, including several dozen from the local mosque who grew up with the genuine article. The recipe below is one of our proudest successes.
How good is it? Let’s put it this way. Every person in the family – on their own – fell back on poetry when asked for a description. Scott offered antique Arabian Nights phrases like, “the fragrant breeze that wafts from the garden of the Sultan.” Kate produced, “elegant, perfumed Fig Newtons dressed up in flowered bonnets.” Our daughters insisted on “parasols, sun dresses, and corsets bound by ribbons of scented silk.” No one reacted with anything less.
This has to be the most evocative set of flavors we’ve ever come up with. They are fantastic. Awesome. Amazing. Magnificent. I cannot urge them on you any more. Not for Christmas. This is a spring and summer treat, not a winter one. But it’s definitely a cookie you need to experience at least once in your life.
At the same time, do not be tempted to “test” the product by picking up one of those dreadful commercial versions from your local Middle Eastern market. We did, and our sheer dismay almost killed the project before it got started. Calling them “awful” would be too kind. Our daughter, a camp counselor, refused to inflict them on her kids! No, you need to do this one right if you want to see what all the fuss is about. I promise: they’re worth the effort.
As always, skip to the bottom if you want the recipe without the discussion
First Step: What Is The Target?
Do some research and you’ll see that every region, country, city, town, and home claims its own unique twist on Ma’amoul. The sheer number of variations makes it hard to pin down a central theme. I had to read through almost 30 recipes (!) before I could nail things down clearly enough to even work on a recipe. Even then I ended up with a pretty vague description. The target was:
A filled, molded cookie;
A buttery, slightly crunchy crust with some elusive, sweet-spice accents;
A filling made from nuts and dried fruits; and
A healthy dose of rose water to import the Mystery Of The East.
None of those targets was particularly hard to achieve once we figured out what all the exotic ingredients were for, but it took some research to get there.
Bringing The Ingredient List Under Control
The recipes I’d been reviewing called for a number of ingredients that many American bakers could view as exotic. The bulk of the crust is made from:
Semolina flour;
Clarified butter;
Rose water (mandatory);
Orange blossom water (less so); and
In some cases yeast instead of baking powder.
None of those ingredients posed any special challenge. The yeast could simply be ignored as an option for ultra-purists, since modern Middle Eastern recipes tend to use baking powder anyway. The two flower waters are readily available in modern supermarkets, and certainly in ethnic markets or baking specialty stores. As for semolina and clarified butter, they are even more available than rose- or orange blossom water, and we’d developed some experience on how to use them during our work on the recipe for Ghraybee (the great Middle Eastern shortbread). But then came the little touches to enhance the crust. These were:
A spice called mastic a/k/a mistika (whosis?);
A spice called mahlab (whatsis?); and
Sandalwood powder (in a baked good?!).
None of the recipes used those spices in any significant amount. They were clearly accent flavors, not core ones. But that kind of thing can matter when you want to get the flavor “right” in addition to “good.” That sent me to Internet library… which greatly eased my mind. It turns out that all three are used in ways that American bakers will find both comforting and familiar, and can be replaced by substitutes you already own.
Mastic is a quintessentially Greek spice made from the dried sap of a local tree, commonly used in baking in the same way that Americans use vanilla… Whoa! Hold it right there. Stripped to its core, Ma’amoul is simply a flavored crust wrapped around a fruit-and-nut filling. What could fit a cookie like that better than a touch of vanilla? And vanilla is missing from the ingredient list! Duh. Substitution #1: check. [For what it’s worth, the exchange rate is two parts of vanilla extract for every one part of ground mastic. Reverse engineer as you desire if you keep ground mastic on hand.]
That was easy. What about Mahlab? This, it turns out, is a spice made from the seeds of a shrub related to cherries. It’s typically used as an accent for fruits, and has a flavor that people compare to almond extract mashed up with sweet-spice notes such as cinnamon, anise, and/or cardamom. This makes just as much sense as the first one! You’d have to search long and hard to find a fruit-and-nut filling that doesn’t have some almond extract with a sweet-spice accent. [We ended up at ¼ tsp. of almond extract plus a healthy pinch of star anise to replace ¼ tsp. of mahlab. Reverse engineer as your pantry allows].
On to the… Sandalwood Powder?! Okay, let’s put this on the table. I have a horrible reaction to the smell of sandalwood. One whiff of incense or scented candles can give me a migraine, and one woman in sandalwood perfume is enough to make me flee the elevator in panic. I’m getting a headache now at the mere thought of this noxious toxin showing up in my food.
At the same time, I can see what it’s supposed to do. The same thing that powdered ginger does in other dried fruit recipes. Substitution #3: check that one off as well. [That said, we tried some ginger and ended up leaving it out. You’ll see it in in the recipe as an option for those who like to gild their lilies.]
Getting The Filling Right
All that research proved that the flavor profile in the crust is a lot more standard than you’d think from reading the list of ingredients. The same is even more true of the filling. It’s basically the standard fruit-and-nut filling from Heritage Cookies of the Old and New World, plus a healthy amount of flower water. The only challenge would lie in perfecting the exact proportions for this particular case.
First the nuts. What could be more Middle Eastern than pistachios? The answer is… walnuts, at least in this case. The bulk of this filling requires a softer nut, and the slight bitterness of walnuts fit in perfectly. Pistachios did taste better, but the texture didn’t work. Maybe a mix of the two…? Oh yeah. That’s the way to go. Better than either one standing on its own.
Next, I have to admit that dates aren’t exactly my favorite fruit. They’re just so… meh. But that was not to be. Dates are 100% required if you want to make a proper Ma’amoul. They are the blank canvas for everything else, and no amount of fidgeting can change that basic fact. That said, we once again preferred the multidimensional, sophisticated effect of a mixed fruit filling over something made with dates alone. Figs turned out to be our favorite addition; apricots and raisins our least favorites; and cherries acceptable, but only when used with so much restraint that I left finally left them off the recipe completely. Consider that a secret tip for online readers only!
That left only the elephant in the room: rose water. This is, to put it mildly, a controversial ingredient. Those who like it tend to use it with abandon. Those who are not fans (like me) tend to respond with phrases like “Grandma’s eau de toilette.” If you’re in the first category, please note that many of the recipes I researched use up to three times what you see in ours. Have at it if you will. We, emphatically, will not.
Indeed, my aversion to rose water is strong enough that I tried a version using only orange blossom water, which is much less pushy, and even penciled in a plan to work on a custom version with “more acceptable” aromatics. The test results scotched both of those ideas, but also reassured this rose-water critic that it wasn’t going to be as rough as I feared.
Yes, this is a recipe that requires a certain amount of rose water to do the heavy lifting. You can’t do without it. And yes, up to 50% of that can be replaced with orange blossom water, with fantastic results that all of us preferred. But we also found that these ingredients, and the baking process, tamed the perfume overflow that Kate and I had feared so much. Indeed, consider that as Free Tip #2: You will be surprised how many of the aromatic compounds cook out during the baking, even though the filling is wrapped in a crust.
A version made with 50/50 blends on both the nuts and fruits, plus 2 tbsp. each of rose- and orange blossom water turned out great. More than enough to trigger requests for the next batch. But there was some room for refining.
First I replaced the bulk of the sugar with honey. A fantastic idea you should embrace. Then I adjusted the salt level, and… O.M.G. Words cannot express the magic embodied by how these ingredients come together, marry, and create a whole that is vastly more than the sum of its parts. Ma’amoul really are an experience straight out of the Arabian Nights.
Forgetting A Part, Aren’t We Scott? What About Putting The Cookie Together?
Oh. Yeah.
I’m not going to kid you: forming the Ma’amoul is the most time consuming part of the recipe. In fact, it’s by far the most time consuming part of the recipe, because the dough and the filling are as simple as a cookie gets once you have the ingredients ironed out.
For The Dough: Whirl the dry dough ingredients in your food processor to distribute, and then process in the wet. Remove, wrap, and refrigerate until you’re ready to form.
For The Filling: Put everything but the nuts into your food processor, whirl until smooth, and then process in the nuts until they are ground to your satisfaction. Remove, wrap, and refrigerate until you’re ready to form.
It honestly couldn’t be any quicker or easier.
Forming the cookies isn’t all that hard either, but it does take some fidgety technique you can only develop with practice. The recipe contains good, step-by-step instructions. Both Kate and I took careful notes. But nothing is going to replace a bit of practice. Grow up in the Ma’amoul Zone and you’d probably master the process after 500 cookies under the careful eyes of your mother. We’re aiming to get that number down to 200. But that’s still a solid couple of batches. Just enjoy the fact that making your Ma’amoul definitely gets easier and faster as you go along, and is a fine thing to do with company.
I also want to emphasize that Ma’amoul are easier to form than other filled products such as Trogirski Rafioli, filled Gingerbread, and savory foods like tortellini, pierogies, etc. That’s because those have actual doughs that you need to roll out. The Ma’amoul “dough” is more like a very thick paste once it warms up from a stay in the fridge. You can wrap it around a ball of filling with nothing more than a bit of dedicated work to pinch the thick areas over to where the crust is thin.
Next, you can leave them plain, and they will taste just as good but why shy away from that final touch which makes them extra, extra special? Home bakers typically shape their Ma’amoul with a neat little mold that comes with a handle. This is a much easier tool to master than Europe’s elaborate Gingerbread, Speculaa, and Springerle molds. The cookies come free with nothing more than a few whacks on the counter if you’ve got it properly floured. Kate bought me the inexpensive plastic mold below just for our Ma’amoul testing, but I promise that we will both be using it for a great many European cookies in the years to come.
Note To Friends And Family: Don’t be surprised if your next set of filled gingerbreads comes with a geometric pattern instead of a figurine. This mold is especially easy to use.
Final Observations, Wisdom, and Lessons Learned
Anyone who loves the idea of Heritage Cookies should make this cookie. How many recipes are there that trace their roots back to the time of the pharaohs? How many can claim to be as central in their culture as wedding cake to a U.S. ceremony? How many will inspire an ode, or transport your imagination to a fantasy world you haven’t summoned up since childhood? I can only think of one, and this is it.
Ma’amoul are a fabulous treat that I guarantee you’re going to enjoy. G.U.A.R.A.N.T.E.E. But they are ever so much more than that, too. This cookie is a cultural ambassador. No matter your point of view – taste, texture, romance, culture, or history – it is a recipe that has it all. “Special” barely scratches the surface.
A NOTE FROM KATE: My grandmother used the word “maamul” in Czech to denote a person who begs shamelessly, and the verb “maamulit” to describe the act of begging until I got my way. It is a colloquial slang. I have heard others use it too. But there is no Czech etymology that would tie the word to begging as such. My best guess is that the frequent trade between Czechoslovakia and the countries of the Middle East introduced a new cookie that people loved to eat, but didn’t know how to make. Translation? If you want a cookie that will reduce your family to begging for more, you have found it!
POSTSCRIPT
Many thanks go out to the kind folk at the Islamic Center of Pittsburgh, who put up with a long pair of visits, including one on their sabbath, and provided invaluable feedback on what a good Ma’amoul is supposed to be.
Speaking of which… This may be the best takeaway I can provide about what we mean by a “proper heritage cookie.” The Islamic Center of Pittsburgh has an intriguing mix of parishioners from many different backgrounds. There’s the Middle Eastern contingent, the Indian Subcontinent group, the African group, and various homegrown American Muslims, all wedded into a unique and welcoming mélange. I, of course, was looking for the Middle Eastern natives. I knew the cookies were good – any moron could tell they were good! – but I needed feedback on whether they were capital-R “Right.” That had to come from people who grew up eating them.
I got my help, sure enough. But there’s a story that goes along with that help.
If I watched it once, I watched it twenty times. A gentleman from Lebanon, Syria, Palestine, Morocc0, Libya, etc. agrees to lend me a hand. He tastes a sample, nods sagely, and says something along these lines: “These are good. Very good! Not as good as my mother’s, of course, but they aren’t too sweet, and yes: they are definitely a true Ma’amoul. Nice job.”
Then someone he knows from one of the other groups looks over his shoulder and innocently says, “What are those?”
“You don’t know Ma’moul? How is that possible? You have to try one!”
Three more samples disappear from the tin. There follows the sound of munching, an ecstatic exclamation, and then a buzz of excited conversation and delighted laughter as the group passes out of range.