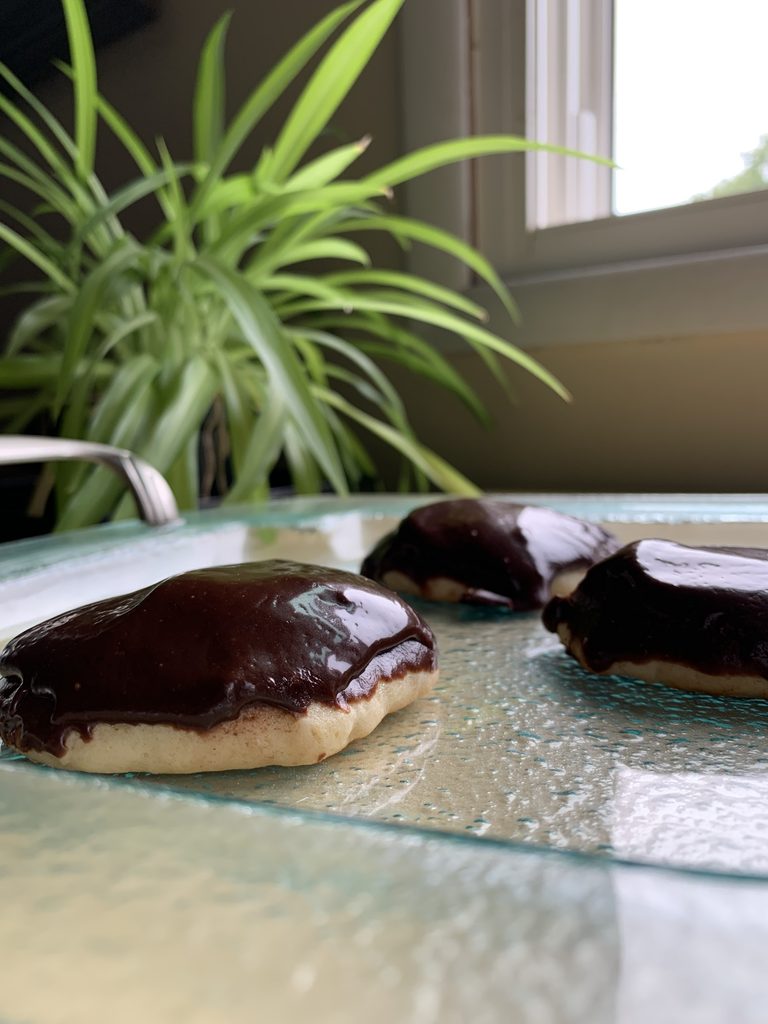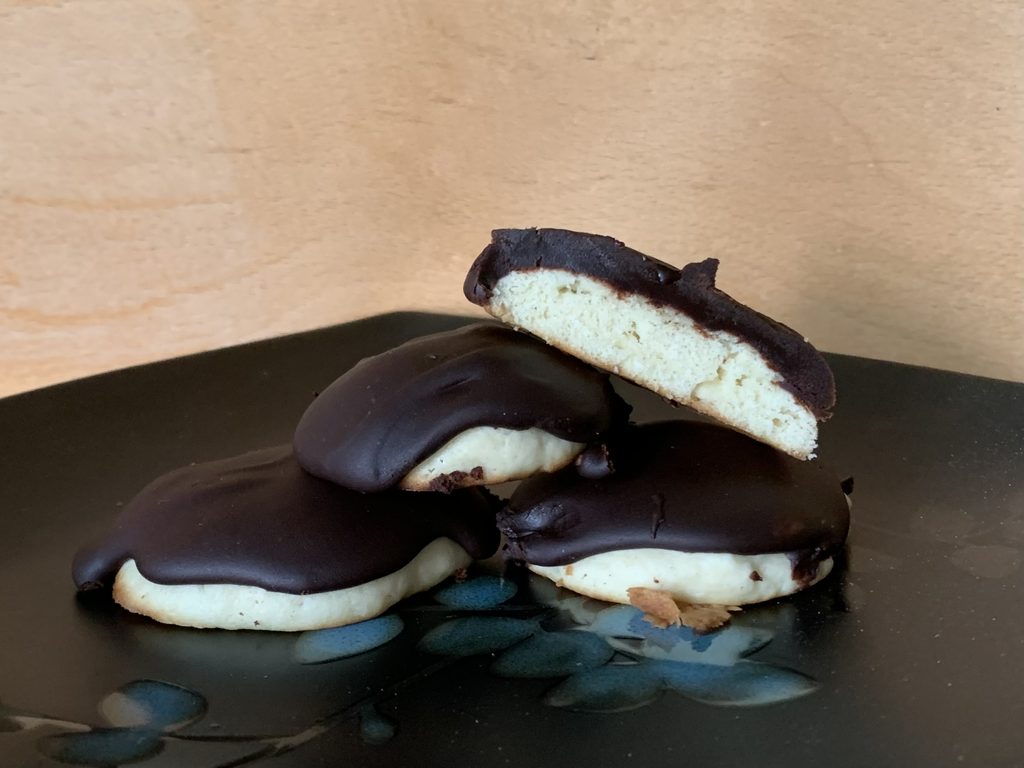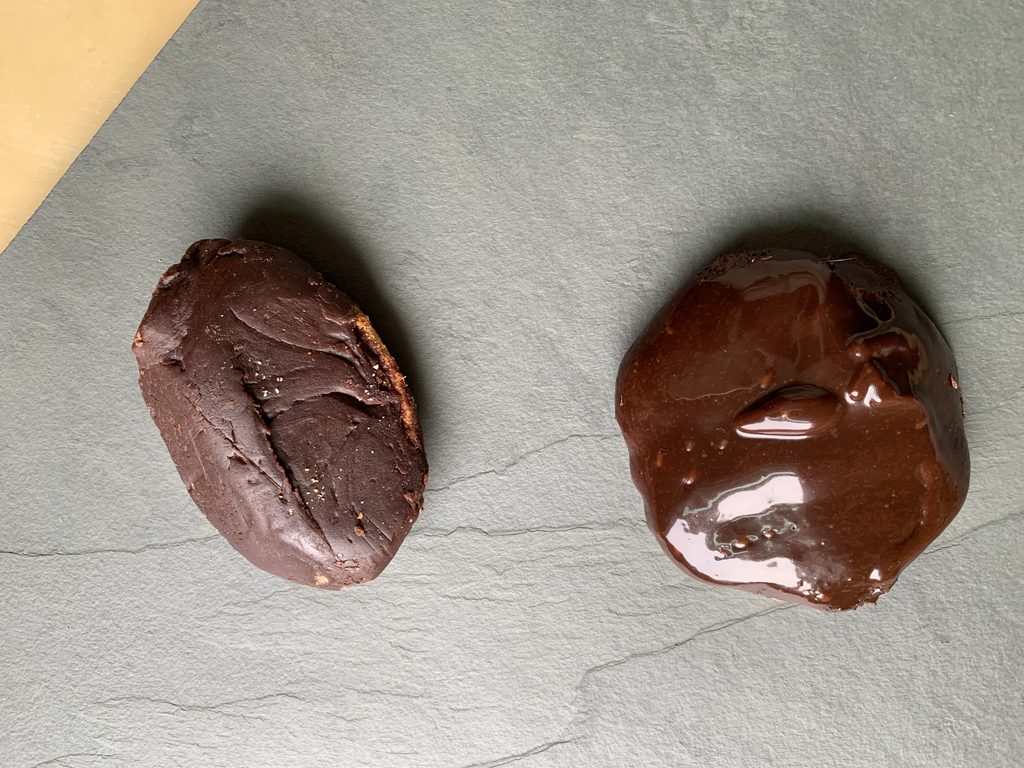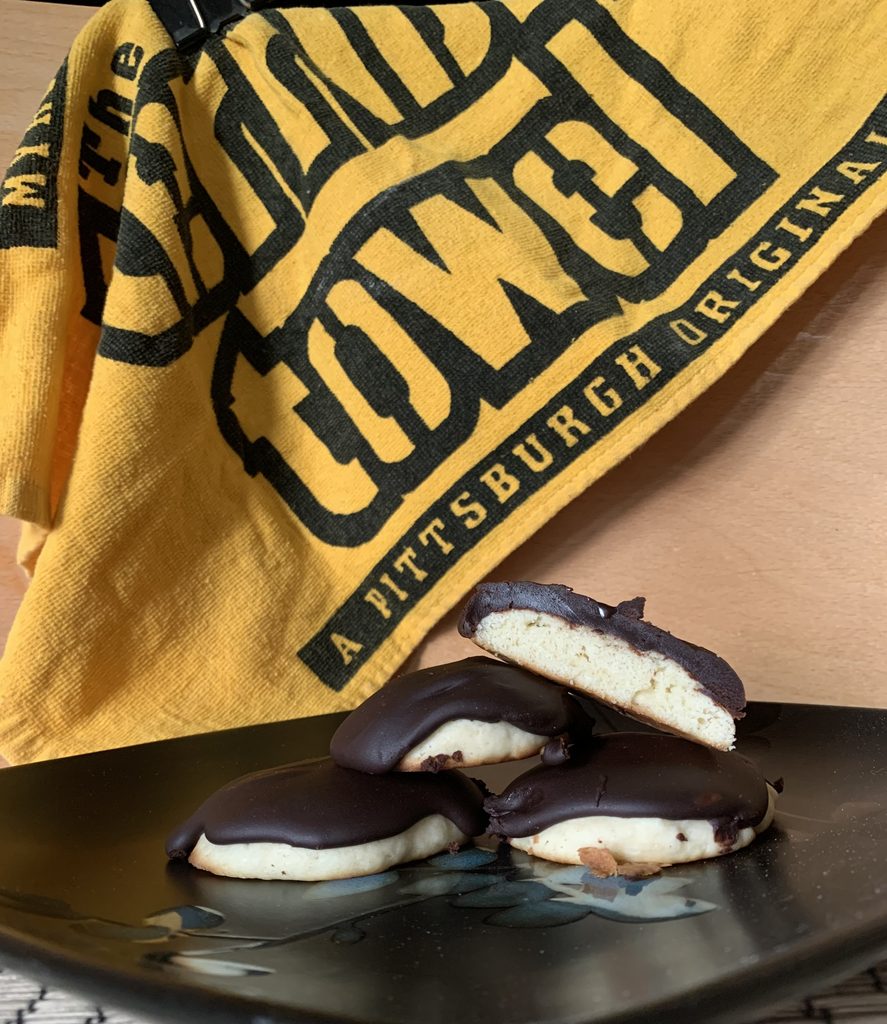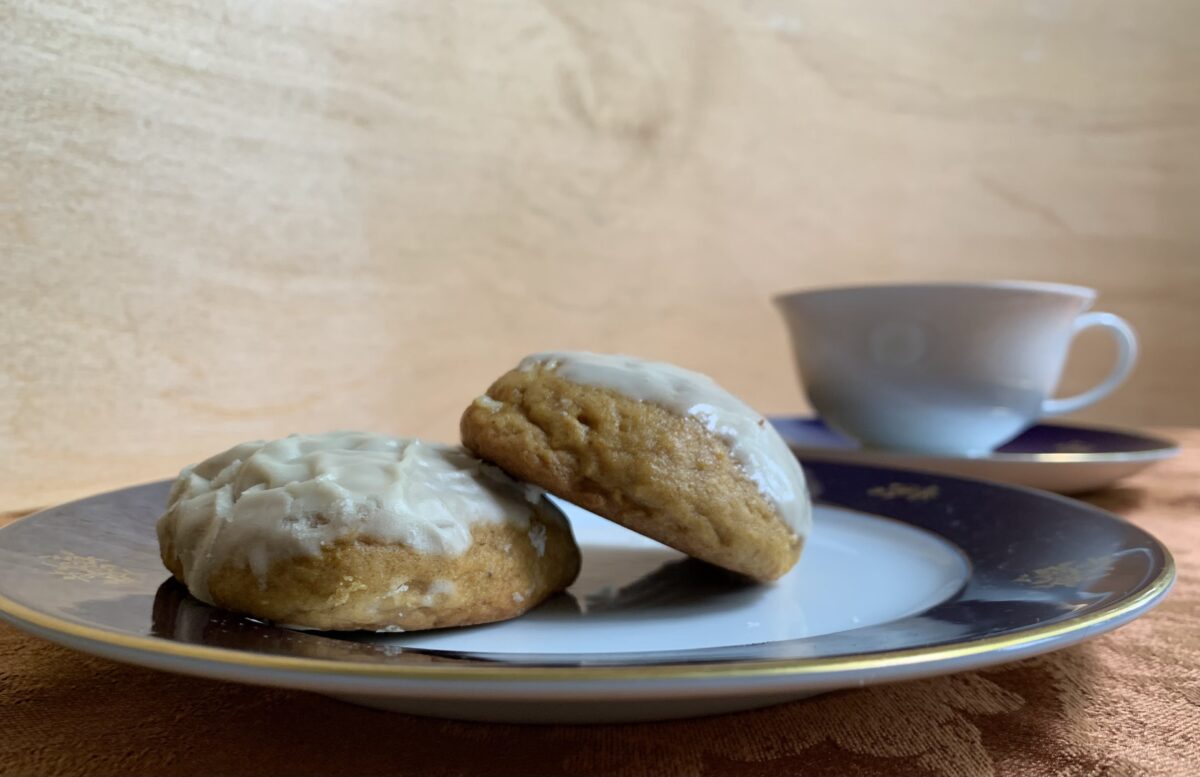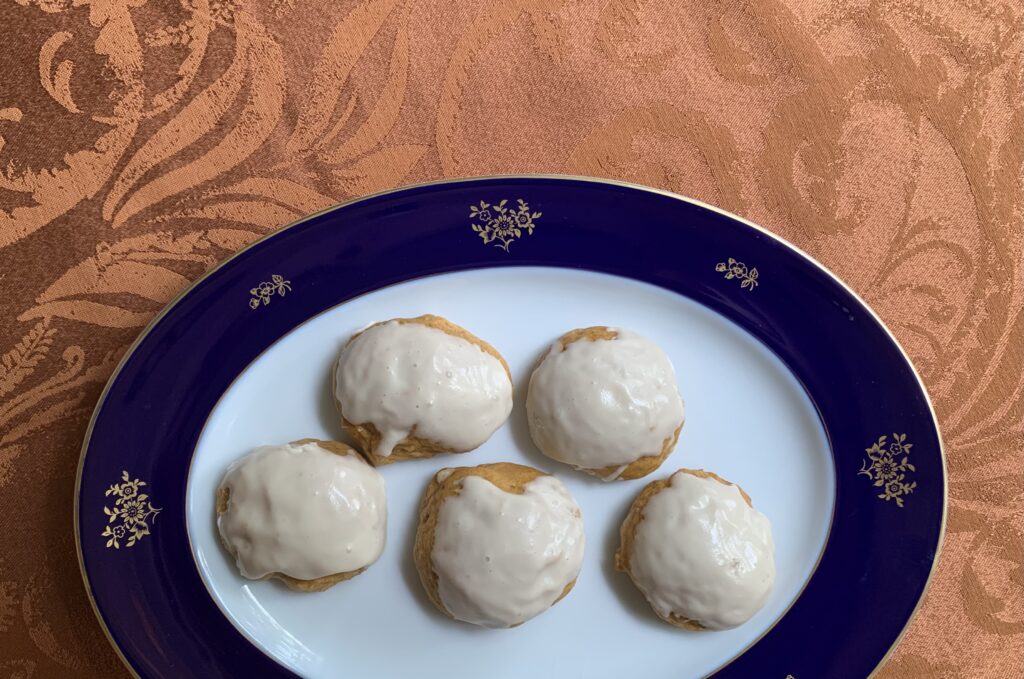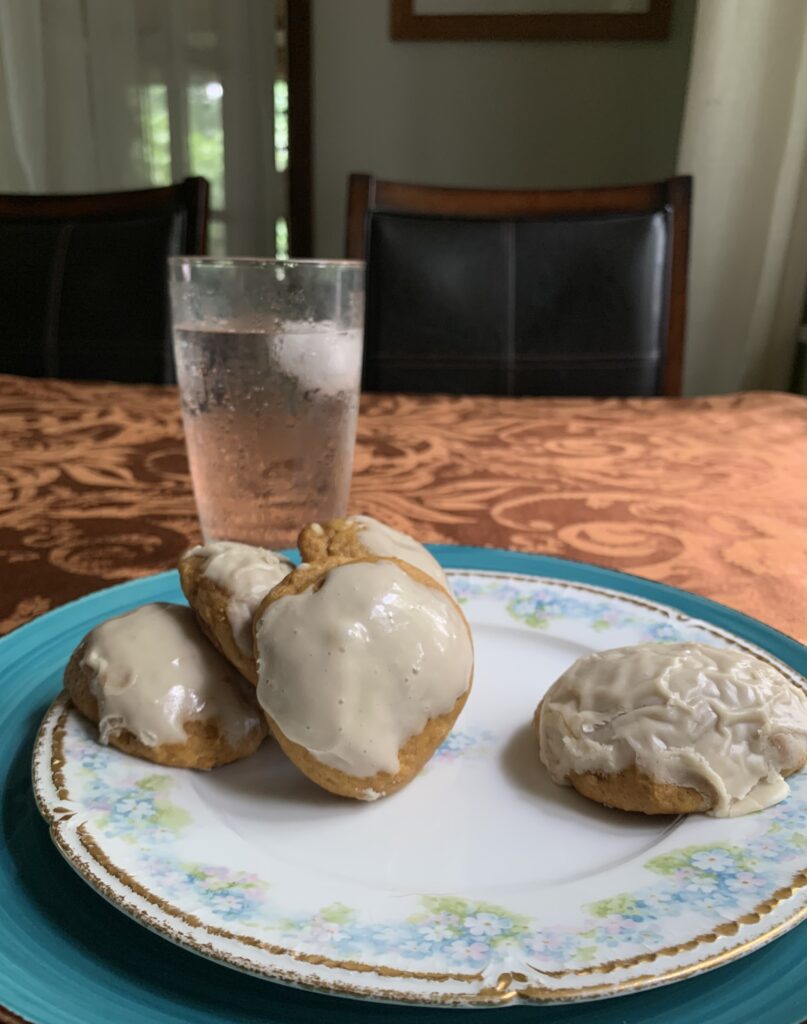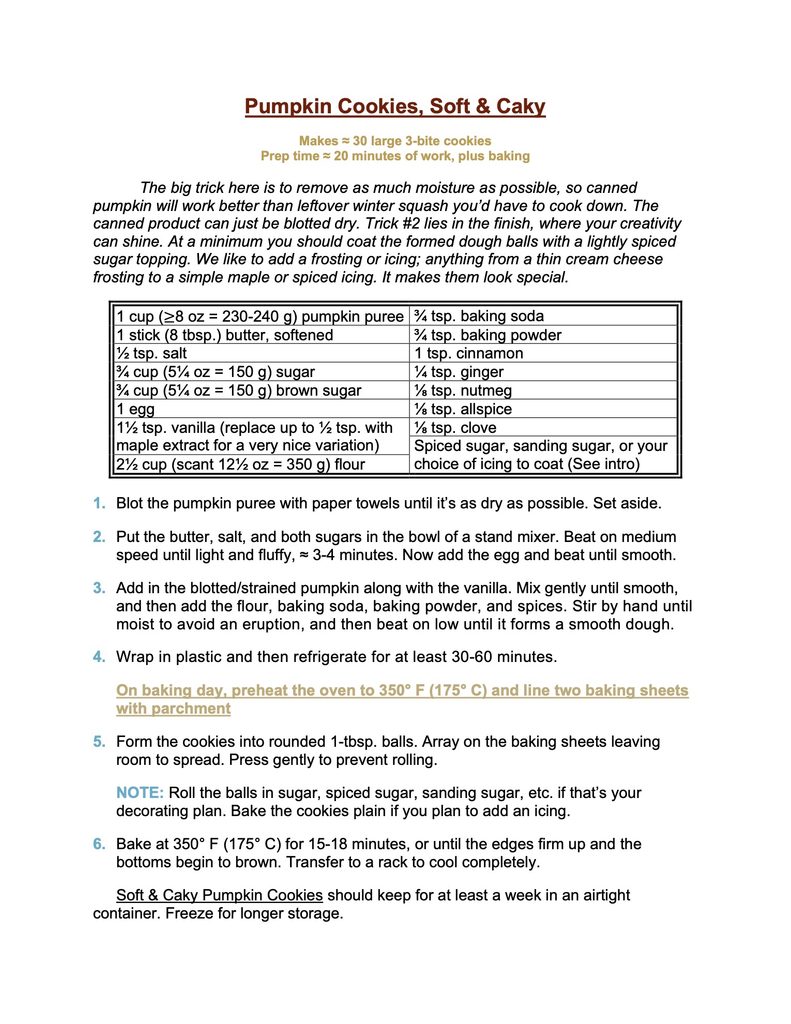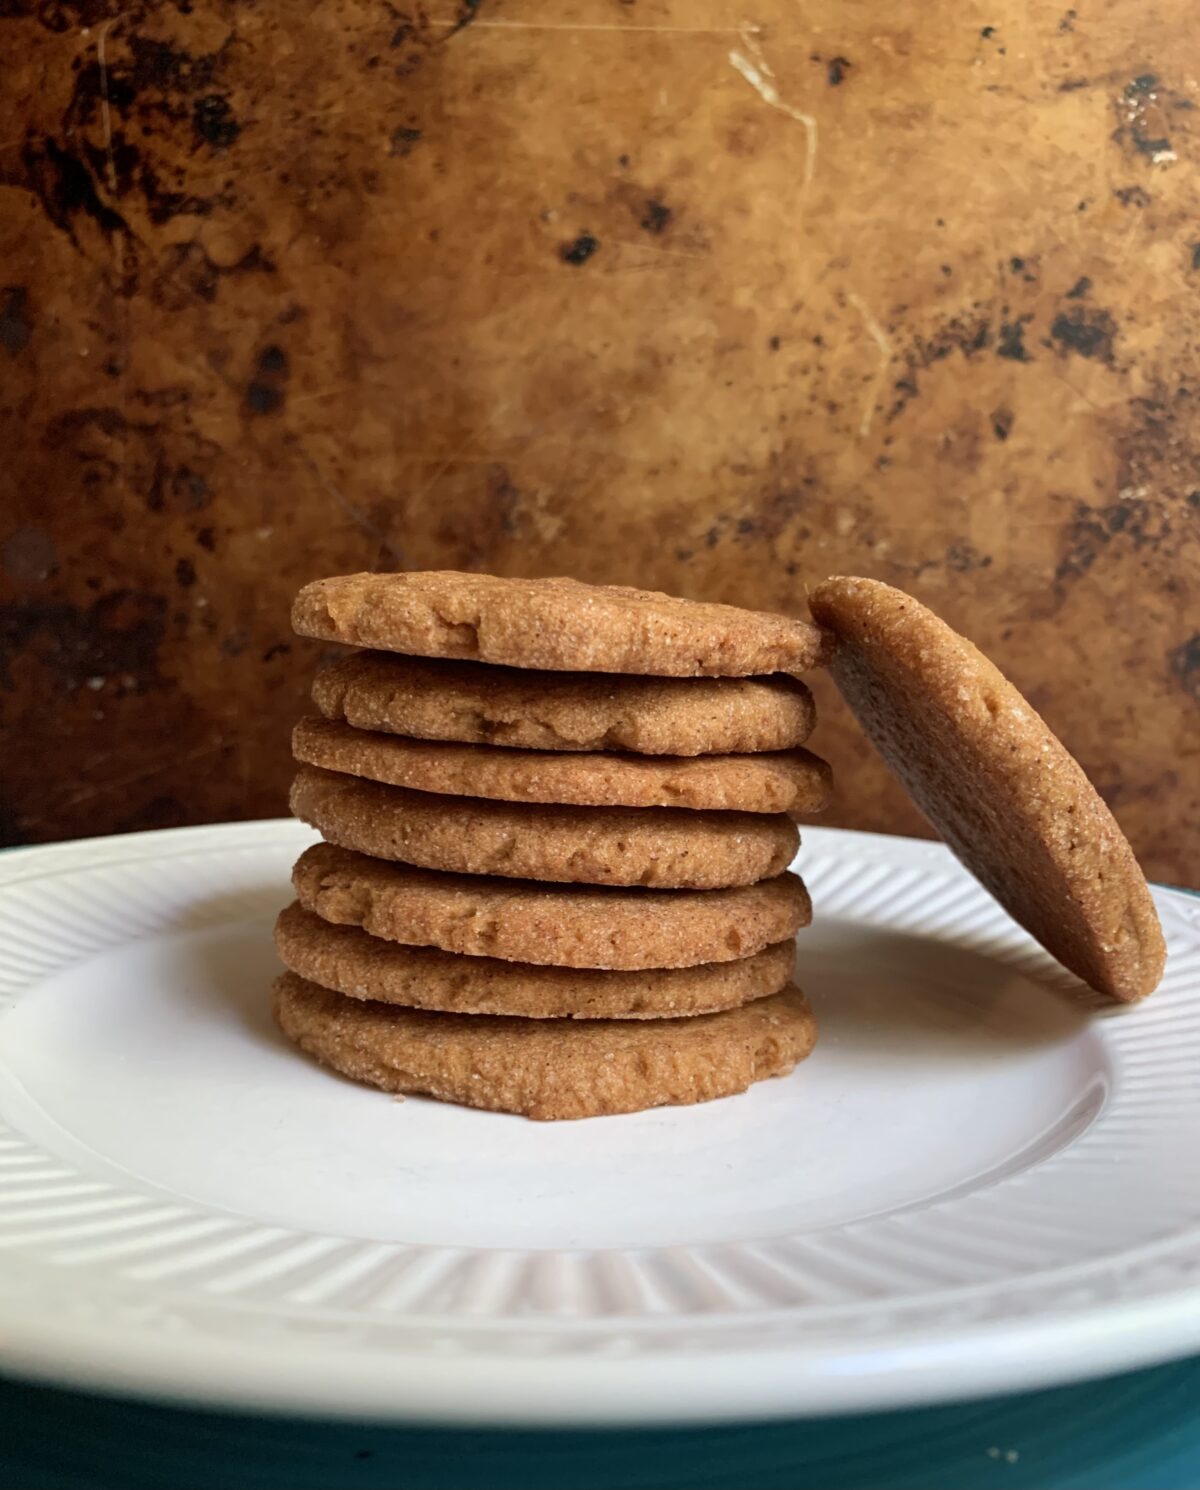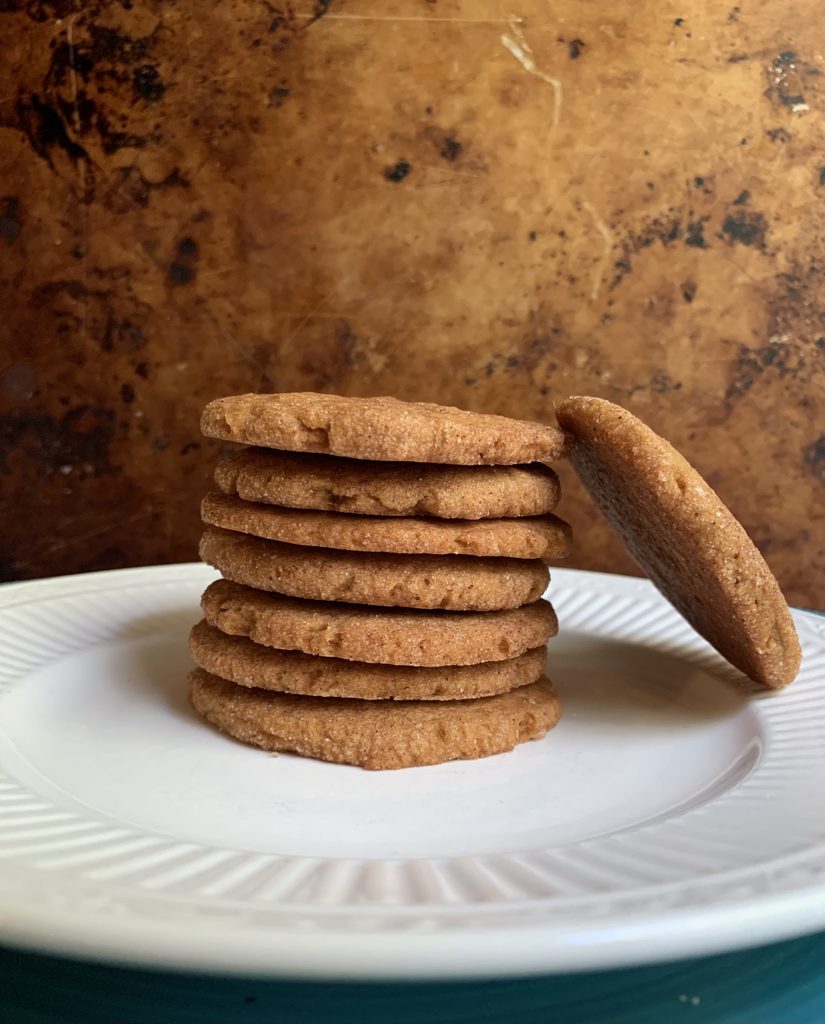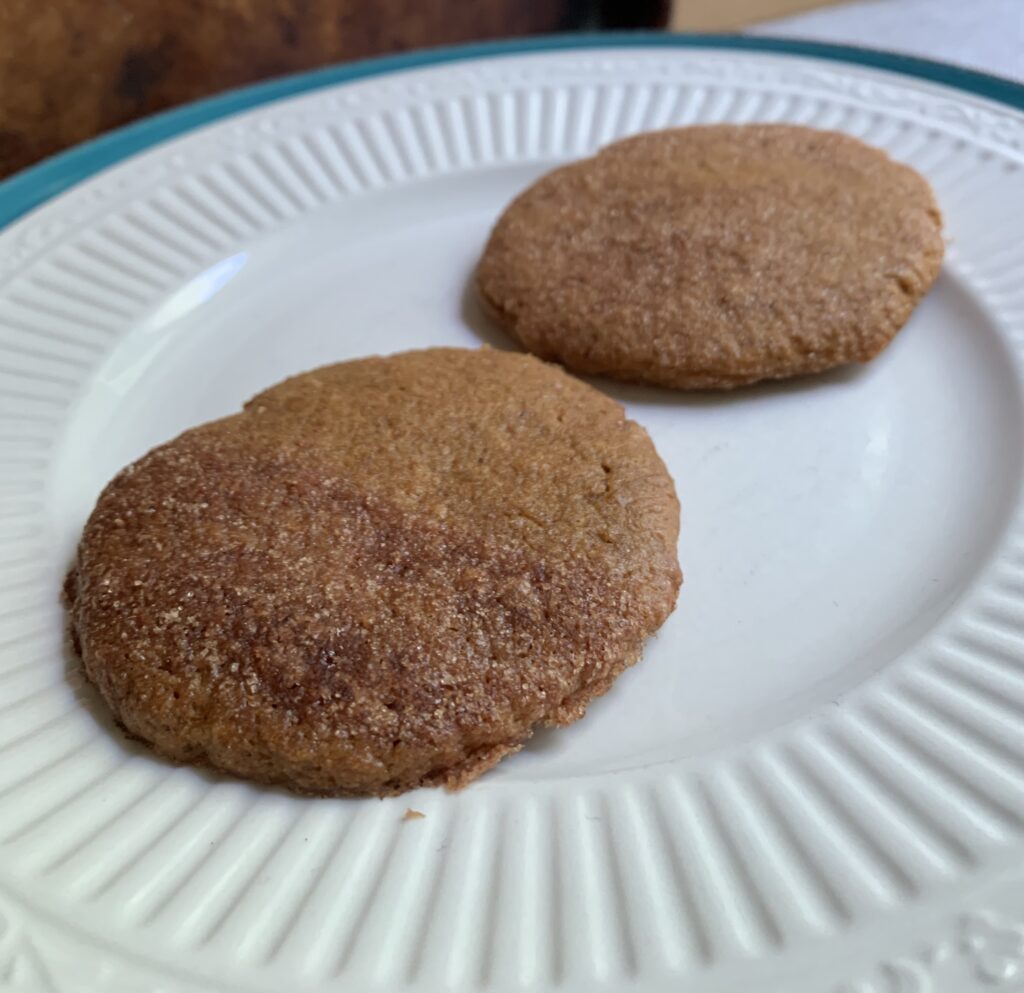
SOUTHERN TEA CAKES, The Most Genteel Of Cookies

The great cookie of the antebellum south

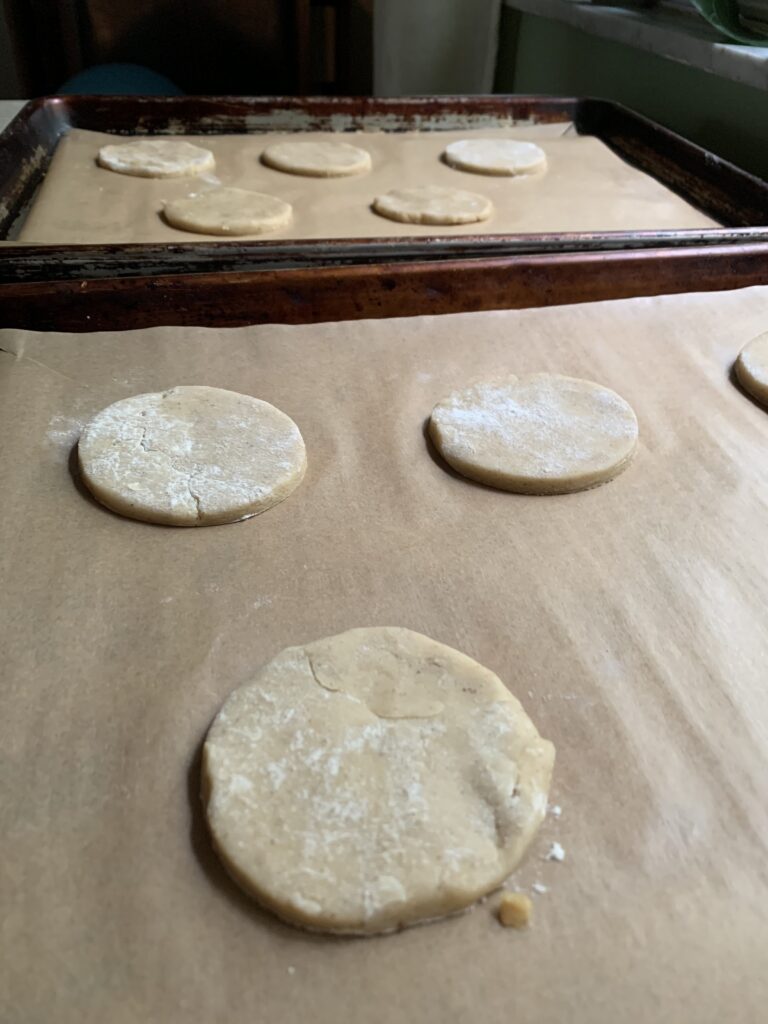
Kate and I recently put out a call to food writers and bloggers around the country for information about any cookie tied to the soul of their city or region. This was the first cookie we heard about, courtesy of Mr. Stacey Little of Southernbite.com. And a worthy cookie it proved to be!

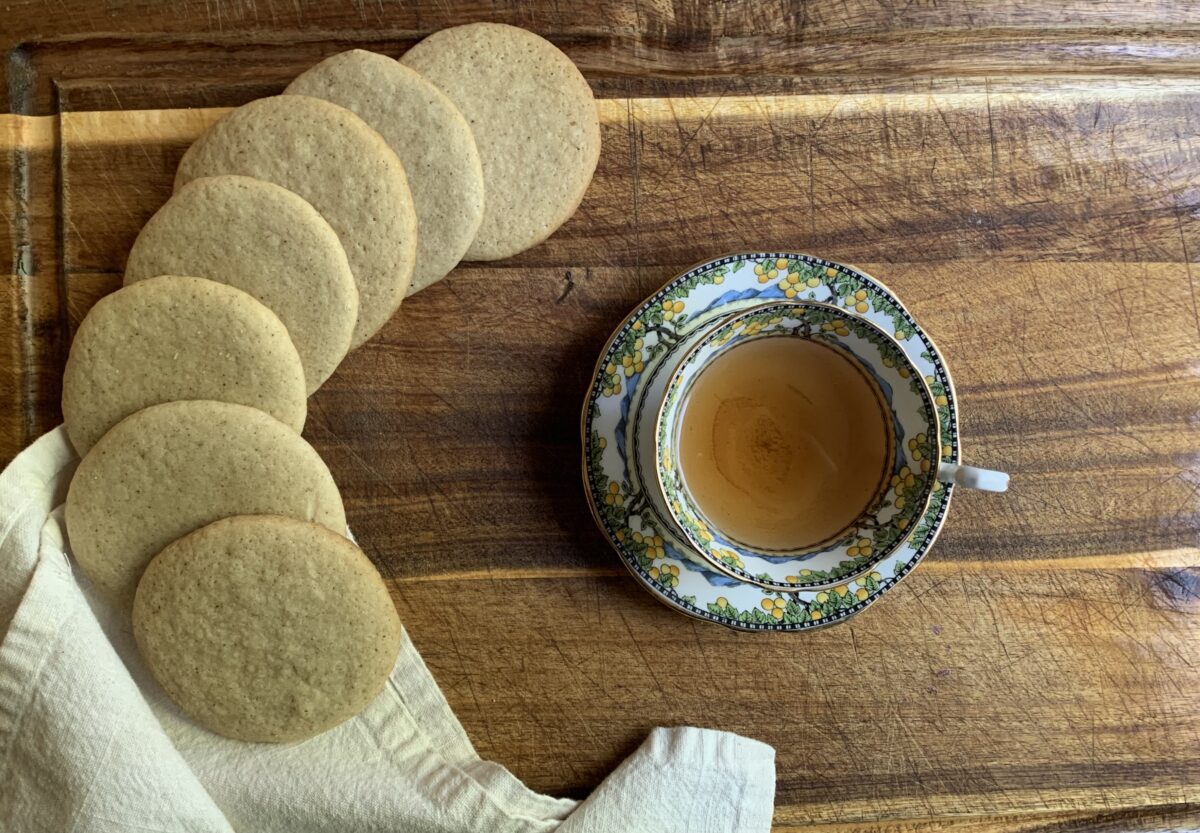
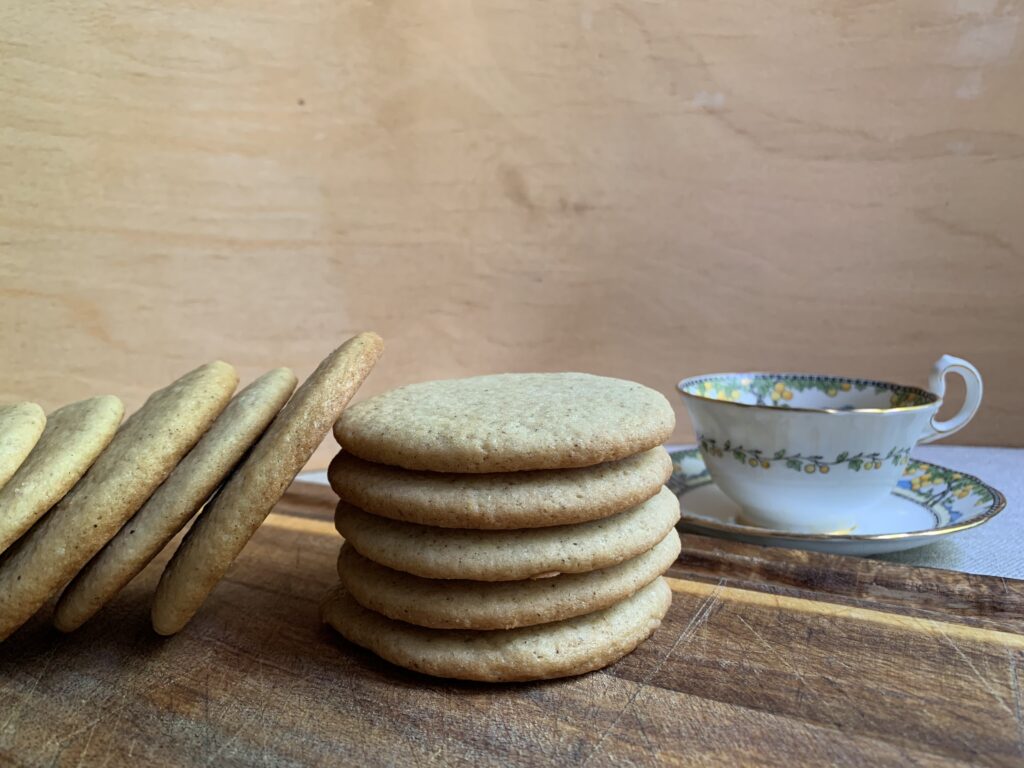
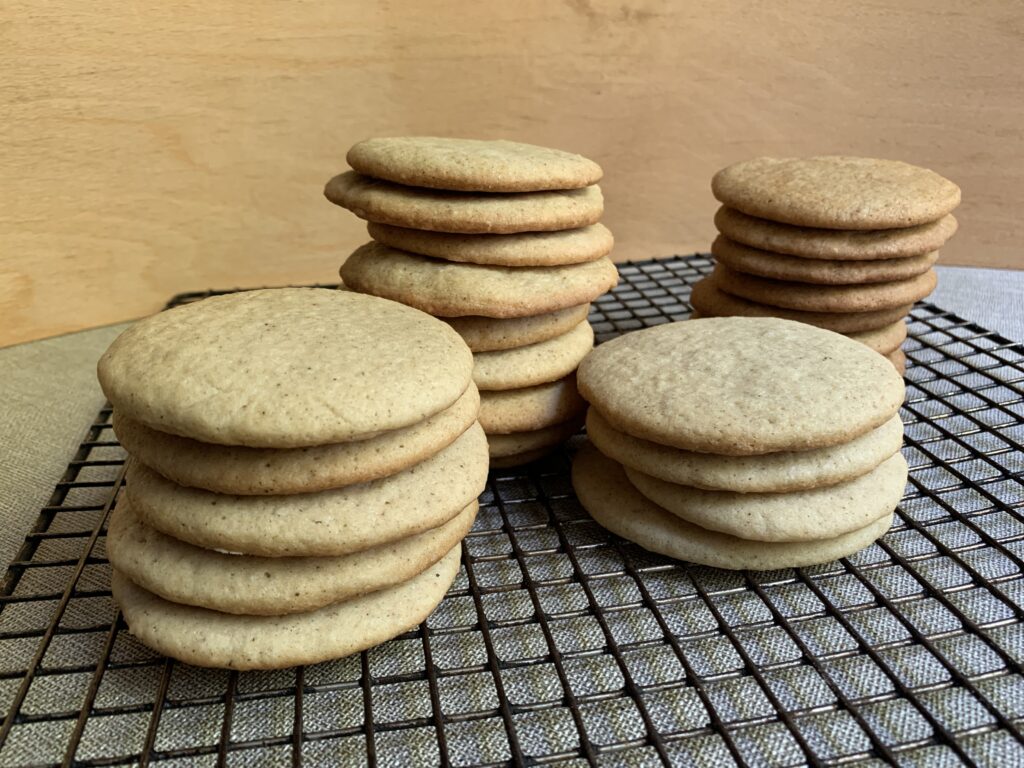
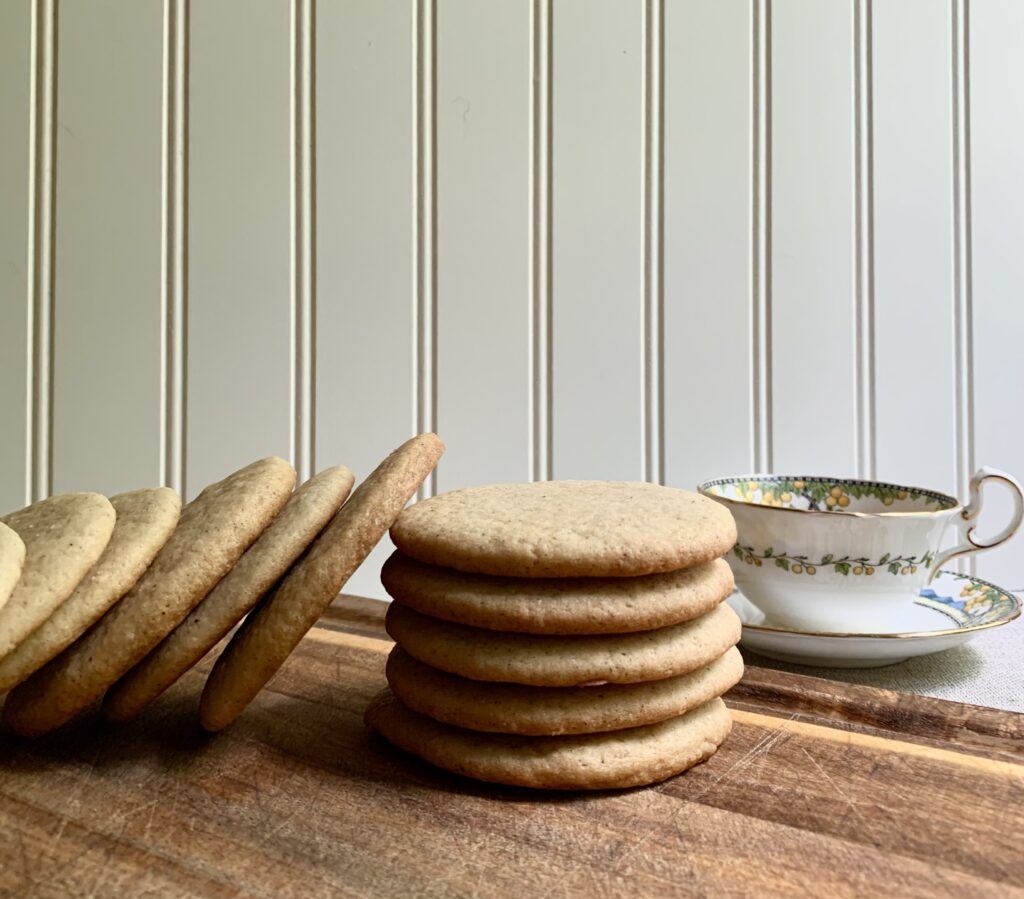
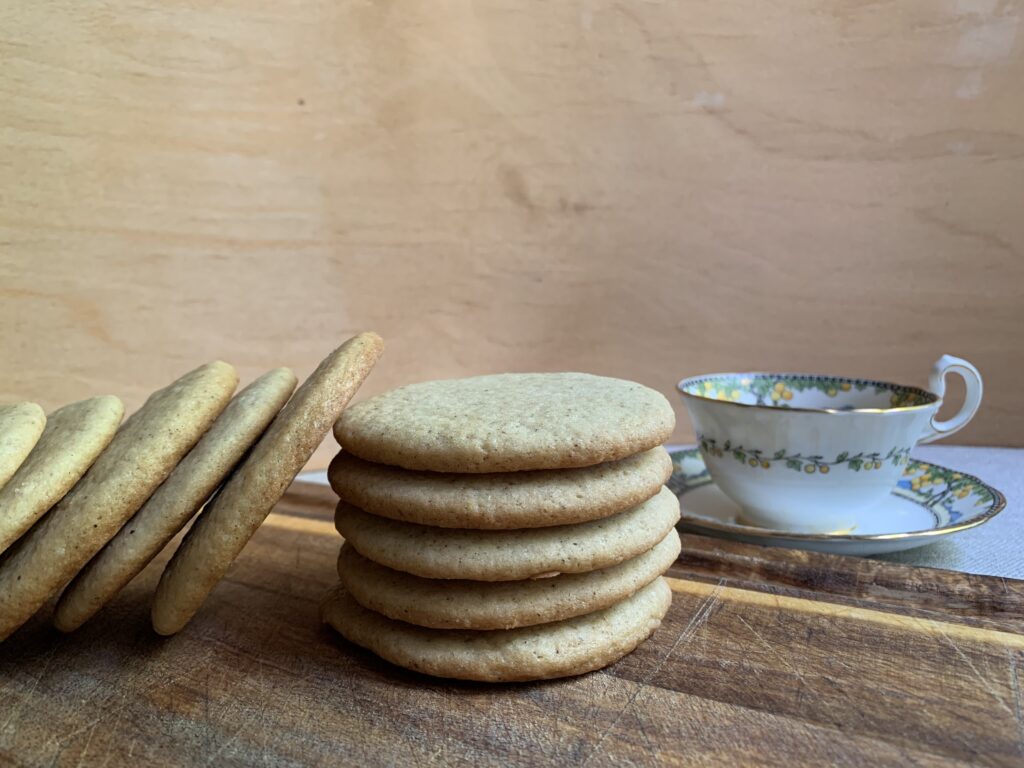
The Tea Cakes tradition goes back to the antebellum south, entrenched so deeply that even today it can be hard to find a church social, teatime, or other gathering that lacks some plates for guests to enjoy. The flavor matches up to that history. Kate and I agreed on “genteel” as the right adjective to describe how these feel when you eat them. They’re at the heart of that tradition called genteel Southern hospitality.

I am a northerner and Kate an immigrant, so neither of us had ever heard of or experienced this cookie. That sent me to Dr. Internet for second-hand experience to start the process.

Recipes abound, with virtually every one describing their version as “just like Grandma’s.” As in 90-95%. Anyone who hasn’t done such research may not appreciate how amazing that consistency is. I found 20 recipes to start with, all of them written independently by people striving to be different while caring enough to honor their heritage as well as they could. What does it take for 20 different people to end up focused on that single image of Grandma proudly presenting the treat she’d learned from her own? It shows how deep the cultural roots really are.

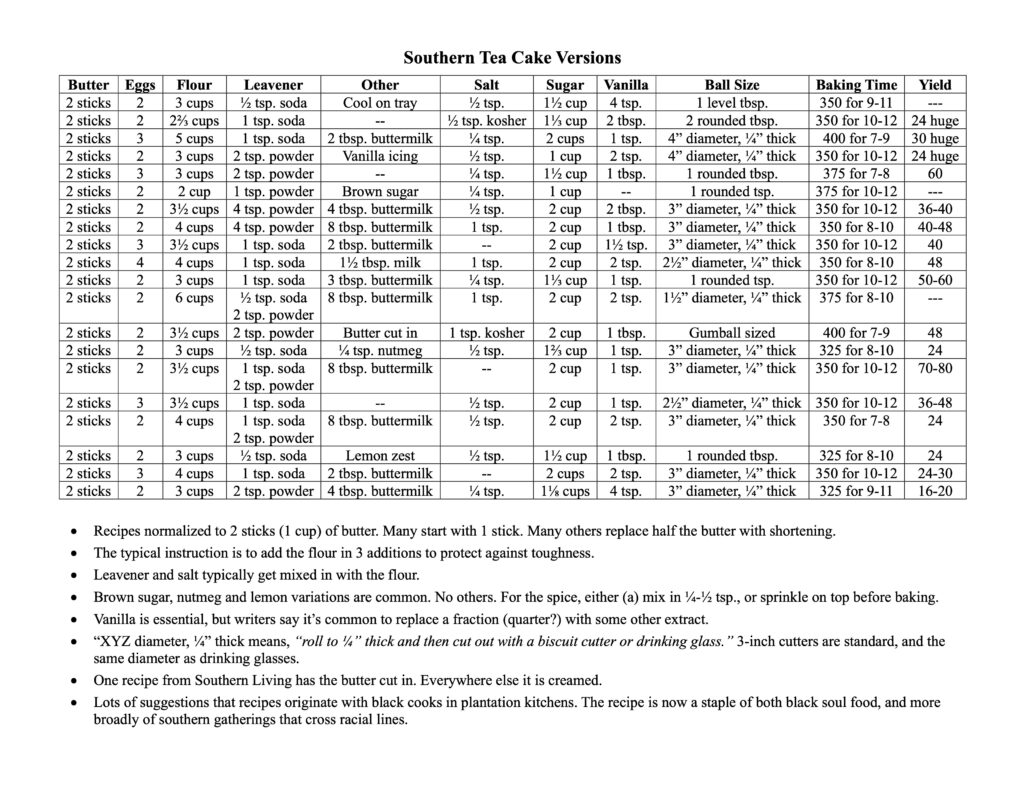
Me being me, I compiled a table of ingredients normalized to two sticks of butter. Then I stepped back to look for an underlying formula.

Choices to Make: Roll or Cut

A few patterns leapt right off the page. First, the writers split more or less evenly on whether to do a drop cookie or a cut out. We chose the roll-and-cut method for our initial version, driven by two reasons. First, most of the recipes call for extra large cookies, as do the array of photos that popped up in my search. Cookies of that size either spread uncontrollably – which conflicted with the possibility of cutting the dough out – or else need some help to stay under control. Second, the idea of large, buttery dough in the American South immediately sent my imagination spinning toward the famous tradition of southern biscuits. How much more “heritage” could you get? And wouldn’t a cookie version of biscuits make sense?

I couldn’t say yes or no either way, but it was a good place to start.

Then I went back to fill in details. Did you know that typical drinking glasses have a diameter of 3″, which not coincidentally pairs exactly to a standard biscuit cutter? Many of the roll-and-cut writers said to use “a round cutter or drinking glass” for the job. The same instruction appears in biscuit recipes. Fair enough. That would be our starting point.

NOTE: Testing proved that I agonized far too much over this choice. Tea Cake dough will ball-and-squish just as well as it rolls-and-cuts. That’s what I did with the leftover scraps, and we found it hard to distinguish the two outside of size and regularity.

Choices to Make: Buttermilk?

Second question: Many writers add in buttermilk. It’s a readily available ingredient, if one we don’t keep in the house as a staple. Was it worth a trip to the market? You bet it was! Remember that analogy to southern biscuits? Southern buttermilk biscuits? This was a gimme. Besides, some buttermilk tang would help to distinguish this recipe from all the other butter cookies we’ve researched over the years.

It proved to be the right choice. That flavor really does matter.

Catching the Vibe: Variations That Really Aren’t

Everyone agrees that Southern Tea Cakes are, first and foremost, all about the texture. They’re supposed to straddle the line between cake and cookie. The universal instruction to bake until the edges start to brown supports that. It shows there’s also a required contrast between the cookie rim and center. So that was a mandatory target. But what about the flavor?

How many variations are there? Buttermilk, which I’d already decided to try. Then there’s lemon; brown sugar instead of white; nutmeg (but no other spices); and… Wait a second! Those aren’t true variations!

You can make faux buttermilk by mixing lemon into whole milk or half-and-half, often with a fleeting hint of nutmeg. (Nutmeg and dairy love each other, as shown by classic examples such as béchamel sauce). For that matter, many dairy-centric baking recipes also use brown sugar, because a very gentle molasses flavor helps to enhance the base flavor. These recipes weren’t showing different targets. They were just different methods to home in on the same target: a cookie with a profound taste of old fashioned, intensely flavored, aged or mildly fermented butter.

Suddenly it all made perfect sense. And the simple fact that everything aims to the same goal shows yet again how much the culture cares about getting this particular cookie right. We tested all of those tricks and came to the following conclusions:

  • Buttermilk: Oh my, yes. It helps in endless ways, and makes the cookie different. We settled on ⅓ cup, right in between the ¼ cup of many examples, and the ½ cup of many more. Modify at will, making up for the extra (or missing) liquid by adjusting the amount of flour.
  • Brown Sugar: An extremely subtle difference in flavor. Someone who cared could argue us into liking it better. Someone who cared the other way could argue us back.
  • Lemon Zest: Disappointing if you use enough to taste it, because it comes across as a failure from both directions. You could convert this to a proper lemon cookie by using 2-3 lemons worth of zest with a sharp glaze made from the juice. Anything short of that left us feeling cheated, until the level drops down low enough to satisfy the anchovy rule: anchovies make food taste better until you can taste them. Then they work in reverse.
  • Nutmeg: See the anchovy rule yet again. A barely discernible hint – no more than ⅛ teaspoon – kicks the whole thing up. Any more than that yields a nutmeg cookie. Really good nutmeg cookies, yes; but a different product when all is said and done. We’ve included the larger amount as a true variation worth trying on its own merits.
  • Other Extract: Do as you like. We prefer to stay true to the original target and intent.
Lemon Molasses
Nutmeg Plain

Vanilla Is Mandatory

Go back and look at that table. Every recipe – 100 % – includes an extremely generous amount of vanilla. We settled on three teaspoons of extract (a/k/a one tablespoon), but this is a case where your taste matters more. Try the recipe as written, take notes, and then adapt it as you wish. Or not.

Roll With Flour, Which Can Be Plain All Purpose

Liquid buttermilk makes this a sticky dough. Like biscuits yet again! Rolling the cookies out on a floured board solved the problem. Just don’t work it over and over, because that could make the cookies tough. Remember: good Tea Cakes have that on-the-line texture, and bad Tea Cakes got too tough.

DIGRESSION: We worried needlessly about whether the texture challenge would require a different flour. It’s a big deal for buttermilk biscuits. Would it matter for Tea Cakes too? I hit the e-books again and found that some people actually tested this. The answer is “No, the flour doesn’t make a difference.” We can also tell you that our cookies came out with the perfect texture using King Arthur all-purpose flour; a brand notorious for its high protein content.

Testing The Cookie: We Have a Winner!

So… I baked the cookies in four batches to cover all the variations. They had a nice flavor. They weren’t just another butter cookie. The texture fit all those descriptions. So they were capital-g Good. But were they capital-r Right?

I took a tin of samples and headed for a soul food restaurant on the North Side. Those owners would know for sure!

Closed. And not just for the day. Grr.

But I wasn’t going to give up! I stopped a pair of local street people on my way back to the car, and asked if they could direct me to some other local spot where I could find someone who grew up in the south. “Somewhere like Alabama, Louisiana, Georgia, Tennessee, or the like.”

Instant suspicion! “Why do you want to know?”

After all these years I’ve got that answer down to an art form. You wouldn’t believe how many people think I’m peddling hash brownies or the like. Free cookies = ulterior motives. So I come prepared with both evidence and explanations. Show book; explain that I’m the author; explain about research; explain about the cookie; show the recipe; and then explain that “I can tell if it’s good. That’s easy. But I need native testers to tell me if I’ve got it Right.”

They reacted the same as everyone else, with that head cocked, ‘I guess that makes sense’ look. The one in heavy dreadlocks mumbled something. His friend translated. “He wants you to know that he’s from Alabama.”

I looked at the man and asked, “Do you know Tea Cakes? The cookie? That’s what I’m working on.”

His eyes lit up before he turned to look at the street. He mumbled something to acknowledge a small experience or two.

“Would you mind tasting one of these, and telling me if I’ve got it Right?”

He took the cookie, gave it a good nibble, and got a bit misty eyed. Then he turned his back. Nibble. Grab with both hands instead of one. Nibble more. Munch. Followed by munch, munch, and more munch, grabbing up crumbs until the cookie was gone. Then he gave me a thumbs-up, still turned away.

“That means you got it right,” his friend said.

“Do you want one? Take your pick. There’s another for him too if he’d like.” Another turned-away thumbs up. Then they vanished up an alley to who knows where or what, heads together and talking.

But I still had some cookies to dispose of. Kate would not approve if I returned to the house with dietary sin still in hand. Besides, one tester – however enthusiastic – is still just one.

We’d been standing outside the local public library, so why not? I made my way in, found the young man at the desk, and went through the story again. “Did anyone here grow up in the south? Somewhere like Alabama, Louisiana, Georgia, Tennessee?”

“No, I’m afraid not. I grew up in North Carolina, and that’s as close as you’re going to get.”

“Oh,” I said. “That’s too bad. But… would you happen to know a cookie called Tea Cakes?” His face lit up.

“Of course I do!”

“Care to test one for me?” Book up; recipe shown; explanation made; etc.

“Sure, I’d love to.” One bite and he came close to misting up too. “Y’know, it’s weird how tasting something from your childhood can bring up so many emotions. I didn’t expect that.”

What could I say except to agree? Cookies have a magic, and that’s a big part.

The last cookie went to his fellow librarian at the end of the counter. She was from somewhere just outside the city. “These are really good! I never heard of them before.”

I left as he began to enthuse about growing up in Tea Cake Land. That’s another part of the magic.

Conclusion

Southern Tea Cakes fit every category of “heritage” you could ever imagine. Right down to embodying a proud part of the culture itself. They really are genteel Southern hospitality incarnate. Homey and a little sweet, with nothing strange except an oddly familiar tang to the dairy flavor, and a remarkable texture right on the line between cake and cookie.

We wholeheartedly approve.

And now I’m off to confirm those findings. Again. I am a loyal husband, after all, and protecting my wife from regret comes with the job. If that means I must throw myself on the fork, so be it.

Enjoy!

NOTE FROM KATE: I agree that Southern Tea Cakes came as a happy surprise. They are pleasantly soft on the day of baking, but harden a bit on the second day. I expressed my mild disappointment with the lemon zest ones, so we talked it over. Yes, it’s there for butter support. No, this is not meant to be a lemon cookie. We have plenty of lemon cookie recipes, and this one isn’t one of them. Scott pretty much said what needed to be said. As for his valiant defense of my waistline, all I can say is, there are risks that come with being around cookies – especially when photographing them. Even though I enjoy some as part of the creative process, it really helps to get them out of the house!

JOE FROGGERS, Americana From The Age Of Sail

A revolutionary war cookie from coastal Massachusetts.

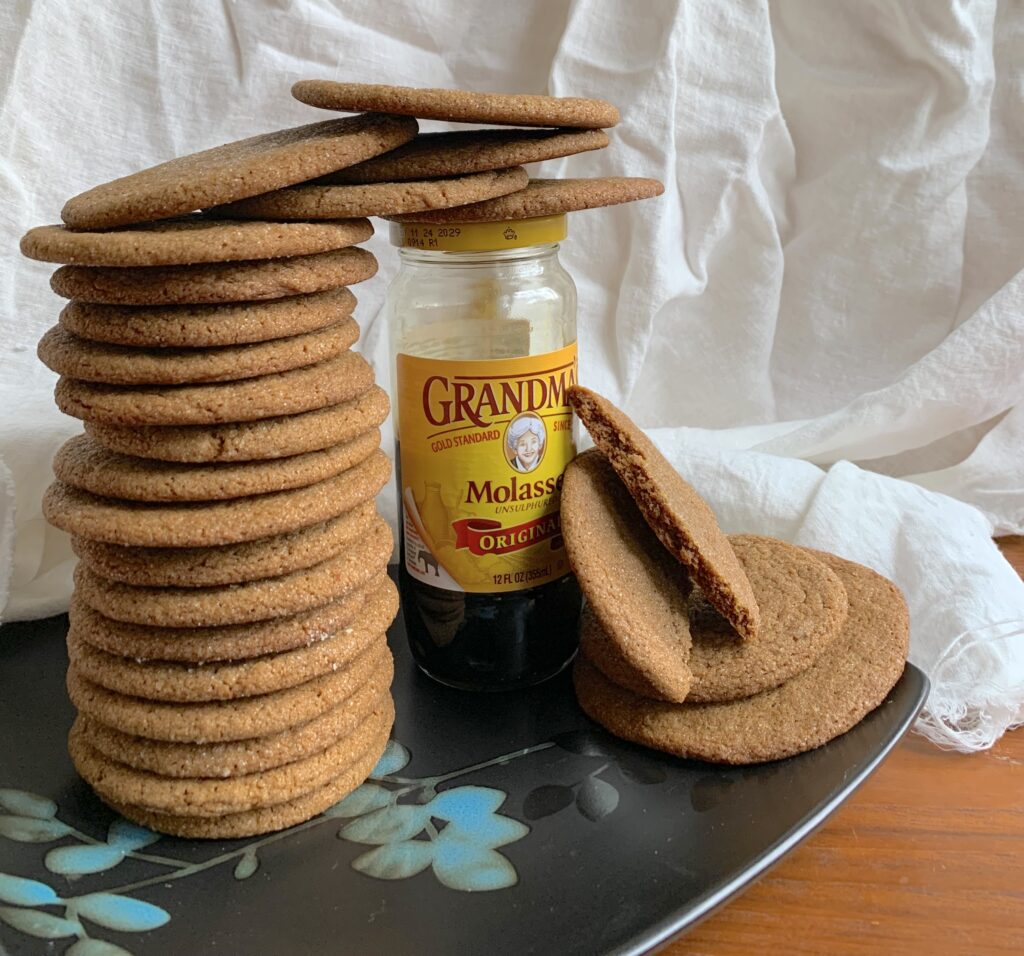
Imagine an arm around your shoulders and friendly voice saying, “Hi. I’m a cookie.” Then add in this quote from one of our tasters: “That’s the biggest, softest, easiest going ginger snap I ever tasted! Or is it gingerbread?” And then triangulate with sailors on a clipper ship singing in the sunlight, “Ho, ho, ho and a bottle of rum!” Somewhere in that intersection you’ll find Joe Froggers, a cookie created right after the Revolutionary War at a Marblehead Island inn outside of Boston, Massachusetts.

The Cookie On Its Own

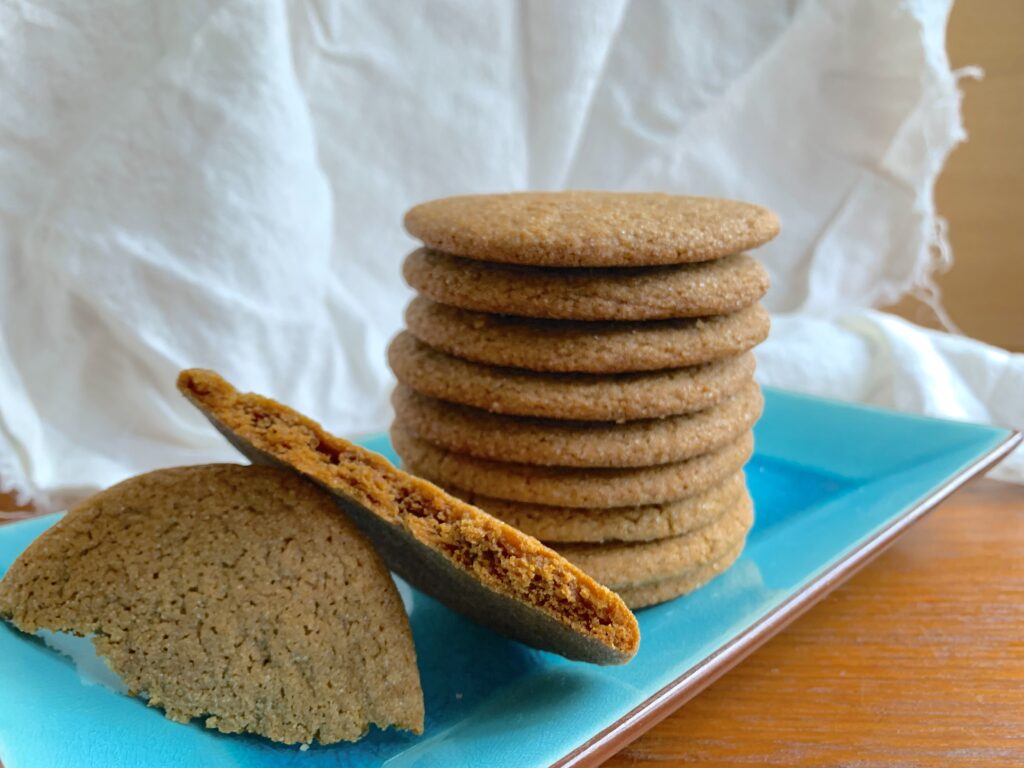
Joe Froggers are a soft, gently spiced molasses cookie with a nice finish from a tot of dark rum in the dough. The cookies were designed and intended for grownups, but they’re also as kid friendly as a cookie can be. The texture is plush and easy; the flavor simple, familiar, and a bit raisiny from the molasses; and they’re about the width of a small child’s face (4″-6″ across), which guarantees the ‘eyes light up with delight‘ reaction.

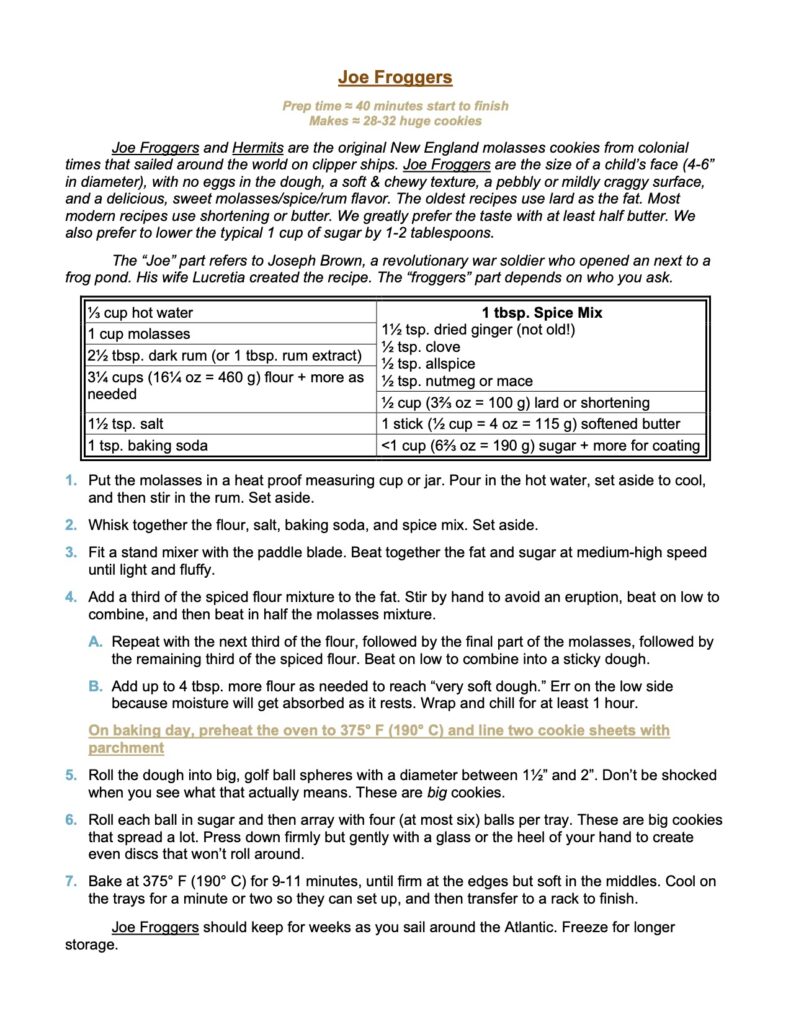
The earliest versions were made with lard. Most modern recipes call for shortening. Butter tastes best of all, of course, but you give up a bit in the way of texture. We make them with a 50/50 mix of butter unless there’s a special reason to be historically accurate.

NOTE FROM KATE: I felt a need to be historically accurate, so Scott made the first batch with lard. This beautiful cookie is friendly and cheerful, but I felt like I had to work against the unfamiliar flavor of lard after the third bite. This particular fat’s texture sticks to the mouth a bit more than butter or shortening. Not a familiar sensation. Next time I’d go with half lard and half butter. Despite its undeniable culinary advantages, I don’t particularly like shortening, as it’s an ultra-processed food, but YMMV. I can see this one becoming a family favorite!

That’s about all you need to know. It’s a big old, friendly, arm around your shoulders cookie.

“Joe Froggers?” A Taste Of History

The general outline of the story is well known and documented, with its own page at the Marblehead Museum website. The story goes like this.

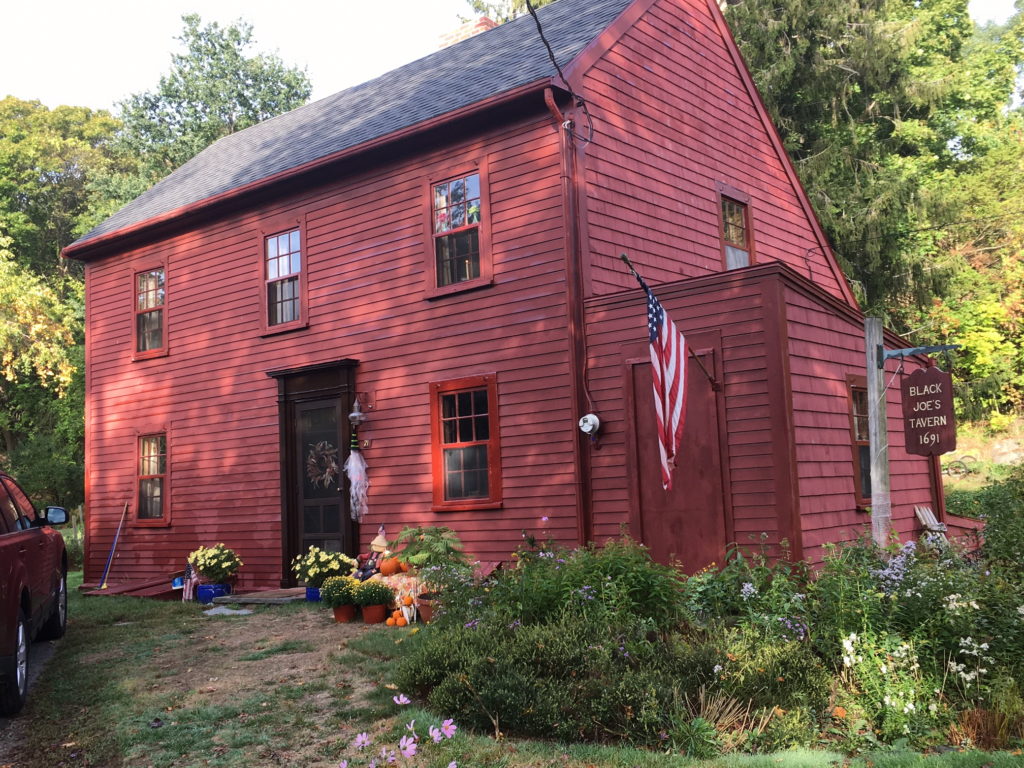
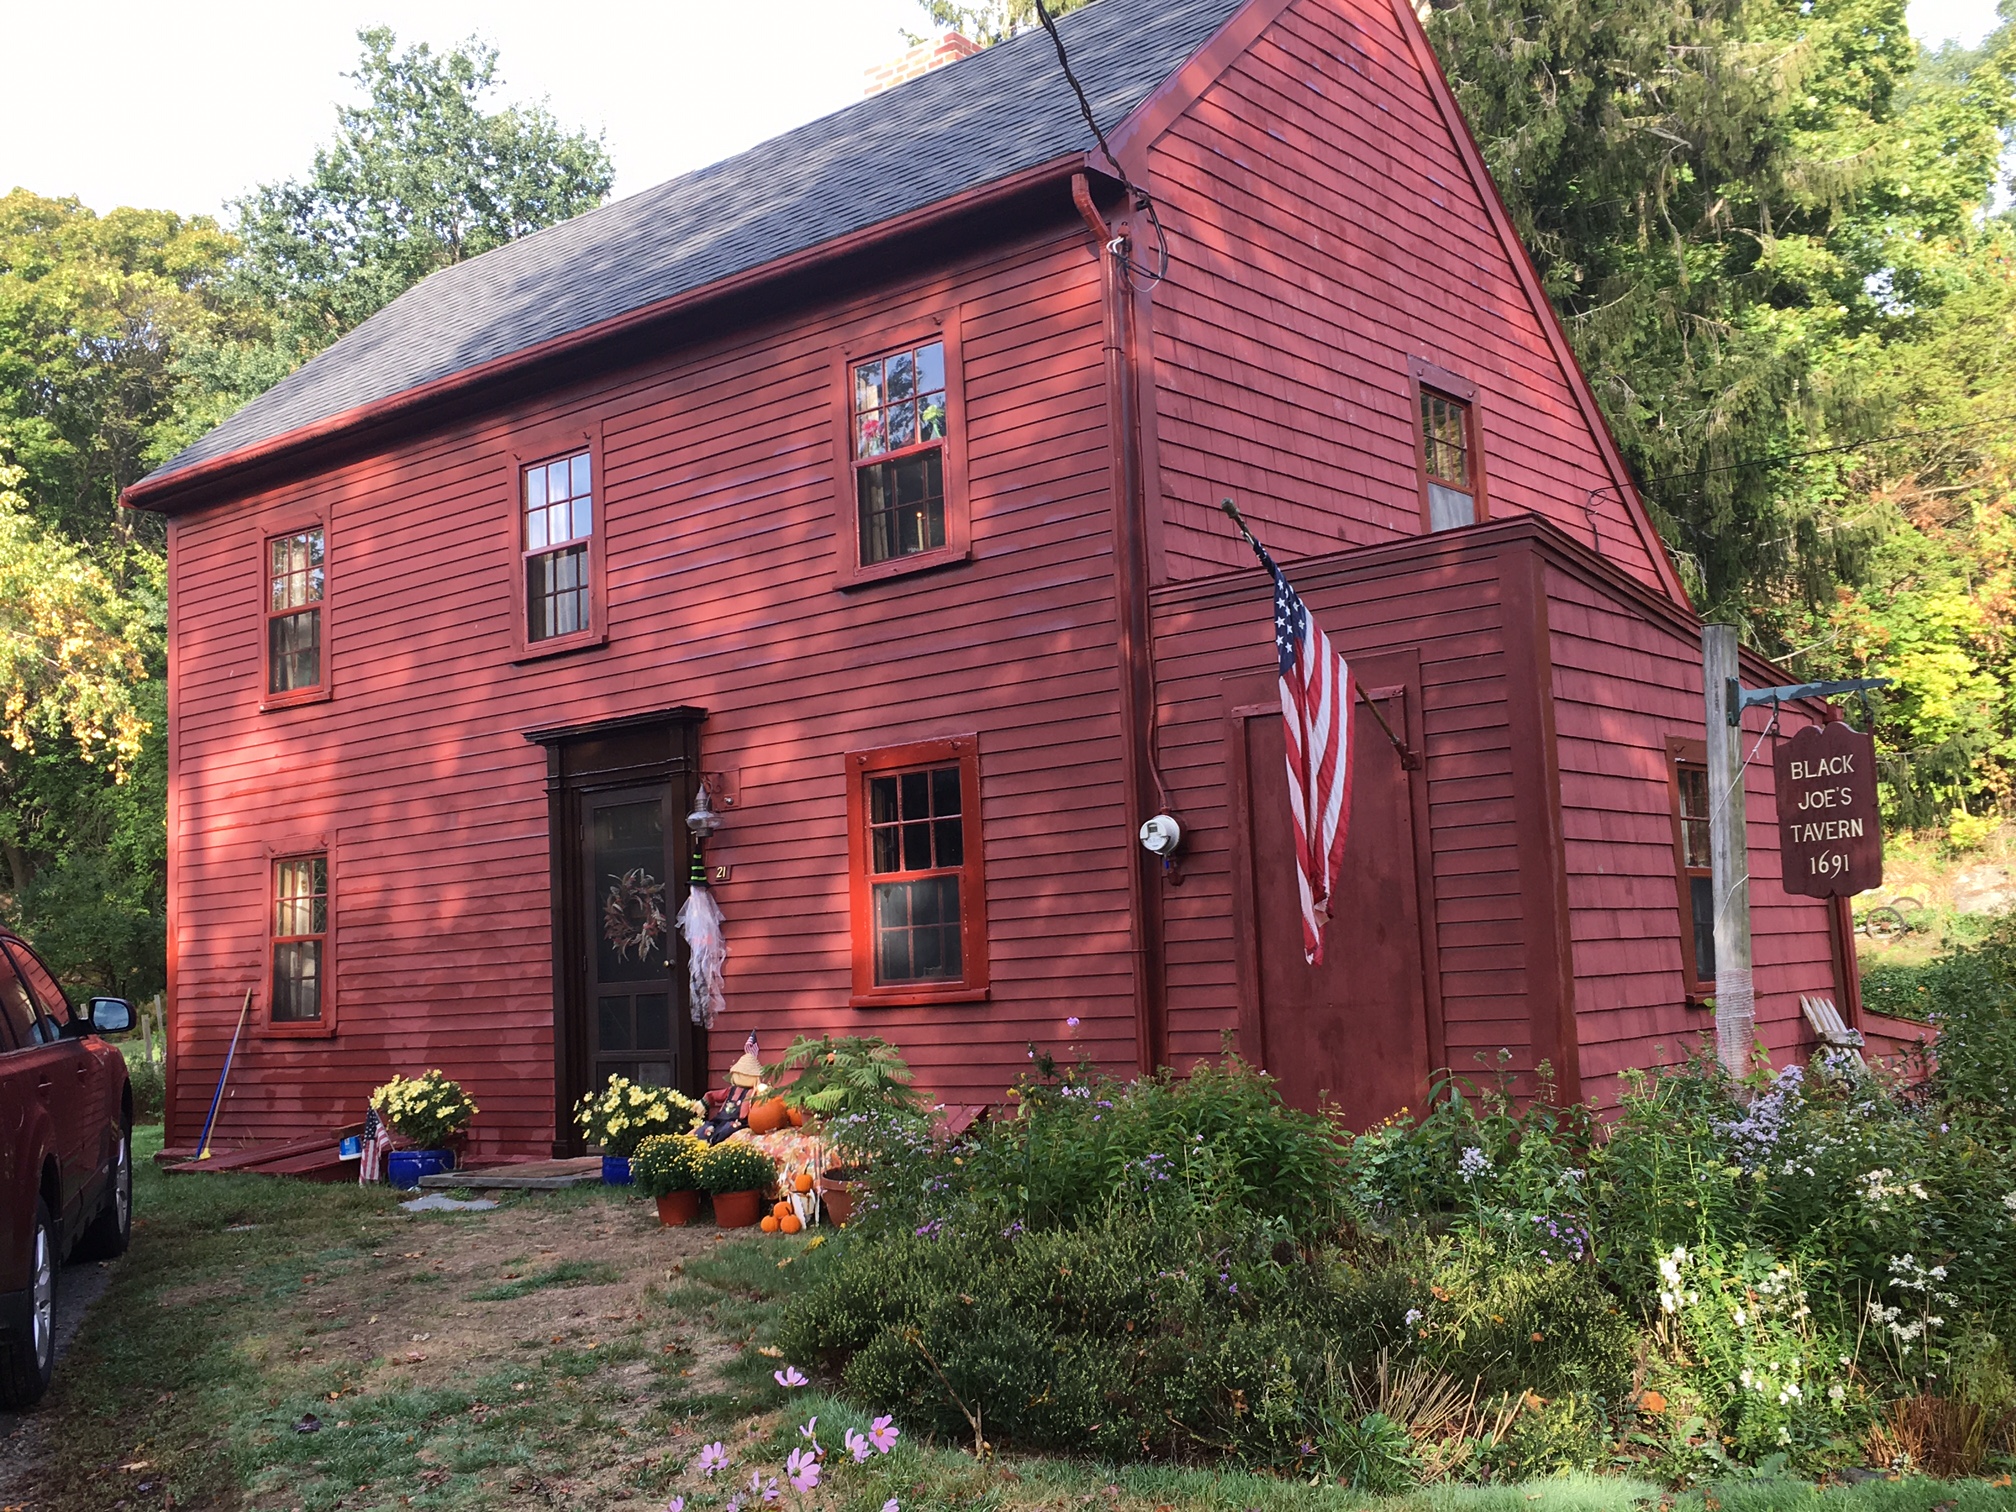
Once upon a time there was a Revolutionary War veteran named Joseph Brown, son of an enslaved, African-American mother and a Wampanoag father. He and his wife Lucretia opened an inn on Marblehead Island after the war, right next to a local frog pond.

Photo, credited to the Smithsonian Institution, found at MarbleheadMuseum.org.

Lucretia invented the cookie, and it became something of a sensation. They’re not only delicious, but they also have enough molasses to keep for a very long time. The revolutionary era Massachusetts economy centered on fishing, trade, and other maritime activities. Marblehead was a major seaport and shipbuilding center, so much so that it’s also known to history as “the birthplace of the American navy.” That fame would only grow as the young nation built its vast fleet of clipper ships.

Joe Froggers (and Hermits) quickly became the treats of choice to send off on long voyages around the Atlantic, and later around the world. Small, tasty, long lasting, and relatively inexpensive because much of the nation’s molasses and rum trade came through Massachusetts ports.

The name itself is more debatable, with every source we’ve found claiming to have the one true answer. It’s certainly related in some way to the pond out back. And the “Joe” part certainly comes from Joe Brown. Others note that Lucretia Brown (“Aunt Creese”) originally made these on a skillet, like extra chewy pancakes, and everyone who’s done such things will know how often the neat, round shapes you’re after come out looking vaguely like a frog. Others argue for the lily pad idea.

Decide as you like. This is me hoppity hop hopping away from all such debates. It’s probably some combination of them all, plus the fact that the name itself is so fun.

Moving on, Brown’s Inn grew into an immensely popular community center for celebrations of all kinds. Joe became the town fiddler, with his own set of local legends. And Lucretia’s breads, buns, cookies, and cakes were the best one could find. The couple eventually grew into local legends in their later years, and then expanded into lore and myth after their deaths, with the details ebbing and flowing with whoever told the tale.

For our purposes the bottom line is this: “Black Joe” and “Aunt Creese” were real people, who owned a real inn, and really were well known and loved across the island of Marblehead, Massachusetts. Lucretia Brown really did invent and popularize the cookie now known as Joe Froggers. Joe Froggers really did become a “thing” both during and after their lives, traveling around the world on the Bay State and American Navy fleets. And they remain a “thing” across eastern Massachusetts even now, in the 2020s.

Many cities around the country have “their” cookie. This is the one belonging to Boston – complete with the inevitable carping about how Boston undeservingly managed to absorb all of maritime New England under its umbrella. You’ll make a friend if you acknowledge that injustice to a native of Marblehood, Lynn, Gloucester, or the other seafaring centers of the era. Just acknowledging their claim will make a difference. And Bostonians won’t care in the slightest. It’s all Greater Boston from their point of view. They’re city folk.

An Aside (Sort Of) – The Great Molasses Flood Of 1919

I spent a few hours walking Pittsburgh’s Strip District in search of enough testers to keep us from devouring dozens of these huge cookies on our own. It was a real danger! We each accounted for at least half a dozen when the other wasn’t looking because they are heartbreakingly moreish. The molasses flood must have come up in conversation close to ten times.

It has no direct connection to Joe Froggers beyond “Massachusetts” and “Molasses,” but it’s one of those fascinating events that everyone’s heard about but never remembers until prompted. And then they remember how much they love the story in a guilty kind of way. 20 people drowned in molasses?! The smell lingering on summer days for decades?! Massive and enduring changes to building codes across the nation? Baking ingredients shutting down a city?! Wow.

This goes to a link from the city website Boston.gov if you want to refresh your memory. Here is a fun Wikipedia link that tells the story better, albeit with less authority.

Notes For Fellow Bakers

  • The rum adds an interesting note you don’t really taste unless you know it’s there. But it does matter. First, because it’s a part of the history, and that’s part of what makes this cookie so fun. But also because the rum rounds out the spices to create a whole that isn’t quite gingerbread, and isn’t quite ginger snap, but something unique within the family.
  • Rum extract should work just fine, though we haven’t tried it. We used Gosling’s Black Seal Bermuda Dark Rum because we also keep around the house just for drinking. Good stuff!
  • The fat makes a difference because you can taste it in the final product. Lard and shortening add something to the texture, however, which is why we recommend a 50/50 mix of butter to other. But it’s truly up to you.
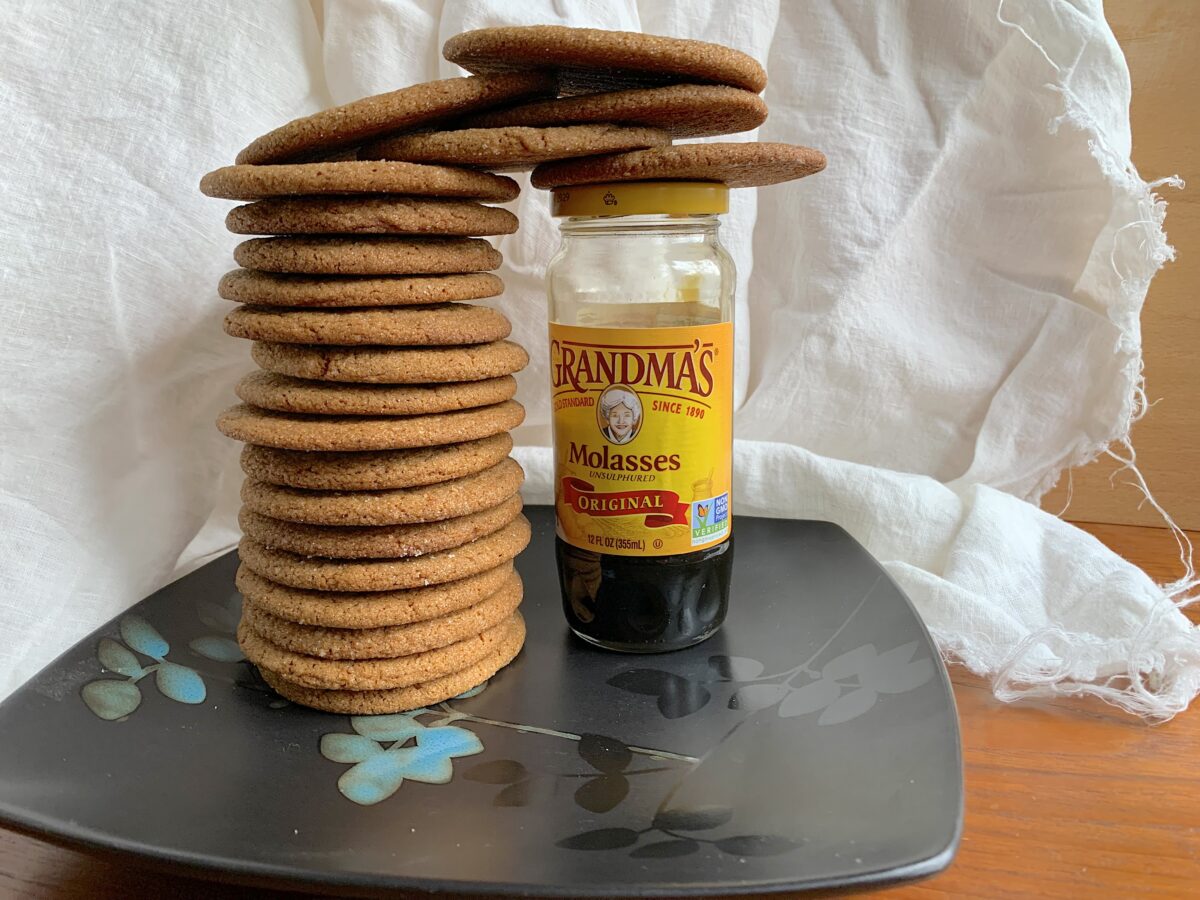
  • Purely by chance, I happened to use up my old jar of molasses while making a test recipe. That jar became the perfect vehicle for combining the (topped off) cup of molasses with the hot water and rum. Put it all in the jar, screw down the lid, and shake until it’s all smooth and liquid.
  • This is a really, really sticky dough that’s just over the line from being a batter AFTER it cools and sets in the fridge. Account for that as you get the dough mixed. You want just enough flour to reach that point. Any more will start to toughen the cookies. Remember: you can always mix in more, but cannot take any out.
  • Some recipes will merely sprinkle the pre-baked balls with sugar, but we ended up rolling them simply to make the sticky dough balls easier to handle. This is why we removed 1-2 tablespoons of sugar (⅓ oz = 10 g) from full 1 cup usually listed for the dough.
  • You want to press the balls down to keep them from rolling, but there’s no need to really squish them. The dough will spread all on its own.
  • Speaking of which, a golf ball sized sphere is really big compared to what you probably make with other recipes. That is the minimum size for true Joe Froggers. They’re supposed to be big enough that children will gape in awe at the wealth. Skimp if you must, but please do it on purpose because regular sized cookies don’t leave the same emotions in their wake. We fit only four cookies per standard baking tray, with six slightly smaller ones on the final tray because that’s what was left in the bowl.
  • Adding the flour and liquid in stages works best. Everything gets smoothly and evenly incorporated. But it isn’t essential unless you’re working by hand.
  • This is a no-eggs recipe. That isn’t a typo. It’s a feature, not a flaw.

Enjoy!

CENTRAL AMERICAN CORN DONUT COOKIES (“Rosquillas de Maiz”)

A staple cookie from Nicaragua and Honduras that acts like a Central American equivalent to Italian Biscotti.

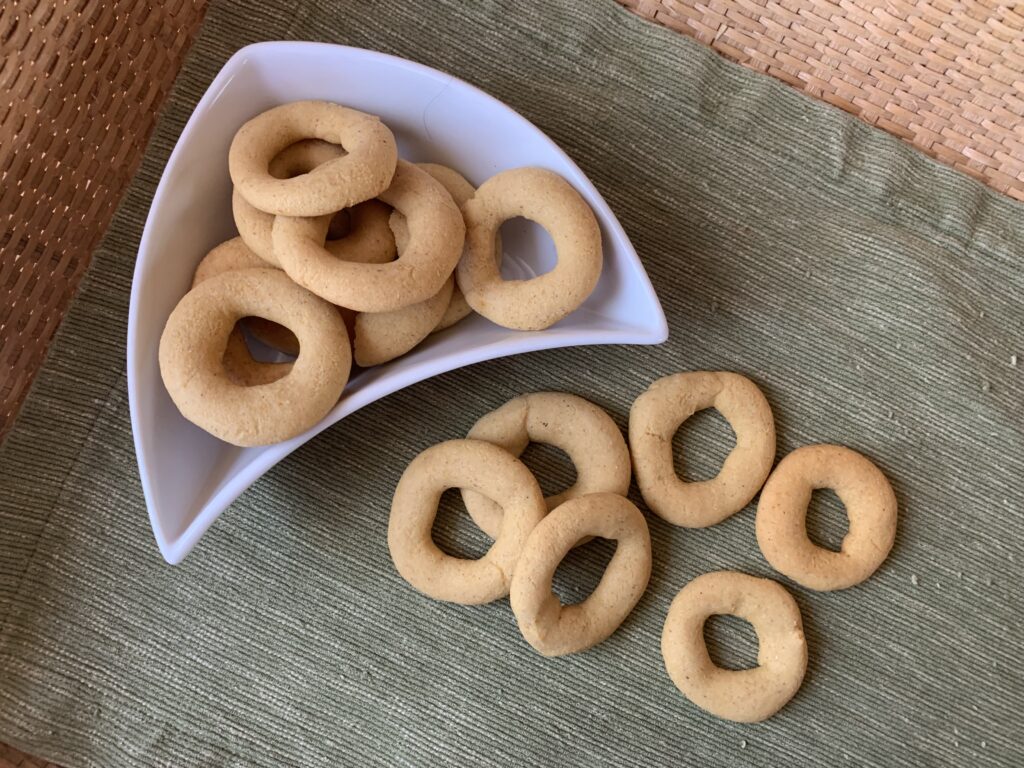
Some countries use more corn than wheat flour as their staff of life, and in those lands you have to expect corn based desserts. Enter Rosquillas de Maiz, a crunchy, mildly sweet cookie meant to accompany a cup of coffee, tea, a drink, or even a fruity dessert soup.

A word to the wise: the word “rosquillas” describes the shape, not the dish, and can include a variety of recipes that can range from our common fried donuts, through ring-shaped breads, tender shortbreads, and in this case, barely-sweet cookies. A native speaker is bound to complain if you use that word alone, just as Norteamericanos would complain if you handed over a bowl of ring shaped breads and called them donuts. Use the adjective, though, and you’re fine. Rosquillas de Maiz means “corn donuts,” and Rosquillas de Nicaragua/Honduras means “donuts from this country.”

NOTE FROM KATE: If this pattern continues, we will never be done testing cookies! What a terrible fate, right? Every time we think our short list got trimmed down to “just a few more,” this happens. Every. Single. Time. However, I have no regrets. This little cookie is easy to make, fun to shape, and expands the repertoire in an entirely unexpected direction! One note of caution: If you toast your corn flour, make sure the flour is cold before you add your leavening agents, especially if you are using hartshorn. (I poured my toasted corn flour into a steel bowl and let it cool in the freezer, for patient I am not.)

An Origin Story For Cookie Sleuths Everywhere

We often get asked “Where do you find all these?!” My best answer is, “They are there waiting to be found if you just take the time to look, and to ask.” This cookie is a case in point.

Kate and I are in the final month of intensive recipe testing before attention turns to getting Volume 2 ready for publication. Sweet Wine Cookies, a ring-shaped treat common from Portugal, Spain, and Italy has been high on our list for some time now. I mean, come on: everybody cooks with wine in their soups and sauces, so it makes total sense that wine growing regions would use their excess wine in baking too. Wine based desserts aren’t exactly rare. Nor are wine based flavors in cakes. Haven’t you come across some version of Champagne Buttercream Frosting for cakes, cupcakes, Macarons, or eclairs? If you haven’t, you’re welcome; that’s good stuff!

I looked around and, sure enough, the wine growing regions in Southern Europe have just such a treat. So I worked up a test recipe, got to where we liked it, and then went searching for native Spaniards to tell me what I needed to tweak. But there I ran into a problem. Our fallback testers include several native Italians (who gave it a big thumbs up), but Spaniards are thin on the ground in Pittsburgh and our Portuguese friend has retired. Thus I wandered into Reyna Foods, a Latin-products grocery store in the Strip District that we have patronized loyally for decades. There’s a lady there who also likes to supply her friends and neighbors with holiday cookies; Latin America was part of the Spanish Empire; and so I hoped that Rosquillas de Vino might have found a sideways path into her repertoire.
No such luck. But there was a lady from Nicaragua in the back who’s reputed to be a fine baker, and her ears perked right up at the word Rosquillas. She doesn’t speak much English, but a coworker agreed to translate my request for feedback.

Her eyes crinkled up in suspicion when I opened the tin of powdered rings. She picked one up with obvious hesitation, gave it a little nibble, and made a face so universal it needs no translation. “No, no, no. No bueno.” It wasn’t quite a blecch! because she didn’t mind the flavor per se, but she was quite firm that these were not the Rosquillas she grew up with. Not even close. Mine were sweet, tender, and had a uniquely wine-tinged aroma. No bueno. Nicaraguan Rosquillas were supposed to barely sweet, very crunchy, and [ahem] untainted.

Then she pulled out her phone, did a quick search, and showed me a photo. Plain, golden rings. “Estas. Estas son Rosquillas.” I scrolled up and saw the title: Rosquillas de Maiz. Wait a second. Maiz? As in “maize?” I.e., corn?

[Pause for translation]. “Of course it is. Rosquillas are made with masa a/k/a corn flour.”

And thus the penny dropped. The basic idea of ring-shaped cookies had indeed traveled the length and breadth of Spain’s former dominion, but not the Spanish recipe. People in the Americas had taken the idea and made it their own.

I looked things up as soon as I got home, and found quite a few examples from Nicaragua and Honduras in particular. It’s a pretty straightforward recipe with a few twists.

Twist #1 – The Basic Formula and Target Result

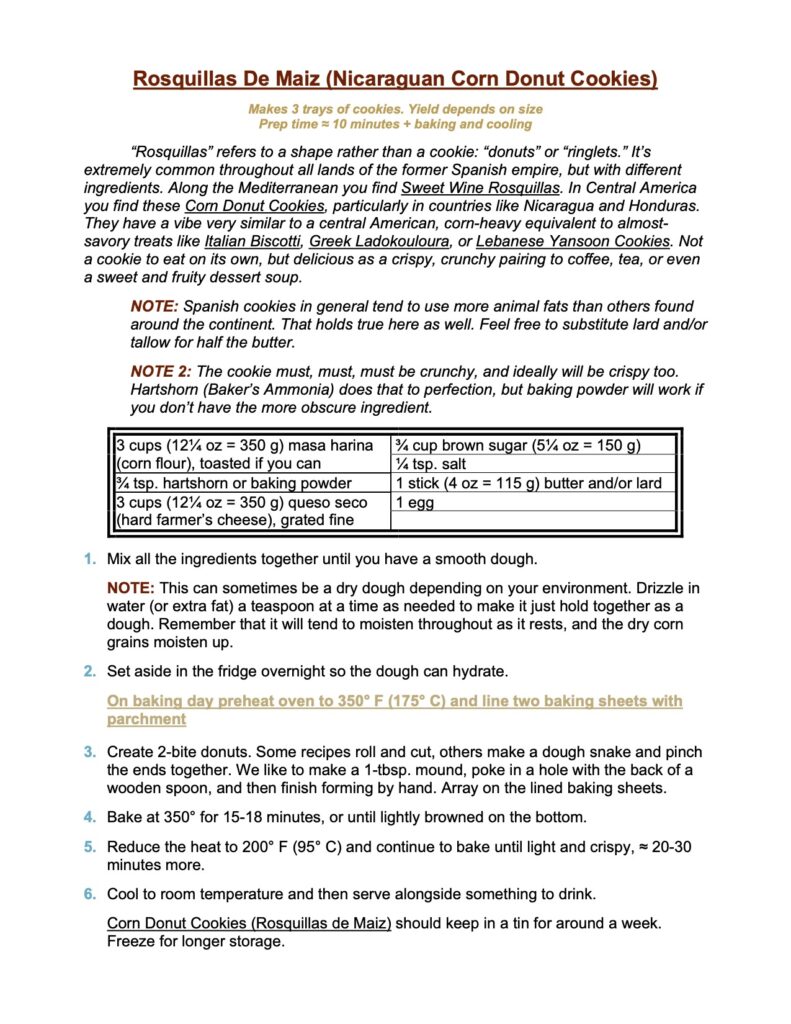
Research for this cookie quickly ran into a problem: the details were all over the place. Some called for lard (pig fat), some called for tallow (beef fat), some called for butter. Some were leavened, others unleavened. Some had sugar added, some didn’t. Etc. Fortunately, it’s a problem we’ve faced before and we knew what it meant.

This is a peasant recipe enjoyed by the whole society, not a well defined restaurant dish. That means the overarching instruction goes like this: “Use what you have on hand, so long as you keep the basics in place, and achieve the right result.”

Here are those basics, as measured by weight:

  • 3 parts finely ground cornmeal (masa harina),
  • 3 parts hard, grated farmer’s cheese (queso seco),
  • 1 part fat,
  • an egg to bind it together, and
  • baking time at 350° F (175° C) to get them browned, followed by more baking at 200° F (93° C) to get them completely dry and crunchy.

And here is the target:

  • Nicaraguan Corn Donut Cookies serve the same function as Italian Biscotti: they’re a not-quite-a-cookie intended to accompany coffee, tea, an alcoholic beverage, or a fruity dessert soup. Make that, and you’ve made Rosquillas de Maiz.

Everything after that comes down to refining and perfecting each point.

Baking With Corn Flour And Meal – You May Want To Toast It In A Pan

Central Americans have fresh masa harina on hand, every day and everywhere, waiting to be used. If you’re like us, you probably have a bag of masa tucked away in the back of your pantry, sealed as well as possible to keep out the moths. “Fresh” it is not.

There is an easy solution. Put your somewhat stale corn product into a dry pan over medium heat, and cook it until you can smell the corn flavor rising up. Presto. Ready to go.

That trick may work for fresh masa harina too, but it isn’t in the original recipes. On the other hand, it isn’t all that outside of the recipes either. Spain and its cultural heirs make a series of cookies like Polvorones that are built on a combination of toasted wheat flour and a healthy amount of butter and/or lard. This fits right into that tradition.
The Cheese

Most cultures with a European heritage make a variety of fresh cheeses known by different names around the globe. Quark, tvorog, topfen, etc. They typically come in two basic varieties, wet and hard, and have a mild, creamy flavor. The closest American equivalents would be something like cottage cheese mixed with ricotta, and then drained in cheesecloth until you get the desired texture.

For this recipe you want the driest version of that cheese you can find, grated down to as fine as you can get it. We used tvorog from a local Polish store, drained in a sieve before weighing it out. It’s probably not ideal, but remember that basic instruction up above. It’s peasant food. Use what you have on hand, so long as you keep the basics in place, and achieve the right result.

NOTE: If you only have access to something as wet as cottage cheese, wring it out well before weighing, and then you’ll be fine. The darned cookies get dried at the end of the recipe anyway, and there’s no gluten to develop because they’re made with corn rather than wheat.

The Fat

As noted above, the authentic recipes vary from all butter through all lard, to a mix of butter, lard, and tallow. That isn’t odd for Spanish-heritage cookies. Again, see Polvorones and their U.S. relative Biscochitos. Use what you have on hand. Our favorite was a mix of butter and lard, but it doesn’t really matter from a “heritage” point of view.
This can be a dry dough. Drizzle in water (or extra fat) a teaspoon at a time as needed to make it just hold together as a dough. Remember that it will tend to moisten throughout as it rests, and the dry corn grains moisten up.

The Sugar Content

Authentic recipes varied from no added sugar at all to a small amount (from the perspective of a U.S. sweet tooth). The target is something that will taste like corn in your personal opinion. Season to taste, as they say.

Some recipes also call for obscure (to us) products like loaf sugar. Nicaragua and Honduras are major production centers for sugar cane, and such niceties probably matter to those who live there every bit as much as green peppers versus red peppers do for us, or Apple A versus Apple B. With all due respect, and subject to one exception, it doesn’t matter to you and me. U.S. brown sugar comes from sugar cane, with some of the byproducts (a/k/a molasses) mixed back in. The result should be identical once it dissolves into a cookie dough.

The exception? There is a Rosquillas variation that uses no sugar at all in the dough, but decorates the top of the cookie with sugar shavings from the aforementioned loaf. Consider that an Internet Bonus, because it isn’t in our written recipe. That’s a case where only true loaf sugar will do, because the texture simply can’t be duplicated.

To Salt Or Not To Salt?

That’s simple. Salt. No, it isn’t in the most authentic recipes. But we’ve found that every single baked good we’ve ever tried will taste a little better if you use an invisible pinch or two of salt.

The Leavening Agent

We call for baker’s ammonia if you have it, and there was one recipe I found that incorporated this antique leavening agent. Others use baking powder, with a healthy percentage calling for nothing.

So why did we specify the more obscure one? It comes down to the target. All biscotti are crunchy and dry, but we’ve eaten a lot of them over the years and have come to appreciate the distinction between (i) hard, which is unpleasant until you’re initiated into the cult, (ii) crunchy, which amounts to the introductory level for people not yet beaten into submission; and (iii) crispy, a rarely achieved state of perfection that catches the essence of hard without the dental ramifications of crunchy.

Unleavened Nicaraguan Rosquillas are hard. They’re still okay because we have molars for a reason, and you’re supposed to dip the darned things anyway, but in our opinion one ought to do better. Nicaraguan Rosquillas made with baking powder are crunchy. That’s what a native of the region will expect.

Nicaraguan Rosquillas made with hartshorn a/k/a baker’s ammonia are light and crispy, which made our native tester down at Reyna’s raise an eyebrow with delight. For what it’s worth, I also brought a version made with baking powder only, and that was considered good, but not as good as the lighter and crispier variety.

NOTE: Here’s an Internet-only tip. Hartshorn is a little stronger than baking powder. You may want to increase the amount to a full 1 teaspoon if you use the more common leavening agent.

CONCLUSION

Nicaraguan Corn Donut Cookes (Rosquillas de Maiz) fell into our life by total surprise, and have quickly earned an enduring spot in our hearts. The aren’t a “favorite” per se, because we associate cookies with sweet, tender, dessert-like baked goods such as shortbreads and nut cookies. But that’s taste, not judgment, and these would definitely be in the running if we were making recipes along the lines of Biscotti, Mandelbrot, or even our recent forays into Greek Ladokouloura and Lebanese Yansoon Cookies.

The first two are crunchy, crispy, and nutty-sweet. The next two are crispy and spiced-sweet. Rosquillas de Maiz are crunchy, crispy, and corn-sweet. They fit right in as a peer to the others, and illustrate a special heritage that most of us could stand to know a lot more about.

NOTE FROM KATE: I really enjoy these, and the cheese adds an extra tang. Also, look at the proportions: doesn’t the recipe resemble “Real Food?” The guilt factor is cut by two-thirds at least when you nosh on a barely-sweet, high-protein Rosquillas de Maiz. They are absolutely lovely. Now as you all know, I struggle with fitting into my jeans in this cookie-rich environment. This round little cookie has me all excited, though. Some online recipes cut out all sugar and add a bit of parmesan to the farmer’s cheese. Interesting… I wonder how these would go over as an almost-savory, balanced treat with my afternoon cup of coffee? Try them and decide for yourself!

Enjoy!

CHINESE RESTAURANT ALMOND COOKIES, Now More Than A Century Old

Chinese immigrants in America, from a cookie’s point of view

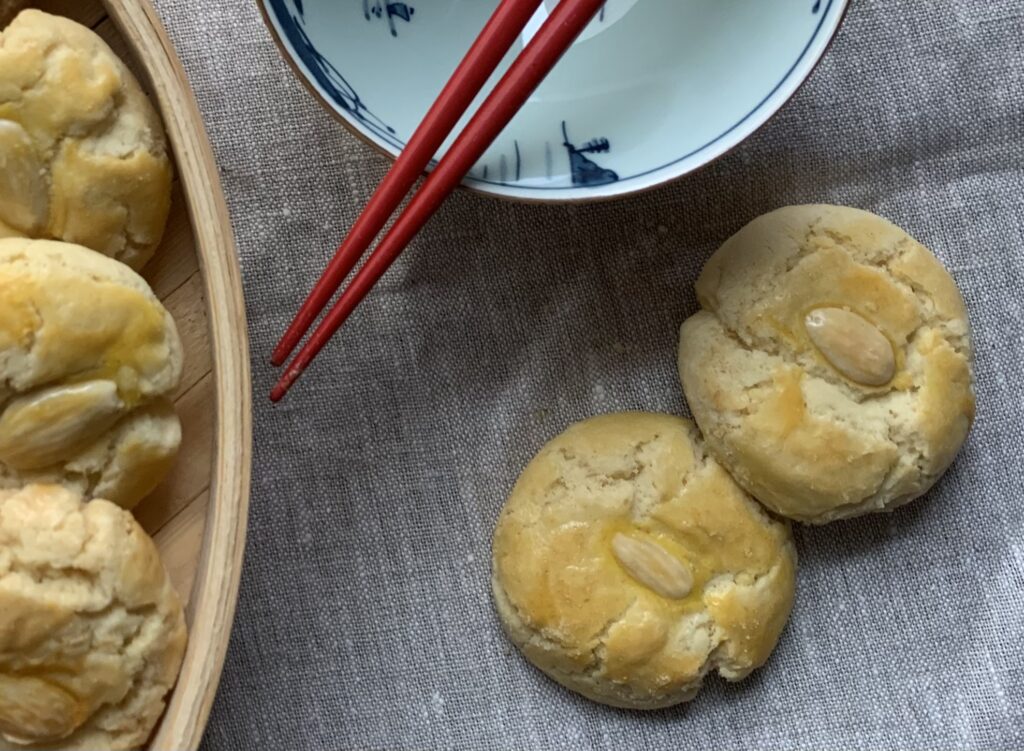
You may have noticed that many Chinese restaurants in the U.S. have an out of place dessert tucked away on the menu: a peculiarly tender almond cookie. Research (a/k/a the 2020 Nom Wah Cookbook) shows an interesting history.

The oldest Chinese restaurant in New York, Nom Wah Tea Parlor, began in 1920 as a bakery focused on standard American fare like cakes, tarts, and of course cookies. These Almond Cookies were a popular creation of the Chinese immigrant owners. Matters changed because that little bakery had a sideline operation selling tea and various traditional savory snacks from Hong Kong; small plates that sparked the NYC love affair with Dim Sum. The sideline restaurant business swallowed up the bakery, and the rest is history. But this particular cookie was too popular to die! It may have stood out like an American sore thumb against all that traditional fare, but the customers insisted. They wanted all those little dumplings, noodle dishes, skewers, soups, and meats most of all… but they wanted Almond Cookies too. It survived every challenge.

Your customers insist!

Other restaurants ran into the same issue when they began to copy the Nom Wah success story. ‘In the know’ customers simply wouldn’t go if a Dim Sum restaurant wasn’t [ahem] authentic enough to include Chinese Almond Cookies on the menu. Never mind that the recipe had no Asian roots.

The cookie itself is a simple shortbread that uses lard instead of butter, a lot of almond extract, and an exceptional number of egg yolks. The proportions are pretty standard beyond that. It’s the history, texture, and flavor that make this cookie such a different, delightful, and (to certain Pavelle family females) indispensable treat.

“Melted” Means Melted

Kate, a long time aficionado of almond cookies, handled the testing on this one. It’s a very old and very well established recipe, so she only ran into two challenges.

First, a certain husband of hers who shall remain nameless, blameless, and in all ways sacrosanct, wrote “lard at room temperature” in the first version instead “melted lard cooled to room temperature.” This made the dough extremely stiff and hard to work with.

Consider yourself warned.

NOTE FROM KATE: Now that I have tried the melted method, the dough seems less “short” and easier to handle. Before, I had to add a teaspoon of water, thinking that our flour became extra dry over the winter. Surprisingly, the end product has the same, identical texture! The only catch: I found it best to let the lard melt ¾ of the way, and then take it off the heat as I prepared the other ingredients. It finished melting in the residual heat, and then cooled just enough to start solidifying again when I was ready to use it. The food processor will handle the solid bits – just make sure you don’t inadvertently cook the egg yolks that are already waiting! (Barely melted lard is warm to touch, but not hot.)

The cookie forming goes like this:

  1. Divide dough in half.
  2. Divide each half into 18 portions (I like to square up the dough using my bench scraper, then I eyeball the sections.)
  3. Roll each portion into a ball in your hands, press the almond into the center, and then squish lightly. Don’t worry about fixing small cracks, it will bake up nicely and the texture, highlighted by the yellow egg wash, is part of cookie’s appeal.

To Soda Or Not To Soda, That Is The Question

We decided to write this up as a doubled version of the recipe in the Nom Wah Cookbook. Those authors called for 1 tsp. each of baking soda and powder; i.e. 2 tsp. each for our version.

Kate tasted distinct baking soda notes in that formula, though Scott (who is much less sensitive to bitter flavors) was willing to give it a pass. So we tried a second version, with two teaspoons of cream of tartar to react with the baking soda byproduct. Those cookies still tasted a bit soapy to her extra sensitive palate, and were a bit too puffy for Scott – a fact which proved she was correct in tasting unreacted baking soda still in the dough.

Do you know that story about the recipe testers who met up with Goldilocks?

Four teaspoons of baking powder with no soda would have eliminated the soapiness for sure, but now we had to deal with the unwanted extra rise. And so we settled 3 tsp. of baking powder. Except… A certain angelic, blameless, and nameless husband pointed out that almond extract originally came from purifying bitter almonds to remove the cyanide. So maybe that baking soda flavor was actually a feature instead of a flaw? Was it possible that a certain recipe tester was being too sensitive? [NOTE TO SELF: Married men should know better than to use the words “too” and “[you-know-what]” in close proximity. Thank goodness the nameless and blameless husband at issue would never, ever make such a rookie mistake.]

NOTE FROM KATE: Scott may be onto something with that touch of bitter almonds. The batch below (3 tsp baking powder, 1 tsp baking soda) leavened about the same (the cookies puff up and deflate a bit with cooling.) A side-by-side taste test revealed that the “soapier” cookie is more authentic! It has that certain something. I like it toned down a bit, but not all the way. But now you have options and see how “soapy” a cookie you prefer.

Suffice it to say that we leave things up to you. It’s a matter of taste. Do you want the bitter edge? Or do you find it revolting enough to point fingers at your entirely innocent spouse, who only wrote down what the original authors required? Almond, or bitter almond? Tradition, or improved?

There’s really no way to lose.

Enjoy!

HARTSHORN CRACKERS, A Beautiful and Tasty Illusion Cookie

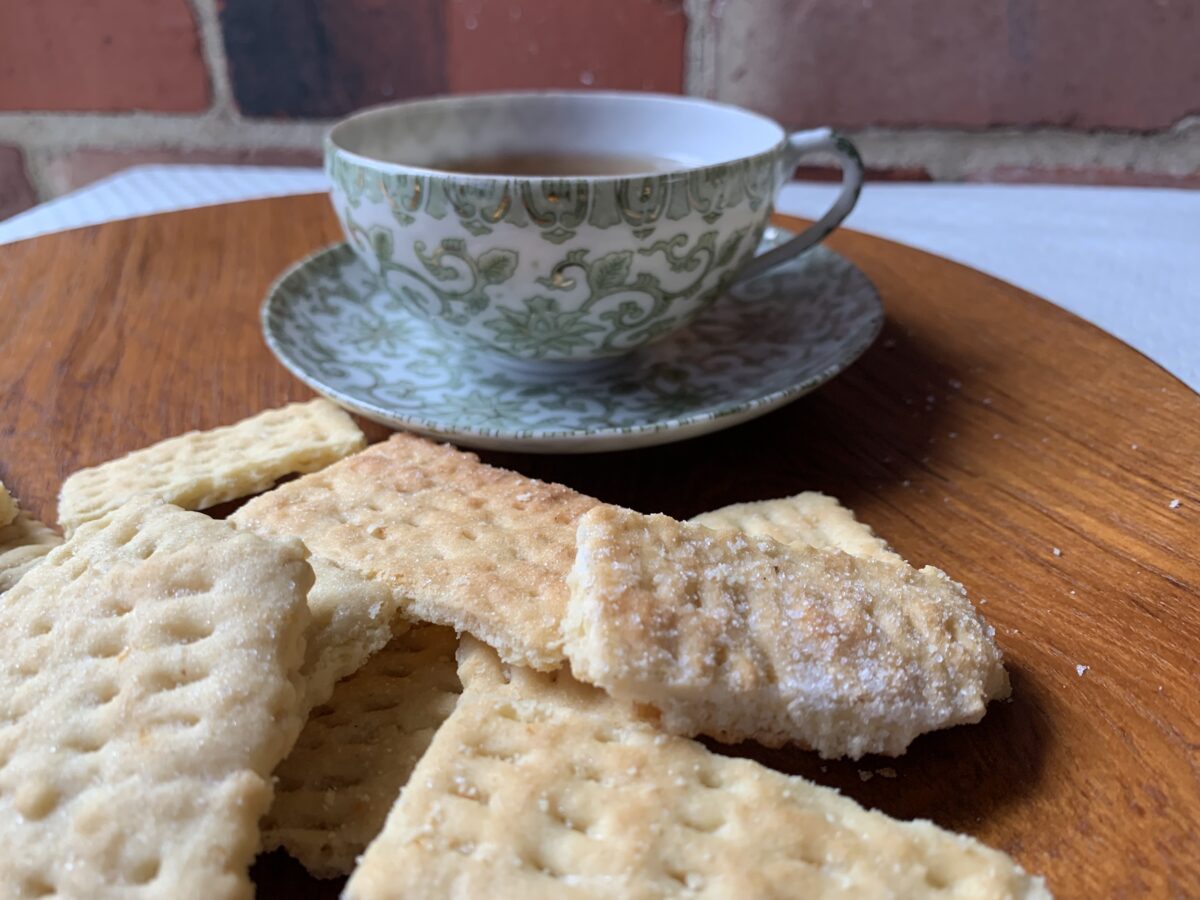
Appeance? Cracker. Texture? Cracker. Taste? Sugar cookie. Gotcha!

We often discover something new and exciting as we experiment when odd or exotic recipes appear on the radar. We expected no less with this one. “Crackers?” It had to be a European version of those crispy, crunchy Mediterranean tea cookies. Right?

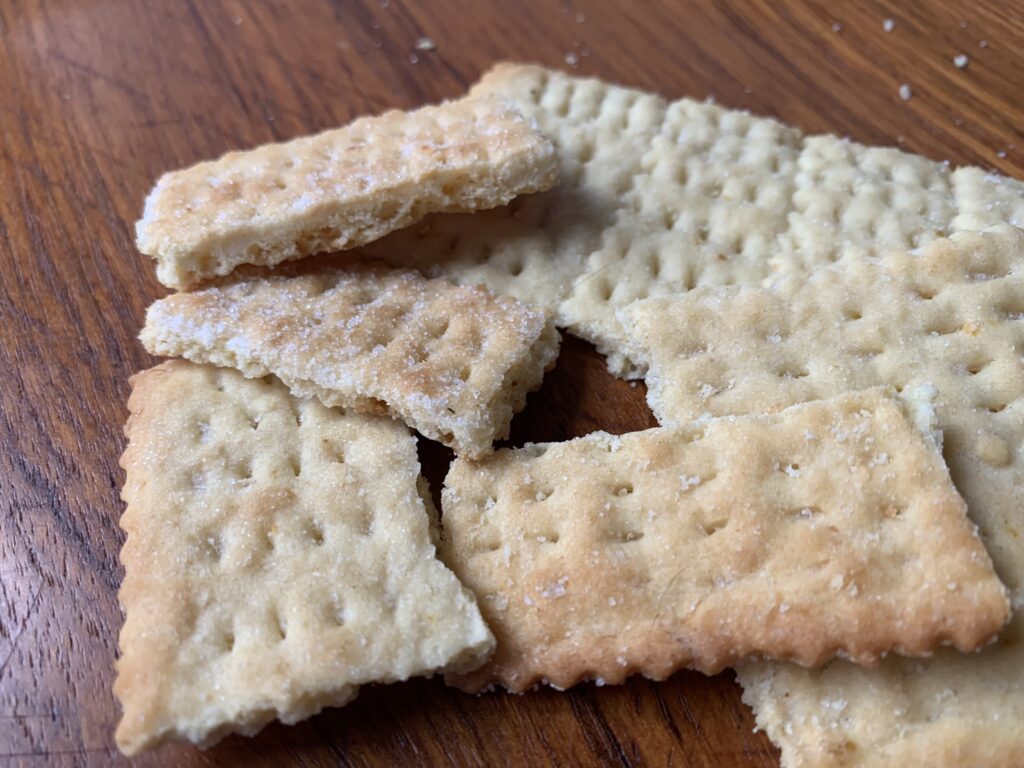
Nope. These taste like a standard sugar cookie, and earned their name by mirroring the appearance and texture of a classic saltine a/k/a soda cracker. They are eminently snackable too. Dangerously so. Each piece is so small that you will find yourself innocently popping five or ten at a sitting, which actually adds up to more than that regular sized sugar cookie you would have been able to resist.

Unique, fascinating, and familiar all at once. How cool is that?

Click here if you only want the recipe without the discussion

Saltines, right? Gotcha!

The Things You Learn When You Do The Math…

The past few months have uncovered several new recipes that rely on baker’s ammonia, including a few that feature a crisp, crackery texture achieved through the use of an antique leavening agent called baker’s ammonia a/k/a hartshorn. See, e.g., Norwegian Pretzel Cookies (Kringla), Greek Olive Oil Cookies (Ladokouloura), and Lebanese Anise (Yansoon) Cookies. So we were kind of excited to try this one, which promised to be a more classic European version.

The Mediterranean recipes both start with oil. The older versions of this recipe start with lard or shortening. Seems like an obvious connection, right? The only unusual thing was the math. All the classic Ammonia a/k/a Hartshorn Cookie recipes ended up with a really odd amount of fat when normalized to a reasonable amount of flour. A bit more than three tablespoons. At the same time, the flour measurements got weird if we tried to normalize things from the fat or sugar point of view.

Version 1.0

I decided to plan out my first test recipe by weight since the numbers weren’t that far off. 100 grams of lard, 100 grams of sugar, and 250 grams of flour. 1 to 1 to 2½, spread over two baking sheets. The result? Extraordinarily thin crackers that tasted like a cookie, but with a very distinct flavor from the fat. They were also a little greasy.

NOTE FROM KATE: They were a fun kind of greasy! Sometimes, using an animal fat you already have saved from a roast can give this kind of a cookie a very interesting character. Flaky tenderness and a hint of other flavors add to the gustatory experience. I like knowing that you’re eating a natural product and not a highly processed shortening. Scott will disparage that from time to time as “virtue points,” but they matter to me.

Fair enough. 250 grams of flour equals 1¾ cups of flour. The next batch would increase the flour to an even two cups. That would take care of the greasiness. The sugar level was about right. But what about that very lard-heavy flavor? What could I do for people who prefer something less distinctive and more common? Shortening, yes… but the flavor wasn’t loud enough to do with a totally neutral fat. So why not clarified butter?

How much butter would I need? Butter is about 16-18% water… Assume that’s been cooked that off, and account for a little more weight from the milk solids… And you end up with…

Son. Of. A. [cough]! You end up with exactly 4 ounces, dead on the nose. And what is 4 ounces? Exactly one standard stick of butter, or and even ½ cup.

And was I wasting effort and cleaning time by assuming the recipe called for two baking sheets? I had carefully rotated the pans midway through because thin dough and high heat are a bad combination. But even so we ended up with one tray browned more on the top, and the other tray more on the bottom. Annoying. And there was an awful lot of room around the dough on each tray, so…

Version 2.0

(A) Clarified butter instead of lard. (B) A little more flour. (C) Roll it all out to fit on a single sheet pan, and see if it’s still thin enough to be a “cracker.” (D) Adjust the cooking time to account for the extra thickness, and having only one pan in the oven.

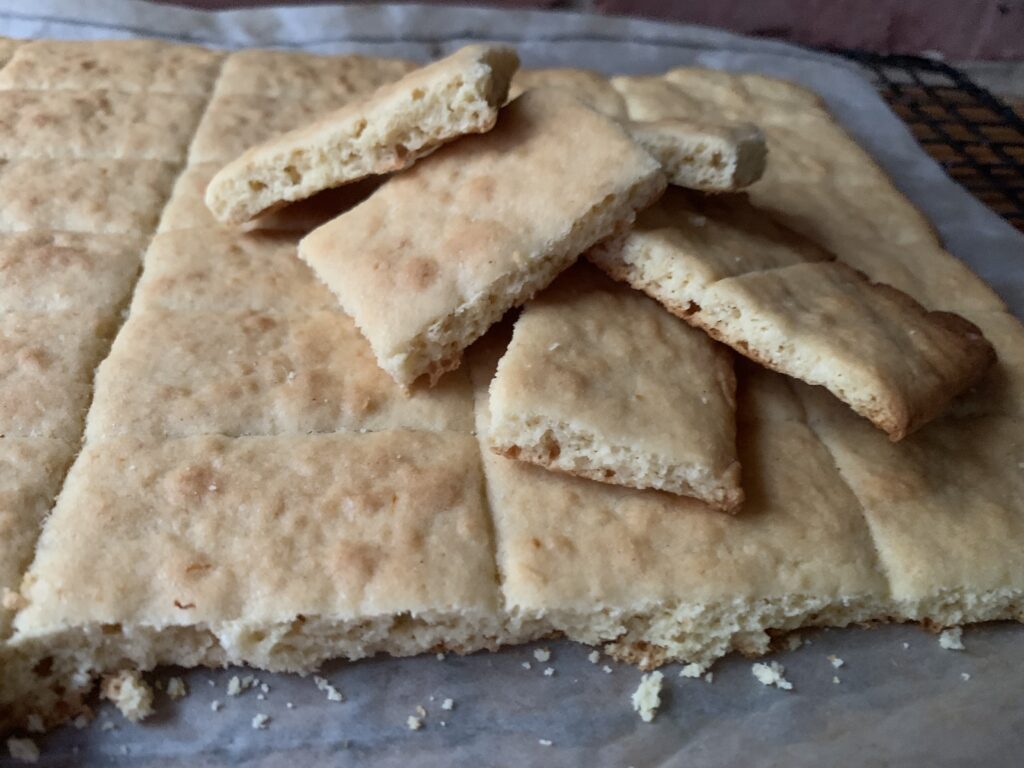
This is how they come out of the oven. See the uneven break by the bottom right? That’s what happens if you merely cut the lines without giving the wheel/blade a little wiggle to add an extra hint of separation.

This experiment told us (almost) everything we needed to know.

  1. I had the proportions nailed. The dough was easy to make, easy to handle, and just plain worked.
  2. This amount of dough rolls out thin – something on the order of ⅛” when all is said and done – but that’s still a big difference from “roll until you can roll no more.” The final result ended up being just under 3/16“, which definitely gave more of a cookie vibe than a cracker.
  3. The flavor changed radically. Lard notes versus butter notes were extremely clear when we tasted them side by side.
  4. The butter version does indeed taste standard. Just like a sugar cookie. But is there anything easier to vary than a sugar cookie? Tea, chai, cinnamon, other spices, herbs… This is clearly a cookie that bakers can play with to an all but infinite extent.
  5. Those darned lines aren’t always clean enough when the cookie comes out of the oven.
    Thick indeed! These come off as more “cookie” than “cracker.” Note how the lack of docking adds to that.

This cookie was, quite honestly, good enough to publish. But we weren’t done just yet! Could we customize this into a true illusion cookie with a taste that would complement a cookie tray instead of just fitting right in with so many other tastealikes?

Digression: Revisiting The Ratio Of Ingredients

Remember how odd the ingredient list seemed at the start of this project? And how the fat didn’t work out evenly until we figured out that it equaled a 4 oz. stick of butter that’s been clarified? But the overall ratios still didn’t work out to even numbers by weight, as experience taught they should in such an old recipe?

But now, with some extra flour and a more limited amount of fat… Aha! These changes created something very close to a 1:1:3 ratio of fat:sugar:flour. Gotcha!

Version 3.0 (see below) established our preference for a little less in the way of both fat and sugar, and that is what the recipe now says, but we have no doubt how Grandma taught the recipe by that ratio back in the day.

Version 3.0

  • Use the 1:1:3 ratio of ingredients;
  • Add some bacon fat in place of butter (we ended up with 2 tablespoons after I rendered four slices in a pan);
  • Roll out two trays as thin as possible, and only bake one at a time;
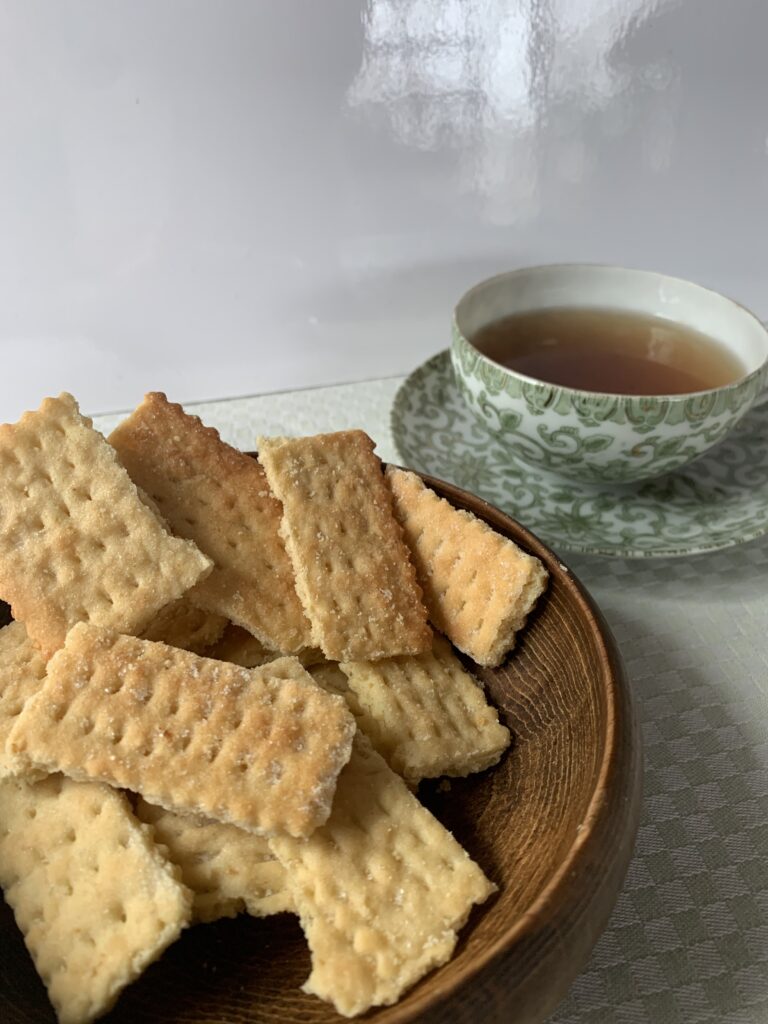
  • Dock the dough to make the final product look more like a saltine; and
  • Move some of the sugar from the inside to a sprinkling on top that would mimic the salt on an actual cracker.

The result? Have a look!

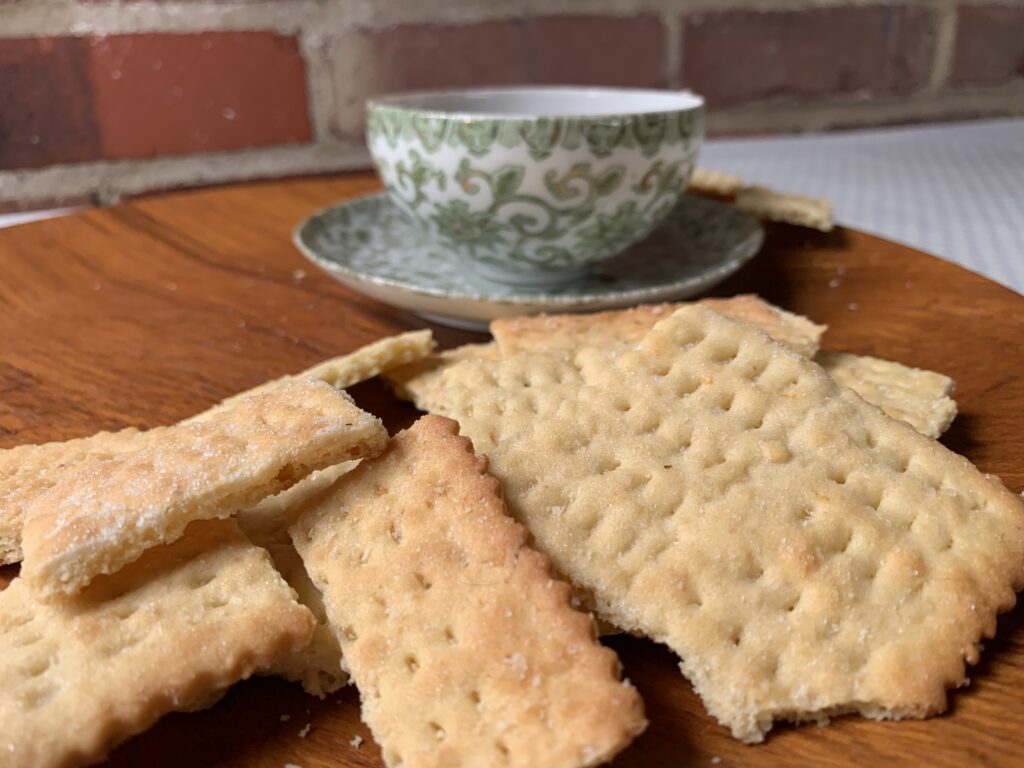
[Shakes head]. I don’t know how I missed it, but this is a marvelous illusion cookie. It actually fooled our real life daughter when she stopped in to visit! That docking made a much bigger difference than I ever imagined.

We could taste the bacon, but only because we knew it was there. The bacon also added a healthy hit of extra salt that we both enjoyed – enough to bump the basic salt level in the recipe up from ¼ to ½ teaspoon (though we might revert to the reduced amount if we work with salty bacon fat again). I even enjoyed sprinkling the tops with a little bit of extra salt to enhance the effect. It now appears as an option in the recipe. Here, among friends, I will admit to recommending that option because it makes the cookie taste more distinctive. But that’s taste, not tradition.

IMPORTANT NOTE: We also learned, to our chagrin, that simply marking the lines with a fluted wheel isn’t enough. We lost several “crackers” because they baked together too firmly, and wouldn’t snap along the lines. Even more than we did with the thick cookie (see photo above).

LESSON LEARNED: Don’t just mark those lines; mark them clearly and emphatically, with a little wiggle of the wheel or blade to be on the safe side. You need the pieces to bake together in order to have that crackerish center show, but you also need the separations clean enough to be sure they will break evenly.

The only other adjustments came down to fine tuning the ratio. Hark! Can you hear your great-great Grandma speaking from the beyond? “It’s a simple ratio dear. Three parts flour, to one part sugar, and one part lard. But here’s the secret… They taste even better if you take back a spoonful of the sugar and fat.”

Grandma is great. Grandma is wise. Listen to your great-great Grandma.

Conclusion

This is one of those cookies where we started out thinking “A,” only to discover it was really a “B.” This is not one of those cracker-crisp Mediterranean tea cookies. It’s more like a good, cracker-crisp sugar cookie designed to create a convincing, extremely snackable illusion.

NOTE FROM KATE: Be careful with these – they are quite more-ish! The texture is a lot of fun. You will easily snack on five cookies when you would’ve said a “no, thank you” to a similar cookie in its one-piece form.

Here’s a summary of the lessons learned:

  1. The dough follows a 1:1:3 ratio of fat to sugar to flour, with a spoonful taken back from the first two.
  2. The cookie changes in wonderful ways if you mix and match different fats in place of the clarified butter. We tried them with lard alone, butter alone, and butter mixed with bacon fat. The last was the best, partly because we liked the extra salt.
  3. The illusion part matters, so roll the dough out super thin, take the time to dock them with a fork, and sprinkle on a bit of sugar to fully recreate the saltine look. Sprinkling on some kosher salt will also help the illusion, and has the side effect of making the cookie taste more distinctive.
  4. Maintain an even thickness. Smeared edges cook faster than rolled centers.
  5. Mark the dividing lines emphatically, with a little wiggle of the wheel/blade to add some room. The helps the “crackers” to separate cleanly.
  6. Just don’t separate them too much, because those broken-open sides show off the crackerish interior, which is both pretty and useful for the illusion.
  7. Bake only one tray at a time, and spin the tray just after the estimated halfway point. Two trays won’t cook evenly, and oven hot spots really show.
  8. The bake is done when the top turns cracker-tan brown. Go by that, not the designated baking time.
  9. Hartshorn is mandatory. Baking soda/powder yield a standard cookie texture.

All in all? A very successful experiment, and a cookie we will gladly add to the repertoire. Especially if we want something more on the snackable side than a proper dessert, or there’s someone coming over who’d be fun to fool…

Enjoy!

LEMON & EXTRA-LEMON CRINKLE COOKIES, Two Pretty Ways To Do Citrus

Crunchy and soft, with either a white crinkle crust or a tart and lemony crust. Options!

Do you like citrus cookies? If so, read on because we spent a massive amount of time trying a few tricks designed to enhance the lemon intensity. So much so that we ended up with four different recipes! Two for texture, each of which can be tailored for beauty or taste.

“Citrus Flavor” Usually Requires An Icing

Here’s an unpleasant fact about baking lemon, lime, and orange cookies: you can fill the dough with the gentle, round notes by stuffing it full of grated zest, and then fill them out by adding in some oil or extract. But you can’t get those lovely, sharp high notes without some kind of icing or other coating that’s full of fresh juice (or a trick as described below). Bright citrus flavors come from the acid in that juice, and that acid dims to nothing on the inside of a dough. Omit the coating and your cookie won’t – can’t – taste “lemony,” “limey,” or “orangey” any more than an yellow, green, or orange gummy bear really tastes like fruit.

In fact, gummy candies are a perfect way to make the point. The plain ones are nice enough, but they’re basically just sweet with some kind of flavor. The sour ones taste vastly more like actual fruit because that sour powder on the outside -usually citric acid – adds the missing high notes.

Heritage Cookies of the Old and New World (Volume 1) has a recipe for Lemon/Lime Sugar Cookies which has become all but mandatory in our annual holiday extravaganza. The cookie part is nice enough. It’s packed full of grated zest, and you can tell. But the magic part comes with the extra-tart icing that’s equally packed with fresh juice from the zested fruits.

But… does it really have to be an icing?

A Very Standard Recipe To Start

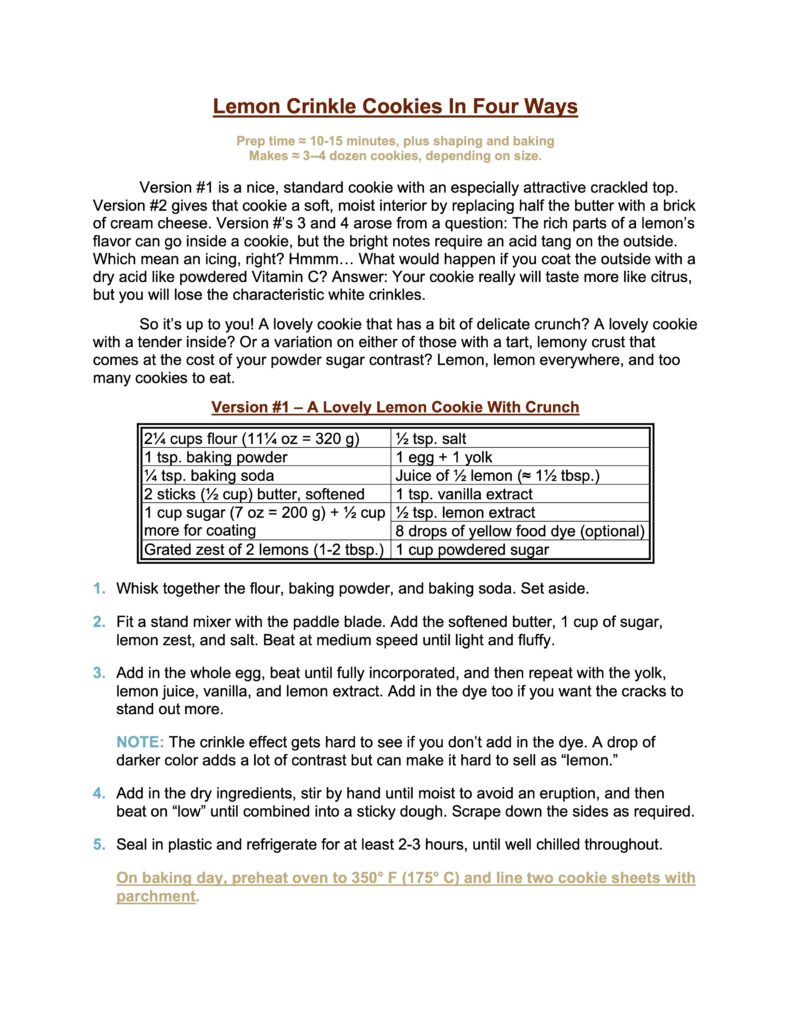
It took very little to develop a working recipe that would produce a nice crinkle effect. As you probably know already from Chocolate Crinkle Cookies, the magic trick is to (a) roll the balls of dough in granulated sugar, and then (b) roll them again in powdered sugar. The first layer insulates the second layer, which allows the cookie to expand in the oven leaving deep cracks of cookie-color surrounded by powdery white.

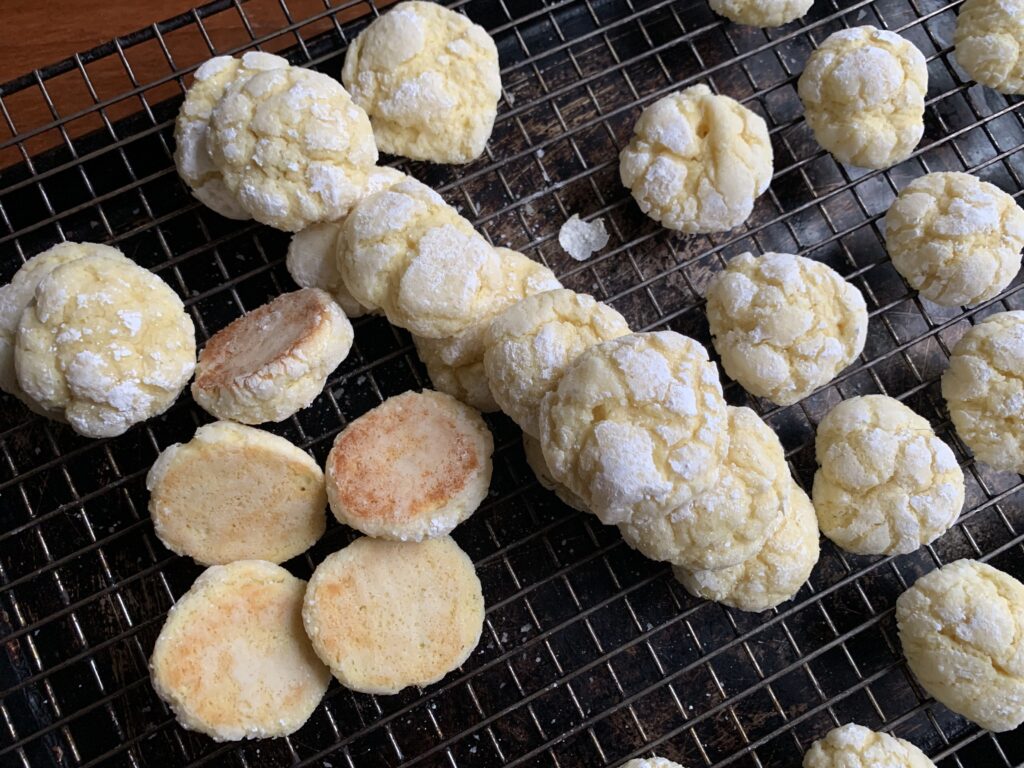
I initially wanted to make a lemon cookie that would imitate the ultra-gooey texture of Chocolate Crinkles, but that’s one I couldn’t figure out. The experiments did prove fruitful nevertheless, because we ended up with two variations for people to choose from. The first uses two sticks of butter and produces a fairly standard drop cookie texture with a gentle crunch. The second replaces one of those sticks of butter with an 8-ounce brick of cream cheese. These turn out soft and cakey on the inside. Not quite the ooey-gooey target, but in the same general arena.

The only hard part came from accepting the amount of yellow food dye required to make a sharp contrast between the cracks and the coating. We really wanted these to look startling and photogenic; a deep, lemony yellow that would really contrast against the bright white of the powdered sugar crust. Physics got in the way.

Are the cracks yellow? Yes. But it took a shocking amount of yellow dye to get there.

The dough is very yellow, especially with the added food dye. But it’s an inescapable fact that colors fade when you spread them out, and puffing cookies up to create a crackled exterior means the inside will end up dimmer, especially if you add in a bit of browning. C’est la vie.

Experiments With Powdered Vitamin C

We used to crush a Vitamin C pill or two in our mortar (uncoated, please) to boost the acid bite of some of our glazes. Now have one kilogram of powdered l-ascorbic acid (Vitamin C) in our pantry.

NOTE FROM KATE: My younger brother and I are both children of the Cold War. Back in Czechoslovakia, we learned how to use our personal gas masks in 1st grade, knew not to throw water on napalm by 6th grade, and shot our first AK-47 machine guns by 7th grade. Once our family came to America and the talk of intercontinental cruise missiles heated up the news, my brother made it his business to learn everything he could about nuclear disaster survival.

When the war in Ukraine broke out, he surprised me with a preventive care package which included, among other things, a 1 kilo package of granulated l-ascorbic acid, i.e. Vitamin C. (A lot of us former Easter European types got “triggered” by all this. When I told my Ukrainian friend over lunch, she offered some of her iodine pill stash without blinking an eye.) So: yes, you can buy powdered acids, and they will do wonders for your cookie and candy experiments!

Our experience with the need for an icing to enhance citrus flavors, together with my love of those sour gummy bears, provoked a genius idea: Since we need to roll the balls in sugar anyway, why not mix in some vitamin C at the same time?

[NOTE: We happened to have the powdered vitamin C handy, but it’s simple to make by grinding up some supplement tablets in a mortar and pestle.]

We tried it immediately, and it worked exactly as we’d hoped. The cookies had a brightly flavored crust that transformed them from “sweet and lemony” to “that tastes like good, tart lemonade!” Not a single one of that batch made it out of the house to our normal cadre of taste testers.

But there was a problem. I’d thought it would be easy to create the white-on-yellow crinkle crust, but these cookies showed now sign of it except for a few that had vague evidence of a pattern on top. [Sigh] So my wife was a flavor genius, while I was an incompetent boob. Par for the course.

I tweaked the recipe for batch #2. Same result. Grrr.

So I went back and researched every version I could find on the Internet, only to discover that every one was pretty darned close to my working recipe. The only difference? Others use a profligate amount of yellow food dye to make the crinkles stand out.

Okay, so batch #3 would include some food dye to enhance the contrast. Same result yet again, except the cookie was slightly yellower than the first two batches. Check. “It isn’t ‘some’ food dye, it’s an ‘are you kidding?!’ amount of food dye.”

Batch #4, I added the larger amount in, and added a single drop of red on the theory that it would help with the contrast. I can recommend this if you want a pink lemonade color, but learn from my disappointment if you’re after lemon-yellow. Oh yes… and there was next to no white left after baking even though I was now producing the exact level of surface crackling and fissuring we were aiming for. Aaaaaargh!

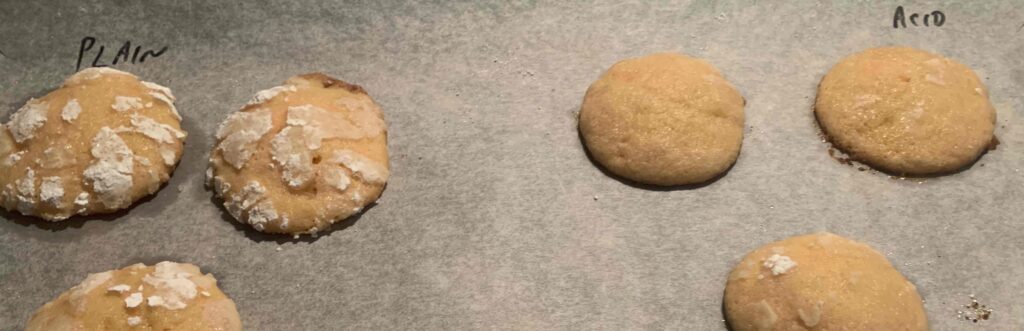
Only then did I begin to wonder if Kate’s beautiful flavor trick might be interfering with the whole crinkle creation process. We still had half of the batch #4 dough left, so I did a formal experiment: same baking sheet, but half with vitamin C in the sugar and half without. Behold!

This batch had a single drop of red food coloring along with 8(!) drops of yellow. You can see how big an effect it had.

Kate refused to believe it.

NOTE FROM KATE: Yep, I did. I kicked hard against leaving out our doomsday Vitamin-C ! With my chemistry background, I didn’t think there was enough time for the acid to mess with the leavening agents. The acid didn’t penetrate all the way through, after all. Oh, hubris! Oh, woe! Now I have egg on my face. (And a cookie in my mouth – these are seriously good!)

Scientific method to the rescue! I whipped up a half batch and repeated the experiment two more times. Yep. The plain half came out with deep crinkles every time, while the acidulated half had almost none.

Why? It’s obviously because… because… well, I’m not exactly sure. At this point I’ve done enough research to know that ascorbic acid will decay at oven temperatures, with two big leaps at 140° F (60° C) and at 170° F (77° C), and an even bigger leap as it passes 200° F (95° C). The degradation takes some time, which is why 10 minutes in the oven isn’t enough to destroy it completely. Thus the still-sour tang to the impregnated crust. Perhaps the byproducts are enough to wet the powdered sugar, and destroy it’s snowy whiteness? That’s my working theory, but it’s still no more than that.

The straight recipe (with that drop of red food dye) on top. Cookies with Vitamin C in the sugar crust underneath.

NOTE FROM KATE: I’d like to point out that despite being a lawyer, my beloved husband instinctively baked three test batches, with three comparison samples in each. That’s your standard Quality Control Protocol – any fewer and the result would lack statistical significance. He also varied only one variable at a time, so we’re golden. (Well, he is. He could have been an excellent engineer, too.)

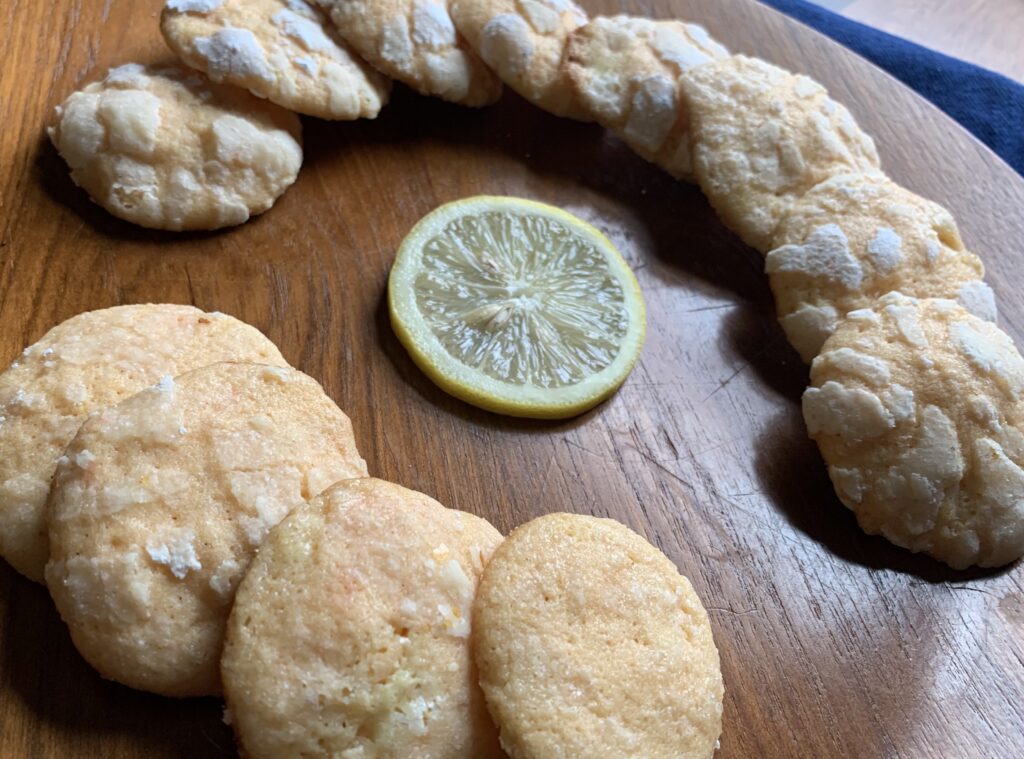
Frustration set in until I changed my point of view. It wasn’t a flaw; it was a variation! Two cookies for the price of one. Or four if you look at it right! The first two, crunchy or cakey, will be targeted by everyone who grabs something pretty off the tray. Then you have the lemon-lover Versions #3 and #4, which will taste better to those who prefer to eat with their tongues rather than their eyes. Not that they’re ugly. Just plain when compared to the more lovely but shallower sister.

Opinions? Me? Never.

Enjoy!

Beautiful from tip to toe.

CANADIAN ARMY MOLASSES COOKIES, A Classic WWII Recipe

The Canadian soldier’s secret trading weapon

Who’da thunk it? Soldiers like to trade amongst themselves, particularly when different groups have different supplies. In World War II the U.S. GI’s were the source for chocolate and smokes. The English always had tea. And the Canadians? They marched into the trading wars armed with cookies that no one else could match – the ones you’ll see below.

Click Here if you only want the recipe without the discussion

The basic recipe comes from the 1946 Canadian Army Cook’s Manual, as published in the Canadian Government website. All we did was test it, which turned out to matter because the volume-to-weight ratios on that page are a little bit off. Following the weights yields a thick drop cookie dough, while the volume measurements (cups) give you a very soft slice-and-bake result. We went with the second one because the instructions specifically mention slicing off pieces before baking. Our version below has corrected weights according to our tried and true conversion tables. Please note, however, that some ingredients (particularly flour) can vary a lot depending on both grind and protein content.

NOTE FROM KATE: When I tested this recipe, I used the scale with an expectation of tidy, slice-and-bake logs. I got a goopy mess of a drop cookie dough, and a discussion ensued along the lines of “You know, this cookie has a HUGE proportion of molasses!” Scott did some recalculating, et voila! The next try yielded slice and bake logs. The cookies bake and taste the same, but I prefer the tidy handling of the logs. It makes for an easier cleanup.

We made only two changes aside from that tweak. (1) The original recipe calls for sour milk, which we successfully replaced with both buttermilk and with fresh milk soured in the kitchen by adding some vinegar/lemon (a standard workaround). Yogurt ought to work too, though we haven’t tested it. And (2) We added raisins and extra spices as optional ingredients. Those might be too expensive for army-level production, but they do yield a tastier result for home cooks making dozens instead of thousands.

So what does it taste like? We found a few dozen tasters for this recipe and got a pretty standard reaction: “Entirely inoffensive with a finger on the scale toward good.” Call it a universal 6 out of 10, with no one going higher than an 8 or lower than a 4. They’d also be a 6 if you had a 1-10 scale from savory to sweet. Add the optional raisins and both scores go up by a notch. Extra spices push it up another.

NOTE FROM KATE: I admit to being spoiled by molasses cookies that bite back. You know, the memorable ones, loaded with spices from the obvious cinnamon to the expensive cardamom, with pepper and ginger for good measure. This is not that kind of a cookie. This is like a mild dish from a famously spicy cuisine. It’s still delicious but it defies your expectations.

People who like spicy cookies will notice a certain lack in this one, while mild food eaters should be thrilled to have a cookie that goes well with both coffee and tea. The restraint on the spice end of things was likely a result of not only preference, but also economy. Spices are expensive, and that matters once you multiply their cost by making enough for the entire Canadian army!

Soft or crunchy?

It’s entirely a matter of baking time and personal taste. Kate prefers these with a bit of residual chew. Scott likes them better when crispy. Choose for yourself. 15-20 minutes gives you one or the other, with all the stages in between.

NOTE FROM KATE: Despite my chew preference, I find that even dry cookies, which sat out for a few days, tasted good! Surprisingly, they didn’t go stale, and they had a nice crisp. Even though the low spice level took me aback at first, this eminently practical cookie grew on me and has now become a part of my “easy and travels well” repertoire!

Enjoy!

MAPLE SANDWICH COOKIES, Pure Autumnal Goodness

Maple shortbread sandwiched around a not-too-sweet maple buttercream.

Alfajores: the legendary South American cookie of childhood formed from two tender, shortbread wafers that sandwich a rich caramel (dulce de leche) filling. Add a bit of maple flavor to the shortbread part, replace the filling with a rich maple buttercream, and you get a cookie that’s just as good, and almost equally loved across its range in North America.

Exceptionally pretty, and featuring a deep sweetness that hovers right on the line of “children adore it” and “adults can too,” this regional specialty is going to find its way into your repertoire and simply won’t leave once you see the children in your life squealing with glee. Just be aware that no child on the planet can resist snitching a few from a low lying jar, which means you’ll have to carefully be looking in another direct.

Perhaps with a plate of your while sipping nice cup of tee or coffee.

A NOTE FROM KATE: The cookie itself isn’t particularly sweet without the filling, which is a bit too sweet for my personal taste. Now, to be fair, this filling grew on me with every tweak. Still, my European alter-ego would like to point out that you don’t have to use all the sugar in the buttercream recipe.

I do agree that Maple Sandwich Cookies are a lovely addition to the fall repertoire, sans “pumpkin spice,” and make an enticing visual statement for both kids, and kids at heart.

Click here if you only want the recipe without the discussion

A few years back we published a wonderful recipe for easy Maple Drop Cookies. This is the upscale, extra pretty version: tender, maple flavored cookies sandwiched around an intensely maple filling. What could go wrong?

The answer proved to be nothing, though it did take a little bit of fidgeting to get the details just, exactly right.

The Cookie Part

Shortbread cookies a/k/a butter cookies mostly follow a standard set of proportions. Here’s a alphabetical list of examples normalized to the same two sticks of butter in this recipe:

Testing showed that we liked this cookie just a bit more tender than a standard Butter Jelly, but it was a close call. Feel free to substitute the specified mix of flour (2½ cups) and starch (½ cup) for a straight 2¾ cups of flour.

As to thickness, keep them thin if you want to make sandwich cookies and a little more robust if you want to skip the filling. Just remember to increase the baking time too! Thicker cookies need to bake longer, especially with doughs like this with a decent amount of starch. Starches stay pasty on the tongue until the inside gets hot enough to break down. The magic temperatures are about 130° for tapioca, 140° for potato starch, and 145° for cornstarch. We prefer tapioca because you can’t exactly probe your cookies with an instant read thermometer. The lower degradation temperature to provides an extra safety margin against pastiness. Note: We have no trouble finding affordable tapioca starch at any good Asian grocery.

The cookies are done when the edges begin to brown, which also means the bottoms will be what the pros call GBD (Golden Brown & Delicious). Those toasty notes pair exceptionally well with the maple and vanilla flavors inside the cookie itself.

NOTE FROM KATE: The GBD bottoms work just fine for thin-rolled cookies. IMHO, I wouldn’t mind getting the thicker, molded-pattern ones a bit toastier. Giving them an extra minute or two will make sure that all the starch is properly degraded by heat. This is especially important when you place a tray of molded cookies in the fridge. In fact, I think a slight hint of darker, well-toasted edge would play well against the sweet buttercream filling.

NOTE FROM SCOTT: I completely agree. And for those who don’t know, refrigerating molded cookies can help to keep the pictures clear.

Next up: fancy touches, which turned out to be a lot of fun. This kind of shortbread holds its shape exceptionally well. They’re perfect for really fine cutouts on the sandwich caps, and even for patterns stamped into the dough. Have a look!

FWIW, we had more success stamping the dough first and then cutting it out. It would have been an ideal situation for using a patterned pin if we had one.

NOTE FROM KATE: This cookie holds its stamp well, but it didn’t do as well with very deep, molded cavities. It won’t be as forgiving as gingerbread, so make sure the dough is at a pleasantly cool temperature. You will also want to clean your molds between every stamping (we have a bowl of oil with a toothbrush, a bowl of starch with a powder brush, and a skewer on duty between each stamping.) For this cookie, it worked well to lightly dust the dough as well as the lightly-oiled mold. The type of your mold will also make a difference. Unlike with a hand-carved wooden mold or stamp, a laser-cut mold with sharp-angled features tends to cut all the way through the dough when pressed too hard. Use a gentle hand. In a larger production situation, I would roll the dough directly on the parchment, stamp the shapes, cut the rounds, and then remove the excess for reuse.

The Filling

Our standard buttercream filling uses half a stick of butter to three cups of powdered sugar, with whatever flavors you want added in. It’s dead reliable, thick enough to hold its shape, easy to thin as desired with a bit of milk or other liquid, and the heat characteristics are easy to understand. Butter gets soft at around 65° F (18° C), and so do these fillings.

In this case we started by simply adding in some maple syrup as the liquid. The texture was spot on, but the syrup made the filling a lot too sweet and a little too loose . Solution for the first: reduce the amount of syrup and add in some maple extract. [See Note below] This came close, but still edged over the line into the too-sweet-for-grownups realm.

Have three standard solutions for something that’s a bit too sweet: add salt, add acid, or add something bitter. Salt came first. I upped the amount from a healthy pinch all the way to ¾ tsp. That did the trick for me, but Kate said she could taste it. ⅔ tsp. proved to be the [ahem] sweet spot.

But the filling was still awfully sweet, and toed right up to the children-only line! It needed some extra help. Lemon didn’t seem to fit, so I decided to whisk in a tablespoon of cream cheese. Perfect! The extra mass tightened the filling that essential bit, and the mild acidity was enough to bring the sweetness under control.

TECHNICAL NOTE: Our go-to means of adding bitterness are molasses (also acidic), coffee, and chocolate. The molasses was tempting, but in the end we worried that it would have tried to steal the scene instead of playing a supporting role. [Additional Note: That observation all but demands a comment about molasses being a ham, but three decades of marital wisdom suggests that I might not get away with it. So never mind.]

NOTE FROM KATE: He thought he got away with it. That’s…kind of adorable, and really sweet! Just like these cookies!

Concerning Maple Syrup

“Pancake syrup” is basically corn syrup with coloring and maple extract. I have nothing against that on some philosophical level, but it would substitute for extract rather than syrup in baked goods. All the cookies we make use real maple syrup.

But that doesn’t end the story, because real maple syrup comes in several grades that basically correspond to the time of year it’s tapped out of the tree. Think of it as analogous to the change from veal to beef, or lamb to mutton: the syrup becomes progressively darker and more intense as the season moves on. We would have loved to try some extra-dark syrup in these cookies, with less extract, but simply don’t have access. If you do, please do, and let us know the results.

Note that syrup “grades” don’t really help because it is an industry term. The only law on point comes from the USDA’s Grade A vs. Processing Grade vs. Substandard. You and I never see anything but Grade A according to that definition.

The industry used to divide the color/flavor lines using the same letter grades with different meanings, going from lightest (Grade A) to darkest (Grade C), but that made consumers perceive the darker colors as inferior. As of this writing the industry has adopted color descriptions instead of grades. Vermont’s industry page describes them like this:

  • Golden color with delicate taste
  • Amber color with rich taste
  • Dark color with robust taste [used in this testing]; and
  • Very Dark color with strong taste.

The Canadians follow suit, though they often grade by “colour” instead of “color;” except when marketing to the U.S.

Storage

Unfilled cookies should keep for a solid week in a cookie tin or other airtight container. Freeze for longer storage.

Filled cookies, and unused filling, will start to get soft if kept above 60° F (18° C), which equates to a chilly room. We prefer to use the refrigerator for convenience, but take extra air to have an airtight container lest the filling absorb flavor from some garlicky pasta in the bowl next door.

I believe the filled cookies can also be frozen, but haven’t tested it yet.

CONCLUSION

That’s a lot of detail, but it all adds up to common sense for any experienced baker. The recipe is for a simple, maple flavored shortbread, and an even simpler maple buttercream. Put the two together and you have maple nirvana. There’s a whole lot worse you can find in this world of ours. And very little that tastes a whole lot better.

P.S. We had some filling left over from the photo shoot, and a few Gingerbread cookies from another project. I combined the two on a lark and… Goodness Gracious and My Oh My! This maple filling loves, Loves, LOVES to be paired with spice cookies! It’s so good that I may well sneak some onto this year’s extravaganza tray. Make an extra batch of Ginger Snaps without the sugar crust, combine with the maple filling… Oh yes. This could definitely be a thing.

Enjoy!

SPICED CHOCOLATE DROP COOKIES – A Master Recipe For Infinite Delights

Turn your favorite chocolate-and-spice bars into exquisite cookies

“Infinite Temptation” may make more sense in the title than “Infinite Delights.” The testing began with a Chocolate Black Pepper cookie, and the batch looked good as it came out of the oven. Thirteen nice, hefty, 2½” pieces. I tasted one, and liked it. A lot! So I duly brought them out to my beloved, and left them there on a plate so she could try one too. Then I went off do some work on another project.

I strolled back in about 30 minutes later. There were 4 cookies left on the plate. Our pup had been with me in the office. Kate had been left alone with the plate, parked on the sofa with her laptop.

13-1 = 12. 12-4 = the sort of math that wise old husbands forgot how to do a great many years ago. Make that wise and generous husbands, since I immediately ate three more and was kind enough to leave her the last.

Batch #2 got made when we hosted a dinner for our daughter and niece. Miranda had the will power to resist, thanks to a bit too much spice for her taste. Amanda? Amanda ate so many that I don’t have the heart to rat her out in public. Let’s just say that we now have testimony to how well the cookies go with a glass of wine, and with a glass of water, straight out of hand when no one seems to be looking, and with coffee too.

Get it? Got it? Good. These really are all of that; as simple as can be, absurdly rich, and with just enough of a twist to always be unique.

NOTE FROM KATE: One whole pound of chocolate, divided into only four dozen cookies. That’s a lot of antioxidants per cookie! So these aren’t just delicious, they are a regular health food! [Yay! That’s my story and I’m sticking to it!]

As always, skip to the bottom if you only want the recipe without the process.

The Cookie Part

This is a fairly standard drop cookie, so there’s no need to bore you with the chemistry. Go look at a regular Chocolate Chip Cookie recipe. Subtract ¼ cup (1¾ oz = 50 g) of flour, and replace it with half a pound (8 oz = 225 g) of melted chocolate. Bing, bang, boom, you’ve got it. The chocolate adds back the structure you lost by removing that bit of flour.

Add another half pound of chopped chocolate (or really good chips), the spice du jour, and you’re done. The only tricky part comes with the baking time. It’s easy to overbake a cookie this dark, and doing means sharing chocolate essence with the air, so we limited the baking time just to be on the safe side. 10-11 minutes instead of the more normal 10-12.

Just make sure to use a good chocolate. There is a full pound of chocolate in every batch. The flavor comes through, and cheap chocolate will show.

NOTE FROM KATE – ABOUT CHOCOLATE: Some of you might’ve seen articles about chocolate with elevated heavy metal levels. Long story short: which risk factor do you want to go with on a given occasion: chocolate or chardonnay?

Development

Chocolate is great. Chocolate is awesome. But the special part here comes from the spice.

Please note that I didn’t actually create this cookie. We publish heritage cookies not mind numbingly good original creations. That said, the accusation has been made and so I feel the need to defend my process.

I began the project looking to highlight a black pepper cookie. Think about it: all those spice snaps, with flavors ranging from across the map, and yet almost no one remembers to try the one spice that’s in basically every kitchen across the breadth of Western civilization. It couldn’t be right… and it wasn’t. Examples abound. And I may get back to them idea later on. But the thought of chocolate black pepper cookies could not be resisted, and thus I went a little sideways.

A Google search for the term “chocolate spice cookies” comes back with a bit more than 68 million results! Italian recipes lead the way, but U.S. versions (like this one) aren’t far behind. There’s one from South Africa with just black pepper… there are a few based on Mexican chocolate… Viennese chocolate pepper cookies (a roll out)… It doesn’t end. This isn’t an original idea, just my version of one that every baker across the world has thought about from time to time.

So what did I do? (A) I elected to go with a U.S.-style drop cookie, and (B) I made it so good that all the other 67,999,999 are stuck with trying to come in second.

NOTE FROM KATE – ON FLOUR: We had a batch where we ran out of AP flour (11.7% gluten) and ended up using pizza flour (14% gluten) for about a quarter of the required amount. Those cookies didn’t spread. They had so much more structural integrity that if you made a little pyramid, it would probably look like a little mountain upon baking. The cookies in the photos are made with regular AP flour, and they did spread some but not very much. This begs the question, would a softer flour yield a more traditional cookie with more spread? Would substituting some starch for 10% of the flour do the trick? If you try it, let us know on our eponymous FaceBook group.

FYI, there was nothing wrong with the pyramidal cookies went came to taste. Their centers remained soft and may even have held on to moisture better. High levels of either cocoa or chocolate will suck moisture out of any baked good, and this is a great example of the phenomenon.

The Spice Part

The first test batch stuck with black pepper. Four teaspoons of it! The result was superb, but it did push right up against that line between “right” and “too much.” The recipe accordingly says 3-4 now. But the big Aha! moment came when we realized that black pepper was just the tip of this particular iceberg.

Go out to your favorite chocolate shop and you’ll find a whole shelf of well spiced options. Chocolate flavored with cinnamon. Chocolate flavored with cinnamon and chili (the Mexican chocolate profile). Chocolate flavored with cayenne, garam masala, ginger, nutmeg, star anise, cloves, gingerbread mix… It’s endless! I mentioned this to Kate and her eyes lit up with an evil gleam.

Every single one of those would work in this recipe. Just compare the potency of your chosen spice to the designated 3-4 tsp. of black pepper in this master recipe, and keep notes so that Version B will be perfect. Bing, bang, boom.

NOTE FROM KATE: I prefer more spice. The cookie doesn’t have to bite back, but higher spice level helps the flavor linger. The pepper version is warming and makes you raise an eyebrow in surprise (use fresh-ground for best effect.) The cinnamon-chipotle one is familiar, with a long and warm finish. Cardamom alone didn’t have the same bite, but the high floral notes carried beautifully, and I plan to see how that spice would play well with black or spicy pepper or to attain an extended note.

One whole recipe gives you approximately 1,200 grams of dough. I divided it into four bowls with 300 grams each, rounding them off to get even weights. (The exact amount of each batch will vary depending how much dough you use for “quality control,” how hard you pack your brown sugar, the size of your eggs, etc.). Then I added proportionate amounts of spices, getting 15 cookies of each per cookie sheet. Label your baking parchment so you know which is which. These are mystery cookies. They all look the same, the first bite keeps you guessing, but by the second bite you know.

NOTE FROM SCOTT: That might even be a fun game. Make several versions with different spices, and then let the party figure out what’s what...

Let us know your favorites so we can give them a try. I might even get to try a few myself before the invisible cookie gremlins get hold of the dozen I left on the plate. Deaf, dumb and blind, thy name is husband of 30+ years.

Enjoy!

POURABLE FONDANT AND COVERTURE – the ideal cookie coatings

All we’ve learned on how to make cookie coatings with texture, thicker than icing but thinner than frosting, which are also safe for shipping

Up until now we’ve been happy to use either a thin chocolate glaze, a ganache filling/frosting, or a coating made from actual chocolate melted with butter. Ischler Cookies, a chocolate coated sandwich with nutty shortbread and apricot jam, wanted that chocolate/butter coating, but had to dry into something that could be packed in a tin without heroic efforts like cutting out custom sized bits of parchment paper.

We have now (finally!) found two answers to the dilemma. The first is coverture, which is essentially a chocolate coating made with cocoa butter instead of regular butter. This has a higher melting temperature and won’t lead to sticky hands until you get toward body temperatures. Think of chocolate bars and you’ll have it.

The problem with coverture? It’s very hard to find in a store, and impossible to make at home unless you keep cocoa butter in the pantry. Most people don’t.

That leaves fondant. You may know this better in the rollable form that people drape over cakes. But did you also know about pourable fondant, the version used for petit fours and the like? It creates an icing that’s almost indistinguishable from coverture from both the visual and textural perspectives. It’s just a good bit sweeter and less chocolaty inside the mouth. An ideal compromise for anyone who wants to stick with standard pantry ingredients.

Heritage Cookies of the Old and New World does include a basic pourable fondant recipe, but we never really dug into the subject to understand how and why it works. Until now. Enjoy!

NOTE FROM KATE: APPLICATION TRICKS. If you have great many cookies and a lot of fondant, by all means use a screen and pour over it, as described above. However, this requires extra sheets, space, and materials. We tested it, and it works. I personally find that dipping a cookie in while holding it yields an excellent result, without having to make coating, and is better suited to the average home kitchen. The only downside is chocolate on your fingers. But I have an answer! To keep having from washing your hands, or fighting the constant temptation to lick your fingers, try using a thin, snug glove! It sure worked for me and my work moved faster. Also, I had absolutely no desire to lick my glove!

P.S. THE HOT WATER TRICK. Our experiments on chocolate coatings led to a wonderful trick:

  • The Problem: Chocolate icings begin to harden as soon as they cool, and it often takes a bit too much time to get all your individual cookies dipped or poured.
  • The Solution: Duh. Keep your icing warm enough to prevent it from cooling too fast. But how?
  • The Method: You have a bowl of molten coating. Fill a slightly larger bowl with hot water, and place your bowl of icing inside. The hot water will keep the icing warm for twice as long, leaving you all the time you need to work.