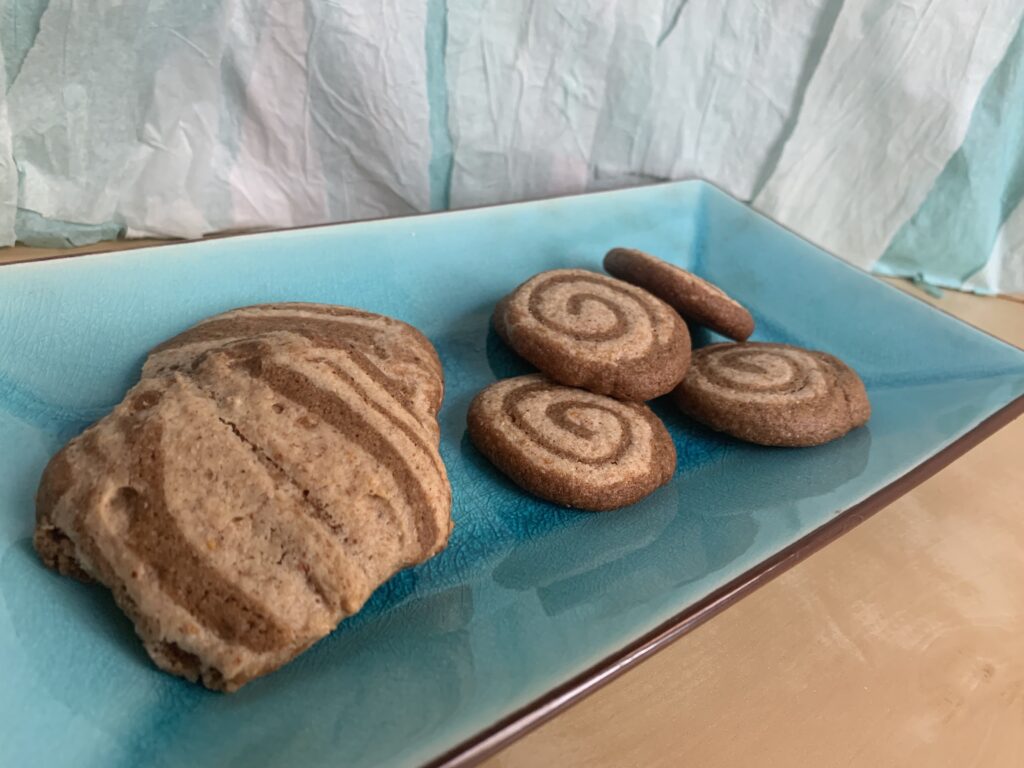
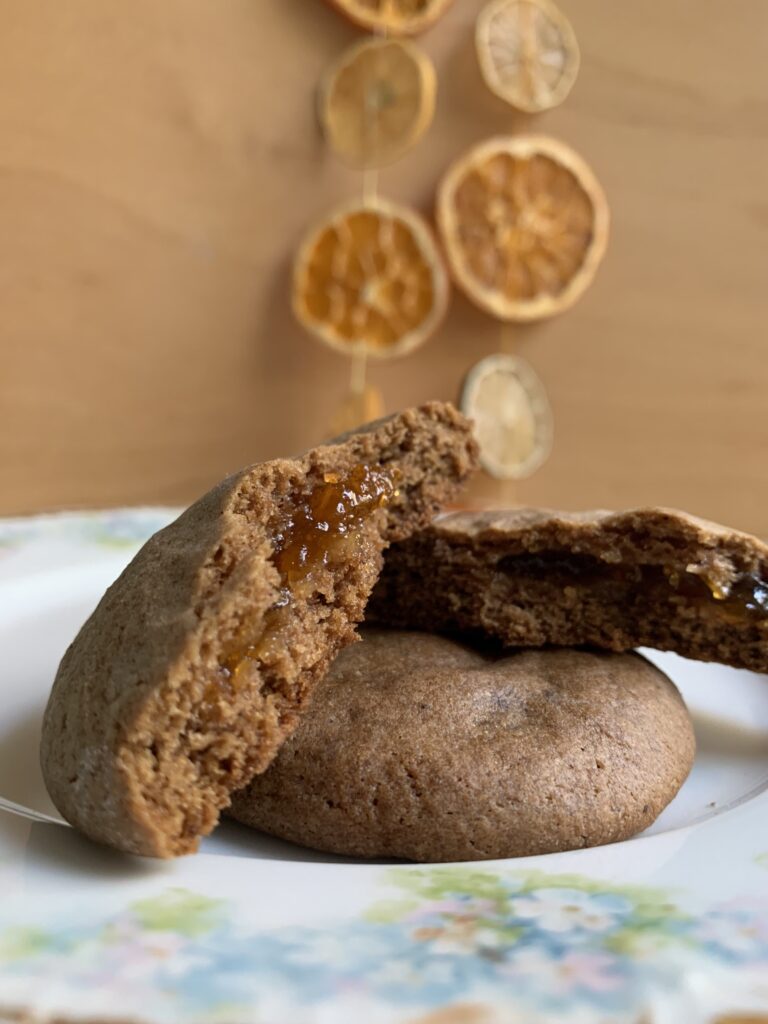
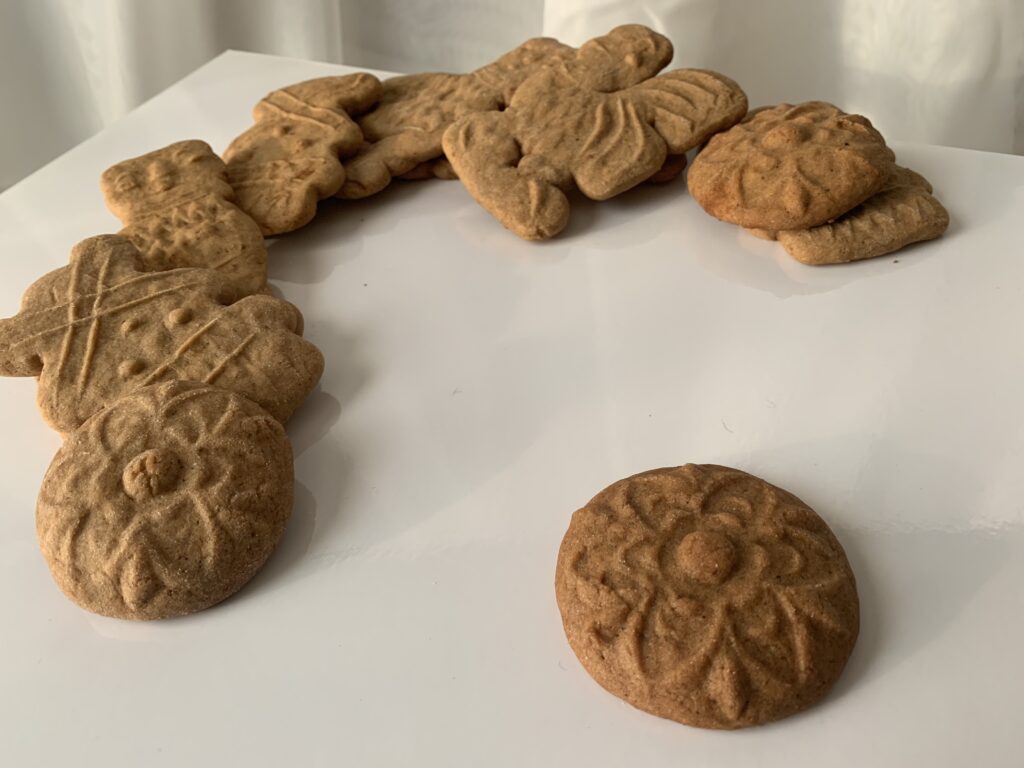
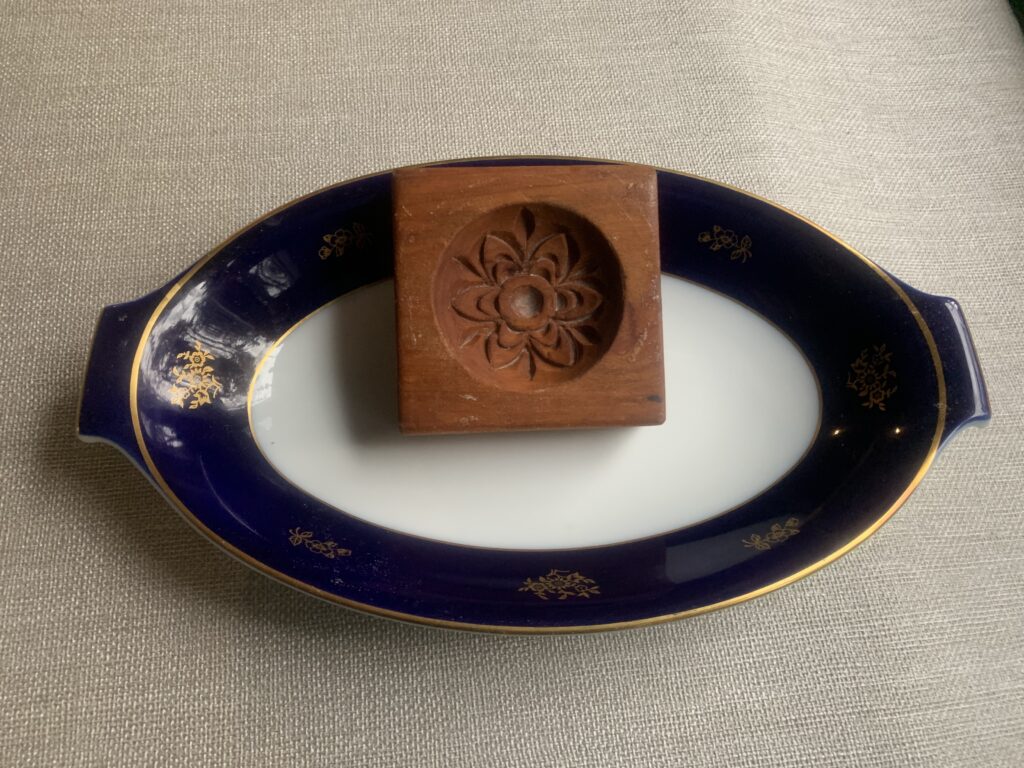
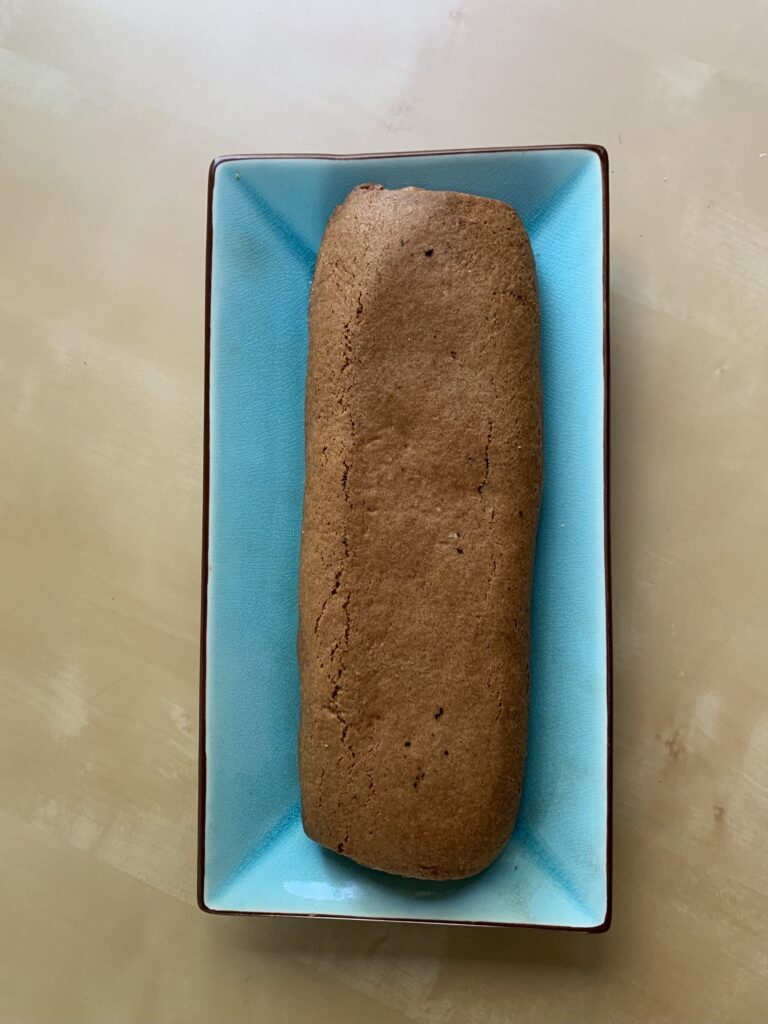
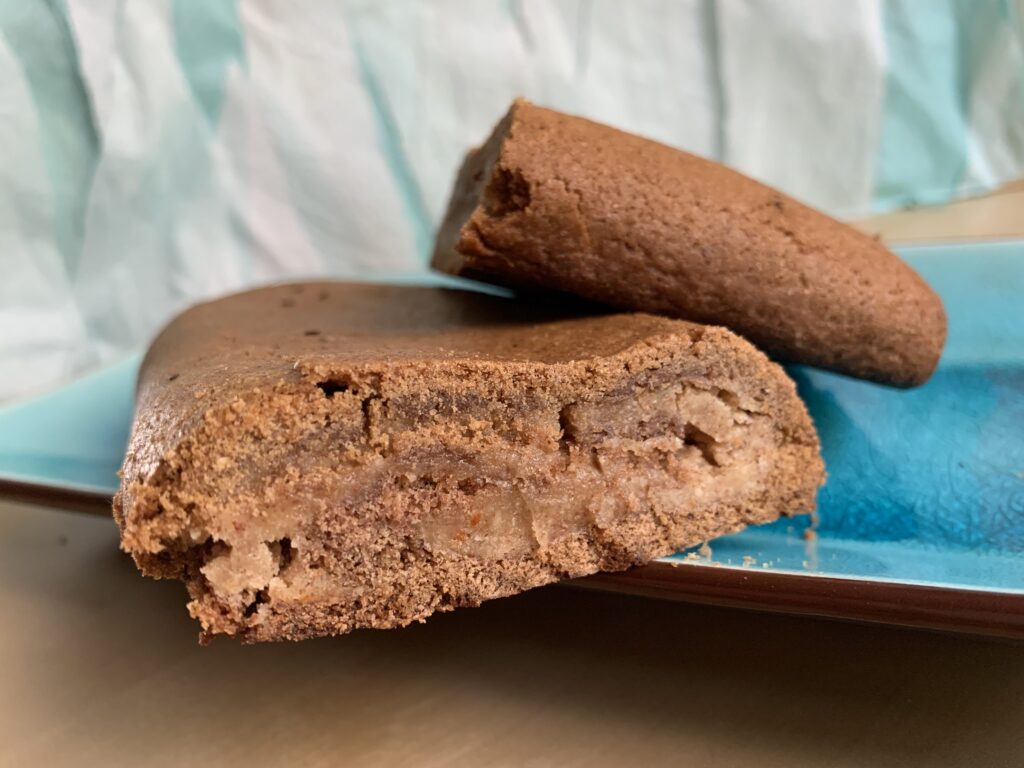
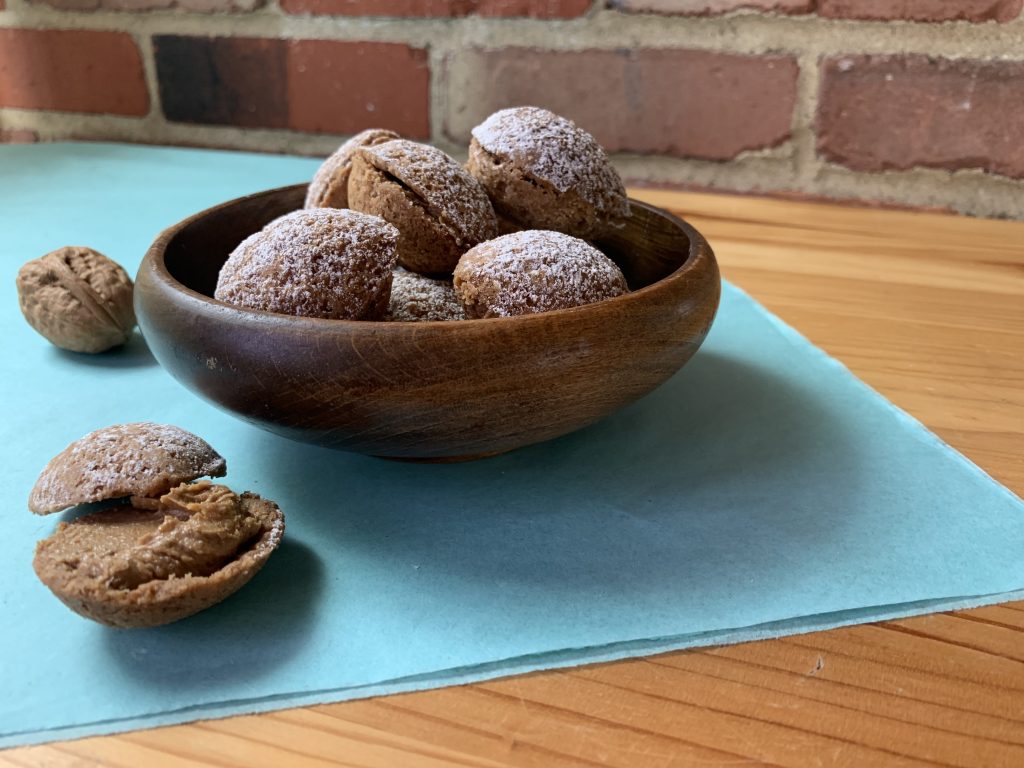
The best way we know to use up casualties from our holiday baking
Our collected work on Heritage Cookies of the Old and New World, both Volume 1 and the forthcoming Volume 2, can be traced back to the Czech tradition of Vánoční Cukroví: “Christmas Sweets.” Central and Norther Europe abounds with impressive holiday baking traditions, but no one takes it more seriously, or does a better job, than Czechs such as my beloved wife.
The thing is, when you make a lot of cookies, you also end up with a lot of casualties. There’s just no way around it. Beehive N0-Bakes may be the single best way of converting those casualties into something new. Who am I kidding? History contains a lot of ‘Oops!’ moments just to ensure the Beehives get made.
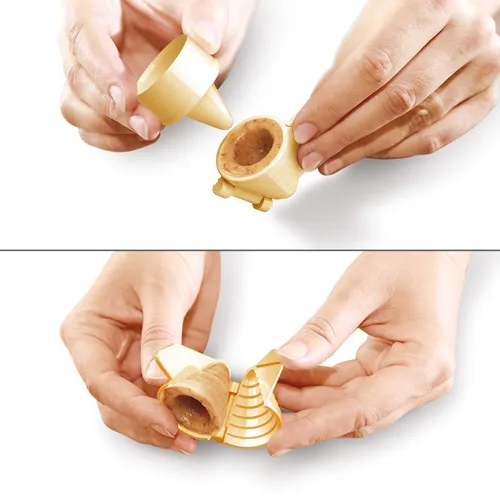
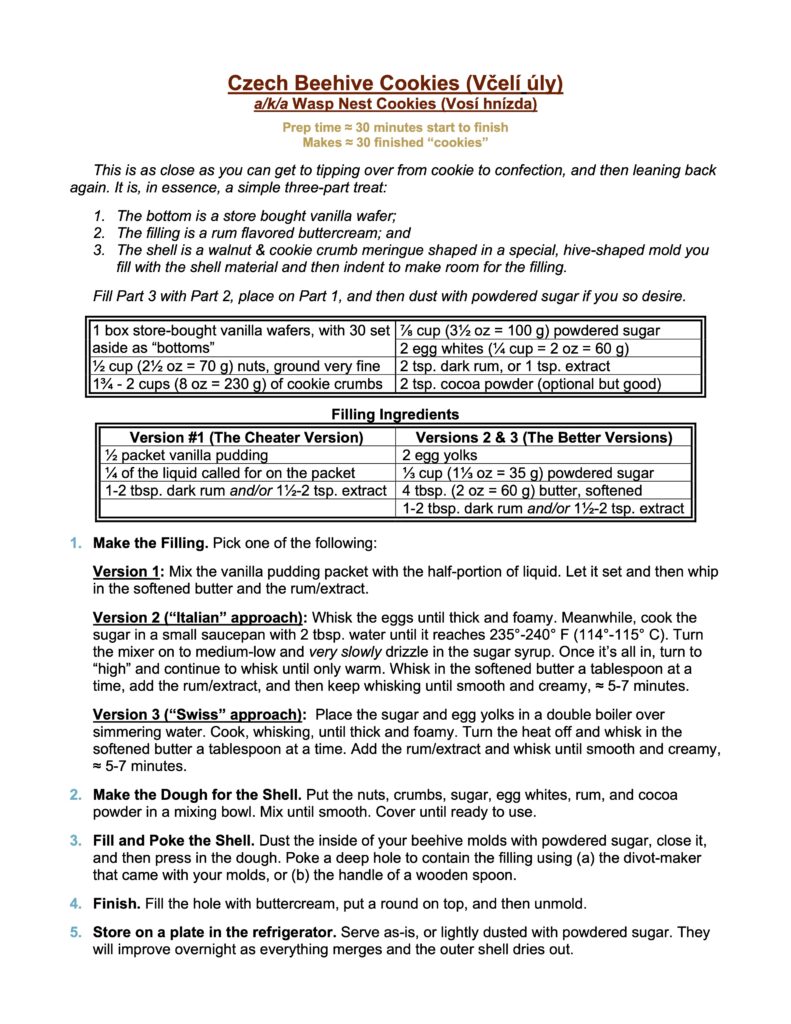
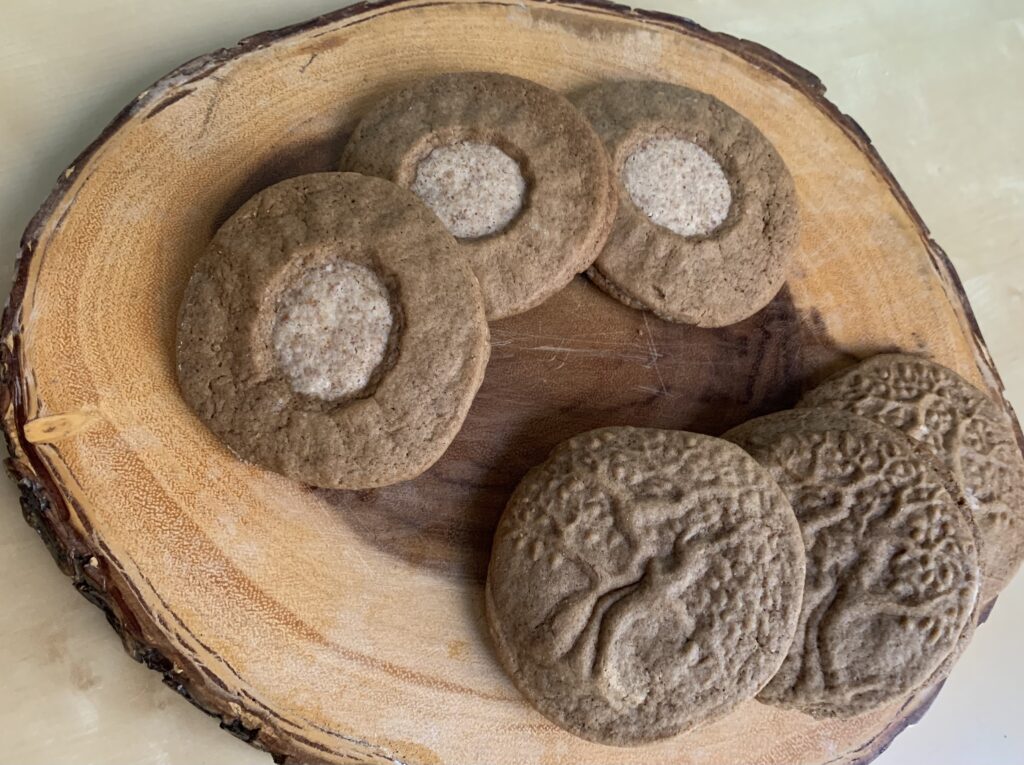
That picture pretty much says it all. (A) create a dough from leftover cookie crumbs, (b) press it into shape using the plastic form, (C) poke in a hole using the provided stamp, or the handle of a wooden spoon, (D) fill said hole with a stiff, rum-heavy buttercream, and then (E) cover the bottom with a small, round cookie like commercial vanilla wafers.
Quick, easy, fun for children of all ages, and requiring no mandatory baking unless you choose to make a superior buttercream. Or wish to make your own wafers, of course.
This is the magic part, and it couldn’t be any easier. Start with your leftover cookie crumbs. Mix in finely ground nuts, a small amount of powdered sugar, and egg white(s) as needed to bind it all together. Most people also add in a bit of rum (or extract) and cocoa powder to round things out, but that can vary with both personal taste and the nature of your casualty crumbs. You can also add spices, depending on the nature of your crumbs. Ground up gingerbread cookies obviously have a different vibe than ground up butter cookies.
NOTE FROM KATE: caution on the casualty cookies. Not all will make good candidates! We had some strongly flavored cocoa bear paws that got recycled into Beehives, and I thought there was a bit much going on. I would’ve preferred a more neutral backdrop to the smooth and delicious filling. If we make them again from the same cookies I will vary from the recipe to accomodate.
Regarding the overall impression, I prefer walls as thin as possible, with a liquidy eggyolk cream filling for contrast. But those would soak the Nilla cookie base over time…so if you’re making a whole bunch, a buttercream might be a longer-lasting option. Due to their egg content, we store Beehives in the refrigerator until serving time.
The only place it could go wrong is the proportions. Sometimes the cookie crumbs will be drier, sometimes wetter, etc. The answer is simple: remember your target. You want a standard, slightly sticky cookie texture. Start with something on the wet side and then add crumbs as needed to get there.
Part 2 – Ready The Filling
This is just as easy even though the recipes can vary drastically from house to house. You are after a rich, thick but not solid filling full of extra rum flavor. How you get there is up to you. The filling texture can vary from thick and boozy liquid eggnog to a firmer, properly flavored buttercream.
Kate’s prefers a cheater-buttercream on the theory, “If you are going to make a life hack recipe out of leftover crumbs, why not make a shortcut buttercream?”
Make an extra-thick, store bought vanilla pudding by using only half the designated amount of liquid.
Finish by whipping in dark rum and/or rum extract to taste.
I prefer to start from a modified pastry cream, otherwise known as a Swiss meringue method using yolks instead of whites:
Whip the leftover egg yolks with some sugar over a hot water bath until thick and foamy.
Remove it from the heat and whip in softened butter piece by piece, waiting each time until the last piece has been fully incorporated.
Finish by whipping in dark rum and/or rum extract to taste.
The third approach is a French Buttercream, otherwise known as an Italian meringue method using yolks instead of whites.:
Whip the yolks off heat until thick and foamy.
Slowly drizzle in a softball-stage sugar syrup (235°-240° F = 114°-115° C), whisking on “high” until the temperature drops back down.
Finish by whipping in dark rum and/or extract to taste.
The Flavor Profile – Does It Need To Be Rum?
We’ve written before that Prague’s secret heart belongs to a combination of nuts, rum and mocha. This recipe has (let’s see…) nuts and cocoa powder in the crust, with rum in both crust and filling. No surprise there!
There is no rule requiring you to stick with that profile, any quick online search will reveal many variations, and you always need to adapt things if your cookie crumbs come from something that has a lot of character. But for plain beehives made from plain cookies, please consider mocha-rum as the home base. That’s what you’d find in the Czech Republic.
NOTE: 100% rum extract starts to taste a bit artificial. We like to mix dark rum and extract together in order to obtain an intense flavor that still has nuance. And a bit of booziness of course!
Part 3 – Construction
Press dough into your little beehive mold:
Finished cookies with an empty mold on the left, and an unfilled one on the right
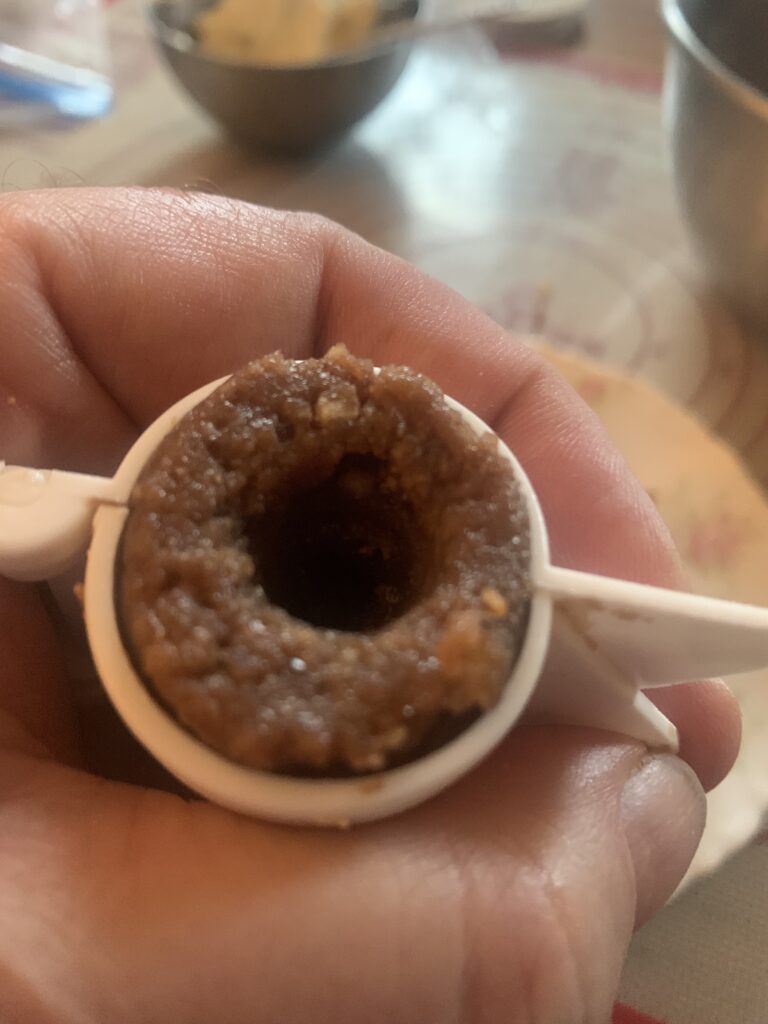
Poke a hole in the bottom using either the tool that came with your mold, or the handle of a wooden spoon.
Poke a hole inside
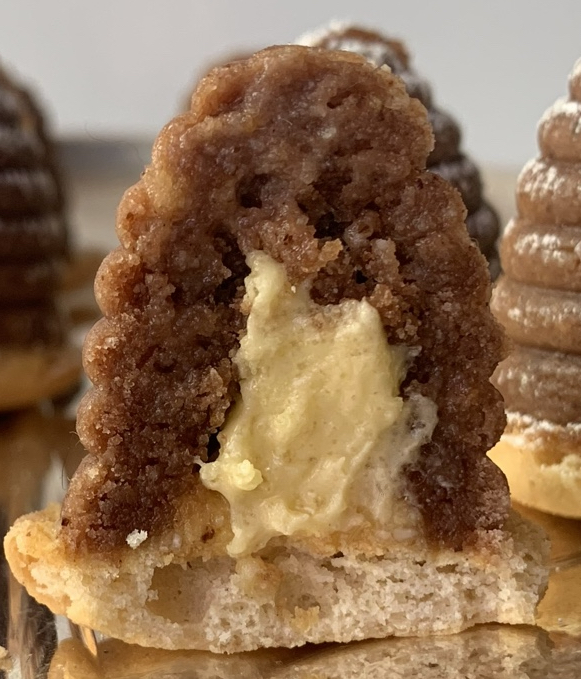
Fill the hole with filling.
Cover the hole with a small, round cookie. We typically use commercial vanilla wafers from the box.
Bottom on, and ready to be pushed free.
Unmold. One side of the mold will come free easily. Use the cookie on the bottom to help free the other.
Done!
Move your finished Beehive Cookies to the fridge, where they will keep well while the cold, dry air hardens the outer crust and makes them that much more cookie-ish.
Storage and Conclusion
No-Bake Beehive Cookies:
Turn casualties into capital;
Look amazing;
Have a distinct and often different flavor from everything else on your tray;
Taste delicious;
Are easy to customize (almost unavoidable);
Occupy a distinct part in an important baking culture; and
Are fairly easy to make.
Can someone please explain the downside?
okay, yes. You may have to put them into a mental “Not-Quite-A-Cookie” category. And yes, that can cause some family friction about where they belong in your forthcoming cookbook. But they’re good. That is the bottom line.
A funny thing happened on the way to Heritage Cookies Volume 1. The closer I got to the deadline, the more must-have cookies showed up to thrust their way into view. Typical, right?
Kate and I recently agreed that Volume 2 will come out sometime in 2024. And sure enough, a whole new set of cookies jumped onto the radar – much loved, irresistible, heritage recipes that rely on hartshorn a/k/a baker’s ammonia because baking powder and baking soda simply can’t duplicate its unique properties.
NOTE FROM KATE: At this rate, we will need to put our project management hats on and simply leave other cookies for later. As in, “There might be a slim pamphlet called Heritage Cookie Crumbs, or something equally silly! It’s true, though. As soon as you think you’re done with a project, new opportunities start to push their way through the door!
Northern Europe offered up two incredible Christmas treats, and two amazing illusion cookies: Swedish Drömmar and Polish Ammoniaczki (a/k/a “Vanilla Puffs”) taste as good as any other holiday cookies you know, but have textures that won’t resemble anything else on your tray. Kringla (Norwegian Pretzel Cookies) and Lemon Ammonia Crackers are simply spectacular. The first tastes like a super-crunchy ladyfinger but looks exactly like a salted pretzel. Go have a look if you don’t believe me. The “crackers” taste more like a standard sugar cookie, but their illusion is so good that a visiting daughter got legitimately fooled. She grabbed a few “saltines” to snack on, and got a surprise I will hold over her head for the next several years.
[NOTE FROM KATE: The same daughter then absconded with a large handful for her drive to see the cousins in Maryland, and to try and fool them in the exact same way. She can deny it all she wants, but we are the ones writing the history here.]
What a trove!
I discovered just as many unique recipes from the Mediterranean nations. There’s Croatian Cvite (Flowers), an illusion cookie we haven’t tested yet. There’s at least a pair of honeycentric biscuits out of Italy. Another from Spain. And then come the most common of them all: crispy, crackery “tea cookies” with powerful flavors offset against enough leavening to keep them airy and light. [NOTE: That’s “Tea,” as in actual tea, or coffee, or maybe something a little stronger.]
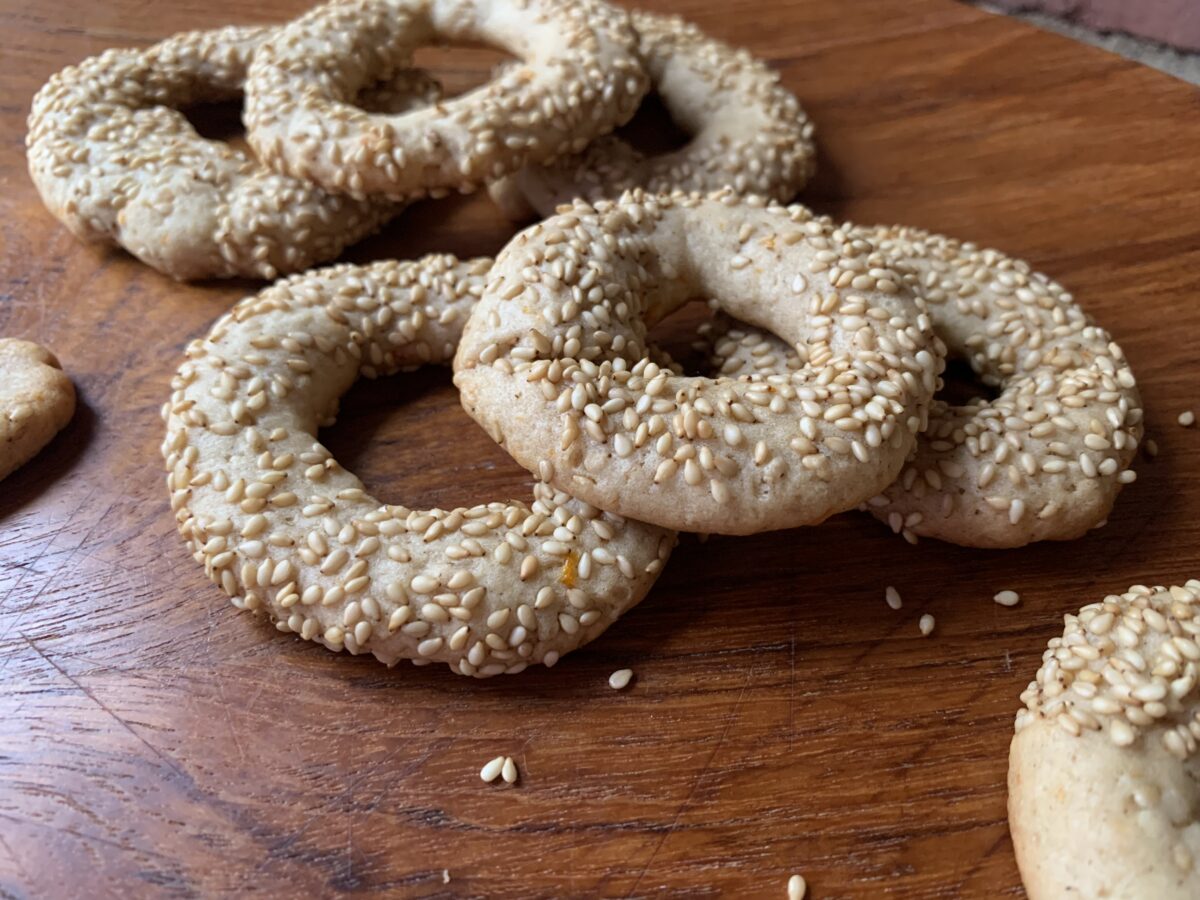
This is the Greek version, known interchangeably as Ladokouloura (“Olive Oil Rings”) and Koulourakia Ladiou (“Sesame Rings”). The names pretty much say it all. The main flavors are good olive oil (adjust the strength to your taste and tolerance), sesame seeds, and a solid hit of orange. Highlights come from delicate amounts of cinnamon and clove. A matching version, Lebanese Anise (Yansoon) Cookies, should be up in the next few weeks.
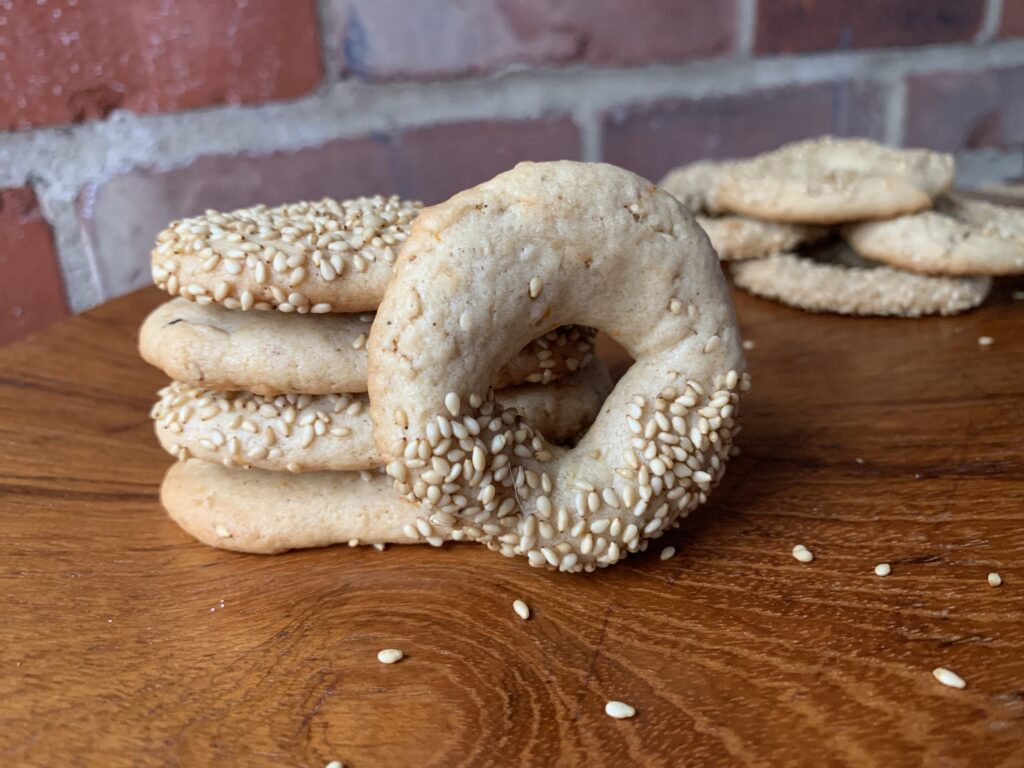
The rings on the right are the most classic form, but other shapes are almost as common.
NOTE FROM KATE: Back in Czechoslovakia when I was in elementary school, I used to walk instead of taking the bus and I saved my transportation allowance for various treats. Orange-oil scented tea biscuits were one of my favorites. Some of these cookies are the closest home-baked thing I have found to date.
Yes, You Must Use Hartshorn
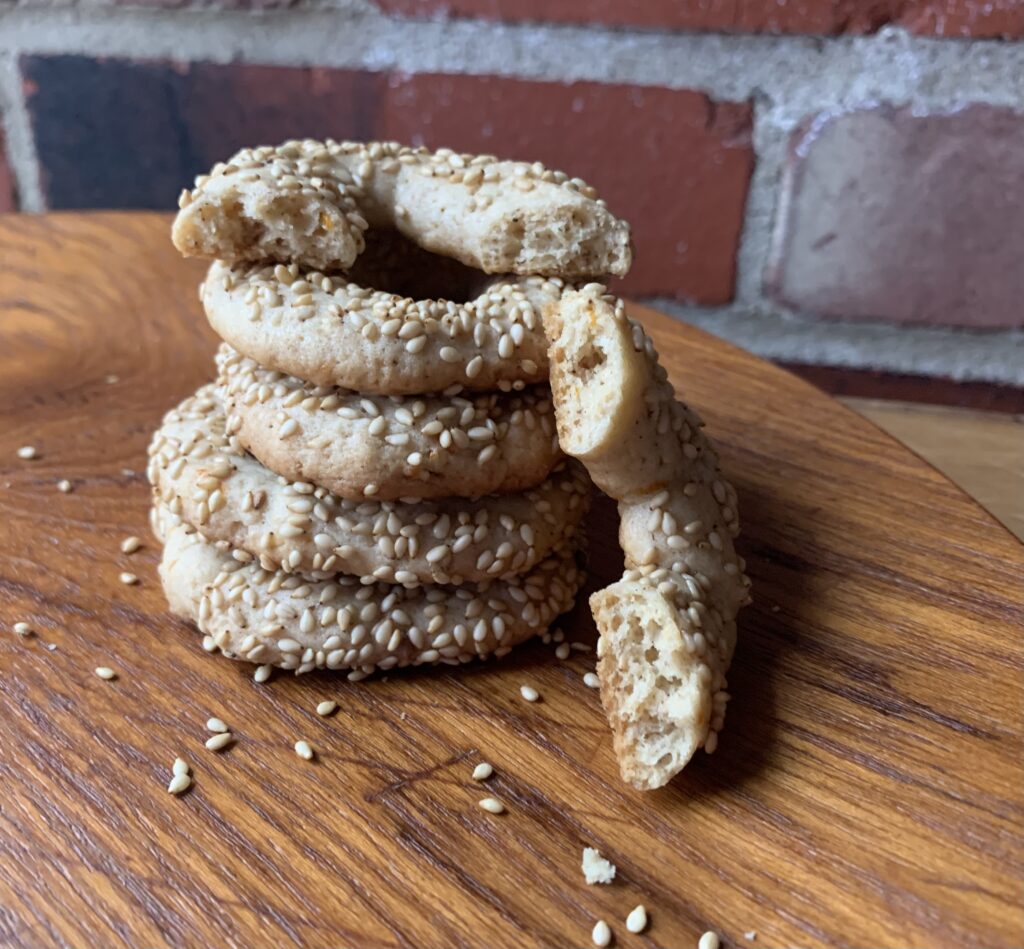
The essence of these cookies lies in how they feel between your teeth: an extremely light center, a crispy crust, and a crunchy texture that baking soda and -powder simply can’t produce. The modern products make a cookie that tastes the same on your tongue. They’re nice. But you won’t “get it” until you taste them made with baker’s ammonia. The feel between your teeth is night and day.
See that crisp, honeycomb core? That’s from the hartshorn.
Lessons In The Baking
Happily, we know several families of first generation immigrants who have been happy to help us with testing Greek cookies. It took only three bakes to get these nailed.
The first one earned raised eyebrows for the exceptional flavor. People really liked the fresh orange notes compared to commercial versions. It only lacked in the texture department.
For version #2 I increased the amount of hartshorn by 50%, and then decided to gild the lily by rolling them in sesame seeds to imitate the ones we were shown in the market. This batch had the right texture, and they looked amazing, but those extra sesame seeds dominated the flavor.
In batch #3 we kept the same level of hartshorn powder, but decided to decorate with some of the sesame seeds originally used inside the cookie. These were perfect according to all our native testers. Or to give a more accurate quote, “Crunch, crunch, mmmmm. Oh my yes.”
NOTE FROM KATE: I love sesame, just love it! To my surprise, however, I found that rolling the entire cookie in sesame went a bit too far. The seedy texture got in the way of the added flavors. For that reason, I tried dipping only the top part (which worked,) on only half of the top part (which produces an interesting effect in itself. Suit yourself – your sesame level is a matter of preference just as the level of orange and clove.
A Final Note On The Olive Oil
Kate loves the taste of olives. I, emphatically, do not. Thus we decided from the very beginning to split the oil 50/50 between powerful extra virgin oil of the sort used in salad dressings, and “light” olive oil of the sort that’s used in cooking.
That turned out to be a very wise choice because it fell exactly at the median opinion. But – BUT – I need to stress that almost everyone fell outside of this middle ground in one direction or the other. Olive aficionados loved the “little hint” of flavor, but would have preferred a little more. Olive doubters could have done without the “vaguely unpleasant note,” but agreed that it wasn’t strong enough to get in the way.
Which camp do you and yours fall into? As some old Greek dude once said, “To know thyself is the first step on the path to wisdom.” It’s pretty good advice for Ladokouloura as well. Though I cannot recommend following that gentleman’s advice for tea to drink alongside… [NOTE: That’s an inside joke for my fellow philosophy and history buffs. If you get it, you win.]
A PHOTOGRAPHY NOTE FROM KATE: This cookie caused me both humor and frustration. The combination of round cookies and the flat ones that look like rectangular teeth had me seeing faces in too many compositions – and once you start seeing faces, you can’t unsee them! I even tried to go with it and made a bunch of goofy, googly-eyed plates. If eating sentient food bothers you, I suggest you bake either circles or rectangles, but not both!
Conclusion
You simply cannot travel through the Greece or any of its neighbors without running into tray after tray of Ladokouloura. They are as ubiquitous as they are loved, which makes them as genuine a Heritage Cookie as anything else we have ever baked.
This is your puppy if you want a true taste of Athens, Santorini, or any of the lands that consider Greece to be a neighbor.
Happy New Year to all! This will be a relatively short article because all the tips and tricks were so important they’ve ended up in the recipe itself. Twenty of them! More or less. There isn’t a lot for me to add.
NOTE FROM KATE: This would be an absolutely wicked technical bake if they ever appear in the Great British Baking Show a/k/a Bakeoff! With their even, delightfully puffed-up loops toasted golden and their intriguing crunch, they are well worth the learning curve.
Here’s the bottom line: Kringla look exactly like a salted pretzel and have soft middles right after baking. From Day 2 on, they turn into an extremely light, ultra-crisp, crunchy sugar “cookie” with moderate sweetness and an innocent flavor that no one can dislike.
Kringle sorta-kinda work with baking powder or soda, but they turn into something special when you use baker’s ammonia a/k/a hartshorn instead. The texture changes from (A) absurdly puffy when fresh and a little tough as they age, into (B) puffy with a pleasant, crispy crust when fresh and wonderfully crunchy as they age. See this article for the underlying reasons. We can’t say they aren’t worth making if you use the more common leavening agents. The illusion still works, and there’s nothing wrong with the flavor. But they will definitely be better if you make them with hartshorn.
Shaping Pretzels Is A P.I.T.A. – If You Are Me
Kate had almost no problems, because she’s an artist with a good 3-D imagination. I end up staring at the darned things and trying to remember, “Was it one twist or two? And then the ends go where…?”
It’s all covered in the recipe itself, but aside from native talent (or lack thereof), the shaping hurdles are all pretty basic and built into the nature of the cookie:
It’s a very soft and sticky dough. But everything will work out fine if you roll each piece in flour before forming, and work with floured fingers.
Move the rolled out “snakes” onto your parchment before turning them into pretzel shapes. They’re so soft that scooping and moving will inevitably distort your work.
Use very skinny “snakes” and leave a huge amount of room in the loops – enough that they look sort of scrawny and pathetic before they hit the oven. Kringla expand by at least 400% percent as they bake, meaning each of those little arms will end up being four times (4x) as thick by the time they are done. Rest assured: all that empty space will vanish.
Keep the pretzels far apart on the trays for the same reason.
NOTE FROM KATE: If you’ve never made a pretzel, I recommend practicing with a piece of thick twine or shoe string. You will want to make a single shape while using up the entire length of 8- 10″. Try various shapes, and try to join the rope under an existing loop. If you can’t, pinch the dough together so that it’s the same thickness everywhere (Thinner portions will darken too much.) The final product is as solid as the dough is fussy. This dough would be suitable for making hearts, flowers, linear animal shapes, or whatever else you fancy.
The Final Touch Decorations Are Easy, But Have Some Sneaky Hazards
Kringla taste perfectly fine. They are friendly, inoffensive, mildly sweet, and basically pleasant to one and all. For a stronger impression, add more freshly ground nutmeg or cardamom. For an even safer flavor, add some extra lemon zest. Either way, this cookie isn’t really about the flavor. It’s the shape that makes them special. The shape, and the illusion of being a salted pretzel instead of a sweet treat.
NOTE FROM KATE: I could be wrong on this, but I perceive hartshorn-leavened cookies as less flavorful than their baking soda/baking powder equivalents. So far we aren’t sure whether it’s just me, or because the extra puff essentially dilutes the spice level per bite. Adjust spice level as you see fit.
That salted pretzel illusion comes from brushing the pretzels with melted butter and then sprinkling the tops with pearl sugar to imitate the salt. The recipe goes over it all in detail, but that process has two basic challenges to overcome. (A) The dough is so soft that brushing it with melted butter can distort those shapes you just spent so much work on; and (B), the oven temperature is hot enough to melt any loose sugar crystals, which can lead to black caramel tainting the bottom of your cookies.
You can fix both problems by baking the pretzels until they are almost done, pulling them out of the oven to be decorated, and then returning them to the oven to finish. That, alas, is both fussy and time consuming. Thus it makes sense to brush and decorate before baking… which means you need to compensate for those two problems.
There is no concrete, surefire answer. It’s just one of those things you need to know about, and do what you can to prevent. See the recipe for various tips, tricks, and hacks you might want to use.
The Pretzel Bottoms Try To Get Out Of Control
Start with an extremely light dough, rolled very thin, and heavily leavened so it will expand by four or even five times in the oven. Add in a very hot oven to brown the top and provide extra crispness to the crust.
What do you get? A cookie that can easily burn on the bottom before the tops are done, even without factoring in any caramel from melted sugar.
Knowing the problem gets you about 50% of the way toward fixing it. Again, please consult the recipe for our tips, tricks, and hacks to forestall that. But I may as well close this article by listing them here as well, because several are very clever if I do say so myself:
You can bake one sheet at a time, on a middle or upper rack of the oven. Oven heat comes from the bottom and collects toward the top, so this will make sure you have consistent air flow while maximizing the heat around your crust rather than on your bottoms. Just remember that one sheet in the oven tends to cook faster than two.
You can use the convection setting on your oven to achieve the same effect. Just remember to turn the oven down by 25° F (about 15° C).
If you use two pans, remember to rotate them halfway through. Bottom to top, while also spinning them back to front.
You can insulate the cookie bottoms by using a silicone mat instead of parchment paper.
You can also insulate the bottoms by using a doubled baking tray.
NOTE FROM KATE: We have a convection oven but we seldom turn the fan on because all our Volume 1 recipes started out in a previous one. Keeping a traditional oven setting helps us compare new recipes connected to our older bakes. If you use a convection oven, reduce the temperature by 25°F and keep an eye on your bake time. Every oven is different.
Conclusion
Please don’t let all the nits and notes discourage you from trying this fun and culturally important little cookie. Yes there are hurdles, but they’re more in the nature of “heads up” warnings about pitfalls to be avoided. They aren’t actual barriers, let alone walls, and the rewards are more than worth the effort. Kringla are fun! Just look at them:
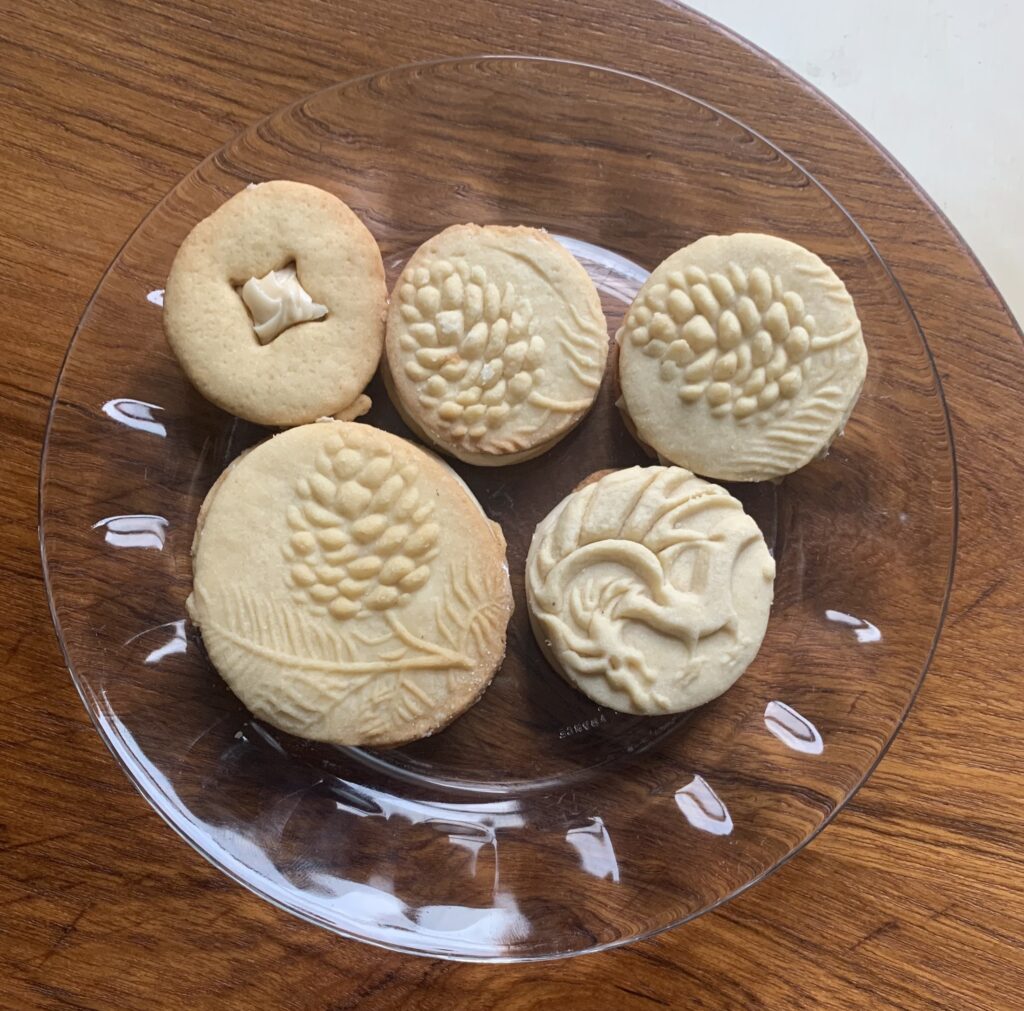
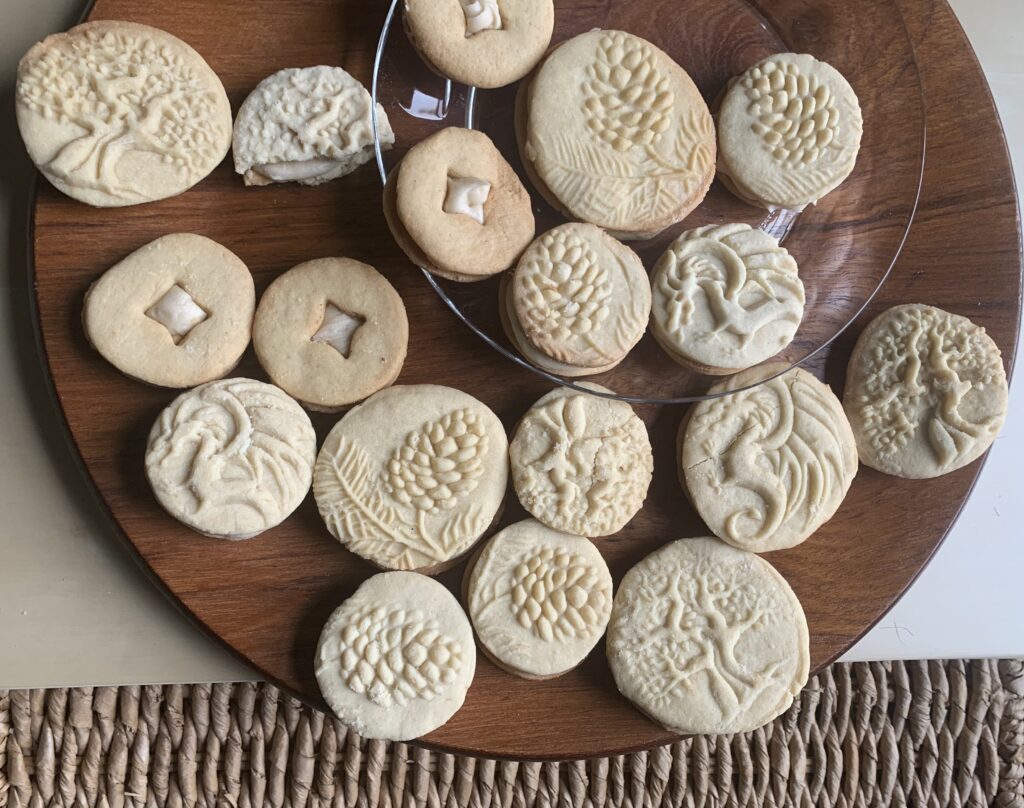
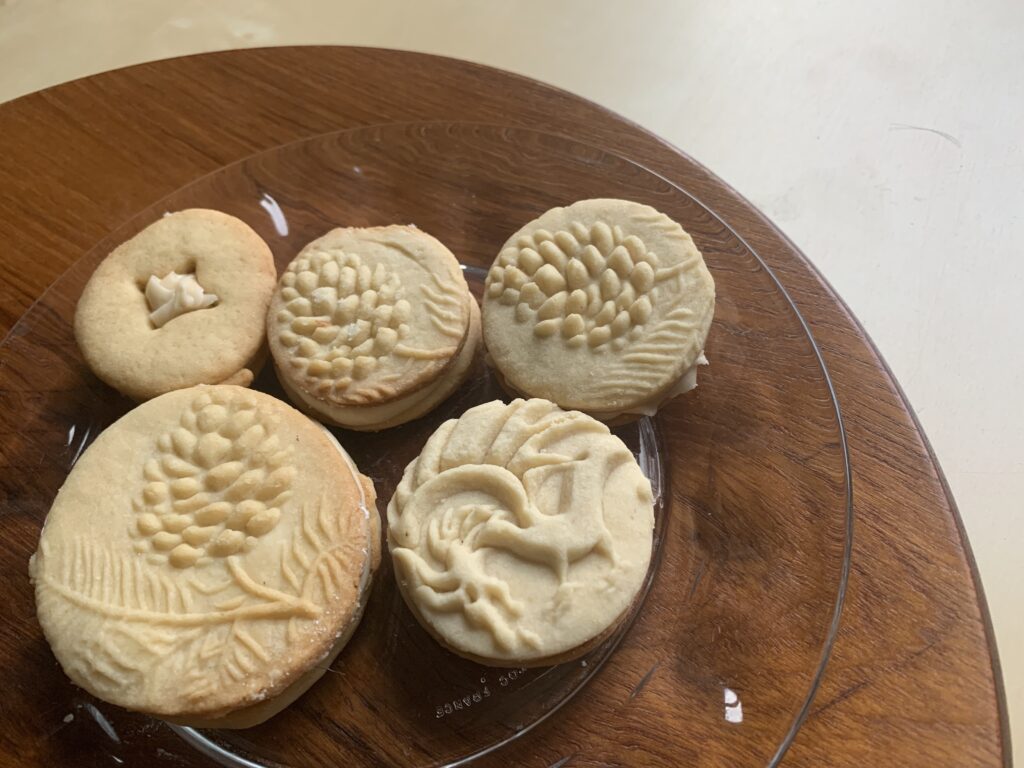
Maple shortbread sandwiched around a not-too-sweet maple buttercream.
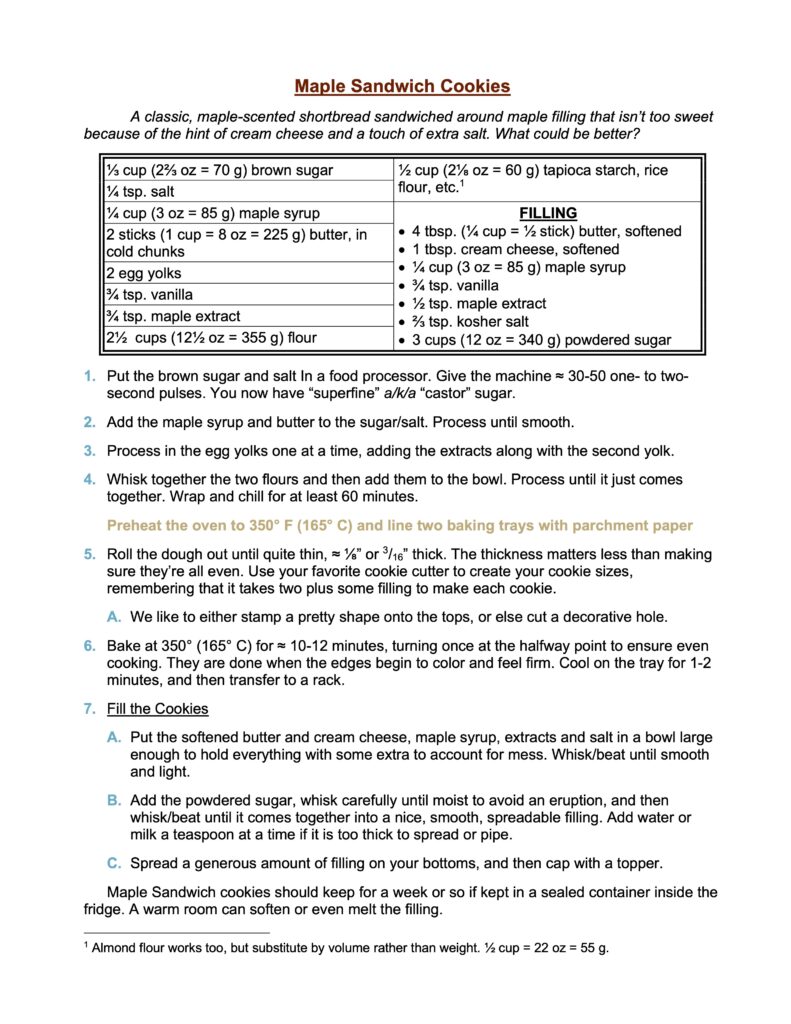
Alfajores: the legendary South American cookie of childhood formed from two tender, shortbread wafers that sandwich a rich caramel (dulce de leche) filling. Add a bit of maple flavor to the shortbread part, replace the filling with a rich maple buttercream, and you get a cookie that’s just as good, and almost equally loved across its range in North America.
Exceptionally pretty, and featuring a deep sweetness that hovers right on the line of “children adore it” and “adults can too,” this regional specialty is going to find its way into your repertoire and simply won’t leave once you see the children in your life squealing with glee. Just be aware that no child on the planet can resist snitching a few from a low lying jar, which means you’ll have to carefully be looking in another direct.
Perhaps with a plate of your while sipping nice cup of tee or coffee.
A NOTE FROM KATE: The cookie itself isn’t particularly sweet without the filling, which is a bit too sweet for my personal taste. Now, to be fair, this filling grew on me with every tweak. Still, my European alter-ego would like to point out that you don’t have to use all the sugar in the buttercream recipe.
I do agree that Maple Sandwich Cookies are a lovely addition to the fall repertoire, sans “pumpkin spice,” and make an enticing visual statement for both kids, and kids at heart.
A few years back we published a wonderful recipe for easy Maple Drop Cookies. This is the upscale, extra pretty version: tender, maple flavored cookies sandwiched around an intensely maple filling. What could go wrong?
The answer proved to be nothing, though it did take a little bit of fidgeting to get the details just, exactly right.
The Cookie Part
Shortbread cookies a/k/a butter cookies mostly follow a standard set of proportions. Here’s a alphabetical list of examples normalized to the same two sticks of butter in this recipe:
Testing showed that we liked this cookie just a bit more tender than a standard Butter Jelly, but it was a close call. Feel free to substitute the specified mix of flour (2½ cups) and starch (½ cup) for a straight 2¾ cups of flour.
As to thickness, keep them thin if you want to make sandwich cookies and a little more robust if you want to skip the filling. Just remember to increase the baking time too! Thicker cookies need to bake longer, especially with doughs like this with a decent amount of starch. Starches stay pasty on the tongue until the inside gets hot enough to break down. The magic temperatures are about 130° for tapioca, 140° for potato starch, and 145° for cornstarch. We prefer tapioca because you can’t exactly probe your cookies with an instant read thermometer. The lower degradation temperature to provides an extra safety margin against pastiness. Note: We have no trouble finding affordable tapioca starch at any good Asian grocery.
The cookies are done when the edges begin to brown, which also means the bottoms will be what the pros call GBD (Golden Brown & Delicious). Those toasty notes pair exceptionally well with the maple and vanilla flavors inside the cookie itself.
NOTE FROM KATE: The GBD bottoms work just fine for thin-rolled cookies. IMHO, I wouldn’t mind getting the thicker, molded-pattern ones a bit toastier. Giving them an extra minute or two will make sure that all the starch is properly degraded by heat. This is especially important when you place a tray of molded cookies in the fridge. In fact, I think a slight hint of darker, well-toasted edge would play well against the sweet buttercream filling.
NOTE FROM SCOTT: I completely agree. And for those who don’t know, refrigerating molded cookies can help to keep the pictures clear.
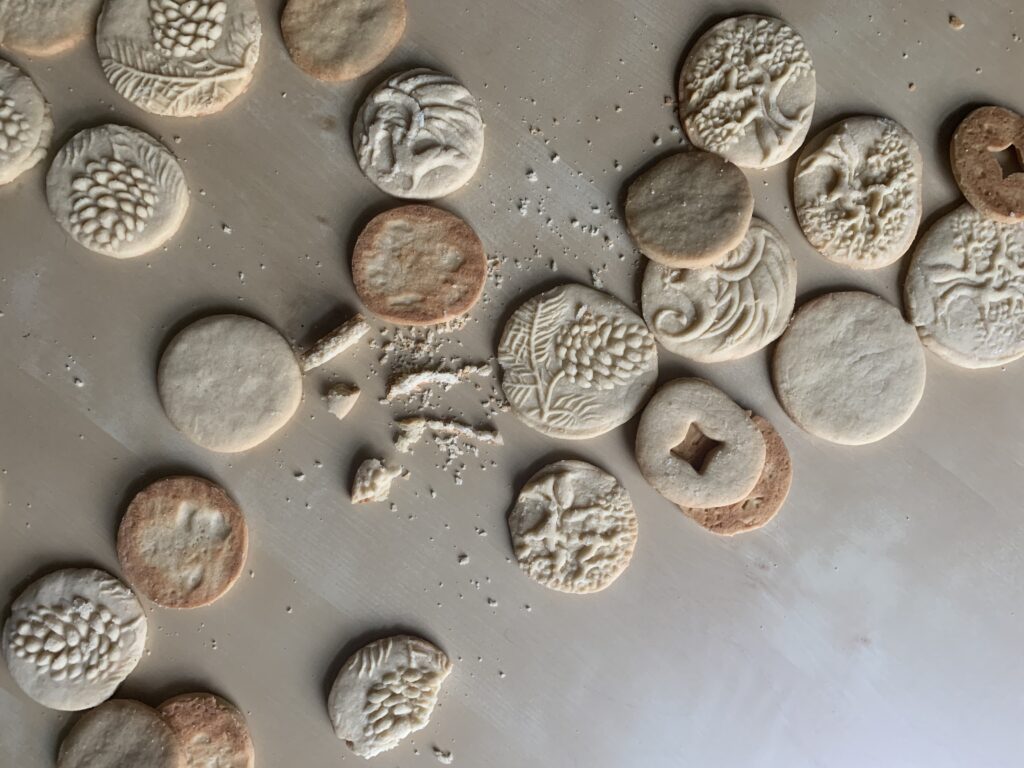
Next up: fancy touches, which turned out to be a lot of fun. This kind of shortbread holds its shape exceptionally well. They’re perfect for really fine cutouts on the sandwich caps, and even for patterns stamped into the dough. Have a look!
FWIW, we had more success stamping the dough first and then cutting it out. It would have been an ideal situation for using a patterned pin if we had one.
NOTE FROM KATE: This cookie holds its stamp well, but it didn’t do as well with very deep, molded cavities. It won’t be as forgiving as gingerbread, so make sure the dough is at a pleasantly cool temperature. You will also want to clean your molds between every stamping (we have a bowl of oil with a toothbrush, a bowl of starch with a powder brush, and a skewer on duty between each stamping.) For this cookie, it worked well to lightly dust the dough as well as the lightly-oiled mold. The type of your mold will also make a difference. Unlike with a hand-carved wooden mold or stamp, a laser-cut mold with sharp-angled features tends to cut all the way through the dough when pressed too hard. Use a gentle hand. In a larger production situation, I would roll the dough directly on the parchment, stamp the shapes, cut the rounds, and then remove the excess for reuse.
The Filling
Our standard buttercream filling uses half a stick of butter to three cups of powdered sugar, with whatever flavors you want added in. It’s dead reliable, thick enough to hold its shape, easy to thin as desired with a bit of milk or other liquid, and the heat characteristics are easy to understand. Butter gets soft at around 65° F (18° C), and so do these fillings.
In this case we started by simply adding in some maple syrup as the liquid. The texture was spot on, but the syrup made the filling a lot too sweet and a little too loose . Solution for the first: reduce the amount of syrup and add in some maple extract. [See Note below] This came close, but still edged over the line into the too-sweet-for-grownups realm.
Have three standard solutions for something that’s a bit too sweet: add salt, add acid, or add something bitter. Salt came first. I upped the amount from a healthy pinch all the way to ¾ tsp. That did the trick for me, but Kate said she could taste it. ⅔ tsp. proved to be the [ahem] sweet spot.
But the filling was still awfully sweet, and toed right up to the children-only line! It needed some extra help. Lemon didn’t seem to fit, so I decided to whisk in a tablespoon of cream cheese. Perfect! The extra mass tightened the filling that essential bit, and the mild acidity was enough to bring the sweetness under control.
TECHNICAL NOTE: Our go-to means of adding bitterness are molasses (also acidic), coffee, and chocolate. The molasses was tempting, but in the end we worried that it would have tried to steal the scene instead of playing a supporting role. [Additional Note: That observation all but demands a comment about molasses being a ham, but three decades of marital wisdom suggests that I might not get away with it. So never mind.]
NOTE FROM KATE: He thought he got away with it. That’s…kind of adorable, and really sweet! Just like these cookies!
Concerning Maple Syrup…
“Pancake syrup” is basically corn syrup with coloring and maple extract. I have nothing against that on some philosophical level, but it would substitute for extract rather than syrup in baked goods. All the cookies we make use real maple syrup.
But that doesn’t end the story, because real maple syrup comes in several grades that basically correspond to the time of year it’s tapped out of the tree. Think of it as analogous to the change from veal to beef, or lamb to mutton: the syrup becomes progressively darker and more intense as the season moves on. We would have loved to try some extra-dark syrup in these cookies, with less extract, but simply don’t have access. If you do, please do, and let us know the results.
Note that syrup “grades” don’t really help because it is an industry term. The only law on point comes from the USDA’s Grade A vs. Processing Grade vs. Substandard. You and I never see anything but Grade A according to that definition.
The industry used to divide the color/flavor lines using the same letter grades with different meanings, going from lightest (Grade A) to darkest (Grade C), but that made consumers perceive the darker colors as inferior. As of this writing the industry has adopted color descriptions instead of grades. Vermont’s industry page describes them like this:
Golden color with delicate taste
Amber color with rich taste
Dark color with robust taste [used in this testing]; and
Very Dark color with strong taste.
The Canadians follow suit, though they often grade by “colour” instead of “color;” except when marketing to the U.S.
Storage
Unfilled cookies should keep for a solid week in a cookie tin or other airtight container. Freeze for longer storage.
Filled cookies, and unused filling, will start to get soft if kept above 60° F (18° C), which equates to a chilly room. We prefer to use the refrigerator for convenience, but take extra air to have an airtight container lest the filling absorb flavor from some garlicky pasta in the bowl next door.
I believe the filled cookies can also be frozen, but haven’t tested it yet.
CONCLUSION
That’s a lot of detail, but it all adds up to common sense for any experienced baker. The recipe is for a simple, maple flavored shortbread, and an even simpler maple buttercream. Put the two together and you have maple nirvana. There’s a whole lot worse you can find in this world of ours. And very little that tastes a whole lot better.
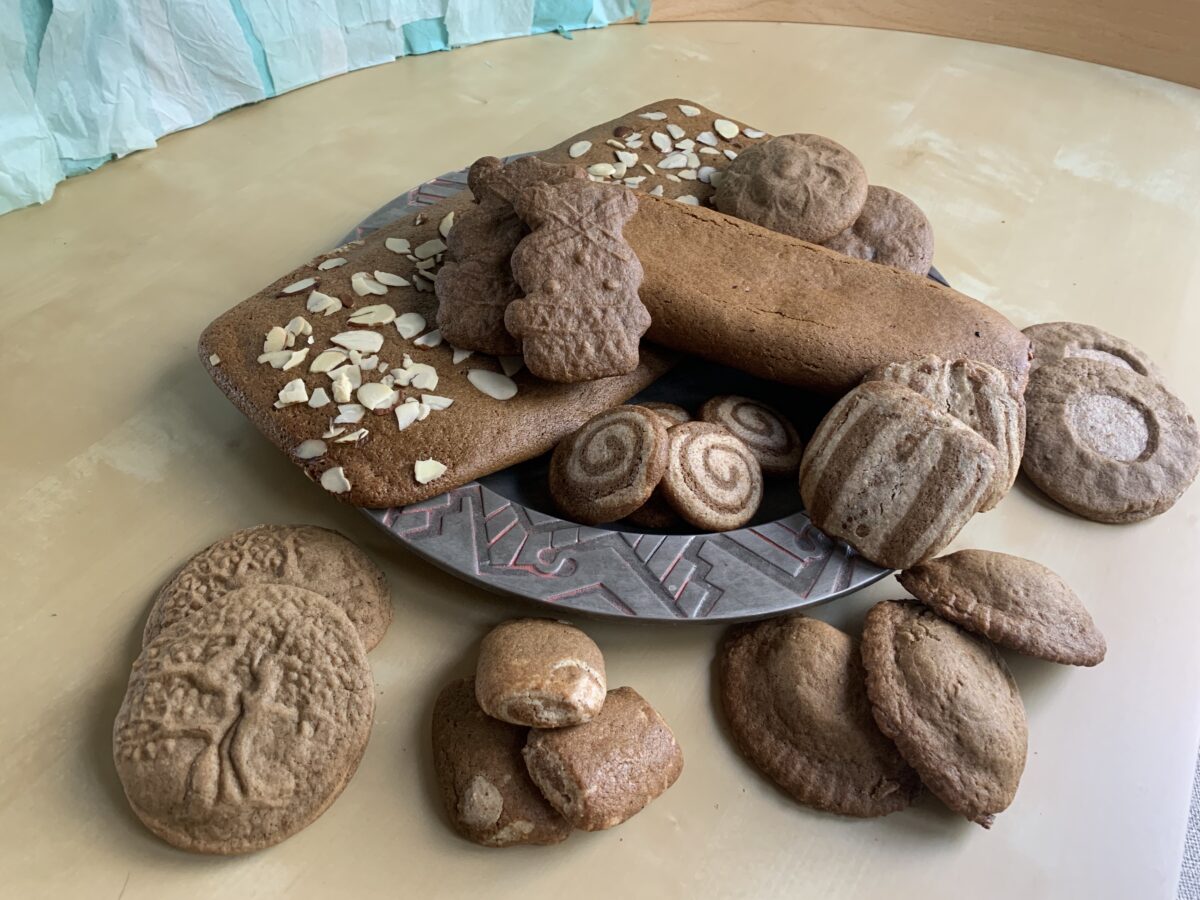
P.S. We had some filling left over from the photo shoot, and a few Gingerbread cookies from another project. I combined the two on a lark and… Goodness Gracious and My Oh My! This maple filling loves, Loves, LOVES to be paired with spice cookies! It’s so good that I may well sneak some onto this year’s extravaganza tray. Make an extra batch of Ginger Snaps without the sugar crust, combine with the maple filling… Oh yes. This could definitely be a thing.
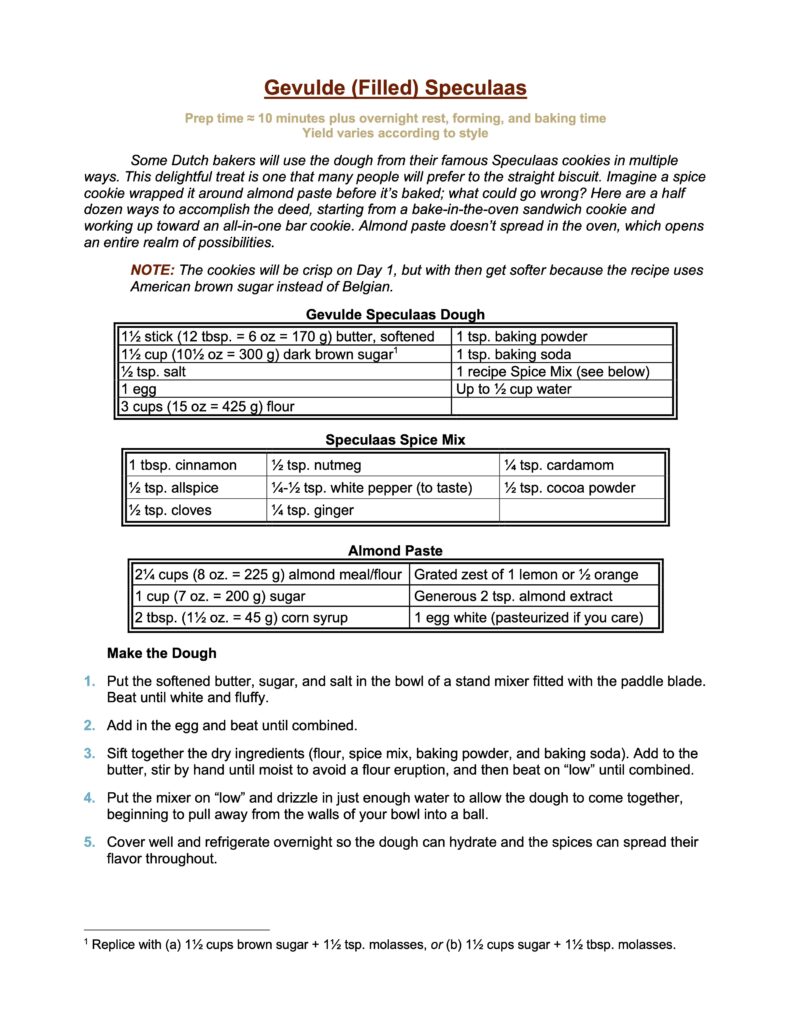
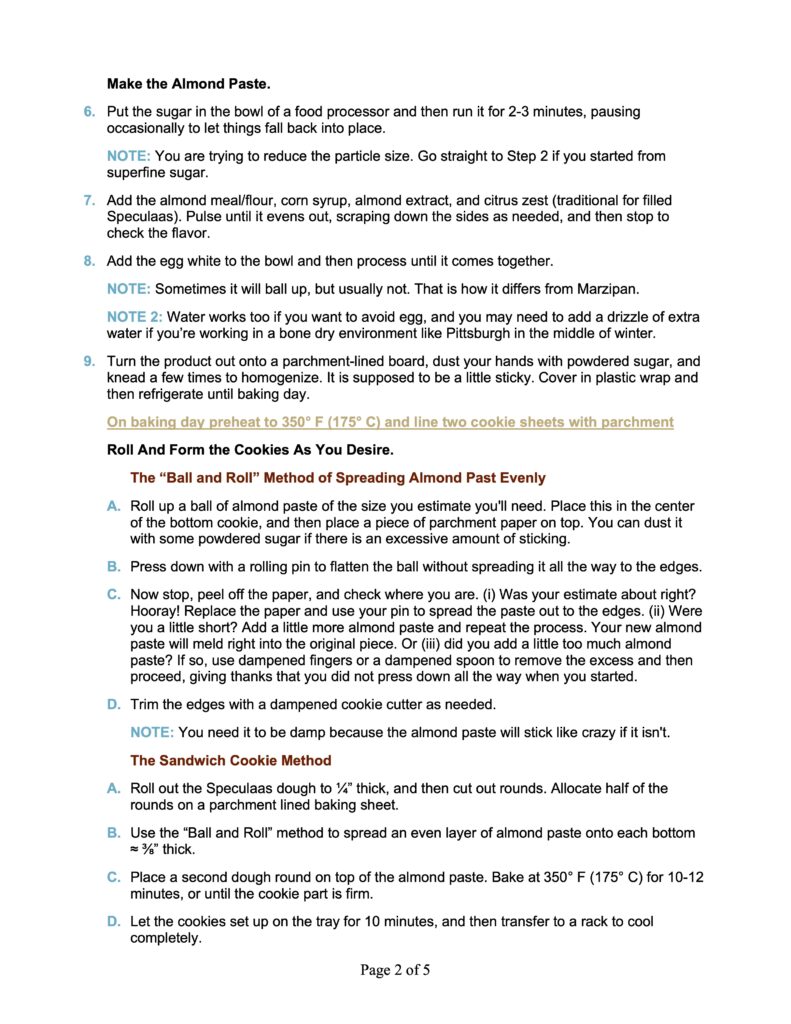
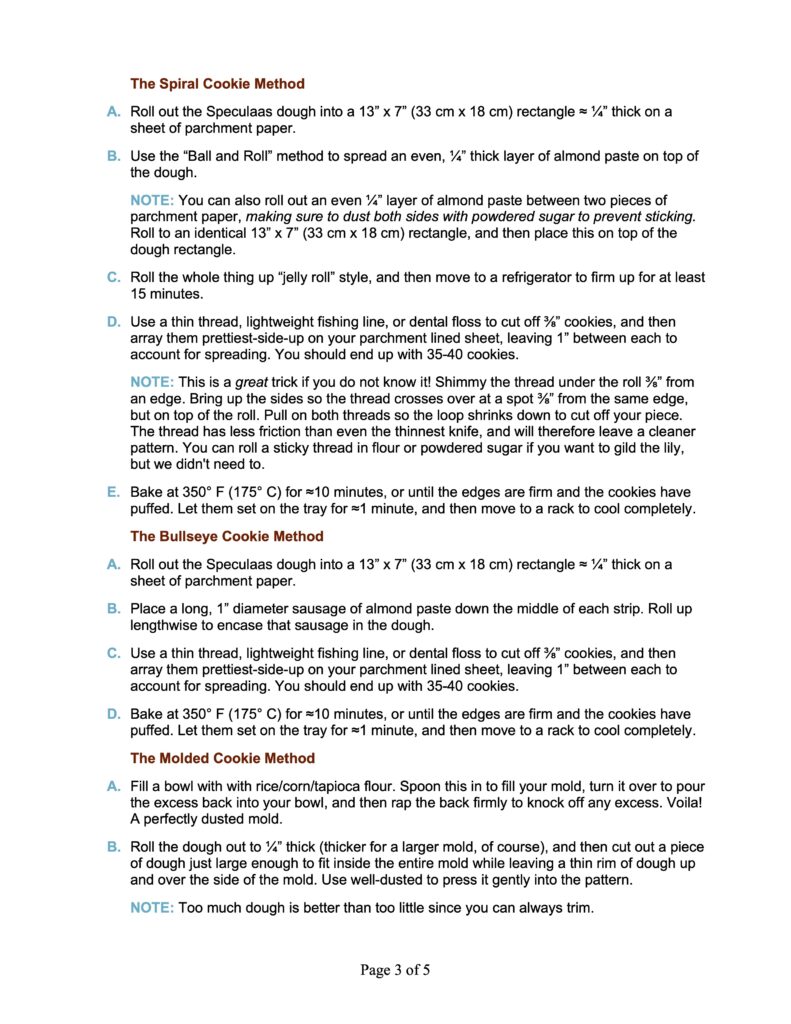
Speculaas filled with almond paste? Thank you Mom, can I have another?
Our published book, Heritage Cookies of the Old and New World, has a wonderful recipe for Nut Dough Speculaas, which offers up a soft, tender version of the famous Dutch spice cookie. This recent article is all about the ultra-authentic, thin-and-crispy version, featuring a recipe straight out of Belgium. Our research for that article accidentally revealed a third style that is immensely popular next door in Holland (a/k/a the Netherlands): Speculaas dough filled with almond paste.
The Nut Dough recipe makes an extra tender version. The 100% Authentic recipe comes out thin and crisp. This is the one in the middle; toothsome, gently spiced, and made with U.S. pantry ingredients. Take that and fill it with homemade almond paste? [Finger Kiss]
As always, you can skip to the bottom if you want the recipe alone. The discussion of our stumbles and revelations along the way is going to take some time.
A SIMPLE, PANTRY-FRIENDLY SPECULAAS DOUGH
Easy peasy, I promise. Yes, this is a top shelf American version of a very European cookie, but that doesn’t make it complicated. The approach couldn’t be more standard. Cream the butter and sugar, beat in an egg, and then mix in the flour, leavening, and spices. Cover and refrigerate overnight so the flour can hydrate and the spices even out. Form and bake however you wish.
The only potential complication lies in the hydration part. You are after a drier dough with only enough moisture to hold together when squeezed. (the Almond Paste filling will add any richness you think is missing). That means the base recipe is likely to be too dry outside of a humid environment. You solve that by adding extra water a tablespoon or two at a time until it holds when squeezed. One or two is usually enough, though it could take as many as six to eight.
Just go sparingly! It is much easier to add more water in than to take any out. I did one batch with the full eight tablespoons (½ cup), and had to double the batch in order to avoid throwing the whole thing out. Tripling would have worked even better. Fortunately, the recipe has enough flexibility to have saved me from that extreme.
THE ALMOND PASTE FILLING
No need to waste a lot of time on this piece either. Almond Paste is super easy to make, and we have a whole discussion of it in the article on Marzipan. The only difference for this purpose is the subtle addition of some citrus zest to help it meet and marry with the flavors of the dough.
We include instructions for the almond paste in the cookie recipe down below. I’ve added our recipe for Marzipan and Almond Paste too, as a free bonus. [NOTE FROM KATE: I love anything resembling marzipan, and the orange notes in this paste have a delicious more-ishness to it. So much so that Scott had to keep chasing me away as I tried to execute numerous rounds of diligent quality control.]
THE MANY DIFFERENT SHAPES
And now we get to the long part. But not because the shaping is hard! It isn’t. The dough is friendly, too, and the techniques are all straightforward. The length comes from the sheer number of options. This article lists a full dozen (12!) possibilities, and you don’t have to stop there. Jam and fruit fillings spread in the oven, searching for any crevice where they can leak out to create black and bitter disaster on your cookie sheet. Almond Paste does not. That feature opens up your options to basically any cookie shape you can imagine.
Bar Cookies? We Don’t Need No Stinking Bar Cookies!
Honesty compels me to admit that most people make Gevulde Speculaas as a bar cookie. You simply coat the bottom of the baking dish with one layer of cookie dough, spread a thick layer of almond paste on top (it should be noticeably thicker than the dough), and then cover that with a second layer of dough. Bake at 350° F (175° C) for about 18-25 minutes, or until the cookie part on top has set by the edges but is still a little soft in the center.
We, however, have a rule: no bar cookies! (Read the article on Chocolate Fudge Cookies if you insist on knowing why). That changes the focus to all those infinitely more interesting options, such as…
Sandwich Cookies!
Roll out the dough to 3/8″ thick. Cut out your choice of shape (we used larger rounds) and mark half of them with whatever you want for the top (we did a cutout for one, and a cookie stamp for a second.
Array the bottoms on a lined baking sheet (or two), keeping 1″ between each piece to account for spreading. Coat the bottom of the cookie with almond paste,* and then place the tops on top. Bake at 350° F (175° C) for about 12-15 minutes, or until the edges have set and the cookie has puffed up.
* Our favorite way to spread the almond paste goes like this:
Roll up a ball of almond paste of the size you estimate you’ll need. Place this in the center of the bottom cookie, and then place a piece of parchment paper on top. You can dust it with some powdered sugar if there is an excessive amount of sticking.
Press down with a rolling pin to evenly flatten the ball without spreading it all the way to the edges.
Now stop, peel off the paper, and check where you are. (A) Was your estimate about right? Hooray! Replace the paper and use your pin to spread the paste out to the edges. (B) Were you a little short? Add a little more almond paste and repeat the process. Your new almond paste will meld right into the original piece. Or (C) did you add a little too much almond paste? If so, use dampened fingers or a dampened spoon to remove the excess and then proceed, giving thanks that you did not press down all the way when you started.
Trim the edges with a dampened cookie cutter as needed. NOTE: You need it to be damp because the almond paste will stick like crazy if it isn’t.[NOTE FROM KATE: I was way too impatient, so I made a ball of almond paste and squished it with the bottom of a wet glass. It’s messier, I admit I had to sop up extra water off a cookie or two. It was fast though, even enough, and got the job done.]
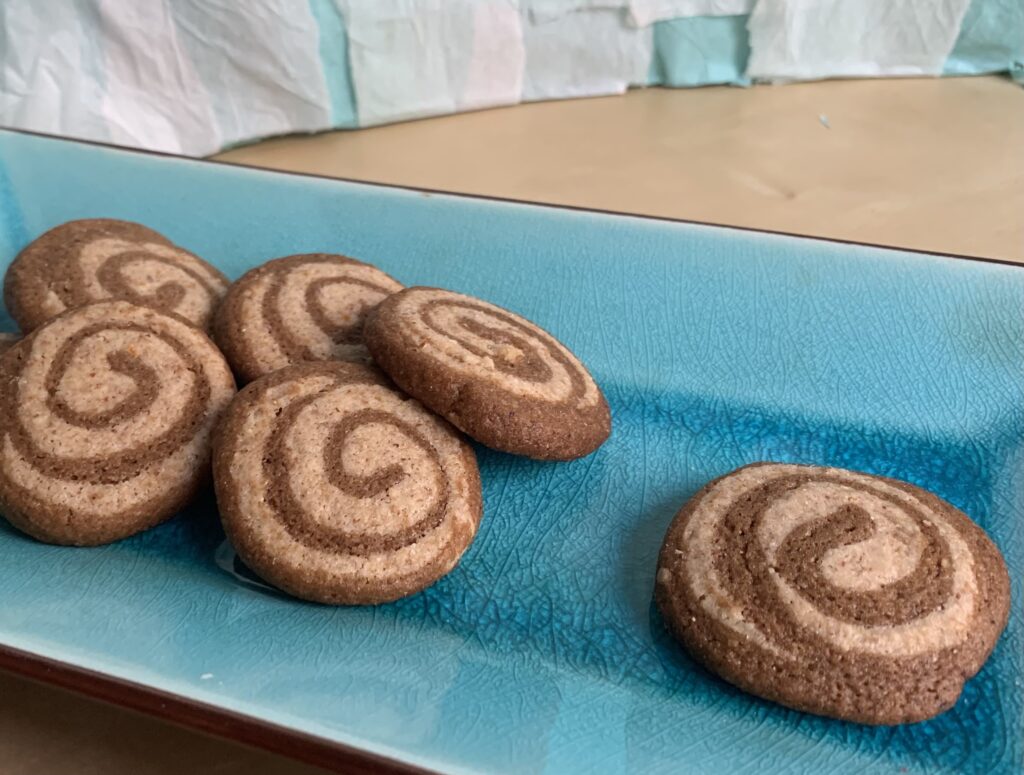
Spiral a/k/a Pinwheel Cookies!
Roll out the Speculaas dough into a 13” x 7” (33 cm x 18 cm) rectangle ≈ ¼” thick.
Use the “balls of almond paste” trick described above in the sandwich cookie section to create an almond layer that is also ¼” thick on top of the dough layer. Making it as even as possible will yield the best patterns in the end.
Roll the whole thing up “jelly roll” style, and then move to a refrigerator to firm up for at least 15 minutes.
Use a thin thread, lightweight fishing line, or dental floss to cut off ⅜” cookies, and then array prettiest-side-up on your parchment lined sheet, leaving 1” between each to account for spreading. You should end up with 35-40 cookies. NOTE: This is a great trick if you do not know it! Shimmy the thread under the roll ⅜” from an edge. Bring up the sides so the thread crosses over at a spot ⅜” from the same edge, but on top of the roll. Pull on both threads so the loop shrinks down to cut off your piece. The thread has less surface area than even the thinnest knife, and will therefore leave a cleaner pattern. You can roll a sticky thread in flour or powdered sugar if you want to gild the lily, but we didn’t need to.
Bake at 350° F (175° C) for ≈10 minutes, or until the edges are firm and the cookies have puffed. Let them set on the tray for ≈1 minute, and then move to a rack to cool completely. NOTE: The baked tops should show a distinct pattern, but the bottoms against the tray will turn into an almost uniform brown.
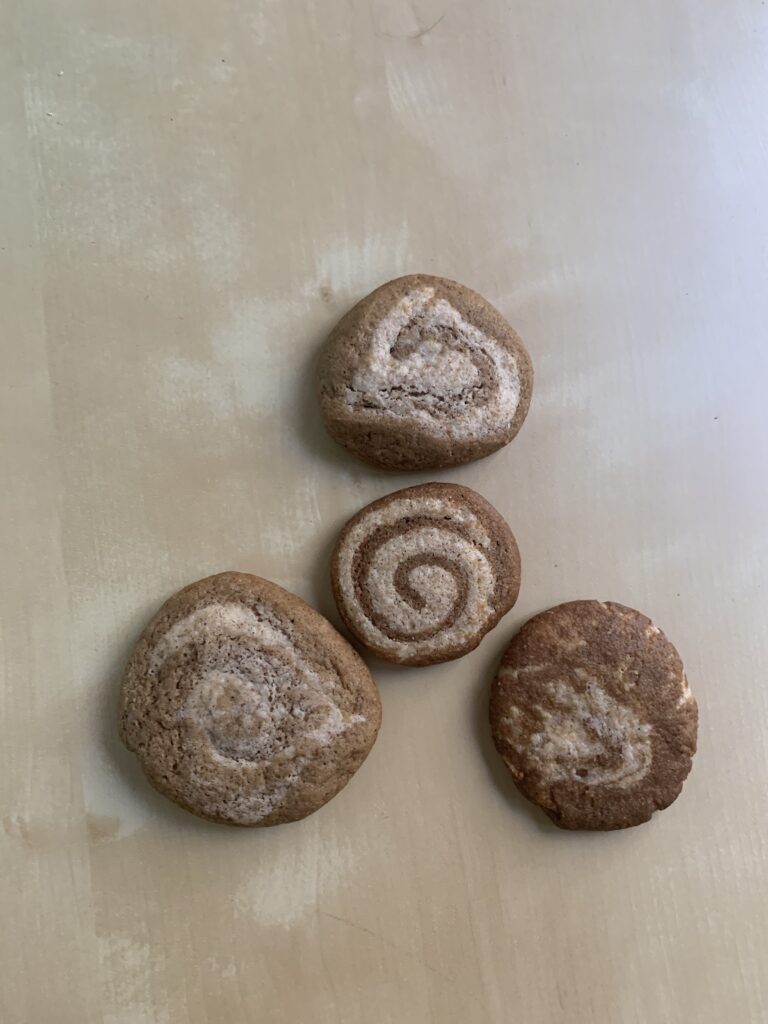
The ends are never as pretty, especially when you need to press down to flatten the odd shaped pieces out. This shows three end pieces surrounding one middle piece.
Bullseye Cookies! [NO PHOTOS]
Roll out the Speculaas dough into a 13” x 7” (33 cm x 18 cm) rectangle ≈ ¼” thick on a sheet of parchment paper.
Place a long, 1” diameter sausage of almond paste down the middle of each strip. Roll up lengthwise to encase that sausage in the dough.
Use a thin thread, lightweight fishing line, or dental floss to cut off ⅜” cookies, and then array them prettiest-side-up on your parchment lined sheet, leaving 1” between each to account for spreading. You should end up with 35-40 cookies.
Bake at 350° F (175° C) for ≈10 minutes, or until the edges are firm and the cookies have puffed. Let them set on the tray for ≈1 minute, and then move to a rack to cool completely.
Tubes and Lengthwise Lines!
Roll out a thinner spiral and cut it into 2” lengths. Starting with a 13” x 6” (33 cm x 15 cm) rectangle should do it.
For tubes, bake at 350° F (175° C) for ≈11-12 minutes, or until the outside is firm and the cookies have puffed. NOTE: The tubes will settle into being flat on the bottom. We haven’t figured a way around that.
For Horizontal lines, use a thin paring knife or a long thread to cut through the top from end to end. Array these curved side down on the baking sheet. What would have been spirals when viewed from the edge in will appear as lines when the roll is cut lengthwise. NOTE: you can also use the paring knife to cut almost all the way through, leaving only a thin piece at the bottom to connect the two halves. Unfold this like an opening flower and you’ll have a double-width line cookie. Bake these at 350° F (175° C) for ≈9-11 minutes depending on thickness.
Let the baked pieces set on the tray for a few minutes, and then move to a rack to cool completely.
Line cookies on the left, spirals on the right. It’s basically the same pattern, but in one case you cut across to reveal the spiral, and in the other you cut lengthwise to reveal straight lines.
NOTE: You can use the “Bullseye” method here as well, or make the final shape a little thinner and broader by creating a filled rectangle instead of a filled tube.
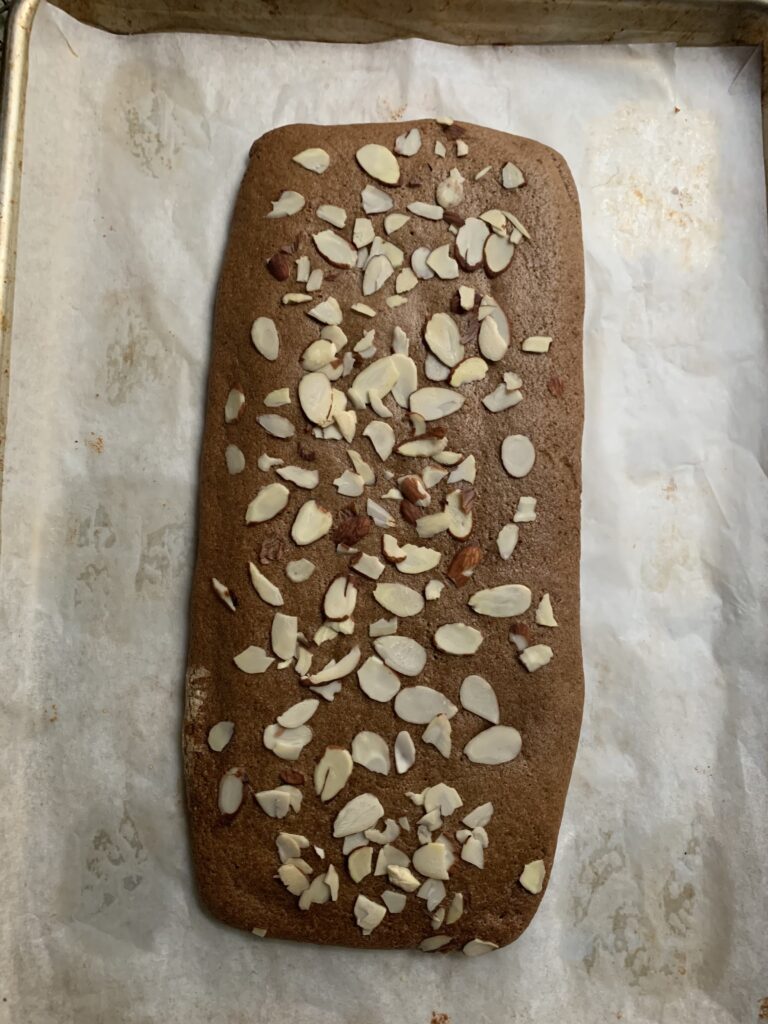
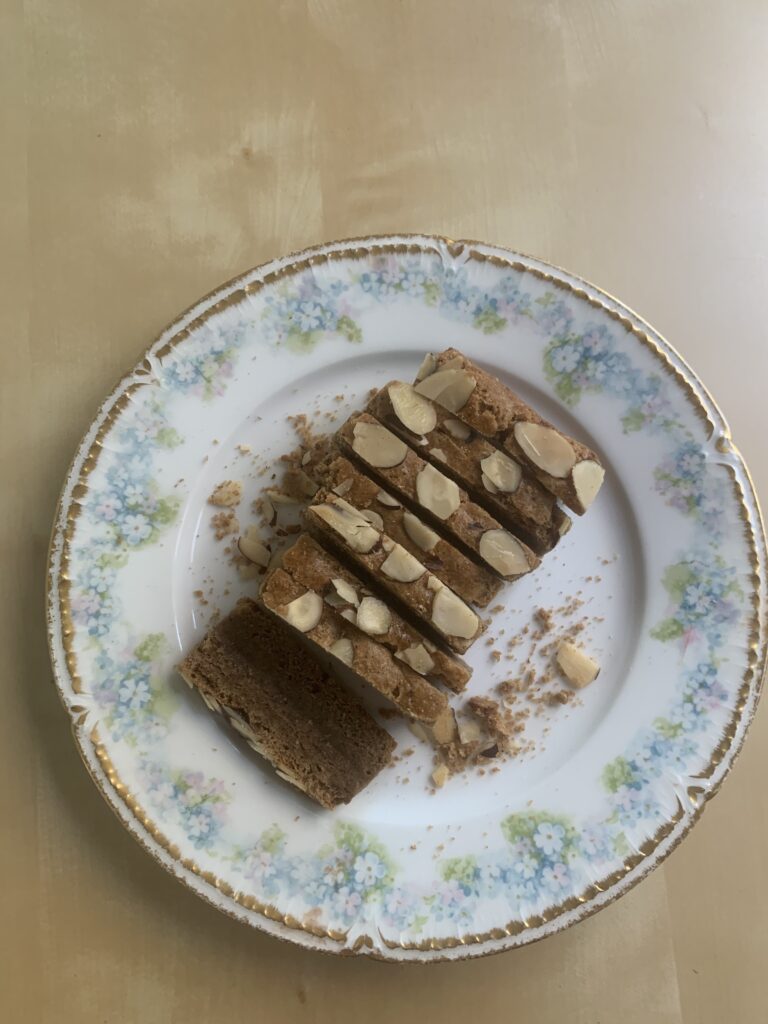
NOTE #2: For Tube Cookies it’s it’s often worth decorating the top of the tube/cake with slices almonds. See the photos of the “Bake And Slice” method down below.
Molded and Filled Speculaas (Works With Jam Too)!
Apricot jam for the filling worked great, but we lost the pattern on top because I forgot to chill before baking.
Filled and plain Speculaas using the 100% authentic, Belgian Brown Sugar dough instead of this U.S. Brown Sugar dough. That time I did chill before baking.
Our favorite mold for individual Filled Speculaas (and gingerbreads of all kinds). We bought it at an actual castle on a trip to visit family in the Czech Republic! It was actually called a “butter mold” rather than a cookie mold, not that it makes any difference.
This Ma’amoul mold would have also worked, but can you imagine the amount of almond paste in each cookie?
Fill a bowl with with rice/corn/tapioca flour. Spoon this in to fill your mold, turn it over to pour the excess back into your bowl, and then rap the back firmly to knock off any excess. Voila! A perfectly dusted mold. (See the articles on the Speculaas Master Class and Filled Gingerbread cookies for more variations and details). FYI, we used this mold to make individual portions:
Roll the dough out to ¼” thick (thicker for a larger mold, of course), and then cut out a piece of dough just large enough to fit inside the entire mold while leaving a thin rim of dough up and over the side of the mold. Use well-dusted to press it gently into the pattern. NOTE: Too much dough is better than too little since you can always trim. NOTE #2: Holes aren’t a disaster. Patch them by pressing in extra dough with your floured fingertips. It will subtract from the inside space by a smidgen, but no one should see it when the cookies are baked.
Add a filling of your choice to a level that reaches level with the top of the mold. REMEMBER: That does NOT mean the top of your dough rim around the edge! Do that and you’ll have too much filling, which will lead to leaking, bursting, and other bad results.
Roll and cut out a second piece of dough sufficient to cover the filled in mold. Place this on top and then run a rolling pin over the entire thing to join the seams. Tap the filled cookie out with the mold-side up, and then use a paring knife to clean up the edges.
Array on a lined baking sheet, and then chill in the refrigerator for at least 15-30 minutes. This will help to keep the pattern a little sharper.
Bake at 350° F (175° C) until the edges are firm. It took ≈11-12 minutes for our smaller mold, but will obviously vary according to the size and thickness of the one you choose to use.
NOTE: It’s a good idea to precook any jam filling before you use it (simply bring it to a boil in the microwave or a small pan). Raw jam tries very, very hard to find a crack it can seep out of. The precooked jam is much, much less runny and will only seep out if you’ve made a noticeable mistake in sealing things up.
Cookie “Dumplings” and “Ravioli”!
Note the extra thick amount of almond inside
Our handy dandy dumpling press, last used when we were working up the recipe for Croatian Rafioli
NOTE: This method uses a bit more almond paste per piece. It should also work with a pre-cooked fruit filling, but we haven’t tried it.
Roll out the Speculaas dough to ⅜” thick, cut out a circle the right size to fit your handy dandy dumpling press, and then fill it with a football-shaped piece of almond paste. Squeeze gently to seal the edges.
Array on a parchment lined baking sheet as you pop the piece out of the press. Leave 1” between each one to account for spreading.
Bake at 350° F (175° C) until the edges are firm. It took ≈ 10 minutes for ours, but we anted to make sure they were baked all the way through.
Leave the cookies on the tray for 10 minutes and then move to a rack to cool completely.
Thumbprints! [No Photo]
Duh. I can’t believe I didn’t think of this in time to get some done for the photo shoot. Bad baker. Bad, bad, bad. No biscuit for you.
Roll the dough into balls ≈ 1¼” in diameter.
Use the handle of a wooden spoon to poke a deep hole, and then fill that hole with almond paste.
Array on a parchment lined baking sheet, and give each ball a gentle squish to make sure it will stay in position with the almond paste facing up. Keep 1-2” in between each piece to account for spreading.
Bake at 350° F (175° C) for ≈ 10-12 minutes, or until the edges are firm.
Bake-And-Slice Rolls and Rectangles!
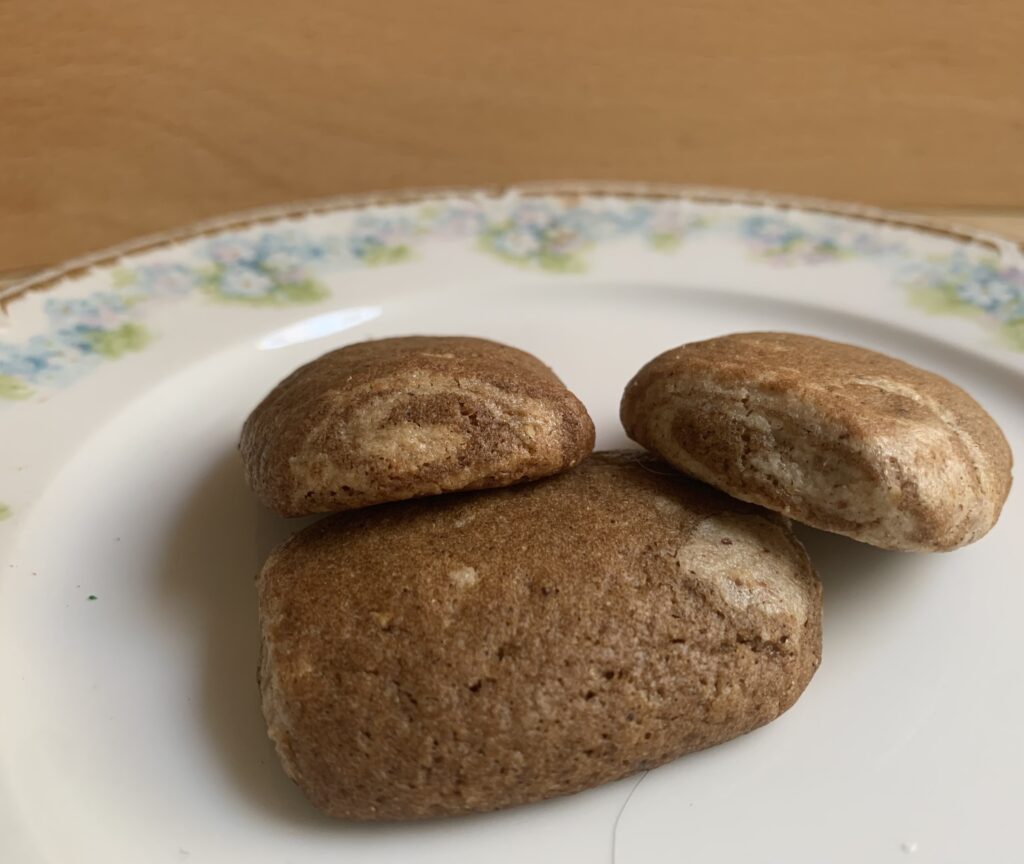
This began it’s life as a Spiral Cookie roll. It was baked before slicing, which allowed it to slump into a rectangle.
The flattened spiral from a baked-before-slicing roll.
Make a roll as described above for Spiral or Bullseye cookies, but a little thicker. You achieve this by starting with a 13” x 8” (33 cm x 21 cm) rectangle.
Bake at 350° F (175° C) for ≈20 minutes, or until the outside is firm, the tube has slumped down into a rectangular “cake”, and cookies have puffed.
Let this set on the tray for ≈5 minute, and then move to a rack to cool completely. Slice with a thin, sharp, serrated knife after it’s completely cool. You will end up with elongated, almost-rectangular spirals.
A “Bullseye Cookie” bar decorated with almond slices. We tried to have this one start as a filled rectangle instead of a roll, but that only enhanced the slumping. Still tasty, and kind of nice if you want the sharper edges in the end.
Don’t Bother To Fill At All
Straight, unfilled Speculaas made from this dough. Not bad, are they?
The dough works fine as a plain old Speculaas cookie pressed into a mold. It doesn’t hold patterns quite as well as the 100% Authentic Speculaas, but it’s pretty darned close. Bake according to the instructions in that article using 350° F (175° C) instead of 375° F (190° C). The molasses in the U.S. brown sugar apparently makes them cook just that little bit faster.
NOTE: You may (may, not will) want to knead in a small amount of extra flour or starch if the dough is particularly soft and sticky. That’s a useful characteristic for the many methods described above, but can result in either sticking or unreliable patterns for straight-out molded cookies. Be judicious, as it won’t take much.
CONCLUSION
The dough is standard and easy. The almond paste is standard and easy. The shaping is fun and interesting once you pick a method (and get used to liking off almond paste from your fingers). And the flavor is just about perfect if you want the world’s friendliest, most accessible, spice cookie treat.
What’s not to love?
We urge you to give it a try. If you do, there’s basically no way it’s ever going to leave your repertoire. They are, as our English friends say, intensely “more-ish.”
Enjoy!
IMPORTANT: You want to make Almond Paste for Gevulde (Filled) Speculaas, not marzipan
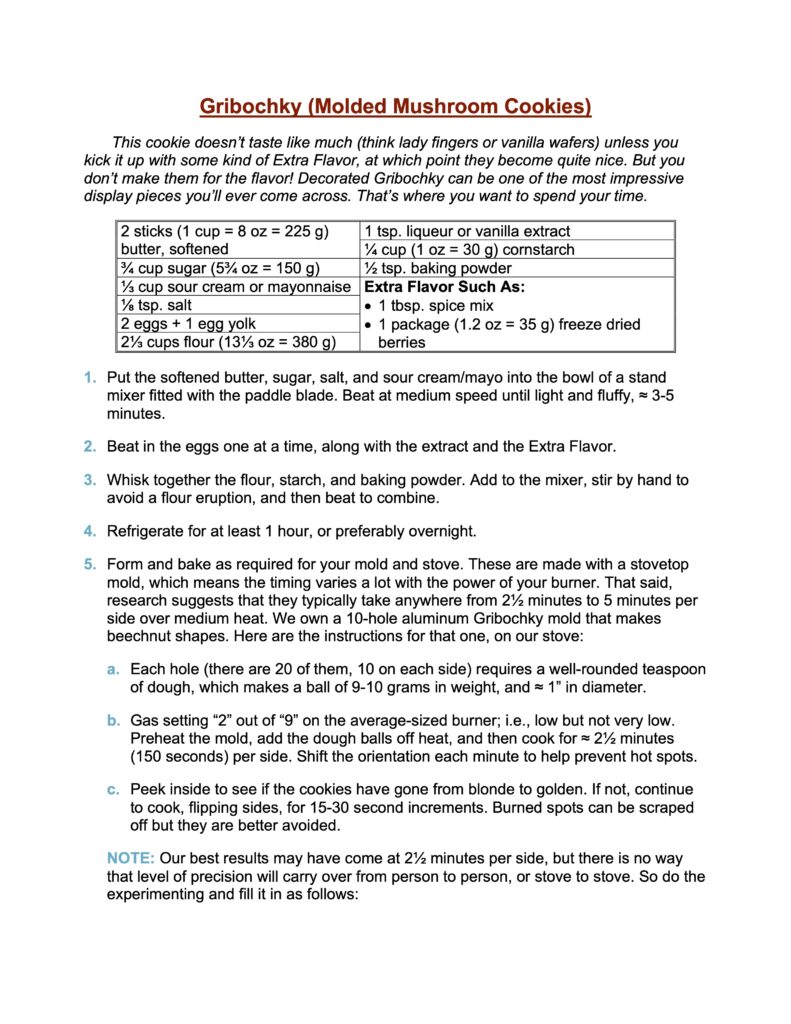
Spectacular eastern European mushroom cookies made with a stove top mold
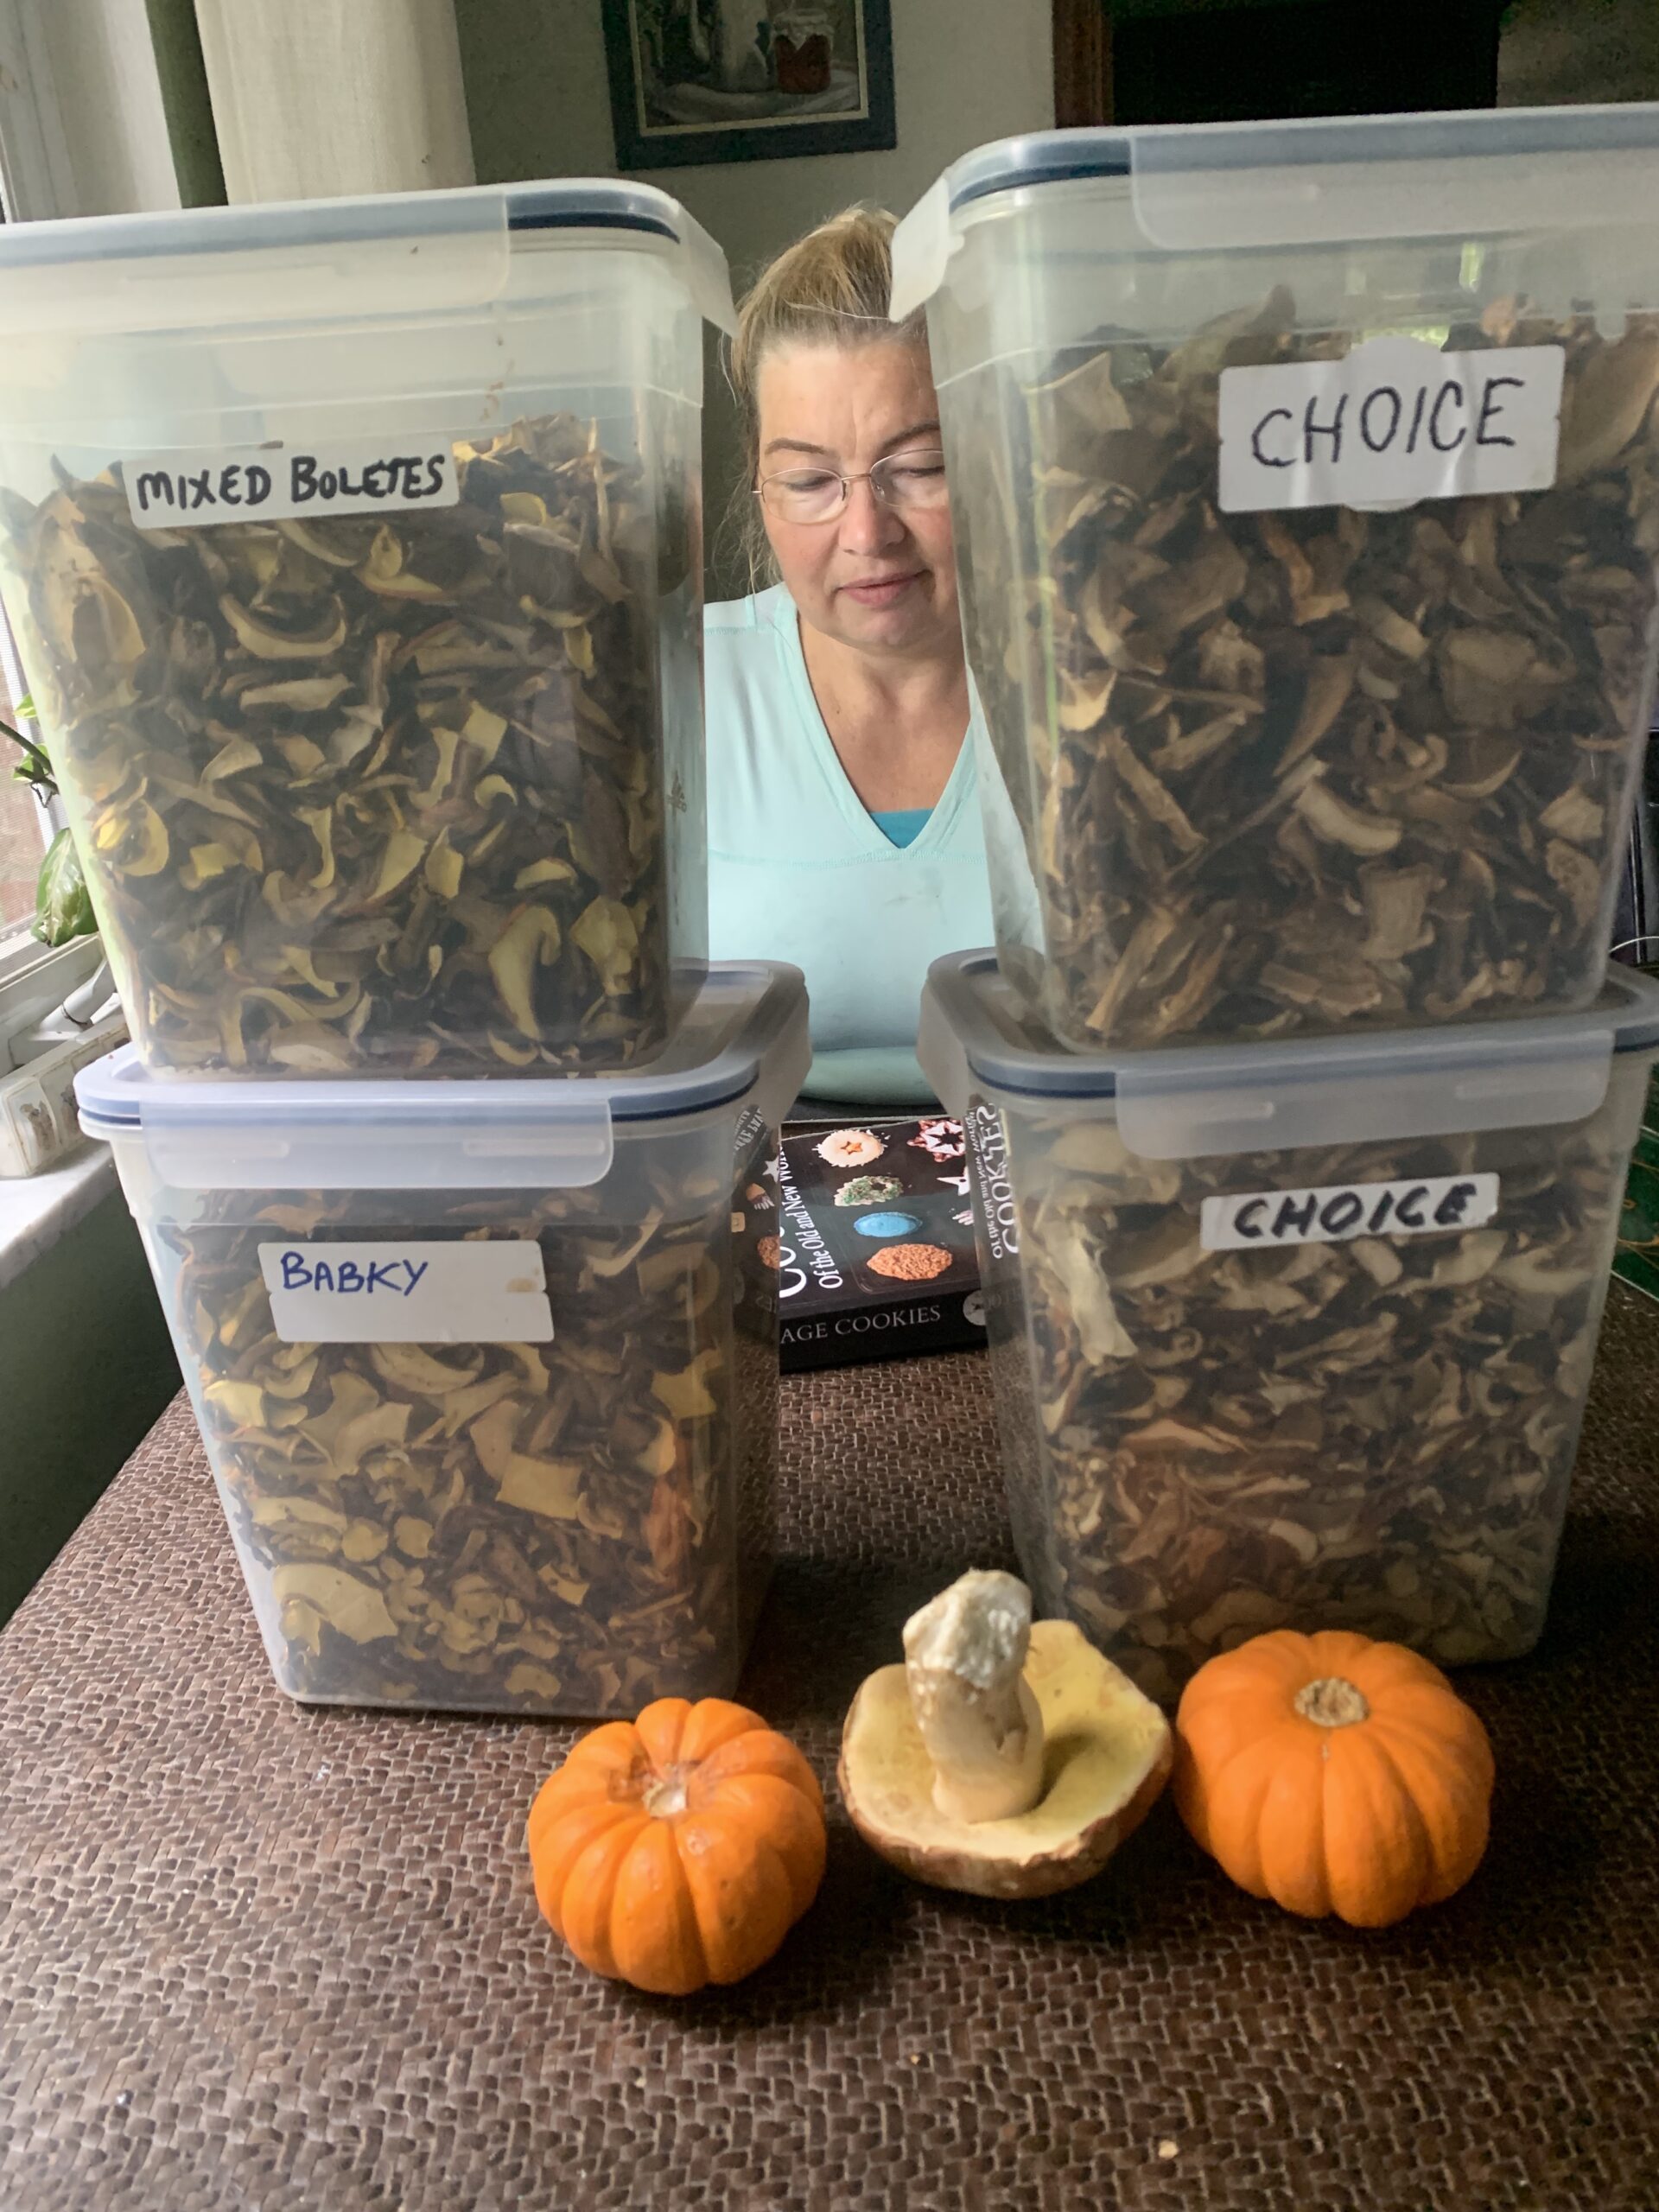
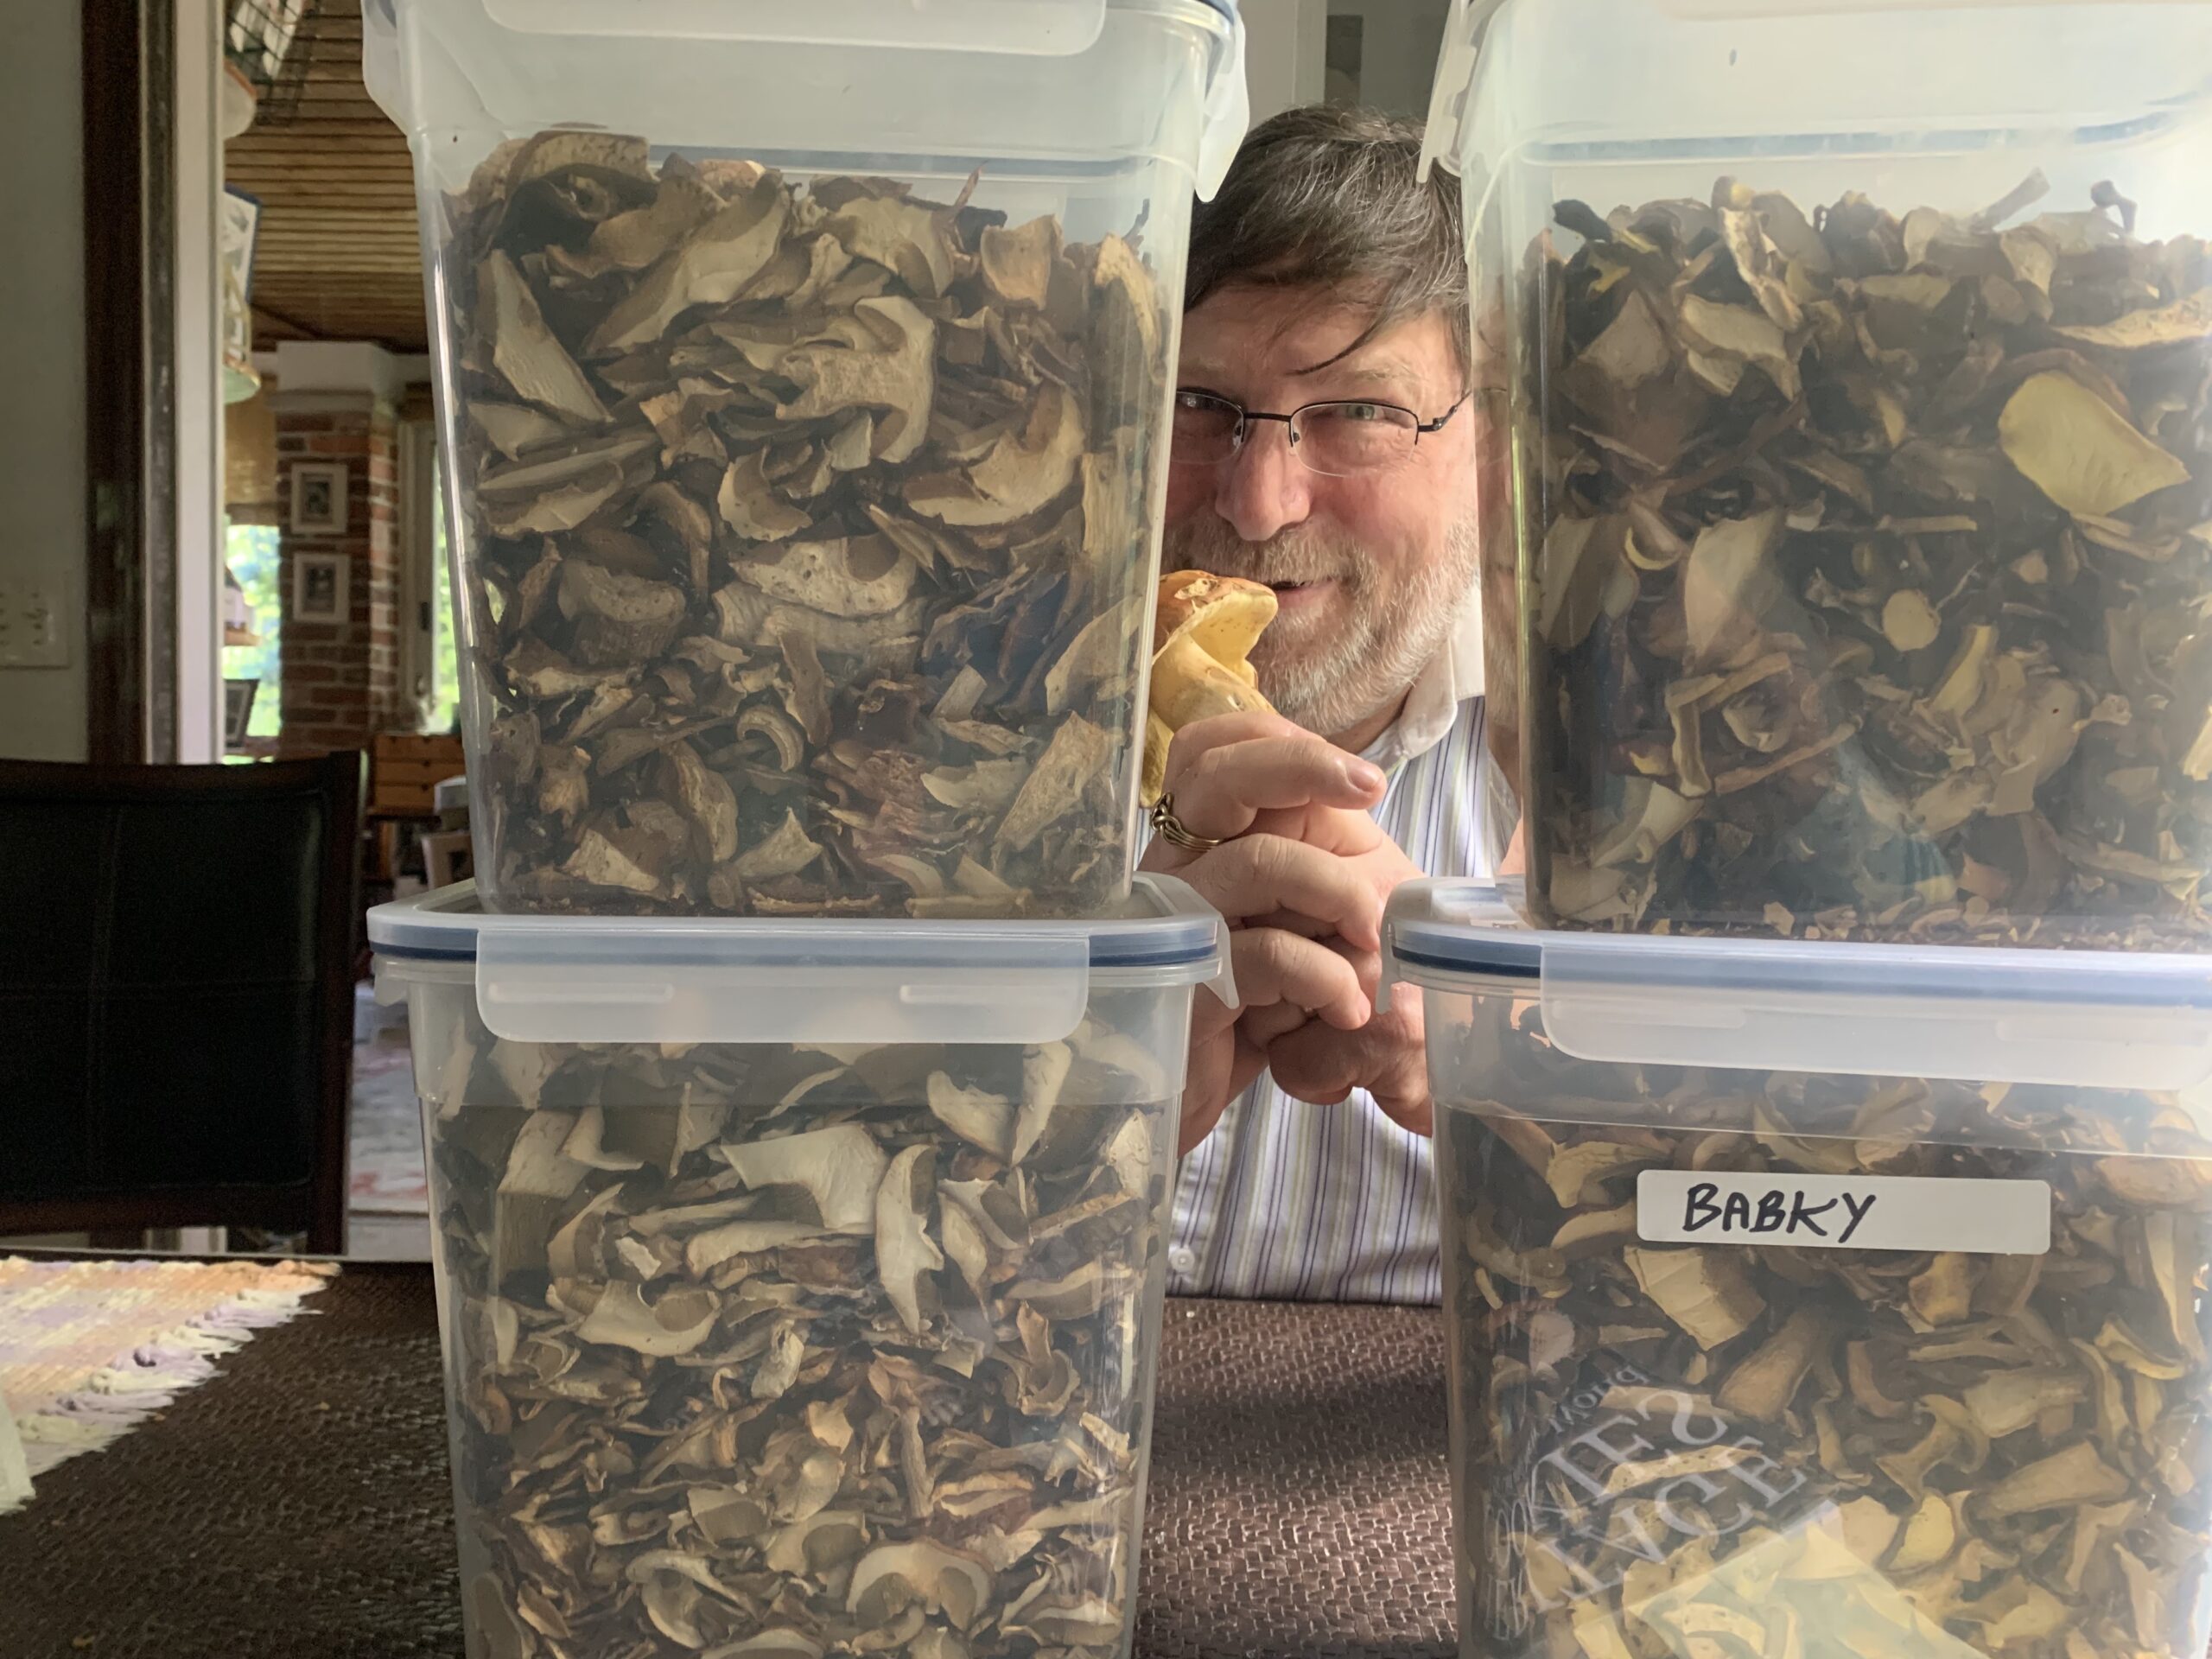
Kate and I are avid foragers who spend a lot of time in the woods hunting for local chanterelles, morels, boletes, maitake, and other species. We do okay.
Kate, the porcini hoard, and tonight’s risotto dinner-in-waitingDown boy! Even edulis is better when cooked. This is the 4-5 gallons (15-20 liters) we draw down each year for gifts.
Every September the local mushroom club hosts a large foray that features a gigantic set of potluck meals supplied by the different members. What did we contribute for 2022? What do you think?
LEFT: poppy seed mushrooms. UPPER LEFT: scottish shortbread leaves. LEFT CENTER: caramel, raspberry, and butterscotch gribochky. CENTER: faux button mushroom caps. BOTTOM: roll and cut mushrooms. RIGHT: laskonky (walnut meringue) mushroom caps. UPPER RIGHT: The insane display made with structural gingerbread trees, poured sugar backdrop, Marshmallo Crispy treat landscape and gingerbread crumb dirt, and two large meringue Lepiotas (or Amanitas, as you wish). NOTE FROM KATE: Oh, definitely Lepiotas!
This article covers our experiments with Gribochky, those colorful little mushroom gems you can see scattered around the display and piled on the bright blue plate. Time permitting, we’ll do another on the other ways to create faux-mushroom illusion cookies. It takes a little fussing, but they’re great fun for baker and eater alike once you get them finished.
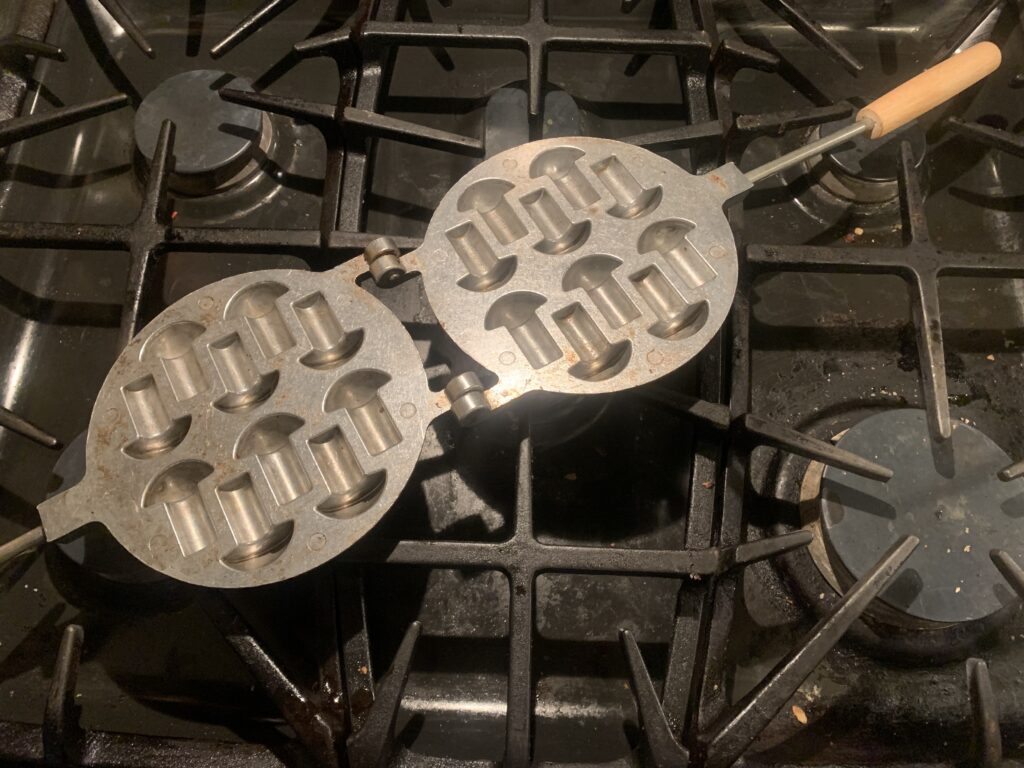
We purchased this specialty mold online. It’s the same company that made our walnut (oreshki) molds
Put a small ball of dough in each hole, close, and then cook on the stovetop until done. Both sides of course.
Gribochky is a slavic word that means “mushrooms”, just as the very similar Oreshki means “nuts.” Both are made from a dough so soft that it could even be called a super-thick batter, and both use a unique stovetop mold as shown above. But where Oreshki come out as stamped halves waiting to be filled with a rich and milky caramel, Gribochky come out as solid, 3-dimensional pieces waiting to be decorated. That’s the point when they turn special.
Amp Up The Flavor. We know at least one excellent baker who tried to make Gribochky and came away disappointed. We can’t blame her. The online recipes, which are very similar, produce a cookie so plain that it isn’t worth eating. Boooooring. We solved that by treating the base recipe as a platform rather than an end point. It worked like a charm.
We made two versions for the foray and both came out great. The first had a 1.2 oz package of freeze dried raspberries (crushed into fine dust), with an extra tablespoon or two of butter/other fat for moisture. Delicious, and a perfect way to mimic the sour tang of candy apple boletes that grow under out local oaks. The second included a tablespoon of our Pardubice honey-gingerbread spice mix. Just as good in a totally different way. And it was obvious that any comparable ‘fix’ would have worked just as well. From “yawwwwwn” to “how interesting…” in one easy step! And it’s a step you can take in any direction that suits the spices in your cabinet, the extracts in your drawer, the freeze dried fruit in your local market, and the whims in your heart.
Trust In Tradition. Many will be surprised to see sour cream or mayonnaise listed as an ingredient. Don’t be. It’s quite common in Eastern European recipes, adds tenderness, and provides a certain complicated je ne sais quoi. I may well try some Greek yogurt for our next batch.
Shorten The Flour By A Lot. Those who know us may be surprised to see such a healthy amount of cornstarch. The reason comes down to simple physics. Gribochky would be amazingly thick if treated as a regular cookie, and the gluten from pure flour would make them prohibitively tough. The starch backs that down into plain old crunchy. Yes, we usually prefer to use rice, tapioca, or potato starch. They avoid the danger of a pasty aftertaste, which can happen when you use cornstarch in flat cookies because it breaks down at a higher temperature than the others. The internal temperature of Gribochky gets high enough to remove that fear. Use whatever starch is cheap and convenient.
Cooking Time Varies. The stove top time varies with burner size, flame height, how often you flip, how often you turn, the underlying color of the dough, and probably the moods of your local household gremlin. Heck, sometimes you want a better cooked specimen, and sometimes a blonder one, so the target changes too. The only universal guidelines I can provide are these:
We never got the cookies done in less than 4-5 minutes (2-2½ minutes per side), and usually wanted to add a little bit of time after peeking inside to check for doneness.
It helps to make regular turns to change the angle, which avoids hot spots caused by an uneven flame.
It also helps to flip them over as they cook in order to to equalize the cooking on both sides. Look closely at the photos and you’ll see one batch that looks a little odd because I cooked them first on Side A, and then on Side B. The first side cooked more, leaving a distinct stripe. No one will notice a thing like that in the decorated cookies unless you point it out, but we knew, and so it nettled.
NOTE FROM KATE: I found that preheating the mold gets too heat-dangerous and fussy for me. I made as many balls as we had holes to fill, and rolled them into a conical shape. I placed the wide part of the cone into the cap of the mold in each cavity (both sides, please!) The mold was warm but not too hot, so I could use my fingers to push the dough all the way in. I closed the mold and popped it over the flame. Time it, flip it, go again, and repeat until done. The lack of preheating doesn’t hurt the cookie (you can vary the time or the flame height) and it avoids “casualties.” Also, you don’t burn your fingertips!
DECORATIONS; a/k/a TURNING ON THE MAGIC
There are four parts you can pay attention to on each cookie: (1) the cap, (2) the base, (3) the stem, and (4) the pore/gill layer. The first two matter most, but you can certainly gild the lily by playing with #’s 3 and 4 as well.
Decorating The Caps: We’ve tested two basic techniques for the cap coating. Both worked, and playing with either approach yields a vast number of options. It’s a no lose situation.
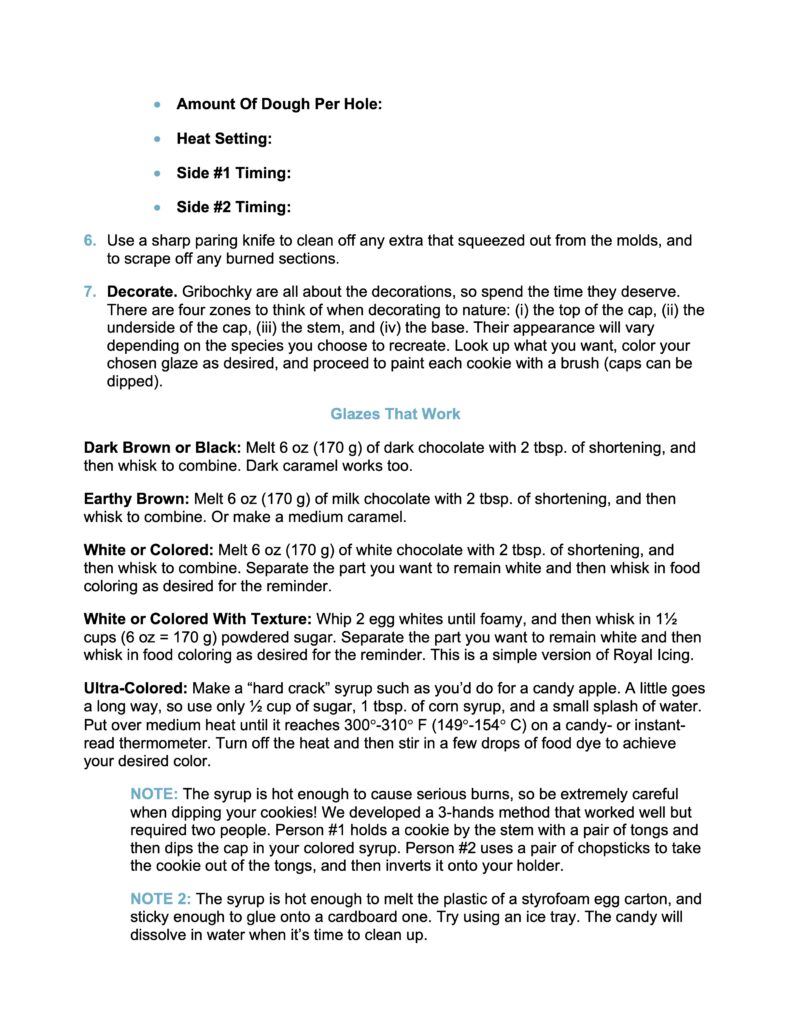
The first method centers on melted chocolate. Dark, milk, white, food-dyed-white, and even commercial candy melts – each and every one of them will work. We like to thin them out with a bit of cream, but your mileage may vary.
The best approach is to hold each piece by the stem, dip it into the coating at an angle, and then roll the cookie to cover the entire surface of the cap. Remove, let the excess drip off, and then set them cap up in a place where they can dry without flattening one part of your coating. Egg cartons worked great, with ice cube trays a very close second.
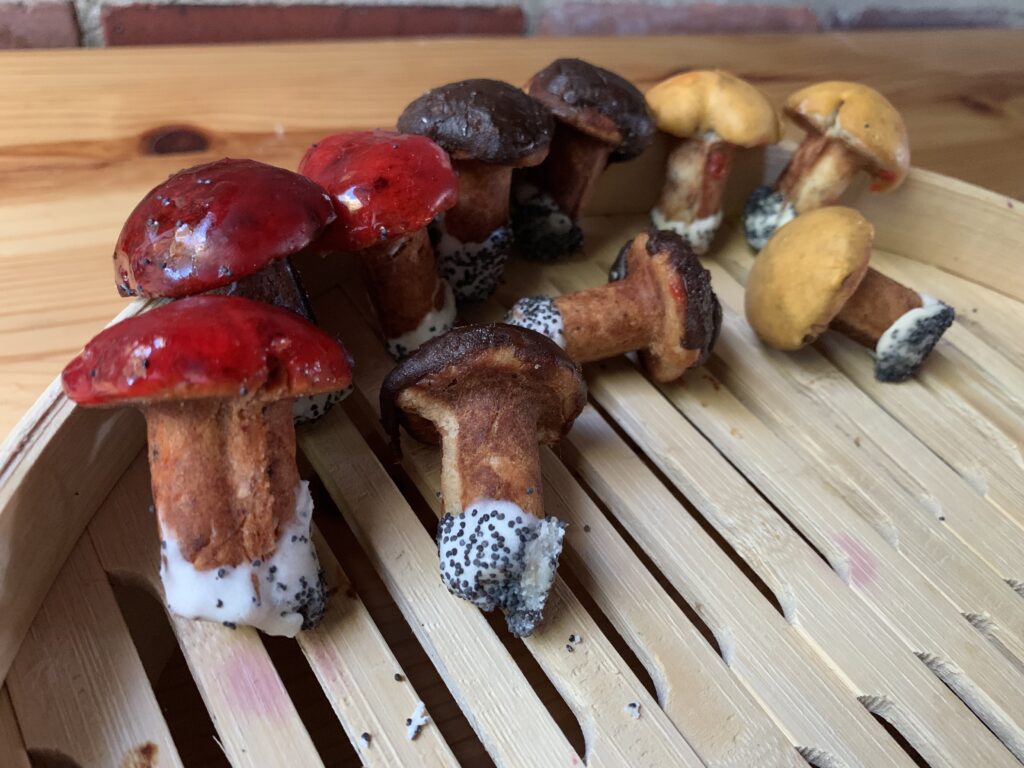
Dark chocolate, textured by accident because I melted it without any cream, cocoa butter, or other fat to make it thinner and smoother. I love the contrast created by painting the “pores” bright yellow.
We also tested chocolate chips, but they didn’t work nearly as well. Chips are carefully designed to not melt, and overcoming that is like fighting the tide. First you must add cream to help them melt evenly. Then you find that they harden, curdle, and/or to harden in inconvenient ways despite the cream. And then they’ll suddenly discolor if you try to keep them warm on the stove top. I can’t recommend chips except for something odd like butterscotch chips, which do double duty as a coating and a unique flavor addition.
NOTE FROM KATE: instead of cream, I prefer using cocoa butter melts. They help your chips or chocolate melt, loosening the mix and helping with dipping properties, but they also yield in a nice and solid surface with none of the tackiness that cream can cause. We winged it with the chips here. For exact instructions, kindly refer to our “Chocolate coverture” recipes associated with chocolate-dipped marshmallow treats.
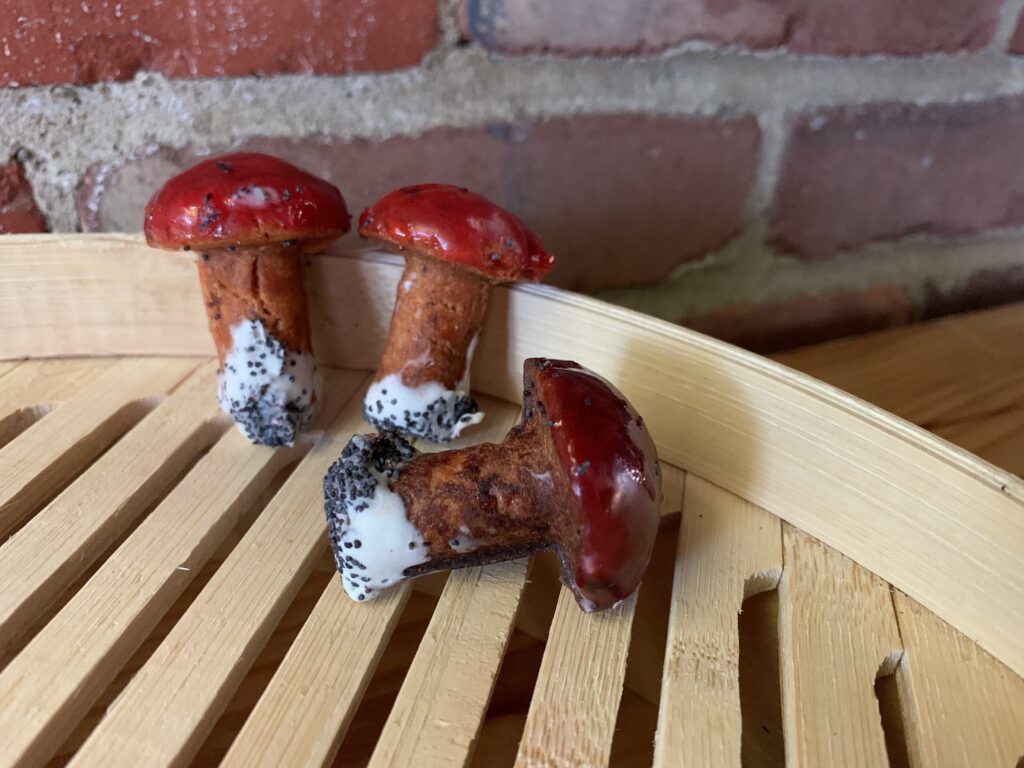
Butterscotch chips for the cap. It was a PITA but we made it work! White chocolate base, with poppy seed dirt. BTW… did you notice the stripe on the left hand cookie? That’s the one where I forgot to flip them as I cooked.
Butterscotch chips cooked into a dark caramel. Still usable and edible, but it came at the cost of frayed tempers and a few choice words that cannot be shared in public. They looked pretty good anyway, and could have been great if we had enough time and energy to paint the underside of the cap.
The other cap technique uses molten sugar. The prettiest of them all is a candy apple coating made from “hard crack” sugar syrup mixed with some bright red food dye. Your target is 300°-310° F (149°-154° C). Caramel works well for light and dark browns.
The problem here comes down to safety. 310° sugar syrup can burn you badly enough to leave obvious scars. No bueno. We came up with a workaround, but it requires three hands. Hand #1 steadies the pot. Hand #2 holds the cookie stem in a pair of tongs, dips it into the hot syrup, rolls it around to get even coverage, and then lets the excess drip back into the pot. Hand #3 then takes the cookie out of the tongs with a pair of chopsticks, inverts it, and lays it out in an ice cube tray (cap up) to dry. NOTE: The sugar is so hot and so sticky that it will melt a styrofoam egg carton, and pull off shreds of a cardboard one. Yes, the cardboard easily peels away from the cooled cookie, but better to avoid the issue in the first place. NOTE FROM KATE: peel cardboard bits off the sugar with fingers, then moisten a small brush and work the surface over a bit. When in doubt, remember that you are making the cookies healthier by incorporating an extra microdose of fiber!
The upside? Behold!
Candy Apple Gribochky
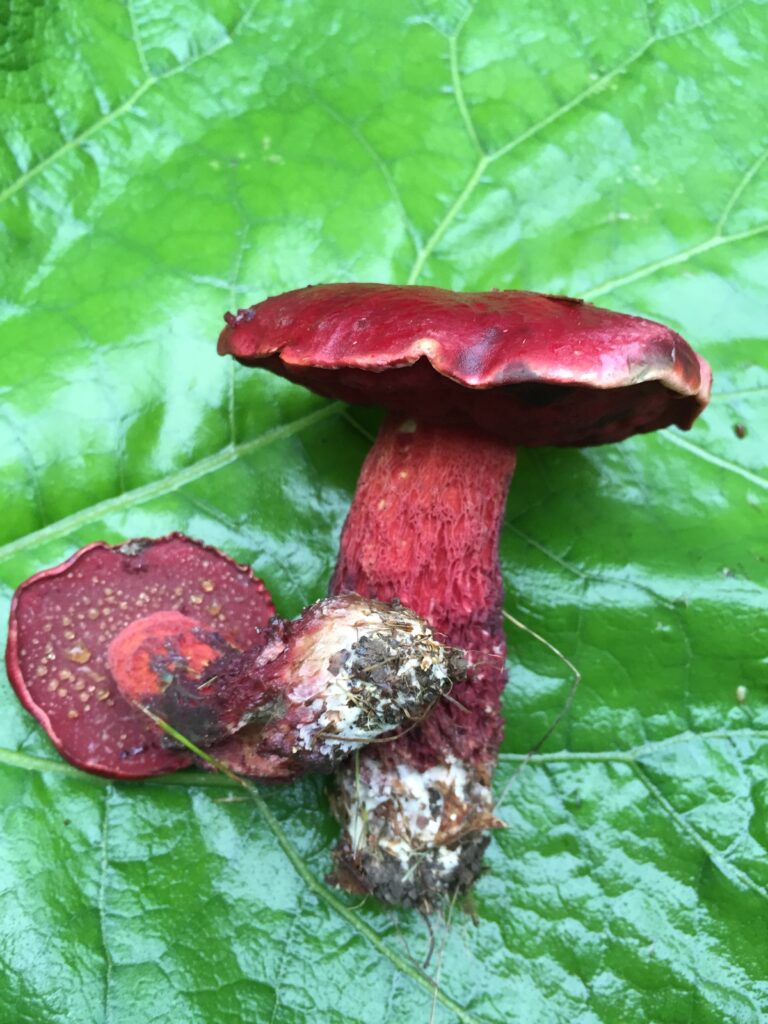
Gotcha! These aren’t cookies. They are the real life Candy Apple Bolete, Exsudoporus frostii. Nature’s pretty cool, isn’t it?
Decorating the Base: This step is easier because there aren’t many options, all of them are easy, and the shape can be handled with fingers alone. Did you know that mushrooms are actually the fruit of the fungus and not the main entity? The apple of the tree? ‘Struth! The main body is called “mycelium” and will be spread in a mat over a relatively vast area in and around the soil or the nearby wood. This is what you’re seeing at the bottom of mushrooms poked fresh out of the ground.
Mycelium is almost always some shade of white or pale yellow, and is easy to replicate with white chocolate or a tinted candy melt. Add poppy seeds or cookie crumbs for “dirt” and presto! Your illusion is complete on both top and bottom.
The Underside Of The Cap: Mushrooms with this shape will have either gills or pores on the underside of the cap. Adding this layer is a special touch that true mushroom geeks will appreciate, but it’s very hard to see unless you make it a bright, contrasting color like the yellow-on-dark specimen up above.
Gills can be any color of the rainbow, but most people will want to make them white, pink, or cocoa brown to imitate the best known species. Lilac will make the mushroom hunters happy. Mushroom pores will be white, yellow, pink, or red at this spot in the vast majority of cases, sometimes with blue or brown bruising on the surface.
Decorating the Stem. Stem features, ironically enough, are often the most useful part of a mushroom for field identification. For Gribochky? They’re an afterthought, because the features are impossibly subtle to duplicate. The only time it’s worth an effort is something along the lines of painting/dipping the stem to make it white, and that only makes sense when you’re trying to model an Amanita or Agaricus (see below). OTOH, adding berries or food dye to the actual dough can be a fantastic trick for species like the red Candy Apple Boletes. That, and cooking the Gribochky to a lighter or darker shade of brown, is almost always enough to complete a high quality illusion.
A Few Common Mushrooms To Mimic.
The so-called “toadstools” with white spots on top are in the genus Amanita. These can have caps ranging from bone white through basically any color, have white gills, almost always have a white stem with a ring of extra tissue about 2/3 of the way up.
Supermarket button mushrooms are in the genus Agaricus. They have white caps with white stems, and gills that start off pink before aging into brown. These will also have a ring on the stipe. Oh! And the answer is “yes.” Store bought mushrooms are all the same species, Agaricus bisporus. The little buttons are babies, cremini are teenagers, and portabellas are full sized grownups.
White chocolate “agaricus” with chocolate “gills.” This was our very first effort, and the illusion is as poor as any version you’ll ever made. And it doesn’t exactly suck even so, does it? Gribochky are show stoppers, plain and simple.
The pored mushrooms, a/k/a boletes, are my personal specialty and it pains me intensely to mention some but not others. You can find a list of every North American species at The Bolete Filter, written by yours truly under a different hat. The true “porcini,” a/k/a Boletus edulis and its close cousins, will have a yellow, orange, light red, or light brown cap with a white or yellow pore surface.
CONCLUSION
Gribochky are a perfectly acceptable eating cookie once you kick up the flavor with berries or spices, in the same way as Vanilla Snaps and the like, but their real glory lies in the illusion. There are other techniques one can use to create the illusion of a mushroom out of different kinds of cookies. They work too, particularly as part of a scene. But none allow for this level of absurd creativity, let alone the chance to customize things toward a copy of real life species. Fun, fun, fun!
Yes, the cookies require a special mold, and can definitely qualify as “fussy” on the decorations side if you try to copy real life. But the results can be shockingly beautiful, especially if you take the relatively easy step of dipping the bottom to mimic the mycelium, and then adding in poppy seeds or cookie crumbs to mimic the dirt. They start at “Cool!” and work their way up to “Spectacular.”
If pure, visual fun is your thing – or mushrooms! – this is a cookie that needs to be in your repertoire.
Raspberry candy apple, dark caramel-spice, and butterscotch-spice Gribochky
A thin, crispy, addictive, and not-too-sweet spice cookie that everyone will adore.
This will be a long post, so please take our standard suggestion seriously:
As always, skip to the bottom if you are only here for the recipe. The discussion of our stumbles and revelations along the way is going to take some time.
INTRODUCTION
I began this research with a simple enough goal. Heritage Cookies of the Old and New World has a recipe for Nut Dough Speculaas, but doesn’t have one for the light, thin, crispy version. This was because I couldn’t get them right enough to meet our somewhat extreme standards.
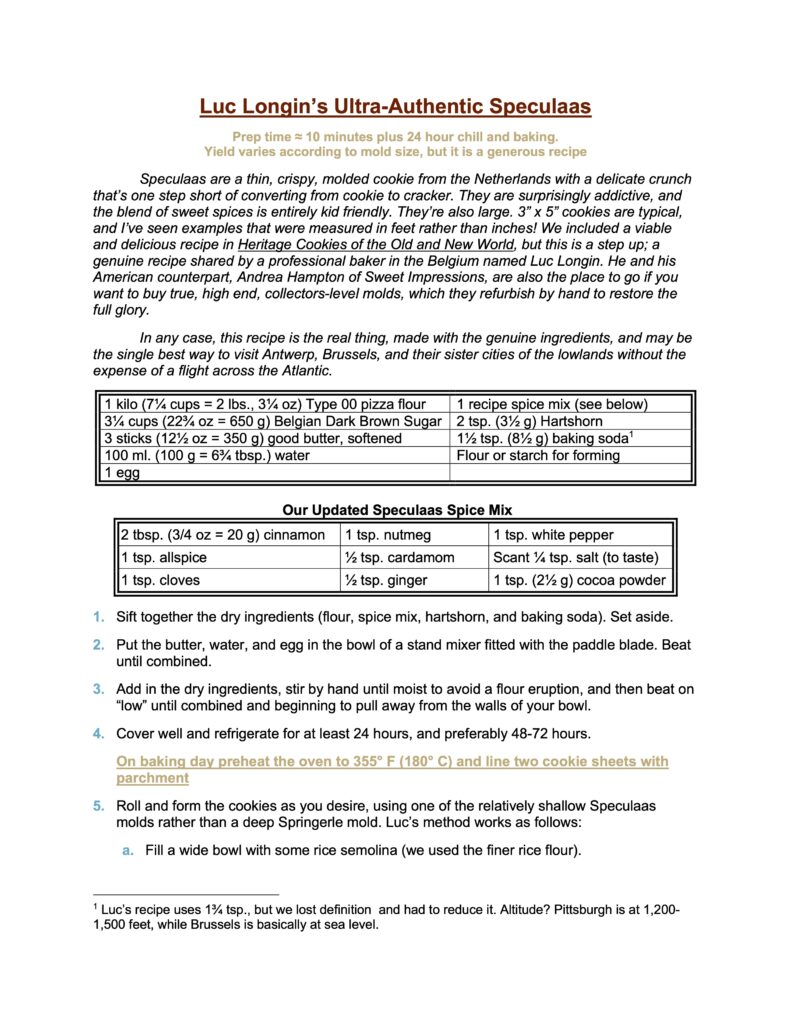
That has now been remedied thanks to the Specifically Spectacular Speculaas Facebook Group. What follows is my tale of working through all the details in the 100% authentic recipe shared by one of that group’s guiding stars: a fantastic Dutch baker named Luc Longin.
Luc’s recipe features some hard to find ingredients which actually matter (see below), and has methodologies for both the dough and the shaping that were new to my experience. Still, it was a recipe that’s worked for hundreds of people over dozens, if not hundreds of years. All I had to do was work it through, keeping some careful notes. Right? Yeah. Sure.
This article ends with a slightly adapted version of Luc’s recipe (we had to cut the leavening by a hair), but getting there turned out to be quite the adventure. I had to tweak our much-loved Speculaas spice mix. I had to bone up on my chemistry to understand how Belgian Brown Sugar differed from its peers, and why it acted differently in a cookie. Then came a comparison of Luc’s recipe to those in our book, the America’s Test Kitchen files, the Seriouseats.com formula, and an English version from Yotam Ottolenghi. After that came the study of Luc’s technical tricks. And then developing half a dozen different ways to make Gevulde (Filled) Speculaas; a Dutch (but not Belgian) holiday treat that will get its own article. All while compiling a list of sources for key ingredients and other materials.
Why can’t anything be simple? [Sigh]
That’s the “fair warning” part. The advertisement is this: all of that was absolutely fascinating, a joy to learn, and has made us better bakers. And, of course, produced some decidedly awesome (specifically spectacular?) recipes. So as that other [ahem] hefty man used to say, And awaaay we go!
HOW DO YOU DEFINE “SPECULAAS” IN THE FIRST PLACE?
Speculaas a/k/a Speculoos have a range that centers on Belgium and the Netherlands, and spreads out into the greater Rhineland, parts of northern France, and specialty shops across the continent. The feature a cinnamon-heavy spice mix that can be used in multiple ways, with several commercial versions and even more that are made at home. All those versions differ in their details, but share a common root; they are “friendly,” “accessible,” “easy to like,” and “familiar.” This spice mix explains why Speculaas are the place to start if you want to hook someone on the basic idea of a spice cookie. They are the cookie that doesn’t bite you back.
Standard Speculaas (those that don’t require an adjective in the name) are also thin, light, and crispy. Most will be formed in a wooden mold before baking (the name comes from the latin word “speculum,” meaning “mirror”). And those molds are shallower than Springerle molds, tend to be less detailed, and are also relatively large.
Have you ever seen those photos of a child clutching a person-shaped “cookie” almost as big as they are? That will be a Speculaa. Even the normal ones are relatively big. Our pussycat mold (see below) makes a cookie just short of 5″across. You know those “monster sized” chocolate chip cookies that mall stores used to tout? 3″ diameter, or 4″ at the most. OTOH, the actual volume isn’t that high because Speculaas are so thin.
Finally, the dough cannot be overly sweet, and must have some caramel notes. In sum, the purest definition would describe a thin, crisp, only-sweet-enough, child-friendly spice cookie formed in a shallow wooden mold. The tree branches out from there.
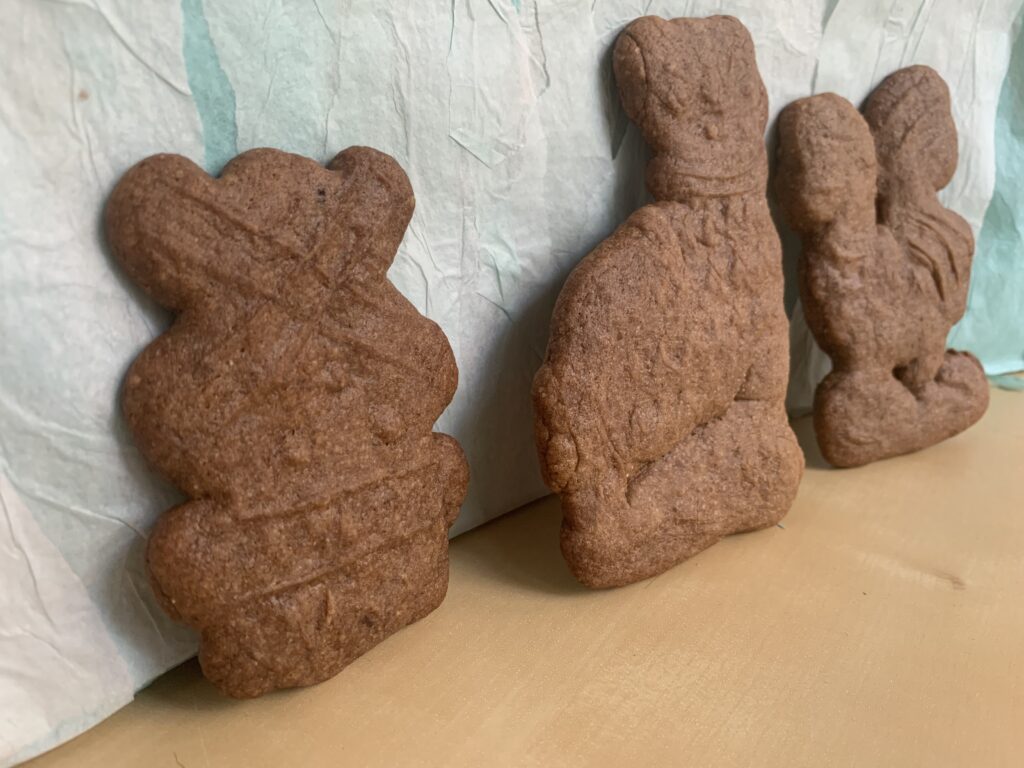
Our three molds: the pussycat, the windmill, and the rooster
One easy and common path avoids the molds in favor of a large, thin, roll-and-cut cookie. Try decorating the top with some almond slices held on by egg wash just to fancy them up. Another limb leads off into filled Speculaas, which can be a bar cookie, a sliced roll similar to Fig Bars, something that can be done as a Molded Gingerbread Cookie, or almost any other type of filled cookie. Almond paste does not spread as it bakes, which opens up a vast range of possibilities.
A third branch will shrug and either accept or embrace a soft texture, like the Heritage Cookies recipe that uses regular brown sugar with some nut flour. There are probably fourth and fifth branches too, though I can’t think of them off the top of my head.
The further you get from that light, thin, and crispy molded cookie, the more a purist could complain that you are “wrong.” But we are bakers, not professors! Kate and I will argue that nothing is out of bounds so long as you know where the trunk of the tree lies, and add a description to the name. Chewy Speculaas, Filled Speculaas, Nut Dough Speculaas, and maybe even Cinnamon Spice Speculaas are all legitimate since they give fair warning that you’ve headed out into the suburbs.
LUC LONGIN’S RECIPE
NOTE: This recipe originates with Mssr. Luc Longin of Belgium, and I hope you will join me in a nod of grateful thanks for his generosity. This goes to examples of Luc’s work, including both cookies and specialty molds. Video #1 (multiple small figures) and video #2 (one huge figure) demonstrate the molding tricks I will try to describe in words down below. Luc’s American counterpart, Andrea Hampton, also provided invaluable assistance as both an inspiration and a bouncing board. She owns the Sweet Impressions Bakery in upstate New York, between Rochester and Syracuse to the north of the Finger Lakes. You won’t find anyone on this continent who’s better, and I’m honestly not sure about anyone, anywhere.
You may also want to know that the two of them collect, refurbish, and sell high end, often historic molds. There are plenty of cheap ones out there (like our old tourist pieces), and also some modern knockoffs, but Luc and Andrea are the place to go for potential heirlooms if this article gets you hooked.
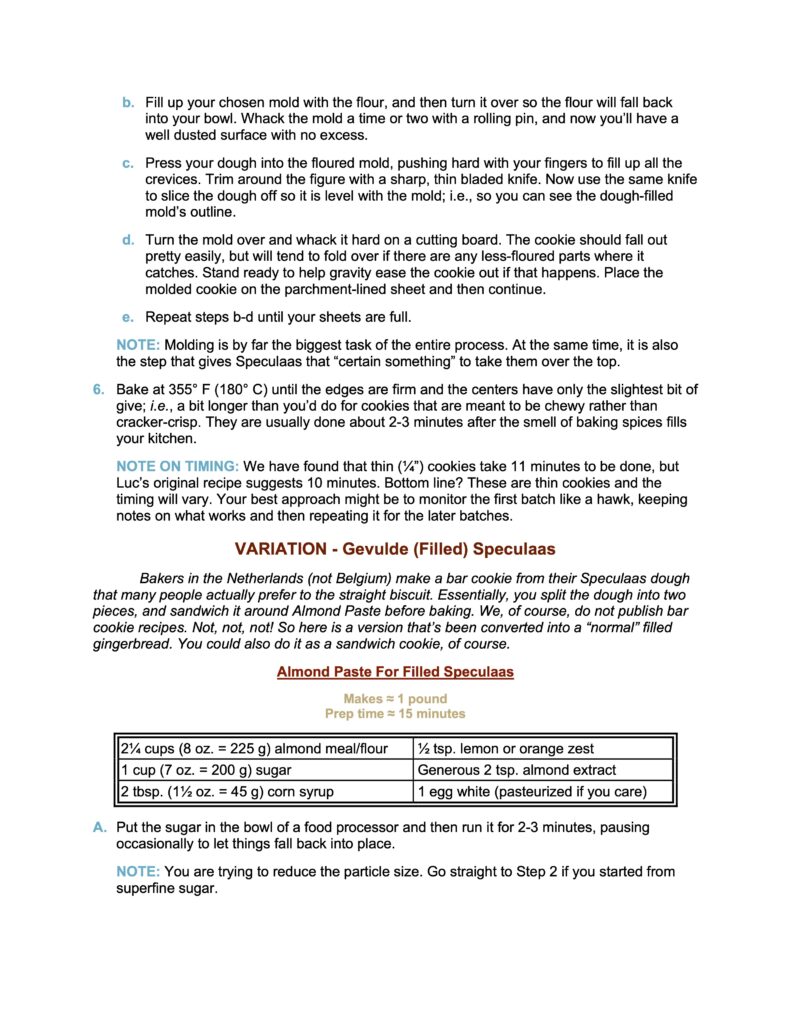
Okay, so here is the original Luc Longin recipe that set me off on this deep dive into the ocean of authenticity:
Read that through and you’ll see a number of ingredients that aren’t exactly common in a U.S. supermarket.
UNDERSTANDING THE INGREDIENTS, AND HOW THEY MATTER
“Type 00” flour.
“Type 00” refers to a super-fine grind, not to a protein content. We tested a few different products and found that “Type 00 pizza flour” worked better than “pasta flour”. King Arthur Flour sells a good product that is easy to find online. We bought ours down at Penn Mac in Pittsburgh’s Strip District, which supplies a lot of our Italian community.
All purpose flour will also work until you get to that last 5%. The difference only becomes apparent when you employ a traditional cookie mold. The finer “Type 00” yields slightly sharper features. Just be aware that “Type 00” weighs a little bit less than AP! Substitute by weight, not volume.
ADDITIONAL NOTE: Speculaas fan Carolyn Koss Kasten adds: “Pizza flour is more successful in speculaas than pasta flour due to the use of soft wheat in most commercially available pizza flour blends. Soft wheat has a lot of extensibility without the enhanced elasticity of modern hard wheats. This results in much better impression retention and very little deformation of the cookies as they bake. If you search my name in the [Specifically Spectacular Speculaas] group, you can see some extensive flour testing and discussion about that.
Belgian Dark Brown Candi Sugar
This is the elephant in the pantry.
Belgian brown sugar is not the same thing as U.S. brown sugar. The American version is made by adding molasses back into white cane sugar (pure sucrose) at a ratio of 1 tbsp. per cup for light brown sugar, and 2 tbsp. per cup for dark. Belgian brown sugar, a byproduct of the candy making industry, differs in several aspects:
It is made from “invert sugar,” meaning sucrose that has been treated with an acid to break a portion of it down into glucose and fructose. Those two component sugars, added together, end up being a little less sweet than pure sucrose. Reason #1 why Speculaas seem less sugary.
The invert sugar (sucrose, glucose, and fructose) is then caramelized to a medium or dark brown color as desired. The darker the caramel, the deeper the flavor and the lower the level of sweetness. Reason #2. FWIW, Luc recommends the darker brown, least sweet version.
Belgian brown sugar also starts from beet sugar instead of cane, but that becomes an imperceptibly subtle distinction after going through the inversion and caramelization steps.
‘But Scott, what if I only want to get close enough to the real thing without going to all the effort of finding this kind of specialty ingredient?’
Fair point. We have found three alternatives, in descending order of preference:
The inestimable Stella Parks of Seriouseats.com, a self avowed Speculaas fanatic, likes to make a “toasted sugar” facsimile of Belgian Brown Sugar. Spread your desired weight out on a tray, and roast it at 300°F (150°C) for 4-5 hours, stirring occasionally, until you get the color you want. Grind the result in a food processor to break up the clumps, and proceed. Toasted sugar differs from the real thing because it is caramalized sucrose rather than caramelized invert sugar, but it is the closest alternative we know of.
America’s Test Kitchen suggests ground turbinado sugar as an easier alternative. Chemically, turbinado is the same thing as American light brown sugar with half as much molasses; i.e., 1 tbsp. for two cups of sugar instead of 1:1. It’s also made with vastly larger crystals, a feature that alters the way it behaves in baked goods. The fine folks at ATK found that finely ground turbinado gave the required hit of caramel flavor without making their cookies too soft. We haven’t tried it, but that is a very reliable group of test cooks and I’m willing to take their word for it.
Plain, old brown sugar from the supermarket is the least desirable substitute. Make no mistake: it will make you a truly delicious cookie! There are just two issues. First, it is noticeably sweeter, and this is a cookie that should be only sweet enough. And second, the hygroscopic powers of the molasses will quickly soften the cookies as you store them. In other words, they’ll be crisp when they come out of the oven, but will soften by the next morning. We use brown sugar for Gevulde (Filled) Speculaas and our Nut Dough Speculaas, but cannot recommend it for making the thin and crispy version that requires no disclaimer in the name.
Hartshorn, a/k/a Baker’s Ammonia, a/k/a ammonium chloride, a/k/a smelling salts is an old frenemy we discussed at length in Heritage Cookies Volume 1, our study of the ultra-leavened Hungarian Kvircedli, and most recently in a page on this website devoted to the whats, whens, hows, and whys of chemical leavening agents in general. It makes sense to use it here because hartshorn yields a finer, more even aeration than other chemical leavening agents. Combining it with baking soda yields the exact crumb you want for truly authentic Speculaas.
Baking soda alone will work, but the cookies will lose some definition. Not a problem unless you use a mold, since cookies without Hartshorn will rarely have good, sharp features. Certainly not reliably sharp.
In fact, the only change we recommend to Luc’s recipe is to lower the amount of baking soda by ¼ tsp. It may be altitude (our home sits at around 1,150 feet above sea level), or it may be some other subtlety, but we found that we lost some resolution when using the recommended 1¾ tsp. of baking soda along with 2 tsp. of hartshorn. Cutting back to 1½ tsp. of baking soda fixed that. I would experiment with even lower amounts if we used molds with finer features.
Good Butter
Both Andrea and Luc started their advice with a warning that I really, really needed to replace American supermarket butter with a high end European product like Ireland’s Kerrygold brand. Nor were they the only ones! The online community of cookie nerds unanimously echoed the point: Use The Best Butter That Money Can Buy! Still, that is a pretty major expense and so I decided to test it. Would the the luxury product really make a difference? How big a difference?
The experiment went like this. First, I made a single batch of dough containing everything but the butter. I used a scale to divide that dough into three equal parts, all of which were too dry to stick together, and then mixed in different butters to each portion in order to complete the dough. For the first I put in Kerrygold; the second got Land O’Lakes; and the third got Land O’Lakes enhanced by the ¼ tsp. of ghee required to give it exactly the same butterfat content as Kerrygold (¾ tsp. would have been needed for a full recipe).
I baked each batch with a secret, only-known-to-me appearance change, and then asked no less than fifteen (15) taste testers to give me their opinion. Skill levels ranged from expert bakers to cookie consumers who don’t know one end of a baking pan from the other.
The result? Everyone loved the cookie. Speculaas are a huge crowd pleaser! A clear majority also commented on the lack of sweetness, saying it was a relief compared to “normal” cookies. But the butter? No one – not a single person! – could tell any difference. Two people preferred the Kerrygold; two preferred the Land O’Lakes; one preferred the enhanced Land O’Lakes; and ten of the fifteen thought I was playing some kind of trick by giving them identical products. Which may say something about how people view me… but never mind.
Take from that what you will. Experts in the field say that luxury butter makes a very noticeable improvement. Experiments in the field said the opposite. Me? I just want another cookie.
THE TECHNIQUE WAS A REVELATION
Admission time: I tried several things to “improve” on Mssr. Longin’s seemingly blunt instructions. Every single change I made hurt the final product. And I mean those words literally. Every change made an actual difference, and that difference made the cookie a little bit worse in some way or another.
How To Make The Dough
Go back and read the recipe. Luc mixes together the butter, egg, and water, and then kneads in the sugar and the dry ingredients. That’s it. Period.
I figured things might work better if I creamed the butter and sugar together before adding in the other ingredients. That’s standard Cookie Making 101, right? Wrong. The cookies came out almost fluffy, with next to no definition, and a distinct lack of the all-important crunch. The experiment earned me nothing but egg on my face rather than egg in the bowl.
On the left, made with creamed butter. On the right, simply mixed.
Same thing. Too much leavening or creamed butter, vs. simply mixed
And a third time. Don’t cream the butter, and don’t add too much leavener!
Do as I say, not as I did. Just get it all combined and proceed from there. Don’t cream the butter first. And don’t even think about cutting in cold butter in some sort of abortive effort to enhance things with crispy layers. Go simple.
I got saved from blunder #2 because I had the smarts to talk about blunder #1 with the experts, Andrea and Luc. When they got done e-snickering, e-chiding, and e-eye rolling at my expense, they dropped a pearl that saved me from another wasted batch. Letting the dough sit in the fridge for 1-3 days is not a matter of convenience, nor of relaxing the gluten. This dough is carefully calibrated to have just enough moisture to hold together with very little more, and it has a lot of flour. That long wait allows the spice flavors to meld, while giving the flour particles a chance to hydrate evenly.
How To Use A Speculaas Plank
Blunder #3 came from trying to do a shortcut in the molding process. Luc’s videos start with a wide bowl or tray of rice flour. He uses that to fill the mold all the way up, dumps that powder back into the bowl, and then knocks on the back of the mold to remove the excess. The result? A perfectly dusted mold every time, without any need for buttering or oiling.
It occurred to me that I had extra, powder-fine, “Type 00” flour on hand, and might as well use it up. Efficiency matters, right? [Sigh] Yes, it worked well enough. The figures released with a single whack. Two at the most. But they were just a little… unfocused, even before baking. Their trip through the oven only enhanced that, leaving me with shapes rather than figures.
The next time through I pulled rice flour from the pantry and used that. Presto changeo! The figures came out even more easily, and were that much sharper. I haven’t tested it, but we are convinced that corn starch, tapioca starch, and similar powders should work equally well.
These are Gevulde (Filled) Speculaas, but make the point. The one on the left was done in a flour-dusted mold with extra leavening. The one on the right was dusted with rice starch and the reduced amount of baking soda.
Blunder #4 happened because I am a knife geek. Luc fills each powdered mold with softened dough, rolls it to fill in all the nooks and crannies, and then cuts off the excess to leave the cookie backs exposed. The videos clearly use a serrated slicing knife to cut off the extra dough. Clearly and obviously.
Did you know that every knife is actually a serrated knife? When you get down to the microscopic level, even the keenest blade is actually made of tiny teeth that saw through their target. This is why you use a slicing motion when using a kitchen knife instead of pressing straight down. That motion amounts to pushing and drawing the “saw.”
I keep my knives very, very sharp. The dullest one is the bread knife, because large serrations are that much harder to hone. A nice, thin, extra sharp blade would obviously work even better than the bread knife. Right? It’s nothing but physics in action! Right?
The answer is, “no.” Our thinnest, sharpest blades caught on the dough no matter what, and kept pulling pieces out of the mold. Our serrated bread knife worked far better, especially when used in very small back-and-forth sawing motions.
Some people never learn.
OTHER NOTES
None. Well, almost none. We developed an excellent Speculaas Spice Mix while working on recipes for Heritage Cookies Of the Old And New World. I use it all the time as my “starter mix” when making a spiced cookie for children and other tender palates. With all this testing, however, Kate began to find the mix a little cloying and simplistic. I solved this by doubling the amount of pepper from ½ tsp. up to a generous 1 tsp., and using white pepper instead of black. That gave it just enough bite to satisfy a grownup palate too.
The recipe below includes the higher amount. Feel free to cut it back if you’re targeting younger appetites.
CONCLUSION
This has been an exceptionally long journey for what’s actually a simple cookie. Yes, a lot of that came from experiments to confirm or belie the importance of European ingredients that can be hard to find here in the U.S., and more came from testing out different substitutions. But some of the wasted time came from me trying to gild the lily. Don’t waste time doing anything more than mixing the ingredients together, and don’t look for false economies like using extra fine flour instead of starch when you’re dusting the molds.
Do follow the very simple instructions, including the extended wait time between making the dough and using it.
What you’ll get is a really special cookie that is light, crisp, delicately spiced, and only as sweet as they need to be. Sort of like a big old grin from your favorite Uncle as you pop in for a holiday. You just can’t help but smile back, and that is the magic of genuine, ultra-authentic Speculaas.
That link will take you to the follow-up article, which includes a recipe for dough made with standard U.S. ingredients, a customized recipe for almond paste filling, and looooong instructions on a full dozen different ways to shape the filled Speculaas to maximum effect. As in…
A traditional Central European Christmas treat. They require some patience because the special molds need to be filled one by one, but they are unbelievably rich, unbelievably good, and unbelievably charming.
Two things happened right after I published our recipe for Oreshki, the Eastern European faux-nut cookie made with a light, crispy shortbread crust and a luscious dulce de leche filling. First, all our Ukrainian, Russian, and other Eastern European friends descended like a pack of starving hyenas on a fat old antelope with a limp. Don’t worry, we got out of the way in time to avoid injury. The show was magnificent!
Second, our Czech, Polish, and other Central European friends said, “Those are really cool, but it’s not the ‘Molded Nut’ cookies I grew up with. You should work on those too!”
Oh? Kate had only a vague memory of Ořechy from her childhood. Grandma Kandler had the molds, but never made the cookies. “Too much hassle.” So I set to researching and uncovered four – only four! – fairly consistent recipes. It took some tweaking to get them right, but Oh…My…Heavens! We will not have a Christmas tray again that does not feature these ridiculously rich, tender, and flavor filled nutty-mocha treats. They are a hassle, yes. But they are also unique, and unbelievably good.
NOTE ABOUT THE NAME: The Eastern and Central European faux-nut cookies have the same name, languages and spelling aside. It’s pronounced “OH-RZHE-ch-ee”, more or less, with a rolling “r” and the “zh” combined into a single sound that English doesn’t possess, and the “ch” being that guttural, back of the throat sound like the Yiddish name Chaim. English doesn’t have that sound either. The “ee” sound at the end denotes a plural, like putting an “s” at the end of an English word. It technically translates as plain old “nuts”, but in context it’s understood to mean “walnuts;” and that is the shape of the mold. You’ll get it wrong if you try to pronounce it properly, especially since there are small variations between the different Slavic tongues. But who cares? You’ll get credit for trying, and everyone will know what you mean.
The name is the same; but the two cookies could not be more different. The Eastern European one is plain, crunchy, and child friendly. It rings the same chimes as Alfajores in South America, Millionaire’s Shortbread in England, and Stroopwafels in the Low Countries.
The Central European cookie (this one) is a sophisticated flavor bomb aimed at knocking adults on the seat of their pants in rapture. The shell is a walnut cookie so tender you have no choice but to eat them in one big bite. They’ll crumble under your teeth if you try to stretch it to two. The filling is less “buttercream” than a “whipped, flavored butter” redolent with coffee and rum. It’s so rich that we include an instruction to use it sparingly!
The final flavor becomes mocha because the cocoa in one part and the coffee in the other combine into a single unit in your mouth. It doesn’t matter which part (shell or filling) gets the cocoa powder, and which one gets the coffee, so long as each side is only half the final flavor. The recipe below goes with cocoa in the shell and coffee in the filling, but both ways work great.
The Dough Is Easy; The Molding Takes Patience
The dough is simple to make; a straightforward creaming method approach. Beat together the butter and sugar until light and fluffy, beat in an egg with an optional touch of extract and/or spice, and then mix in the dry ingredients. The only complication is that one of those ingredients is a large amount of grated walnuts. We’ve yet to see walnut meal in a market, but it’s easy enough to make. Toast whole walnuts for 8-10 minutes in a 350° F (175° C) oven until they’re fragrant. Remove, cool, and then grate down to meal.
NOTE: A rotary hand grater is by far the best tool for this task. Food processors get dicey because walnuts go from “chopped” to “nut butter” in a heartbeat, much faster than almonds or even peanuts. On the plus side, it doesn’t need to be flour-fine. Grating them is plenty good enough.
Then comes the filling of the molds, which is indeed a fidgety chore. Where the Eastern European version is baked in a unique stovetop mold, Central European Ořechy get formed in thin, individual metal molds that go in the oven so the cookies will keep their shape. It isn’t hard, just time consuming because you need to go one by one.
This is the Central European mold. Notice those crumbs? Don’t clean them off until you are done! That residue from earlier bakes saves you from needing to butter and flour the molds every time you fill them.
First you coat the inside with a bit of butter, then you dust it with flour, and then you press the dough in with your thumbs until it coats the entire inside of the mold with a layer that’s maybe 1/8″ thick. [NOTE: You only need to butter-and-flour on the first batch. The remaining crumbs from that batch will be enough to prevent sticking on the second, the second for the third, and so on.] Then you scrape off the excess with a flat tool like a metal spatula or bench scraper, and then move onto the next one.
The dough will soften significantly as you work it. That makes the molding easier, and causes no issues. Incredibly tender doughs will do that. The process isn’t hard, just time consuming.
But you aren’t ready to bake just yet!
Trick #1. Freeze or dock the dough baking. We learned the hard way that Ořechy will puff up to be almost level if you put them right into the oven after shaping. It leaves you with a dent more than a cavity.
Our first batch came out of the oven with no room for the filling!
You can prevent this by (A) poking in holes in the dough with a fork (“docking”) as you would with a pie crust; or (B) freezing the dough in the molds before baking. Both work, and both leave plenty of room in the final product for your incredibly rich filling.
Docked and frozen before baking = generous cavities for filling. Too much room if you use the traditional whipped-butter filling.
Version 1 versus Version 2. Either too little room, or too much!
Trick #2. Freeze or dock, but don’t do both. Docking combined with freezing will give you full sized cavities inside your “nuts,” suitable for a normal buttercream, frosting, caramel product, or any other typical filling. Bit the traditional filling for this cookie? A half-teaspoon or so is all you want. As one baker friend said, “a knob the size and shape of an almond.” That’s just about the amount of room that’s left over if you freeze the shells before baking and so nothing else. Docking creates a little bit of extra room. The combination creates too much.
Extra room won’t kill you, of course, The cookies taste just fine with a cavity that’s got some empty space.
Fresh out of the oven. These were frozen but not docked. A nice, noticeable cavity that has just the right amount of room for a super-rich filling. [P.S. I feel your pain if you’re groaning at that poor sheet pan! It was recently used for roasting bones, and then vegetables right after. A few more trips through the elbow grease sink with Barkeeper’s Friend ought to help.]
Trick #3. Ignore both #1 and #2, and then press a hole in to the flat cookies when they are warm from the oven. So you have molded cookies that puffed up in the oven. You pull them out and say, “Oh no! They have no room for filling!”
Not a disaster. Simply press the warm and still-soft center with your asbestos thumb, and you’ll have a dent you can work with. Yes, it is hot, and yes, you can get a minor burn if you have human skin instead of baker’s asbestos. But beauty can be expensive. Even when it’s only beautiful cookies.
On To the Whipped Butter Filling. This couldn’t be any simpler. Whisk the butter until it’s soft and fluffy, and then whisk in the other ingredients: powdered sugar, more grated walnuts, instant espresso/coffee powder, and a good hit of dark rum. That’s it. What you get is a flavor bomb that carries the essence of Prague. If America is the land of cinnamon and sugar, and Scandinavia of cardamom, Prague’s heart belongs to a mix of mocha, nuts, and rum. Utterly scrumptious. Just use it with care because we aren’t kidding about how rich it really is!
Place an almond-sized piece of whipped butter filling between two shells. Close carefully so you don’t shatter the tender pieces. Dust with powdered sugar to complete the illusion, and enjoy. They will improve overnight, hit their peak on Day 3, and be good for another two days after that.
Be prepared for “Wow!”
CONCLUSION
Ořechy require some patience because the special molds need to be filled one by one, and they only last for a week or so after they get filled. That makes them a special occasion treat. But you know what? They are also spectacular enough to be a star entry on famous dessert trays in any top coffee house of Prague, Warsaw, Vienna, Budapest, or any of the other great cities of central Europe. They’re the sort of food that tourists taste, gape at, and then go home to tell stories about.
We won’t be making them on any kind of a regular basis. Not even for guests. But you’d better believe we’ll be making them for the holiday tray! They’re just too cute and too fantastically delicious to pass by. The whole family would pine at the loss now that they know what we’d be missing.
Yes, they are that good. And cute, too. Wouldn’t you agree?
Ma’amoul is the cookie of the Middle East; the one that crosses every cultural division. Muslim, Christian, or Jew, it doesn’t matter. One cannot celebrate Eid, Easter, Purim, or any other big ceremony without this treat any more than you could stage a U.S. wedding without a cake.
What you have here is a very good Ma’amoul that replaces some Mediterranean baking staples (mastic, mahlab, and sandalwood powder) with readily available American substitutes (vanilla, almond, anise, and ginger). The result is an amazing cookie that everyone adores – at least if you’ll accept the testimony of close to 100 taste testers, including several dozen from the local mosque who grew up with the genuine article. The recipe below is one of our proudest successes.
How good is it? Let’s put it this way. Every person in the family – on their own – fell back on poetry when asked for a description. Scott offered antique Arabian Nights phrases like, “the fragrant breeze that wafts from the garden of the Sultan.” Kate produced, “elegant, perfumed Fig Newtons dressed up in flowered bonnets.” Our daughters insisted on “parasols, sun dresses, and corsets bound by ribbons of scented silk.” No one reacted with anything less.
This has to be the most evocative set of flavors we’ve ever come up with. They are fantastic. Awesome. Amazing. Magnificent. I cannot urge them on you any more. Not for Christmas. This is a spring and summer treat, not a winter one. But it’s definitely a cookie you need to experience at least once in your life.
At the same time, do not be tempted to “test” the product by picking up one of those dreadful commercial versions from your local Middle Eastern market. We did, and our sheer dismay almost killed the project before it got started. Calling them “awful” would be too kind. Our daughter, a camp counselor, refused to inflict them on her kids! No, you need to do this one right if you want to see what all the fuss is about. I promise: they’re worth the effort.
As always, skip to the bottom if you want the recipe without the discussion
First Step: What Is The Target?
Do some research and you’ll see that every region, country, city, town, and home claims its own unique twist on Ma’amoul. The sheer number of variations makes it hard to pin down a central theme. I had to read through almost 30 recipes (!) before I could nail things down clearly enough to even work on a recipe. Even then I ended up with a pretty vague description. The target was:
A filled, molded cookie;
A buttery, slightly crunchy crust with some elusive, sweet-spice accents;
A filling made from nuts and dried fruits; and
A healthy dose of rose water to import the Mystery Of The East.
None of those targets was particularly hard to achieve once we figured out what all the exotic ingredients were for, but it took some research to get there.
Bringing The Ingredient List Under Control
The recipes I’d been reviewing called for a number of ingredients that many American bakers could view as exotic. The bulk of the crust is made from:
Semolina flour;
Clarified butter;
Rose water (mandatory);
Orange blossom water (less so); and
In some cases yeast instead of baking powder.
None of those ingredients posed any special challenge. The yeast could simply be ignored as an option for ultra-purists, since modern Middle Eastern recipes tend to use baking powder anyway. The two flower waters are readily available in modern supermarkets, and certainly in ethnic markets or baking specialty stores. As for semolina and clarified butter, they are even more available than rose- or orange blossom water, and we’d developed some experience on how to use them during our work on the recipe for Ghraybee (the great Middle Eastern shortbread). But then came the little touches to enhance the crust. These were:
A spice called mastic a/k/a mistika (whosis?);
A spice called mahlab (whatsis?); and
Sandalwood powder (in a baked good?!).
None of the recipes used those spices in any significant amount. They were clearly accent flavors, not core ones. But that kind of thing can matter when you want to get the flavor “right” in addition to “good.” That sent me to Internet library… which greatly eased my mind. It turns out that all three are used in ways that American bakers will find both comforting and familiar, and can be replaced by substitutes you already own.
Mastic is a quintessentially Greek spice made from the dried sap of a local tree, commonly used in baking in the same way that Americans use vanilla… Whoa! Hold it right there. Stripped to its core, Ma’amoul is simply a flavored crust wrapped around a fruit-and-nut filling. What could fit a cookie like that better than a touch of vanilla? And vanilla is missing from the ingredient list! Duh. Substitution #1: check. [For what it’s worth, the exchange rate is two parts of vanilla extract for every one part of ground mastic. Reverse engineer as you desire if you keep ground mastic on hand.]
That was easy. What about Mahlab? This, it turns out, is a spice made from the seeds of a shrub related to cherries. It’s typically used as an accent for fruits, and has a flavor that people compare to almond extract mashed up with sweet-spice notes such as cinnamon, anise, and/or cardamom. This makes just as much sense as the first one! You’d have to search long and hard to find a fruit-and-nut filling that doesn’t have some almond extract with a sweet-spice accent. [We ended up at ¼ tsp. of almond extract plus a healthy pinch of star anise to replace ¼ tsp. of mahlab. Reverse engineer as your pantry allows].
On to the… Sandalwood Powder?! Okay, let’s put this on the table. I have a horrible reaction to the smell of sandalwood. One whiff of incense or scented candles can give me a migraine, and one woman in sandalwood perfume is enough to make me flee the elevator in panic. I’m getting a headache now at the mere thought of this noxious toxin showing up in my food.
At the same time, I can see what it’s supposed to do. The same thing that powdered ginger does in other dried fruit recipes. Substitution #3: check that one off as well. [That said, we tried some ginger and ended up leaving it out. You’ll see it in in the recipe as an option for those who like to gild their lilies.]
Getting The Filling Right
All that research proved that the flavor profile in the crust is a lot more standard than you’d think from reading the list of ingredients. The same is even more true of the filling. It’s basically the standard fruit-and-nut filling from Heritage Cookies of the Old and New World, plus a healthy amount of flower water. The only challenge would lie in perfecting the exact proportions for this particular case.
First the nuts. What could be more Middle Eastern than pistachios? The answer is… walnuts, at least in this case. The bulk of this filling requires a softer nut, and the slight bitterness of walnuts fit in perfectly. Pistachios did taste better, but the texture didn’t work. Maybe a mix of the two…? Oh yeah. That’s the way to go. Better than either one standing on its own.
Next, I have to admit that dates aren’t exactly my favorite fruit. They’re just so… meh. But that was not to be. Dates are 100% required if you want to make a proper Ma’amoul. They are the blank canvas for everything else, and no amount of fidgeting can change that basic fact. That said, we once again preferred the multidimensional, sophisticated effect of a mixed fruit filling over something made with dates alone. Figs turned out to be our favorite addition; apricots and raisins our least favorites; and cherries acceptable, but only when used with so much restraint that I left finally left them off the recipe completely. Consider that a secret tip for online readers only!
That left only the elephant in the room: rose water. This is, to put it mildly, a controversial ingredient. Those who like it tend to use it with abandon. Those who are not fans (like me) tend to respond with phrases like “Grandma’s eau de toilette.” If you’re in the first category, please note that many of the recipes I researched use up to three times what you see in ours. Have at it if you will. We, emphatically, will not.
Indeed, my aversion to rose water is strong enough that I tried a version using only orange blossom water, which is much less pushy, and even penciled in a plan to work on a custom version with “more acceptable” aromatics. The test results scotched both of those ideas, but also reassured this rose-water critic that it wasn’t going to be as rough as I feared.
Yes, this is a recipe that requires a certain amount of rose water to do the heavy lifting. You can’t do without it. And yes, up to 50% of that can be replaced with orange blossom water, with fantastic results that all of us preferred. But we also found that these ingredients, and the baking process, tamed the perfume overflow that Kate and I had feared so much. Indeed, consider that as Free Tip #2: You will be surprised how many of the aromatic compounds cook out during the baking, even though the filling is wrapped in a crust.
A version made with 50/50 blends on both the nuts and fruits, plus 2 tbsp. each of rose- and orange blossom water turned out great. More than enough to trigger requests for the next batch. But there was some room for refining.
First I replaced the bulk of the sugar with honey. A fantastic idea you should embrace. Then I adjusted the salt level, and… O.M.G. Words cannot express the magic embodied by how these ingredients come together, marry, and create a whole that is vastly more than the sum of its parts. Ma’amoul really are an experience straight out of the Arabian Nights.
Forgetting A Part, Aren’t We Scott? What About Putting The Cookie Together?
Oh. Yeah.
I’m not going to kid you: forming the Ma’amoul is the most time consuming part of the recipe. In fact, it’s by far the most time consuming part of the recipe, because the dough and the filling are as simple as a cookie gets once you have the ingredients ironed out.
For The Dough: Whirl the dry dough ingredients in your food processor to distribute, and then process in the wet. Remove, wrap, and refrigerate until you’re ready to form.
For The Filling: Put everything but the nuts into your food processor, whirl until smooth, and then process in the nuts until they are ground to your satisfaction. Remove, wrap, and refrigerate until you’re ready to form.
It honestly couldn’t be any quicker or easier.
Forming the cookies isn’t all that hard either, but it does take some fidgety technique you can only develop with practice. The recipe contains good, step-by-step instructions. Both Kate and I took careful notes. But nothing is going to replace a bit of practice. Grow up in the Ma’amoul Zone and you’d probably master the process after 500 cookies under the careful eyes of your mother. We’re aiming to get that number down to 200. But that’s still a solid couple of batches. Just enjoy the fact that making your Ma’amoul definitely gets easier and faster as you go along, and is a fine thing to do with company.
I also want to emphasize that Ma’amoul are easier to form than other filled products such as Trogirski Rafioli, filled Gingerbread, and savory foods like tortellini, pierogies, etc. That’s because those have actual doughs that you need to roll out. The Ma’amoul “dough” is more like a very thick paste once it warms up from a stay in the fridge. You can wrap it around a ball of filling with nothing more than a bit of dedicated work to pinch the thick areas over to where the crust is thin.
Next, you can leave them plain, and they will taste just as good but why shy away from that final touch which makes them extra, extra special? Home bakers typically shape their Ma’amoul with a neat little mold that comes with a handle. This is a much easier tool to master than Europe’s elaborate Gingerbread, Speculaa, and Springerle molds. The cookies come free with nothing more than a few whacks on the counter if you’ve got it properly floured. Kate bought me the inexpensive plastic mold below just for our Ma’amoul testing, but I promise that we will both be using it for a great many European cookies in the years to come.
Note To Friends And Family: Don’t be surprised if your next set of filled gingerbreads comes with a geometric pattern instead of a figurine. This mold is especially easy to use.
Final Observations, Wisdom, and Lessons Learned
Anyone who loves the idea of Heritage Cookies should make this cookie. How many recipes are there that trace their roots back to the time of the pharaohs? How many can claim to be as central in their culture as wedding cake to a U.S. ceremony? How many will inspire an ode, or transport your imagination to a fantasy world you haven’t summoned up since childhood? I can only think of one, and this is it.
Ma’amoul are a fabulous treat that I guarantee you’re going to enjoy. G.U.A.R.A.N.T.E.E. But they are ever so much more than that, too. This cookie is a cultural ambassador. No matter your point of view – taste, texture, romance, culture, or history – it is a recipe that has it all. “Special” barely scratches the surface.
A NOTE FROM KATE: My grandmother used the word “maamul” in Czech to denote a person who begs shamelessly, and the verb “maamulit” to describe the act of begging until I got my way. It is a colloquial slang. I have heard others use it too. But there is no Czech etymology that would tie the word to begging as such. My best guess is that the frequent trade between Czechoslovakia and the countries of the Middle East introduced a new cookie that people loved to eat, but didn’t know how to make. Translation? If you want a cookie that will reduce your family to begging for more, you have found it!
POSTSCRIPT
Many thanks go out to the kind folk at the Islamic Center of Pittsburgh, who put up with a long pair of visits, including one on their sabbath, and provided invaluable feedback on what a good Ma’amoul is supposed to be.
Speaking of which… This may be the best takeaway I can provide about what we mean by a “proper heritage cookie.” The Islamic Center of Pittsburgh has an intriguing mix of parishioners from many different backgrounds. There’s the Middle Eastern contingent, the Indian Subcontinent group, the African group, and various homegrown American Muslims, all wedded into a unique and welcoming mélange. I, of course, was looking for the Middle Eastern natives. I knew the cookies were good – any moron could tell they were good! – but I needed feedback on whether they were capital-R “Right.” That had to come from people who grew up eating them.
I got my help, sure enough. But there’s a story that goes along with that help.
If I watched it once, I watched it twenty times. A gentleman from Lebanon, Syria, Palestine, Morocc0, Libya, etc. agrees to lend me a hand. He tastes a sample, nods sagely, and says something along these lines: “These are good. Very good! Not as good as my mother’s, of course, but they aren’t too sweet, and yes: they are definitely a true Ma’amoul. Nice job.”
Then someone he knows from one of the other groups looks over his shoulder and innocently says, “What are those?”
“You don’t know Ma’moul? How is that possible? You have to try one!”
Three more samples disappear from the tin. There follows the sound of munching, an ecstatic exclamation, and then a buzz of excited conversation and delighted laughter as the group passes out of range.
As always, you can skip to the bottom if you’re only here for the recipe.
I began this recipe looking at the Baltic version, and finally realized that Honey Gingerbread a/k/a Honeycakes are a category unto themselves. They’re particularly common in the Slavic nations of Europe’s center (bottom to top) and east. I’ve seen so many other versions from the Czechs, Poles, Russians (and all the ethnic subgroups), the Baltic States, Ukraine, etc… Might the the talented Southern Slav bakers have something really unique?
I pinned those hopes on the simple lack of spice. All those beautiful and famous Honeycakes from the Slavic nations to the north? Czech Pardubice Gingerbread, Polish Pierniczki, etc.? They’re all variations on a basic formula that differ mostly with the use of some subtle and sophisticated spice blend developed by that particular region. Balkan bakers vary their Medenjaci by playing with the structural part of the cookie – particularly when it comes to the use of eggs.
So was it really different? Sort of… but not in some fundamental way. Leaving out the spices works. It yields a relatively pure, easy to access flavor that’s worth the experience. And adding extra egg yolks plays with texture in a radical way that’s almost a revelation. We fully intend to play with it over the next many years. But what you really have here is an expansion kit to the mix-and-match options that all those other recipes have in common too.
In other words, this is an article about pure, baker’s geekery. Read on and you’ll learn how to seize control of that traditional recipe from your Baba, and convert it like a chemist into exactly what you want.
Every one of those famous cookies uses one or more of those variations, so they really do come out as distinct individuals, but the family kinship is there.
Medenjaci differ in two ways. First, they tend to use a much simpler spice mix, and less of it. Two tablespoons in a 3-cup recipe would be a lot, and it is rare to include more than a healthy dose of cinnamon with a touch of ginger, nutmeg, mace, or clove. I suppose you could argue that they tend to be heavier on the citrus too.
The bigger difference is in the eggs. Our recipe adds four(!) egg yolks to the one whole egg, and we aren’t the only ones. Scott compiled the following table of online recipes to provide some idea of both the variations and the consistency.
Flour
Butter
Leavener
Sweetener
Spices
Eggs
5⅔ cup (805 g) mix of AP, Cake & Whole
1 cup
1 tsp. soda
255 g honey 285 g brown
2 tsp. cinnamon ½ tsp. ginger ½ tsp. clove ½ tsp. nutmeg
3 whole 1 yolk
5¼ cup (750 g) mix of AP, Cake & Whole
1 cup
1 tsp. soda
250 g honey 180 g brown
2 tsp. cinnamon ½ tsp. ginger ½ tsp. clove ½ tsp. nutmeg
3 whole
4¼ cup (600 g)
¾ cup
1 tbsp. soda
200 g honey 200 g sugar
6 tsp. cinnamon 3 tsp. vanilla
2 whole
3 cups (425 g)
½ cup
1 tsp. soda
170 g honey 70 g brown
1 tsp. cinnamon ½ tsp. ginger ½ tsp. nutmeg ¼ tsp. clove
2 whole 1 yolk
3 cups (425 g)
½ cup
1 tsp. soda
170 g honey 100 g brown
1 tsp. cinnamon ½ tsp. ginger ½ tsp. nutmeg ¼ tsp. clove
2½ tsp. cinnamon 1 tsp. ginger ½ tsp. clove ½ tsp. nutmeg Extra as an option
1 whole 4 yolks
Our Version of Medenjaci
Let’s be honest for a moment: we’ve been doing this for a long time, and have a lot of Honeycake (a/k/a honey gingerbread) recipes. All this research said two things: Medenjaci were pretty middle-of-the-road from a flavor point of view, but some of the recipes used extra eggs to create really unique textures. That led in turn to two options: we could “fix” the spices to make something more appealing to our (admittedly) Northern palates, or we could embrace the egg-centric approach and see how far it could go.
We went with the latter. So let it be said up front. Our version of Medenjaci is dead-on true to what you’d find in Belgrade, Zagreb, or Sarajevo from the flavor point of view, and on the cakier side from the textural perspective.
The result is a cookie that comes off as a light, honey-centric gingerbread with a rounded flavor and a chewy, meaty texture like nothing else in our repertoire. Easy to like, hard to hate, and really entertaining if you happen to be a baking nerd.
A Final Note: Looks Can Be Deceiving
Yes, the photos look like Pfeffernusse, the famous Dutch/German cookie. And yes, Pfeffernusse are a honey-spice cookie. But that is where the similarities end. A good half the bulk of Pfeffernusse comes from almond or hazelnut meal, which is often combined with chopped softer nuts such as walnuts or pecans. They also have a bare minimum of leavening (¼ tsp. of baking soda), and are bound by two whole eggs. That combines to give them a nut-cake texture, and often a crispy one because many people prefer to add a few minutes to the baking time. Medenjaci? No nuts at all, just flour; half the amount of butter; and much more in the way of leavening and eggs. They may look alike, but no one would ever confuse the two after even a single bite.