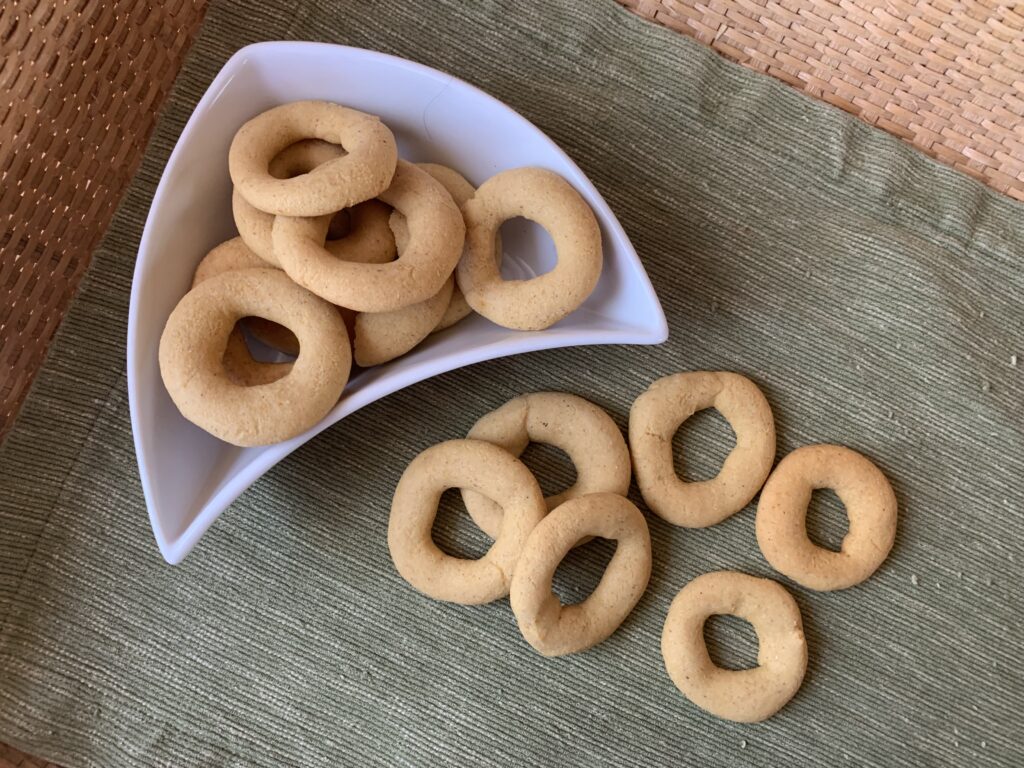
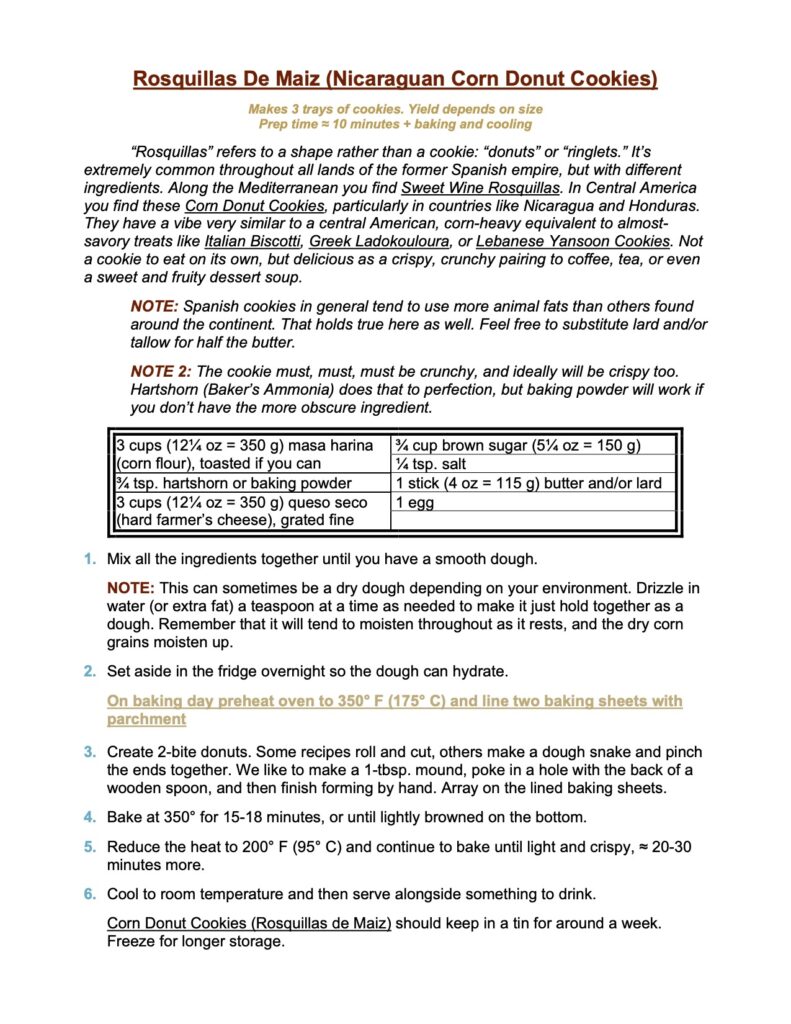
CENTRAL AMERICAN CORN DONUT COOKIES (“Rosquillas de Maiz”)

A staple cookie from Nicaragua and Honduras that acts like a Central American equivalent to Italian Biscotti.

Some countries use more corn than wheat flour as their staff of life, and in those lands you have to expect corn based desserts. Enter Rosquillas de Maiz, a crunchy, mildly sweet cookie meant to accompany a cup of coffee, tea, a drink, or even a fruity dessert soup.

A word to the wise: the word “rosquillas” describes the shape, not the dish, and can include a variety of recipes that can range from our common fried donuts, through ring-shaped breads, tender shortbreads, and in this case, barely-sweet cookies. A native speaker is bound to complain if you use that word alone, just as Norteamericanos would complain if you handed over a bowl of ring shaped breads and called them donuts. Use the adjective, though, and you’re fine. Rosquillas de Maiz means “corn donuts,” and Rosquillas de Nicaragua/Honduras means “donuts from this country.”

NOTE FROM KATE: If this pattern continues, we will never be done testing cookies! What a terrible fate, right? Every time we think our short list got trimmed down to “just a few more,” this happens. Every. Single. Time. However, I have no regrets. This little cookie is easy to make, fun to shape, and expands the repertoire in an entirely unexpected direction! One note of caution: If you toast your corn flour, make sure the flour is cold before you add your leavening agents, especially if you are using hartshorn. (I poured my toasted corn flour into a steel bowl and let it cool in the freezer, for patient I am not.)

An Origin Story For Cookie Sleuths Everywhere

We often get asked “Where do you find all these?!” My best answer is, “They are there waiting to be found if you just take the time to look, and to ask.” This cookie is a case in point.

Kate and I are in the final month of intensive recipe testing before attention turns to getting Volume 2 ready for publication. Sweet Wine Cookies, a ring-shaped treat common from Portugal, Spain, and Italy has been high on our list for some time now. I mean, come on: everybody cooks with wine in their soups and sauces, so it makes total sense that wine growing regions would use their excess wine in baking too. Wine based desserts aren’t exactly rare. Nor are wine based flavors in cakes. Haven’t you come across some version of Champagne Buttercream Frosting for cakes, cupcakes, Macarons, or eclairs? If you haven’t, you’re welcome; that’s good stuff!

I looked around and, sure enough, the wine growing regions in Southern Europe have just such a treat. So I worked up a test recipe, got to where we liked it, and then went searching for native Spaniards to tell me what I needed to tweak. But there I ran into a problem. Our fallback testers include several native Italians (who gave it a big thumbs up), but Spaniards are thin on the ground in Pittsburgh and our Portuguese friend has retired. Thus I wandered into Reyna Foods, a Latin-products grocery store in the Strip District that we have patronized loyally for decades. There’s a lady there who also likes to supply her friends and neighbors with holiday cookies; Latin America was part of the Spanish Empire; and so I hoped that Rosquillas de Vino might have found a sideways path into her repertoire.

No such luck. But there was a lady from Nicaragua in the back who’s reputed to be a fine baker, and her ears perked right up at the word Rosquillas. She doesn’t speak much English, but a coworker agreed to translate my request for feedback.

Her eyes crinkled up in suspicion when I opened the tin of powdered rings. She picked one up with obvious hesitation, gave it a little nibble, and made a face so universal it needs no translation. “No, no, no. No bueno.” It wasn’t quite a blecch! because she didn’t mind the flavor per se, but she was quite firm that these were not the Rosquillas she grew up with. Not even close. Mine were sweet, tender, and had a uniquely wine-tinged aroma. No bueno. Nicaraguan Rosquillas were supposed to barely sweet, very crunchy, and [ahem] untainted.

Then she pulled out her phone, did a quick search, and showed me a photo. Plain, golden rings. “Estas. Estas son Rosquillas.” I scrolled up and saw the title: Rosquillas de Maiz. Wait a second. Maiz? As in “maize?” I.e., corn?

[Pause for translation]. “Of course it is. Rosquillas are made with masa a/k/a corn flour.”

And thus the penny dropped. The basic idea of ring-shaped cookies had indeed traveled the length and breadth of Spain’s former dominion, but not the Spanish recipe. People in the Americas had taken the idea and made it their own.

I looked things up as soon as I got home, and found quite a few examples from Nicaragua and Honduras in particular. It’s a pretty straightforward recipe with a few twists.

Twist #1 – The Basic Formula and Target Result

Research for this cookie quickly ran into a problem: the details were all over the place. Some called for lard (pig fat), some called for tallow (beef fat), some called for butter. Some were leavened, others unleavened. Some had sugar added, some didn’t. Etc. Fortunately, it’s a problem we’ve faced before and we knew what it meant.

This is a peasant recipe enjoyed by the whole society, not a well defined restaurant dish. That means the overarching instruction goes like this: “Use what you have on hand, so long as you keep the basics in place, and achieve the right result.”

Here are those basics, as measured by weight:

  • 3 parts finely ground cornmeal (masa harina),
  • 3 parts hard, grated farmer’s cheese (queso seco),
  • 1 part fat,
  • an egg to bind it together, and
  • baking time at 350° F (175° C) to get them browned, followed by more baking at 200° F (93° C) to get them completely dry and crunchy.

And here is the target:

  • Nicaraguan Corn Donut Cookies serve the same function as Italian Biscotti: they’re a not-quite-a-cookie intended to accompany coffee, tea, an alcoholic beverage, or a fruity dessert soup. Make that, and you’ve made Rosquillas de Maiz.

Everything after that comes down to refining and perfecting each point.
Baking With Corn Flour And Meal – You May Want To Toast It In A Pan

Central Americans have fresh masa harina on hand, every day and everywhere, waiting to be used. If you’re like us, you probably have a bag of masa tucked away in the back of your pantry, sealed as well as possible to keep out the moths. “Fresh” it is not.

There is an easy solution. Put your somewhat stale corn product into a dry pan over medium heat, and cook it until you can smell the corn flavor rising up. Presto. Ready to go.

That trick may work for fresh masa harina too, but it isn’t in the original recipes. On the other hand, it isn’t all that outside of the recipes either. Spain and its cultural heirs make a series of cookies like Polvorones that are built on a combination of toasted wheat flour and a healthy amount of butter and/or lard. This fits right into that tradition.

The Cheese

Most cultures with a European heritage make a variety of fresh cheeses known by different names around the globe. Quark, tvorog, topfen, etc. They typically come in two basic varieties, wet and hard, and have a mild, creamy flavor. The closest American equivalents would be something like cottage cheese mixed with ricotta, and then drained in cheesecloth until you get the desired texture.

For this recipe you want the driest version of that cheese you can find, grated down to as fine as you can get it. We used tvorog from a local Polish store, drained in a sieve before weighing it out. It’s probably not ideal, but remember that basic instruction up above. It’s peasant food. Use what you have on hand, so long as you keep the basics in place, and achieve the right result.

NOTE: If you only have access to something as wet as cottage cheese, wring it out well before weighing, and then you’ll be fine. The darned cookies get dried at the end of the recipe anyway, and there’s no gluten to develop because they’re made with corn rather than wheat.

The Fat

As noted above, the authentic recipes vary from all butter through all lard, to a mix of butter, lard, and tallow. That isn’t odd for Spanish-heritage cookies. Again, see Polvorones and their U.S. relative Biscochitos. Use what you have on hand. Our favorite was a mix of butter and lard, but it doesn’t really matter from a “heritage” point of view.

This can be a dry dough. Drizzle in water (or extra fat) a teaspoon at a time as needed to make it just hold together as a dough. Remember that it will tend to moisten throughout as it rests, and the dry corn grains moisten up.

The Sugar Content

Authentic recipes varied from no added sugar at all to a small amount (from the perspective of a U.S. sweet tooth). The target is something that will taste like corn in your personal opinion. Season to taste, as they say.

Some recipes also call for obscure (to us) products like loaf sugar. Nicaragua and Honduras are major production centers for sugar cane, and such niceties probably matter to those who live there every bit as much as green peppers versus red peppers do for us, or Apple A versus Apple B. With all due respect, and subject to one exception, it doesn’t matter to you and me. U.S. brown sugar comes from sugar cane, with some of the byproducts (a/k/a molasses) mixed back in. The result should be identical once it dissolves into a cookie dough.

The exception? There is a Rosquillas variation that uses no sugar at all in the dough, but decorates the top of the cookie with sugar shavings from the aforementioned loaf. Consider that an Internet Bonus, because it isn’t in our written recipe. That’s a case where only true loaf sugar will do, because the texture simply can’t be duplicated.

To Salt Or Not To Salt?

That’s simple. Salt. No, it isn’t in the most authentic recipes. But we’ve found that every single baked good we’ve ever tried will taste a little better if you use an invisible pinch or two of salt.

The Leavening Agent

We call for baker’s ammonia if you have it, and there was one recipe I found that incorporated this antique leavening agent. Others use baking powder, with a healthy percentage calling for nothing.

So why did we specify the more obscure one? It comes down to the target. All biscotti are crunchy and dry, but we’ve eaten a lot of them over the years and have come to appreciate the distinction between (i) hard, which is unpleasant until you’re initiated into the cult, (ii) crunchy, which amounts to the introductory level for people not yet beaten into submission; and (iii) crispy, a rarely achieved state of perfection that catches the essence of hard without the dental ramifications of crunchy.

Unleavened Nicaraguan Rosquillas are hard. They’re still okay because we have molars for a reason, and you’re supposed to dip the darned things anyway, but in our opinion one ought to do better. Nicaraguan Rosquillas made with baking powder are crunchy. That’s what a native of the region will expect.

Nicaraguan Rosquillas made with hartshorn a/k/a baker’s ammonia are light and crispy, which made our native tester down at Reyna’s raise an eyebrow with delight. For what it’s worth, I also brought a version made with baking powder only, and that was considered good, but not as good as the lighter and crispier variety.

NOTE: Here’s an Internet-only tip. Hartshorn is a little stronger than baking powder. You may want to increase the amount to a full 1 teaspoon if you use the more common leavening agent.

CONCLUSION

Nicaraguan Corn Donut Cookes (Rosquillas de Maiz) fell into our life by total surprise, and have quickly earned an enduring spot in our hearts. The aren’t a “favorite” per se, because we associate cookies with sweet, tender, dessert-like baked goods such as shortbreads and nut cookies. But that’s taste, not judgment, and these would definitely be in the running if we were making recipes along the lines of Biscotti, Mandelbrot, or even our recent forays into Greek Ladokouloura and Lebanese Yansoon Cookies.

The first two are crunchy, crispy, and nutty-sweet. The next two are crispy and spiced-sweet. Rosquillas de Maiz are crunchy, crispy, and corn-sweet. They fit right in as a peer to the others, and illustrate a special heritage that most of us could stand to know a lot more about.

NOTE FROM KATE: I really enjoy these, and the cheese adds an extra tang. Also, look at the proportions: doesn’t the recipe resemble “Real Food?” The guilt factor is cut by two-thirds at least when you nosh on a barely-sweet, high-protein Rosquillas de Maiz. They are absolutely lovely. Now as you all know, I struggle with fitting into my jeans in this cookie-rich environment. This round little cookie has me all excited, though. Some online recipes cut out all sugar and add a bit of parmesan to the farmer’s cheese. Interesting… I wonder how these would go over as an almost-savory, balanced treat with my afternoon cup of coffee? Try them and decide for yourself!

Enjoy!
BEEHIVE COOKIES (Včelí úly), A No-Bake Life Hack For Your Casualties

The best way we know to use up casualties from our holiday baking

Our collected work on Heritage Cookies of the Old and New World, both Volume 1 and the forthcoming Volume 2, can be traced back to the Czech tradition of Vánoční Cukroví: “Christmas Sweets.” Central and Norther Europe abounds with impressive holiday baking traditions, but no one takes it more seriously, or does a better job, than Czechs such as my beloved wife.

The thing is, when you make a lot of cookies, you also end up with a lot of casualties. There’s just no way around it. Beehive N0-Bakes may be the single best way of converting those casualties into something new. Who am I kidding? History contains a lot of ‘Oops!’ moments just to ensure the Beehives get made.

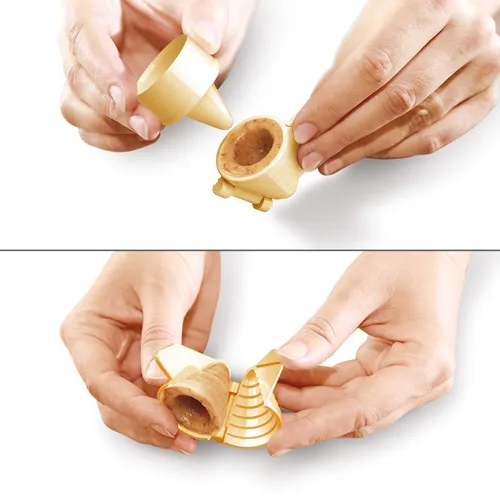
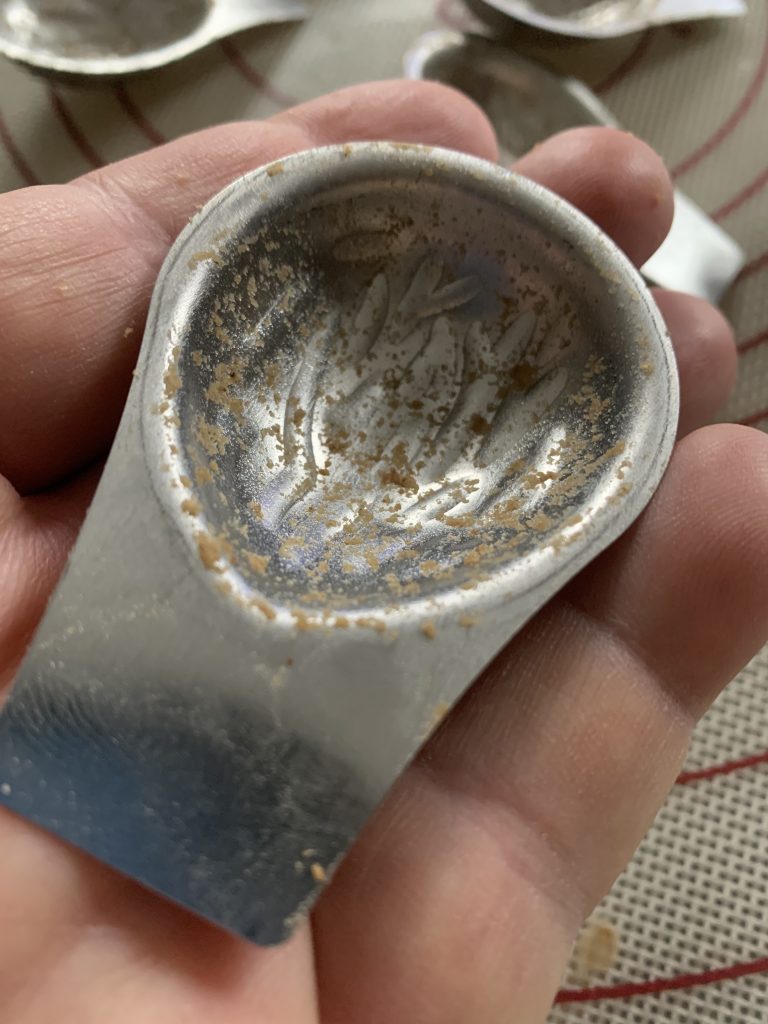
It starts with tiny plastic molds such as this one from the Czech manufacturer Tescoma:

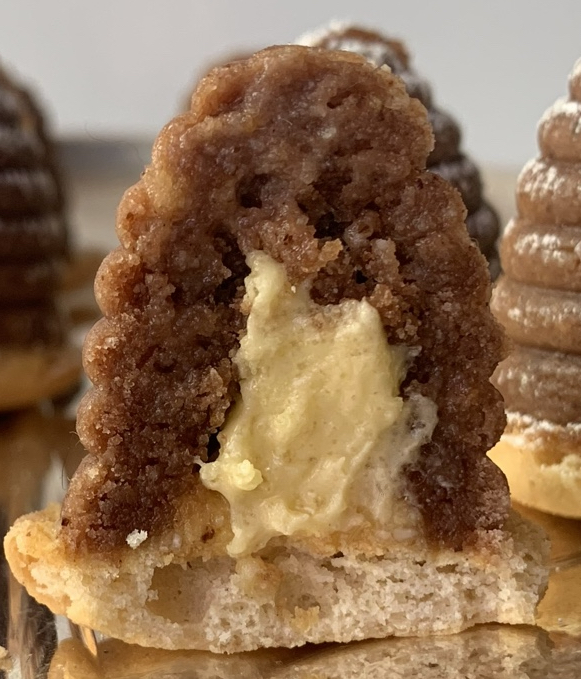
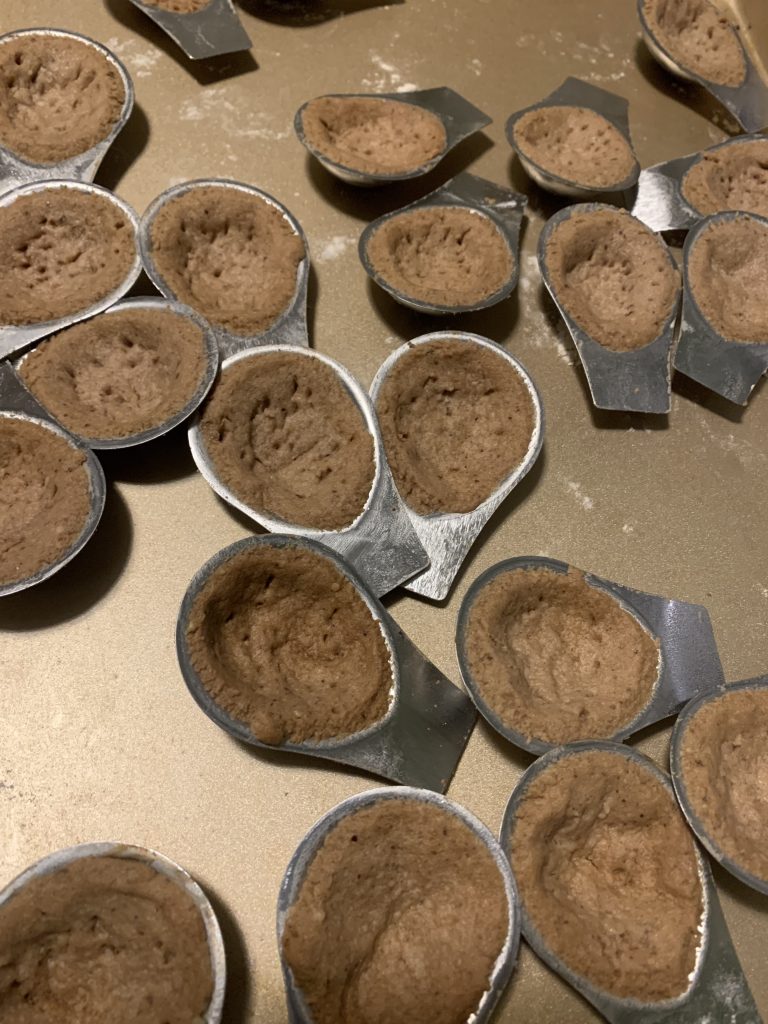
It ends with this:

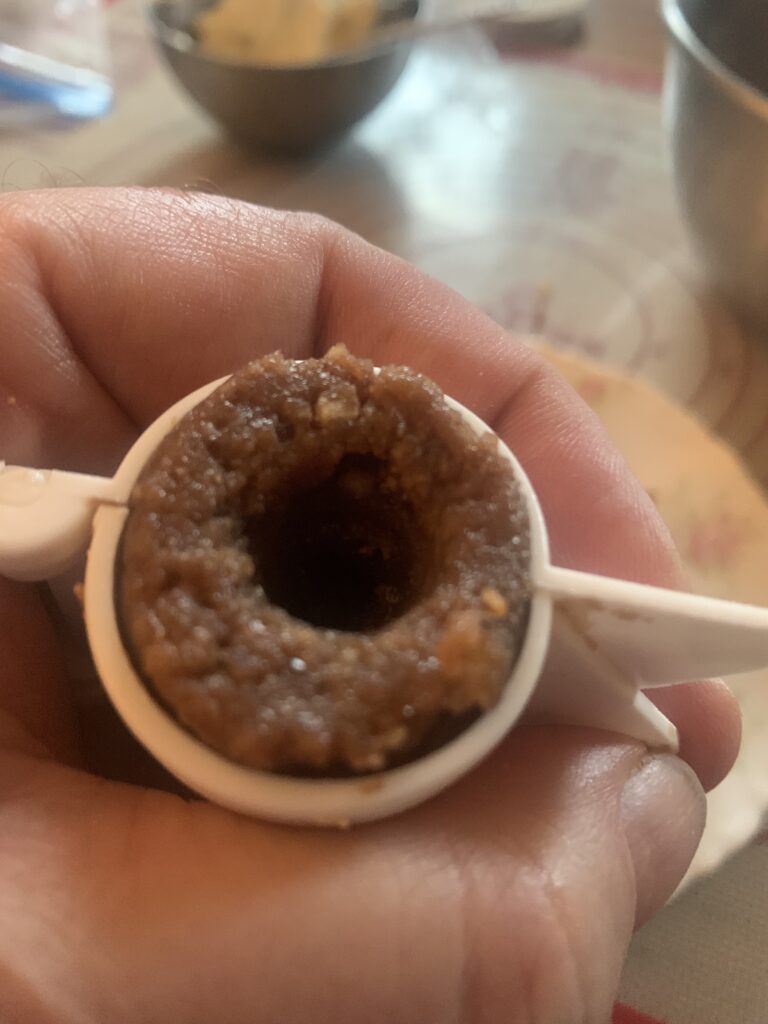
That picture pretty much says it all. (A) create a dough from leftover cookie crumbs, (b) press it into shape using the plastic form, (C) poke in a hole using the provided stamp, or the handle of a wooden spoon, (D) fill said hole with a stiff, rum-heavy buttercream, and then (E) cover the bottom with a small, round cookie like commercial vanilla wafers.

Quick, easy, fun for children of all ages, and requiring no mandatory baking unless you choose to make a superior buttercream. Or wish to make your own wafers, of course.

Part 1 – Ready The Shell

This is the magic part, and it couldn’t be any easier. Start with your leftover cookie crumbs. Mix in finely ground nuts, a small amount of powdered sugar, and egg white(s) as needed to bind it all together. Most people also add in a bit of rum (or extract) and cocoa powder to round things out, but that can vary with both personal taste and the nature of your casualty crumbs. You can also add spices, depending on the nature of your crumbs. Ground up gingerbread cookies obviously have a different vibe than ground up butter cookies.

NOTE FROM KATE: caution on the casualty cookies. Not all will make good candidates! We had some strongly flavored cocoa bear paws that got recycled into Beehives, and I thought there was a bit much going on. I would’ve preferred a more neutral backdrop to the smooth and delicious filling. If we make them again from the same cookies I will vary from the recipe to accomodate.

Regarding the overall impression, I prefer walls as thin as possible, with a liquidy eggyolk cream filling for contrast. But those would soak the Nilla cookie base over time…so if you’re making a whole bunch, a buttercream might be a longer-lasting option. Due to their egg content, we store Beehives in the refrigerator until serving time.

The only place it could go wrong is the proportions. Sometimes the cookie crumbs will be drier, sometimes wetter, etc. The answer is simple: remember your target. You want a standard, slightly sticky cookie texture. Start with something on the wet side and then add crumbs as needed to get there.

Part 2 – Ready The Filling

This is just as easy even though the recipes can vary drastically from house to house. You are after a rich, thick but not solid filling full of extra rum flavor. How you get there is up to you. The filling texture can vary from thick and boozy liquid eggnog to a firmer, properly flavored buttercream.

Kate’s prefers a cheater-buttercream on the theory, “If you are going to make a life hack recipe out of leftover crumbs, why not make a shortcut buttercream?”

  1. Make an extra-thick, store bought vanilla pudding by using only half the designated amount of liquid.
  2. Finish by whipping in dark rum and/or rum extract to taste.

I prefer to start from a modified pastry cream, otherwise known as a Swiss meringue method using yolks instead of whites:

  1. Whip the leftover egg yolks with some sugar over a hot water bath until thick and foamy.
  2. Remove it from the heat and whip in softened butter piece by piece, waiting each time until the last piece has been fully incorporated.
  3. Finish by whipping in dark rum and/or rum extract to taste.

The third approach is a French Buttercream, otherwise known as an Italian meringue method using yolks instead of whites.:

  1. Whip the yolks off heat until thick and foamy.
  2. Slowly drizzle in a softball-stage sugar syrup (235°-240° F = 114°-115° C), whisking on “high” until the temperature drops back down.
  3. Finish by whipping in dark rum and/or extract to taste.

The Flavor Profile – Does It Need To Be Rum?

We’ve written before that Prague’s secret heart belongs to a combination of nuts, rum and mocha. This recipe has (let’s see…) nuts and cocoa powder in the crust, with rum in both crust and filling. No surprise there!

There is no rule requiring you to stick with that profile, any quick online search will reveal many variations, and you always need to adapt things if your cookie crumbs come from something that has a lot of character. But for plain beehives made from plain cookies, please consider mocha-rum as the home base. That’s what you’d find in the Czech Republic.

NOTE: 100% rum extract starts to taste a bit artificial. We like to mix dark rum and extract together in order to obtain an intense flavor that still has nuance. And a bit of booziness of course!

Part 3 – Construction

Press dough into your little beehive mold:

Finished cookies with an empty mold on the left, and
an unfilled one on the right

Poke a hole in the bottom using either the tool that came with your mold, or the handle of a wooden spoon.

Poke a hole inside

Fill the hole with filling.

Cover the hole with a small, round cookie. We typically use commercial vanilla wafers from the box.

Bottom on, and ready to be pushed free.

Unmold. One side of the mold will come free easily. Use the cookie on the bottom to help free the other.

Done!

Move your finished Beehive Cookies to the fridge, where they will keep well while the cold, dry air hardens the outer crust and makes them that much more cookie-ish.

Storage and Conclusion

No-Bake Beehive Cookies:

  • Turn casualties into capital;
  • Look amazing;
  • Have a distinct and often different flavor from everything else on your tray;
  • Taste delicious;
  • Are easy to customize (almost unavoidable);
  • Occupy a distinct part in an important baking culture; and
  • Are fairly easy to make.

Can someone please explain the downside?

okay, yes. You may have to put them into a mental “Not-Quite-A-Cookie” category. And yes, that can cause some family friction about where they belong in your forthcoming cookbook. But they’re good. That is the bottom line.

Ah, the burdens of life…

Enjoy!
KRINGLA, Scandinavian Holiday Pretzel Cookies

Yummy and unique.

Happy New Year to all! This will be a relatively short article because all the tips and tricks were so important they’ve ended up in the recipe itself. Twenty of them! More or less. There isn’t a lot for me to add.

NOTE FROM KATE: This would be an absolutely wicked technical bake if they ever appear in the Great British Baking Show a/k/a Bakeoff! With their even, delightfully puffed-up loops toasted golden and their intriguing crunch, they are well worth the learning curve.

Here’s the bottom line: Kringla look exactly like a salted pretzel and have soft middles right after baking. From Day 2 on, they turn into an extremely light, ultra-crisp, crunchy sugar “cookie” with moderate sweetness and an innocent flavor that no one can dislike.

Yes, Hartshorn Makes A Difference

Kringle sorta-kinda work with baking powder or soda, but they turn into something special when you use baker’s ammonia a/k/a hartshorn instead. The texture changes from (A) absurdly puffy when fresh and a little tough as they age, into (B) puffy with a pleasant, crispy crust when fresh and wonderfully crunchy as they age. See this article for the underlying reasons. We can’t say they aren’t worth making if you use the more common leavening agents. The illusion still works, and there’s nothing wrong with the flavor. But they will definitely be better if you make them with hartshorn.

Shaping Pretzels Is A P.I.T.A. – If You Are Me

Kate had almost no problems, because she’s an artist with a good 3-D imagination. I end up staring at the darned things and trying to remember, “Was it one twist or two? And then the ends go where…?”

It’s all covered in the recipe itself, but aside from native talent (or lack thereof), the shaping hurdles are all pretty basic and built into the nature of the cookie:

  • It’s a very soft and sticky dough. But everything will work out fine if you roll each piece in flour before forming, and work with floured fingers.
  • Move the rolled out “snakes” onto your parchment before turning them into pretzel shapes. They’re so soft that scooping and moving will inevitably distort your work.
  • Use very skinny “snakes” and leave a huge amount of room in the loops – enough that they look sort of scrawny and pathetic before they hit the oven. Kringla expand by at least 400% percent as they bake, meaning each of those little arms will end up being four times (4x) as thick by the time they are done. Rest assured: all that empty space will vanish.
  • Keep the pretzels far apart on the trays for the same reason.

NOTE FROM KATE: If you’ve never made a pretzel, I recommend practicing with a piece of thick twine or shoe string. You will want to make a single shape while using up the entire length of 8- 10″. Try various shapes, and try to join the rope under an existing loop. If you can’t, pinch the dough together so that it’s the same thickness everywhere (Thinner portions will darken too much.) The final product is as solid as the dough is fussy. This dough would be suitable for making hearts, flowers, linear animal shapes, or whatever else you fancy.

The Final Touch Decorations Are Easy, But Have Some Sneaky Hazards

Kringla taste perfectly fine. They are friendly, inoffensive, mildly sweet, and basically pleasant to one and all. For a stronger impression, add more freshly ground nutmeg or cardamom. For an even safer flavor, add some extra lemon zest. Either way, this cookie isn’t really about the flavor. It’s the shape that makes them special. The shape, and the illusion of being a salted pretzel instead of a sweet treat.

NOTE FROM KATE: I could be wrong on this, but I perceive hartshorn-leavened cookies as less flavorful than their baking soda/baking powder equivalents. So far we aren’t sure whether it’s just me, or because the extra puff essentially dilutes the spice level per bite. Adjust spice level as you see fit.

That salted pretzel illusion comes from brushing the pretzels with melted butter and then sprinkling the tops with pearl sugar to imitate the salt. The recipe goes over it all in detail, but that process has two basic challenges to overcome. (A) The dough is so soft that brushing it with melted butter can distort those shapes you just spent so much work on; and (B), the oven temperature is hot enough to melt any loose sugar crystals, which can lead to black caramel tainting the bottom of your cookies.

You can fix both problems by baking the pretzels until they are almost done, pulling them out of the oven to be decorated, and then returning them to the oven to finish. That, alas, is both fussy and time consuming. Thus it makes sense to brush and decorate before baking… which means you need to compensate for those two problems.

There is no concrete, surefire answer. It’s just one of those things you need to know about, and do what you can to prevent. See the recipe for various tips, tricks, and hacks you might want to use.

The Pretzel Bottoms Try To Get Out Of Control

Start with an extremely light dough, rolled very thin, and heavily leavened so it will expand by four or even five times in the oven. Add in a very hot oven to brown the top and provide extra crispness to the crust.

What do you get? A cookie that can easily burn on the bottom before the tops are done, even without factoring in any caramel from melted sugar.

Knowing the problem gets you about 50% of the way toward fixing it. Again, please consult the recipe for our tips, tricks, and hacks to forestall that. But I may as well close this article by listing them here as well, because several are very clever if I do say so myself:

  • You can bake one sheet at a time, on a middle or upper rack of the oven. Oven heat comes from the bottom and collects toward the top, so this will make sure you have consistent air flow while maximizing the heat around your crust rather than on your bottoms. Just remember that one sheet in the oven tends to cook faster than two.
  • You can use the convection setting on your oven to achieve the same effect. Just remember to turn the oven down by 25° F (about 15° C).
  • If you use two pans, remember to rotate them halfway through. Bottom to top, while also spinning them back to front.
  • You can insulate the cookie bottoms by using a silicone mat instead of parchment paper.
  • You can also insulate the bottoms by using a doubled baking tray.

NOTE FROM KATE: We have a convection oven but we seldom turn the fan on because all our Volume 1 recipes started out in a previous one. Keeping a traditional oven setting helps us compare new recipes connected to our older bakes. If you use a convection oven, reduce the temperature by 25°F and keep an eye on your bake time. Every oven is different.

Conclusion

Please don’t let all the nits and notes discourage you from trying this fun and culturally important little cookie. Yes there are hurdles, but they’re more in the nature of “heads up” warnings about pitfalls to be avoided. They aren’t actual barriers, let alone walls, and the rewards are more than worth the effort. Kringla are fun! Just look at them:

Enjoy!

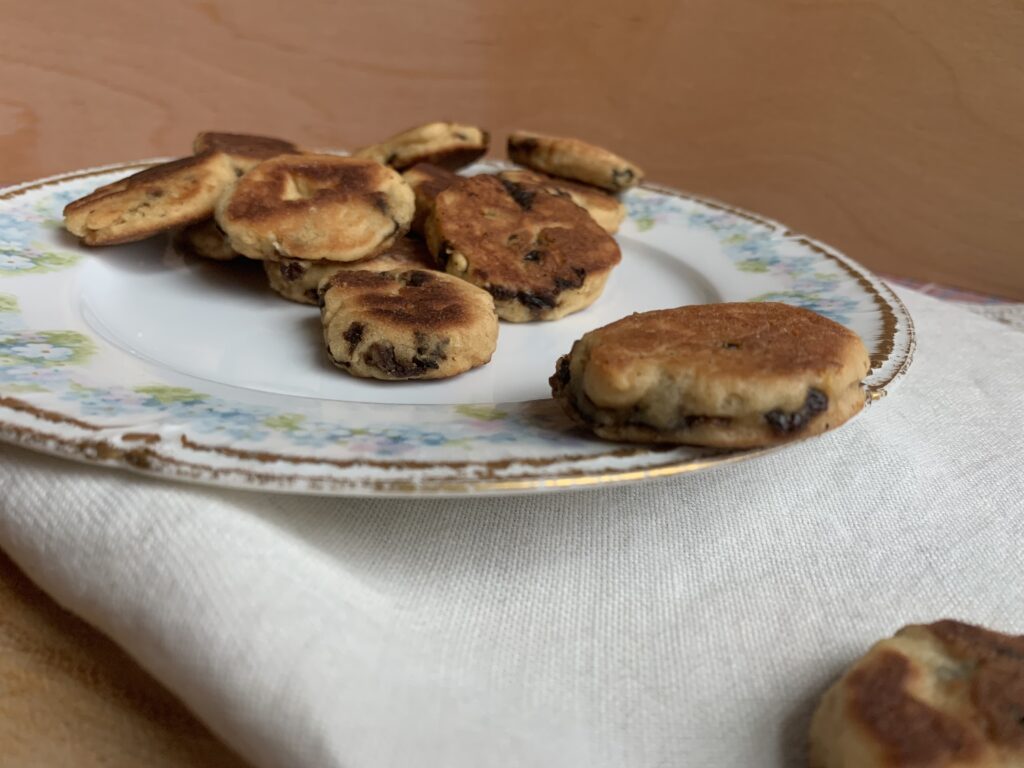
WELSH CURRANT COOKIES a/k/a CAKES, Fresh From The… Griddle?

Cookie, pancake or both? Who cares when they’re just plain good?

I’ve got some money to bet! You either (a) know and love Welsh Currant Cookies/Cakes, or (b) have only the vaguest impression that such a thing exists. We fell in the latter category. Yes, I have a number of friends who chimed in with, “Oh, you’ve got to research currant cookies!” So we knew they existed. But I’d honestly never tasted one until we got into the recipe testing.

You may now put us in category #1. They’re wonderful.

NOTE FROM KATE: When this intriguing cookie came up for trials, I was of two minds about it. First, leaves were falling and we were carving pumpkins. For most people, October 31st is just Halloween, cosumes, and candy bars. The holiday originated as Samhain, a Celtic New Year. One Samhain tradition is thanking the warm part of the year for its bounty, and greeting the cold hibernation with its hunting season. Traditional offerings include bannocks, biscuits, or, indeed, cookies. I was all in favor of this concept: we would try a recipe and I would have some genuine griddle cookies to share with the garden.

And yet… pan and griddle means oil. Have I mentioned that we fry have not researched a single fried cookie because I loathe even the idea of the cleanup? If you’re like me, fear not. The amount of butter or oil is minimal, and these curiously enticing cookies are well worth the effort.

The brits have a wonderful word that catches the essential appeal of Welsh Currant Cookies/Cakes: they are moreish. It means they’re one of those foods that don’t taste “special,” but trigger that mysterious need to just keep noshing until there is nothing left in range. Simple, tasty, accessible, and fun.

“But are they a cookie or a pancake?” That’s a whole other debate. They have one foot firmly planted on each side of the line. Thus their assignment into our category for Not Quite A Cookies. Another perfect description.

As always, click here to jump to the recipe without any discussion.

Currants?

Linguistically, yes. Biologically? No.

To a naturalist “currants” means one of two species in the genus Ribes, both of which produce small, round berries that look like itty bitty grapes (which are in the unrelated genus Vitus). There’s Ribes rubrum, which can be red, pink, or white (my favorites are the classic reds), and then there’s Ribes nigrum, the black currant species favored by our daughters. Kate’s favorite would be Ribes uva-crispa a/k/a Gooseberries.

Red currants have that classic sweet/tart flavor profile you find in currant jam. The black ones have a unique, musky flavor. Gooseberries are sort of like a sour blueberry with the size and texture of a very firm grape. All three are delicious once you acquire the taste. Heck, we grow them all in our yard! But they’re only good when eaten fresh or turned into some kind of jam, preserves, or compote.

HISTORICAL NOTE: America has a fascinating history of actively destroying these crops. It happened because currants and gooseberries are required species for the spread of blister rust, a fungal disease capable of wiping out entire forests of white pine. White pines were a major U.S. natural resource in the early 20th century, so both state and federal authorities felt compelled to fight it off. The easiest solution? Eradicate the vector. And so they did. Currants and gooseberries disappeared from American soil for many decades, and are only now making a comeback due to the fact that resistant white pines have evolved to take over the forests. Mostly. Ribes of all kinds are still illegal in Maine and several other states.

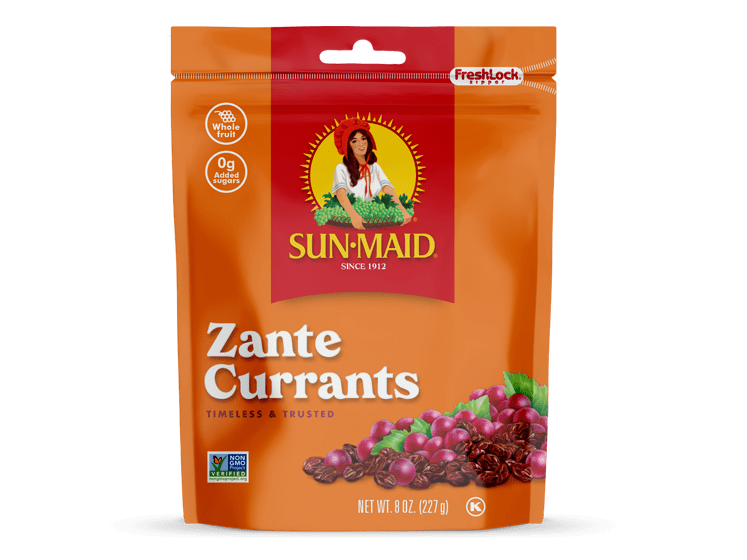
Getting back to the point, culinary “currants” are not currants at all. They are miniature grapes that dry into extra small raisins, which are then sold under names such as “Corinthian grapes,”Zante raisins,” and “Zante currants.”

ANOTHER HISTORICAL NOTE: Those names have their own history worth reading about. The grape varietal originated in Greece and became a significant export crop. The main shipping point was the city of Corinth, a major seaport in the country’s northeast. The actual farms were, and largely still are, located in the Greek southwest, on an island called Zakynthos f/k/a Zante. Hence the descriptive words Corinthian and Zante. The name “currants” gets used because the berries aren’t much bigger than actual currants.

Those miniature raisins are what the recipe refers to. We’ve never had a problem finding them in any large supermarket.

The supermarket brand works just fine

Getting at the “dough”

Research showed surprising consistency in the ingredients and amounts. The dough contains (by weight):

  • 3 parts flour;
  • 1½ parts butter, lard, or shortening (which you can stretch to 2 parts if you want);
  • 1 part sugar;
  • 1 part Zante currants (see above);
  • 1 part egg combined with dairy (buttermilk, soured milk, yogurt, whole milk, etc.); and
  • A surprising amount of baking powder, with some nutmeg and grated orange zest to tie it all together.

Yes, there are some bakers who view the orange zest as an option rather than a requirement, and I’m sure that most of them are perfectly nice people, but in this case they are wrong. You’ll see. ‘Nuff said.

Those proportions vary a bit from recipe to recipe, but never by enough to change the basic pattern in a fundamental way. It’s so consistent that I now believe old country Grandmas passed the recipe down more or less as follows: “Use these proportions and then vary according to taste.”

If it’s good enough for Grandma, it is good enough for you and me.

The method varies more than the ingredients. Our recipe adopts the most common, cut-in-the-butter approach. Almost as many recipes use a creaming method, and more than a few call for melted fat. We didn’t bother to try them all because the message is clear. Pick whatever method you want so long as it gives you a rollable dough.

Yes, that’s right: a dough. Pancake batter has much, much more liquid in it than what you use to make Welsh Currant Cookies. It really does feel and act like a cookie dough, albeit one with too much leavening to yield a normal cookie texture.

Roll to ¼” thick, and cut out rounds or other basic shapes

The dough holds its shape surprisingly well, but you want to stick with basic shapes nevertheless. We tried making a few animal shapes in addition to rounds, hearts, stars, and the like. The problems occurred halfway through the cooking process, when we had to flip each cookie/cake over. The animals inevitably lost their heads, tails, and/or legs. Feel free to try, but we will stick to the basics.

Cook on a skillet or griddle

Up to now we’ve had cookie technique in making the dough; cookie technique in the rolling; and more cookie technique in the cutting. From here on it looks much more like a pancake. Heat a skillet or griddle over a medium-low flame just like you would for pancakes, butter/oil it as you would for pancakes, and then cook the cut-outs as if they were miniature pancakes; i.e., until both sides are a light, golden brown. The exact timing will vary tremendously because of tiny factors ranging from the color and weight of your pan/griddle, to the thickness of your cookie and the fraction by which your flame leans toward medium- or low heat. You’ll be fine if you exercise a bit of touch and cooking experience, especially since (a) the ones that go too far will still taste great, and (b) a dusting of powdered sugar will cover all sins.

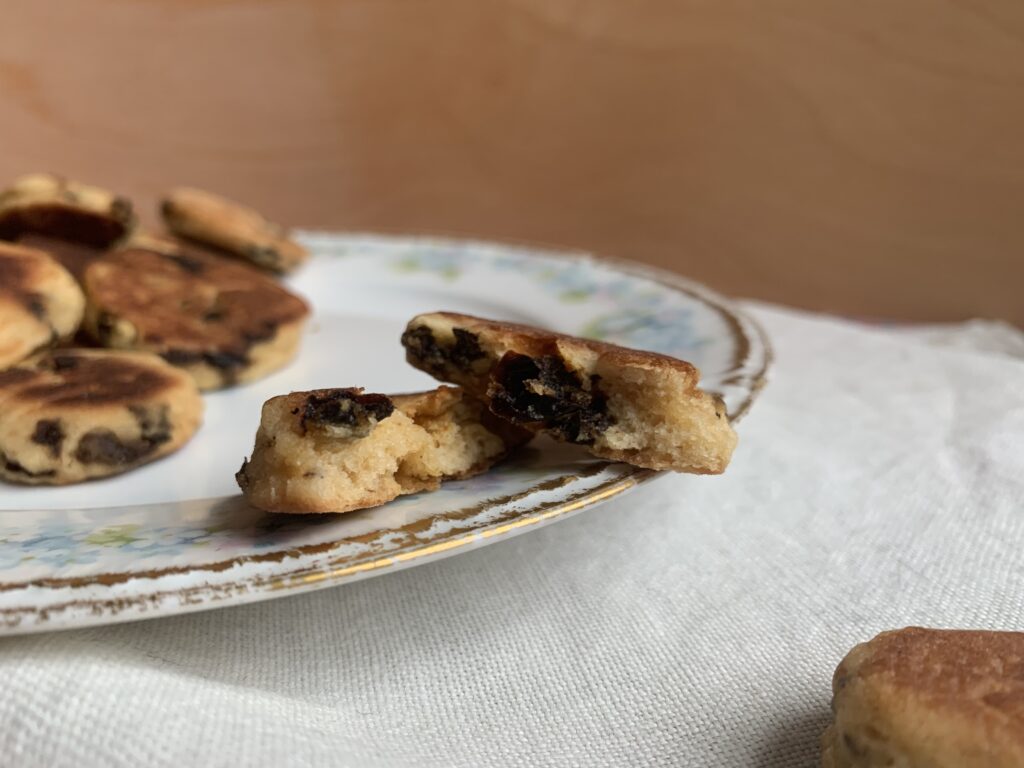
What you get will taste like a raisiny, not-too-sweet cookie with the texture of a pancake. Absolutely delicious, and incredibly moreish.

NOTE FROM KATE: Just like with pancakes and crepes, griddle cookies take its own bit of practice. A few of my observations are as follows:

  1. SIZE MATTERS: Both of the pan, and of the cookie. Every pan holds heat differently, and a larger and thicker cookie will require more time.
  2. CONTROL YOUR HEAT: A relative of the pie crust, the raw cookie will soften if left waiting in the hot kitchen for too long. Pop the sheet in the fridge between pan-batches in order to retain cookie shapes. As the cookies hit the pan, they will want to set, not burn. They will warm up and turn flaccid. For an easy and cooperative flip-over, use a tool the width of the cookie (offset spatula works well) and make sure its bottom is set. It will be darker than you think it should be.
  3. ENJOY THE PROCESS. This is a very zen, in-the-moment activity as compared to more precise baking. Imperfections happen. Eat them.
Note the inside texture. Just like a very firm pancake.

Shelf Life

Even moreish cookies end up having leftovers now that our nest is emptying out. We stored those leftovers in an open bowl, an airtight container on the counter, and an airtight container in the fridge. None were as good on Day 2 as they’d been on Day 1, but they didn’t actually go stale. They just went meh. And they stayed at that same level of meh day, after day, after day. More than that, meh turned right back into yum as soon as we refreshed the cookie/cakes on a pan/griddle or through a few seconds in the microwave.

LAB REPORT FROM KATE: Side-by-side testing has shown that a fresh-made and frozen cookie, when brought to room temperature, will taste just as good upon thawing as a fresh-made cookie cooled to room temperature. Furthermore, these cookies don’t go stale as much as they simply dry out. Older ones are just fine with coffee or tea as-is, or you can revive them with a judicious 5-15 second microwave burst.

So the moral of the story is this: Welsh Currant Cookies keep like pancakes. They change very quickly, but they also store extremely well, especially when frozen, and will taste basically as good as new once you get them warm again.

Conclusion

How good is this “cookie?” We have a local diner near our house called Pamela’s (one of a Pittsburgh chain). They are famous for their hotcakes. The owners were even invited to the White House to make brunch for the first family! They are also good people we like enough to treat as our go-to place for a diner breakfast.

I’ve already stopped by with samples and a recipe, and will almost be surprised if they don’t leap at the chance to add Welsh Currant Cakes to the menu after doing some testing of their own. So my bottom line answer is this. They are good enough that some of you readers will bless this article for a great many years to come, and your heirs for that much longer.

Enjoy!

GRIBOCHKY – Eastern European Molded Mushroom Cookies

Spectacular eastern European mushroom cookies made with a stove top mold

Kate and I are avid foragers who spend a lot of time in the woods hunting for local chanterelles, morels, boletes, maitake, and other species. We do okay.

Every September the local mushroom club hosts a large foray that features a gigantic set of potluck meals supplied by the different members. What did we contribute for 2022? What do you think?

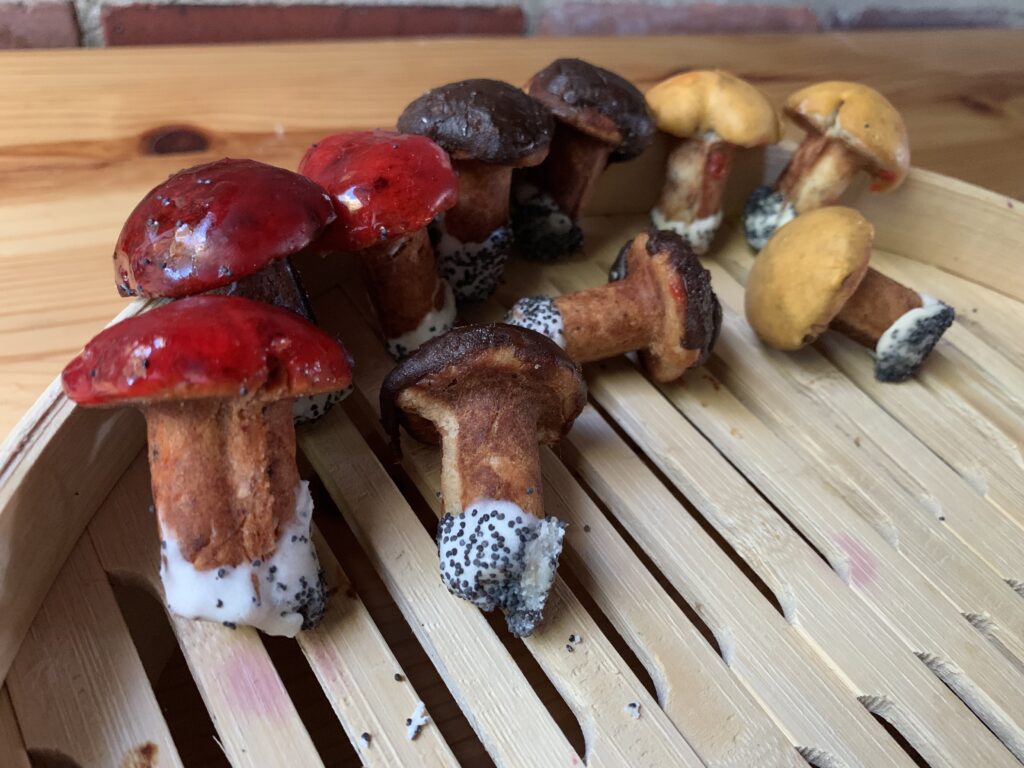
LEFT: poppy seed mushrooms. UPPER LEFT: scottish shortbread leaves. LEFT CENTER: caramel, raspberry, and butterscotch gribochky. CENTER: faux button mushroom caps. BOTTOM: roll and cut mushrooms. RIGHT: laskonky (walnut meringue) mushroom caps. UPPER RIGHT: The insane display made with structural gingerbread trees, poured sugar backdrop, Marshmallo Crispy treat landscape and gingerbread crumb dirt, and two large meringue Lepiotas (or Amanitas, as you wish). NOTE FROM KATE: Oh, definitely Lepiotas!

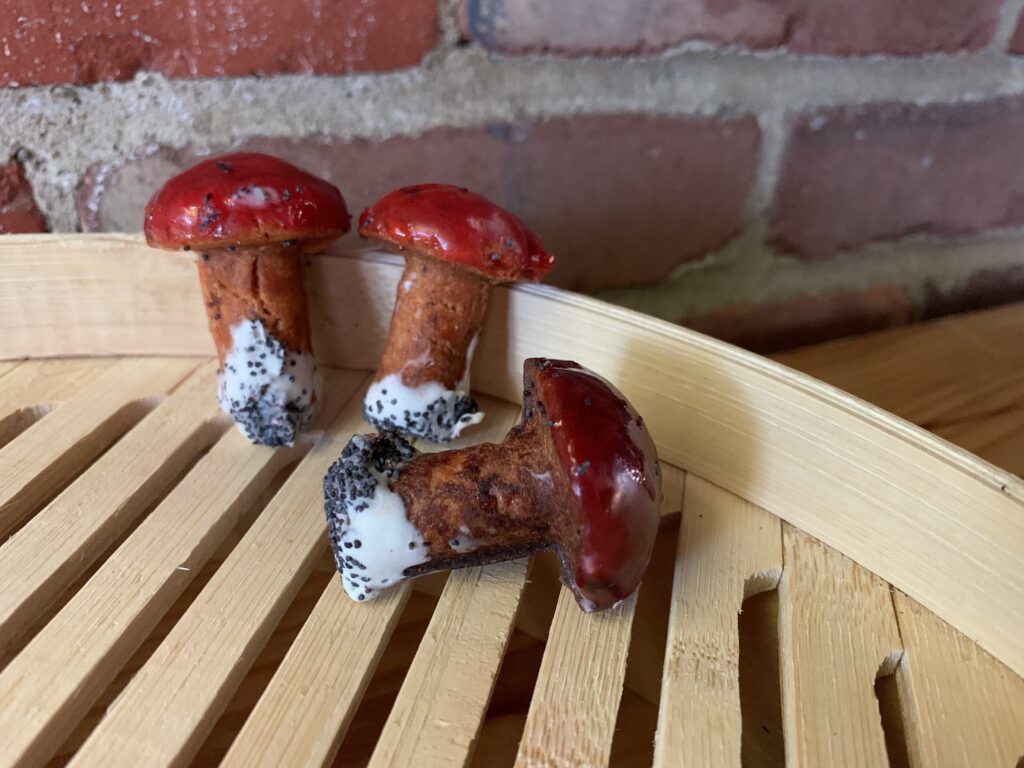
This article covers our experiments with Gribochky, those colorful little mushroom gems you can see scattered around the display and piled on the bright blue plate. Time permitting, we’ll do another on the other ways to create faux-mushroom illusion cookies. It takes a little fussing, but they’re great fun for baker and eater alike once you get them finished.

As always, skip to the bottom if you are only here for the recipe

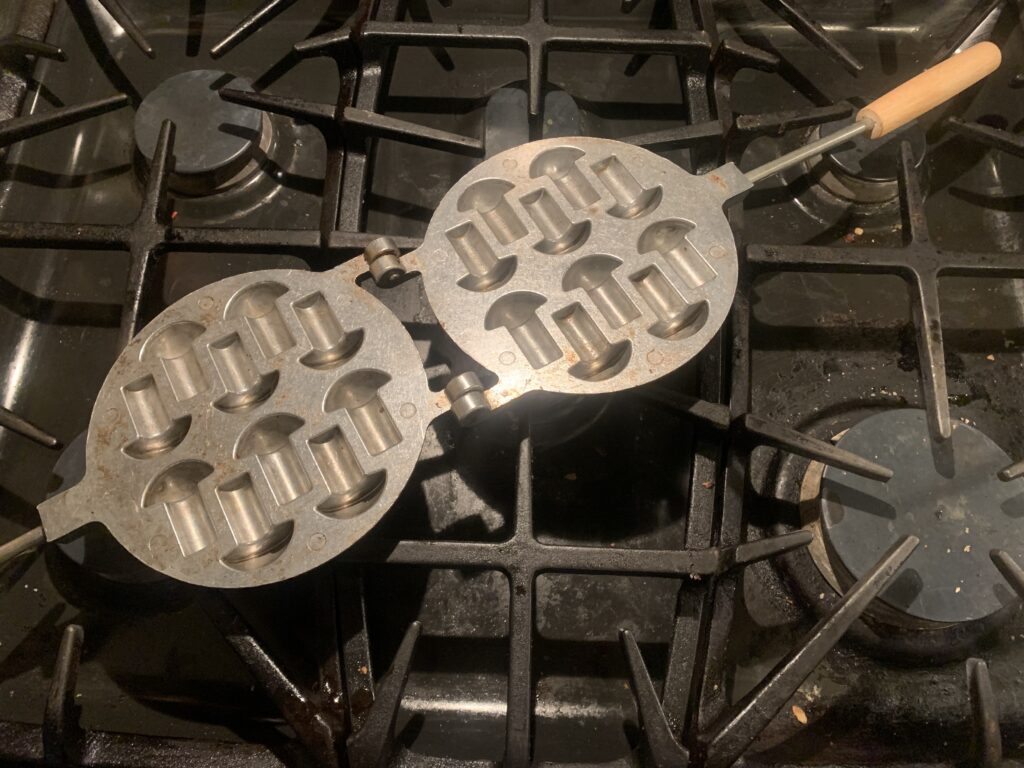
We purchased this specialty mold online. It’s the same company that made our walnut (oreshki) molds
Put a small ball of dough in each hole, close, and then cook on the stovetop until done. Both sides of course.

Gribochky is a slavic word that means “mushrooms”, just as the very similar Oreshki means “nuts.” Both are made from a dough so soft that it could even be called a super-thick batter, and both use a unique stovetop mold as shown above. But where Oreshki come out as stamped halves waiting to be filled with a rich and milky caramel, Gribochky come out as solid, 3-dimensional pieces waiting to be decorated. That’s the point when they turn special.

Amp Up The Flavor. We know at least one excellent baker who tried to make Gribochky and came away disappointed. We can’t blame her. The online recipes, which are very similar, produce a cookie so plain that it isn’t worth eating. Boooooring. We solved that by treating the base recipe as a platform rather than an end point. It worked like a charm.

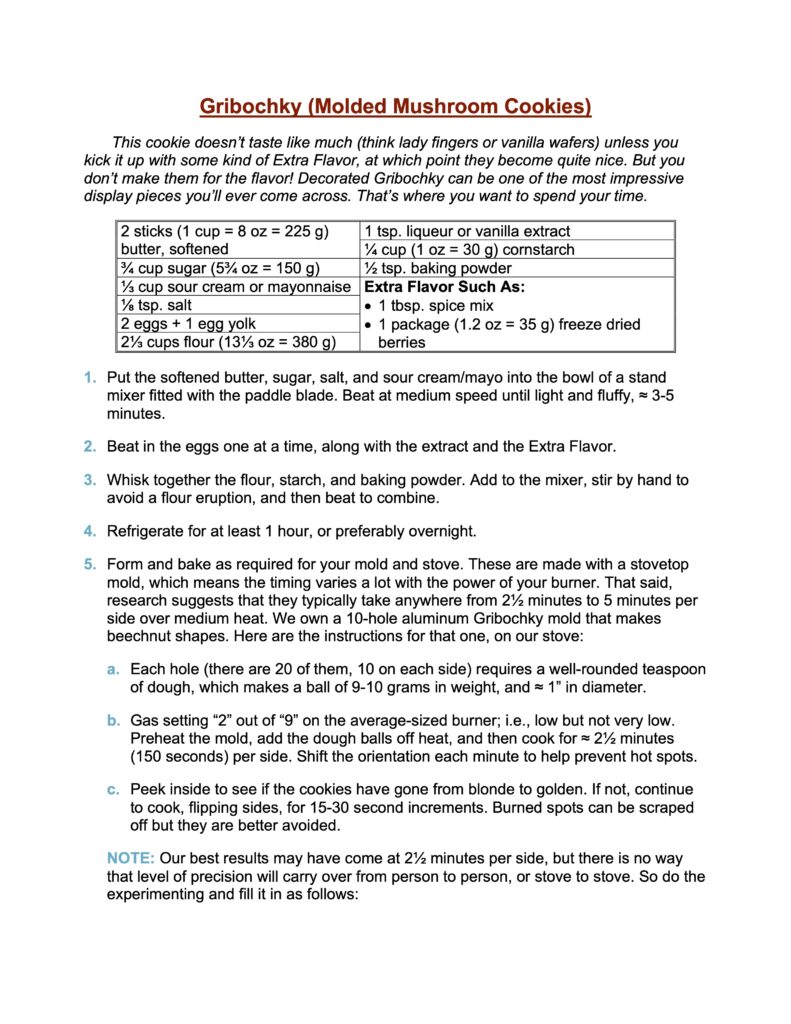
We made two versions for the foray and both came out great. The first had a 1.2 oz package of freeze dried raspberries (crushed into fine dust), with an extra tablespoon or two of butter/other fat for moisture. Delicious, and a perfect way to mimic the sour tang of candy apple boletes that grow under out local oaks. The second included a tablespoon of our Pardubice honey-gingerbread spice mix. Just as good in a totally different way. And it was obvious that any comparable ‘fix’ would have worked just as well. From “yawwwwwn” to “how interesting…” in one easy step! And it’s a step you can take in any direction that suits the spices in your cabinet, the extracts in your drawer, the freeze dried fruit in your local market, and the whims in your heart.

Trust In Tradition. Many will be surprised to see sour cream or mayonnaise listed as an ingredient. Don’t be. It’s quite common in Eastern European recipes, adds tenderness, and provides a certain complicated je ne sais quoi. I may well try some Greek yogurt for our next batch.

Shorten The Flour By A Lot. Those who know us may be surprised to see such a healthy amount of cornstarch. The reason comes down to simple physics. Gribochky would be amazingly thick if treated as a regular cookie, and the gluten from pure flour would make them prohibitively tough. The starch backs that down into plain old crunchy. Yes, we usually prefer to use rice, tapioca, or potato starch. They avoid the danger of a pasty aftertaste, which can happen when you use cornstarch in flat cookies because it breaks down at a higher temperature than the others. The internal temperature of Gribochky gets high enough to remove that fear. Use whatever starch is cheap and convenient.

Cooking Time Varies. The stove top time varies with burner size, flame height, how often you flip, how often you turn, the underlying color of the dough, and probably the moods of your local household gremlin. Heck, sometimes you want a better cooked specimen, and sometimes a blonder one, so the target changes too. The only universal guidelines I can provide are these:

  • We never got the cookies done in less than 4-5 minutes (2-2½ minutes per side), and usually wanted to add a little bit of time after peeking inside to check for doneness.
  • It helps to make regular turns to change the angle, which avoids hot spots caused by an uneven flame.
  • It also helps to flip them over as they cook in order to to equalize the cooking on both sides. Look closely at the photos and you’ll see one batch that looks a little odd because I cooked them first on Side A, and then on Side B. The first side cooked more, leaving a distinct stripe. No one will notice a thing like that in the decorated cookies unless you point it out, but we knew, and so it nettled.
  • NOTE FROM KATE: I found that preheating the mold gets too heat-dangerous and fussy for me. I made as many balls as we had holes to fill, and rolled them into a conical shape. I placed the wide part of the cone into the cap of the mold in each cavity (both sides, please!) The mold was warm but not too hot, so I could use my fingers to push the dough all the way in. I closed the mold and popped it over the flame. Time it, flip it, go again, and repeat until done. The lack of preheating doesn’t hurt the cookie (you can vary the time or the flame height) and it avoids “casualties.” Also, you don’t burn your fingertips!

DECORATIONS; a/k/a TURNING ON THE MAGIC

There are four parts you can pay attention to on each cookie: (1) the cap, (2) the base, (3) the stem, and (4) the pore/gill layer. The first two matter most, but you can certainly gild the lily by playing with #’s 3 and 4 as well.

Decorating The Caps: We’ve tested two basic techniques for the cap coating. Both worked, and playing with either approach yields a vast number of options. It’s a no lose situation.

The first method centers on melted chocolate. Dark, milk, white, food-dyed-white, and even commercial candy melts – each and every one of them will work. We like to thin them out with a bit of cream, but your mileage may vary.

The best approach is to hold each piece by the stem, dip it into the coating at an angle, and then roll the cookie to cover the entire surface of the cap. Remove, let the excess drip off, and then set them cap up in a place where they can dry without flattening one part of your coating. Egg cartons worked great, with ice cube trays a very close second.

Dark chocolate, textured by accident because I melted it without any cream, cocoa butter, or other fat to make it thinner and smoother. I love the contrast created by painting the “pores” bright yellow.

We also tested chocolate chips, but they didn’t work nearly as well. Chips are carefully designed to not melt, and overcoming that is like fighting the tide. First you must add cream to help them melt evenly. Then you find that they harden, curdle, and/or to harden in inconvenient ways despite the cream. And then they’ll suddenly discolor if you try to keep them warm on the stove top. I can’t recommend chips except for something odd like butterscotch chips, which do double duty as a coating and a unique flavor addition.

NOTE FROM KATE: instead of cream, I prefer using cocoa butter melts. They help your chips or chocolate melt, loosening the mix and helping with dipping properties, but they also yield in a nice and solid surface with none of the tackiness that cream can cause. We winged it with the chips here. For exact instructions, kindly refer to our “Chocolate coverture” recipes associated with chocolate-dipped marshmallow treats.

Butterscotch chips for the cap. It was a PITA but we made it work! White chocolate base, with poppy seed dirt. BTW… did you notice the stripe on the left hand cookie? That’s the one where I forgot to flip them as I cooked.
Butterscotch chips cooked into a dark caramel. Still usable and edible, but it came at the cost of frayed tempers and a few choice words that cannot be shared in public. They looked pretty good anyway, and could have been great if we had enough time and energy to paint the underside of the cap.

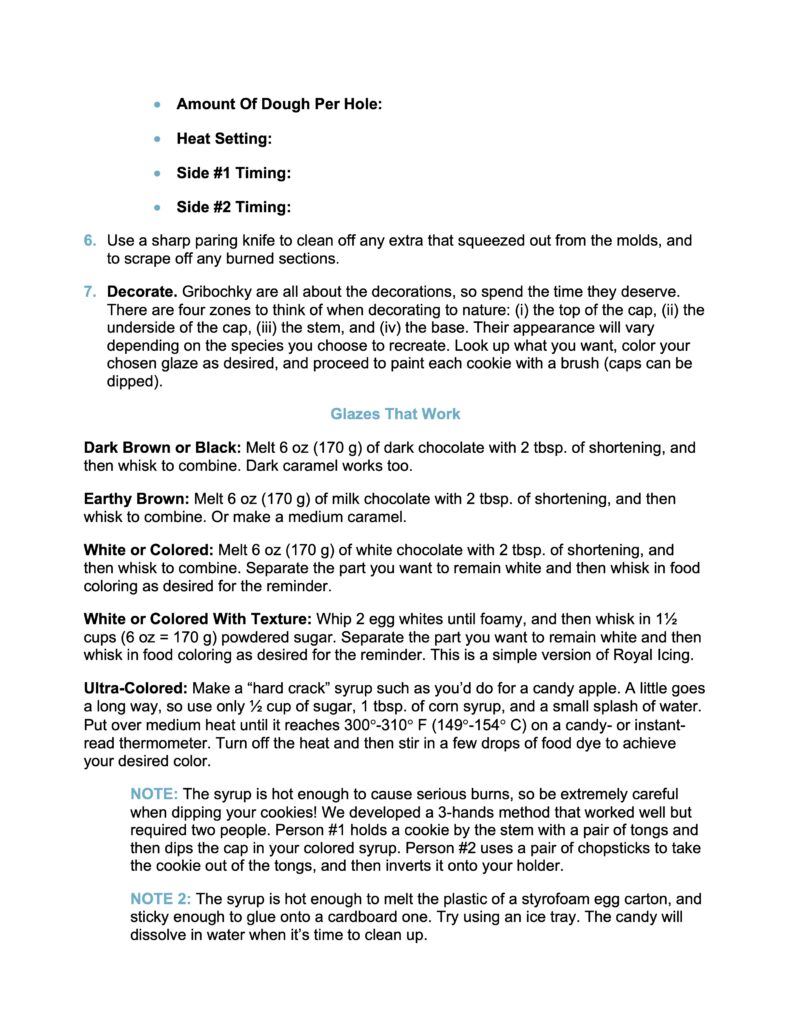
The other cap technique uses molten sugar. The prettiest of them all is a candy apple coating made from “hard crack” sugar syrup mixed with some bright red food dye. Your target is 300°-310° F (149°-154° C). Caramel works well for light and dark browns.

The problem here comes down to safety. 310° sugar syrup can burn you badly enough to leave obvious scars. No bueno. We came up with a workaround, but it requires three hands. Hand #1 steadies the pot. Hand #2 holds the cookie stem in a pair of tongs, dips it into the hot syrup, rolls it around to get even coverage, and then lets the excess drip back into the pot. Hand #3 then takes the cookie out of the tongs with a pair of chopsticks, inverts it, and lays it out in an ice cube tray (cap up) to dry. NOTE: The sugar is so hot and so sticky that it will melt a styrofoam egg carton, and pull off shreds of a cardboard one. Yes, the cardboard easily peels away from the cooled cookie, but better to avoid the issue in the first place. NOTE FROM KATE: peel cardboard bits off the sugar with fingers, then moisten a small brush and work the surface over a bit. When in doubt, remember that you are making the cookies healthier by incorporating an extra microdose of fiber!

The upside? Behold!

Candy Apple Gribochky
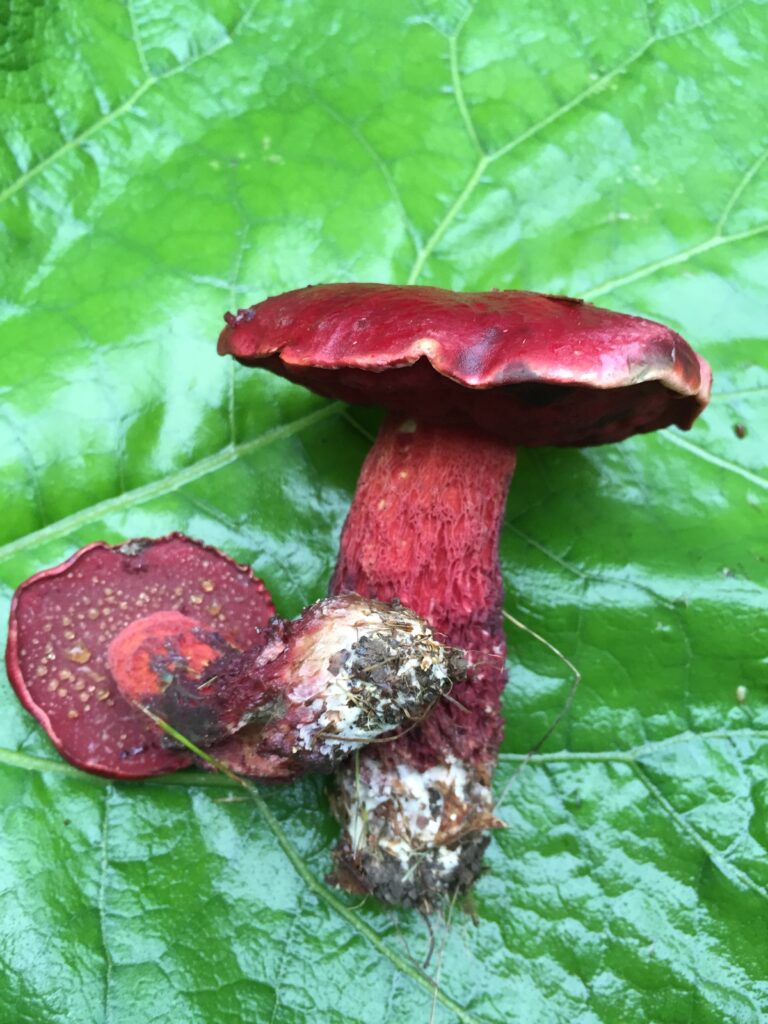
Gotcha! These aren’t cookies. They are the real life Candy Apple Bolete, Exsudoporus frostii. Nature’s pretty cool, isn’t it?

Decorating the Base: This step is easier because there aren’t many options, all of them are easy, and the shape can be handled with fingers alone. Did you know that mushrooms are actually the fruit of the fungus and not the main entity? The apple of the tree? ‘Struth! The main body is called “mycelium” and will be spread in a mat over a relatively vast area in and around the soil or the nearby wood. This is what you’re seeing at the bottom of mushrooms poked fresh out of the ground.

Mycelium is almost always some shade of white or pale yellow, and is easy to replicate with white chocolate or a tinted candy melt. Add poppy seeds or cookie crumbs for “dirt” and presto! Your illusion is complete on both top and bottom.

The Underside Of The Cap: Mushrooms with this shape will have either gills or pores on the underside of the cap. Adding this layer is a special touch that true mushroom geeks will appreciate, but it’s very hard to see unless you make it a bright, contrasting color like the yellow-on-dark specimen up above.

Gills can be any color of the rainbow, but most people will want to make them white, pink, or cocoa brown to imitate the best known species. Lilac will make the mushroom hunters happy. Mushroom pores will be white, yellow, pink, or red at this spot in the vast majority of cases, sometimes with blue or brown bruising on the surface.

Decorating the Stem. Stem features, ironically enough, are often the most useful part of a mushroom for field identification. For Gribochky? They’re an afterthought, because the features are impossibly subtle to duplicate. The only time it’s worth an effort is something along the lines of painting/dipping the stem to make it white, and that only makes sense when you’re trying to model an Amanita or Agaricus (see below). OTOH, adding berries or food dye to the actual dough can be a fantastic trick for species like the red Candy Apple Boletes. That, and cooking the Gribochky to a lighter or darker shade of brown, is almost always enough to complete a high quality illusion.

A Few Common Mushrooms To Mimic.

The so-called “toadstools” with white spots on top are in the genus Amanita. These can have caps ranging from bone white through basically any color, have white gills, almost always have a white stem with a ring of extra tissue about 2/3 of the way up.

Supermarket button mushrooms are in the genus Agaricus. They have white caps with white stems, and gills that start off pink before aging into brown. These will also have a ring on the stipe. Oh! And the answer is “yes.” Store bought mushrooms are all the same species, Agaricus bisporus. The little buttons are babies, cremini are teenagers, and portabellas are full sized grownups.

White chocolate “agaricus” with chocolate “gills.” This was our very first effort, and the illusion is as poor as any version you’ll ever made. And it doesn’t exactly suck even so, does it? Gribochky are show stoppers, plain and simple.

The pored mushrooms, a/k/a boletes, are my personal specialty and it pains me intensely to mention some but not others. You can find a list of every North American species at The Bolete Filter, written by yours truly under a different hat. The true “porcini,” a/k/a Boletus edulis and its close cousins, will have a yellow, orange, light red, or light brown cap with a white or yellow pore surface.

CONCLUSION

Gribochky are a perfectly acceptable eating cookie once you kick up the flavor with berries or spices, in the same way as Vanilla Snaps and the like, but their real glory lies in the illusion. There are other techniques one can use to create the illusion of a mushroom out of different kinds of cookies. They work too, particularly as part of a scene. But none allow for this level of absurd creativity, let alone the chance to customize things toward a copy of real life species. Fun, fun, fun!

Yes, the cookies require a special mold, and can definitely qualify as “fussy” on the decorations side if you try to copy real life. But the results can be shockingly beautiful, especially if you take the relatively easy step of dipping the bottom to mimic the mycelium, and then adding in poppy seeds or cookie crumbs to mimic the dirt. They start at “Cool!” and work their way up to “Spectacular.”

If pure, visual fun is your thing – or mushrooms! – this is a cookie that needs to be in your repertoire.

Raspberry candy apple, dark caramel-spice, and butterscotch-spice Gribochky

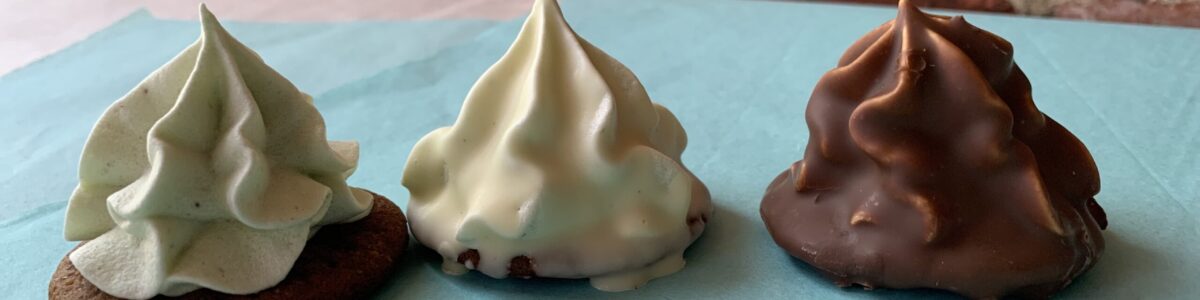
CHOCOLATE COVERED MARSHMALLOW TREATS – Part 1, An Overview

Part 1 of a 5-part series about those chocolate coated treats you adored as a child. This is the overview.

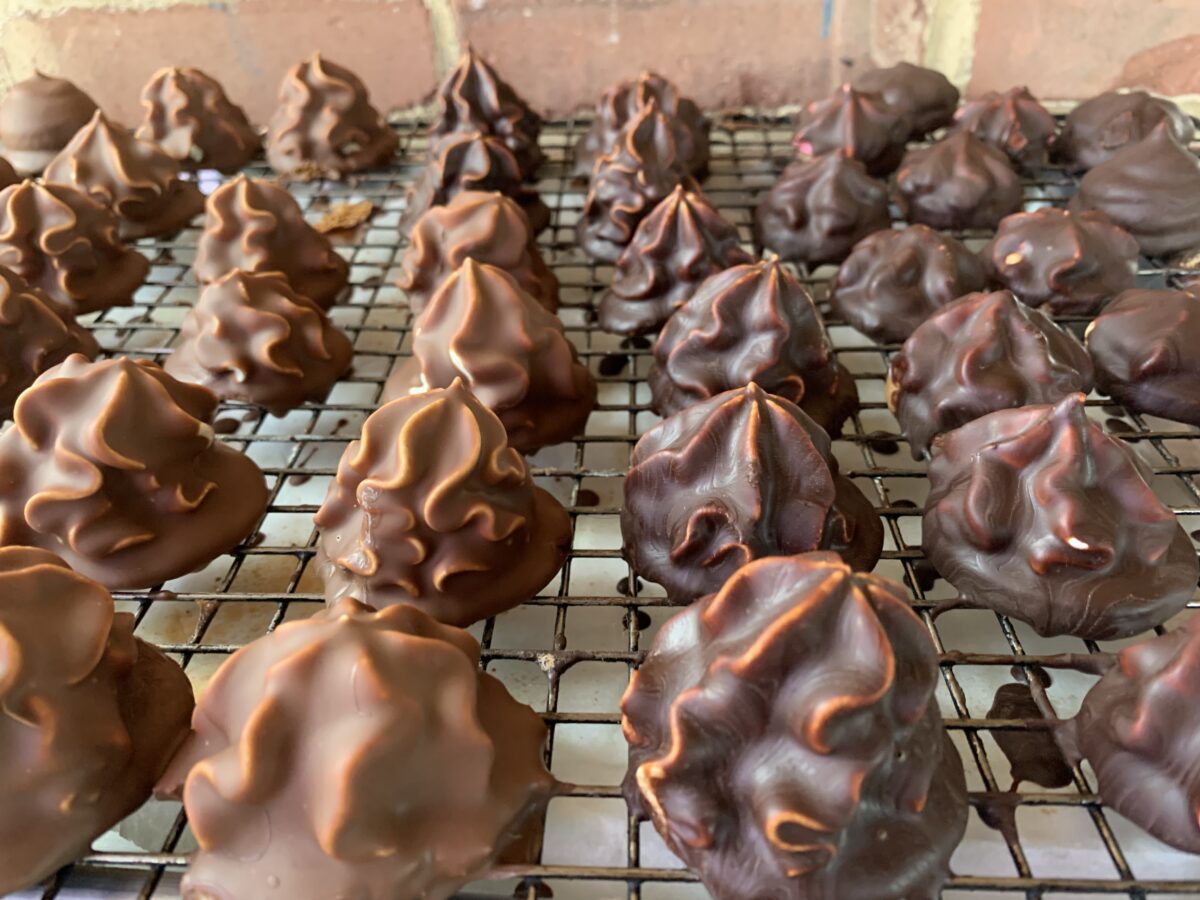
This is by far the most challenging recipe we’ve undertaken even though the basic instructions for all of the 73,000 variations could not be simpler:

  1. Make a simple, basic cookie base.
  2. Make a marshmallow filling and pipe it on top of the base.
  3. Cover with a thin coat of snappy chocolate.

Easy, right?

Well, maybe the cookie part… until you account for the infinite variations and my obsessive need to test each and every one. But that’s just volume of work, not difficulty, and I can sum it up quickly. (A) any plain cookie of the proper size will work, and we took great delight in playing around. It’s almost shocking at how big a difference you can create by shifting to a cardamom, cinnamon, or gingerbread flavored base in lieu of the classic Vanilla or Graham Wafer. (2) Straightforward shortbreads like your favorite butter cookie will also work. But (3) It is vital to keep the intensity under control, so the base to be a partner in the enterprise, and not a dominator. If you’re starting from a standard spice cookie (a/k/a “snap”), cut the amount of featured flavor in half.

The marshmallow fillings posed a bigger problem. We are bakers, not candy makers, which created a learning curve issue before we could start narrowing down toward the perfect version. I discovered there are two basic approaches to making a homemade marshmallow: the U.S. gelatin-only version, and the European Italian-meringue version. Both recipes work… if you want to make a marshmallow to eat out of hand. They emphatically do not work when you’re after an ultra-light, not too sweet marshmallow filling!

The solution came down to food chemistry in action, as discussed in this online grade school experiment. All marshmallows have a certain proportion of corn syrup (glucose) in addition to regular sugar (sucrose). They must, because at these concentrations you need to combine the two sweeteners in order to prevent crystallization. If you do the experiment, you’ll learn that a higher percentage of corn syrup yields a fluffier but less sweet product. Ding ding! That was exactly what I wanted! The two marshmallow fillings have different proportions, but raising the level of glucose pretty much solved the problem. More than solved. Taste testers actually stopped to ask, “how did you get this texture?”

Then came the third kind of marshmallow… but that’s the tale of Part 5.

The chocolate coatings drove poor Kate nigh unto madness. [NOTE FROM KATE: Ahem! “To a level of high frustration.” Husbands.] Here’s the problem in a nutshell: you’re trying to duplicate cheap, commercial, pseudo-chocolate shells using quality products in a homemade environment. So how the devil could you create that thin, snappy shell at room temperature without all the apparatus of industry?

Back to the food chemistry research I went, where I discovered that the answer lies in the kind of fat you use to thin out the chocolate. Think of it this way. You’re really trying to create a version of the “magic shell” liquid used to coat ice cream. That is nothing more than melted chocolate thinned with coconut oil. It works because the cold ice cream hardens the oil to create a shell. Leave your finger on that shell, and the spot you’re touching will turn soft and gooey because the heat of your body is higher than the melting point of coconut oil.

What we needed for Chocolate Marshmallow treats was a fat that would harden/soften at body temperature rather than room temperature. Industry uses palm oil, which does just that and is also cheap. But palm oil is evil. The combination of slave labor and environmental havoc behind that industry means that we won’t have anything to do with it. Palm oil was out. Cocoa butter was in.

For what it’s worth, our taste runs toward a classic dark chocolate coating, but white and milk versions will also work, and sprinkles, sparkles, or stripes, ground nuts, espresso powder, & etc. could be used to guild the lily. Oh yes! You can also flavor the chocolate with a touch of coffee or liqueur.

Permutations Multiplied By Possibilities; And Again; and Again; and Again.

Look at the options we had at this point in time. Start with cookie bases limited only by your imagination; multiply by two marshmallow fillings that can be piped in any shape; multiply again by literally any extract buried away in your spice cabinet; multiply a fourth time all the different forms of chocolate; multiply a final time for the ways you can flavor that chocolate; and then consider all the ways you could decorate those final products.

You could fill an entire bakery with that many variations, and still have ones you left out. Macarons 2.0, done and ready to publish. Right? Not exactly. It turns out there is a third kind of marshmallow, which will blow your mind unless you grew up in Eastern Europe.

Zefir, named after the gentle southern wind,is a marshmallow that starts from a base of concentrated fruit. But that doesn’t do it justice. They don’t taste of “fruit” so much as FRUIT!!!! The level of pure flavor is almost hard to believe, especially when you factor in the distinctly sour tang that no extract could even begin to imitate. It’s like nothing else we’ve ever come across.

Zefir are usually sold on their own, with neither a cookie base nor a chocolate coating. But both variations exist on store shelves in every country from Poland and the Czech Republic eastward into Central Asia, and no study centered on marshmallow fillings would be complete without at least mentioning Zefir as a potential variation.

Alas, but Zefir are also a maddening puzzle we still haven’t cracked! The basic method could be the simplest one of all, and it has worked spectacularly for both sour apple and raspberry versions. But it’s also failed completely with some other fruits, and we’ve yet to understand why. So part five of this series is a work in progress. We can promise results for the apple and raspberry versions, but things get inconsistent after that.

CONCLUSION

Macarons are a very elegant, grownup treat. Chocolate Marshmallow Treats make your inner child jump up and down like a vibrating six year old. But the two cookies share something in common: they can be made in endless, high-end variations that deserve to be tucked into elegant little boxes for a nifty markup. If you’re a bakery owner, take me at my word and do a few “Why not?” experiments of your own. It could be the start a whole new trend, and it’s as simple as 1, 2, 3:

  1. Cookie Base, flavored with anything you want;
  2. Marshmallow Filling, flavored with anything you want; and
  3. Chocolate coating, flavored with anything you want, and decorated as you desire.

It took us forever to get each of those pieces capital-R Right, but none of them is hard on its own once you have the recipe. So don’t be daunted! People across the world will bow at your feet once you master the simple tricks that let you make these for gifts, parties, and sales. Wait a sec… Let me lodge the protest on your behalf:

“Across the world?” Come on Scott. Why the exaggeration? We all know this treat from childhood. It’s hardly the sort of thing that would make people all over the world go wild!

Think not? Let me leave you with this:

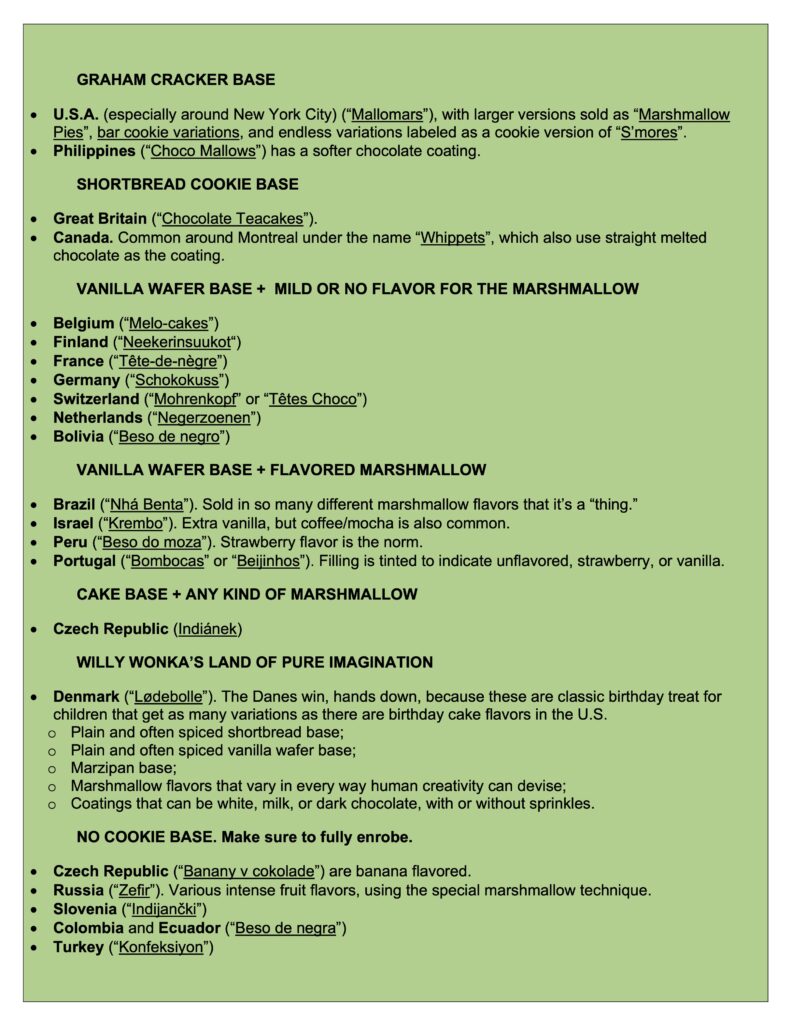
A LIST OF INTERNATIONAL VERSIONS, VARIATIONS, AND NAMES (drawn from perhaps the best Wikipedia article ever)

THE CHOCOLATE MARSHMALLOW TREATS SERIES

Part 1, The Chocolate Marshmallow Treat Overview

Part 2, The Cookie Base Options

Part 3, The Marshmallow Filling Options

Part 4, The Chocolate Coating and Finishing Options

Part 5, Experiments With Fruit-Based Zefir Marshmallows

CHOCOLATE COVERED MARSHMALLOW TREATS – Part 2, The Cookie Base Options

Part 2 of a 5-part series about those chocolate coated treats you adored as a child. This examines the cookie base.

This should be a short post because it has a relatively simple, if far-reaching, message. Most of us grew up with a single version of Chocolate Marshmallow Treats. That’s the one that will feel “right,” while everything else is an experiment. But that version is not “right” to the rest of the world. There are almost infinite ways to customize these cookies, and a great many of those variations have been popular in some part of the world even if they were unknown in yours. So when you look at the different options for the cookie base, start by considering the options and possibilities.

As always, skip to the bottom if you are only here for the recipe

Chocolate Marshmallow Treats can build on almost any kind of cookie base, and shifting that part up will completely change the effect for the loved ones who are privileged to share your bounty. We really did test this, and the distinctions aren’t exactly subtle. Indeed, the best advice we can give is this: keep the amount of flavor in your cookie base down to a hint rather than a dominant feature. You want the cookie part to mesh with the marshmallow and the chocolate, not fight them for dominance.

The recipes we tested include:

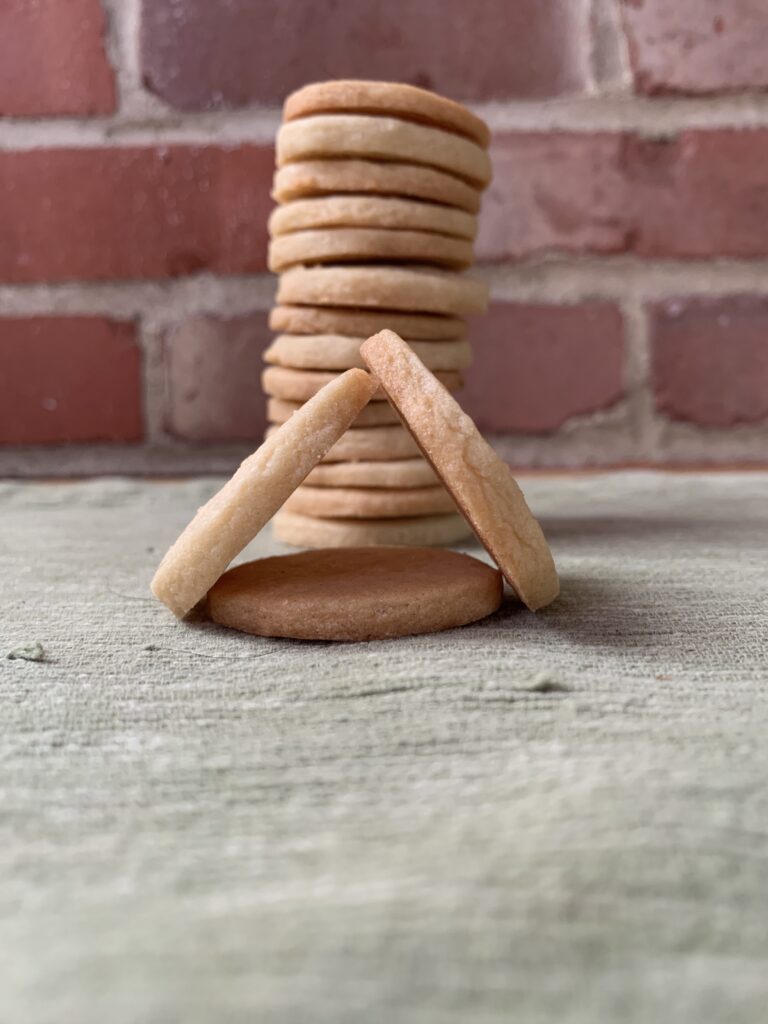
  • Commercial Vanilla “Wafers” – on the smaller side, but absolutely delicious as a plain, almost invisible foundation. The marshmallow filling will soften them in the beginning, but time will help them to crisp back up a little.
Homemade Vanilla Snaps
  • Homemade Vanilla Snaps – Step up your game from “plain” to “elegant” with a homemade version.
  • Graham Cracker Snaps – I grew up with MallomarsTM as my personal norm. Those come with a graham cracker base that evokes a S’more. See below for an elegant homemade version that’s worth eating out of hand as well as inside a cookie.
  • Spice Snaps – See the master recipe below, or use your personal favorite with about half as much spice as you’d use for a free standing cookie. Full-flavored snaps aren’t partners so much as pushy, wannabe overlords.
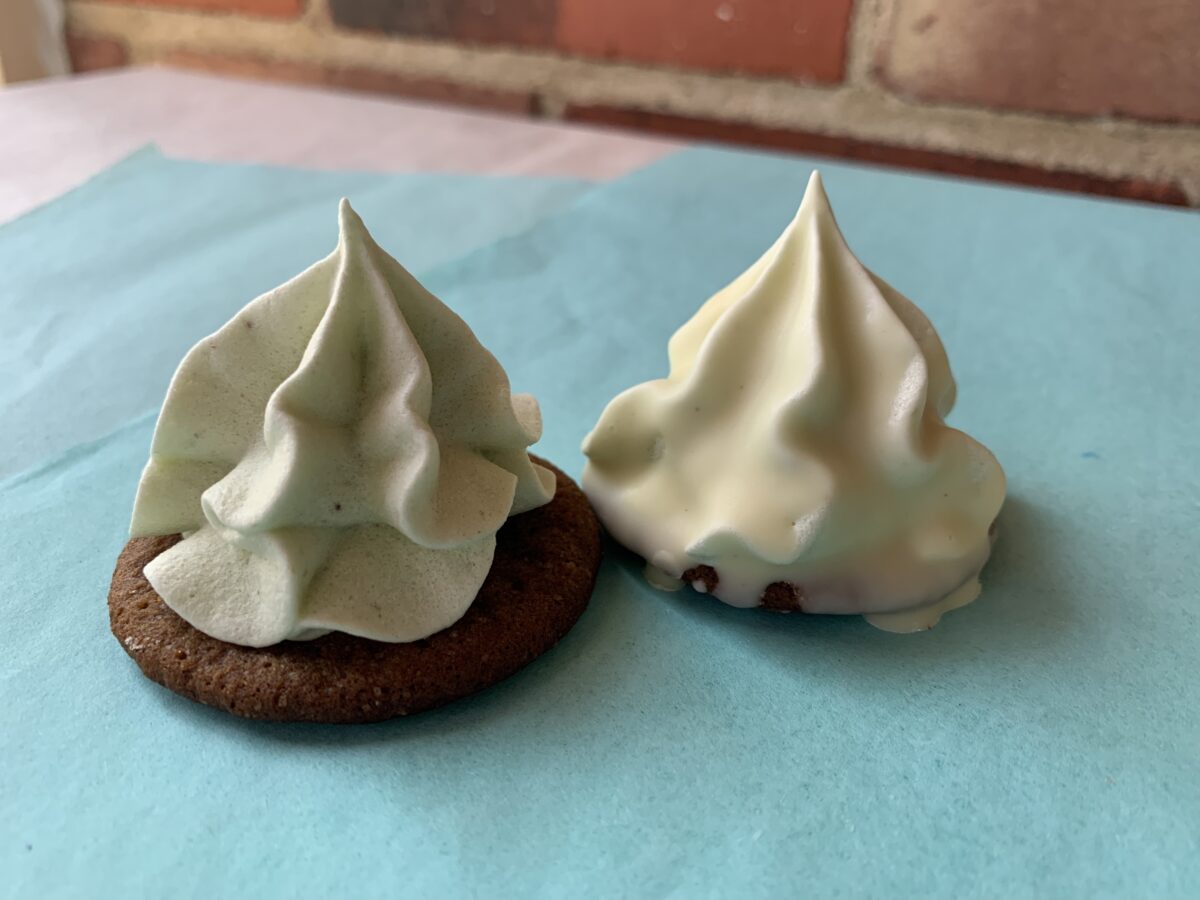
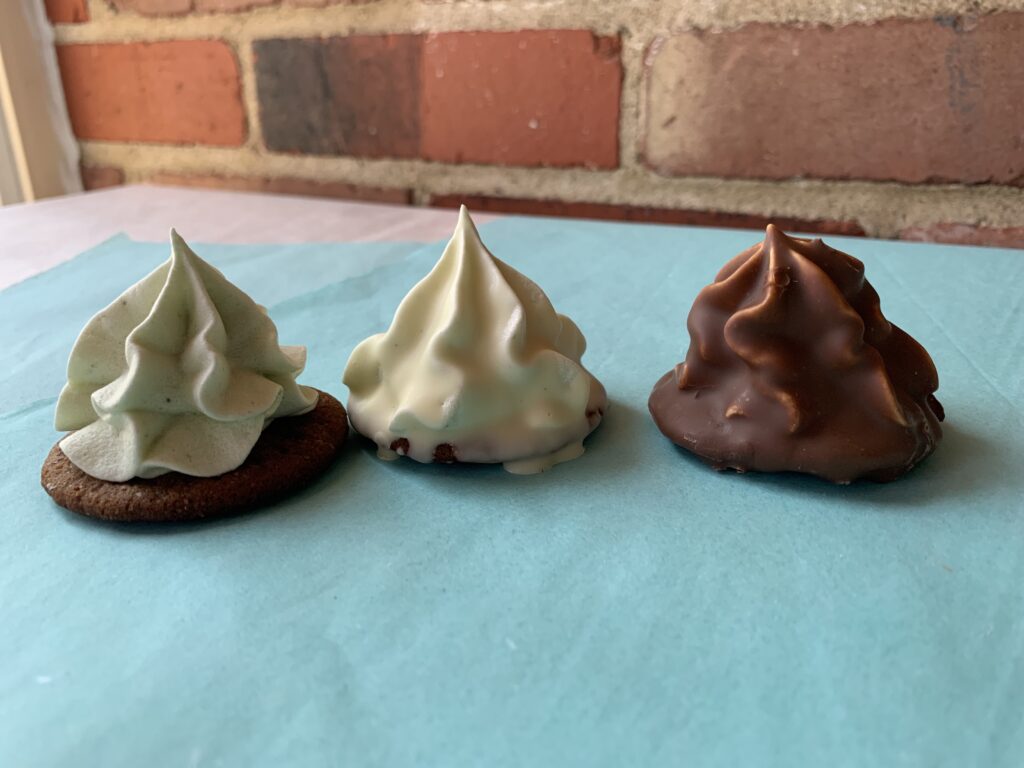
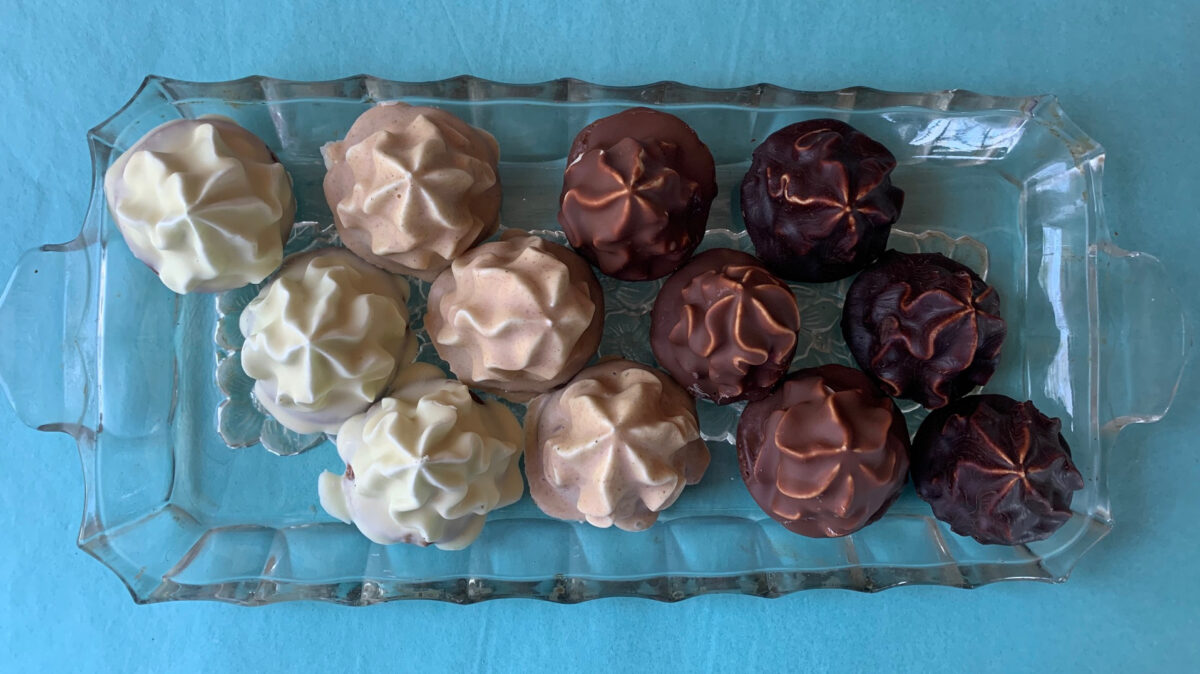
Cocoa Spice Snaps with marshmallow only, white chocolate, and dark chocolate
  • Shortbread Wafers (Commercial or Homemade) – You just can’t lose when buttery goodness comes to town.
  • Miniature Cake Rounds (No Recipe Provided) – This is as common as can be among the commercial versions, but you won’t see a recipe here. We do cookies, thank you very much, not cake. (I might also be just about done with experimenting by now…)
  • No Cookie Base – Omit the base and you get a candy rather than a cookie. Same issue as the cake base. Besides, I have zero doubt that anyone who reads this will be able to figure this one out on their own.
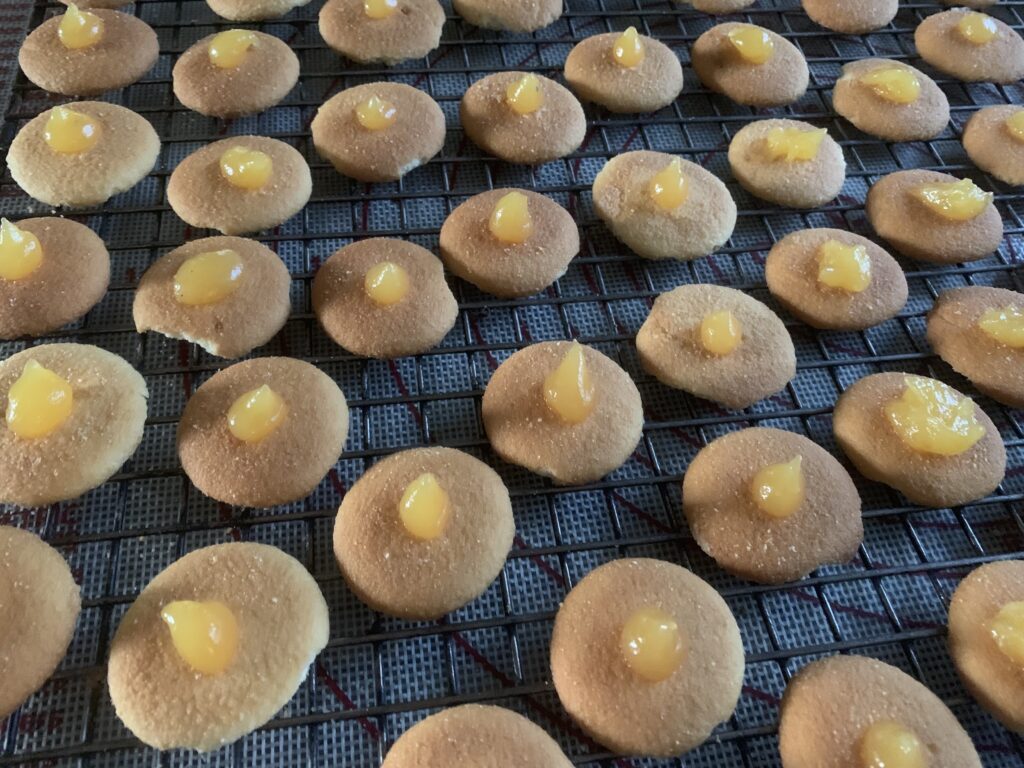
Want to play? Lemon curd dots to go inside the marshmallow!

CONCLUSION

That covers it folks. Expand out from here. But please pause for a moment and look at how we’re already multiplying out! So many choices for just the cookie part. And believe me, there are just as many options when it comes to the marshmallow filling.

THE CHOCOLATE MARSHMALLOW TREATS SERIES

Part 1, The Chocolate Marshmallow Treat Overview

Part 2, The Cookie Base Options

Part 3, The Marshmallow Filling Options

Part 4, The Chocolate Coating and Finishing Options

Part 5, The Strange New World of Fruit-Based Zefir Marshmallows

NOTE: You can also use the Vanilla Snap/Wafer recipe as your base. Cut the vanilla in half and then add in the Spice Option.

CHOCOLATE COVERED MARSHMALLOW TREATS – Part 4, The Sticky Problem of Chocolate Dip

Today you get a big, fat note from Kate, because I’ve somehow become the family chocolate dipper.

Oh, we’ve all tried it, and we all have our tricks. I’m the one who gets to share the final results with you, though, because I strongly believe in the Power of Chocolate. It is, after all, its own separate food group!

[NOTE FROM SCOTT: It also has magic powers. I know this from long experience with both a wife and two daughters. “Just stand back and throw some chocolate at her” isn’t a joke, it’s a survival mechanism. The masculine life expectancy in America soared in the late 1890’s and early 1900’s. Hershey’s went into business in 1894. Coincidence? You lay your bets, and I’ll lay mine.]

As always, you can skip to the bottom if you’re only here for the recipe

We’ve been dipping various cookies in chocolate for years, as evidenced by the recipes in Volume I of the Heritage Cookies Cookbook. A careful observer may notice that the quality of our chocolate dip in some of those photos isn’t nearly as smooth and shiny as commercially made products. There is a reason for that. First, we are home bakers, not chocolatiers.

Sure, I could invest into (a few more) additional pieces of equipment. Then, because tempering chocolate is best done at volumes larger than we usually use, I could sink an inordinate amount of money into ingredients only to learn how to temper chocolate properly. But… really?

Friends, chocolate ain’t cheap. Never was. And neither is time. Therefore, I am forever grateful for every little trick, as well as for those immense bricks of good-enough, affordable chocolate from Trader Joe’s. They do a pretty good job for most our applications. For fussier cookies we’ll buy Callebaut or Valrhona, and for convenience, Scott is willing to use those commercially available chocolate melts. But that doesn’t get us into the main point of this article.

Why is high-quality, commercially produced chocolate so pretty and shiny, and how can one do that at home? I’m not a chocolate expert so I’ll give you the shorthand as I understand it.

Cocoa butter, the off-white fat that forms the bulk of the chocolate we eat, crystallizes into several different forms. Of those, the beta-crystals are the ones that produce a smooth and shiny surface. If you melt your chocolate under exacting, well-controlled conditions, working the softened product under controlled humidity, concentration, temperatures, and timing, you will end up with tempered chocolate. Such conditions can be achieved for the home baker, but they require low air humidity, a large marble or granite board, and a certain minimum volume.

Plus, of course, practice.

But there is a shortcut! Properly tempered chocolate is chock-full of beta-crystals. It snaps upon breaking, and the break is smooth instead of crumbly. The chocolate’s surface shines with that undeniable gleam of quality and good taste.

Commercial chocolate makers, who process tons of material, have their processes tightly in check. The less-expensive brands also stretch their batches with extra fillers (powdered milk and lots of extra sugar), flavorings, emulsifiers, and various fats to act as melt conditioners. You will notice that cheap chocolate has a list of ingredients as long as Twinkies, whereas high-quality chocolate will have fewer than you can count on your fingers.

Technically speaking, the final product requires only cocoa butter, cocoa, and sugar. But there is an inexpensive, readily available product that works even better if you are willing to turn a blind eye toward certain other factors.

To Palm Oil Or Not To Palm Oil, That Is The Question

Palm oil is entirely edible, tasteless, inert, and has a combination of high molecular weight and melting characteristics that allow you to easily thin chocolate enough to produce a hard, thin layer at room temperature. These properties, its low cost, and its ability to substitute the more expensive cocoa butter, makes it ideal for a whole slew of commercial applications.

NOTE FROM SCOTT: Wilton, the maker of Candy Melts™ sells a product called “EZ Thin Dipping Aid.” That is the product to use if you’re willing to go the palm oil route. It works like a charm and is the perfect solution used across the board by the baking industry. So why do we go to all this effort to avoid it? Well…

Coatings, fillings, cakes – even tortillas! Palm is an incredibly useful product for a host of culinary purposes; so useful that human greed has gotten involved to change the calculus. Entire tropical rain forests were cut down to make space for palm plantations, where brutal working conditions approaching slavery are routinely employed. And there is absolutely no way to source palm oil from only the “good actors.”

Understand: palm oil is no worse than anything else from the chemistry and biology points of view. It is a fat, with all the pluses and minuses that entails, and a particularly desirable one because of its unique characteristics. But our family will not willingly contribute toward either environmental devastation nor human degradation, and so palm oil has now become a product that we actively avoid whenever possible. You will not find it in any of our recipes until we’ve been convinced that the problems were solved.

If Palm Oil Is Out, What Then?

So what do you do when you’ve ruled out the cheap, convenient, and chemically ideal ingredient as your melting aid? We ended up resorting to the more expensive, natural and equally ideal cocoa butter. You know, the stuff that actually belongs in chocolate!

A quick online search revealed that cocoa butter is available in convenient melt discs. A purchase under $20 lasted us through great many chocolate projects, so a little goes a long way. Make sure to get the food-grade, as many less-expensive brands are intended for cosmetic use only.

What did we try before cocoa butter?

“Everything.”

It feels like it, anyway. Butter, cream, and various oils all got a whirl in our kitchen. Our younger daughter is a great fan of coconut oil as the magic ingredient for the “magic shell” used to coat ice cream. That texture is exactly what you want for Chocolate Marshmallow Treats too, but it just doesn’t work at room temperature. The coating stays solid when it’s down at ice cream temperatures, but it turns tacky on cookies and becomes downright runny if your room turns warm.

Butter and cream will also lower viscosity (i.e., the chocolate melt is thinner) but they won’t give you that shiny surface and can also remain sticky. Vegetable oil works to thin the result and it helps the melting process, but the chocolate remains even runnier because the melting point is that much lower.

We found that cocoa butter was the only alternative that really worked. It has the right combination of both melting point and melt properties to help soften the chocolate thin it for a good dip – but also gets hard enough to avoid being sticky at room temperature. Think of every other chocolate! They melt in the mouth, not on the plate.

But What About The Pretty, Shiny Part?

Aha! You want to grow beta-crystals.

Think back to that sugar crystallization experiment from elementary school. You coated a wet string in sugar crystals, put it into the saturated liquid, and then watched the crystals grow over the next few days. Those initial crystals were key to giving a platform for the crystals to form. You had to seed the string.

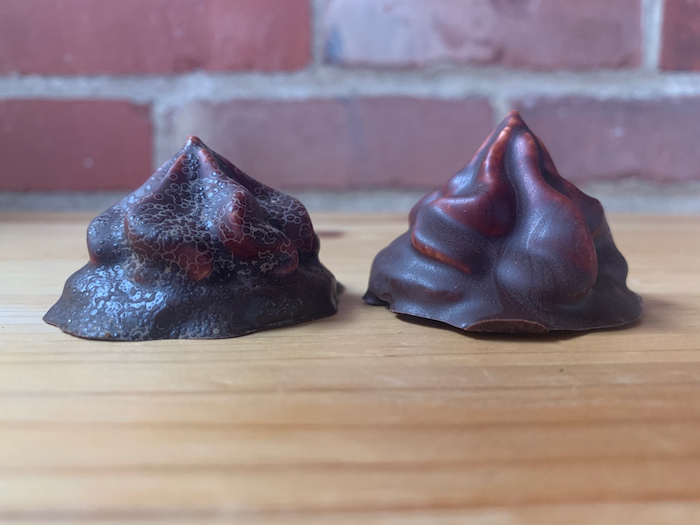
In exactly the same way, you can seed your microwave-melted chocolate with beta-crystals by adding solid grating of an expensive, shiny, properly tempered chocolate you bought at the store. If you fail to do that, the chocolate won’t look shiny after it sets. A day or five later, depending on how humid it is, you’ll notice the chocolate’s surface breaking into light and dark structures. The chocolate is blooming with the growth of unwanted, non-beta crystals.

Compare the two enrobed treats in the photo below:

So here you have it. You will find that white chocolate melts differently from all other chocolates, because it has a slew of various other ingredients. I had to add more cocoa butter to help it melt and got a thin coating as a result. Milk chocolate is the best-behaved and least likely to seize. Which brings us to a sticky situation:

What If Your Chocolate Seizes?

Seizing refers to a phenomenon where you are melting chocolate, stirring it, and it suddenly thickens into a grainy, thick, clay-like mass. Seizing occurs when a droplet of water accidentally splashes into your melt. A steamy kitchen has been reported as a culprit in cookbooks. The cocoa butter crystallizes into the “wrong” crystals, locking its structure into something you can’t easily use.

Overheating your chocolate will make it more prone to seizing. The darker the chocolate, the easier it is for it to seize, too.

But there is a fix: Add boiling water one tablespoon at a time, stirring vigorously. The water will dissolve the structure of the crystals, and give you a chance to melt-and-seed as described above.

This being said, I have not tried to make chocolate coverture with a melt that has seized and been rescued. I don’t know how the final product would set, and whether it would bloom or not. However, this chocolate can be used for any other melted chocolate application. If you make ganache, you can save it for a cake filling, brownies, or truffles you’ll probably be making down the line.

I hope this helps. Keep playing with it and expect to have a ruined batch every so often. Since no chocolate is wasted unless you burn it, this experimentation is a low-stakes learning curve. Let us know how this worked for you, and please share tips of your own!

NOTE FROM SCOTT: As you might expect, we made a lot of coated treats in the process of recipe development over the past several months. A lot of them looked perfect when made, and perfect the next day, but mysteriously bloomed after a few days out on the table by the window (we being too lazy to store them properly). Poor Kate was beside herself, figuring that all her careful work had gone wrong. (NOTE FROM KATE: Not “beside myself.” I am entirely too cool a cat for that. More like, pissed off and frustrated. This might have something to do with the fact that I dejunked our excess storage containers 😉

Then, one late morning, en route to a work-break bit of snitching, I noticed that the cookies were positively glowing in the sunlight; and made my fingers sticky in an extremely tattle-tale way. Aha! The penny dropped. The chocolate coating was heating past the critical stage and then re-hardening in a random way without the benefit of beta crystals to guide the process! The result? A coating that bloomed with big white splotches after it rehardened.

It tasted just as good before and after. I assure you; I tested that feature thoroughly, and with great attention to detail. But it is a lesson to remember. Leave your chocolate out in the sun, and it will lose its temper, have a tantrum, and go all white in the face.

To Mold Or To Pour?

The neatest solution is to spend a few bucks on a silicone chocolate mold. Paint the inside of that with your chocolate coating, set it aside to harden, and then fill it with your marshmallow. Top that with your cookie, or some complementary jam and then your cookie. Chill a little more, and then unmold.

Perfect every time unless your coating somehow sticks to the silicone.

THE CHOCOLATE MARSHMALLOW TREATS SERIES

Part 1, The Chocolate Marshmallow Treat Overview

Part 2, The Cookie Base Options

Part 3, The Marshmallow Filling Options

Part 4, The Chocolate Coating and Finishing Options

Part 5, The Strange New World of Fruit-Based Zefir Marshmallows

CHOCOLATE COVERED MARSHMALLOW TREATS – Part 3, The Marshmallow Filling Options

Part 3 of a 5-part series about those chocolate coated treats you adored as a child. This examines the marshmallow fillings.

Part 1 of this series provided an overview of this massive project, with some notes about the problems we ran into.

Part 2 listed several recipes we developed for different cookie bases: Vanilla, Spice, Graham Cracker, and Shortbread. You can also use a thin cake round, but we left that one out because this is, after all, a project devoted to heritage cookies.

This Part 3 examines the two main approaches to creating a marshmallow filling. There is a third approach too, for fruit-based Zefir marshmallows, but I’ve moved that discussion over to its own Part 5.

Piped with a round tip onto commercial wafers
Piped with a star tip onto commercial wafers
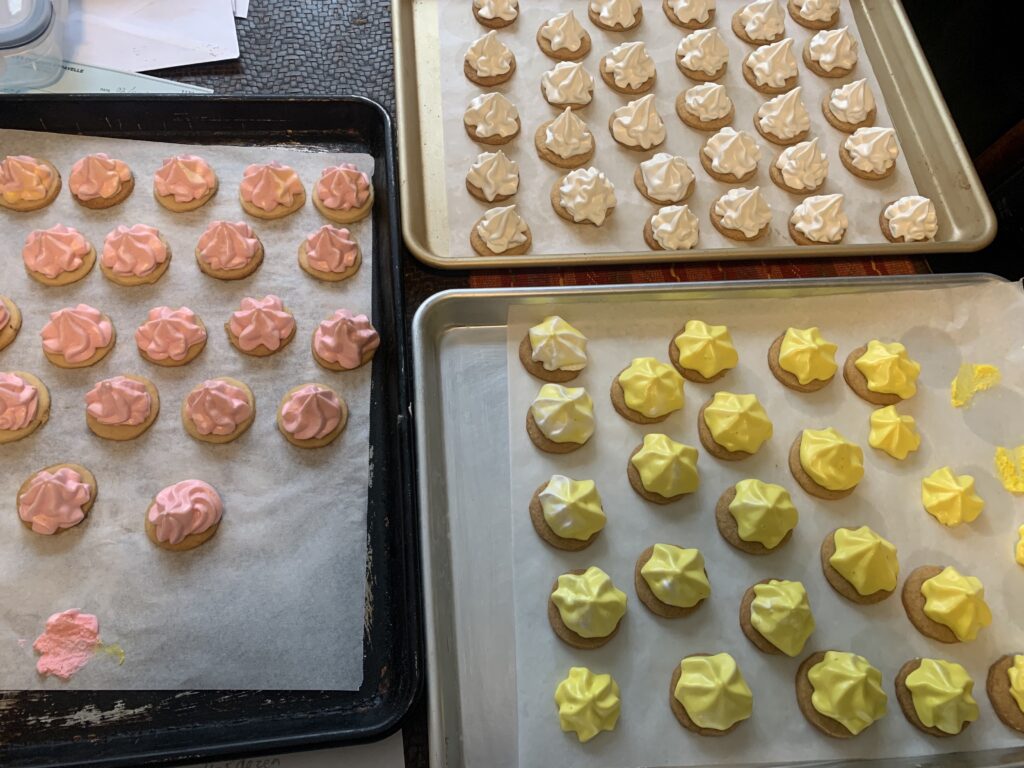
Rose, Vanilla, and Banana on homemade Vanilla Snaps. Color coded with a few drops of food dye.

As always, skip to the bottom if you only want the recipes. The rest of this article digs into the process behind those final results.

The Internet offers a metric ton of recipes for homemade marshmallows, most of which work pretty well. They’re the world’s easiest candy. Basically:

  1. Start with a thick and sticky substrate (made from the marshmallow plant in antiquity);
  2. Heat a sugar syrup to the soft ball stage (235‑240 °F a/k/a 112-115 °C), using a combination of table sugar (sucrose) and corn syrup (glucose) syrup to prevent crystallization; and then
  3. Whip the sugar syrup into the substrate until it balloons up to create fluffy marshmallows. These can be piped while warm, or else cooled in a pan to make cut-out eating marshmallows.

The American version uses a lot of gelatin to make that sticky substrate. The European version uses whipped egg whites with less gelatin; i.e., is a gelatin-strengthened Italian Meringue. NOTE: French meringue is egg white whipped with sugar; Italian meringue is egg white whipped with hot sugar syrup; and Swiss meringue is egg white heated to around 170-175 °F (76-79 °C) before being whipped. Swiss is stiffer and more stable than Italian, which is stiffer and more stable than French.

Problem #1: The filling was denser and sweeter than we wanted.

Think of a classic marshmallow you eat out of hand. They have a distinct chew to them, right? It’s part of the appeal. Now think of that chocolate covered marshmallow treat you grew up with. Much less chewy! And a bit less sweet, because flavor also comes from the cookie base and the chocolate topping. The The cookie would not be perfect until we got a handle on the problem.
Fair enough, but how do you change a marshmallow recipe to achieve those targets? It can obviously be done – the commercial products prove that – but we had to figure out how. And that was a major pain in the whosis, because our expertise on the baking side did not extend into this kind of candy making and sugar work.

The first and most obvious solution (cutting cut back on the amount of gelatin) proved to be impossible. Cut back too far and the structure dissolves rather than getting lighter, and I could not fidget my way into a perfect balance because kitchen scales only have so much precision. Plus the marshmallows were far too sweet for this use, and cutting back on the sugar too created other textural issues. I fought this problem for months, and ended up with a pair of solutions that work hand in hand.

Kate gets 100% of the credit for the first. She noticed that our trusty stand mixer began to really strain as the marshmallow mix cooled down. Part of this came from how the filling thickened as it cooled, but the overflowing bowl factored in too. Her solution? Shrink the recipe by a third. Huge difference. The lower volume resulted in a fluffier marshmallow because the machine wasn’t slowing down, and also because the bowl had extra room to accommodate it.

I claim credit for the second solution. I posted the question on some Internet groups/boards, and no one seemed able to help. All I got were suggestions for vegan substitutes that could be used instead of gelatin. That wasn’t the issue! Vegan shmegan; I just wanted to know what was going on in the chemistry, and how to adjust it. One long-suffering volunteer finally burst out with, “maybe you should take a food science class or two.”

Ding ding! For some reason I’d done all my Internet searches using the words “chemistry,” “physics,” and descriptions like “fluffier” and “denser.” I’d never done one using the term “food science.” Why not try? I did, and up popped this lovely article on a project for grade school science teachers: “Sweet Science – Making Marshmallows.” I urge you to read it, but here’s a quick summary in case you want to save some time. Loosely translated, the project reads as follows:

“Have your students make marshmallows with different proportions of sugar to corn syrup, and then measure the characteristics. They’ll find out that more sugar equals a denser and sweeter product, while a higher ratio of corn syrup reverses that. Then you can let the kids eat their experiment, and send the sugared-up darlings off to some class with a colleague you don’t like.”

Okay, I added that last last sentence on my own. But look at what it says! Lighter, and less sweet. Exactly what I wanted. We did the experiment; it worked just as predicted; and the results now appear in the recipes below.

Plus there’s this: Now you have the power too! By way of reference, American eating marshmallows have a sugar:syrup ratio of 6:1 by volume. That’s now at 3:2 for the cookie filling, which coincidentally works out to just about 1:1 by weight. This is just about perfect for us, but you can fuss with it to your heart’s content to find the proportion that’s perfect for you. Tastes differ. Though it must be said that we achieved a texture so “right” that our testers actually singled it out for special compliments! Yes, you really can tell.

Problem #2: Piping the Marshmallow was a P.I.T.A.

There’s no easy way to say this. I suck at piping. And that is a problem because this is a recipe where you need to work quickly. Cooled marshmallow filling stiffens, is harder to pipe, and tends to mound up unevenly instead of covering the whole cookie in a pretty layer. Nor does it help that our biggest piping bags are “mediums” on anyone else’s scale. Even the reduced recipe required us to refill the bag two or three times, which led to the filling cooling off that much faster, and becoming that much… You get the idea.

Marshmallow gets stiffer as it cools, and won’t pipe out cleanly.

In the end I found three solutions that worked pretty well.

  • Scott’s Solution. Rope in Kate or a daughter to cover for my sorry efforts. This works perfectly, and I recommend it highly.
  • The Doh! Solution. Buy a bigger bag. Maybe next time. They aren’t as easy to find as you’d think.
  • Solution #3. Prepare two or three of the medium-sized bags before you start to pipe the cookies out. This saves a few critical minutes, and also lets you use more than one tip.

Yes, I am overselling the difficulty a bit. Anyone with the right tools and some basic skills won’t find it as challenging as I did. The multiple-bags approach also solves a lot of the problem, and the cookies taste just as good even if the marshmallow cools enough to come out lopsided. Still, forewarned is forearmed. Be ready to pipe as quickly and efficiently as you can; and/or to laugh at your funky shapes.

Problem #3: The Infinite Variations

Continuing the theme from Parts 1 and 2, the marshmallow filling can also be varied in as many ways as your imagination permits. And it’s super simple to do!

So-called “plain” marshmallows are flavored with vanilla extract. An even teaspoon works perfectly at these amounts. “Flavored” marshmallows replace the vanilla with with any extract and/or food color that’s buried in your spice cabinet, and that same 1 tsp. will do the job just as well. Lemon, rose, rum, banana, coffee, mint, almond… there is some place in the world where that flavor of marshmallow is a beloved favorite sold in stores. I recommend some color coding to avoid frowns of confusion, but it really is that easy.

Spices work too but we found that spiced cookie bases were easier to control. Marshmallows have a ton of air, and adding enough spice to provide solid flavor can make them a little gritty.

Fruit flavors are a little different. The extracts work fine for a properly artificial flavor reminiscent of commercial products, but you can also get The Real Thing by making Zefir instead of a classic marshmallow. Talk about intense essence of fruit…! But that’s getting ahead of myself. I moved that discussion to Part 5 for very good reason, and you’ll simply have to wait.

CONCLUSION

It took some serious work and research to nail down the filling part of this cookie, but that really came down to exploring things at the food science level. [It had nothing to do with me being obsessive, no matter what my piping assistants may say!] If you follow the recipe below – either one – you will find it quick, easy, and effective. You’ve got your wheel, and there’s no need to recreate it.

So where are we at?

  1. Make a simple cookie base, flavored in any way you can imagine.
  2. Pick your choice of marshmallow approach, and flavor it with any extract or liqueur in your cabinet by substituting 1:1 for the designated vanilla, and color coding with a touch of food dye.
  3. Pipe your marshmallow creation onto your choice of cookie, using your choice of piping tip.

Bing, bang, boom. You’ve got these Chocolate Covered Marshmallow Treats 70% done. All that remains is coating them in everyone’s favorite darkest-brown food of the gods.

THE CHOCOLATE MARSHMALLOW TREATS SERIES

Part 1, The Chocolate Marshmallow Treat Overview

Part 2, The Cookie Base Options

Part 3, The Marshmallow Filling Options

Part 4, The Chocolate Coating and Finishing Options

Part 5, The Strange New World of Fruit-Based Zefir Marshmallows

CENTRAL EUROPEAN OŘECHY (Filled, Molded faux-Nut Cookies)

A traditional Central European Christmas treat. They require some patience because the special molds need to be filled one by one, but they are unbelievably rich, unbelievably good, and unbelievably charming.

Two things happened right after I published our recipe for Oreshki, the Eastern European faux-nut cookie made with a light, crispy shortbread crust and a luscious dulce de leche filling. First, all our Ukrainian, Russian, and other Eastern European friends descended like a pack of starving hyenas on a fat old antelope with a limp. Don’t worry, we got out of the way in time to avoid injury. The show was magnificent!

Second, our Czech, Polish, and other Central European friends said, “Those are really cool, but it’s not the ‘Molded Nut’ cookies I grew up with. You should work on those too!”

Oh? Kate had only a vague memory of Ořechy from her childhood. Grandma Kandler had the molds, but never made the cookies. “Too much hassle.” So I set to researching and uncovered four – only four! – fairly consistent recipes. It took some tweaking to get them right, but Oh…My…Heavens! We will not have a Christmas tray again that does not feature these ridiculously rich, tender, and flavor filled nutty-mocha treats. They are a hassle, yes. But they are also unique, and unbelievably good.

As always, skip to the bottom if you only want the recipe. But this might not be the best article to do that with. It contains some extremely useful tricks.

First, Know Your Target

NOTE ABOUT THE NAME: The Eastern and Central European faux-nut cookies have the same name, languages and spelling aside. It’s pronounced “OH-RZHE-ch-ee”, more or less, with a rolling “r” and the “zh” combined into a single sound that English doesn’t possess, and the “ch” being that guttural, back of the throat sound like the Yiddish name Chaim. English doesn’t have that sound either. The “ee” sound at the end denotes a plural, like putting an “s” at the end of an English word. It technically translates as plain old “nuts”, but in context it’s understood to mean “walnuts;” and that is the shape of the mold. You’ll get it wrong if you try to pronounce it properly, especially since there are small variations between the different Slavic tongues. But who cares? You’ll get credit for trying, and everyone will know what you mean.

The name is the same; but the two cookies could not be more different. The Eastern European one is plain, crunchy, and child friendly. It rings the same chimes as Alfajores in South America, Millionaire’s Shortbread in England, and Stroopwafels in the Low Countries.

The Central European cookie (this one) is a sophisticated flavor bomb aimed at knocking adults on the seat of their pants in rapture. The shell is a walnut cookie so tender you have no choice but to eat them in one big bite. They’ll crumble under your teeth if you try to stretch it to two. The filling is less “buttercream” than a “whipped, flavored butter” redolent with coffee and rum. It’s so rich that we include an instruction to use it sparingly!

The final flavor becomes mocha because the cocoa in one part and the coffee in the other combine into a single unit in your mouth. It doesn’t matter which part (shell or filling) gets the cocoa powder, and which one gets the coffee, so long as each side is only half the final flavor. The recipe below goes with cocoa in the shell and coffee in the filling, but both ways work great.

The Dough Is Easy; The Molding Takes Patience

The dough is simple to make; a straightforward creaming method approach. Beat together the butter and sugar until light and fluffy, beat in an egg with an optional touch of extract and/or spice, and then mix in the dry ingredients. The only complication is that one of those ingredients is a large amount of grated walnuts. We’ve yet to see walnut meal in a market, but it’s easy enough to make. Toast whole walnuts for 8-10 minutes in a 350° F (175° C) oven until they’re fragrant. Remove, cool, and then grate down to meal.

NOTE: A rotary hand grater is by far the best tool for this task. Food processors get dicey because walnuts go from “chopped” to “nut butter” in a heartbeat, much faster than almonds or even peanuts. On the plus side, it doesn’t need to be flour-fine. Grating them is plenty good enough.

Then comes the filling of the molds, which is indeed a fidgety chore. Where the Eastern European version is baked in a unique stovetop mold, Central European Ořechy get formed in thin, individual metal molds that go in the oven so the cookies will keep their shape. It isn’t hard, just time consuming because you need to go one by one.

This image has an empty alt attribute; its file name is Molds-to-reuse-pre-buttered-768x1024.jpg
This is the Central European mold. Notice those crumbs? Don’t clean them off until you are done! That residue from earlier bakes saves you from needing to butter and flour the molds every time you fill them.

First you coat the inside with a bit of butter, then you dust it with flour, and then you press the dough in with your thumbs until it coats the entire inside of the mold with a layer that’s maybe 1/8″ thick. [NOTE: You only need to butter-and-flour on the first batch. The remaining crumbs from that batch will be enough to prevent sticking on the second, the second for the third, and so on.] Then you scrape off the excess with a flat tool like a metal spatula or bench scraper, and then move onto the next one.

The dough will soften significantly as you work it. That makes the molding easier, and causes no issues. Incredibly tender doughs will do that. The process isn’t hard, just time consuming.

But you aren’t ready to bake just yet!

Trick #1. Freeze or dock the dough baking. We learned the hard way that Ořechy will puff up to be almost level if you put them right into the oven after shaping. It leaves you with a dent more than a cavity.

This image has an empty alt attribute; its file name is Version-1-puffed-up-coming-out-of-the-oven-768x1024.jpg
Our first batch came out of the oven with no room for the filling!

You can prevent this by (A) poking in holes in the dough with a fork (“docking”) as you would with a pie crust; or (B) freezing the dough in the molds before baking. Both work, and both leave plenty of room in the final product for your incredibly rich filling.

This image has an empty alt attribute; its file name is Version-2-Docked-and-frozen-flattens-much-less-768x1024.jpg
Docked and frozen before baking = generous cavities for filling. Too much room if you use the traditional whipped-butter filling.
This image has an empty alt attribute; its file name is Comparison-of-plain-and-frozen-docked-on-white-plate-768x1024.jpg
Version 1 versus Version 2. Either too little room, or too much!

Trick #2. Freeze or dock, but don’t do both. Docking combined with freezing will give you full sized cavities inside your “nuts,” suitable for a normal buttercream, frosting, caramel product, or any other typical filling. Bit the traditional filling for this cookie? A half-teaspoon or so is all you want. As one baker friend said, “a knob the size and shape of an almond.” That’s just about the amount of room that’s left over if you freeze the shells before baking and so nothing else. Docking creates a little bit of extra room. The combination creates too much.

Extra room won’t kill you, of course, The cookies taste just fine with a cavity that’s got some empty space.

This image has an empty alt attribute; its file name is Frozen-but-not-docked-middling-puff-768x1024.jpg
Fresh out of the oven. These were frozen but not docked. A nice, noticeable cavity that has just the right amount of room for a super-rich filling. [P.S. I feel your pain if you’re groaning at that poor sheet pan! It was recently used for roasting bones, and then vegetables right after. A few more trips through the elbow grease sink with Barkeeper’s Friend ought to help.]

Trick #3. Ignore both #1 and #2, and then press a hole in to the flat cookies when they are warm from the oven. So you have molded cookies that puffed up in the oven. You pull them out and say, “Oh no! They have no room for filling!”

Not a disaster. Simply press the warm and still-soft center with your asbestos thumb, and you’ll have a dent you can work with. Yes, it is hot, and yes, you can get a minor burn if you have human skin instead of baker’s asbestos. But beauty can be expensive. Even when it’s only beautiful cookies.

On To the Whipped Butter Filling. This couldn’t be any simpler. Whisk the butter until it’s soft and fluffy, and then whisk in the other ingredients: powdered sugar, more grated walnuts, instant espresso/coffee powder, and a good hit of dark rum. That’s it. What you get is a flavor bomb that carries the essence of Prague. If America is the land of cinnamon and sugar, and Scandinavia of cardamom, Prague’s heart belongs to a mix of mocha, nuts, and rum. Utterly scrumptious. Just use it with care because we aren’t kidding about how rich it really is!

Place an almond-sized piece of whipped butter filling between two shells. Close carefully so you don’t shatter the tender pieces. Dust with powdered sugar to complete the illusion, and enjoy. They will improve overnight, hit their peak on Day 3, and be good for another two days after that.

Be prepared for “Wow!”

This image has an empty alt attribute; its file name is Orechi-half-filled-side-view-with-real-nut-pretty-1024x768.jpg

CONCLUSION

Ořechy require some patience because the special molds need to be filled one by one, and they only last for a week or so after they get filled. That makes them a special occasion treat. But you know what? They are also spectacular enough to be a star entry on famous dessert trays in any top coffee house of Prague, Warsaw, Vienna, Budapest, or any of the other great cities of central Europe. They’re the sort of food that tourists taste, gape at, and then go home to tell stories about.

We won’t be making them on any kind of a regular basis. Not even for guests. But you’d better believe we’ll be making them for the holiday tray! They’re just too cute and too fantastically delicious to pass by. The whole family would pine at the loss now that they know what we’d be missing.

Yes, they are that good. And cute, too. Wouldn’t you agree?

This image has an empty alt attribute; its file name is Orechi-in-a-wooden-bowl-side-view-cute-1024x768.jpg
This image has an empty alt attribute; its file name is Orechi-recipe-page-2-Central-European-Nut-Dough-Walnuts-791x1024.jpg