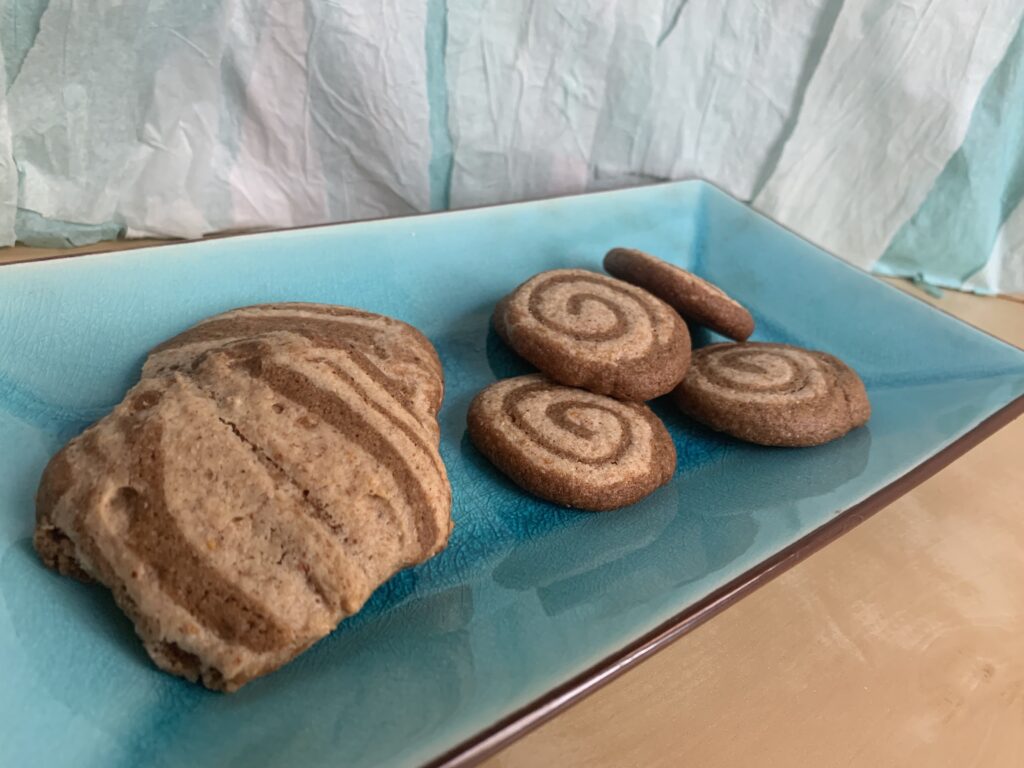
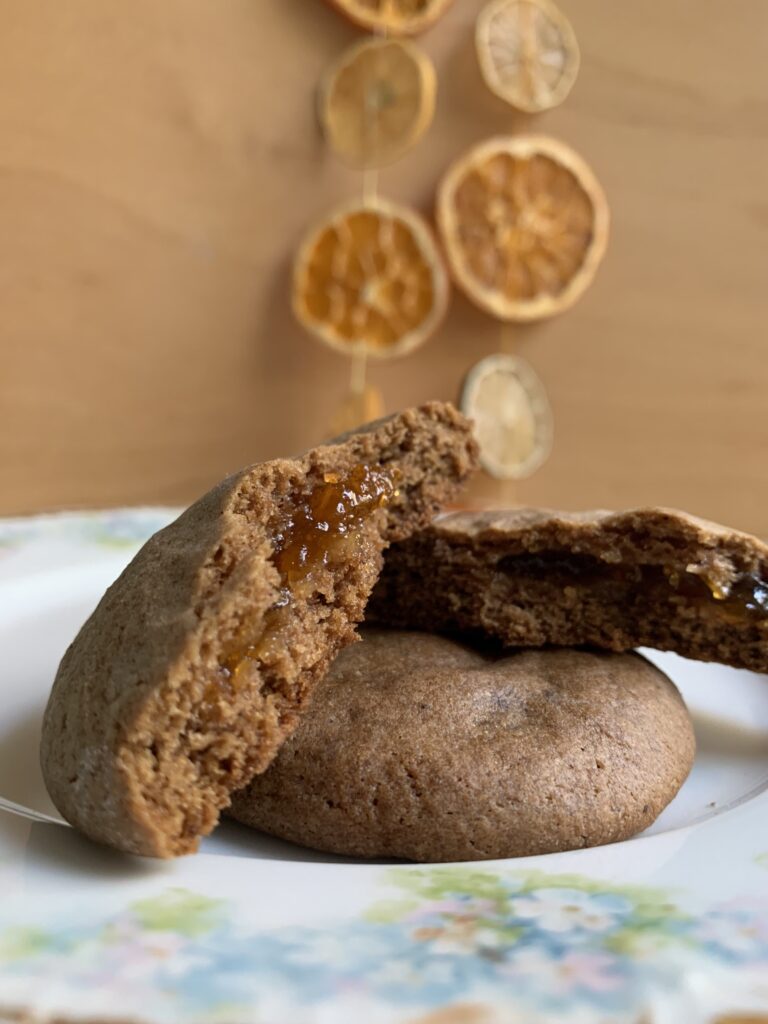
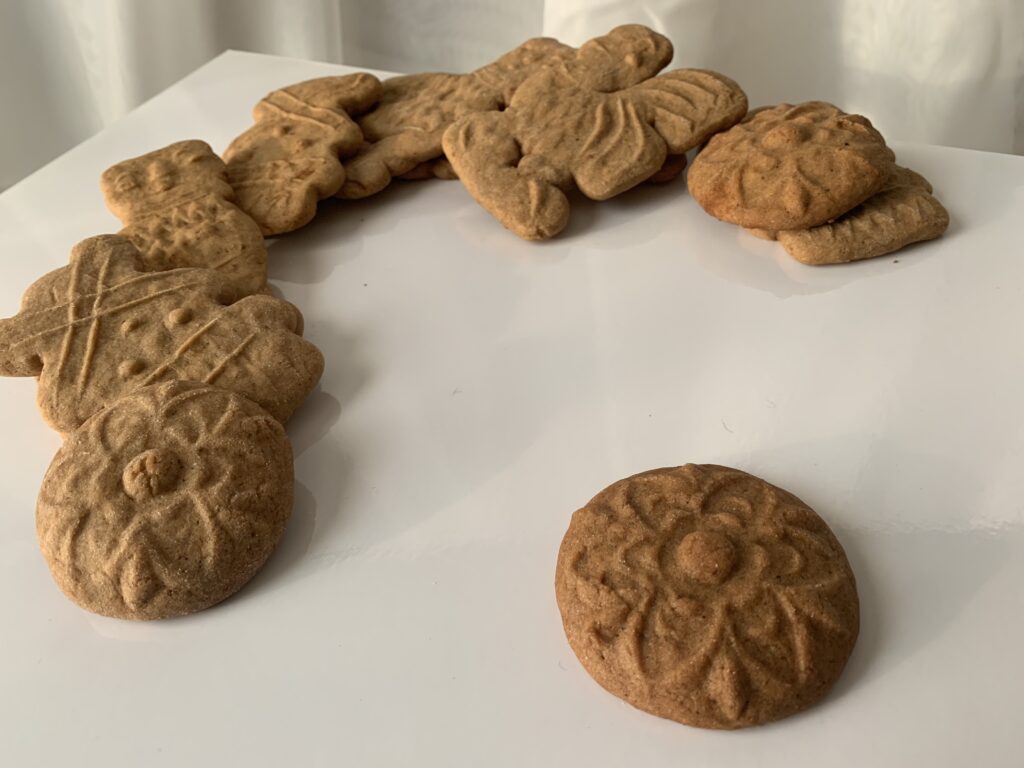
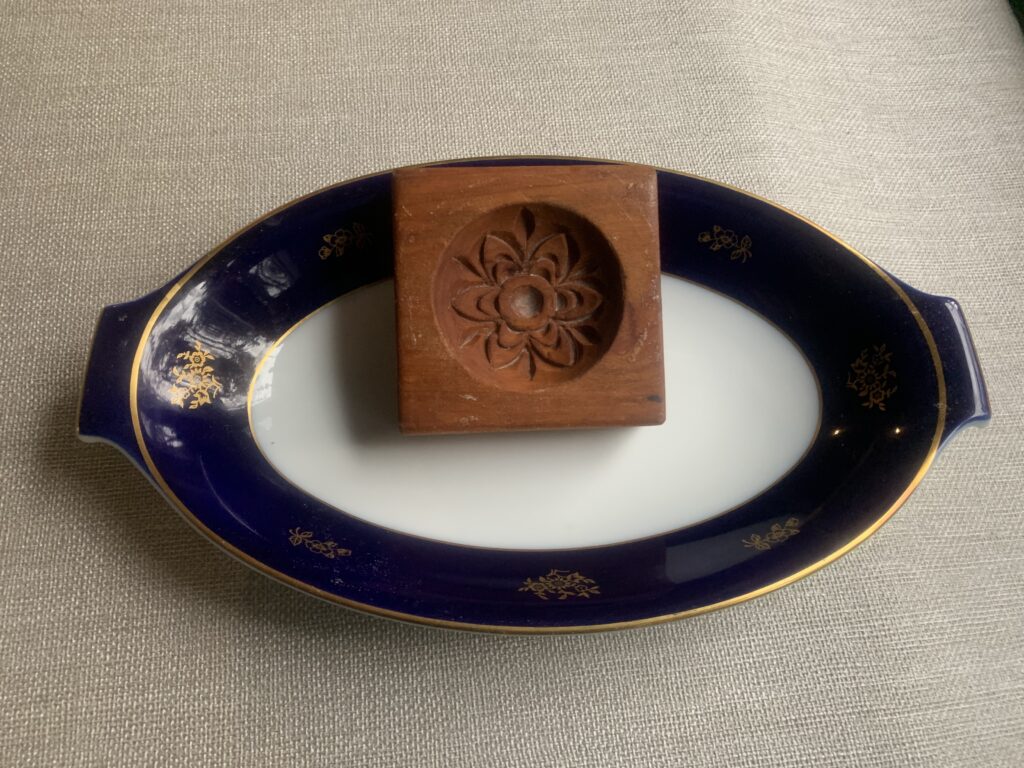
Turn your favorite chocolate-and-spice bars into exquisite cookies
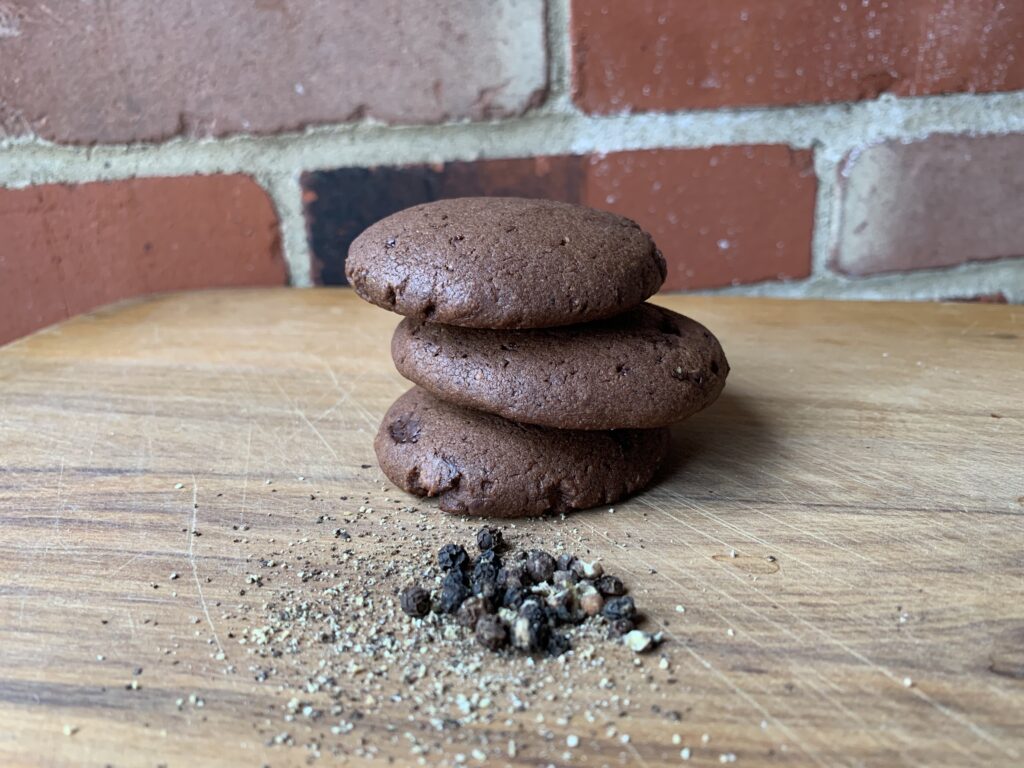
“Infinite Temptation” may make more sense in the title than “Infinite Delights.” The testing began with a Chocolate Black Pepper cookie, and the batch looked good as it came out of the oven. Thirteen nice, hefty, 2½” pieces. I tasted one, and liked it. A lot! So I duly brought them out to my beloved, and left them there on a plate so she could try one too. Then I went off do some work on another project.
I strolled back in about 30 minutes later. There were 4 cookies left on the plate. Our pup had been with me in the office. Kate had been left alone with the plate, parked on the sofa with her laptop.
13-1 = 12. 12-4 = the sort of math that wise old husbands forgot how to do a great many years ago. Make that wise and generous husbands, since I immediately ate three more and was kind enough to leave her the last.
Batch #2 got made when we hosted a dinner for our daughter and niece. Miranda had the will power to resist, thanks to a bit too much spice for her taste. Amanda? Amanda ate so many that I don’t have the heart to rat her out in public. Let’s just say that we now have testimony to how well the cookies go with a glass of wine, and with a glass of water, straight out of hand when no one seems to be looking, and with coffee too.
Get it? Got it? Good. These really are all of that; as simple as can be, absurdly rich, and with just enough of a twist to always be unique.
NOTE FROM KATE: One whole pound of chocolate, divided into only four dozen cookies. That’s a lot of antioxidants per cookie! So these aren’t just delicious, they are a regular health food! [Yay! That’s my story and I’m sticking to it!]
This is a fairly standard drop cookie, so there’s no need to bore you with the chemistry. Go look at a regular Chocolate Chip Cookie recipe. Subtract ¼ cup (1¾ oz = 50 g) of flour, and replace it with half a pound (8 oz = 225 g) of melted chocolate. Bing, bang, boom, you’ve got it. The chocolate adds back the structure you lost by removing that bit of flour.
Add another half pound of chopped chocolate (or really good chips), the spice du jour, and you’re done. The only tricky part comes with the baking time. It’s easy to overbake a cookie this dark, and doing means sharing chocolate essence with the air, so we limited the baking time just to be on the safe side. 10-11 minutes instead of the more normal 10-12.
Just make sure to use a good chocolate. There is a full pound of chocolate in every batch. The flavor comes through, and cheap chocolate will show.
NOTE FROM KATE – ABOUT CHOCOLATE: Some of you might’ve seen articles about chocolate with elevated heavy metal levels. Long story short: which risk factor do you want to go with on a given occasion: chocolate or chardonnay?
Development
Chocolate is great. Chocolate is awesome. But the special part here comes from the spice.
Please note that I didn’t actually create this cookie. We publish heritage cookies not mind numbingly good original creations. That said, the accusation has been made and so I feel the need to defend my process.
I began the project looking to highlight a black pepper cookie. Think about it: all those spice snaps, with flavors ranging from across the map, and yet almost no one remembers to try the one spice that’s in basically every kitchen across the breadth of Western civilization. It couldn’t be right… and it wasn’t. Examples abound. And I may get back to them idea later on. But the thought of chocolate black pepper cookies could not be resisted, and thus I went a little sideways.
A Google search for the term “chocolate spice cookies” comes back with a bit more than 68 million results! Italian recipes lead the way, but U.S. versions (like this one) aren’t far behind. There’s one from South Africa with just black pepper… there are a few based on Mexican chocolate… Viennese chocolate pepper cookies (a roll out)… It doesn’t end. This isn’t an original idea, just my version of one that every baker across the world has thought about from time to time.
So what did I do? (A) I elected to go with a U.S.-style drop cookie, and (B) I made it so good that all the other 67,999,999 are stuck with trying to come in second.
NOTE FROM KATE – ON FLOUR: We had a batch where we ran out of AP flour (11.7% gluten) and ended up using pizza flour (14% gluten) for about a quarter of the required amount. Those cookies didn’t spread. They had so much more structural integrity that if you made a little pyramid, it would probably look like a little mountain upon baking. The cookies in the photos are made with regular AP flour, and they did spread some but not very much. This begs the question, would a softer flour yield a more traditional cookie with more spread? Would substituting some starch for 10% of the flour do the trick? If you try it, let us know on our eponymous FaceBook group.
FYI, there was nothing wrong with the pyramidal cookies went came to taste. Their centers remained soft and may even have held on to moisture better. High levels of either cocoa or chocolate will suck moisture out of any baked good, and this is a great example of the phenomenon.
The Spice Part
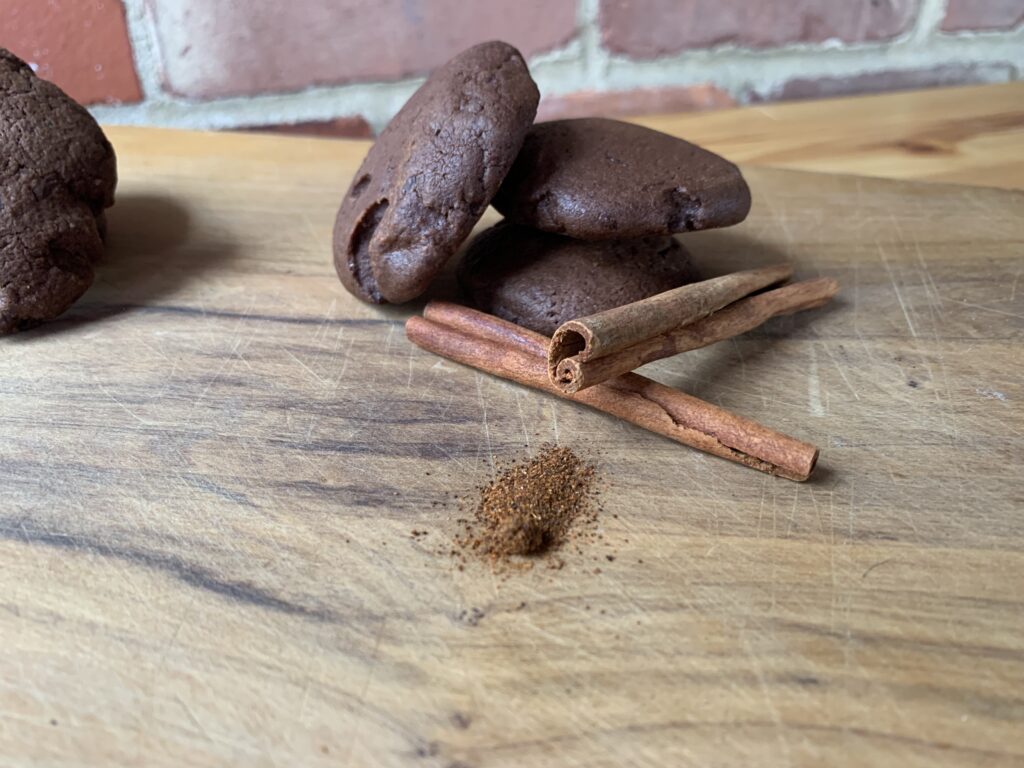
The first test batch stuck with black pepper. Four teaspoons of it! The result was superb, but it did push right up against that line between “right” and “too much.” The recipe accordingly says 3-4 now. But the big Aha! moment came when we realized that black pepper was just the tip of this particular iceberg.
Go out to your favorite chocolate shop and you’ll find a whole shelf of well spiced options. Chocolate flavored with cinnamon. Chocolate flavored with cinnamon and chili (the Mexican chocolate profile). Chocolate flavored with cayenne, garam masala, ginger, nutmeg, star anise, cloves, gingerbread mix… It’s endless! I mentioned this to Kate and her eyes lit up with an evil gleam.
Every single one of those would work in this recipe. Just compare the potency of your chosen spice to the designated 3-4 tsp. of black pepper in this master recipe, and keep notes so that Version B will be perfect. Bing, bang, boom.
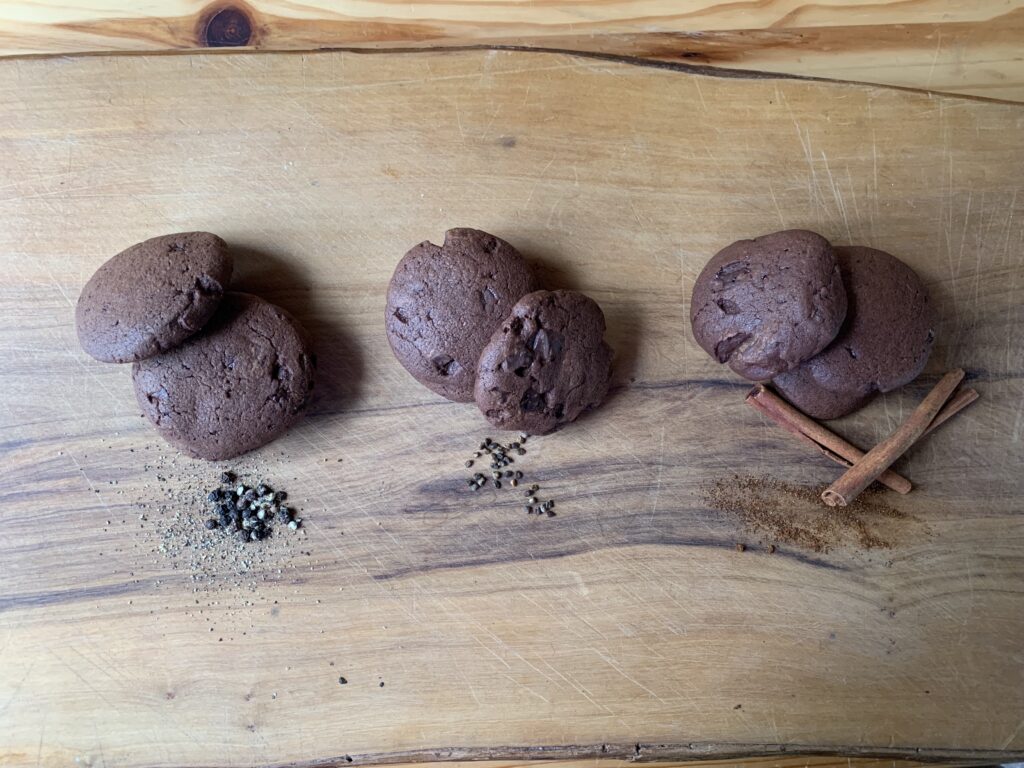
NOTE FROM KATE: I prefer more spice. The cookie doesn’t have to bite back, but higher spice level helps the flavor linger. The pepper version is warming and makes you raise an eyebrow in surprise (use fresh-ground for best effect.) The cinnamon-chipotle one is familiar, with a long and warm finish. Cardamom alone didn’t have the same bite, but the high floral notes carried beautifully, and I plan to see how that spice would play well with black or spicy pepper or to attain an extended note.
One whole recipe gives you approximately 1,200 grams of dough. I divided it into four bowls with 300 grams each, rounding them off to get even weights. (The exact amount of each batch will vary depending how much dough you use for “quality control,” how hard you pack your brown sugar, the size of your eggs, etc.). Then I added proportionate amounts of spices, getting 15 cookies of each per cookie sheet. Label your baking parchment so you know which is which. These are mystery cookies. They all look the same, the first bite keeps you guessing, but by the second bite you know.
NOTE FROM SCOTT: That might even be a fun game. Make several versions with different spices, and then let the party figure out what’s what...
Let us know your favorites so we can give them a try. I might even get to try a few myself before the invisible cookie gremlins get hold of the dozen I left on the plate. Deaf, dumb and blind, thy name is husband of 30+ years.
Delicate, spice scented cones: a treat for all seasons
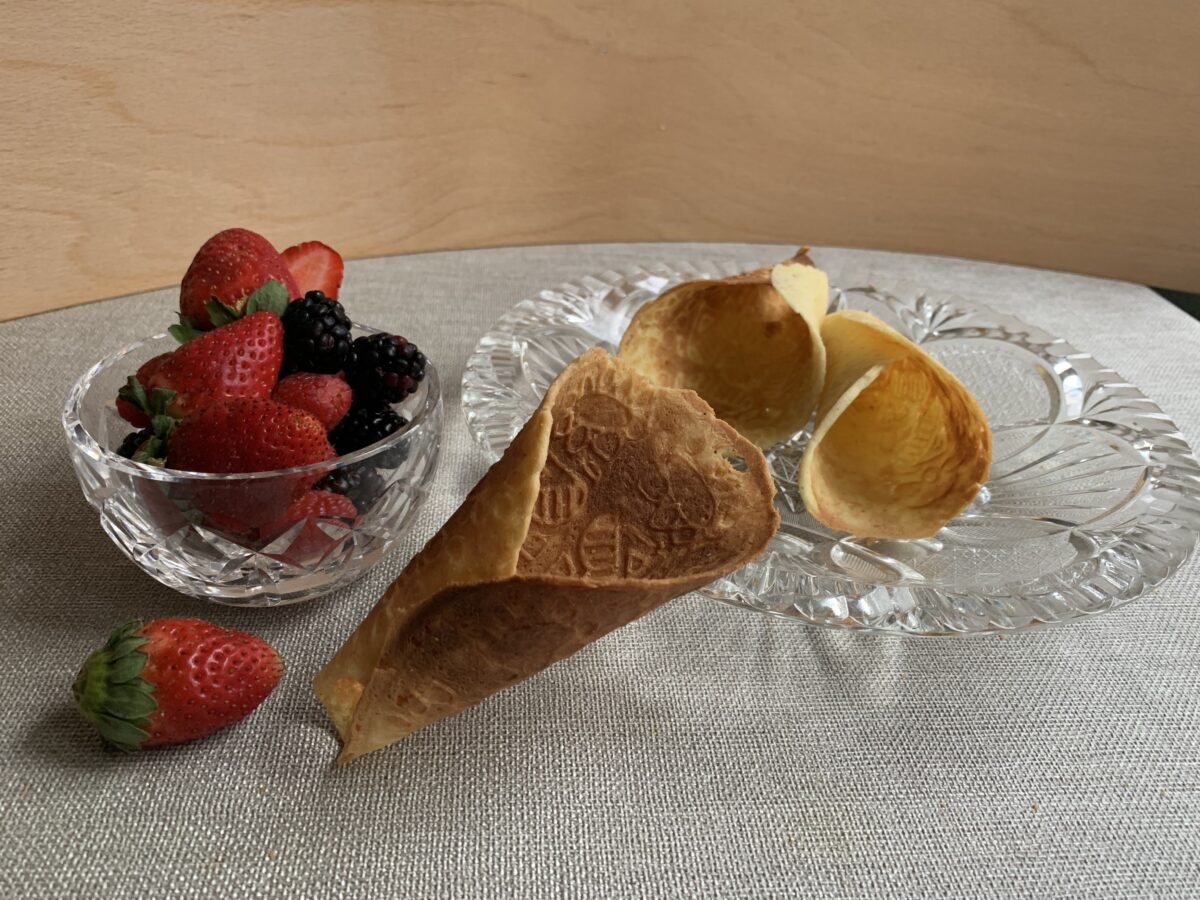
Krumkake are one of those cookies that keep improving with every new batch you try. I can’t honestly say we’ve mastered it yet – which is a little scary when you realize they’ve gotten nothing but rave reviews from guests, spouse, and even a certain stubborn daughter on a low sugar kick who only gave it a taste because Dad did a comic begging routine. (And who then had somewhere between two and several more in order to decide that strawberries were her favorite berry inside. And then had to be restrained to save some for her sister who was out of town. But admittedly had the good grace to only laugh and agree when confronted with this description).
In other words, the Krumkaker we’re already making are Good with a capital G and are still getting better as our skill improves. They are as much fun to serve and eat as any other cookie we know, and have the potential to be even better than all that once we start to explore all the ideas for a filling beyond berries and cream.
Yes Virginia, there is a Santa Claus who lives up by the North Pole, and travels south every year – making his first stop in Norway to get his allotment of Krumkake.
Krumkake (Krumkaker in the plural) is a light, crisp, Norwegian waffle cookie made as follows:
Start with an unleavened batter made from melted butter, eggs, flour, and sugar,
Season it with vanilla and cardamom,
Use a special waffle iron to make wafer thin cookies,
Form those wafers into cones or tubes while hot, and then
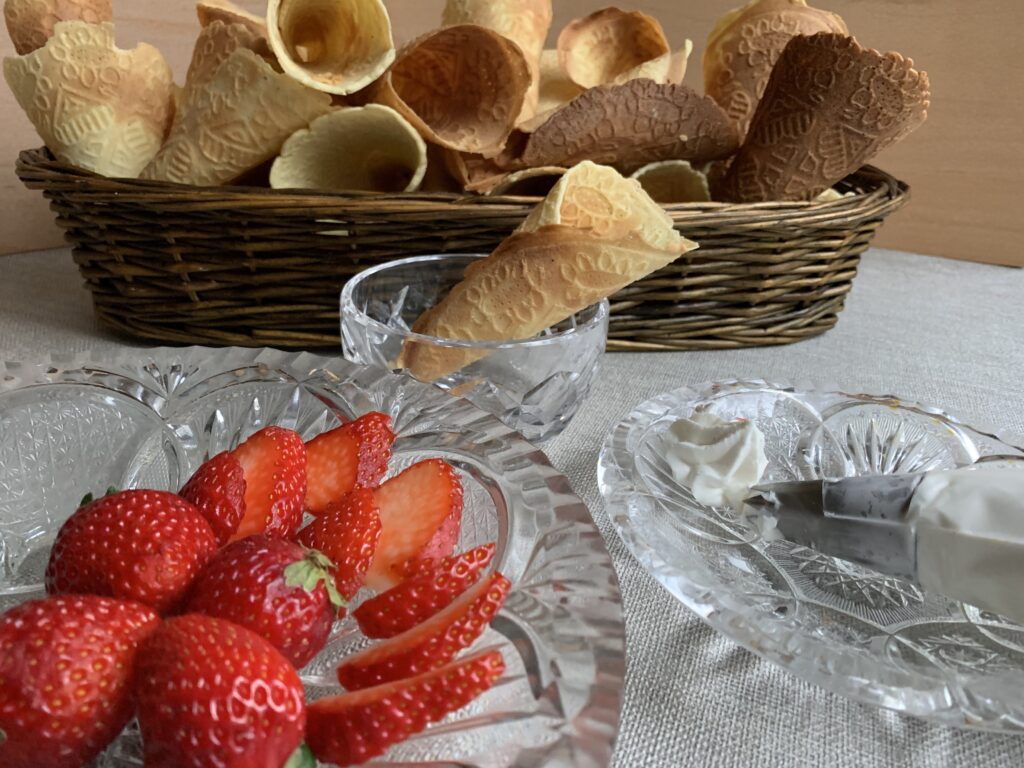
Serve with a filling such as the classic whipped cream and berries.
Whoever makes the thinnest, lightest, crispiest Krumkake wins. Sounds simple, right? And it is, except for hidden subtleties in every one of those five basic points.
About #1, why do they need to be unleavened? Especially when a bit of baking powder ought to make them that much lighter?
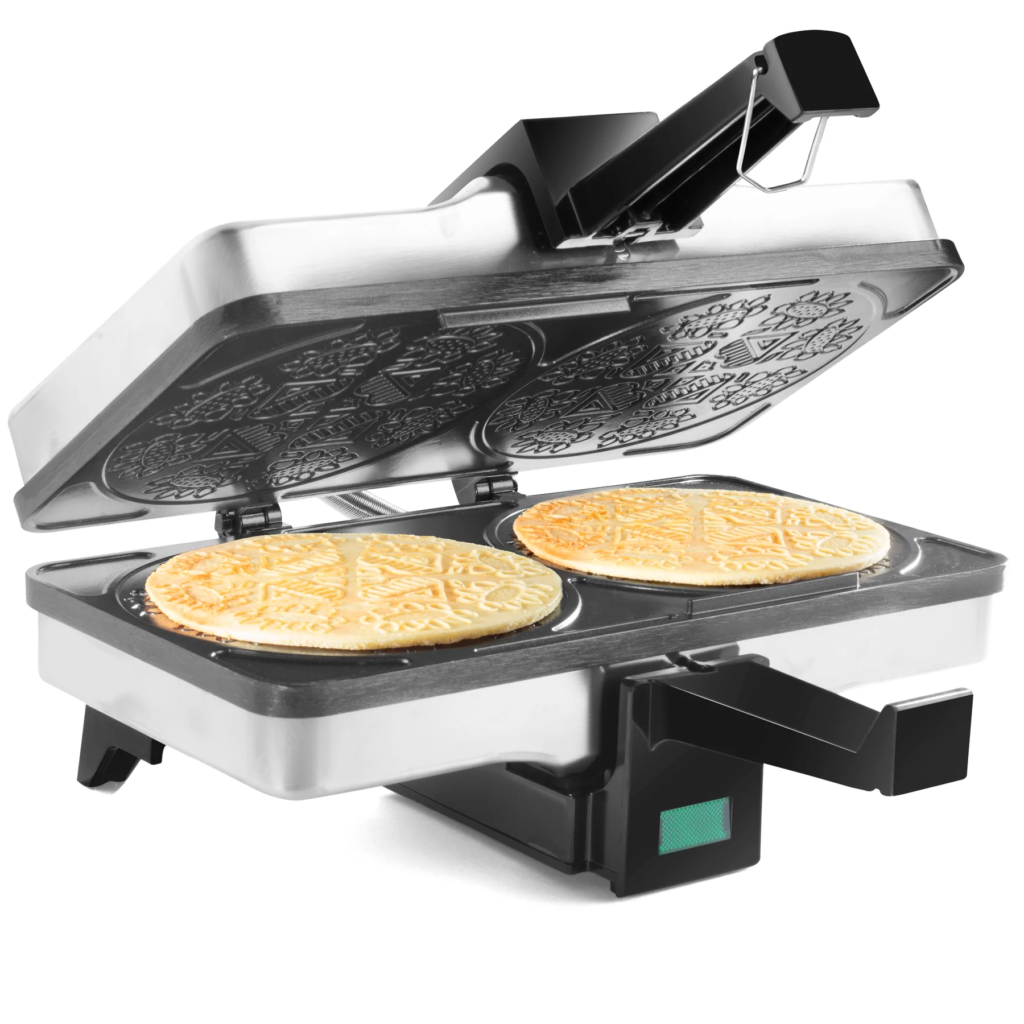
Krumkake irons aren’t quite the same as pizzelle irons. The space between the two halves is noticeably thinner; enough so that any puff from the baking powder would be squeezed out by the brute force of pressing the top and bottom. You’d think people would try it anyway, but I failed to find a single recipe that reinforced the batter with baking powder.
OTOH, every recipe requires a fairly generous portion of starch to lighten the flour, and that serves a similar purpose.
For #2, why be so specific about vanilla and cardamom?Aren’t people allowed to play around?
This is the one that’s going to get me in trouble. Our Internet friend Libby is the finest Krumkake baker we know – the culmination of at least three generations of tradition, with 30+ years of expertise. She has faced and conquered every challenge that Krumkake can present… and she makes her Krumkake with vanilla and almond extract alone. No cardamom in sight. [NOTE: She has subsequently admitted to using ground mace in half of her batter, which may perhaps be blamed on her roots being Swedish instead of Norwegian.]
I stand by my guns nevertheless for at least three reasons:
Every native Norwegian recipe I could find specified cardamom, usually with a grudging note that some people prefer nutmeg (or mace, I guess).
Scandinavian bakers are as free with their use of cardamom as Americans are with cinnamon. It’s a cultural trait, and I wanted to produce an Old Country recipe rather than an American adaptation.
My family really liked how that delicate, background spice enhanced the berries.
So cardamom it is. That is the norm, and doing without is the variation.
On #3, why do I need to spend extra money on a new device? Can’t I use my pizzelle iron instead?
Yeeessss… you can, so long as you understand that your final result won’t be as thin as it should be, won’t shape as cleanly, and will therefore be tasty but not “right.” FWIW, we tested this with a certain amount of diligence because (a) I am nothing if not cheap, and (b) my beloved wasn’t exactly fond of adding yet another large, single purpose tool. I wanted to find a different answer, but the darned wafers just wouldn’t cooperate. I ended up with tasty shards and crumbs, not pretty cones or tubes.
Thoroughly daunted, I went back to consult with Libby about this (consulted, not whined, no matter what she says). She replied with an electronic shrug. “I’m afraid you can’t get around it. Krumkake are supposed to be super thin, and pizzelle irons have too much space between the plates. I give them an extra squeeze even in my Krumkake iron just to be sure. But don’t worry about the extra machine. It won’t be a once-per-year waste. I use my Krumkake iron all year long to make crackers.”
Crackers? Okay, that works… And it’s hard to ignore the voice of experience when that’s why you’re asking for help in the first place. So I bit the bullet, searched around for a deal, and found one right away. Brand new irons retail for around $45.00 as of the end of 2022. That’s well within a household budget no matter what, but an hour of additional searching found me a technically used iron, still in its unopened box, for half that price even after accounting for the cost of shipping. $23.00. So I made the purchase, and discovered that Libby was 100% right. The Krumkake wafers really do come off the iron significantly thinner, and it really does make a difference in the final product.
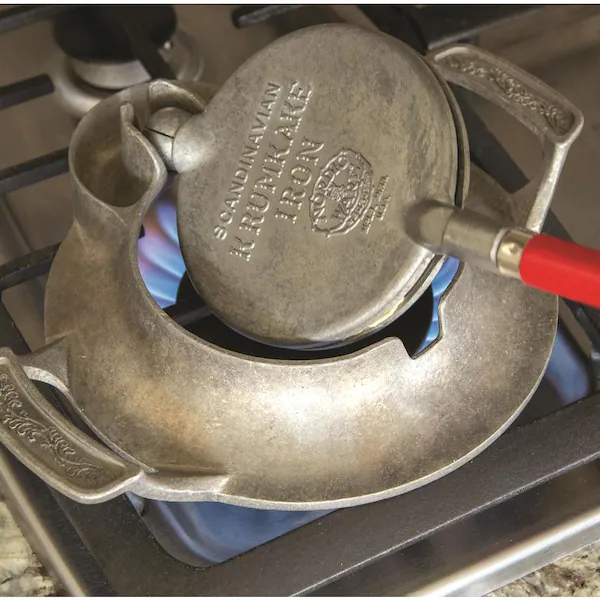
That search came with a side benefit too. We bought a standard electric iron, and it works great, but now I learned that traditional stovetop versions are still being sold as well! How cool is this?
An old fashioned stovetop Krumkake iron from Nordic Ware.
Krumkake recipes existed long before electrical power, and you can actually reproduce that experience if you choose. “Heritage” indeed!
For heaven’s sake, #4 has to be excessive. I like flat pizzelles just fine and I’m perfectly willing to have “topping” instead of “filling.” Why go to the hassle of burning my fingertips to form these into shapes?
Let’s start with the name. “Kake” means cake or cookie, and “krum” translates to ‘curved’ or ‘crooked’; so Krumkaker are by definition “curved cookies.” Cones are the most traditional shape, with tubes close behind, but I couldn’t find a single recipe where the author left them flat. Our casualties irregular results used for taste testing confirm that wafers taste just fine, but you won’t be getting the full experience, and it will matter once you get to the final touches. More on that below.
Okay, Let me have it. What’s the big deal behind requirement #5? I eat my pizzelles plain. Why not Krumkake?
This is actually the most important piece of the puzzle!
We had plenty of “irregular results” as Kate and I struggled with portioning, timing, shaping, and my desire to somehow make this work with a pizzelle machine. Casualties = nibbling. And the nibbling proved, beyond any doubt, that straight Krumkaker are… inoffensive. Nothing wrong with them, just ho hum. Uninspiring. Even disappointing, to be totally honest. Pizzelles have character. Stroopwafels incorporate a caramel filling the gods use to enhance their ambrosia. These Krumkake fragments had neither.
So you can imagine my surprise at the startled cries of delight that came from the other room as guests and family went in to try them out. “Well, they’re certainly pretty enough… Ssshhhhpritz! (From the can of whipped cream)… And oooh, berries. I think I’ll try… Oh. Good. Lord. Jim, you’ve got to come here! You’re missing out on the good stuff! These things are amazing!”
Maybe I ought to try one too… And yes, that was when the penny dropped.
Plain, unfilled Krumkaker are like a light, crispy, and extra fun version of that plain cake underneath a Strawberry Shortcake. [Yawn] Everything changes when you add the cream and berries. Hody hum to holy cow in one quick instant.
That, my friends, is the frame you need to complete the picture. Krumkaker, like Cat Tongues, are a platform rather than a standalone cookie. They aren’t complete until they are filled. But trust me on this. Once they are completed, you will be H.A.P.P.Y.
NAILING DOWN THE RECIPE
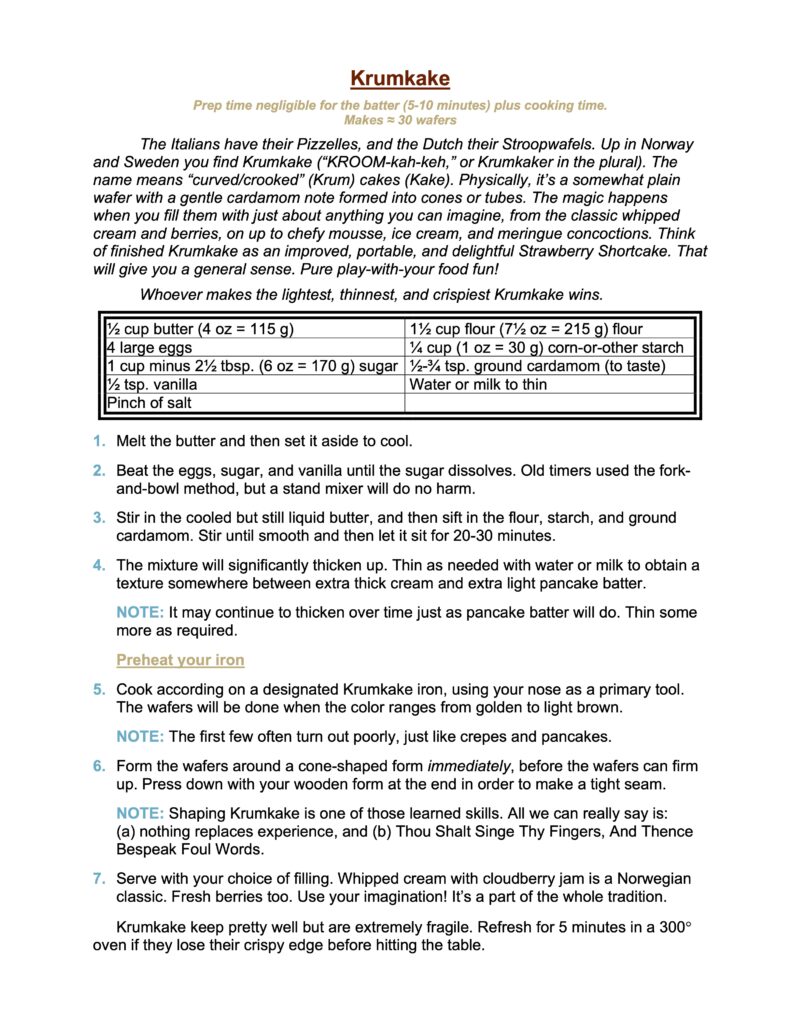
Recipes for the Krumkaker shells. I did a great deal of research for this recipe because it’s so well loved in Scandinavian tradition, and found that the recipes all followed the same basic pattern. First you mix together eggs and sugar until the sugar dissolves; then you add in melted (and cooled) butter; then you stir in some flour mixed with starch (potato, corn, etc.); and then you thin the batter as needed to get to a consistency somewhere between an extra-thick cream and an extra-light pancake batter. The recipes only differ in their proportion of eggs, sugar, butter, and shortened flour, and those group loosely into three basic categories:
Recipes made 1-2 eggs, standard flour, and a lot of whole milk, half and half, or cream.
Libby’s recipe, which uses 3 eggs, shortens the flour with a lot of starch (1 cup and ½ cup respectively), has a small amount of sugar (½ cup), and then thins the result with water.
The recipe that came with our machine (the most common by far), which starts with 4 eggs, flour with just a little bit of starch (1½ cups and 2 tbsp.), a full cup of sugar, and then thins the already looser result with your choice of water, milk, etc.
We tested all three. The first one disappointed. It came out as a nice, thick batter but cooked up a little tough. In the ideal world I would have gone back to test this again later on, because it probably suffered from both our lack of technique and my insistence on trying to a pizzelle iron. I never did, however, because the egg-heavy recipes ended up working so well. Thus I won’t call this approach a “failure,” just an alternative that got abandoned early on.
Libby’s 3-egg recipe worked, but had two issues I felt compelled to refine. First, it wasn’t quite sweet enough for our admittedly American taste, and second, it kept thickening up into something that could barely be called a batter at all. Adding water would thin it out for 10-20 minutes, and then it would thicken up yet again. Fixable issues, beyond any doubt, but first I wanted to try the 4-egg recipe since it promised to be both thinner and sweeter.
This one worked quite well. Yes, it was a little on the sweet side. And yes, it still needed some extra liquid. But it wasn’t over the top sweet, and it needed less liquid than Libby’s. A compromise between the 3- and 4-egg approaches looked like an obvious way to go. Or would have if my itch to experiment hadn’t intervened.
COOKIE NERD MOMENT
The Unwise Diversion
I know from general baking principles that egg yolks tend to add structure and cakiness to baked goods, while egg whites make things a little drier and crispier. Whipping the eggs/whites also makes things lighter and crispier. And weren’t “light” and “crispy” the very targets we were after? So logic said the path toward an Ultimate Krumkake might actually lie in separating the eggs and playing around with longer mixing times, rather than fussing with the ingredients alone. “Most innnterestink…” says he in a cartoon Dr. Freud voice.
But here’s the thing. Our work isn’t really about finding the Ultimate Version. We’re after the Best Traditional Version that can be made with standard U.S. ingredients and materials. All of which forbade something as radical as separating eggs… unless I could dig up traditional versions that followed the same logic.
Eyes aglow I went back to my research, and found [crickets]. The deeper I looked, the clearer it became. Krumkake is an ancient treat that Grandma’s grandmother made by whisking whole eggs and sugar with a fork until the sugar dissolved, adding shortened flour, and then thinning with liquid. That evolved over time to make use of better tools, but only because they achieve the same result a little quicker. Chefy variations and techniques? Not a one to be found.
The batter part came together quickly after that. I added some extra starch for tenderness, cut back on the sugar by a few tablespoons, et voila. This was the recipe that went out for an initial public test, and yielded all those rave reviews. Could I make it even better? What if I…
Sometimes it’s good to have a wife. (Okay, okay: most times.) Kate looked at me and said, “Perfection is overrated. These aren’t just ‘good enough,’ they are good enough that I want to call over company just to show them off, and get them out of the house where I won’t be tempted any more. Leave well enough alone.” So be it.
The recipe down below still tends to thicken up over time, but only by a little, and isn’t that just as true of pancake and crepe batters? It’s the nature of the beast. Consider it a trick of the trade.
Finding the ideal Krumkake filling.
There is no such thing. End of story.
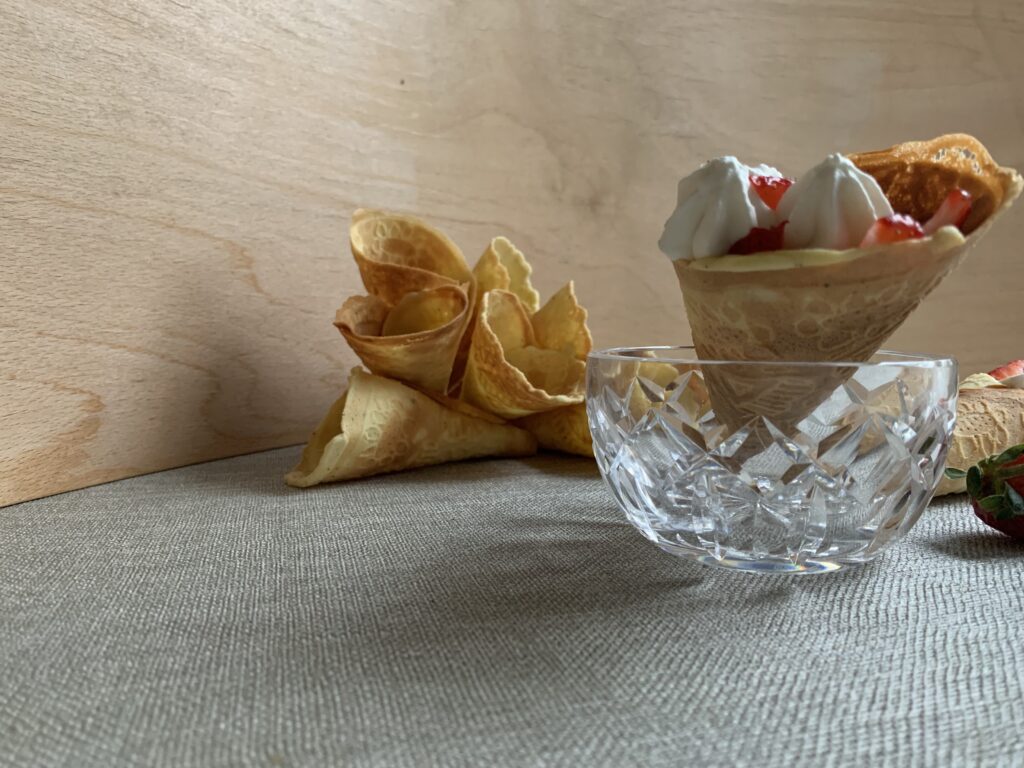
The simplest, most basic filling is berries or preserves served with whipped cream. Lingonberries or cloudberries if you’re in Scandinavia; and something like fresh strawberries here in the U.S. But that is just the starting point.
Novel fillings are a significant part of the Krumkake tradition. Ice cream? Yes, and I can personally attest to how well they go with a little Häagen-Dazs coffee. Custards and thickened creams? Yes. Berries or jam alone? Yes. Other fruit, be it cooked, raw, preserved, fresh, northern, or tropical? All of the above. Pudding, mousse, caramel drizzles, chocolate dips, meringues, etc. ad infinitum? Ditto.
If tradition limits the shell to a basic approach, that same tradition says that only a baker who lacks inspiration (or has demanding family members) would trot out the same kind of filling every time. Krumkake must be filled with something. That’s a fact. But “something” is about as specific as it gets.
Just keep the fragility factor in mind as you ponder what to use. Super thin, crispy-but-tender shells are going to shatter in your hands somewhere between bites one and two. There’s no way around it. When (not if) that happens, there’s nothing to do but laugh, catch the crumbs, and then lick your fingers. We can’t recommend the use of any filling where that would present a problem. After that, anything goes.
FORMING KRUMKAKE CONES
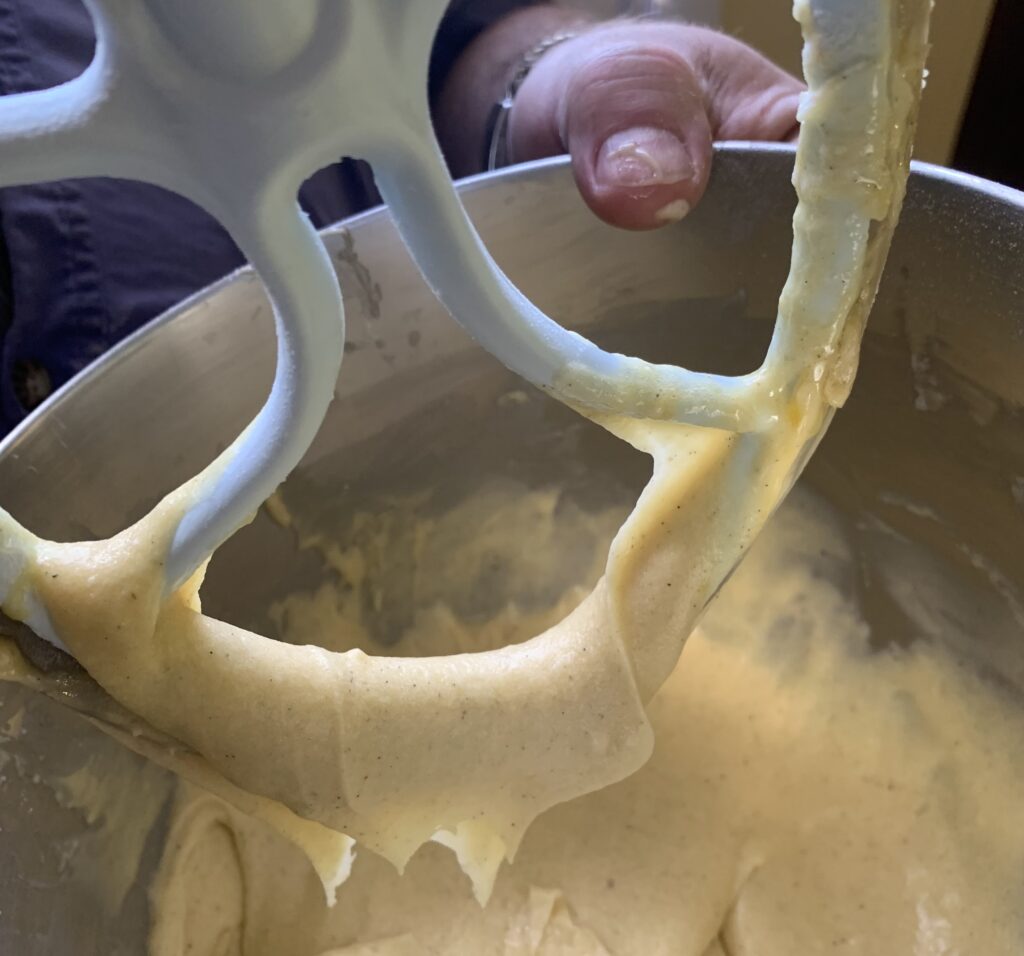
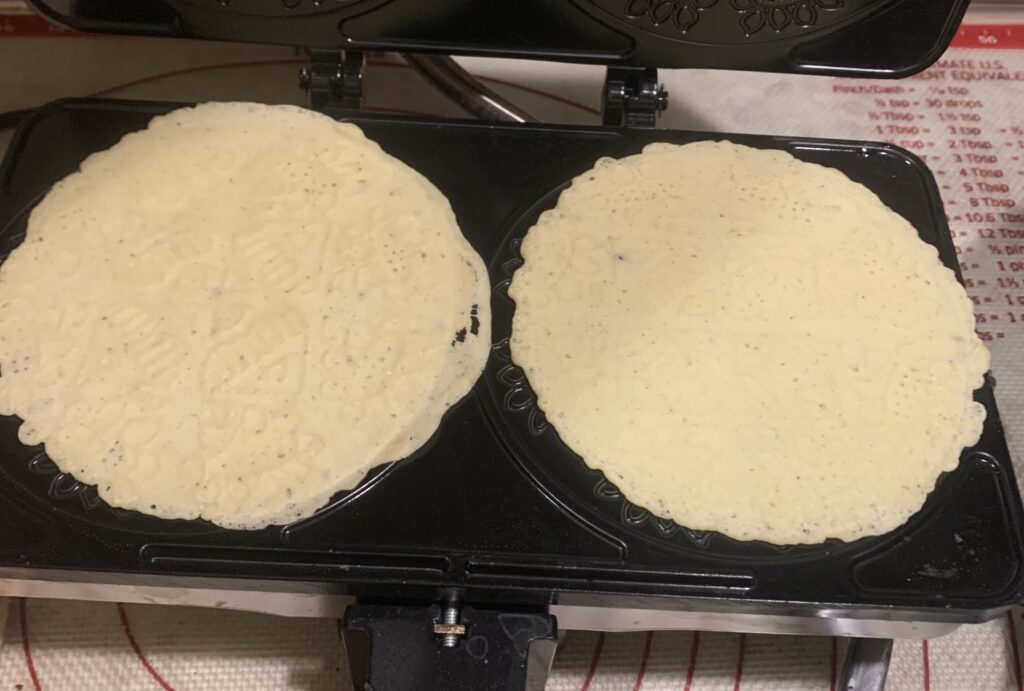
The batter before it gets thinned with water or milk
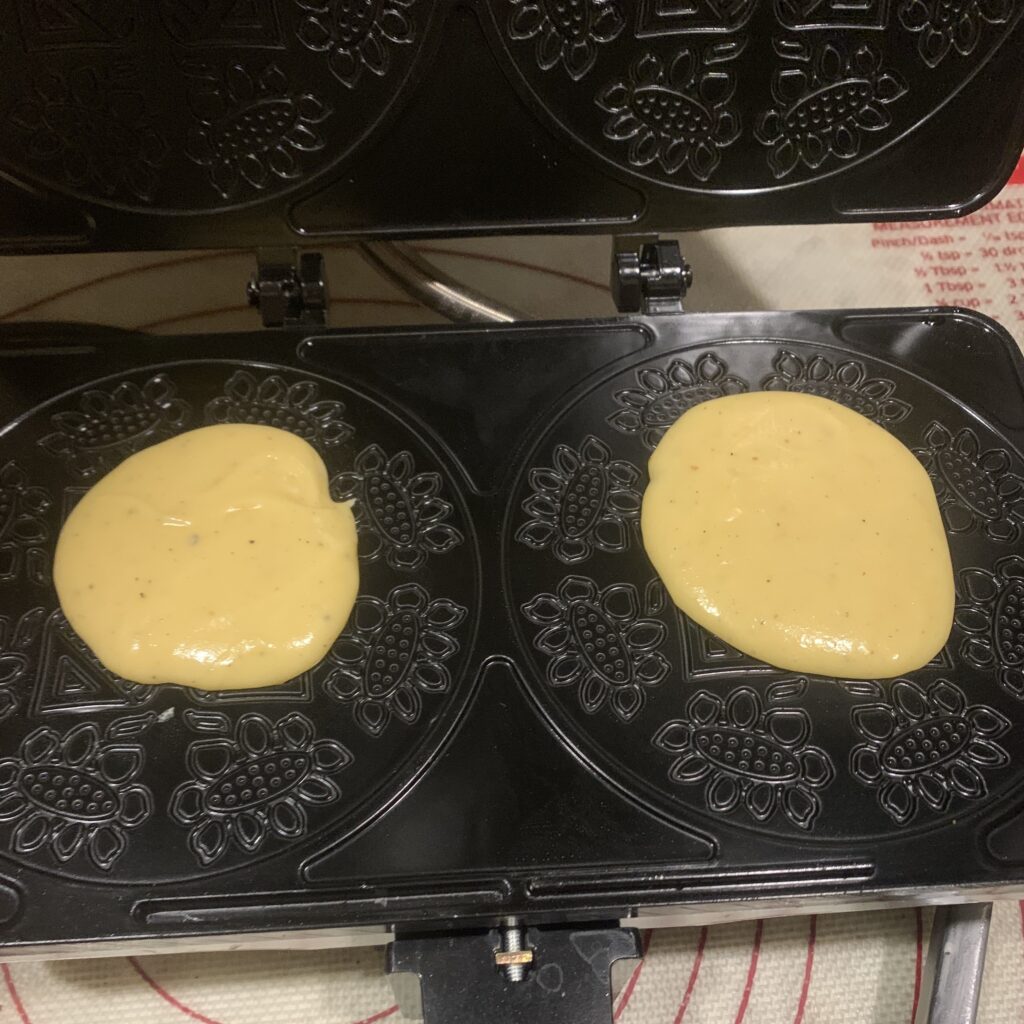
Thinned Krumkake batter at the right consistency
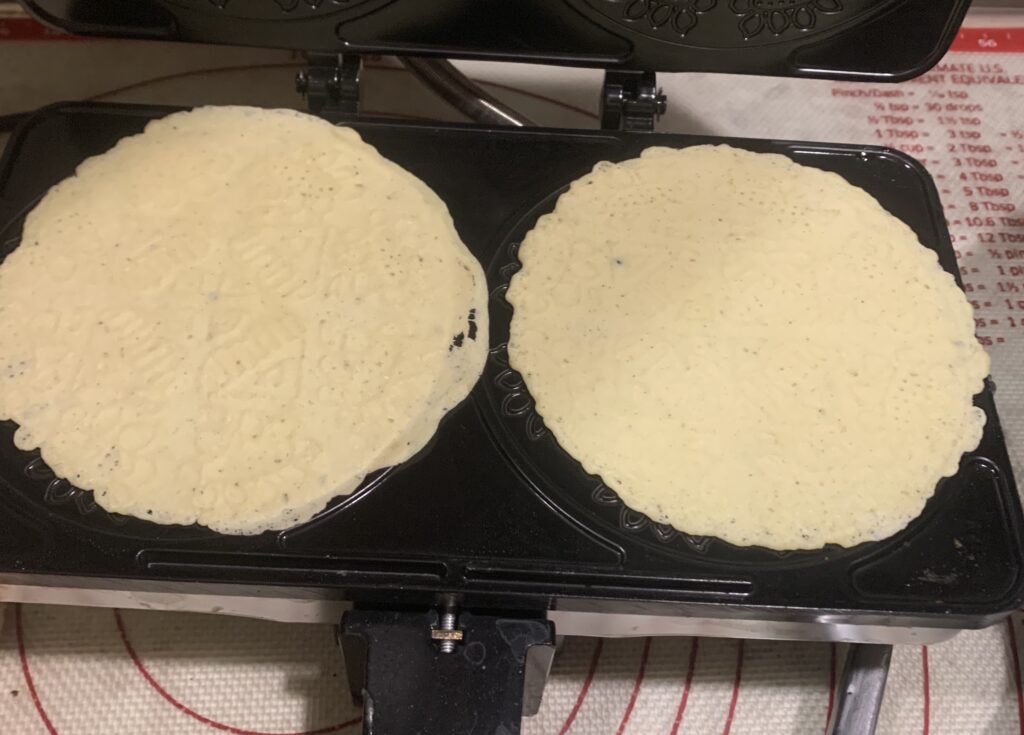
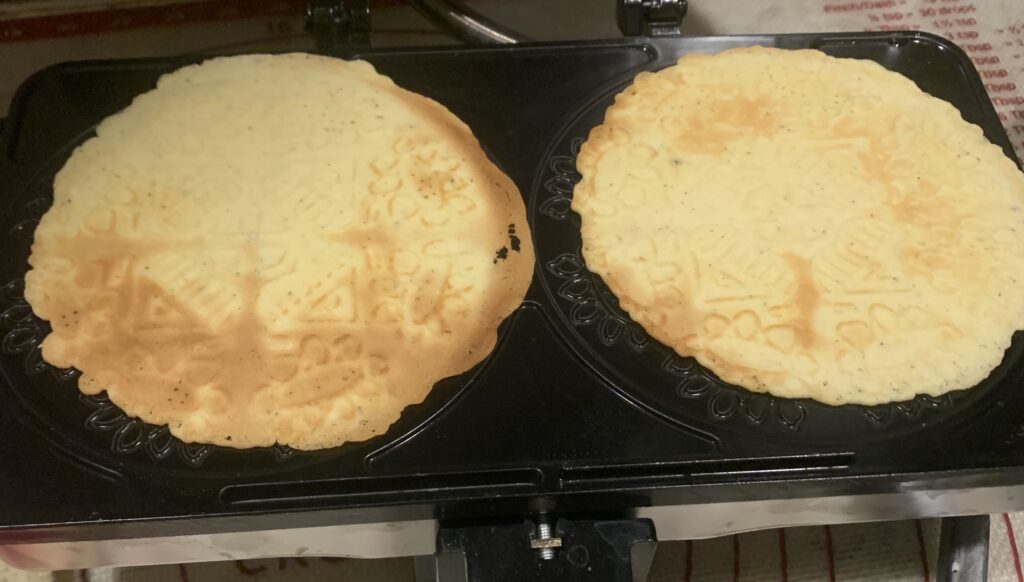
Not dark enough yet
Still not dark enough
Ready to roll
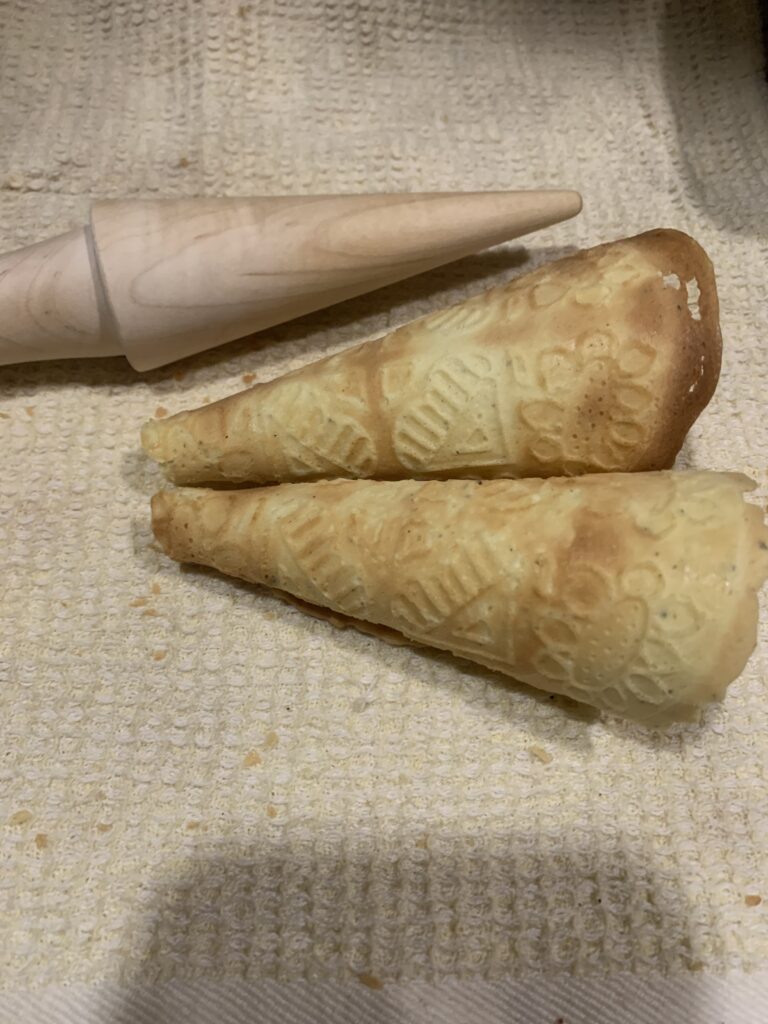
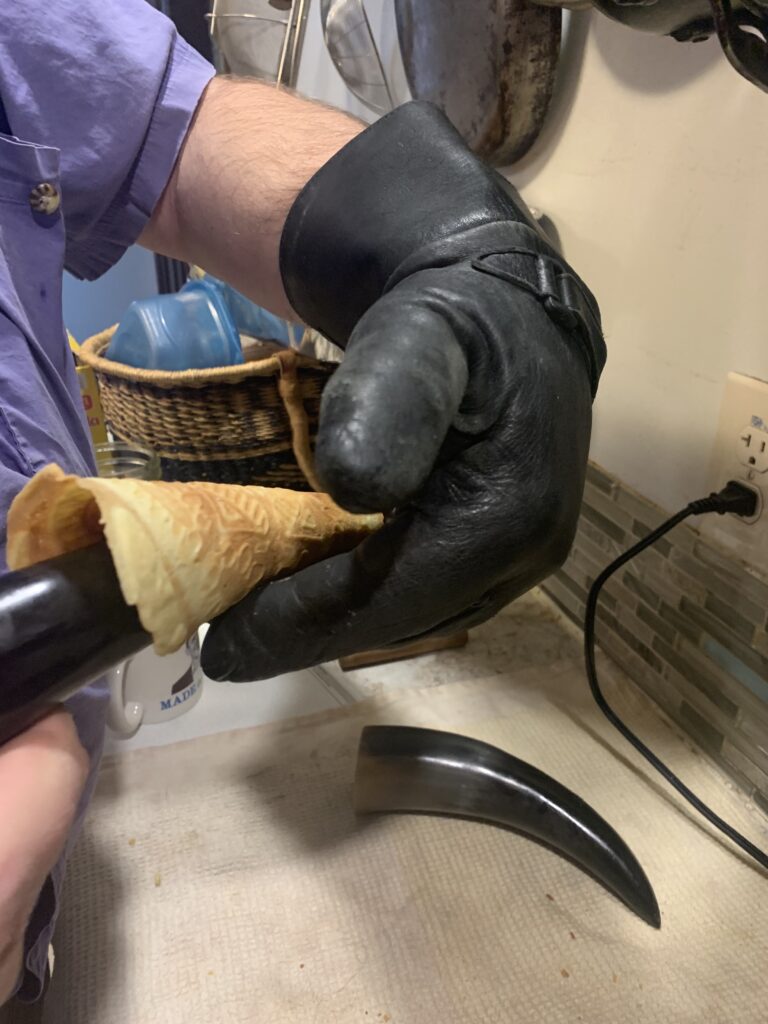
And now we’re done! The kitchen towel was used as a “glove” to cut down on singed fingertips. Note the wooden cone mold at the top.
I don’t know what to tell you. The only advice I can give is both obvious and doesn’t offer a whole lot of help.
Thy Fingers Shalt Get Singed. The wafers can only be shaped when they’re piping hot, which makes the ouchies are unavoidable.
Wearing a glove will help. Same with rolling on a clean towel, which can double as a pseudo-glove for handling. But it’s going to happen. Just remember that you’re doing it for love, and be creative with how you curse.
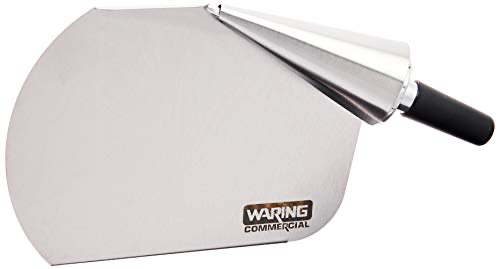
A good, solid cone mold makes everything easier. Those tools exist for a reason, and they work. There is a tool good enough to solve all problems (pictured below), but at that point you’re talking about something used for industrial production.
Kate likes to keep a bowl of cold water standing by to cool her fingertips. (NOTE FROM SCOTT: Being a big, tough, manly man I obviously scorn such sensible comforts).[NOTE FROM KATE: And use a manly biker glove instead].
But the bottom line is simple: nothing will ever replace experience. Experience makes you quicker and more efficient, and turns the race against ouchies into a private challenge rather than a looming threat. Nothing replaces experience.
All of which explains why war stories are so big a part of the Krumkake experience, both for the rueful memories and the times you cut loose with some [ahem] appropriate words, not realizing who was standing right behind you.
NOTE FROM KATE: We had a lot of fun with this recipe, and it’s easier than it sounds. In this, it reminds me of macarons: You end up learning a new technique, and you will make some misshapen, too-light, or too-dark pieces. But they will still taste pretty good, and by the end of your first batch, you’ll find you are making very respectable cones.
We engaged in all kinds of foolishness before Scott ordered that wooden cone shape. We tried a cardboard roll shaped into a horn and covered in aluminum foils (an epic fail – you really need to press on the ‘seam’ where the edges of your cone meet.) We tried bovine horns, carved and uncarved (a remnant of an old hobby – I don’t carve anymore.) That sparked a promise of how good it could be, if we only had a straight horn. Like, y’know, one made of wood for the purpose. The gloves were a massive overkill. You don’t need to touch the hot wafer except for that one edge, and you can do it through a clean tea towel. [SCOTT RESPECTFULLY DISAGREES. There is no such thing as overkill when it comes to tools. If you’re going to make a thing, why not make it from stainless steel?]
Filling the horns is a lot of fun. You will eventually want to start making your cream (or cream-based fillings) ahead to keep in the fridge. The spray cans are fun but inelegant. The higher end approach is to stabilize your cream with gelatin and powdered sugar. Here’s what I did, and it worked like a charm:
1 cup of cream
1 tsp. powdered gelatin
2-4 tbsp. hot water
1-4 tbsp powdered sugar.
Bloom the gelatin in hot water, let it cool, and then add it into half-whipped cream. Finish whipping until you get soft peaks.
We served this in disposable pastry bags, with jam and pre-sliced berries on the side. [Sigh] It was wonderful. Several berries, in fact, so people could create their own combinations. Every one was delicious, and our guests enjoyed competing for whose would be best. Oh yes – remember to serve with extra napkins on the side. Trust me on this.
Another view of the molding tool and some Krumkake I made using it. $8.00, and worth every penny
A commercial waffle forming tool. Ouchy free, but $40 instead of $8, and not so easy to store
Or you can get really traditional…
The glove was a great idea despite Kate’s rolling of the eyes. The natural horns? Not so much. The lack of a handle made them hard to, well, handle, and the curve made forming them slower, which increased the ouchy factor.
CONCLUSION
Enough with the ouchies! War stories, remember? They’re a part of the fun. But the best part of all is this:
Krumkake are so good, and so much fun, that they are going on our short list for favorite desserts to make whenever guests come by. Not just for the holidays either, but all year round. The whole experience adds up to a solid “10.” Your guests and loved ones even get to play with their food! What could be better than that?
Dense nutty shortbread with an apricot filling and chocolate coating. What’s not to love?
“There is a tide in the affairs of bakers. Which, taken at the flood, leads to cookies of legend.”
Williamnot Shakesthepan, ‘Julius Eater’
The bakers of Imperial Austria were always good, but immortality escaped them until the creation of a series of desserts in the 1800’s. Yes, Linzer Tarts date back to at least the 1600’s. But nailing it? Pre- and post-French Revolution. One example is Sachertorte, created in 1832; a dense, extremely chocolatey layer cake with a generous amount of apricot jam on the inside. Ischler Cookies are another.
This particular cookie was created for Emperor Franz Joseph I in 1849 at the spa town of Bad Ischl. Look with care and you’ll see a marriage of the first two; the buttery, nutty, Linzer shortbread sharing the stage with apricot filling and dark chocolate counterpoints.
Exquisite.
As always, skip to the bottom if you are only here for the recipe. Most of this article concerns the choices we made to get there.
MORE A “PROFILE” THAN A “RECIPE”
A search for “Ischler Cookies Recipe” yields somewhere in the area of 2,000 recipes in English alone, and another 10,000 in German, Czech, Slovak, Hungarian, and any number of other languages. Plus books, of course. I’ve scanned maybe a hundred in all, with close study of several dozen, and all the work done on ours. On that authority I feel confident about the [lack of a] target definition:
A sandwich cookie made from a tender, nut-heavy shortbread;
An apricot filling, which often gets varied in the name of creativity;
And a densely chocolate element, which can take any form that human ingenuity can contrive.
This cookie has been around for more than 170 years, and the recipe now has all but infinite variations. If you insist, I will admit to a belief that the original cookie used a lot of hazelnuts, had an apricot filling, and was enrobed in chocolate, but that is based purely on inference and guesswork. Why hazelnuts? Because it pairs so very well with chocolate. Why enrobed instead of sandwiched? Well, if I was a pastry chef, and I wanted to impress an Emperor, that would be my default.
Sensible? Yes. A statement of fact? Not exactly.
So here’s the bottom line. Our version of this recipe is as good as any, better than most, and is 100%, capital-R Right. But that doesn’t mean that other recipes are capital-letter Wrong. They aren’t. We’re looking at a flavor profile, not a fixed recipe. Everything is “right” so long as it has the nutty shortbread, jam filling, and distinct hit of chocolate.
THE NUTTY SHORTBREAD
I spent years refining the proportions in my nutty Linzer Tart dough to perfection, and there is no reason to mess with success for this one. Here is the basic formula:
≈ 1 cup (7 oz = 185 g) of fine nut meal, ideally from gently toasted nuts;
2 sticks (1 cup = 8 oz = 225 g) of butter;
2 cups (10 oz = 185 g) of flour;
One large or XL egg yolk;
A small amount of baking powder; and
A healthy pinch (¼ tsp.) of salt.
Tests pushed us to add an extra half cup of flour to the dough, plus a little beyond that for oily walnuts, but that’s basically where we ended up.
What Nuts To Use? Any. Most modern American recipes tend toward almonds as the nut of choice. Modern recipes from Austria tend to use hazelnuts (filberts). The Hungarians often favor walnuts. Kate and I usually recommend a mix of nuts, but it had to be tested. We did so. And the result was clear: It doesn’t really matter.
NOTE FROM KATE: I figure the preferred nut may have also been a function of availability. The Hungarian versions favor walnuts, which they grow locally. In Bohemia (and I believe Austria) you can find hazelnuts bushes growing prolifically near every village, much to the delight of both youngsters and squirrels. So they make more sense for where I grew up. That said, the 1924 Sandtnerova cookbook uses almonds for almost everything, including her version of Ischler Cookies, and Austria sat in the middle of all these trade routes during Imperial times. Thus the Bad Ischl bakers would have had ready access to all three.
The photos in this post vary from examples that are pure walnut through pure hazelnut, 2:1 hazelnuts and almonds, and 3:1 hazelnuts and walnuts. They look the same, and while a devoted taster can tell one from the other (especially when the nuts are toasted), every variation was just as delicious as the last. So choose what you wish according to personal taste, budget, and pantry.
“What about oddball nuts like pecans, peanuts, macadamia, etc.?” Yes, that’s valid too. Look at the definition! “Nut meal” it says, and that is all it means. You’ll just be making another of those infinite and delicious variations. The only change is the obvious one: walnuts and other oilier nuts create a looser dough, which you’ll need to compensate for by adding some extra flour during the rolling phase. (NOTE FROM KATE: Macadamias would be interesting. They are the oiliest nut in existence and would produce a very short dough. I can already taste a Hawaiian take on the Ischler, with a tropical jam filling and a white chocolate coating on top!)
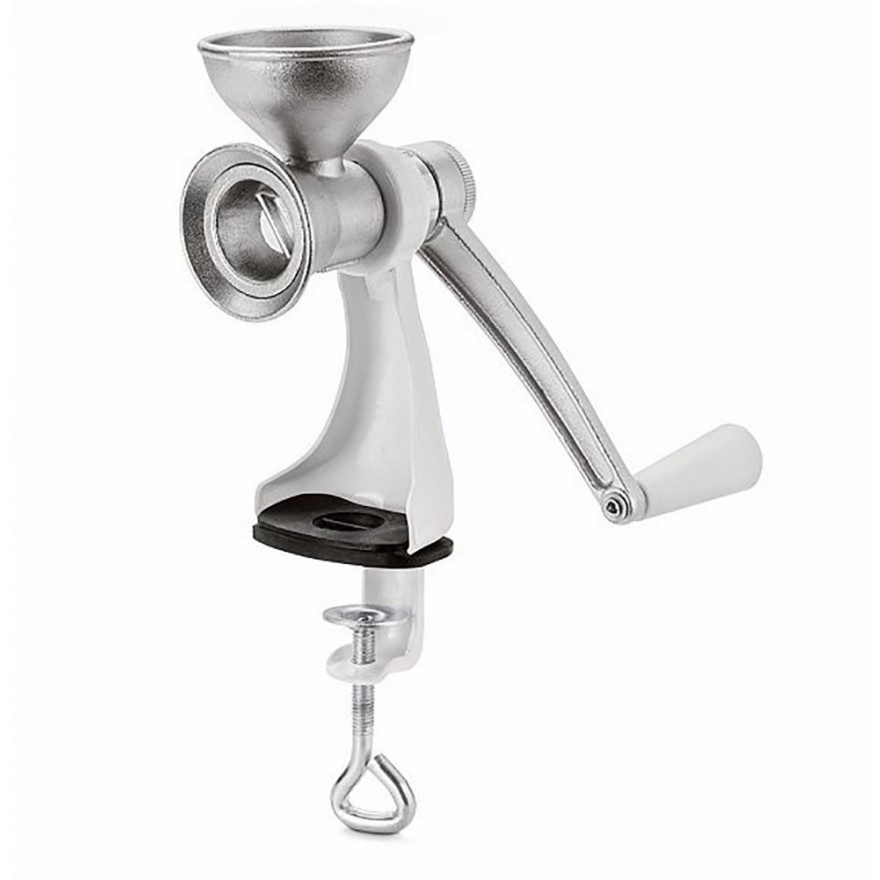
What Texture of Nuts? This one is more defined. Use nut meal nut flour, without any significant chunks of the sort you’d want if we used the word “chopped.” Yes, many people prefer to have little pops of crunchy nuts in their cookies. And yes, it adds some texture while also being convenient. After all, that is what you can get from a food processor. It just isn’t capital-R Right, because food processors did not exist in 1849. Bakers used table mounted grinders instead. Kate’s Grandma Kandler had one that looked a lot like this:
Image shows a 1930’s version from the Czech company Porkert
(NOTE FROM KATE: Scott has this part only half right. Grandma used one like this for poppy seed, and only occasionally for walnuts (which she used in her zimtsterne-like meringue sticks). She didn’t have a nut grinder for hazelnuts or the oh-so-rare almonds. Those she ground on the Czech equivalent of a box grater, one nut at a time, while listening to the radio and cursing. That works fine if you use the small slicing openings, but it’s laborious and does a job on your manicure.
You might ask, “Why didn’t she have the menfolk do it?” The answer is twofold: 1. The menfolk were busy pounding regular sugar into powdered sugar using a brass mortar and pestle. 2. She didn’t trust the menfolk not to eat the nuts. They were hard to obtain during the product shortages of the communist era, and she often had to visit numerous stores with hours-long lines just to get two small baggies of hazelnuts. For a great tool we can use now, keep reading.)
We have gotten by for 30 years with a much smaller and more familiar device:
Image shows the Oxo Rotary Grater, often used for Parmesan cheese but just as effective with nuts.
Both of those grinders inhale whole nuts and breathe out either fine shreds or powder, depending on which grating blade you insert. They do not produce “chopped” nuts. Thus we believe that (a) nut meal is almost certainly the texture used in the 1849 version of this cookie; (b) it’s a texture we prefer to eat; and therefore (c) it is the texture this recipe recommends. [NOTE: Almond flour and meal have started to become available in U.S. markets. Hazelnut and walnut meal are a lot harder to find, at least in 2022.]
As for chocolate inside the dough… see below.
Can I add some spice to the dough? Absolutely! Linzer Tarts have a hint of spice, and these can too. Just be judicious. Ischler Tarts have a strong, three-legged theme that every good recipe needs to balance; nutty shortbread, chocolate, and jam. Spices that enhance this balance do nothing but help. Spices that add a fourth layer will throw things awry. We didn’t do a whole lot of experimenting along these lines, but experience suggests that the best approach would focus on a spice that works with your central nuts. E.g., walnuts love to pair with ground cloves and coffee; vanilla, cinnamon, and nutmeg pair to perfection with hazelnuts; almonds get along cinnamon or an oddball spice like pepper.
THE APRICOT FILLING
Yes, apricot. We defunded the cookie police before publishing this article, so no one’s going to arrest you for using something else. There are, however, a number of reasons to start with this particular fruit:
Apricot and chocolate are a classic Austrian combination, as shown by the much loved Sachertorte;
Raspberry has its own cookie in Linzer Tarts; and
All accounts seem to agree that the original, 1859 recipe did indeed use apricot and not any other fruit.
QED.
Apricot cookie fillings come in two basic versions. The first is slow-cooked puree or compote a/k/a apricot butter, povidla, lekvar, etc. We prefer these fillings for recipes that bake the filling, but with this one – filled after the fact – we recommend the easier route; a modified apricot jam.
Jam fillings present two issues, both of which are easy to solve. #1 is excess moisture that can soak into the cookies and limit their lifespan. #2 is availability, since our stores only carry “apricot preserves,” and that product has enough chunks to detract from your ideal result.
Cookies made with unstrained preserves. See how the bits of fruit hold the two halves apart? It doesn’t hurt the taste at all, but it’s less perfect than what you can do with only a little more effort.
Same cookies, same presentation, but without the chunks of fruit.
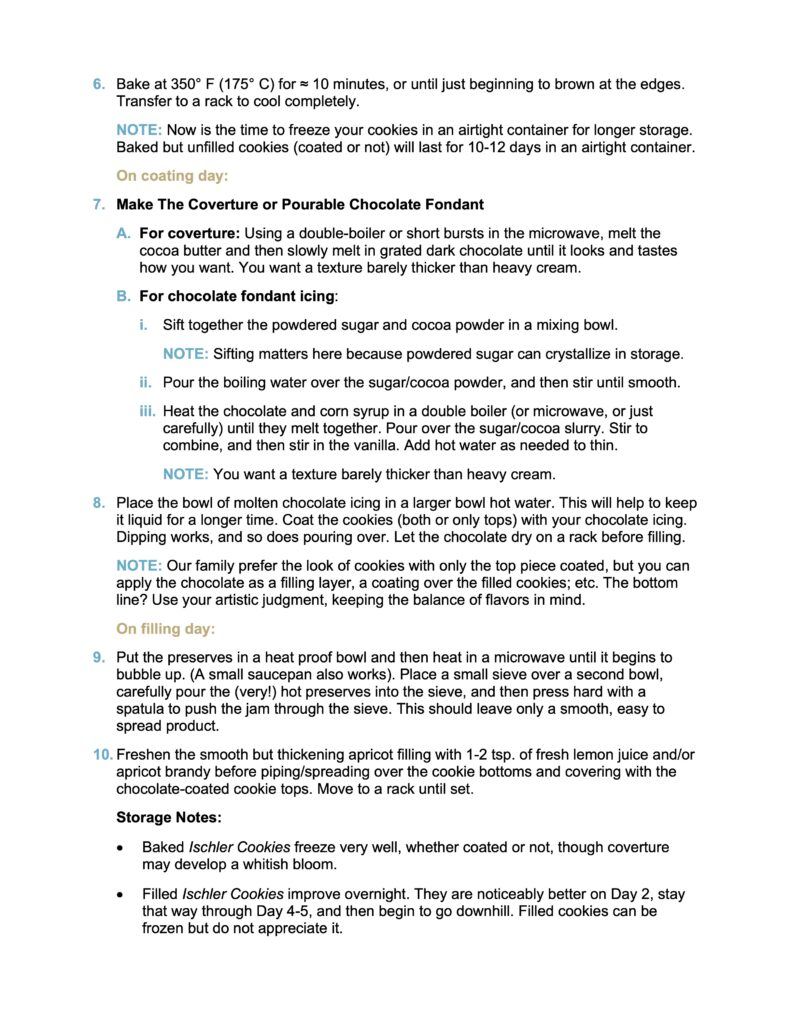
We prefer this cookie with a smooth jam instead, and ideally one that’s just a little drier. You can address both concerns by (a) heating preserves until loose, (b) pushing the hot goo through a sieve, and then (c) spiking it with a squeeze of fresh lemon juice or apricot brandy for that certain je ne sais quoi. Apricot perfection with just the texture you want.
I did try to sieve the jam without preheating, hoping to avoid the danger of handling something so hot. Alas, even a coarse sieve wouldn’t do the job. Preserves are just too hefty, and it did nothing about the moisture concern. Thus you are hereby warned about the danger, and we recommend doing it anyway.
THE CHOCOLATE
Yes, a chocolate component is essential. That is what separates this cookie from being a mere variation on Linzer Tarts. Same genus; different species.
What kind of chocolate? That is a matter of some debate. Look at those 12,000 recipes on line and you’ll see that different bakers try to incorporate the chocolate element in every possible way. And I do mean every. We found recipes based on:
Grated or melted chocolate mixed into the dough. This produces a wonderful cookie on its own merits, and it’s the simplest approach.The drawback? It doesn’t have the same ‘Wow’ factor as a chocolate filling or topping, and it adds flavor without texture.
Cocoa powder mixed into the dough. Again, it’s a wonderful cookie on its own, but it lacks in both Wowness and mouthfeel.
A chocolate ganache filling paired with the apricot filling. This is the most common solution in American recipes because it’s simple, tasty, has a great mouthfeel, and is easy to pack. The drawback? It looks good but not great, and too much of either layer will make your filling squirt out the sides.
A ring of chocolate ganache filling with the apricot placed inside. This is a neater variant on #2, because the piping process enforces exactly the sort of filling-discipline you need. The downside? “Piping” is #1, because many people find it fussy and hard. Visual appeal comes in again as #2. There’s nothing wrong with looking at chocolate, but seeing the jam adds a flash of appealing color. #3, I think it messes too much with the balance of flavors, though Kate disagrees. (NOTE FROM KATE: I have a higher tolerance for bitter than Scott, and find the ring of darker chocolate ganache very pleasant. This is especially true for when used with the sweeter chocolate fondant icing – see below. Also, YMMV.)
Chocolate ganache spread or piped over the top. A great compromise, but the ganache can look a little messy if you don’t pay attention, and it makes for a very sticky top. There’s no way at all you could hope to pack it in a tin. Right idea; wrong solution.
Chocolate buttercream cake frosting piped on top. Think of these sandwich cookies as a tiny cupcake made from shortbread instead of batter. Now go ahead and frost that cupcake. Taste: check. Texture: check. Appearance: check. The drawbacks? (A) It moves us away from “cookie” and into “confection,” (B) no one could even dream of packing them in a tin, and (C) there are better answers yet to come.
A chocolate glaze. Looks fine and packs like a charm, but glazes never have the desired mouthfeel, and almost always lack something on the flavor side too.
Melted chocolate a/k/a why get weird? Alas, but the texture is wrong. The cookies wants a coating that feels dry to the fingers, but gives way to the teeth without any effort. The ‘snap’ of actual chocolate turns from asset to issue in this particular case.
Chocolate melted with butter, and then either poured over the top or used as a dip. This is an ideal solution for taste, appearance, and texture, but it also softens at room temperature, which makes it a mess to eat and impossible to ship unless you heroically cut a piece of parchment as protection.
Coverture a/k/a chocolate melted with extra cocoa butter, used as either a coating or a dip. Ding! This is the best solution of all… if you keep cocoa butter on hand, or have access to specialty stores that sell ready made coverture. If you don’t…
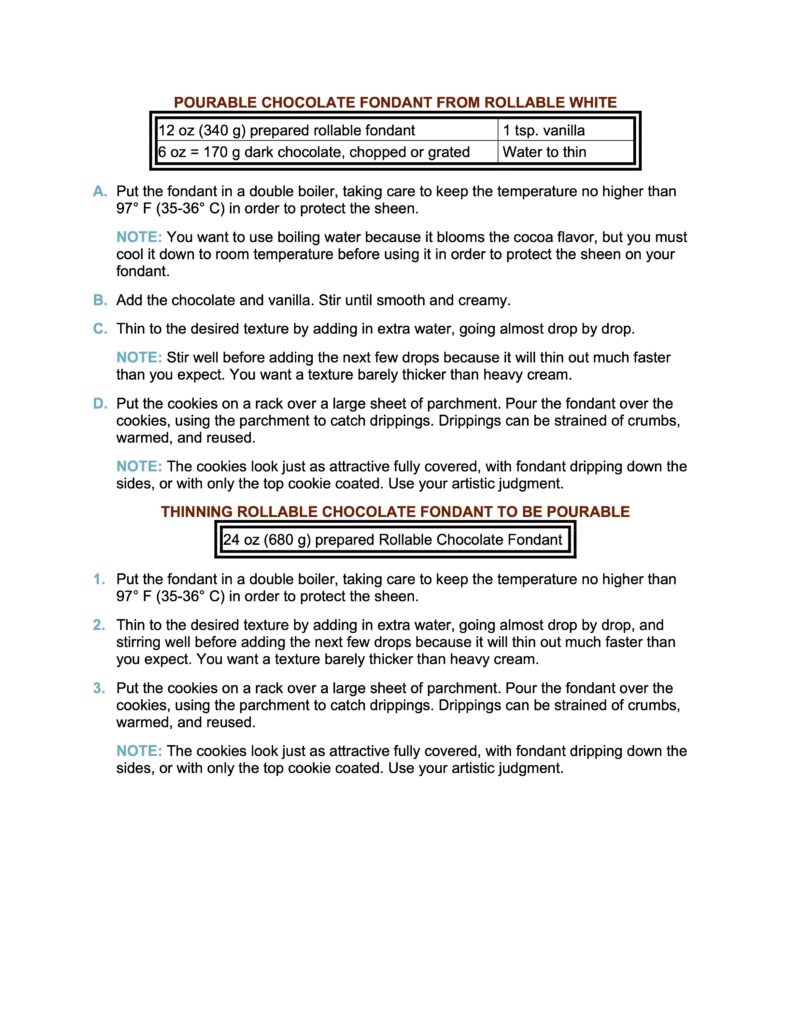
A pourable chocolate fondant used as either a coating or a dip. Ding ding! We have finally arrived at our #1 solution for everyday pantries! Looks perfect; thick enough to give an ideal, luscious mouthfeel; dries enough to pack in a tin without worry; and the flavor is exactly as you want, since it can be varied to taste. It’s even pretty easy… or would prove to be after we figured it out.
Want chocolate icing that flows over your cookies, settles into a coating with some heft, is dry to the touch, but melts in your mouth? Pourable fondant is where it’s at.
THE ICING ODYSSEY
You may find this hard to believe, but we really did try every one of the first nine approaches (other than the frosting). See this parallel article on coverture and pourable fondant. Which one do we recommend? It’s chocolate, people! Chocolate wrapped around rich, nutty shortbread that encases a lively hit of bright apricot filling! Don’t stress. This is the very definition of a no-lose situation.
If you keep cocoa butter on hand, go with coverture. If you don’t, whip up a pourable chocolate fondant.
“But should I pour the coating over? Dip the cookies in? Cover only part of the cookies? Apply decorative stripes or some such?
[Sigh] Do what you prefer. We happened to be testing these just in time for Thanksgiving, which led to an extended family vote in favor of coating only the tops with as smooth a layer as possible. Hence the photos. But we can promise that all the others work too. Once again, you cannot lose, so do not stress.
CONCLUSION
Ischler Cookies can hold their own on any cookie tray in the world. They really are that good, and that full of history and heritage.
Are they actually better than all the other cookies in the world? Well, that one’s up to you. They call it taste for a reason, and I cannot speak for yours any more than you can speak for mine. But I can promise you this. Wise men and women will do a lot of careful tasting and re-tasting before reaching any decision.
“I better have just one more to be sure…”
A FEW FINAL NOTES
On storage:
The dough freezes as well as any other so long as you seal it in plastic wrap or an equivalent.
Baked halves keep as well as any others. Just remember that they are fragile, and do best in an airtight container like a cookie tin.
Baked and coated halves freeze well too, but coverture can sometimes develop a whitish bloom (which doesn’t alter the taste, but does detract from their beauty). Fondant made with actual chocolate can do that too, but less so. Fondant made with only cocoa powder doesn’t mind freezing at all.
Filled cookies freeze ‘okay,’ but not ‘well’ because the added moisture of the jam creates a number of potential problems. Better to freeze before filling.
On lifespan:
Ischler Cookies are a little hard if eaten right after they’re filled; remain perfect for up to a week if kept in a tin; and then go downhill.
All we’ve learned on how to make cookie coatings with texture, thicker than icing but thinner than frosting, which are also safe for shipping
Up until now we’ve been happy to use either a thin chocolate glaze, a ganache filling/frosting, or a coating made from actual chocolate melted with butter. Ischler Cookies, a chocolate coated sandwich with nutty shortbread and apricot jam, wanted that chocolate/butter coating, but had to dry into something that could be packed in a tin without heroic efforts like cutting out custom sized bits of parchment paper.
We have now (finally!) found two answers to the dilemma. The first is coverture, which is essentially a chocolate coating made with cocoa butter instead of regular butter. This has a higher melting temperature and won’t lead to sticky hands until you get toward body temperatures. Think of chocolate bars and you’ll have it.
The problem with coverture? It’s very hard to find in a store, and impossible to make at home unless you keep cocoa butter in the pantry. Most people don’t.
That leaves fondant. You may know this better in the rollable form that people drape over cakes. But did you also know about pourable fondant, the version used for petit fours and the like? It creates an icing that’s almost indistinguishable from coverture from both the visual and textural perspectives. It’s just a good bit sweeter and less chocolaty inside the mouth. An ideal compromise for anyone who wants to stick with standard pantry ingredients.
Heritage Cookies of the Old and New World does include a basic pourable fondant recipe, but we never really dug into the subject to understand how and why it works. Until now. Enjoy!
NOTE FROM KATE: APPLICATION TRICKS. If you have great many cookies and a lot of fondant, by all means use a screen and pour over it, as described above. However, this requires extra sheets, space, and materials. We tested it, and it works. I personally find that dipping a cookie in while holding it yields an excellent result, without having to make coating, and is better suited to the average home kitchen. The only downside is chocolate on your fingers. But I have an answer! To keep having from washing your hands, or fighting the constant temptation to lick your fingers, try using a thin, snug glove! It sure worked for me and my work moved faster. Also, I had absolutely no desire to lick my glove!
P.S. THE HOT WATER TRICK. Our experiments on chocolate coatings led to a wonderful trick:
The Problem: Chocolate icings begin to harden as soon as they cool, and it often takes a bit too much time to get all your individual cookies dipped or poured.
The Solution: Duh. Keep your icing warm enough to prevent it from cooling too fast. But how?
The Method: You have a bowl of molten coating. Fill a slightly larger bowl with hot water, and place your bowl of icing inside. The hot water will keep the icing warm for twice as long, leaving you all the time you need to work.
“Caviar!” chorus Kate and Daughter #1. “How nice,” say Scott and Daughter #2.
Part 1 of this extra long article addressed Poppy Seed Drop Cookies and Roll-Outs. This article covers our work on a Heritage Poppy Seed Filling worthy of the name, and a number of other heritage treats that don’t quite make it as “cookies.”
NOTE FROM KATE: We took a while ironing the kinks out of this one because I have some serious opinions about poppy seed. It’s fabulous! In fact, I started eating poppy young. My paternal grandparents had a summer farm house well outside of Prague. The crops grown around it varied every year, depending on what the state farm’s agronomer decided to grow. One year we had peas (which the kids plundered, using the dry peas in spit guns to devastating effect.) The field next to it grew poppies. The frothy sea of white blossoms faded into blue-green marbles, which soon turned into poppy heads. We kids liked to pick them. We would take our poppy heads into the hay loft, pull out our pocket knives, dig out the white seeds in their slightly bitter white sap, and eat it.
When our grandparents found out, they just shook their heads. Grandma Stoy said, “Don’t eat that. It will make you sleepy, and if you eat too much you’ll grow stupid.”
“That’s how opium is made,” Grandpa Stoy said. “And morphine, for surgeries.” We got a whole lecture on the pharmacological importance of poppies. We were also warned not to make opium (addictive, illegal) while Grandma let it slip that she had seen it used to pacify teething babies. “They used to simmer green poppy heads in milk,” she said. “Then they’d wrap soft bread in a linen handkerchief, tie it off, and soak it in the poppy milk. The baby would suck on it, and go to sleep.”
And here you thought I wouldn’t share any heritage information. This is first-hand research!
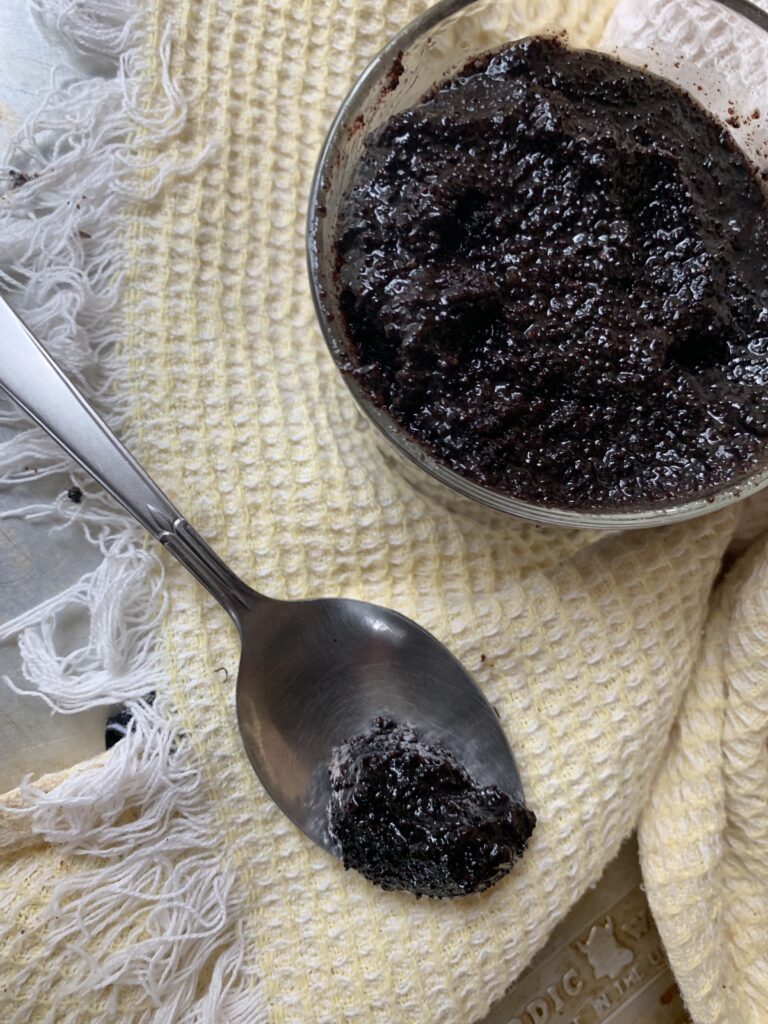
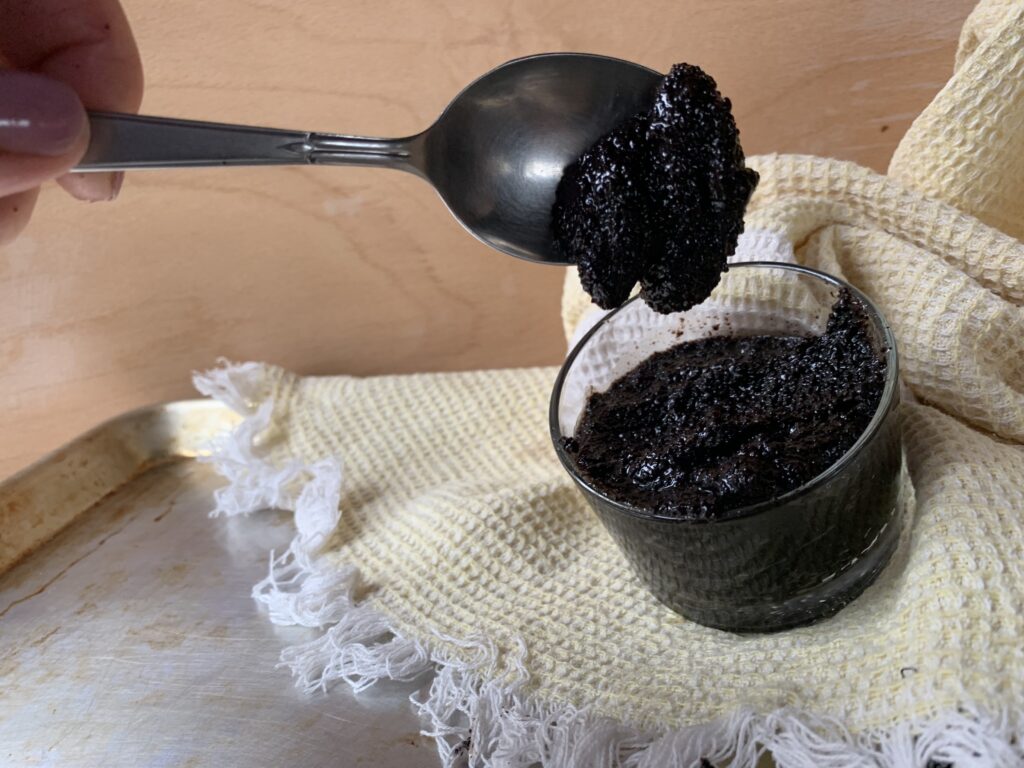
The drop cookies came together quickly even though I (we’re back to Scott) had to start with some creative baking. This Poppy Seed Filling? Not so much.
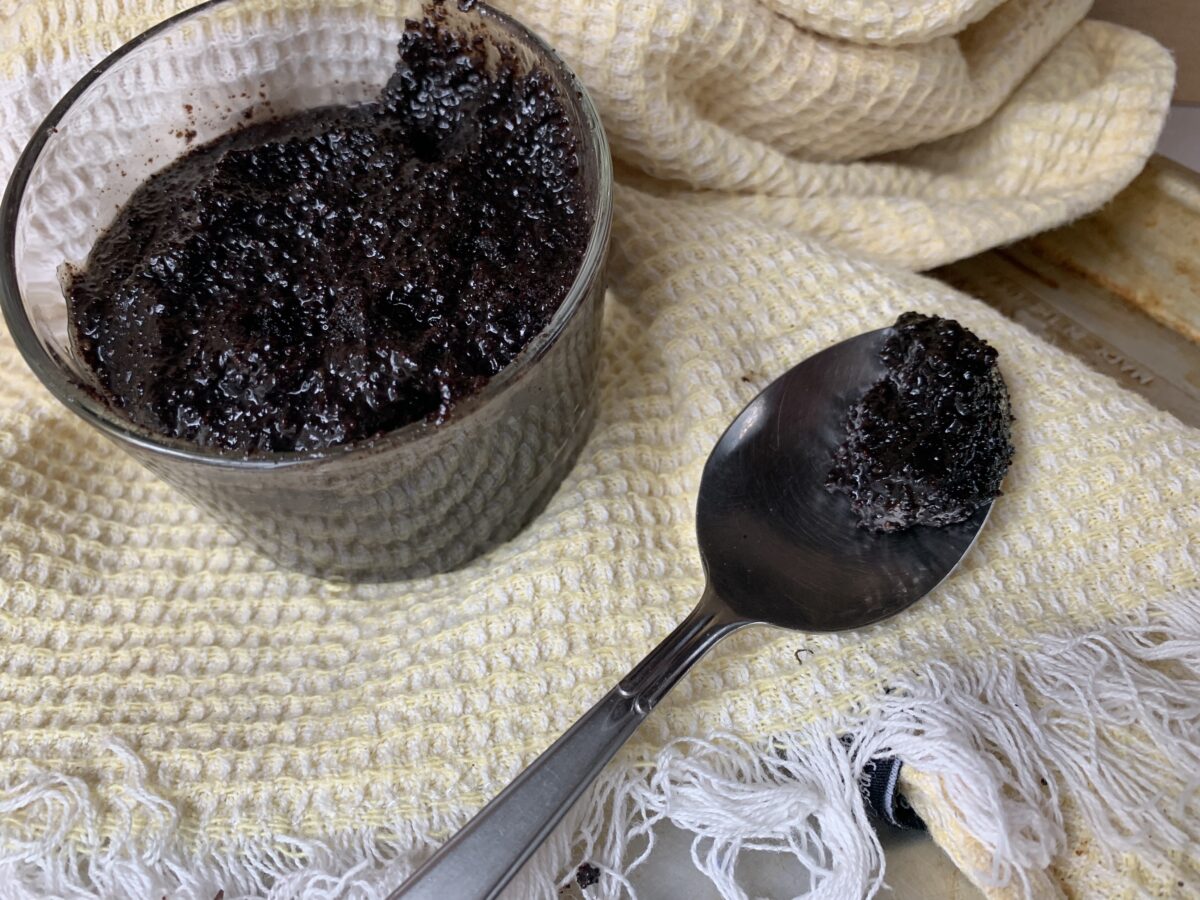
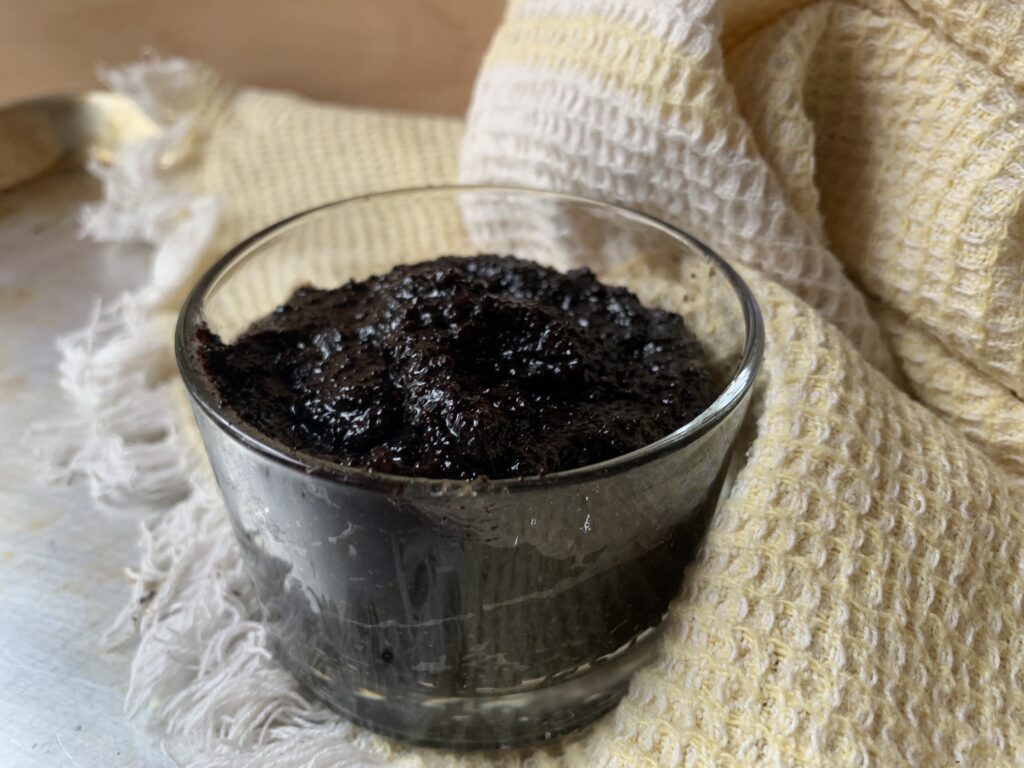
You’d think otherwise, because it is incredibly popular and used in inumerable ways. This is the stuff that goes inside Poppy Seed Hamantaschen, Poppy Seed Kolache, Hungarian Poppy Seed Rolls, the swirls inside of Poppy Seed Cakes and Poppy Seed Breads… and on, and on, and on. There should be recipes out there by the dozen. And there are. But in the end it took both experience, failure, and some understanding of the basic chemistry before we could get it capital-R Right.
Problem #1: Poppy Seeds have a bitter edge that’s part of their appeal. But old poppy seeds get bitter in an unpleasant way, and the bitter edge becomes a stabbing blade if you go from “ground” to “pulverized.” I now believe this happens because the seeds, like many other seeds and nuts, are full of oil. Let the oil age, and it goes rancid; i.e., becomes unpleasant. Pulverize the seeds too far in a blender, and the increased surface area of the particles gives the oil a greater opportunity to oxidize, turning harsh in the same way you see with extra virgin olive oil.
Solution 1a: Buy your poppy seeds fresh, and store them in the freezer until you’re ready to use them. This goes double for ground poppy seeds, where the oils are no longer protected by the hulls. [NOTE FROM KATE: A week at room temperature is enough to render ground poppy seeds “less than fresh.” Double that and they will turn bitter. Grandma Kandler always ground them fresh right before use. If you buy them ground to order, as we do, I suggest you make your filling right away, label it, and freeze it.]
Solution 1b: Keep the blender problem in mind, and don’t blithely turn it on for a minute or two. There is “not enough,” but there is also “too much.” The baker’s job is to find the perfect compromise. Mixing whole and ground can also help. [See below].
Solution 1c: If poppy seed flavor lies in the oils, then one should be able to extract those oils into either dairy products or alcohol. And you can! Include some cooking/soaking-in-milk time as part of the recipe. This will even out the flavor, prevent it from going rancid anywhere near as fast, and will also hydrate the whole seeds [see below].
Caviar for Kate
Problem #2:Many sources argue that whole poppy seeds provide some desirable pop in a filling. On the other hand, they can get annoying very fast when you end up with a mouthful of grit; and they get extra gritty when a little dried out. Turning it around, ground poppy seeds release more flavor and also smooth things out, but can make the filling a little too dense, shorten its shelf life, and remove all the pop instead of just some. [NOTE FROM KATE: YMMV on cooking them whole, and I have been as open-minded about it as I could be. Yes, they do soften over time, but even the 50/50 ground:whole compromise left me irritated about the whole seeds’ texture. Let your preference be your guide.]
Solution 2a: Start from a mix of ground and whole. Fact is, blenders are not the best tool for grinding poppy seeds. There are actual mills you can buy for just that specialized purpose.
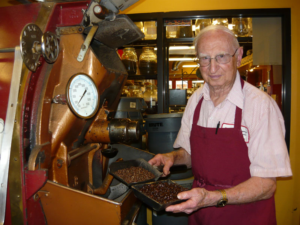
We buy our poppy seeds in bulk from our inestimably awesome local coffee roaster. They have just such a tool, and will grind on site as requested. Thus it takes us exactly zero effort to order two half bags instead of one big one, with the first half ground and the second half whole. Highly recommended.
The founder, Mr. John Prestogeorge. A gentleman through and through.
Solution 2b: In theory, poppy seeds swell as you cook them in a liquid, and eventually will swell enough to burst. Think of rice, or some other grain like quinoa. They do just the same. Cooking a little longer will make them swell that much more. The technical challenge here is not allowing the mixture go above the barest of a simmer for more than a few minutes. Boiling will turn them bitter for sure. And with a mixture as viscous as a poppy seed filling, reaching a boil is almost a foregone conclusion. You could put the whole mix into a sous vide for a few hours, and that might work quite well, but we haven’t tried it.
Solution 2c: If you go through the whole process and the filling still feels gritty, swirl a pat or two of softened butter into the warm filling. It’s just like finishing a sauce. The butter adds mouthfeel way out of proportion to the amount you use.
Caviar for Miranda, the eldest daughter
Problem #3: Poppy seeds alone are… meh. They come into their own when mixed with some kind of fruit. This is why you almost always see lemon-poppy goods rather than poppy playing a solo tune.
Solution 3a: Include some concentrated fruit flavor (a/k/a honey, jam, preserves, and the like) as one of the sweeteners. This isn’t some secret trick! At least 90% of the recipes out there will include both honey and some kind of jam. The most common ones are povidla (prune butter/filling) and its apricot equivalent lekvar. [N.B. The names are from different languages, and actually mean the same thing: cooked, jam-like fruit filling used in baked goods. Thus the Czechs have both prune povidla and apricot povidla, just as the Hungarians have both apricot and prune lekvar. I use the one name for a prune version and the other for apricot for the sake of reader clarity despite the fact that I know it is linguistically misleading.] But any good fruit preserve will do if that’s the flavor you want to pair! Strawberry, blueberry, raspberry, grape… they’ll all work well and give you a customized “other” to claim as your own.
[NOTE FROM KATE: If you don’t have a jar of prune butter handy, soak two or three prunes with your liquid of choice. The flavor will spread and even out when you the blend the two into filling.]
Solution 3b: I know, I know. ‘But fruit preserves usually include undesirable seeds and/or lumpy bits of pulp! What do I do about those?’ Simple enough. Heat the “jam” until it’s thin, and then push it through a sieve by pressing down hard with a rubber spatula or spoon. The seeds and irredeemable pulp will be left behind, while the rest will get broken down to the point where it no longer matters.
Solution 3c: And yes, mixing sweeteners even more will only increase the complexity. Our recipe uses plain sugar (to ensure the poppy seeds stay front and center), honey (to round everything out), and also choice-of-jam to transform it from ordinary into special.
Solution 3d: Poppy seeds adore fruits of all kinds, but their One True Love is lemon. Don’t fight it. We add some zest into our filling just because it’s part of what everyone thinks of as “poppy seed flavor.” Vanilla also works but we consider that to be more of an optional extra touch.
“Poppy seeds? How nice. Couldn’t we do something with chocolate?” At least according to Scott and Lee (daughter #2)
Final problem: How do you use this wonderful filling now that it’s made and waiting?
THE LAST AND FINAL NOTE FROM KATE: My feelings run strong about this one! I view whole poppy seeds in my filling much like Scott’s opinion on coconut (remember how he called it “Demon Hair” in our Heritage Cookies Alfajores recipe?) Poppy seed filling should be smooth enough not to feel gritty, and should never leave dark seeds between your teeth. If you’re baking for me, use only ground seeds OR blend it after cooking. Remember that, as a rule of thumb, every 10 degrees Centigrade will double the rate of a chemical reaction. Oxidation of the popp yseed oil is just another chemical reaction. Thus, the bitterness will be directly proportional to the combination of time and temperature in the presence of oxygen. (Since the size of our kitchen excludes the installation of a temperature-controlled, nitrogen-atmosphere reaction kettle, we need to plod on like it was 1899.) ANYHOW, you can use fresh-ground poppy seed and gently simmer it, and freeze it. OR, you can pre-soak whole poppy seeds overnight in warm water, strain, gently simmer them, and then blend it till smooth; but only once it has cooled some. (Remember: every degree you shave off helps to slow down the oxidative process.)
And don’t forget the balance flavors? Yes about lemon zest and juice. And yes about some jam. But dry spices have a place too. Clove is lovely in moderation and, not coincidentally, rounds out the flavor in a way that keeps the bitter notes under control.
MY FAVORITE QUICK USE: Eat 3 spoonfuls in the morning while waiting for your coffee to brew. [Note From Scott: I support this. See above for Grandma’s wisdom about teething babies. It works just as well for other dispositions. And now I will run…]
FILLED POPPY SEED COOKIES
Start with a classic filled cookie from any nation starting with Turkey, Greece, and the Balkan states in the south, on up through Germany, Poland, and Scandinavia in the north. Poppy Seed Filling gets used every bit as often as fruit fillings, nut fillings, and sweet cheese fillings. Here are two examples from our original Heritage Cookies of the Old and new World collection.
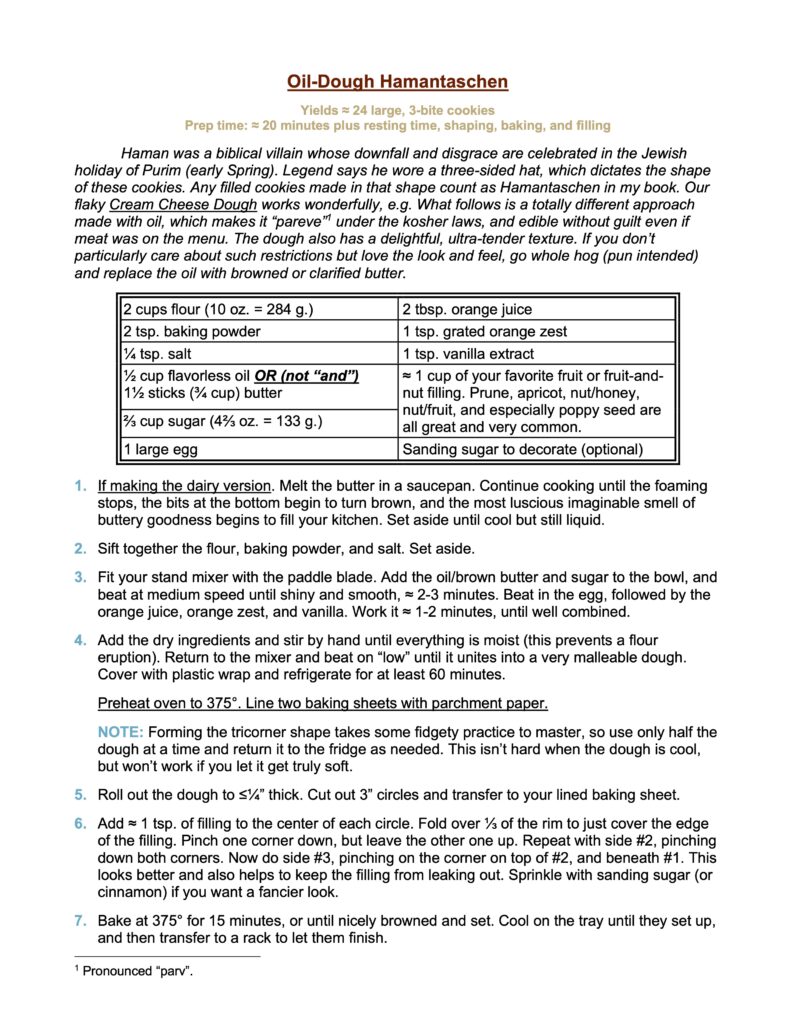
Served at every Purim feast, Hamantaschen are even more common than Queen Esther Cookies. They are actually named for Haman, the villain of that holiday story.
That’s just two examples. Poppy Seed Filling has as much versatility as anything else in the repertoire.
OTHER POPPY SEED DESSERTS
But that isn’t the end of the story. Poppy-centric desserts abound, and several deserve some special mention. No, they aren’t “cookies,” nor even Not-Quite-A-Cookies. So why talk about them at all? Because the treats I’m about to describe are immensely popular, carry great cultural significance, and often fill the same role as a cookie on many a holiday table. No actual recipes, because that would be a step too far, but honorable and honored mention? Absolutely.
Hungarian Poppy Seed Rolls. These look a bit like jelly rolls or roulades, but those are made by rolling up filling inside a yellow cake or meringue layer. Poppy- and Nut Rolls start with a soft, well sweetened, yeast bread dough. After that it’s just the same. Roll the dough out into a rectangle, let it rise, then spread it all over with a thick layer of Poppy Seed (or Sweet Walnut) Filling, leaving only enough room on the sides to account for the filling that’s bound to squish out. Roll the dough up around the filling very, very gently to make a giant roll, and then bake. When it’s done, cut into slices for both easy eating and to display the spiral pattern on the inside.
Lithuanian Poppy-Bread Holiday Nuggets (“Kūčiukai”). There are websites out there that characterize Kūčiukai and its derivatives, as a “cookie”. It isn’t. Kūčiukai are a straightforward, moderately sweet yeast bread stuffed to the gills with whole and/or ground poppy seeds. Roll the dough out into a thin sausages maybe ½” (1-1½ cm) thick; cut them into ¾” (2 cm) pieces; bake until fully done and even a little crispy; and then serve them in a big bowl for the Christmas feast.
Ancient baltic tradition uses Kūčiukai in several ways, ranging from something like cereal floated in a bowl of sweet poppy seed milk, to croutons in a bowl of thickened fruit soup (the most common name is “Kissel”). And, of course, as the object of snitch-and-snack raids by both the young and the young at heart.
That’s why some people call this a “cookie” to begin with? Consider this:
Kūčiukai served in sweet poppy milk or Kissel serve as sweet endings to the feast… just like cookies in the more western nations.
Kūčiukai are bait for tiny hands… just like western “cookies.”
And Kūčiukai are all but mandatory for the holiday gathering… again, just like the things we’d all describe as “proper” cookies.
Plus there is no other category in which you could put Kūčiukai from the pure translation point of view, because other cultures have no equivalent.
So Kūčiukai may not be a “cookie” for our purposes, but they 100% deserve to be mentioned in the same breath.
Poppy Seed Cakes, like the Czech “Makovec”. This is an extremely popular dessert often served on a cookie tray during the holidays, but it’s actually a moderately dense cake cut into 3-bite pieces. Recipes vary from a Yellow Cake base, to a White Cake base, oftentimes a Pound Cake base, and sometimes even an Angel Cake base; but cake it is. Fill that batter with an absurd amount of poppy seeds (whole and/or ground), and you’re pretty much done except for gilding-the-lily touches like a sharp lemon icing.
CONCLUSION
There are two types of people in the world: those who adore poppy seeds, and those who barely give them a second thought. That’s a pretty good average. People all over the world make cookies out of them too. But if you are a true devotee, the filling is where it’s at. This is the recipe that hooks ’em in and keeps ’em coming back.
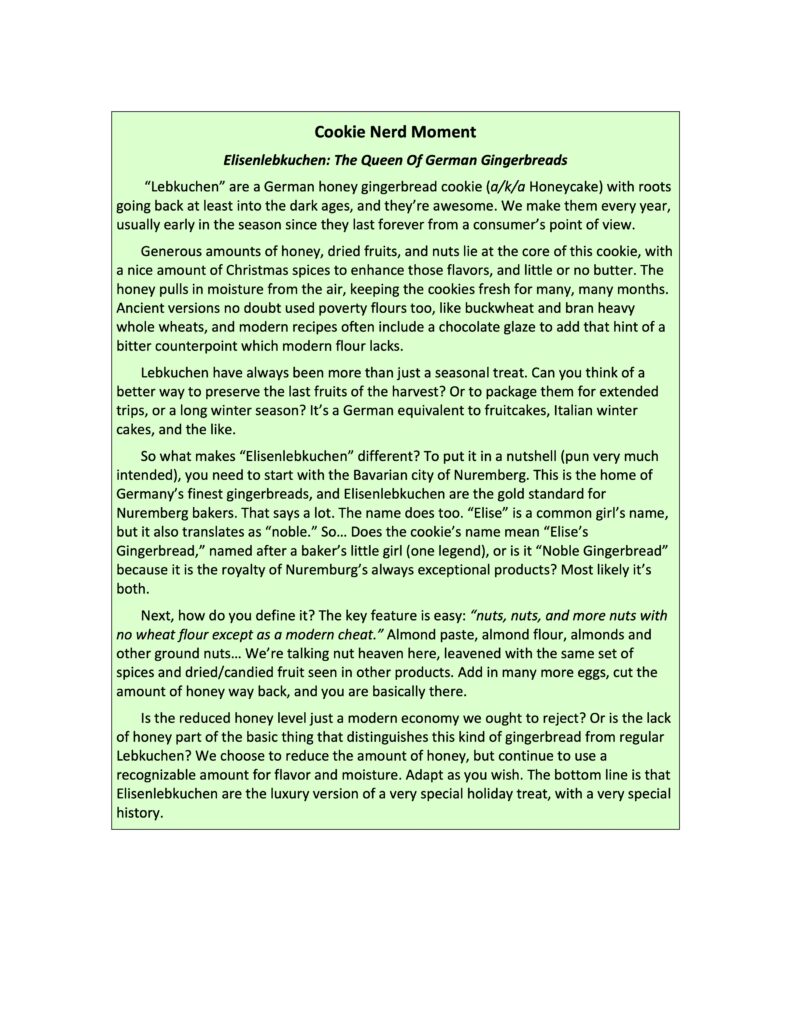
Here’s a funny but true: we love our classic Lebkuchen recipe so much that we hesitated to work on this one out of pure loyalty. We’ve amassed a great number of honey gingerbread recipes (a/k/a “Honeycakes”), but Lebkuchen remains the a family favorite. Christmas wouldn’t be Christmas if we left them off our tray.
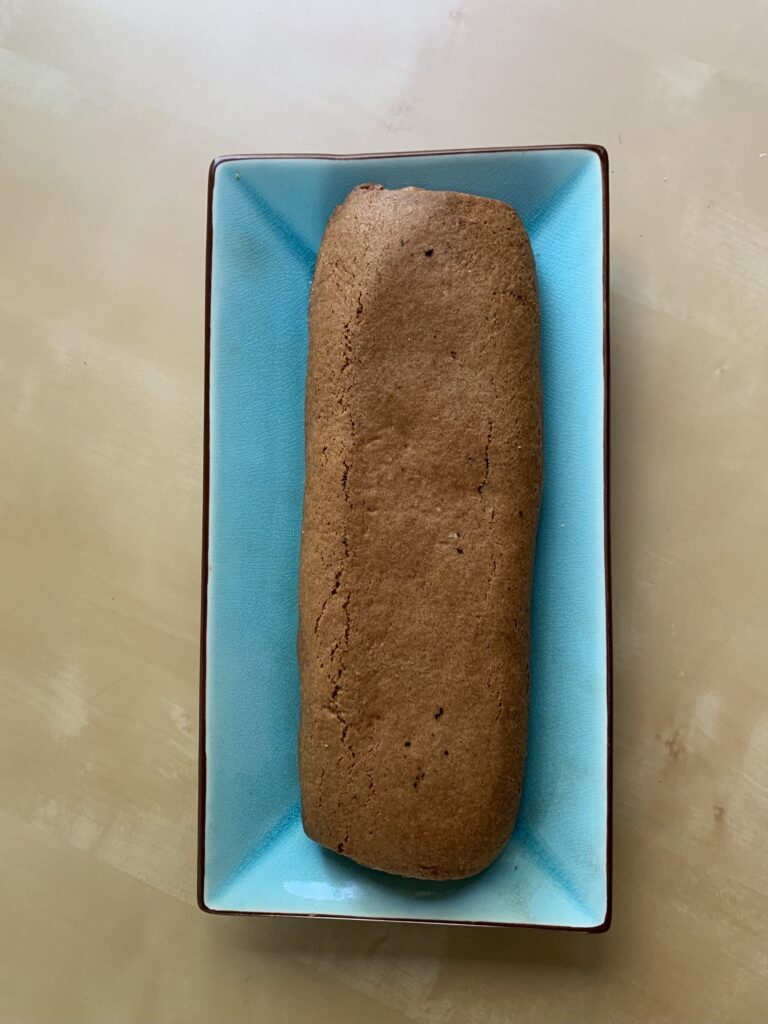
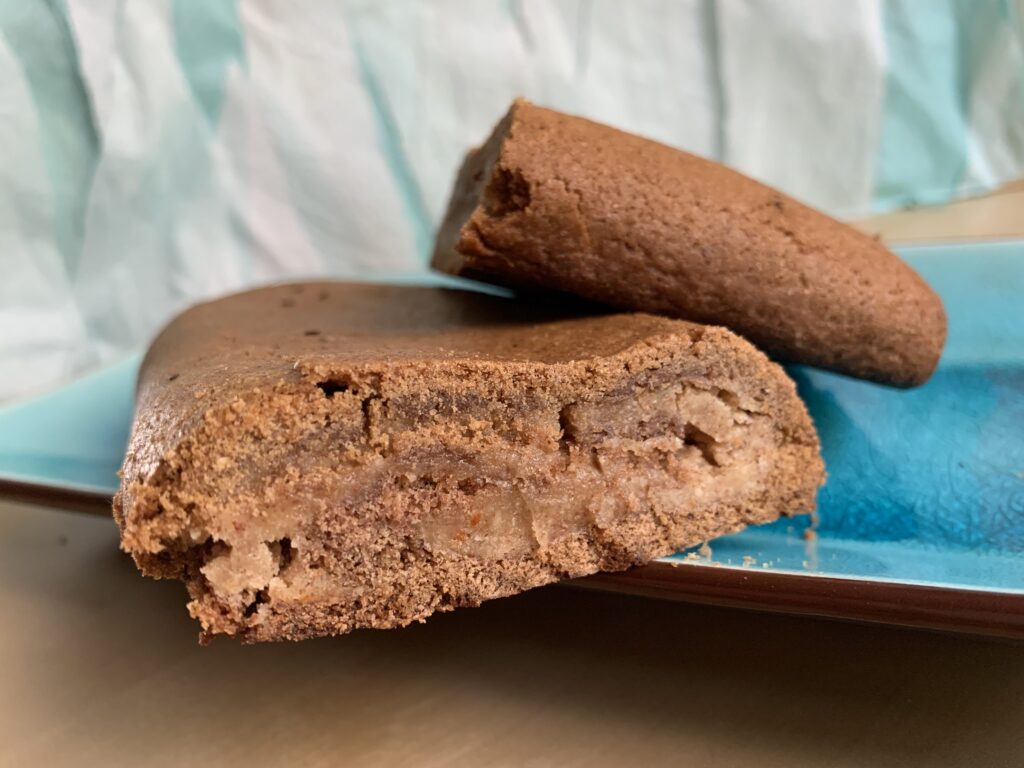
It turned out to be a misplaced loyalty. Elisenlebkuchen bear very little resemblance to regular Lebkuchen when push comes to shove. Our old favorite is a classic built on a flour-based dough that’s jam packed with nuts, fruits, a bit of spice, and a whole lot of honey to act as the binder. Elisenlebkuchen have even more nuts, no flour at all, and instead rely on both honey and a full five (5!) eggs to act as the binder. They are two very different experiences.
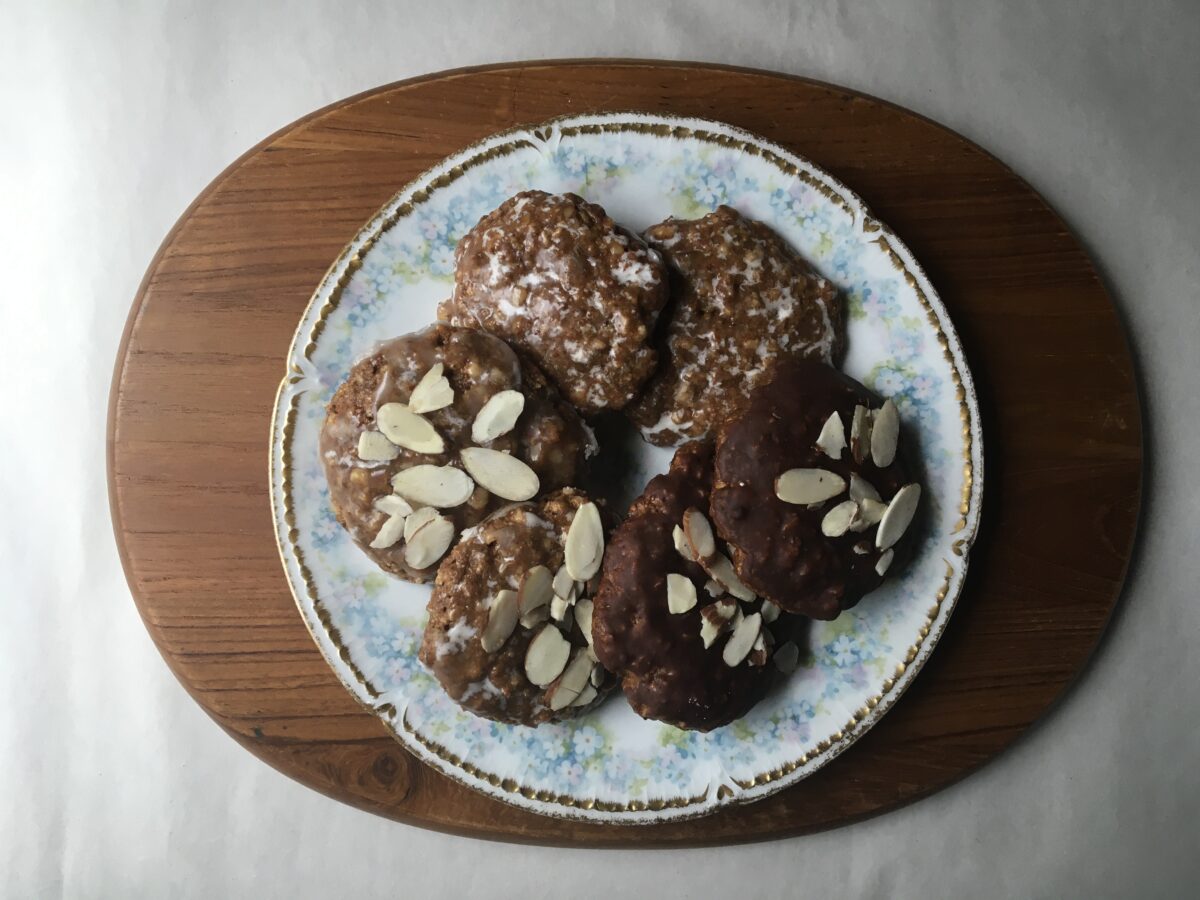
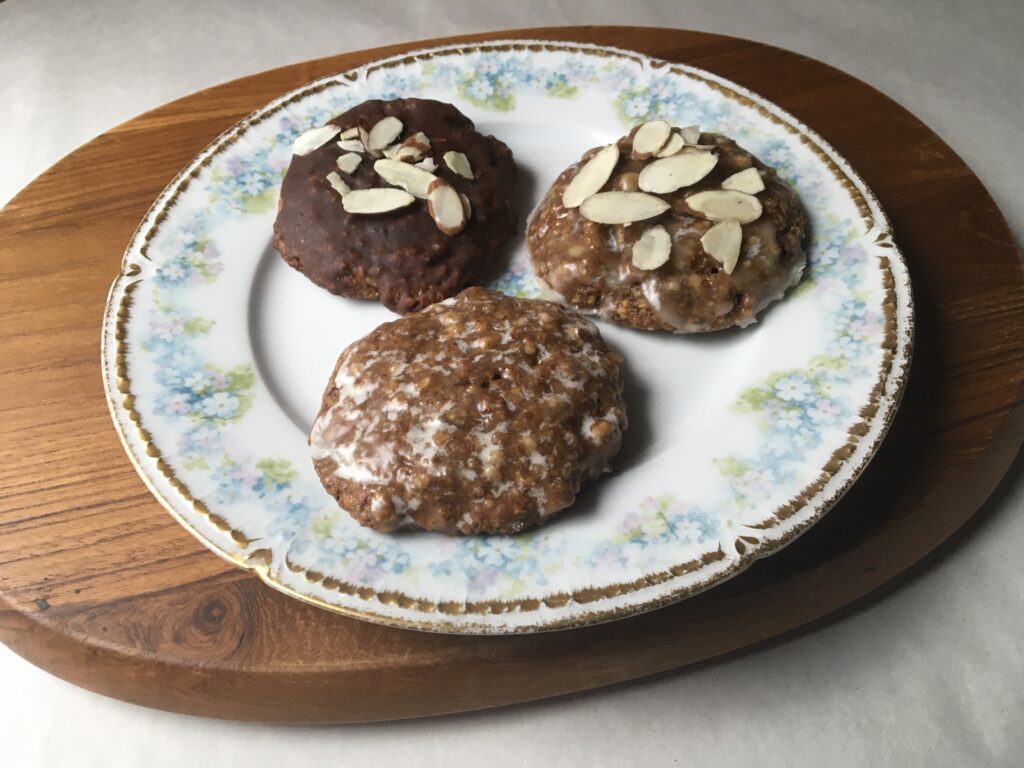
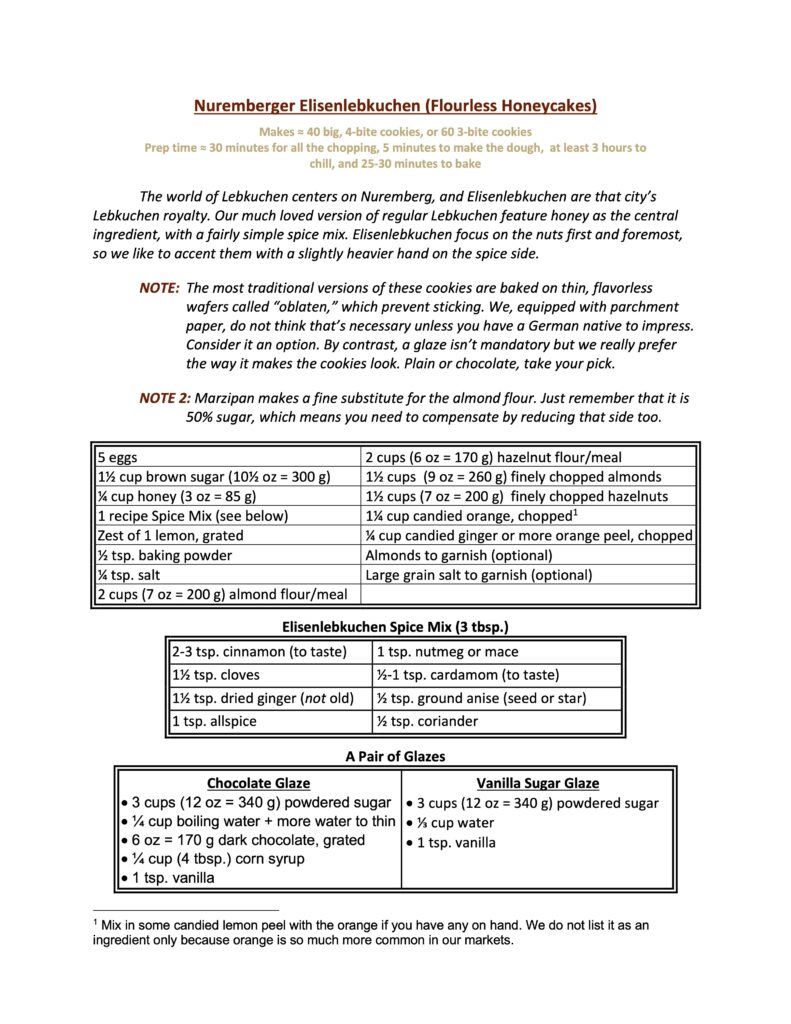
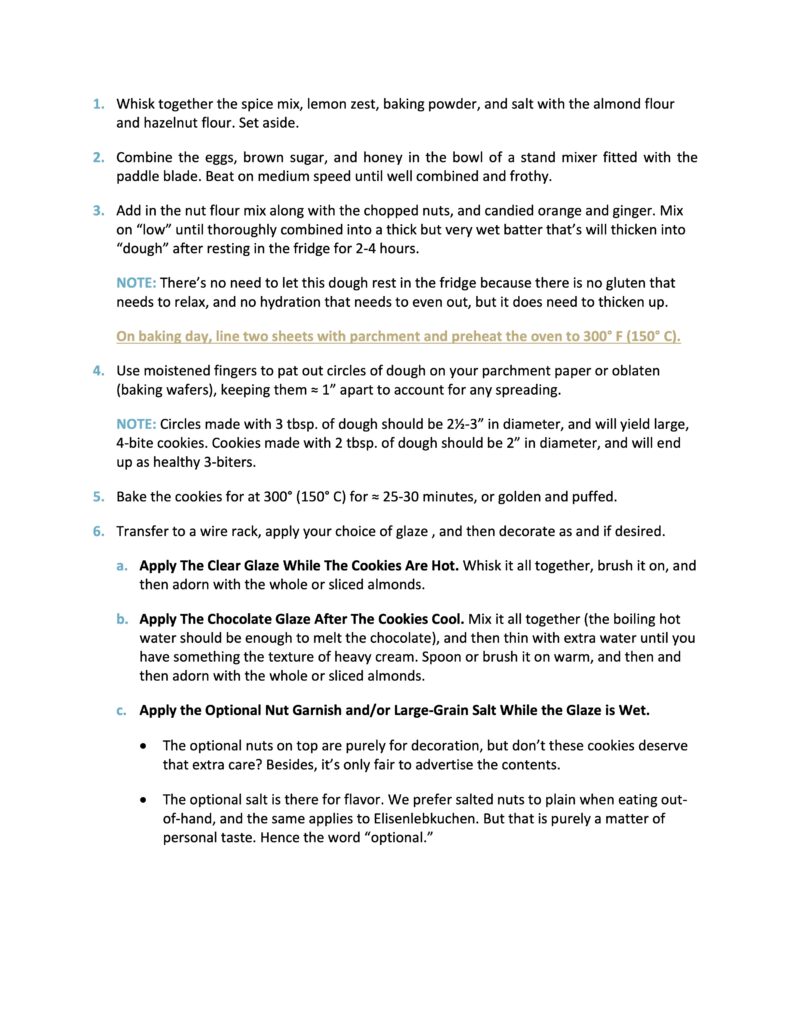
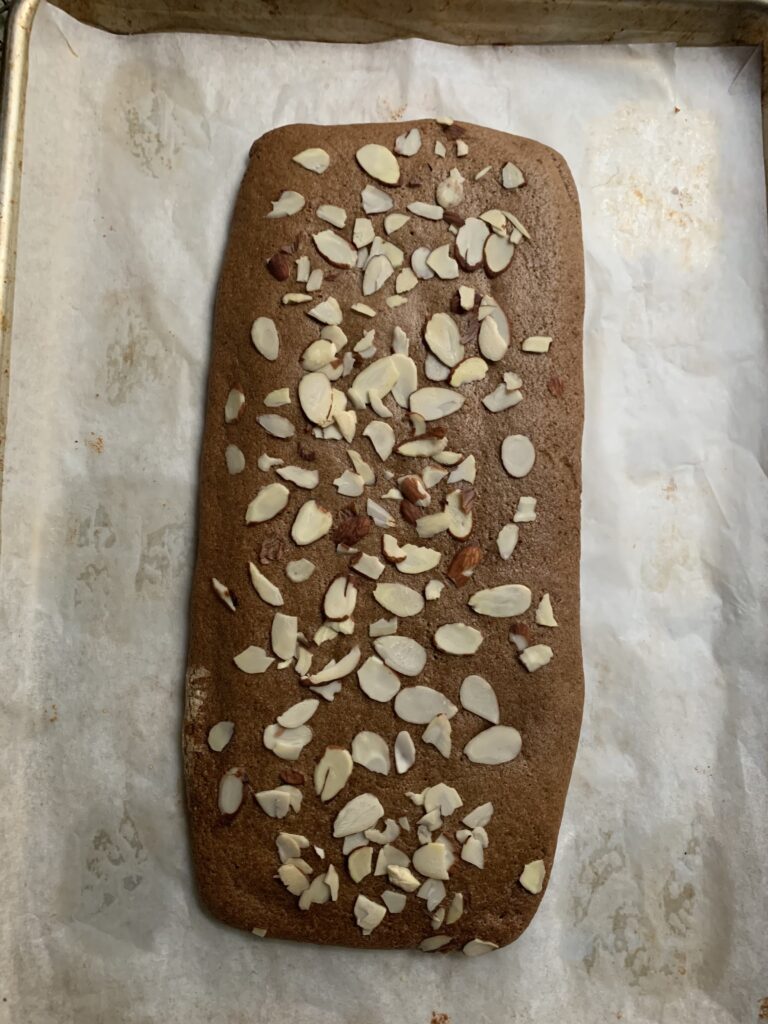
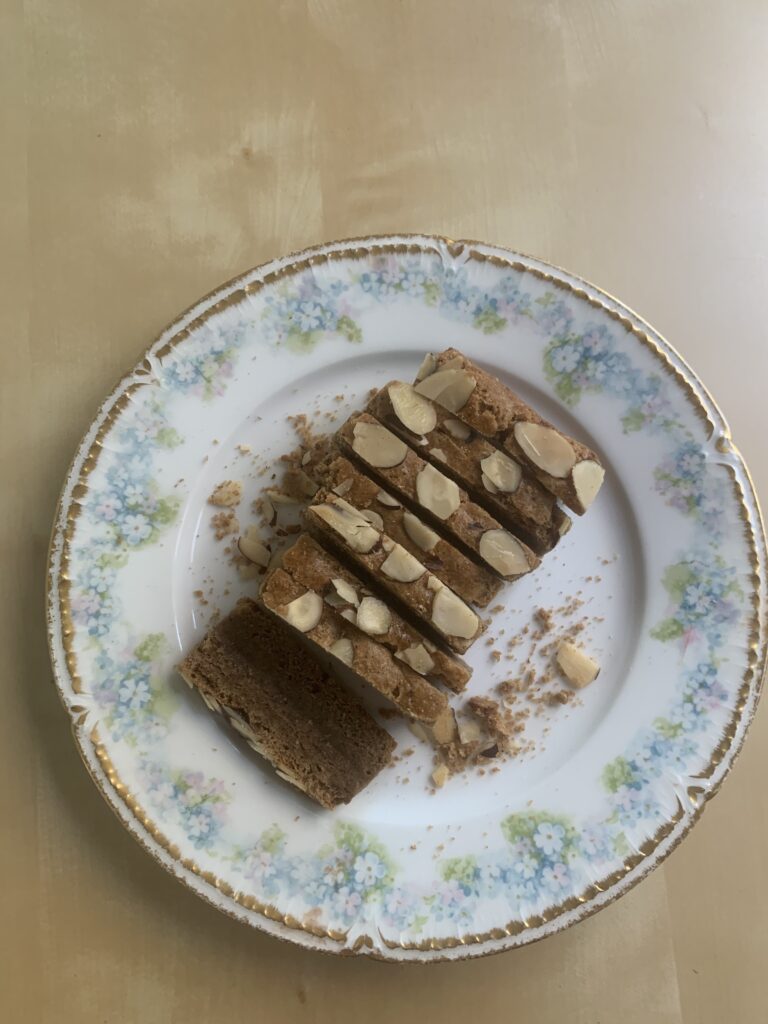
On the Upper Left: chocolate glaze with sliced almonds. On The Upper Right: vanilla glaze with sliced almonds. On The Bottom: vanilla glaze only. Use whichever you think is prettiest.
NOTE FROM KATE: These cookies are horribly deceptive in their overall “goodness.” That is, with the exception of the brown sugar, they are a “whole food,” so what could go wrong, right? I’ll have to do a caloric breakdown one of these days. Let’s just say, they contain more energy than meets the eye. If you were riding across the mountains and had to choose a fabulous, long-lasting food source for the extra space in your saddle bags, these would be it. They remind me of Panforte in their composition, but have eggs for eggstra protein. [Insert eye roll from Scott] The good news? With eggstra protein and the good-for-you fat from the nuts, the sugar in the brown sugar and honey won’t hit your bloodstream too fast. A cookie or two could hold you for hours.
Best of all? Of all our cookies and especially waybreads, these are the closest to the Lembas the elves made famous in the Lord of the Rings. Toss in an apple, and you got yourself a balanced diet for the day! (Shh…don’t tell Scott!)
The recipe explains itself, and includes an extensive Cookie Nerd Moment with extra background material, so I will only take the time to discuss a few of the decision points you’ll face when trying this out on your own:
Should I use marzipan or ground nuts? It’s entirely up to you, and makes very little difference. Just remember that Marzipan has almost as much sugar as nuts (our recipe has a ratio of 4:5), and usually has some extra sweetness lurking in the background. If you make this substitution, do it by weight and assume the Marzipan is actually a 50/50 mix. You need to reduce the amount of both almonds and sugar accordingly.
Can I play with the spices? Of course you can! But we do recommend that you (a) stick to the basic, quite generous amount of overall spice, and (b) think of the spices as an accent to bring the best out of your chosen nuts.
Can I substitute in other nuts? Yes, but these are the classics used in Nuremberg. Be aware that you’ll be departing off road from the One True Tradition.
Should I glaze the cookies? Yes. That was easy enough. The glaze definitely enhances the overall look, especially since the bottoms are not glazed.
Should I use the vanilla glaze or the chocolate? Tradition allows for either one, so it’s entirely up to you. Both are thin enough to be only an accent flavor. This cookie is all about the nuts, and even I, a lifelong chocoholic, don’t want to mess with that purity.
Should I add the nut garnish on top? As you wish. They are only there for the sake of appearance and fair warning to anyone who sees them lying there on your tray.
Should I add the optional salt? And why specify “large grain” salt? This is a nontraditional option that we liked so much that we felt obliged to share. Both Kate and I have a strong preference for salted nuts over plain when we snack on them out of hand. The optional salt creates that effect in a light way. We recommend large grain salt sprinkled on top of the glaze because that is the best way to give a salty highlight. The base recipe also contains some salt, but that is more of a bare minimum that the cookie would suffer without.
That’s it folks. Enjoy!
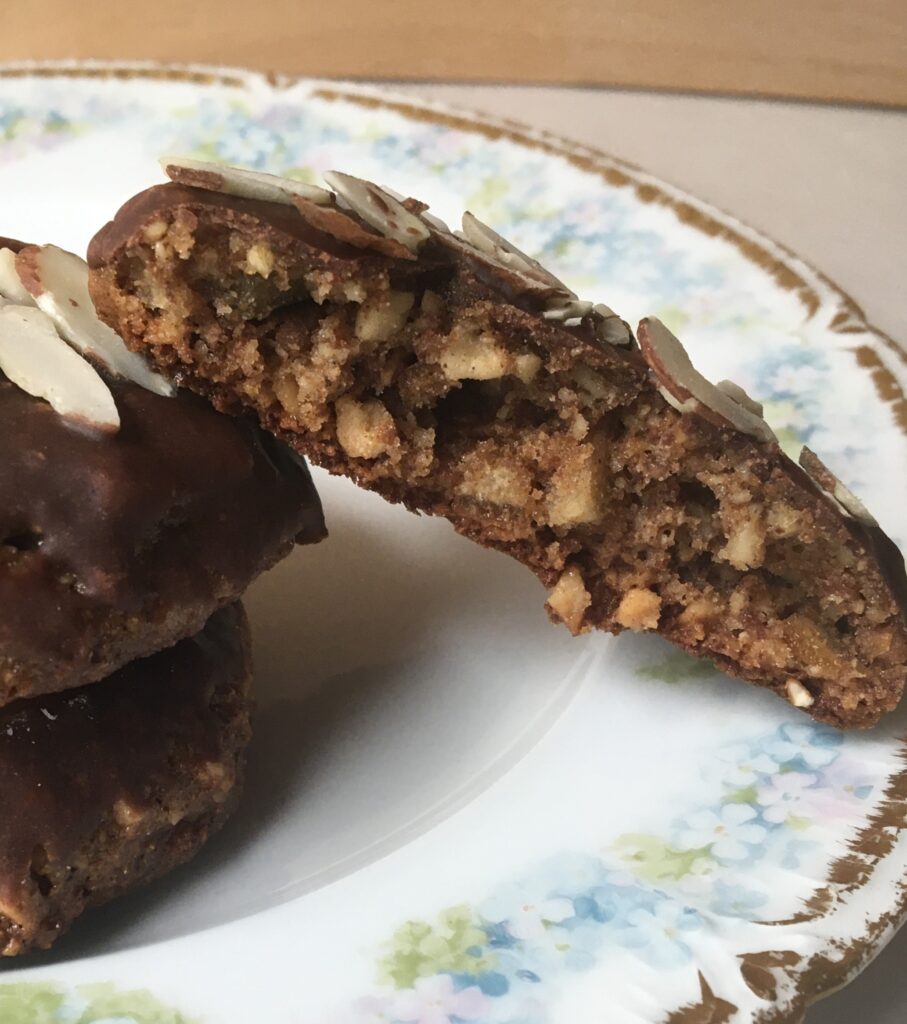
Nuts, nuts, nuts, and fruit. The only other things inside this cookie are honey and eggs as the binder.
A recipe direct from the great-grandma of Czech cuisine
Kate grew up in Prague, which explains the Czech accent in so many of our recipes. This one is so utterly Czech that even native Praguers will be a little stunned. Not because of the recipe itself, though it really does make a fantastic, ultra-buttery thumbprint cookie with a unique technical twist. It’s the history that makes this cookie special.
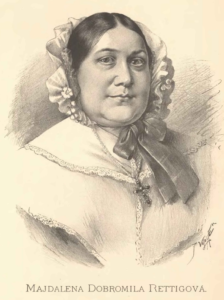
The published recipe dates back to the landmark 1826 book by Magdalena Dobromila Rettigová (a/k/a M.D. Rettig), a name that every Czech knows, but also tends to discount. Non-natives may want to think of her as a much loved national Grandma; the old lady you treasure because she snuck you cookies, held you in her lap, and taught you how to handle pets, children, and husbands with a firm but loving hand. It’s an archetype, right?
But here’s the thing. Mrs. Rettigova has held that role in the cultural heart for 200 years and counting.
The key characteristics of a proper Thumbprint Cookie are:
An easygoing flavor that will pair with your jam based filling;
A tender, vaguely chewy, fine grained texture; and
Just enough structure to keep a clear dimple in the center when baked as a ball with a deep hole poked inside.
Mrs. Rettigova’s Dimple Cookies (“důlkové koláčky”) feature exactly the texture and structure you want, but also have a flavor that positively screams of BUTTER!!! Butter that pairs extremely well with fruit flavors of every kind, of course. Or can stand on its own.
The Key Trick: Combine Softened Butter With Clarified Butter
It’s a fairly simple procedure. (1) Beat a generous amount of softened butter with an equal amount of clarified or browned butter until smooth, (2) beat in egg yolks one at a time, and then (3) mix in the dry ingredients. All very simple, and totally brilliant.
Our article on Ghraybee, the Middle Eastern shortbread, details my years of frustration trying to incorporate browned butter into a shortbread cookie. The problem drove me mad, and I finally had to settle for simply using it as an icing. The delicate balancing act of Ghraybee offers one way around that diliemma. This cookie is the European solution I never managed to crack.
Yes, it’s also 200 years old and counting. [Sigh]. Don’t remind me. But look at this way: I’ve got a choice between feeling elated to have the answer, or ashamed that I didn’t think of it myself. Thanks all the same, but I’m going with Door #1.
THE ONLY QUESTION: NARROW HOLES OR WIDER HOLES?
There isn’t much else to add, since we’re offering the recipe basically unchanged from the original Czech. The only issue we found goes to personal choice. What’s the balance you want between cookie part and jam part? Here are the two options (you can also vote for “in between” of course):
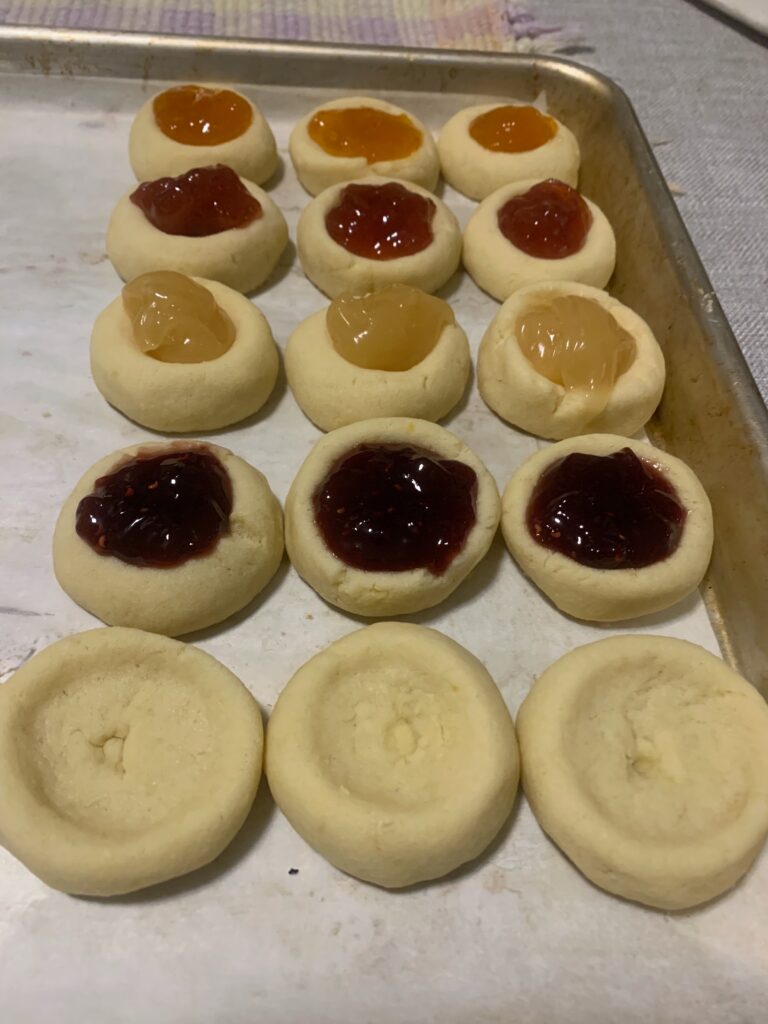
Cookies made with a narrow hole by using only the width of a wooden spoon.
Cookies where the spoon hole was widened out before baking to the size of my (Scott’s) thumb.
The wider your holes before baking, the wider and shallower they will be after baking, with the initial difference enhanced by spreading. It really comes down to what you want. I am a jam-first kind of guy. Kate prefers a bit more balance.
(NOTE FROM KATE: I like the fruity notes of jam to pair with my shortbread without overwhelming it. In the past, I’ve removed excess jam out of an otherwise perfect cookie with a spoon. Psst…don’t tell on me.)
Then there is the final option: make a relatively flat topped cookie and then press a dimple in with your asbestos finger when they are hot out of the oven. Yes, it can give you a mild burn on a sensitive thumb tip. Sometimes you pay for beauty. And yes, you can use a tool like the blunt end of a small pestle; if you have one. Just be sure to act quickly! The cookies get delicate as they cool, at which point your effort to push in a dent will start to cause destruction instead.
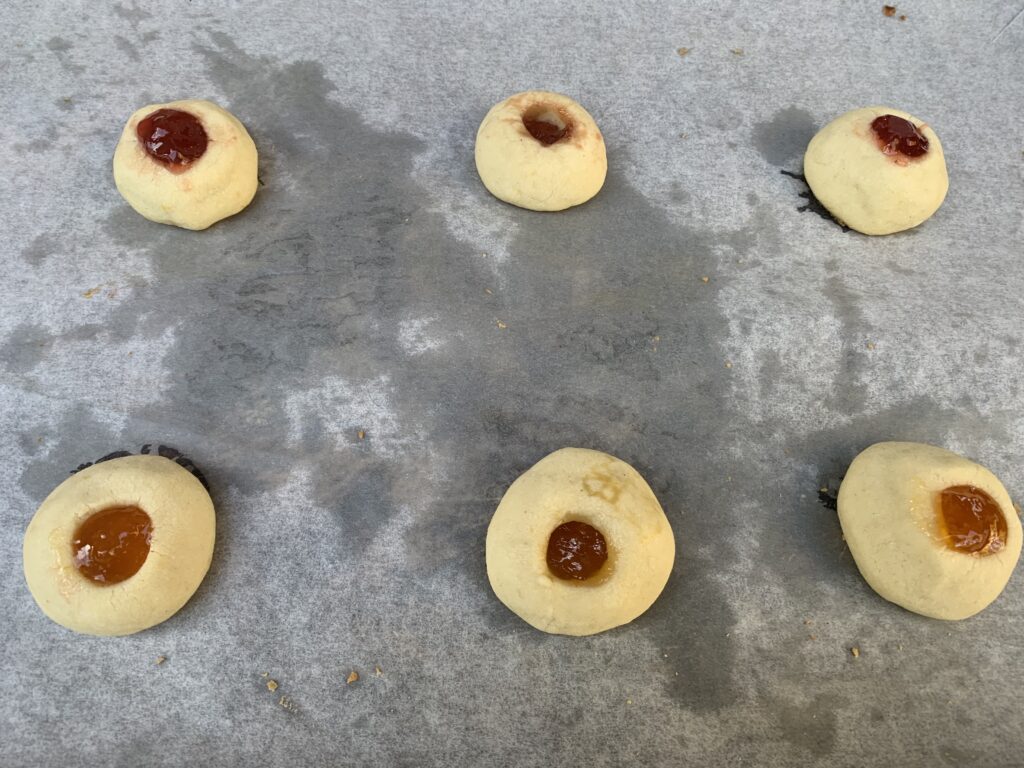
P.S. These are cookies you fill after baking. Yes, you can do it in advance, but it serves no purpose. The jam condenses and shrinks as it bakes, while also losing its high notes. Here’s an example:
From the left, apricot filled after, apricot prefilled, strawberry prefilled, and strawberry filled after
I also believe those high notes matter, at least to my taste. Strawberry jam with a tiny hint of lemon juice or balsamic vinegar? Oh yeah. “How to elevate a childhood favorite into maturity in an instant.”
Apricot with a spice (cardamom!), herb (rosemary!), hint of booze (cognac!), or lemon? 1826, meet 2026. It has no end except the bounds of human creativity.
There are plenty of cookies where a cooked fruit filling is the right way to go, especially if you hope to ship them. This is a different critter. Thumbprints are for eating at home, not shipping out. Though nothing stops you from shipping them empty, of course. Even the most inept, kitchen-phobic bachelor can manage to fill a hole with a bit of his favorite jam!
So much for the actual cookie. Now it’s time for the treasure behind the cookie; an absolutely fascinating bit of history and perspective that most people tend to forget.
Again, head to the bottom if you only want the recipe. What follows is all about history, culture, and why you should go out of your way to give this one a try. It has nothing to do with the actual baking
WHO WAS M.D. RETTIGOVA AND WHY WAS SHE SO IMPORTANT?
(NOTE FROM KATE: Scott doesn’t waste a moment to learn something new from history, and this time period was of great interest to him in college.He’s also a professional storyteller, and thus can’t resist a good opportunity to share an interesting tale. Stories, however, are as important as they are interesting. They teach us much about who came before us, and they help shed light upon the things we do today without even thinking about it. We all stand on the shoulders of giants. For our Czech readers, you’ll note a non-Czech slant to Scott’s view of Czech history. Let’s treat pani Rettigova as one singular dot, and for this time, not worry about the seminal “details” that form the rest of the Czech history puzzle. Enjoy!)
Hmmm… Let’s start by setting the scene.The girl who would grow up to become Mrs. Rettigova was born in 1785 to a German speaking, very assimilated family named Artmann. They lived in a 500-person village located in the northern quarter of Imperial Austria that would later become the Czech Republic.
Austria in 1785 was the world of Mozart’s prime: a country heavy with tradition, and organized around an ancient, universally accepted, divinely inspired social order that began with the Emperor and moved on down. Loyalties were more medieval than modern. The ran to your patron, and from him on up to the imperial person. There were no amorphous concepts like a political state or ethnic group with the sole exception of religion, and the hellish wars of the 1600’s had left so deep a mark that smart people did their very best to avoid it. Citizenship and self image had precious little to do with a common language or a common history. Your “team” was your fellow imperial subjects, plain and simple.
(NOTE FROM KATE: this is what I mean about a non-Czech attitude. Those of us who grew up with Czech history will be saying, “But what about Charles IV, the Holy Roman Emperor and king of Bohemia? What about the Czech lords who elected their own king after the turmoil of the Hussite wars?” Not relevant. In Magdalena’s time, these events were esoteric and forgotten by all but literate historians. That’s the point. If a Czech person wanted to show how worldly and educated they were, they spoke and wrote in German.)
Recall too that Austria, a/k/a the Holy Roman Empire, had been one of Europe’s great powers since the fall of Rome, second only to France and at least the peer of Great Britain. Prussia and Sweden up north had famous armies too, while Spain was a declining but still great power in the far west, and the Ottoman Empire a historic menace to the south. Neither Germany nor Italy existed as a political unit, and no one but wild eyed, fantasizing academics bothered to dream about that kind of unification. They were mere “geographical expressions” as one of the era’s most famous politicians quipped later on.
That was the world this baby was born to enter. The first real stirrings of change occurred in 1792, when she was seven (7) years old. How can I bring home the enormous weight of what was coming down the historical turnpike? Let’s try this:
Imagine what life would be like for a girl in rural Ohio if Communist China suddenly threw off its chains and declared itself to be a new and radical democracy in the model of ancient Athens. That’s a pretty good analogy of what the French Revolution meant to people in the rural villages of central Europe. Or it would be if you could spice that impact up because the current queen and king of “China” happened to be the sister and brother-in-law of your own “President.”
These great events would have been a consuming topic of conversation for the grownups, but only a background noise for our little girl and her daily life. Seven year olds care more about playtime than the storm clouds of war on the horizon.
A few months later the deposed French king and queen tried to flee to Austria, and were recaptured. The revolutionaries had them beheaded in a public square just as she turned five. Monarchs fed to the same guillotine as common peasants! Shocking! But still just loud and urgent grownup talk from her perspective.
Her Emperor immediately declared war on France, Prussia joined in, her local “big kids” started to talk about military careers, and the atmosphere got ever more intense. Children her age would have been sent out of the kitchen, rather than assuming they’d just be bored.
The Reign of Terror began ran from ages 8-9 (the age of a typical American 3rd- to 4th-grader). While that went on, Austria and Prussia used the distraction to launch a joint invasion. It enjoyed enough initial success to make Great Britain and Spain join in for their fair share of the soon-to-be-carcass. Which meant that all of Europe had come together in a loose alliance against divided, self-consuming Revolutionary France. What else could happen but victory, soon and profound?
They all found out as she went the preschoolers started to see her as one of the Big Kids. France rallied enough to bounce the Prussians out of the war, though she managed no more than a desperate draw against Austria. The world went into 1794/95 (age 9-10) with the other Great Powers beginning to close their own nets. Victory still seemed inevitable, however stubborn the French mob had turned out to be. The war’s end, right there on the horizon… only to vanish with the rise of an unknown, undersized, provincial artillery officer who’d grown up on some tiny islet in the sea. Over the next half decade Napoleon Bonaparte took over the French command in Italy, proceeded to disgrace army after army, finally driving on to dethrone the Pope himself. Absolutely historic routs, which kept piling up until a final French triumph at the soul crushing Battle of Marengo in 1800. That year, Magdalena turned 15 and could start to be viewed as marriageable.
From here we can speed up a bit. Her Emperor and the victorious Napoleon declared an uneasy truce. Everyone knew it was more of an ‘armistice’ than a ‘peace,’ however, and so it proved. War renewed a few years later, only to end when she was 20, with Bonaparte’s legions sweeping across the continent to humble, humiliate, and crush the combined armies of Austria, Prussia, Sweden, and Russia. Every king but the Tsar was forced to surrender, and he would have too if Moscow wasn’t 1,200 miles (2,000 km) away from Vienna, off in the middle of nowhere.
(NOTE FROM KATE: it’s well-known that Napoleon’s armies looted a lot of art from Czech castles and churches. It is less known that they had absconded with half the nascent nation’s supply of vowels. This is why Czech has many words with only one vowel in them, and some with none at all! But look at French. They have so many, they can’t decide which ones to keep silent.)
Austria, along with everyone else, became a grudging vassal state, and the tide of revolutionary ideas began to flow from Paris unimpeded. The main treaties establishing a new world order were signed when Magdalena was 22 and 24, respectively. She married at the age of 23.
THE CHANGING LIFE OF THE NEW MAGDALENA D. RETTIGOVA
Magdalena wed an aspiring, politically active attorney named Jan Alois Sudiprav Rettig in 1808. The marriage, even now, seems to have been a love match as well as a deeply felt partnership. Jan had grown up in the same whirl of events as his new bride, and now grew entranced with the world of international thought.
Opponents gave credit for the French victories to Napoleon’s military genius, but the French themselves (including Napoleon) disagreed. They insisted that their true advantage came from the bottom up, not the top down; a hitherto unknown esprit de corps based on their common loyalty to la belle France et la révolution. This, they said, made even amateur French militiamen into better soldiers than any professional troops in service to old fashioned kings.
Intellectuals like Attorney Rettig called it “Nationalism,” and defined it as “loyalty to a nation and its ideals instead of a person.” One pictures the 25 year old Jan sitting in a cafe and pondering all these great events with like minded friends. “If there is a French people and nation, what is mine? It isn’t this defeated emperor of moribund Austria. Aha! My people date back to the great Slavic migrations of the Dark Ages. And who led those? King Lech, who began the people of Poland; his brother Rus, who created an empire from Estonia in the west, to Moscow in the east, and on down to the Ukraine; and finally King Czech, who created Bohemia and Moravia. That must be where I truly belong.”
(NOTE FROM KATE: This is really pushing my Czech buttons. Arrgh!)
Jan Rettig spent the rest of his life working for a renaissance of the old Czech culture, with the wholehearted support and assistance of his loving wife. They became the regional version of what we would call a Power Couple. It began at home, of course. Jan had grown up in a bilingual household. The couple now decided to speak only Czech within their walls. Magdalena learned this new-to-her language quickly, and from then on used her middle name Dobromila (literally “lover of good”) rather than the first name she’d gone by as a girl.
Her “M” period ended, and the “D” period began.
THE WORLD OF M. DOBROMILA RETTIGOVA TO AND AFTER THE FALL OF NAPOLEON
Napoleon’s reign finally came to a conclusive end half a decade later, with the 1815 Battle of Waterloo; an event that took place in the same year that M.D. Rettigova turned 30.
Stop and think about that. Her entire world, from the age of 7-30, had been formed during and by the political and social upheavals wrought by the French Revolution. The years of her childhood playing with dolls; the years of her adolescence; her marriage with a man she loved; and on into motherhood. (She eventually gave birth to 11 children, 3 of whom survived to adulthood).
The wars may have ended in 1815, but the Rettig family had been changed from its roots on up. The fall of France did precious little to weaken their devotion to the idea of a Czech People whose ancient roots predated any allegiance to the rulers of Austria.
Speaking of which… Austria came out of all this history as master of an enormous, polyglot empire more or less comparable to its possessions before the eruptions in France. Austria also wielded dominating international power due to the personal influence of its legendary chancellor, Klemens von Metternich. A man who soon proved to be one of the most brilliantly conservative, backward-looking minds the world has ever known.
(NOTE FROM KATE: While doing research for a book set in the Balkans, I learned that toward the end of WWI the former Yugoslavia was home to at least 33 languages, many of which are now considered dead.)
Metternich created, or at least to codified, the idea of a balance of power across the continent. Under his influence, the larger states agreed to join what he called the “Concert Of Europe”; an alliance aimed at maintaining the status quo. The events of France’s Revolutionary Era had lasted for a bit more than 20 years. Metternich’s repressive counter reaction would go on for more than 30.
[OBSERVATIONS FROM THE FUTURE: the “System of Metternich” inside of Austria persisted until a series of attempted revolutions in 1848. The Hungarians basically won in the east, causing the country to be renamed “Austria-Hungary” with the Emperor being titled as the king of two lands rather than a singular one. The Czech effort at independence failed, and they remained the Kingdom of Bohemia with the Emperor of Austria-Hungary being the automatic King; just as things had been since the Battle of Prague in 1621. Only WWI finally shattered the empire completely.
M.D. Rettigova died in 1845, so these pivotal events all took place after she was gone.]
With Napoleon exiled and Europe acting in concert, Metternich turned his attention to the nagging problem of stability inside the Empire. History shows that for all his flexibility when it came to tactics, there was an overarching principle: he wanted to erase the French Revolution, and turn the clock back to the world as it existed in 1791. Politically and socially. And Chancellor Metternich was willing to do anything – anything at all – to accomplish that goal. His army of secret police was only the tip of the proverbial iceberg.
You can see how much danger this created for a politically active, reform seeking couple like Mr. and Mrs. Rettig. But they were not the types to knuckle under. Mr. Rettig soldiered on, plotting with extreme caution behind the scenes. They could not oppose the political realities. Not with any hope of survival, let alone success. Thus most of his efforts would have turned toward building a groundwork for future changes. He and his fellow radicals began to promote things like academic study into the Czech language and history, promotion of Czech arts, research into Czech folklore, and education of the upcoming generations. Etc. Much the same sort of things, in fact, as the Grimm Brothers were doing in Germany, and others would soon be doing across the continent.
(NOTE FROM KATE: The Bible had been translated into Czech during the Hussite wars, and one of the concessions of the 1621 Hapsburg takeover had been the continuation of sermons in Czech as well as Latin. This made it much easier to resurrect the language that it would’ve been under other circumstances.)
Mrs. Rettigova? She established a school to teach young women “how to keep their husbands happy.” What could satisfy Herr Metternich more than a traditional focus like that? Not much, which is no doubt why the school survived even though the classes were taught in Czech (with German as a fallback), with materials written in Czech, recipes that dutifully used local Czech ingredients, and so on.
It was “soft power” at its finest, and it worked far better than any of the abortive political battles fought by her (no doubt very happy) husband and his friends.
Portrait by Jan Vilimek, 1860-1938. Such a nice, plump, harmless woman. Right? Riiiiight.
Notice those years? The artist painted this a full 40 years after M.D. Rettigova died. Her work carried that much cultural weight.
In 1826, at the age of 41, M.D. Rettigova published her Czech-language treatise “A Household Cookery Book,” which she revised and expanded over decades of later editions. That book served as an essential text for every Czech household in the century that followed, even though her specific advice grew ever more dated. There wasn’t even a remote competitor on the culinary side until the 1920’s, after the nation of Czechoslovakia had come into being, and the impossible dream achieved.
HERITAGE
Modern Czechs view Rettigova (largely known by that single name) as a sort of cartoon exemplar of a bygone and not-so-nostalgic age. “You can’t even use that book anymore! Every recipe starts with a pound of butter and half a dozen eggs. Who eats like that? And come on! ‘How to keep your man happy’? Really? Who wants to push that view of womanhood in the modern world? Haven’t we evolved a bit in the 193 years since she published? M.D. Rettigova was a lovely lady for her time, and my own great-Grandma mother swore by everything she wrote, but we need to look toward the future.”
I won’t disagree with any of that. Times really have changed, and I believe for the better. But I strongly disagree with waving a dismissive hand, and walking away after finishing that statement. It’s unfair, shortsighted, disrespectful, and just plain dumb.
Consider this: Your own beloved Grandma does not control your life. Nor should she. And you certainly wouldn’t agree with all her values and viewpoints, nor she with yours. But did she matter? Does she matter? You’re darned right she does! She and her equally old fashioned peers created the paper and ink you are using to write your own life. There’s no getting around it.
Think on it from this angle too. Are you old enough yet to be into your own parenting and grandparenting years? If so, I’d bet money that you occasionally stop and wonder if you are living up to Grandma’s example. It’s just the way we are.
CONCLUSION
Magdalena Dobromila Rettigova, born a solid quarter-century before Abraham Lincoln, has served as the national Grandma of the modern Czech nation for coming up on 200 years. It’s soft power, not hard. The stuff of homes and community centers more than parliament buildings and cathedrals. But it’s power nonetheless. Power right down at the core of Czech society. Power that has made, and continues to make a difference in hundreds of millions of lives.
She mattered, and mattered a lot. And this is one of her very best recipes. It doesn’t get more “heritage” than that.
Even if it does start out with the better part of a pound of butter and three large egg yolks.
Speculaas filled with almond paste? Thank you Mom, can I have another?
Our published book, Heritage Cookies of the Old and New World, has a wonderful recipe for Nut Dough Speculaas, which offers up a soft, tender version of the famous Dutch spice cookie. This recent article is all about the ultra-authentic, thin-and-crispy version, featuring a recipe straight out of Belgium. Our research for that article accidentally revealed a third style that is immensely popular next door in Holland (a/k/a the Netherlands): Speculaas dough filled with almond paste.
The Nut Dough recipe makes an extra tender version. The 100% Authentic recipe comes out thin and crisp. This is the one in the middle; toothsome, gently spiced, and made with U.S. pantry ingredients. Take that and fill it with homemade almond paste? [Finger Kiss]
As always, you can skip to the bottom if you want the recipe alone. The discussion of our stumbles and revelations along the way is going to take some time.
A SIMPLE, PANTRY-FRIENDLY SPECULAAS DOUGH
Easy peasy, I promise. Yes, this is a top shelf American version of a very European cookie, but that doesn’t make it complicated. The approach couldn’t be more standard. Cream the butter and sugar, beat in an egg, and then mix in the flour, leavening, and spices. Cover and refrigerate overnight so the flour can hydrate and the spices even out. Form and bake however you wish.
The only potential complication lies in the hydration part. You are after a drier dough with only enough moisture to hold together when squeezed. (the Almond Paste filling will add any richness you think is missing). That means the base recipe is likely to be too dry outside of a humid environment. You solve that by adding extra water a tablespoon or two at a time until it holds when squeezed. One or two is usually enough, though it could take as many as six to eight.
Just go sparingly! It is much easier to add more water in than to take any out. I did one batch with the full eight tablespoons (½ cup), and had to double the batch in order to avoid throwing the whole thing out. Tripling would have worked even better. Fortunately, the recipe has enough flexibility to have saved me from that extreme.
THE ALMOND PASTE FILLING
No need to waste a lot of time on this piece either. Almond Paste is super easy to make, and we have a whole discussion of it in the article on Marzipan. The only difference for this purpose is the subtle addition of some citrus zest to help it meet and marry with the flavors of the dough.
We include instructions for the almond paste in the cookie recipe down below. I’ve added our recipe for Marzipan and Almond Paste too, as a free bonus. [NOTE FROM KATE: I love anything resembling marzipan, and the orange notes in this paste have a delicious more-ishness to it. So much so that Scott had to keep chasing me away as I tried to execute numerous rounds of diligent quality control.]
THE MANY DIFFERENT SHAPES
And now we get to the long part. But not because the shaping is hard! It isn’t. The dough is friendly, too, and the techniques are all straightforward. The length comes from the sheer number of options. This article lists a full dozen (12!) possibilities, and you don’t have to stop there. Jam and fruit fillings spread in the oven, searching for any crevice where they can leak out to create black and bitter disaster on your cookie sheet. Almond Paste does not. That feature opens up your options to basically any cookie shape you can imagine.
Bar Cookies? We Don’t Need No Stinking Bar Cookies!
Honesty compels me to admit that most people make Gevulde Speculaas as a bar cookie. You simply coat the bottom of the baking dish with one layer of cookie dough, spread a thick layer of almond paste on top (it should be noticeably thicker than the dough), and then cover that with a second layer of dough. Bake at 350° F (175° C) for about 18-25 minutes, or until the cookie part on top has set by the edges but is still a little soft in the center.
We, however, have a rule: no bar cookies! (Read the article on Chocolate Fudge Cookies if you insist on knowing why). That changes the focus to all those infinitely more interesting options, such as…
Sandwich Cookies!
Roll out the dough to 3/8″ thick. Cut out your choice of shape (we used larger rounds) and mark half of them with whatever you want for the top (we did a cutout for one, and a cookie stamp for a second.
Array the bottoms on a lined baking sheet (or two), keeping 1″ between each piece to account for spreading. Coat the bottom of the cookie with almond paste,* and then place the tops on top. Bake at 350° F (175° C) for about 12-15 minutes, or until the edges have set and the cookie has puffed up.
* Our favorite way to spread the almond paste goes like this:
Roll up a ball of almond paste of the size you estimate you’ll need. Place this in the center of the bottom cookie, and then place a piece of parchment paper on top. You can dust it with some powdered sugar if there is an excessive amount of sticking.
Press down with a rolling pin to evenly flatten the ball without spreading it all the way to the edges.
Now stop, peel off the paper, and check where you are. (A) Was your estimate about right? Hooray! Replace the paper and use your pin to spread the paste out to the edges. (B) Were you a little short? Add a little more almond paste and repeat the process. Your new almond paste will meld right into the original piece. Or (C) did you add a little too much almond paste? If so, use dampened fingers or a dampened spoon to remove the excess and then proceed, giving thanks that you did not press down all the way when you started.
Trim the edges with a dampened cookie cutter as needed. NOTE: You need it to be damp because the almond paste will stick like crazy if it isn’t.[NOTE FROM KATE: I was way too impatient, so I made a ball of almond paste and squished it with the bottom of a wet glass. It’s messier, I admit I had to sop up extra water off a cookie or two. It was fast though, even enough, and got the job done.]
Spiral a/k/a Pinwheel Cookies!
Roll out the Speculaas dough into a 13” x 7” (33 cm x 18 cm) rectangle ≈ ¼” thick.
Use the “balls of almond paste” trick described above in the sandwich cookie section to create an almond layer that is also ¼” thick on top of the dough layer. Making it as even as possible will yield the best patterns in the end.
Roll the whole thing up “jelly roll” style, and then move to a refrigerator to firm up for at least 15 minutes.
Use a thin thread, lightweight fishing line, or dental floss to cut off ⅜” cookies, and then array prettiest-side-up on your parchment lined sheet, leaving 1” between each to account for spreading. You should end up with 35-40 cookies. NOTE: This is a great trick if you do not know it! Shimmy the thread under the roll ⅜” from an edge. Bring up the sides so the thread crosses over at a spot ⅜” from the same edge, but on top of the roll. Pull on both threads so the loop shrinks down to cut off your piece. The thread has less surface area than even the thinnest knife, and will therefore leave a cleaner pattern. You can roll a sticky thread in flour or powdered sugar if you want to gild the lily, but we didn’t need to.
Bake at 350° F (175° C) for ≈10 minutes, or until the edges are firm and the cookies have puffed. Let them set on the tray for ≈1 minute, and then move to a rack to cool completely. NOTE: The baked tops should show a distinct pattern, but the bottoms against the tray will turn into an almost uniform brown.
The ends are never as pretty, especially when you need to press down to flatten the odd shaped pieces out. This shows three end pieces surrounding one middle piece.
Bullseye Cookies! [NO PHOTOS]
Roll out the Speculaas dough into a 13” x 7” (33 cm x 18 cm) rectangle ≈ ¼” thick on a sheet of parchment paper.
Place a long, 1” diameter sausage of almond paste down the middle of each strip. Roll up lengthwise to encase that sausage in the dough.
Use a thin thread, lightweight fishing line, or dental floss to cut off ⅜” cookies, and then array them prettiest-side-up on your parchment lined sheet, leaving 1” between each to account for spreading. You should end up with 35-40 cookies.
Bake at 350° F (175° C) for ≈10 minutes, or until the edges are firm and the cookies have puffed. Let them set on the tray for ≈1 minute, and then move to a rack to cool completely.
Tubes and Lengthwise Lines!
Roll out a thinner spiral and cut it into 2” lengths. Starting with a 13” x 6” (33 cm x 15 cm) rectangle should do it.
For tubes, bake at 350° F (175° C) for ≈11-12 minutes, or until the outside is firm and the cookies have puffed. NOTE: The tubes will settle into being flat on the bottom. We haven’t figured a way around that.
For Horizontal lines, use a thin paring knife or a long thread to cut through the top from end to end. Array these curved side down on the baking sheet. What would have been spirals when viewed from the edge in will appear as lines when the roll is cut lengthwise. NOTE: you can also use the paring knife to cut almost all the way through, leaving only a thin piece at the bottom to connect the two halves. Unfold this like an opening flower and you’ll have a double-width line cookie. Bake these at 350° F (175° C) for ≈9-11 minutes depending on thickness.
Let the baked pieces set on the tray for a few minutes, and then move to a rack to cool completely.
Line cookies on the left, spirals on the right. It’s basically the same pattern, but in one case you cut across to reveal the spiral, and in the other you cut lengthwise to reveal straight lines.
NOTE: You can use the “Bullseye” method here as well, or make the final shape a little thinner and broader by creating a filled rectangle instead of a filled tube.
NOTE #2: For Tube Cookies it’s it’s often worth decorating the top of the tube/cake with slices almonds. See the photos of the “Bake And Slice” method down below.
Molded and Filled Speculaas (Works With Jam Too)!
Apricot jam for the filling worked great, but we lost the pattern on top because I forgot to chill before baking.
Filled and plain Speculaas using the 100% authentic, Belgian Brown Sugar dough instead of this U.S. Brown Sugar dough. That time I did chill before baking.
Our favorite mold for individual Filled Speculaas (and gingerbreads of all kinds). We bought it at an actual castle on a trip to visit family in the Czech Republic! It was actually called a “butter mold” rather than a cookie mold, not that it makes any difference.
This Ma’amoul mold would have also worked, but can you imagine the amount of almond paste in each cookie?
Fill a bowl with with rice/corn/tapioca flour. Spoon this in to fill your mold, turn it over to pour the excess back into your bowl, and then rap the back firmly to knock off any excess. Voila! A perfectly dusted mold. (See the articles on the Speculaas Master Class and Filled Gingerbread cookies for more variations and details). FYI, we used this mold to make individual portions:
Roll the dough out to ¼” thick (thicker for a larger mold, of course), and then cut out a piece of dough just large enough to fit inside the entire mold while leaving a thin rim of dough up and over the side of the mold. Use well-dusted to press it gently into the pattern. NOTE: Too much dough is better than too little since you can always trim. NOTE #2: Holes aren’t a disaster. Patch them by pressing in extra dough with your floured fingertips. It will subtract from the inside space by a smidgen, but no one should see it when the cookies are baked.
Add a filling of your choice to a level that reaches level with the top of the mold. REMEMBER: That does NOT mean the top of your dough rim around the edge! Do that and you’ll have too much filling, which will lead to leaking, bursting, and other bad results.
Roll and cut out a second piece of dough sufficient to cover the filled in mold. Place this on top and then run a rolling pin over the entire thing to join the seams. Tap the filled cookie out with the mold-side up, and then use a paring knife to clean up the edges.
Array on a lined baking sheet, and then chill in the refrigerator for at least 15-30 minutes. This will help to keep the pattern a little sharper.
Bake at 350° F (175° C) until the edges are firm. It took ≈11-12 minutes for our smaller mold, but will obviously vary according to the size and thickness of the one you choose to use.
NOTE: It’s a good idea to precook any jam filling before you use it (simply bring it to a boil in the microwave or a small pan). Raw jam tries very, very hard to find a crack it can seep out of. The precooked jam is much, much less runny and will only seep out if you’ve made a noticeable mistake in sealing things up.
Cookie “Dumplings” and “Ravioli”!
Note the extra thick amount of almond inside
Our handy dandy dumpling press, last used when we were working up the recipe for Croatian Rafioli
NOTE: This method uses a bit more almond paste per piece. It should also work with a pre-cooked fruit filling, but we haven’t tried it.
Roll out the Speculaas dough to ⅜” thick, cut out a circle the right size to fit your handy dandy dumpling press, and then fill it with a football-shaped piece of almond paste. Squeeze gently to seal the edges.
Array on a parchment lined baking sheet as you pop the piece out of the press. Leave 1” between each one to account for spreading.
Bake at 350° F (175° C) until the edges are firm. It took ≈ 10 minutes for ours, but we anted to make sure they were baked all the way through.
Leave the cookies on the tray for 10 minutes and then move to a rack to cool completely.
Thumbprints! [No Photo]
Duh. I can’t believe I didn’t think of this in time to get some done for the photo shoot. Bad baker. Bad, bad, bad. No biscuit for you.
Roll the dough into balls ≈ 1¼” in diameter.
Use the handle of a wooden spoon to poke a deep hole, and then fill that hole with almond paste.
Array on a parchment lined baking sheet, and give each ball a gentle squish to make sure it will stay in position with the almond paste facing up. Keep 1-2” in between each piece to account for spreading.
Bake at 350° F (175° C) for ≈ 10-12 minutes, or until the edges are firm.
Bake-And-Slice Rolls and Rectangles!
This began it’s life as a Spiral Cookie roll. It was baked before slicing, which allowed it to slump into a rectangle.
The flattened spiral from a baked-before-slicing roll.
Make a roll as described above for Spiral or Bullseye cookies, but a little thicker. You achieve this by starting with a 13” x 8” (33 cm x 21 cm) rectangle.
Bake at 350° F (175° C) for ≈20 minutes, or until the outside is firm, the tube has slumped down into a rectangular “cake”, and cookies have puffed.
Let this set on the tray for ≈5 minute, and then move to a rack to cool completely. Slice with a thin, sharp, serrated knife after it’s completely cool. You will end up with elongated, almost-rectangular spirals.
A “Bullseye Cookie” bar decorated with almond slices. We tried to have this one start as a filled rectangle instead of a roll, but that only enhanced the slumping. Still tasty, and kind of nice if you want the sharper edges in the end.
Don’t Bother To Fill At All
Straight, unfilled Speculaas made from this dough. Not bad, are they?
The dough works fine as a plain old Speculaas cookie pressed into a mold. It doesn’t hold patterns quite as well as the 100% Authentic Speculaas, but it’s pretty darned close. Bake according to the instructions in that article using 350° F (175° C) instead of 375° F (190° C). The molasses in the U.S. brown sugar apparently makes them cook just that little bit faster.
NOTE: You may (may, not will) want to knead in a small amount of extra flour or starch if the dough is particularly soft and sticky. That’s a useful characteristic for the many methods described above, but can result in either sticking or unreliable patterns for straight-out molded cookies. Be judicious, as it won’t take much.
CONCLUSION
The dough is standard and easy. The almond paste is standard and easy. The shaping is fun and interesting once you pick a method (and get used to liking off almond paste from your fingers). And the flavor is just about perfect if you want the world’s friendliest, most accessible, spice cookie treat.
What’s not to love?
We urge you to give it a try. If you do, there’s basically no way it’s ever going to leave your repertoire. They are, as our English friends say, intensely “more-ish.”
Enjoy!
IMPORTANT: You want to make Almond Paste for Gevulde (Filled) Speculaas, not marzipan
The first of two articles on Poppy Seed Cookies. This one contains a roll-and-cut cookie (Queen Esther Cookies) and a drop Cookie (Poppy Seed Sour Cream Cookies)
Admission: poppy seeds are not my thing. They don’t offend me or anything, but my world would be no worse if poppy seed desserts simply disappeared. Kate? For Kate that would be a disaster on the same level as a plague to destroy the worldwide apple crop. My beloved wife adores poppy seeds, to the point where that’s one of her favorite bagels. [Shakes head].
NOTE FROM KATE: Poppy seeds! Oh my, they are…well…strangely addictive. I’ve loved them since childhood.
It turns out she’s not alone. Poppy seeds are one of those flavors that some people put at the very top of the food pyramid. My guess would be somewhere between one in five or one in ten based on recent conversations. Calling them “devoted” barely scratches the surface! And you know what? Almost everyone else is like me. We don’t dislike the flavor, it’s just the sort of thing we’re happy to leave to those who care.
Common? Check. Beloved by a lot of people? Check. A significant part of the culture from the Baltic States down through Turkey? Absolutely.
Sounds like the sort of thing we need to discuss.
But here’s the thing: poppy seeds are an ingredient more than a concept. They’re used in almost endless ways. So this article is going to focus sharply on cookies where poppy seeds are the central theme. I count four basic categories, plus a few that fall outside our scope:
Poppy seed roll-and-cut cookies, like the Queen Esther Cookies down below; and
Poppy seed drop cookies, like Poppy-Lemon Cookies.
Those are the subject of this article. Then there’s
Poppy Seed Filling;
Cookies made with Poppy Seed Filling, like Hamantaschen and Kolachy; and
Other beloved treats that cannot be called a “cookie”.
Those will get addressed in Part 2 of The Great Poppy Seed Adventure.
See that toasty bottom? It’s a secret key to getting these just…exactly…right. The bottoms add both texture and a flavor that neatly ties together the poppy seed and lemon elements.
I’m going to ignore the infinite versions that use poppy as an ingredient (Poppy Snaps, Lemon-Poppy Icings, etc.), and get to the meat of the question. What is the best fancy-looking cookie to make for friends and family who are [ahem] addicted to the flavor of poppy seeds?
The best answer we have found are Queen Esther Cookies, a treat from the Jewish tradition that’s often paired with Poppy Seed Hamantaschen.
It’s an easy cookie to make, and the development process was even easier because we started from a century-old family recipe. Not our family. This one comes from our online friend Carolyn, an estimable baker, who received it in turn from her grandmother. Here’s the original recipe for the sake of full disclosure and free giveaways:
Grandma made these for Purim, the Jewish early-spring holiday, and used margarine to avoid any potential issues with the kosher laws on a holiday. We have specified butter instead, and normalized the recipe to an even 2 sticks of butter. We also increased the amount of poppy seeds because, well, Kate. [NOTE: My beloved even wanted to try a full ½ cup! I put my foot down, but you might too if you fall in that camp.](NOTE FROM KATE: It would’ve worked. While experimenting with a Lithuanian recipe, I baked up cookies the color of asphalt. Yum! Usually, we give away our trial runs. Not this time-these are bagged in the freezer for “emergencies.”)
Two flavor notes: First, we found over and over again that the best cookies were the ones with the browner bottoms. That little bit of toastiness enhanced both the lemon and the poppy seed flavors.
We also choose to go with baking powder instead of soda, because we enjoyed the bright hit of lemon as a counterpoint to the cookie. If you want it more restrained (and Carolyn did say the lemon flavor should be subtle), try using baking soda instead. It’s an easy 3:1 conversion; exchange ½ tsp. baking soda for the designated 1½ tsp. baking powder. That will remove some of the extra acid from the lemon juice? [N.B. You can make baking powder at home by using two parts cream of tartar to one part baking soda. Thus baking soda makes up one-third of the designated 1½ teaspoons of powder; or to put it another way, is 3x as strong]
As you might expect, the recipe was nigh unto perfect. We did play around a bit, and found that the standard creaming method in a mixer works as well as cutting the butter in with a food processor. Does it work as well as doing it by hand? Try it and let us know. We are children of the machine age.
We also tested ground poppy seeds versus whole. The first has slightly more flavor and is a lot less gritty, but makes for a gray cookie with darker specks. The whole seeds make a vastly more attractive cookie that’s black-on-pale, but you do end up with seeds between the teeth. I’d go with the whole because I’m not eating them anyway, but She Who Snarfs [Ow! That hurt!] thinks it is a much closer call. (NOTE FROM KATE: I won’t kick whole-poppy seed cookies out of bed, but I prefer the more developed bitter edge of ground seeds. They may look a bit modern and abstract, but the flavor is superb. Also, there’s no danger of getting seeds stuck between your teeth.)
So that’s the first. Queen Esther’s Roll and Cut Poppy Seed Cookies. Check.
POPPY SEED DROP COOKIES
For good or ill, this is a cookie where I had to get a bit creative. We had just finished developing our version of the roll-and-cut Queen Esther cookies, and wanted to do a parallel, poppy-heavy drop cookie. Online recipes are all over the place; cutting back on the amount of flour would have been too easy; and I wanted to use the basic Queen Esther flavor balance while creating something with a very different, more pillow-like texture. So I started by noodling around in the world of online drop cookie formulae until I happened across a recipe for Sour Cream Cookies. Aha!
We haven’t written that recipe up because they’re heartlessly plain, and aren’t common enough to demand a spot on the list. But I have baked them, and knew they would perfectly match the target texture. Besides that, the flavor of sour cream would enhance both the lemon and the poppy flavor, while shifting the focus just sideways enough to really distinguish them from the roll-and-bake recipe. So I set to work, did a sample batch, and [Insert Proud Daddy Preening].
It’s a similar lemon-poppy flavor profile, but with sour cream as well to broaden the edges. Note the toasty bottom. Same thing here as with the Queen Esther cookies. We liked them distinctly better when the bottoms were properly browned. Our dark cookie sheet worked significantly better than the lighter one in this regard.
Are you a married man? If so, you know that moment when your wife gets that look of surprised, big-eyed delight, and then looks at you with pride and admiration. It’s rare. It’s precious. And I got just such a look when my beloved gave the test run a sample. “OMG Scott. You’re goooood. [Munch, munch, reach].”
I don’t know what else to tell you. Is it a “heritage” recipe? Debatable. The two halves are, but the combination is original. But as they say in Paris, c’est la vie. And who cares? They’re goooood!
NOTE FROM KATE: Unlike the Queen Esther cookies, which soften in the tin, the drop cookies tend to harden overnight. Adding a slice of bread in the morning restored them by mid afternoon.
NOTE: We haven’t tried it, but this should be a cookie where you can replace the actual poppy seeds with a commercial poppy seed filling. Our homemade filling (see below) is somewhere close to 65% poppy seed, 20% milk, and 15% sweetener if you measure by volume. Assuming a comparable proportion in the canned versions… [click, click, click]… the math says one should get an almost identical product by replacing the ⅓ cup of poppy seeds with ½ cup of filling, and then reducing both the sour cream and the sugar by 2 tbsp. each. It won’t be perfect (experiments never are), but it should be close enough for the second batch to be just about right if you keep good notes.
CONCLUSION
So much for Part 1 of our poppy seed adventure. Part 2 will cover the tips, tricks, and secrets to making the world’s best Poppy Seed Filling, along with a couple of sample recipes for how to use it, and some discussion of the poppy desserts world beyond just cookies.
Spectacular eastern European mushroom cookies made with a stove top mold
Kate and I are avid foragers who spend a lot of time in the woods hunting for local chanterelles, morels, boletes, maitake, and other species. We do okay.
Kate, the porcini hoard, and tonight’s risotto dinner-in-waitingDown boy! Even edulis is better when cooked. This is the 4-5 gallons (15-20 liters) we draw down each year for gifts.
Every September the local mushroom club hosts a large foray that features a gigantic set of potluck meals supplied by the different members. What did we contribute for 2022? What do you think?
LEFT: poppy seed mushrooms. UPPER LEFT: scottish shortbread leaves. LEFT CENTER: caramel, raspberry, and butterscotch gribochky. CENTER: faux button mushroom caps. BOTTOM: roll and cut mushrooms. RIGHT: laskonky (walnut meringue) mushroom caps. UPPER RIGHT: The insane display made with structural gingerbread trees, poured sugar backdrop, Marshmallo Crispy treat landscape and gingerbread crumb dirt, and two large meringue Lepiotas (or Amanitas, as you wish). NOTE FROM KATE: Oh, definitely Lepiotas!
This article covers our experiments with Gribochky, those colorful little mushroom gems you can see scattered around the display and piled on the bright blue plate. Time permitting, we’ll do another on the other ways to create faux-mushroom illusion cookies. It takes a little fussing, but they’re great fun for baker and eater alike once you get them finished.
We purchased this specialty mold online. It’s the same company that made our walnut (oreshki) molds
Put a small ball of dough in each hole, close, and then cook on the stovetop until done. Both sides of course.
Gribochky is a slavic word that means “mushrooms”, just as the very similar Oreshki means “nuts.” Both are made from a dough so soft that it could even be called a super-thick batter, and both use a unique stovetop mold as shown above. But where Oreshki come out as stamped halves waiting to be filled with a rich and milky caramel, Gribochky come out as solid, 3-dimensional pieces waiting to be decorated. That’s the point when they turn special.
Amp Up The Flavor. We know at least one excellent baker who tried to make Gribochky and came away disappointed. We can’t blame her. The online recipes, which are very similar, produce a cookie so plain that it isn’t worth eating. Boooooring. We solved that by treating the base recipe as a platform rather than an end point. It worked like a charm.
We made two versions for the foray and both came out great. The first had a 1.2 oz package of freeze dried raspberries (crushed into fine dust), with an extra tablespoon or two of butter/other fat for moisture. Delicious, and a perfect way to mimic the sour tang of candy apple boletes that grow under out local oaks. The second included a tablespoon of our Pardubice honey-gingerbread spice mix. Just as good in a totally different way. And it was obvious that any comparable ‘fix’ would have worked just as well. From “yawwwwwn” to “how interesting…” in one easy step! And it’s a step you can take in any direction that suits the spices in your cabinet, the extracts in your drawer, the freeze dried fruit in your local market, and the whims in your heart.
Trust In Tradition. Many will be surprised to see sour cream or mayonnaise listed as an ingredient. Don’t be. It’s quite common in Eastern European recipes, adds tenderness, and provides a certain complicated je ne sais quoi. I may well try some Greek yogurt for our next batch.
Shorten The Flour By A Lot. Those who know us may be surprised to see such a healthy amount of cornstarch. The reason comes down to simple physics. Gribochky would be amazingly thick if treated as a regular cookie, and the gluten from pure flour would make them prohibitively tough. The starch backs that down into plain old crunchy. Yes, we usually prefer to use rice, tapioca, or potato starch. They avoid the danger of a pasty aftertaste, which can happen when you use cornstarch in flat cookies because it breaks down at a higher temperature than the others. The internal temperature of Gribochky gets high enough to remove that fear. Use whatever starch is cheap and convenient.
Cooking Time Varies. The stove top time varies with burner size, flame height, how often you flip, how often you turn, the underlying color of the dough, and probably the moods of your local household gremlin. Heck, sometimes you want a better cooked specimen, and sometimes a blonder one, so the target changes too. The only universal guidelines I can provide are these:
We never got the cookies done in less than 4-5 minutes (2-2½ minutes per side), and usually wanted to add a little bit of time after peeking inside to check for doneness.
It helps to make regular turns to change the angle, which avoids hot spots caused by an uneven flame.
It also helps to flip them over as they cook in order to to equalize the cooking on both sides. Look closely at the photos and you’ll see one batch that looks a little odd because I cooked them first on Side A, and then on Side B. The first side cooked more, leaving a distinct stripe. No one will notice a thing like that in the decorated cookies unless you point it out, but we knew, and so it nettled.
NOTE FROM KATE: I found that preheating the mold gets too heat-dangerous and fussy for me. I made as many balls as we had holes to fill, and rolled them into a conical shape. I placed the wide part of the cone into the cap of the mold in each cavity (both sides, please!) The mold was warm but not too hot, so I could use my fingers to push the dough all the way in. I closed the mold and popped it over the flame. Time it, flip it, go again, and repeat until done. The lack of preheating doesn’t hurt the cookie (you can vary the time or the flame height) and it avoids “casualties.” Also, you don’t burn your fingertips!
DECORATIONS; a/k/a TURNING ON THE MAGIC
There are four parts you can pay attention to on each cookie: (1) the cap, (2) the base, (3) the stem, and (4) the pore/gill layer. The first two matter most, but you can certainly gild the lily by playing with #’s 3 and 4 as well.
Decorating The Caps: We’ve tested two basic techniques for the cap coating. Both worked, and playing with either approach yields a vast number of options. It’s a no lose situation.
The first method centers on melted chocolate. Dark, milk, white, food-dyed-white, and even commercial candy melts – each and every one of them will work. We like to thin them out with a bit of cream, but your mileage may vary.
The best approach is to hold each piece by the stem, dip it into the coating at an angle, and then roll the cookie to cover the entire surface of the cap. Remove, let the excess drip off, and then set them cap up in a place where they can dry without flattening one part of your coating. Egg cartons worked great, with ice cube trays a very close second.
Dark chocolate, textured by accident because I melted it without any cream, cocoa butter, or other fat to make it thinner and smoother. I love the contrast created by painting the “pores” bright yellow.
We also tested chocolate chips, but they didn’t work nearly as well. Chips are carefully designed to not melt, and overcoming that is like fighting the tide. First you must add cream to help them melt evenly. Then you find that they harden, curdle, and/or to harden in inconvenient ways despite the cream. And then they’ll suddenly discolor if you try to keep them warm on the stove top. I can’t recommend chips except for something odd like butterscotch chips, which do double duty as a coating and a unique flavor addition.
NOTE FROM KATE: instead of cream, I prefer using cocoa butter melts. They help your chips or chocolate melt, loosening the mix and helping with dipping properties, but they also yield in a nice and solid surface with none of the tackiness that cream can cause. We winged it with the chips here. For exact instructions, kindly refer to our “Chocolate coverture” recipes associated with chocolate-dipped marshmallow treats.
Butterscotch chips for the cap. It was a PITA but we made it work! White chocolate base, with poppy seed dirt. BTW… did you notice the stripe on the left hand cookie? That’s the one where I forgot to flip them as I cooked.
Butterscotch chips cooked into a dark caramel. Still usable and edible, but it came at the cost of frayed tempers and a few choice words that cannot be shared in public. They looked pretty good anyway, and could have been great if we had enough time and energy to paint the underside of the cap.
The other cap technique uses molten sugar. The prettiest of them all is a candy apple coating made from “hard crack” sugar syrup mixed with some bright red food dye. Your target is 300°-310° F (149°-154° C). Caramel works well for light and dark browns.
The problem here comes down to safety. 310° sugar syrup can burn you badly enough to leave obvious scars. No bueno. We came up with a workaround, but it requires three hands. Hand #1 steadies the pot. Hand #2 holds the cookie stem in a pair of tongs, dips it into the hot syrup, rolls it around to get even coverage, and then lets the excess drip back into the pot. Hand #3 then takes the cookie out of the tongs with a pair of chopsticks, inverts it, and lays it out in an ice cube tray (cap up) to dry. NOTE: The sugar is so hot and so sticky that it will melt a styrofoam egg carton, and pull off shreds of a cardboard one. Yes, the cardboard easily peels away from the cooled cookie, but better to avoid the issue in the first place. NOTE FROM KATE: peel cardboard bits off the sugar with fingers, then moisten a small brush and work the surface over a bit. When in doubt, remember that you are making the cookies healthier by incorporating an extra microdose of fiber!
The upside? Behold!
Candy Apple Gribochky
Gotcha! These aren’t cookies. They are the real life Candy Apple Bolete, Exsudoporus frostii. Nature’s pretty cool, isn’t it?
Decorating the Base: This step is easier because there aren’t many options, all of them are easy, and the shape can be handled with fingers alone. Did you know that mushrooms are actually the fruit of the fungus and not the main entity? The apple of the tree? ‘Struth! The main body is called “mycelium” and will be spread in a mat over a relatively vast area in and around the soil or the nearby wood. This is what you’re seeing at the bottom of mushrooms poked fresh out of the ground.
Mycelium is almost always some shade of white or pale yellow, and is easy to replicate with white chocolate or a tinted candy melt. Add poppy seeds or cookie crumbs for “dirt” and presto! Your illusion is complete on both top and bottom.
The Underside Of The Cap: Mushrooms with this shape will have either gills or pores on the underside of the cap. Adding this layer is a special touch that true mushroom geeks will appreciate, but it’s very hard to see unless you make it a bright, contrasting color like the yellow-on-dark specimen up above.
Gills can be any color of the rainbow, but most people will want to make them white, pink, or cocoa brown to imitate the best known species. Lilac will make the mushroom hunters happy. Mushroom pores will be white, yellow, pink, or red at this spot in the vast majority of cases, sometimes with blue or brown bruising on the surface.
Decorating the Stem. Stem features, ironically enough, are often the most useful part of a mushroom for field identification. For Gribochky? They’re an afterthought, because the features are impossibly subtle to duplicate. The only time it’s worth an effort is something along the lines of painting/dipping the stem to make it white, and that only makes sense when you’re trying to model an Amanita or Agaricus (see below). OTOH, adding berries or food dye to the actual dough can be a fantastic trick for species like the red Candy Apple Boletes. That, and cooking the Gribochky to a lighter or darker shade of brown, is almost always enough to complete a high quality illusion.
A Few Common Mushrooms To Mimic.
The so-called “toadstools” with white spots on top are in the genus Amanita. These can have caps ranging from bone white through basically any color, have white gills, almost always have a white stem with a ring of extra tissue about 2/3 of the way up.
Supermarket button mushrooms are in the genus Agaricus. They have white caps with white stems, and gills that start off pink before aging into brown. These will also have a ring on the stipe. Oh! And the answer is “yes.” Store bought mushrooms are all the same species, Agaricus bisporus. The little buttons are babies, cremini are teenagers, and portabellas are full sized grownups.
White chocolate “agaricus” with chocolate “gills.” This was our very first effort, and the illusion is as poor as any version you’ll ever made. And it doesn’t exactly suck even so, does it? Gribochky are show stoppers, plain and simple.
The pored mushrooms, a/k/a boletes, are my personal specialty and it pains me intensely to mention some but not others. You can find a list of every North American species at The Bolete Filter, written by yours truly under a different hat. The true “porcini,” a/k/a Boletus edulis and its close cousins, will have a yellow, orange, light red, or light brown cap with a white or yellow pore surface.
CONCLUSION
Gribochky are a perfectly acceptable eating cookie once you kick up the flavor with berries or spices, in the same way as Vanilla Snaps and the like, but their real glory lies in the illusion. There are other techniques one can use to create the illusion of a mushroom out of different kinds of cookies. They work too, particularly as part of a scene. But none allow for this level of absurd creativity, let alone the chance to customize things toward a copy of real life species. Fun, fun, fun!
Yes, the cookies require a special mold, and can definitely qualify as “fussy” on the decorations side if you try to copy real life. But the results can be shockingly beautiful, especially if you take the relatively easy step of dipping the bottom to mimic the mycelium, and then adding in poppy seeds or cookie crumbs to mimic the dirt. They start at “Cool!” and work their way up to “Spectacular.”
If pure, visual fun is your thing – or mushrooms! – this is a cookie that needs to be in your repertoire.
Raspberry candy apple, dark caramel-spice, and butterscotch-spice Gribochky