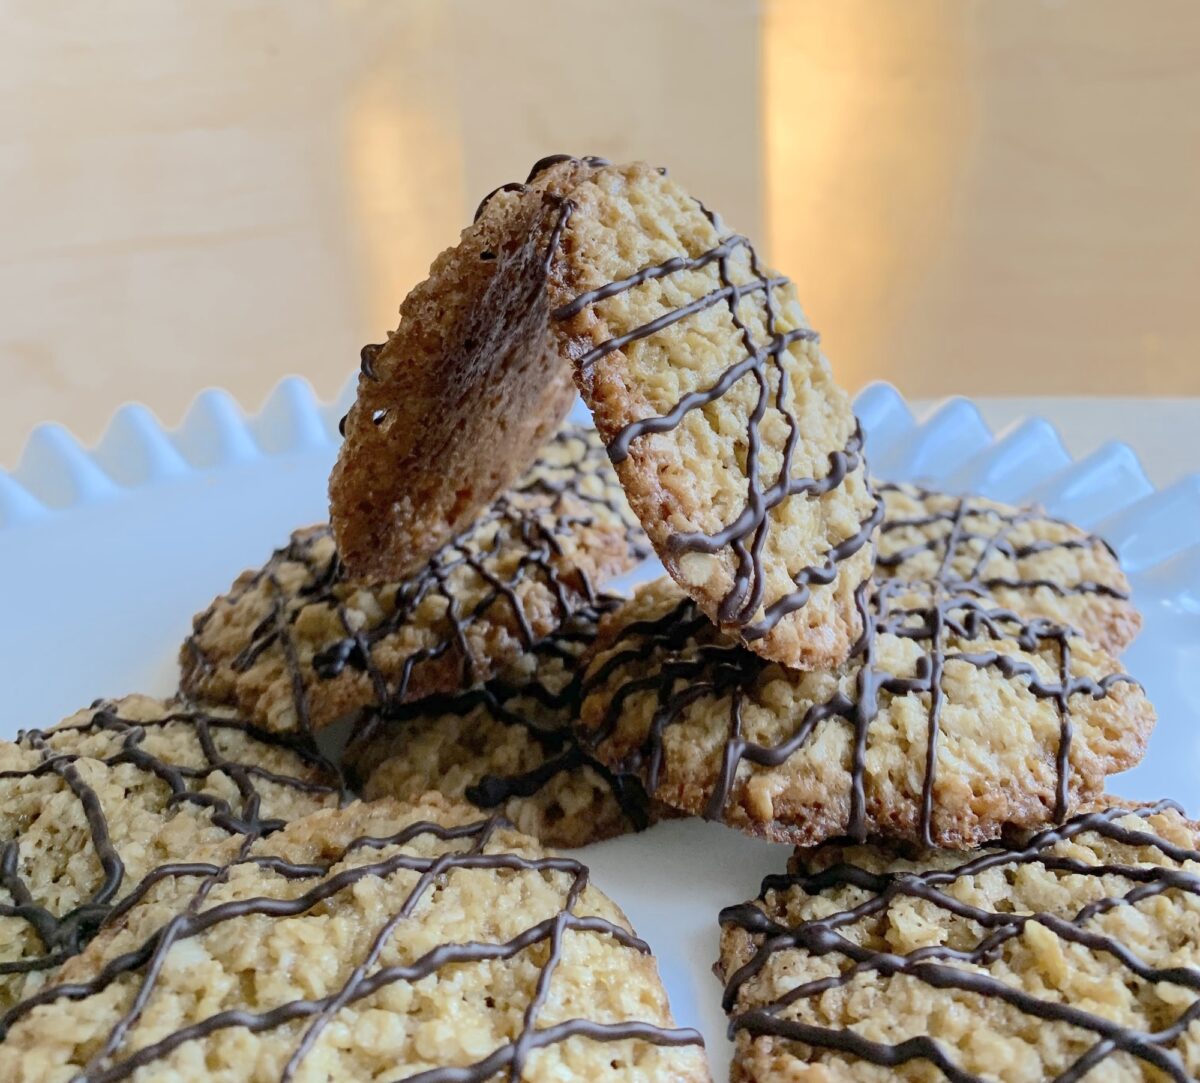
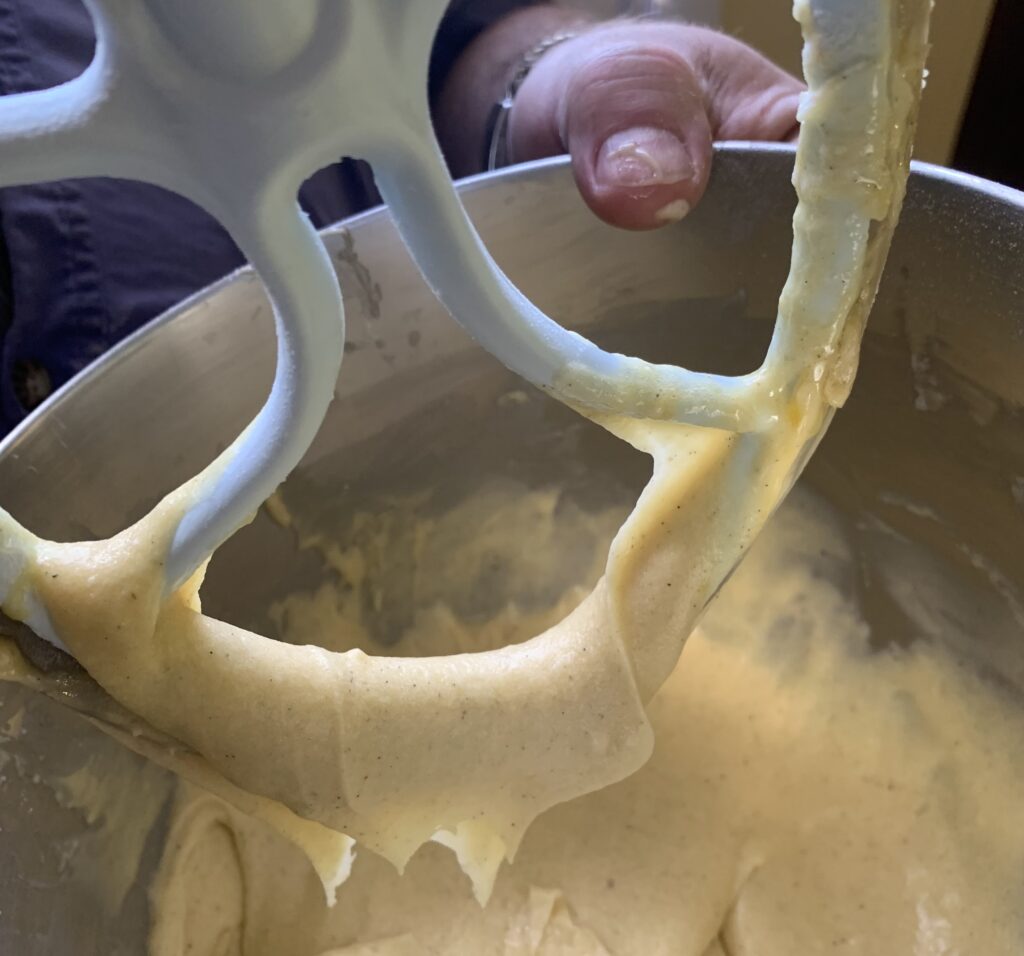
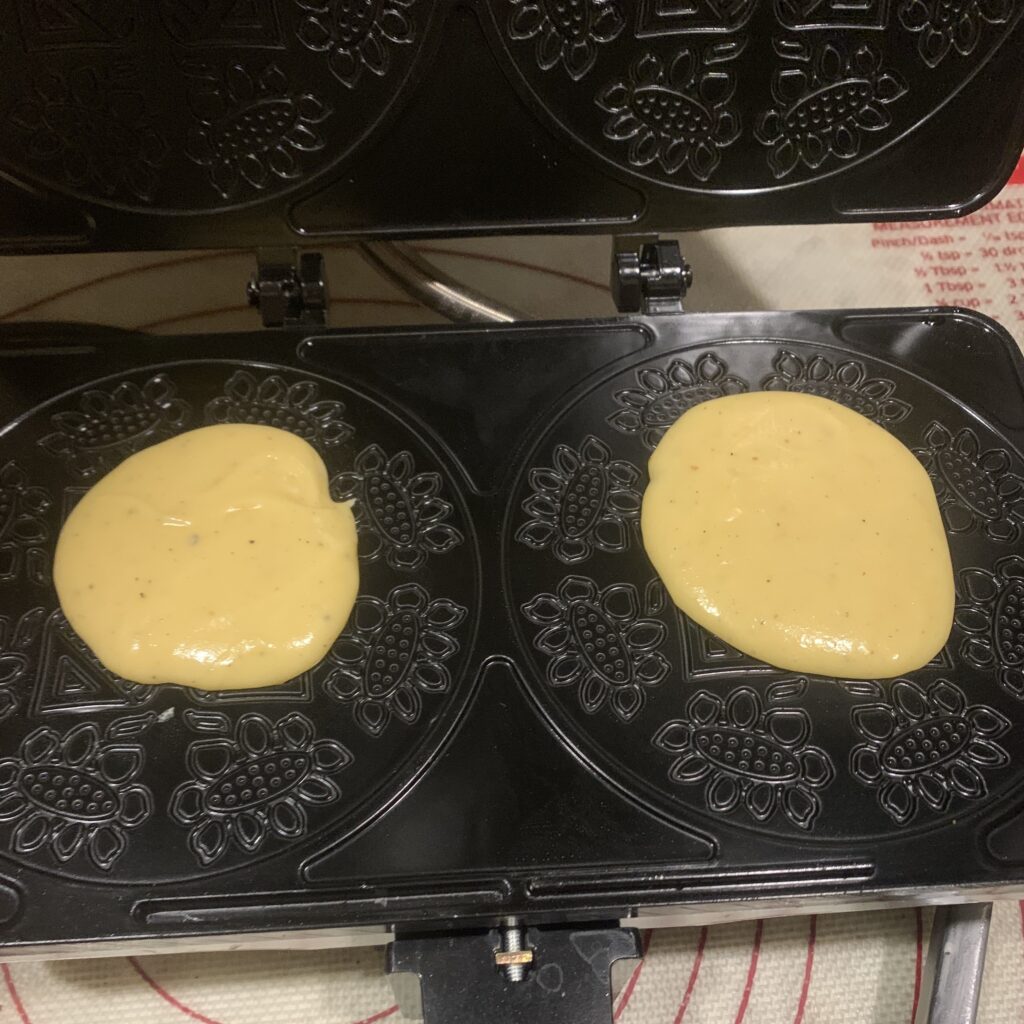
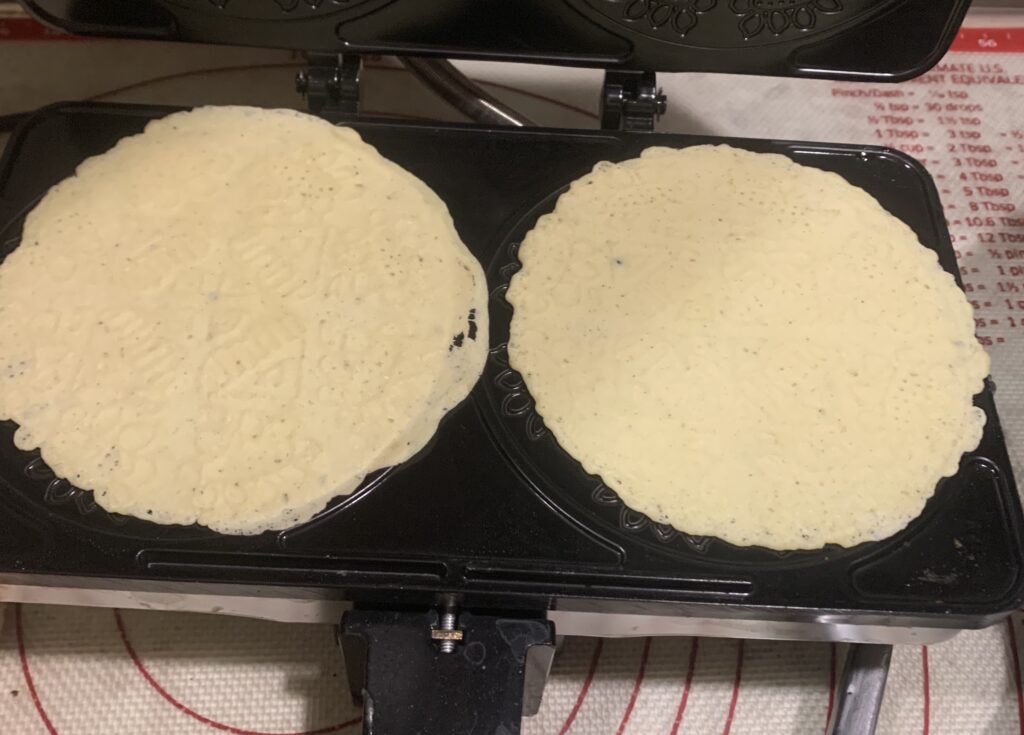
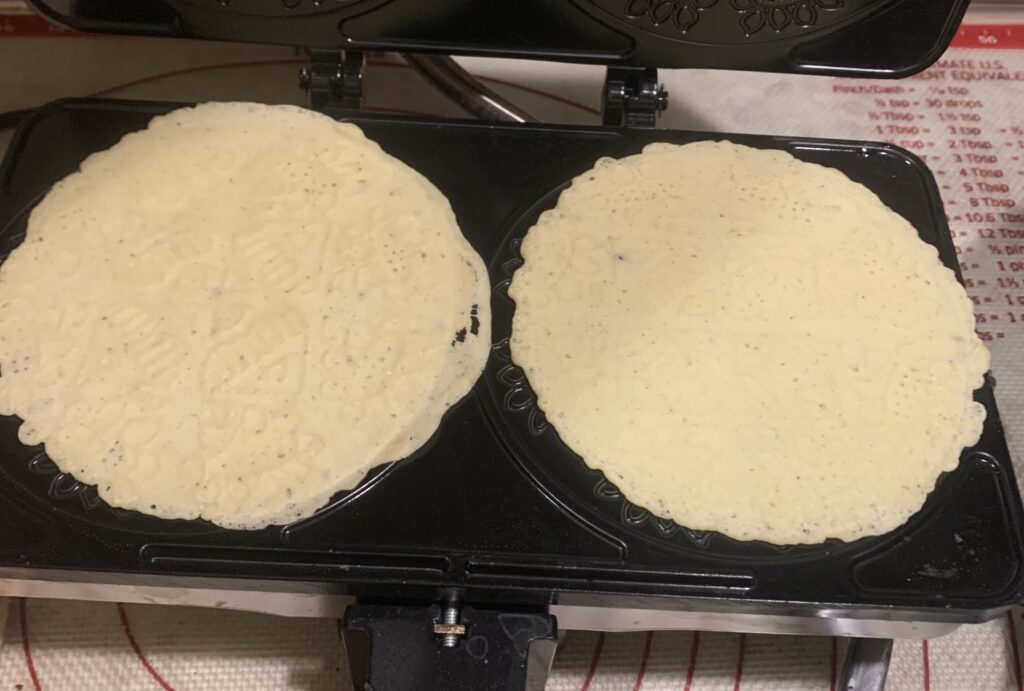
A perfect year-round, super fast cookie for all ages and tastes.
It’s funny how the simplest cookies can be the ones that drive you batty. Scott’s been trying to nail down Tuiles for so long that it’s become a family joke. Oatmeal wafers have been another bane. Until now. These aren’t thin enough to call a proper “wafer” – hence the name “thins” – but they are simple, easy to play with, and utterly delicious. A true year-round cookie rather than something fancy for the holidays.
There isn’t a whole lot more to say beyond “make this cookie, and make it often.”Oat Thins are a classic, relatively bulletproof treat from Scandinavia that is more equivalent to an everyday Chocolate Chip Cookie than any of the fancier Christmas treats.
It’s nailed. Enjoy.
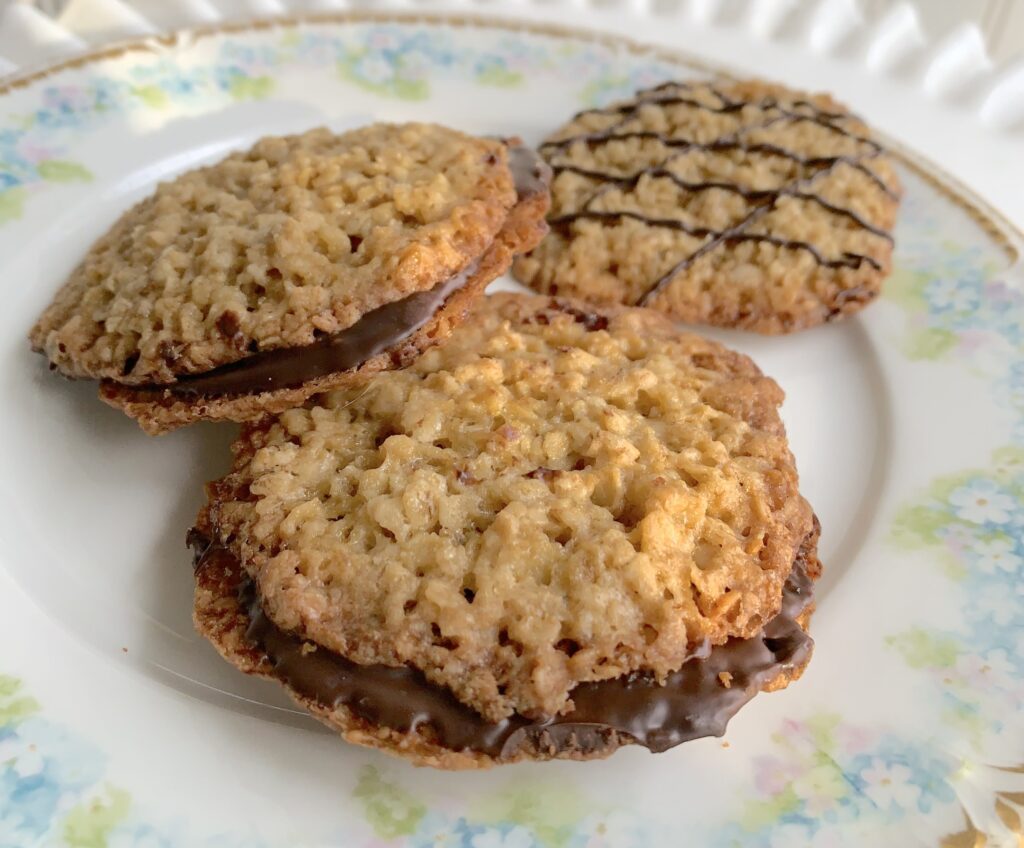
NOTE FROM KATE: I had nothing to do with the baking of this cookie…but I played with the chocolate. The neatest way is to load your melted chocolate into a pastry bag, snip off the tip so you get a thin stream, and make parallel lines across the entire sheet at once. Then stripe them sideways to form the diamonds. To easily make sandwiches, snip the bag opening a little larger, squirt, and squish. As much as I like these with chocolate, I absolutely adore the hit of buttery flavors when these cookies are still slightly warm and pliable!
The most interesting part came when Scott broke the recipe down to put in one of his all-cookie ratio tables. Would you believe that Swedish Oatmeal Thins turn out to be all but identical to our recipe for the deep south’s famous recipe for Benne a/k/a Sesame Wafers? Talk about parallel development!
We’ve now tested the cookies plain, drizzled with chocolate, and sandwiched into a serious, four-bite, chocolate oatmeal sandwich. Every one of those was fantastic. A ten out of ten for good, old fashioned yumminess. The texture is crisp, and stays that way. The flavor has that irresistible caramel/vanilla/oatmeal essence we’ve searched for over the years. And both of those features stay that way over time. What more could you want?
As for ease… wow. This is one of the fastest and simplest cookies we’ve ever come across. No exaggeration: Scott decided to race the clock for our final test batch. He put the oven on to preheat toward 350°, and then hurried to put the dough together and set up the trays.
Ready… set… go. Melt butter; measure out the dry ingredients; stir in the butter; and then stir in the vanilla and egg. Dough done, oven at only 275°. Form balls of dough, array on the trays, and… oven at 337°. The cookies were ready to bake before the oven could finish preheating!
That, my friends, is a cookie that comes together fast. Dump, stir, scoop with a spoon, form into balls, and bake.
We often discover something new and exciting as we experiment when odd or exotic recipes appear on the radar. We expected no less with this one. “Crackers?” It had to be a European version of those crispy, crunchy Mediterranean tea cookies. Right?
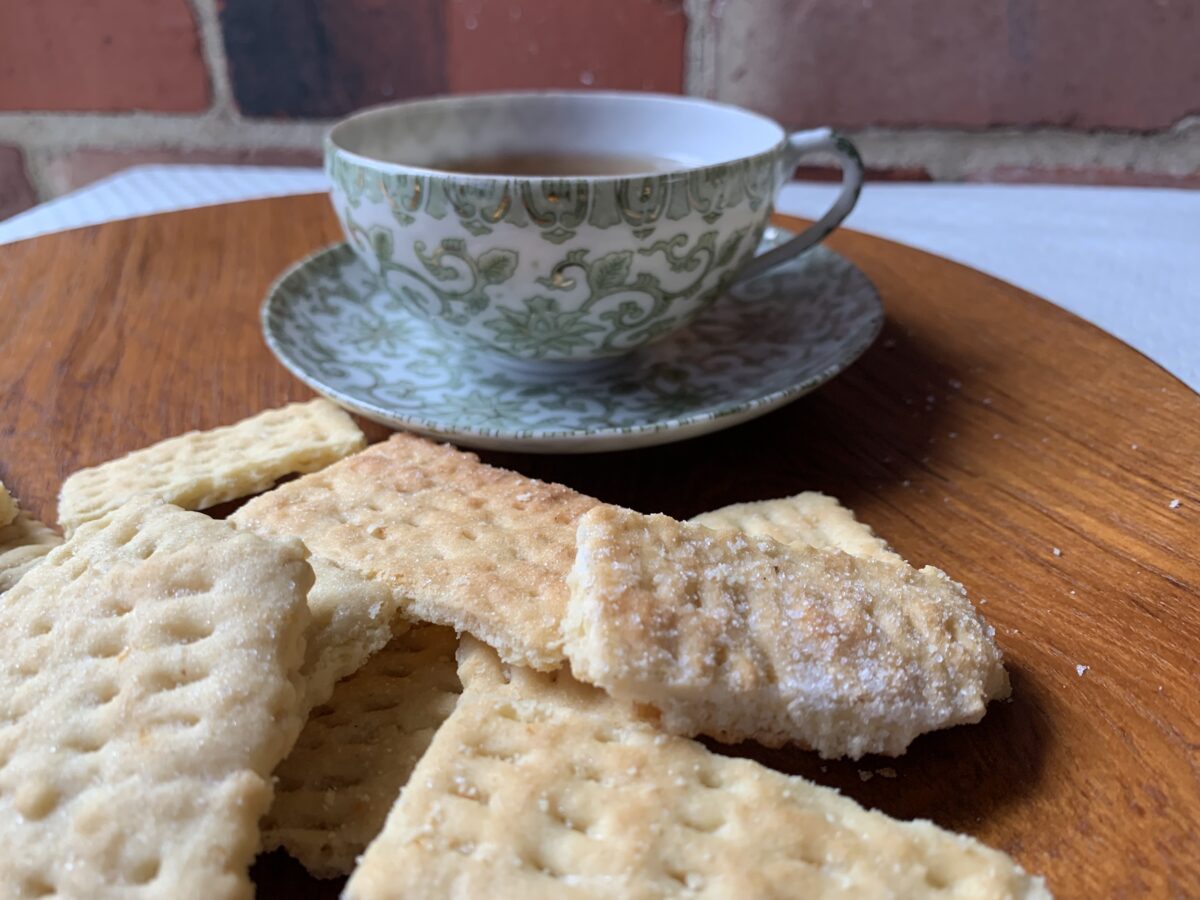
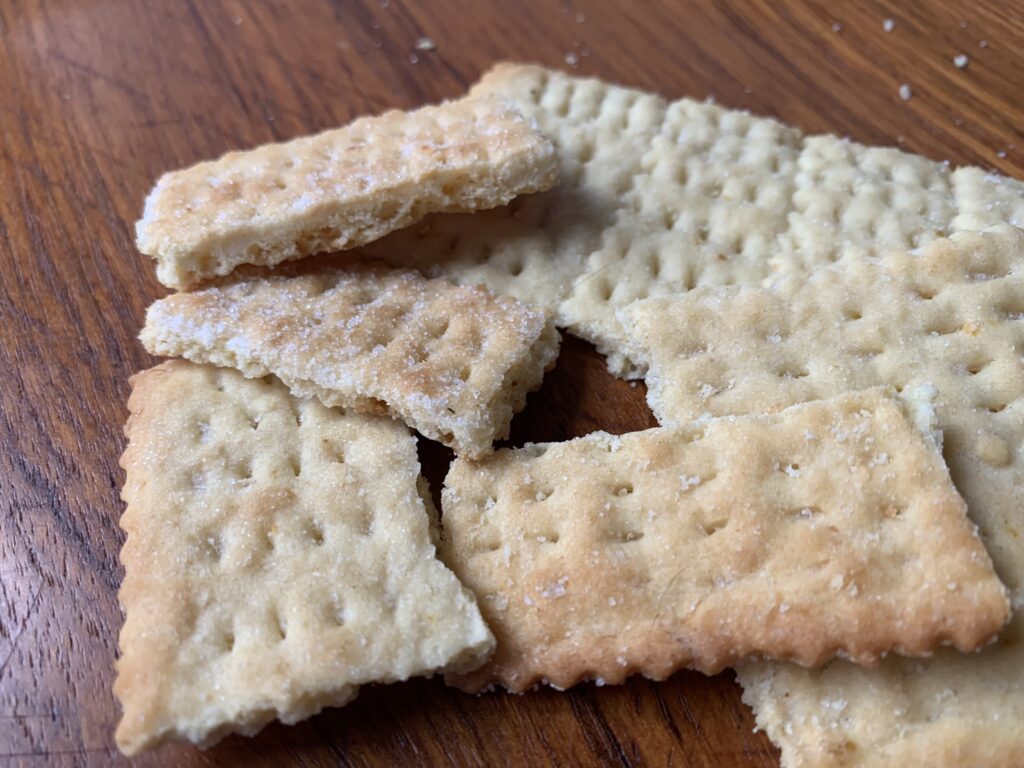
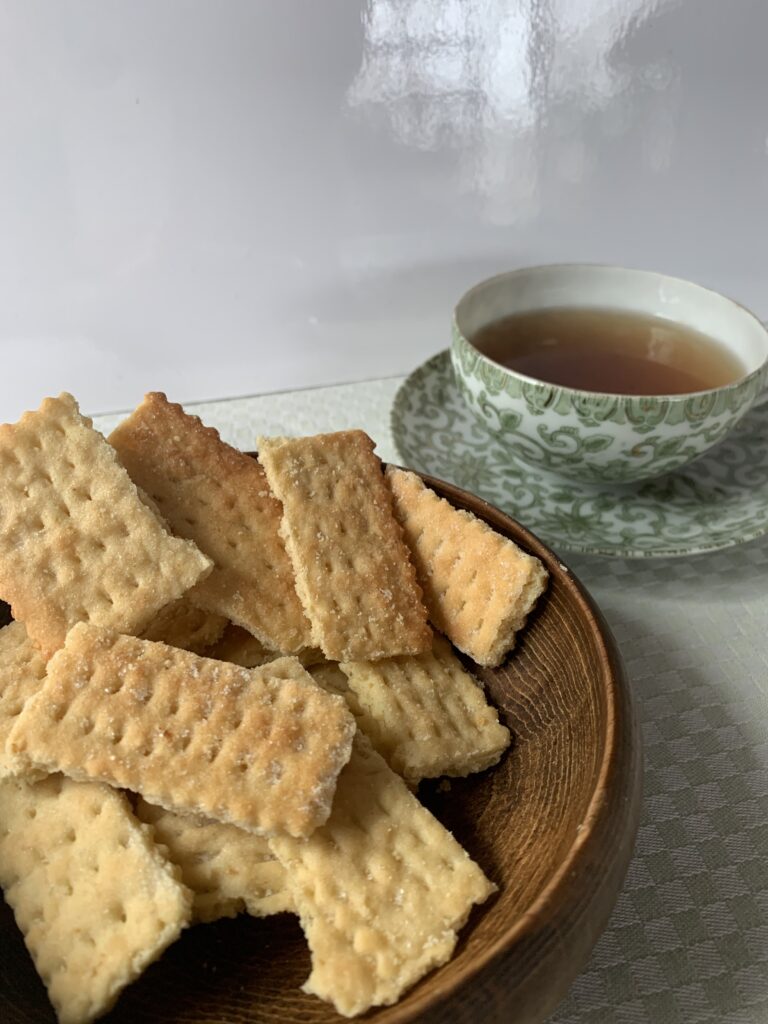
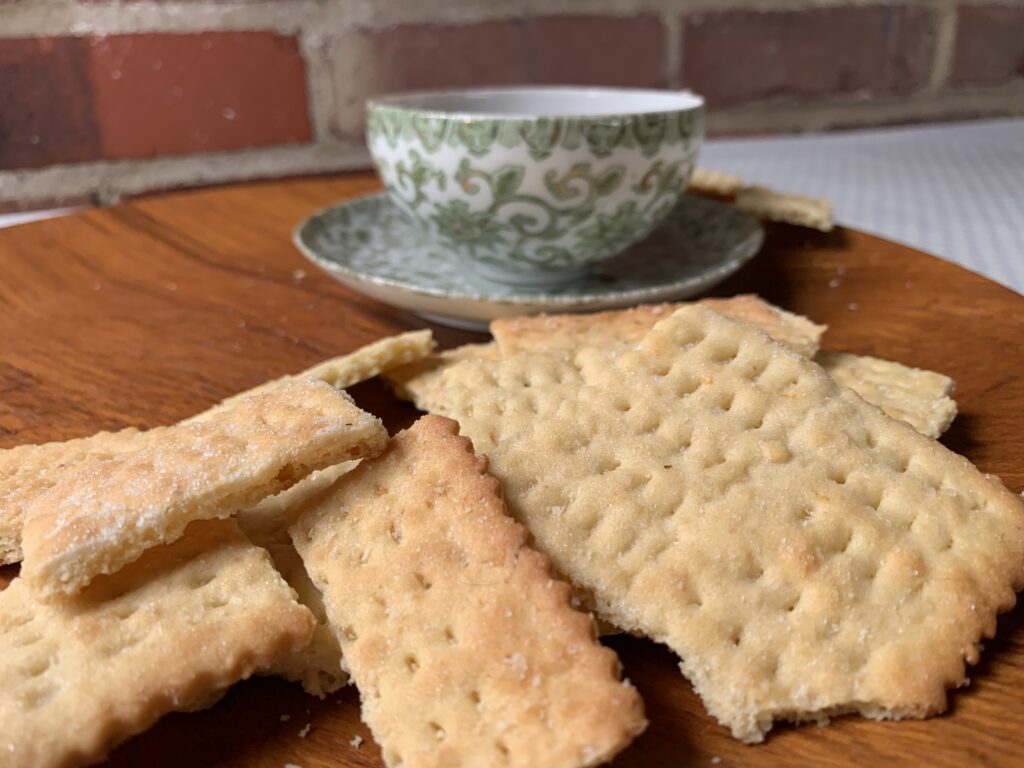
Nope. These taste like a standard sugar cookie, and earned their name by mirroring the appearance and texture of a classic saltine a/k/a soda cracker. They are eminently snackable too. Dangerously so. Each piece is so small that you will find yourself innocently popping five or ten at a sitting, which actually adds up to more than that regular sized sugar cookie you would have been able to resist.
Unique, fascinating, and familiar all at once. How cool is that?
The Mediterranean recipes both start with oil. The older versions of this recipe start with lard or shortening. Seems like an obvious connection, right? The only unusual thing was the math. All the classic Ammonia a/k/a Hartshorn Cookie recipes ended up with a really odd amount of fat when normalized to a reasonable amount of flour. A bit more than three tablespoons. At the same time, the flour measurements got weird if we tried to normalize things from the fat or sugar point of view.
Version 1.0
I decided to plan out my first test recipe by weight since the numbers weren’t that far off. 100 grams of lard, 100 grams of sugar, and 250 grams of flour. 1 to 1 to 2½, spread over two baking sheets. The result? Extraordinarily thin crackers that tasted like a cookie, but with a very distinct flavor from the fat. They were also a little greasy.
NOTE FROM KATE: They were a fun kind of greasy! Sometimes, using an animal fat you already have saved from a roast can give this kind of a cookie a very interesting character. Flaky tenderness and a hint of other flavors add to the gustatory experience. I like knowing that you’re eating a natural product and not a highly processed shortening. Scott will disparage that from time to time as “virtue points,” but they matter to me.
Fair enough. 250 grams of flour equals 1¾ cups of flour. The next batch would increase the flour to an even two cups. That would take care of the greasiness. The sugar level was about right. But what about that very lard-heavy flavor? What could I do for people who prefer something less distinctive and more common? Shortening, yes… but the flavor wasn’t loud enough to do with a totally neutral fat. So why not clarified butter?
How much butter would I need? Butter is about 16-18% water… Assume that’s been cooked that off, and account for a little more weight from the milk solids… And you end up with…
Son. Of. A. [cough]! You end up with exactly 4 ounces, dead on the nose. And what is 4 ounces? Exactly one standard stick of butter, or and even ½ cup.
And was I wasting effort and cleaning time by assuming the recipe called for two baking sheets? I had carefully rotated the pans midway through because thin dough and high heat are a bad combination. But even so we ended up with one tray browned more on the top, and the other tray more on the bottom. Annoying. And there was an awful lot of room around the dough on each tray, so…
Version 2.0
(A) Clarified butter instead of lard. (B) A little more flour. (C) Roll it all out to fit on a single sheet pan, and see if it’s still thin enough to be a “cracker.” (D) Adjust the cooking time to account for the extra thickness, and having only one pan in the oven.
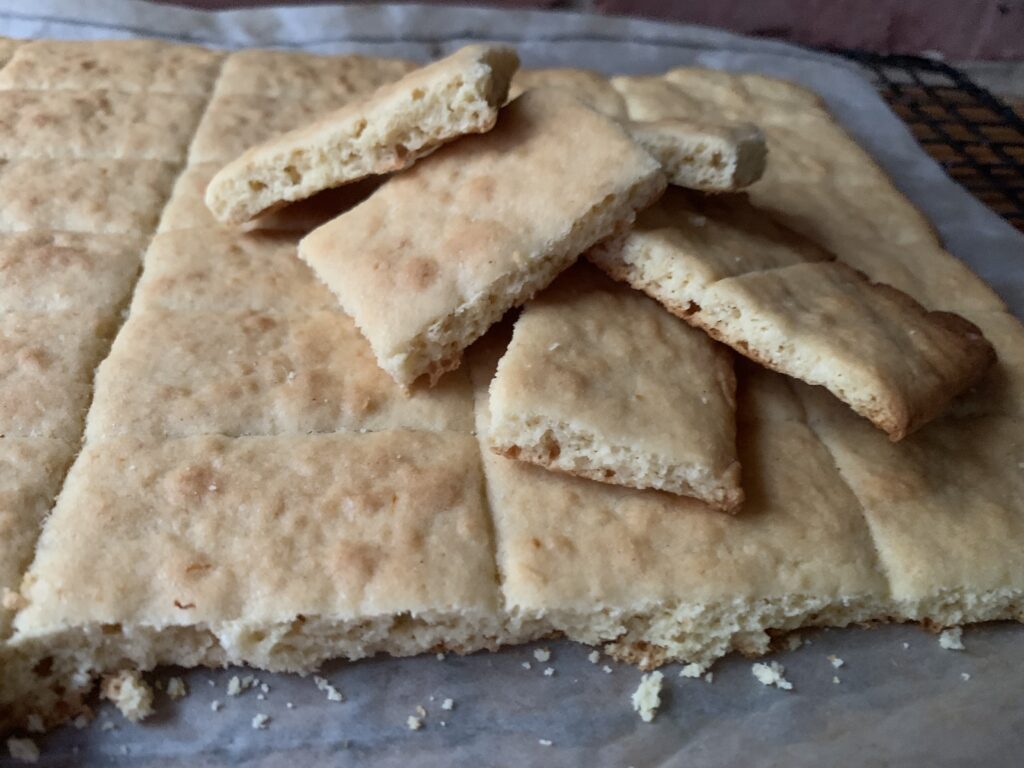
This is how they come out of the oven. See the uneven break by the bottom right? That’s what happens if you merely cut the lines without giving the wheel/blade a little wiggle to add an extra hint of separation.
This experiment told us (almost) everything we needed to know.
I had the proportions nailed. The dough was easy to make, easy to handle, and just plain worked.
This amount of dough rolls out thin – something on the order of ⅛” when all is said and done – but that’s still a big difference from “roll until you can roll no more.” The final result ended up being just under 3/16“, which definitely gave more of a cookie vibe than a cracker.
The flavor changed radically. Lard notes versus butter notes were extremely clear when we tasted them side by side.
The butter version does indeed taste standard. Just like a sugar cookie. But is there anything easier to vary than a sugar cookie? Tea, chai, cinnamon, other spices, herbs… This is clearly a cookie that bakers can play with to an all but infinite extent.
Those darned lines aren’t always clean enough when the cookie comes out of the oven.
Thick indeed! These come off as more “cookie” than “cracker.” Note how the lack of docking adds to that.
This cookie was, quite honestly, good enough to publish. But we weren’t done just yet! Could we customize this into a true illusion cookie with a taste that would complement a cookie tray instead of just fitting right in with so many other tastealikes?
Digression: Revisiting The Ratio Of Ingredients
Remember how odd the ingredient list seemed at the start of this project? And how the fat didn’t work out evenly until we figured out that it equaled a 4 oz. stick of butter that’s been clarified? But the overall ratios still didn’t work out to even numbers by weight, as experience taught they should in such an old recipe?
But now, with some extra flour and a more limited amount of fat… Aha! These changes created something very close to a 1:1:3 ratio of fat:sugar:flour. Gotcha!
Version 3.0 (see below) established our preference for a little less in the way of both fat and sugar, and that is what the recipe now says, but we have no doubt how Grandma taught the recipe by that ratio back in the day.
Version 3.0
Use the 1:1:3 ratio of ingredients;
Add some bacon fat in place of butter (we ended up with 2 tablespoons after I rendered four slices in a pan);
Roll out two trays as thin as possible, and only bake one at a time;
Dock the dough to make the final product look more like a saltine; and
Move some of the sugar from the inside to a sprinkling on top that would mimic the salt on an actual cracker.
The result? Have a look!
[Shakes head]. I don’t know how I missed it, but this is a marvelous illusion cookie. It actually fooled our real life daughter when she stopped in to visit! That docking made a much bigger difference than I ever imagined.
We could taste the bacon, but only because we knew it was there. The bacon also added a healthy hit of extra salt that we both enjoyed – enough to bump the basic salt level in the recipe up from ¼ to ½ teaspoon (though we might revert to the reduced amount if we work with salty bacon fat again). I even enjoyed sprinkling the tops with a little bit of extra salt to enhance the effect. It now appears as an option in the recipe. Here, among friends, I will admit to recommending that option because it makes the cookie taste more distinctive. But that’s taste, not tradition.
IMPORTANT NOTE: We also learned, to our chagrin, that simply marking the lines with a fluted wheel isn’t enough. We lost several “crackers” because they baked together too firmly, and wouldn’t snap along the lines. Even more than we did with the thick cookie (see photo above).
LESSON LEARNED: Don’t just mark those lines; mark them clearly and emphatically, with a little wiggle of the wheel or blade to be on the safe side. You need the pieces to bake together in order to have that crackerish center show, but you also need the separations clean enough to be sure they will break evenly.
The only other adjustments came down to fine tuning the ratio. Hark! Can you hear your great-great Grandma speaking from the beyond? “It’s a simple ratio dear. Three parts flour, to one part sugar, and one part lard. But here’s the secret… They taste even better if you take back a spoonful of the sugar and fat.”
Grandma is great. Grandma is wise. Listen to your great-great Grandma.
Conclusion
This is one of those cookies where we started out thinking “A,” only to discover it was really a “B.” This is not one of those cracker-crisp Mediterranean tea cookies. It’s more like a good, cracker-crisp sugar cookie designed to create a convincing, extremely snackable illusion.
NOTE FROM KATE: Be careful with these – they are quite more-ish! The texture is a lot of fun. You will easily snack on five cookies when you would’ve said a “no, thank you” to a similar cookie in its one-piece form.
Here’s a summary of the lessons learned:
The dough follows a 1:1:3 ratio of fat to sugar to flour, with a spoonful taken back from the first two.
The cookie changes in wonderful ways if you mix and match different fats in place of the clarified butter. We tried them with lard alone, butter alone, and butter mixed with bacon fat. The last was the best, partly because we liked the extra salt.
The illusion part matters, so roll the dough out super thin, take the time to dock them with a fork, and sprinkle on a bit of sugar to fully recreate the saltine look. Sprinkling on some kosher salt will also help the illusion, and has the side effect of making the cookie taste more distinctive.
Maintain an even thickness. Smeared edges cook faster than rolled centers.
Mark the dividing lines emphatically, with a little wiggle of the wheel/blade to add some room. The helps the “crackers” to separate cleanly.
Just don’t separate them too much, because those broken-open sides show off the crackerish interior, which is both pretty and useful for the illusion.
Bake only one tray at a time, and spin the tray just after the estimated halfway point. Two trays won’t cook evenly, and oven hot spots really show.
The bake is done when the top turns cracker-tan brown. Go by that, not the designated baking time.
Hartshorn is mandatory. Baking soda/powder yield a standard cookie texture.
All in all? A very successful experiment, and a cookie we will gladly add to the repertoire. Especially if we want something more on the snackable side than a proper dessert, or there’s someone coming over who’d be fun to fool…
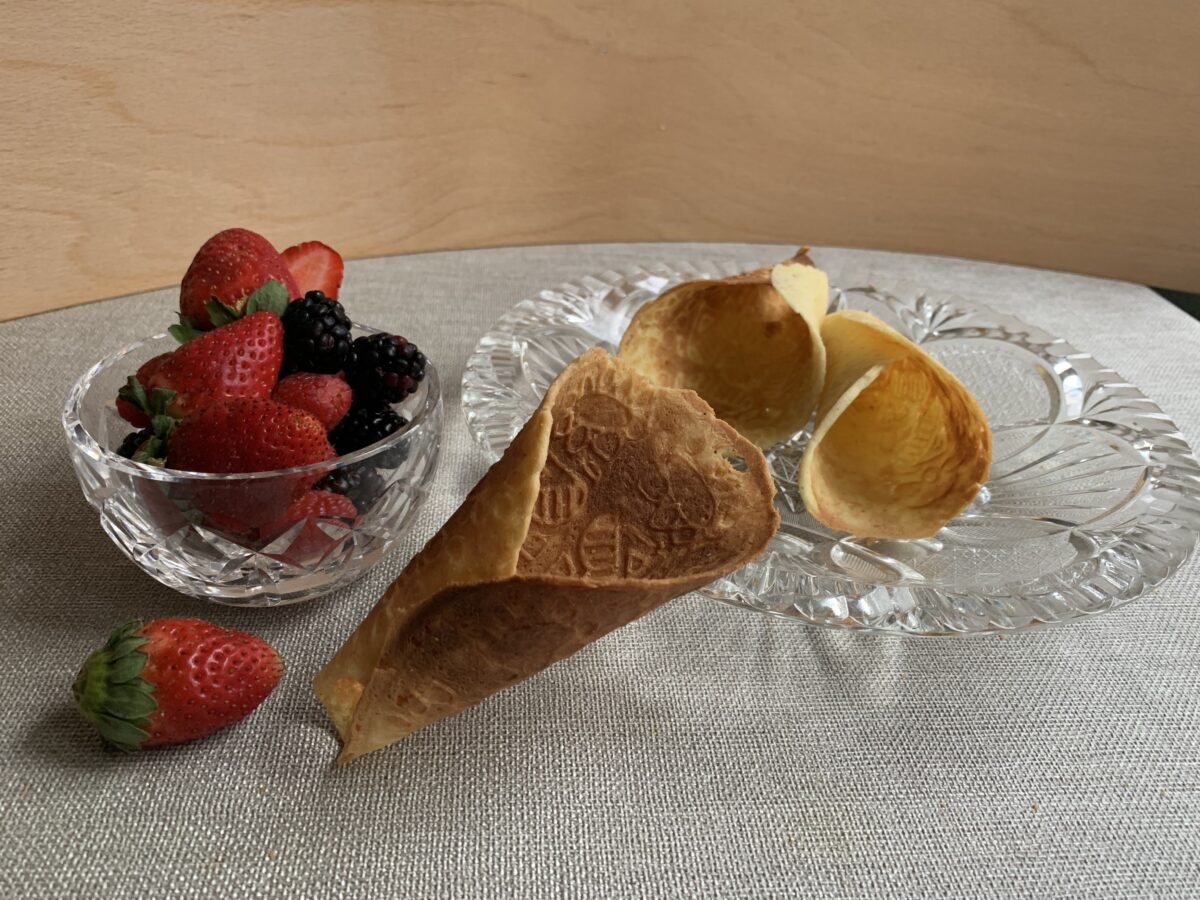
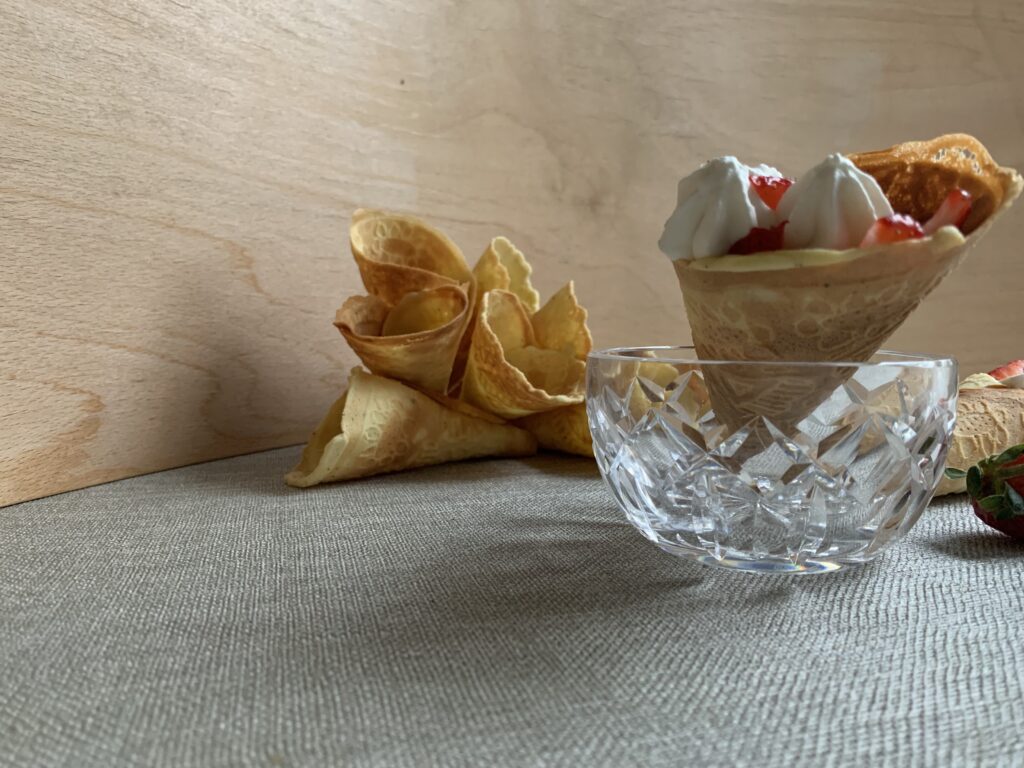
Delicate, spice scented cones: a treat for all seasons
Krumkake are one of those cookies that keep improving with every new batch you try. I can’t honestly say we’ve mastered it yet – which is a little scary when you realize they’ve gotten nothing but rave reviews from guests, spouse, and even a certain stubborn daughter on a low sugar kick who only gave it a taste because Dad did a comic begging routine. (And who then had somewhere between two and several more in order to decide that strawberries were her favorite berry inside. And then had to be restrained to save some for her sister who was out of town. But admittedly had the good grace to only laugh and agree when confronted with this description).
In other words, the Krumkaker we’re already making are Good with a capital G and are still getting better as our skill improves. They are as much fun to serve and eat as any other cookie we know, and have the potential to be even better than all that once we start to explore all the ideas for a filling beyond berries and cream.
Yes Virginia, there is a Santa Claus who lives up by the North Pole, and travels south every year – making his first stop in Norway to get his allotment of Krumkake.
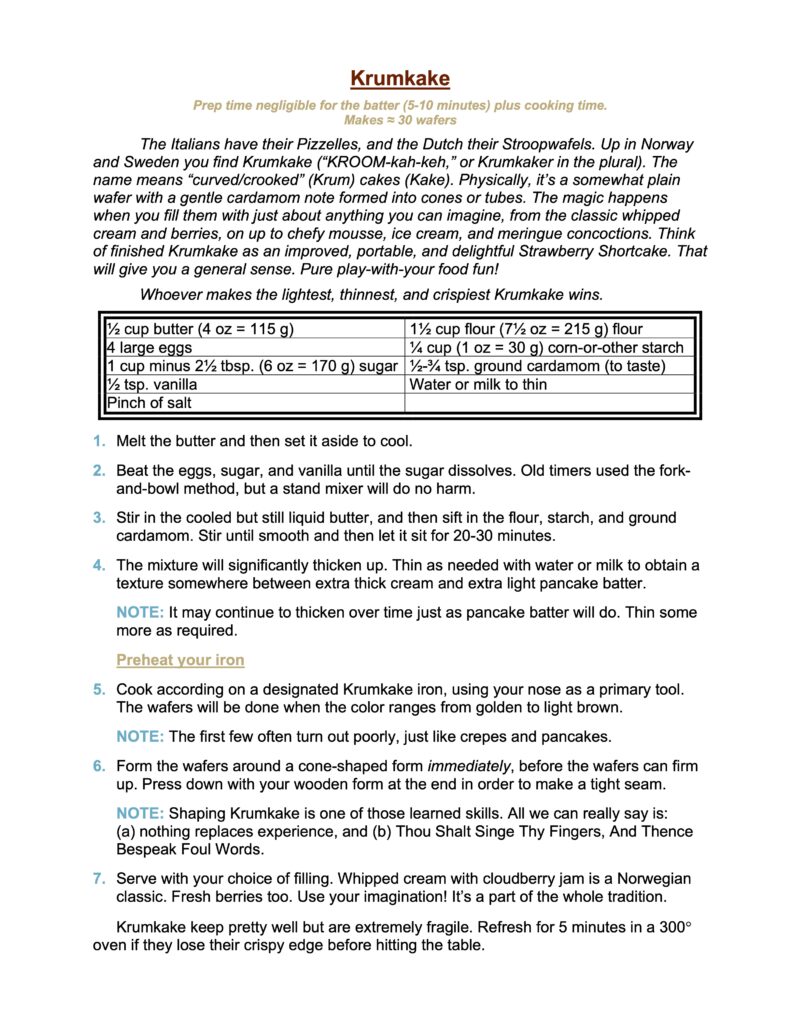
Krumkake (Krumkaker in the plural) is a light, crisp, Norwegian waffle cookie made as follows:
Start with an unleavened batter made from melted butter, eggs, flour, and sugar,
Season it with vanilla and cardamom,
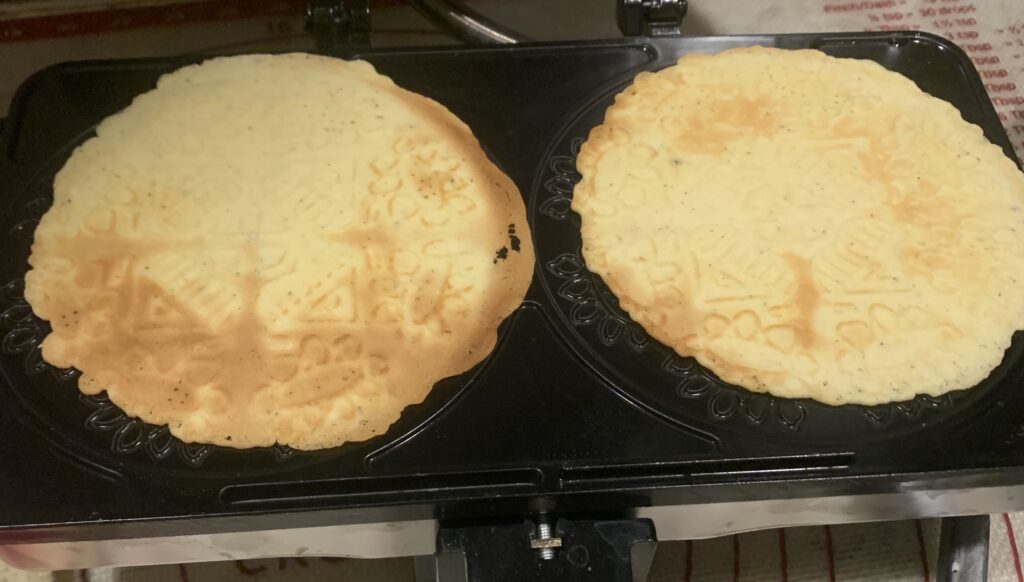
Use a special waffle iron to make wafer thin cookies,
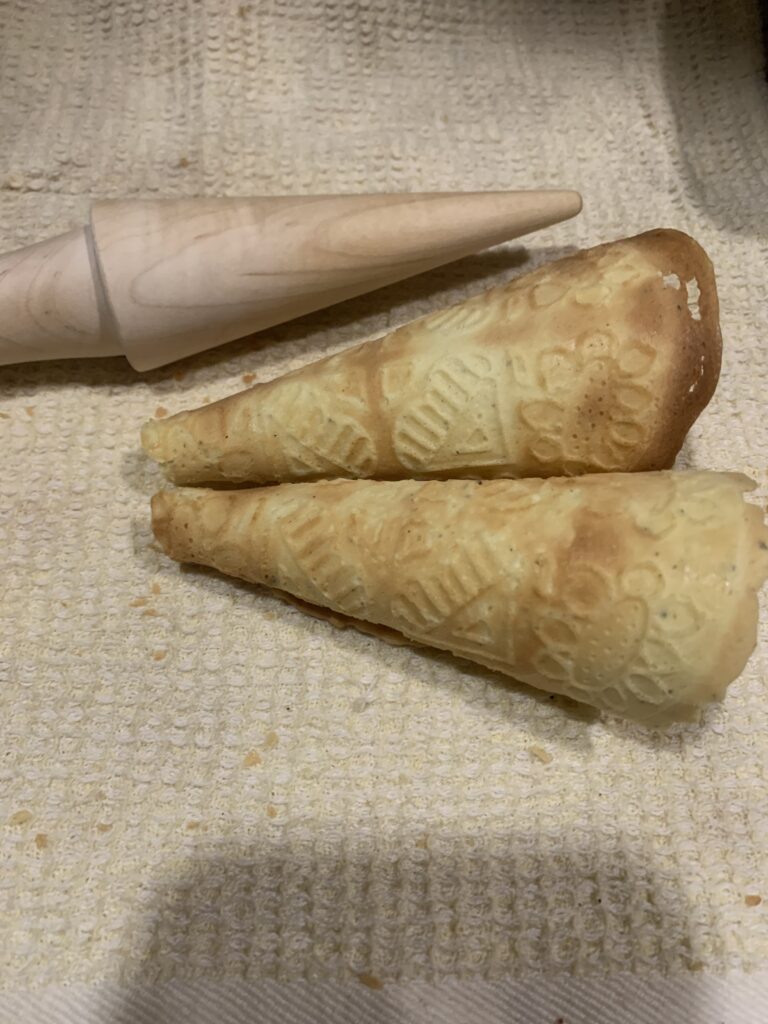
Form those wafers into cones or tubes while hot, and then
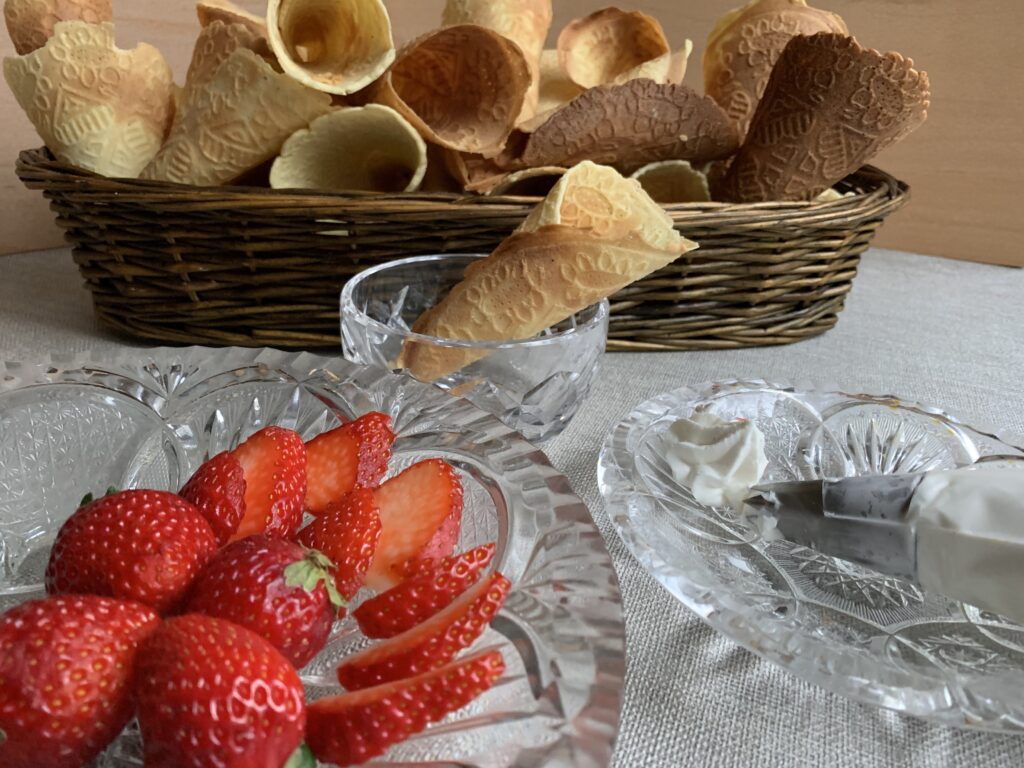
Serve with a filling such as the classic whipped cream and berries.
Whoever makes the thinnest, lightest, crispiest Krumkake wins. Sounds simple, right? And it is, except for hidden subtleties in every one of those five basic points.
About #1, why do they need to be unleavened? Especially when a bit of baking powder ought to make them that much lighter?
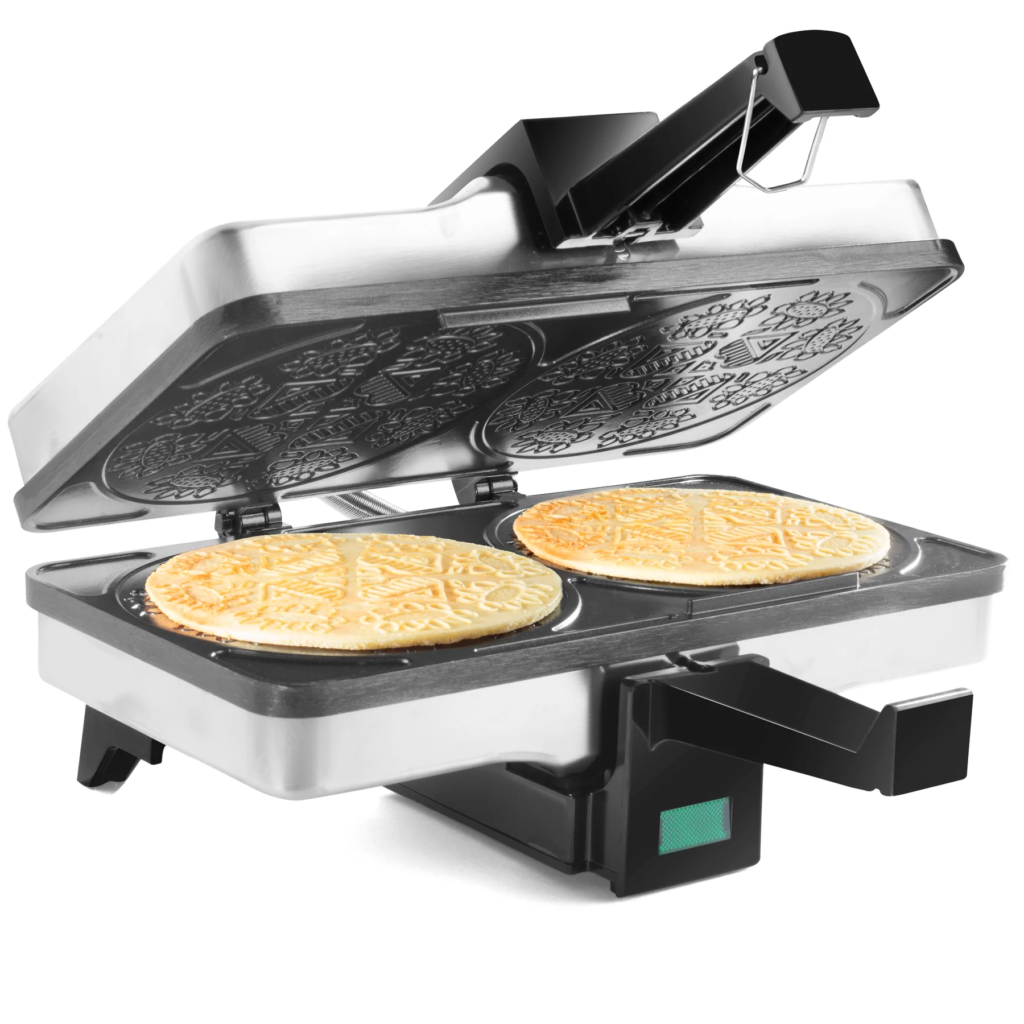
Krumkake irons aren’t quite the same as pizzelle irons. The space between the two halves is noticeably thinner; enough so that any puff from the baking powder would be squeezed out by the brute force of pressing the top and bottom. You’d think people would try it anyway, but I failed to find a single recipe that reinforced the batter with baking powder.
OTOH, every recipe requires a fairly generous portion of starch to lighten the flour, and that serves a similar purpose.
For #2, why be so specific about vanilla and cardamom?Aren’t people allowed to play around?
This is the one that’s going to get me in trouble. Our Internet friend Libby is the finest Krumkake baker we know – the culmination of at least three generations of tradition, with 30+ years of expertise. She has faced and conquered every challenge that Krumkake can present… and she makes her Krumkake with vanilla and almond extract alone. No cardamom in sight. [NOTE: She has subsequently admitted to using ground mace in half of her batter, which may perhaps be blamed on her roots being Swedish instead of Norwegian.]
I stand by my guns nevertheless for at least three reasons:
Every native Norwegian recipe I could find specified cardamom, usually with a grudging note that some people prefer nutmeg (or mace, I guess).
Scandinavian bakers are as free with their use of cardamom as Americans are with cinnamon. It’s a cultural trait, and I wanted to produce an Old Country recipe rather than an American adaptation.
My family really liked how that delicate, background spice enhanced the berries.
So cardamom it is. That is the norm, and doing without is the variation.
On #3, why do I need to spend extra money on a new device? Can’t I use my pizzelle iron instead?
Yeeessss… you can, so long as you understand that your final result won’t be as thin as it should be, won’t shape as cleanly, and will therefore be tasty but not “right.” FWIW, we tested this with a certain amount of diligence because (a) I am nothing if not cheap, and (b) my beloved wasn’t exactly fond of adding yet another large, single purpose tool. I wanted to find a different answer, but the darned wafers just wouldn’t cooperate. I ended up with tasty shards and crumbs, not pretty cones or tubes.
Thoroughly daunted, I went back to consult with Libby about this (consulted, not whined, no matter what she says). She replied with an electronic shrug. “I’m afraid you can’t get around it. Krumkake are supposed to be super thin, and pizzelle irons have too much space between the plates. I give them an extra squeeze even in my Krumkake iron just to be sure. But don’t worry about the extra machine. It won’t be a once-per-year waste. I use my Krumkake iron all year long to make crackers.”
Crackers? Okay, that works… And it’s hard to ignore the voice of experience when that’s why you’re asking for help in the first place. So I bit the bullet, searched around for a deal, and found one right away. Brand new irons retail for around $45.00 as of the end of 2022. That’s well within a household budget no matter what, but an hour of additional searching found me a technically used iron, still in its unopened box, for half that price even after accounting for the cost of shipping. $23.00. So I made the purchase, and discovered that Libby was 100% right. The Krumkake wafers really do come off the iron significantly thinner, and it really does make a difference in the final product.
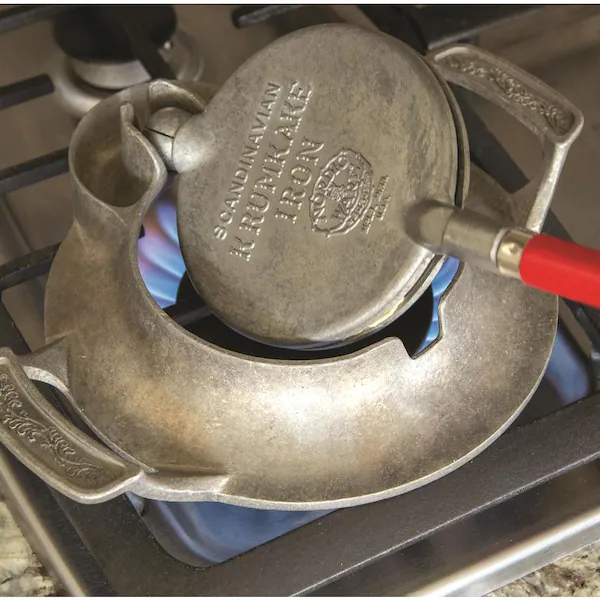
That search came with a side benefit too. We bought a standard electric iron, and it works great, but now I learned that traditional stovetop versions are still being sold as well! How cool is this?
An old fashioned stovetop Krumkake iron from Nordic Ware.
Krumkake recipes existed long before electrical power, and you can actually reproduce that experience if you choose. “Heritage” indeed!
For heaven’s sake, #4 has to be excessive. I like flat pizzelles just fine and I’m perfectly willing to have “topping” instead of “filling.” Why go to the hassle of burning my fingertips to form these into shapes?
Let’s start with the name. “Kake” means cake or cookie, and “krum” translates to ‘curved’ or ‘crooked’; so Krumkaker are by definition “curved cookies.” Cones are the most traditional shape, with tubes close behind, but I couldn’t find a single recipe where the author left them flat. Our casualties irregular results used for taste testing confirm that wafers taste just fine, but you won’t be getting the full experience, and it will matter once you get to the final touches. More on that below.
Okay, Let me have it. What’s the big deal behind requirement #5? I eat my pizzelles plain. Why not Krumkake?
This is actually the most important piece of the puzzle!
We had plenty of “irregular results” as Kate and I struggled with portioning, timing, shaping, and my desire to somehow make this work with a pizzelle machine. Casualties = nibbling. And the nibbling proved, beyond any doubt, that straight Krumkaker are… inoffensive. Nothing wrong with them, just ho hum. Uninspiring. Even disappointing, to be totally honest. Pizzelles have character. Stroopwafels incorporate a caramel filling the gods use to enhance their ambrosia. These Krumkake fragments had neither.
So you can imagine my surprise at the startled cries of delight that came from the other room as guests and family went in to try them out. “Well, they’re certainly pretty enough… Ssshhhhpritz! (From the can of whipped cream)… And oooh, berries. I think I’ll try… Oh. Good. Lord. Jim, you’ve got to come here! You’re missing out on the good stuff! These things are amazing!”
Maybe I ought to try one too… And yes, that was when the penny dropped.
Plain, unfilled Krumkaker are like a light, crispy, and extra fun version of that plain cake underneath a Strawberry Shortcake. [Yawn] Everything changes when you add the cream and berries. Hody hum to holy cow in one quick instant.
That, my friends, is the frame you need to complete the picture. Krumkaker, like Cat Tongues, are a platform rather than a standalone cookie. They aren’t complete until they are filled. But trust me on this. Once they are completed, you will be H.A.P.P.Y.
NAILING DOWN THE RECIPE
Recipes for the Krumkaker shells. I did a great deal of research for this recipe because it’s so well loved in Scandinavian tradition, and found that the recipes all followed the same basic pattern. First you mix together eggs and sugar until the sugar dissolves; then you add in melted (and cooled) butter; then you stir in some flour mixed with starch (potato, corn, etc.); and then you thin the batter as needed to get to a consistency somewhere between an extra-thick cream and an extra-light pancake batter. The recipes only differ in their proportion of eggs, sugar, butter, and shortened flour, and those group loosely into three basic categories:
Recipes made 1-2 eggs, standard flour, and a lot of whole milk, half and half, or cream.
Libby’s recipe, which uses 3 eggs, shortens the flour with a lot of starch (1 cup and ½ cup respectively), has a small amount of sugar (½ cup), and then thins the result with water.
The recipe that came with our machine (the most common by far), which starts with 4 eggs, flour with just a little bit of starch (1½ cups and 2 tbsp.), a full cup of sugar, and then thins the already looser result with your choice of water, milk, etc.
We tested all three. The first one disappointed. It came out as a nice, thick batter but cooked up a little tough. In the ideal world I would have gone back to test this again later on, because it probably suffered from both our lack of technique and my insistence on trying to a pizzelle iron. I never did, however, because the egg-heavy recipes ended up working so well. Thus I won’t call this approach a “failure,” just an alternative that got abandoned early on.
Libby’s 3-egg recipe worked, but had two issues I felt compelled to refine. First, it wasn’t quite sweet enough for our admittedly American taste, and second, it kept thickening up into something that could barely be called a batter at all. Adding water would thin it out for 10-20 minutes, and then it would thicken up yet again. Fixable issues, beyond any doubt, but first I wanted to try the 4-egg recipe since it promised to be both thinner and sweeter.
This one worked quite well. Yes, it was a little on the sweet side. And yes, it still needed some extra liquid. But it wasn’t over the top sweet, and it needed less liquid than Libby’s. A compromise between the 3- and 4-egg approaches looked like an obvious way to go. Or would have if my itch to experiment hadn’t intervened.
COOKIE NERD MOMENT
The Unwise Diversion
I know from general baking principles that egg yolks tend to add structure and cakiness to baked goods, while egg whites make things a little drier and crispier. Whipping the eggs/whites also makes things lighter and crispier. And weren’t “light” and “crispy” the very targets we were after? So logic said the path toward an Ultimate Krumkake might actually lie in separating the eggs and playing around with longer mixing times, rather than fussing with the ingredients alone. “Most innnterestink…” says he in a cartoon Dr. Freud voice.
But here’s the thing. Our work isn’t really about finding the Ultimate Version. We’re after the Best Traditional Version that can be made with standard U.S. ingredients and materials. All of which forbade something as radical as separating eggs… unless I could dig up traditional versions that followed the same logic.
Eyes aglow I went back to my research, and found [crickets]. The deeper I looked, the clearer it became. Krumkake is an ancient treat that Grandma’s grandmother made by whisking whole eggs and sugar with a fork until the sugar dissolved, adding shortened flour, and then thinning with liquid. That evolved over time to make use of better tools, but only because they achieve the same result a little quicker. Chefy variations and techniques? Not a one to be found.
The batter part came together quickly after that. I added some extra starch for tenderness, cut back on the sugar by a few tablespoons, et voila. This was the recipe that went out for an initial public test, and yielded all those rave reviews. Could I make it even better? What if I…
Sometimes it’s good to have a wife. (Okay, okay: most times.) Kate looked at me and said, “Perfection is overrated. These aren’t just ‘good enough,’ they are good enough that I want to call over company just to show them off, and get them out of the house where I won’t be tempted any more. Leave well enough alone.” So be it.
The recipe down below still tends to thicken up over time, but only by a little, and isn’t that just as true of pancake and crepe batters? It’s the nature of the beast. Consider it a trick of the trade.
Finding the ideal Krumkake filling.
There is no such thing. End of story.
The simplest, most basic filling is berries or preserves served with whipped cream. Lingonberries or cloudberries if you’re in Scandinavia; and something like fresh strawberries here in the U.S. But that is just the starting point.
Novel fillings are a significant part of the Krumkake tradition. Ice cream? Yes, and I can personally attest to how well they go with a little Häagen-Dazs coffee. Custards and thickened creams? Yes. Berries or jam alone? Yes. Other fruit, be it cooked, raw, preserved, fresh, northern, or tropical? All of the above. Pudding, mousse, caramel drizzles, chocolate dips, meringues, etc. ad infinitum? Ditto.
If tradition limits the shell to a basic approach, that same tradition says that only a baker who lacks inspiration (or has demanding family members) would trot out the same kind of filling every time. Krumkake must be filled with something. That’s a fact. But “something” is about as specific as it gets.
Just keep the fragility factor in mind as you ponder what to use. Super thin, crispy-but-tender shells are going to shatter in your hands somewhere between bites one and two. There’s no way around it. When (not if) that happens, there’s nothing to do but laugh, catch the crumbs, and then lick your fingers. We can’t recommend the use of any filling where that would present a problem. After that, anything goes.
FORMING KRUMKAKE CONES
The batter before it gets thinned with water or milk
Thinned Krumkake batter at the right consistency
Not dark enough yet
Still not dark enough
Ready to roll
And now we’re done! The kitchen towel was used as a “glove” to cut down on singed fingertips. Note the wooden cone mold at the top.
I don’t know what to tell you. The only advice I can give is both obvious and doesn’t offer a whole lot of help.
Thy Fingers Shalt Get Singed. The wafers can only be shaped when they’re piping hot, which makes the ouchies are unavoidable.
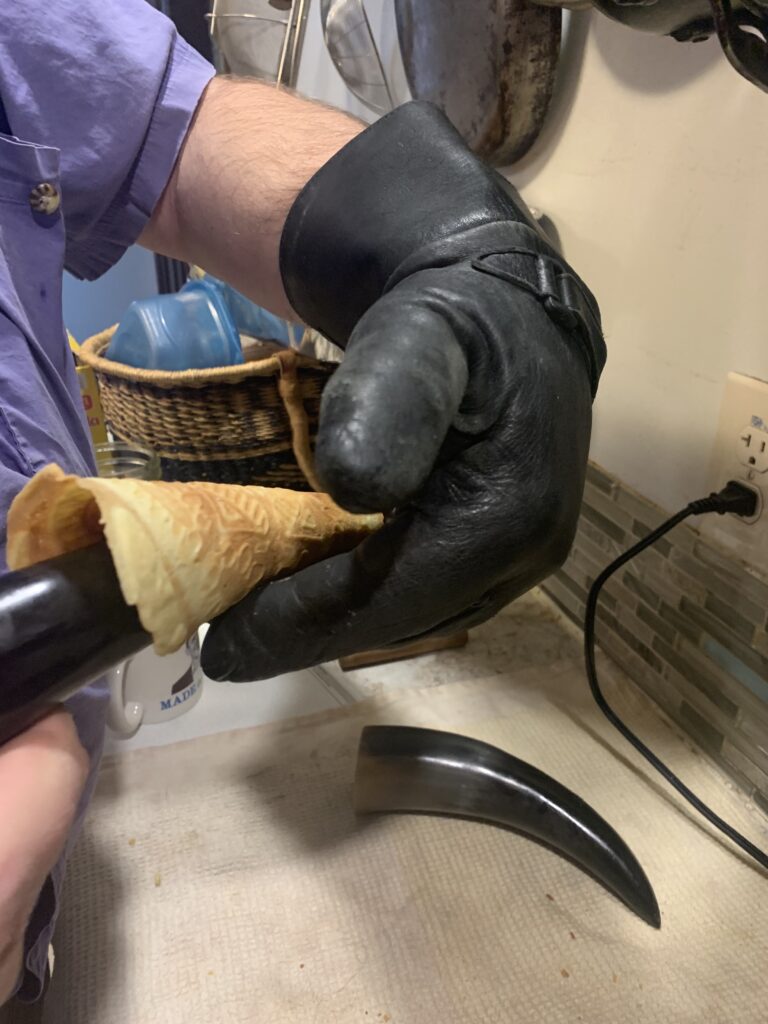
Wearing a glove will help. Same with rolling on a clean towel, which can double as a pseudo-glove for handling. But it’s going to happen. Just remember that you’re doing it for love, and be creative with how you curse.
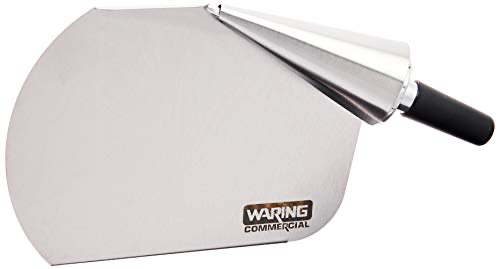
A good, solid cone mold makes everything easier. Those tools exist for a reason, and they work. There is a tool good enough to solve all problems (pictured below), but at that point you’re talking about something used for industrial production.
Kate likes to keep a bowl of cold water standing by to cool her fingertips. (NOTE FROM SCOTT: Being a big, tough, manly man I obviously scorn such sensible comforts).[NOTE FROM KATE: And use a manly biker glove instead].
But the bottom line is simple: nothing will ever replace experience. Experience makes you quicker and more efficient, and turns the race against ouchies into a private challenge rather than a looming threat. Nothing replaces experience.
All of which explains why war stories are so big a part of the Krumkake experience, both for the rueful memories and the times you cut loose with some [ahem] appropriate words, not realizing who was standing right behind you.
NOTE FROM KATE: We had a lot of fun with this recipe, and it’s easier than it sounds. In this, it reminds me of macarons: You end up learning a new technique, and you will make some misshapen, too-light, or too-dark pieces. But they will still taste pretty good, and by the end of your first batch, you’ll find you are making very respectable cones.
We engaged in all kinds of foolishness before Scott ordered that wooden cone shape. We tried a cardboard roll shaped into a horn and covered in aluminum foils (an epic fail – you really need to press on the ‘seam’ where the edges of your cone meet.) We tried bovine horns, carved and uncarved (a remnant of an old hobby – I don’t carve anymore.) That sparked a promise of how good it could be, if we only had a straight horn. Like, y’know, one made of wood for the purpose. The gloves were a massive overkill. You don’t need to touch the hot wafer except for that one edge, and you can do it through a clean tea towel. [SCOTT RESPECTFULLY DISAGREES. There is no such thing as overkill when it comes to tools. If you’re going to make a thing, why not make it from stainless steel?]
Filling the horns is a lot of fun. You will eventually want to start making your cream (or cream-based fillings) ahead to keep in the fridge. The spray cans are fun but inelegant. The higher end approach is to stabilize your cream with gelatin and powdered sugar. Here’s what I did, and it worked like a charm:
1 cup of cream
1 tsp. powdered gelatin
2-4 tbsp. hot water
1-4 tbsp powdered sugar.
Bloom the gelatin in hot water, let it cool, and then add it into half-whipped cream. Finish whipping until you get soft peaks.
We served this in disposable pastry bags, with jam and pre-sliced berries on the side. [Sigh] It was wonderful. Several berries, in fact, so people could create their own combinations. Every one was delicious, and our guests enjoyed competing for whose would be best. Oh yes – remember to serve with extra napkins on the side. Trust me on this.
Another view of the molding tool and some Krumkake I made using it. $8.00, and worth every penny
A commercial waffle forming tool. Ouchy free, but $40 instead of $8, and not so easy to store
Or you can get really traditional…
The glove was a great idea despite Kate’s rolling of the eyes. The natural horns? Not so much. The lack of a handle made them hard to, well, handle, and the curve made forming them slower, which increased the ouchy factor.
CONCLUSION
Enough with the ouchies! War stories, remember? They’re a part of the fun. But the best part of all is this:
Krumkake are so good, and so much fun, that they are going on our short list for favorite desserts to make whenever guests come by. Not just for the holidays either, but all year round. The whole experience adds up to a solid “10.” Your guests and loved ones even get to play with their food! What could be better than that?
Did you know? This world famous cookie with the evocative name is actually part of a pair
This is one of those classic recipes I’ve been meaning to try for ages because it has the world’s most evocative name, but kept putting off because it looked too easy. I have seen many dozens of recipes, maybe hundreds of recipes, and they are basically all the same. What could I possibly have to add? Yes, the formalities had to be observed. We really do bake every recipe we publish, over and over until we have it right, so I knew that sooner or later I’d have to go through the motions. But I will admit that Cat Tongues fell into that rare group where my inner Scrooge kept insisting, “Why bother?”
Was he ever wrong! It took me several different batches to penetrate the subtleties behind this cookie, and then an explanation from our extremely French friend before I finally got the underlying point: Cat Tongues aren’t a standalone cookie at all, but rather something new that I’ve never played around with before.
So there was a lot of reason to bother. I only regret that I waited this long.
How Often Do You See A Mathematically Perfect Recipe?
The French are a very orderly people, at least on the cooking side, and few things show that more than the traditional recipe for Langues de Chat:
Equal weight of butter;
Equal weight of powdered sugar;
Equal weight of egg white;
Equal weight of flour; and
A hint of salt with a touch of some aromatic “extra” such as citrus zest, spice, or vanilla.
That’s it. A kitchen scale should let you multiply the recipe up or down with no effort at all.
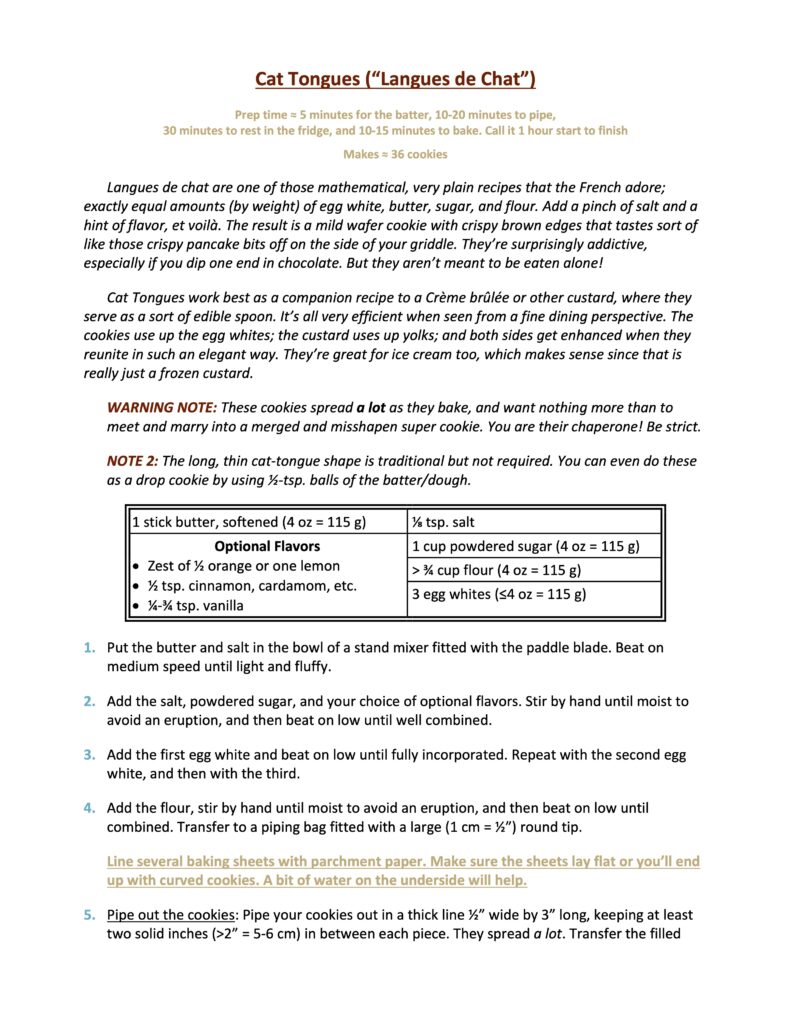
Note To [Shall Not Be Named]: Yes, I really do mean “no effort at all.” Start with the bowl for your mixer. Put that on your scale, tare to zero, and then add the butter. Make a note of the weight, which should be 115 grams for a single stick, give or take. Set the mixing bowl aside, and put a new, smaller bowl on the scale. Tare to zero, and crack in your egg whites, saving the yolks for the custard you’re making alongside. Get to that same weight or below, and then set this aside too (as discussed below, there is no issue if the egg whites come in underweight). Repeat with a bowl for the powdered sugar, and then again for the flour. A,B,C and alakazam: you are ready to go.
Problem #1: The Egg Whites Did Not Cooperate
For our testing I chose to normalize around the weight of a standard U.S. stick of butter, which is 4 oz = 115 g. The conversion tables may say that equates to around three (3) egg whites, but that is only true if they’re Jumbos. The regular Size Large whites from our local supermarkets averaged out to more like 32-33 grams apiece, meaning that three was too little (about 95-100 g), but four was too many (≈ 125-130 g).
I solved this by using four and spooning off the excess, but there’s no need to be that compulsively precise. I’ve since learned (see below) that professional bakers often like to control the amount of spreading by cutting back on the egg whites. Et voilà! Don’t be like me. Be like the pros. Use three whites per stick of butter, and tell anyone who asks that you departed from mathematical perfection on purpose.
Problem #2: The Order Of Addition
Here’s another case where I outsmarted myself by trying to be too precise. The typical “creaming method” approach says to (1) beat the butter until it is fluffy and white, (2) beat in the sugar and flavoring until smooth, (3) beat in the eggs one at a time until fully combined, and then (4) beat in the flour until just combined. The order matters for chemistry reasons. Several of the Cat Tongue recipes reverse #3 and #4, which got me all angsty. Was it a hidden trick? Or a typo?
After testing both I can tell you that it makes no difference. If you add the flour first (i.e., at step 3), you need to take extra care to avoid an eruption from the mixing bowl, but the advance warning should be enough. There is no real buildup of gluten to worry about. If you add the egg whites first, you never get them fully incorporated into the butter because there are just too many, but it will still come together nicely when the flour comes in later on, and you won’t need to deal with “are you sure this order is right?” question marks as you bake.
It’s a batter, my friends, not a dough. Very forgiving. Laugh at me so you won’t have to laugh at yourself, and then do whatever feels best. [But do remember to laugh. These are cookies, after all. They’re supposed to be fun.]
Problem #3: What “Extra” Flavors Work Best?
The answer turns out to be just as simple as those for the first two so-called problems: “Whatever suits your fancy of the moment so long as it’s only a hint.” That said, I should probably describe what happened during the testing in order to give you some context.
My first batch followed an online formula suggesting ¼ tsp. of vanilla for each egg white. Uhm, no. Or rather, NOOOOOO! That was at least triple the required amount, and it also hit us squarely in the [yawn] button. Plain and buttery, sure. Character free? No thank you.
The next experiments involved cinnamon and cardamom, two favorites, and those worked fine so long as I stuck to sharply limited amounts. You want only enough for tasters to know the “extra” flavor is there. You do not want to make extra-flavor Cat Tongues.
Hmm. That might be a little vague. Let me try this a different way. When our daughter tasted the final batch, she reacted by saying this:
“Darn it, these remind me of something but I just can’t think of what it is. Wait a sec… I know! They taste like the toasted pancake bits off at the side of the griddle. You know, those little spots and strings that happen when batter drips off your ladle by accident? Don’t tell anyone, but I love those.”
She nailed it, and I hereby promise to keep the admission in confidence. From now on, at least. I need to share it here because it explains one of the two main reasons why you want such a light hand with the flavorings. The primary Cat Tongue flavor needs to come from that crispy, toasted, butter-infused browning at the edges and the bottoms of each piece. Adding too much “extra” flavor hides that, and thereby subtracts more than it adds.
What’s the second reason? Read on.
The Inside Story Brought It All Together
Both Kate and I had grown a little frustrated by the time I got a few batches in. The cookies tasted nice enough, but they just didn’t deserve all the treasured memories we read about online. Sure, everyone loves toasted buttery goodness, but these weren’t all of that. I can make something even better with a standard butter or spritz cookie that won’t require fussing around with a piping bag. Same thing for the texture. Yes, they were delightfully crispy when fresh out of the oven, but they quickly toughened up and no amount of dunking could change it. If anything, we thought the cookies were downright dunk-resistant because all those egg whites seem to provide some insulation. Given a tray with an array of Cat Tongues alongside any of the butter cookie variations from Volume 1, the Cat Tongues would soon be lonely orphans.
I had to be missing something, so I took the most recent (cinnamon) batch out in search of a native tester. Where was I going wrong?
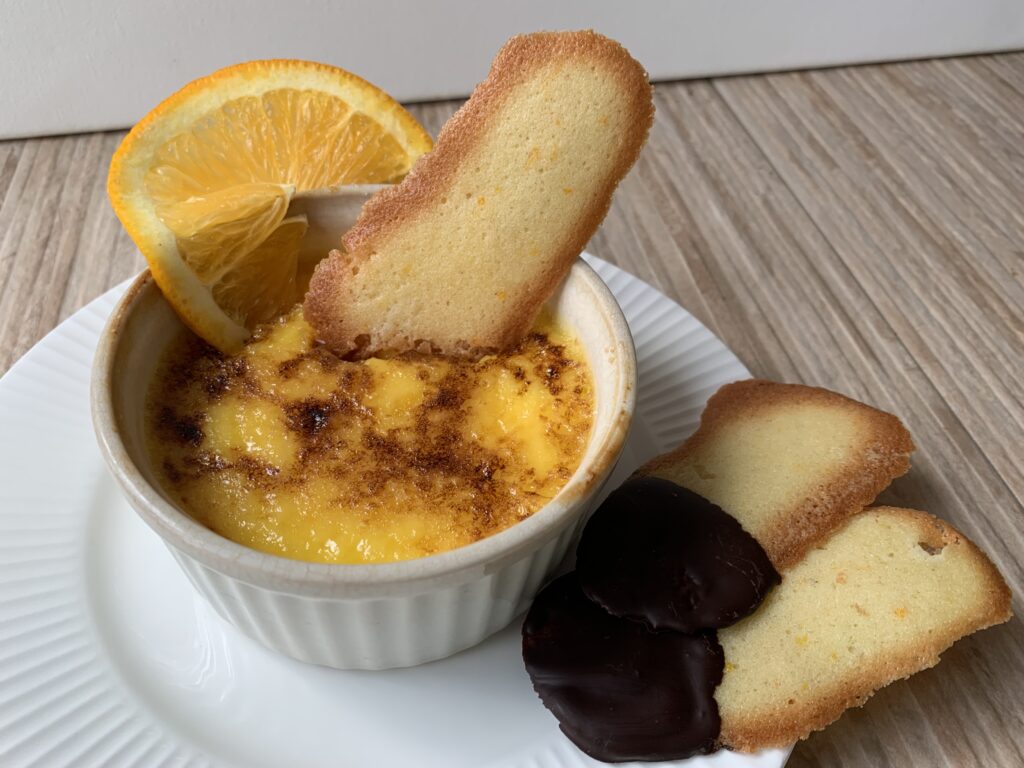
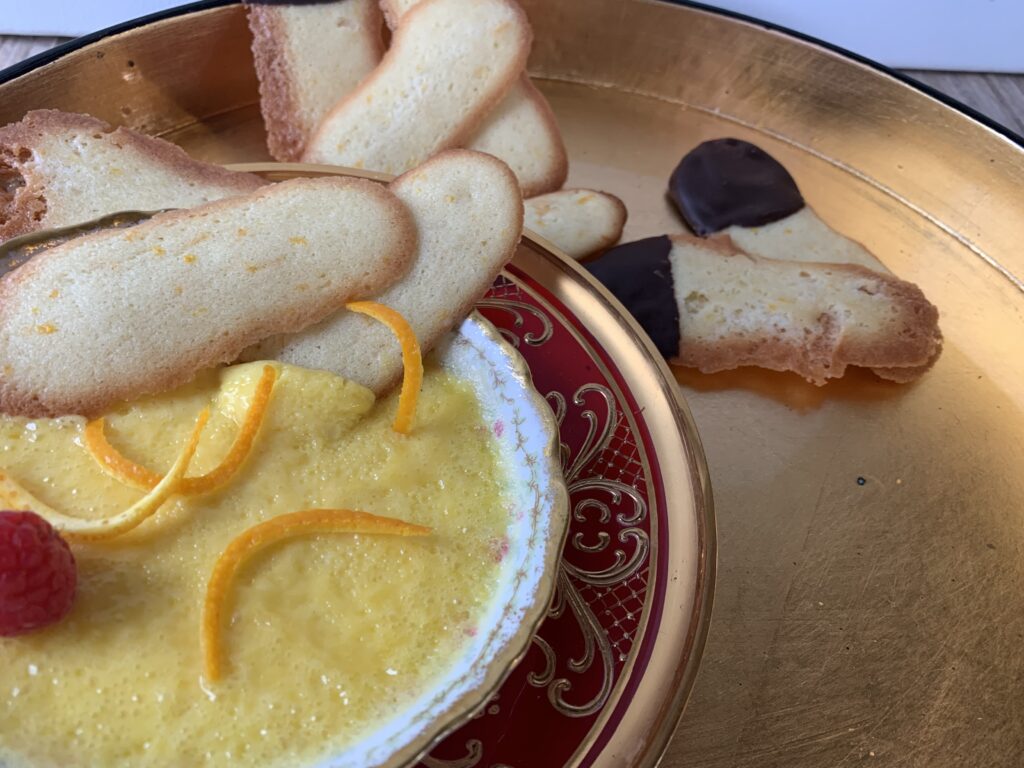
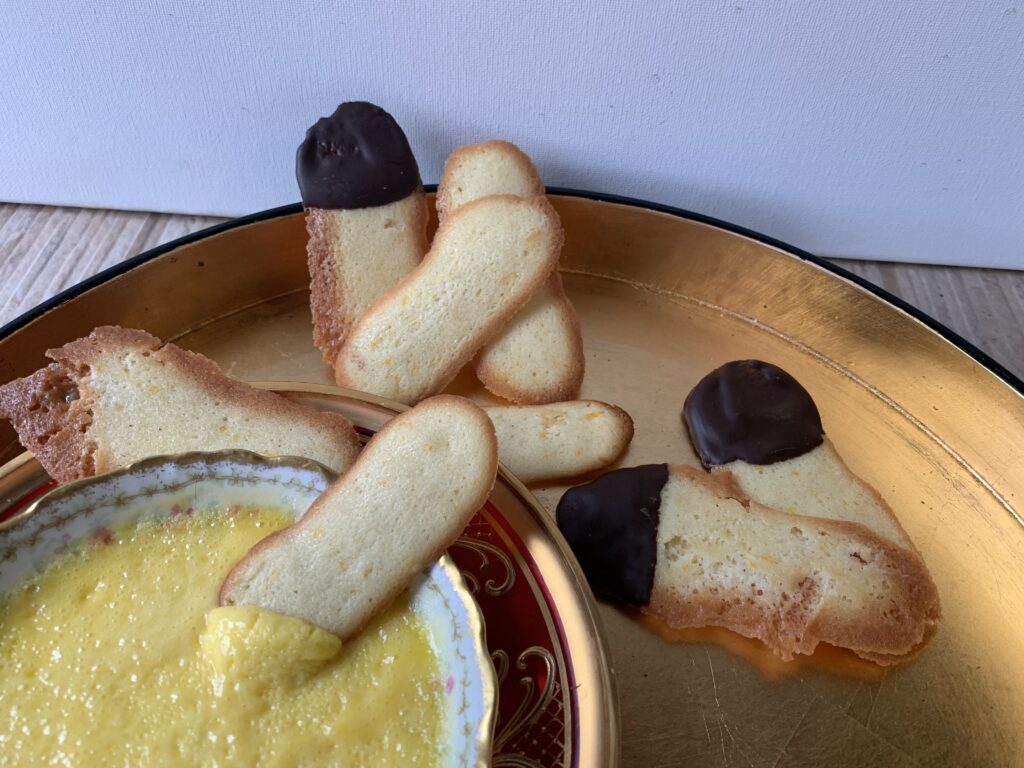
NOTE FROM KATE: I was really happy with this particular series of photos, until I noticed that the custard was frowning!
NOTE FROM KATE: But once I flipped the offending sliver of orange peel, the entire composition brightened the cheerful glow I knew was hiding there somewhere! (That’s what you get when you anthropomorphize custard…)
Fortunately enough, we have an old friend who is not only a native of France but also a professional baker of extraordinary skill. Jean-Marc does not share America’s obsession with cinnamon, but even he approved the light hint contained in the batch I brought over. Then he ventured a polite suggestion:
“It works, but I still miss the orange. We always made our Langues de Chat with orange zest so it would pair with the crème brûlée.”
I’m sorry, what? That off-hand comment led to a conversation that finally flipped on that proverbial, cartoon light bulb in my head. It comes down to a simple, basic realization:
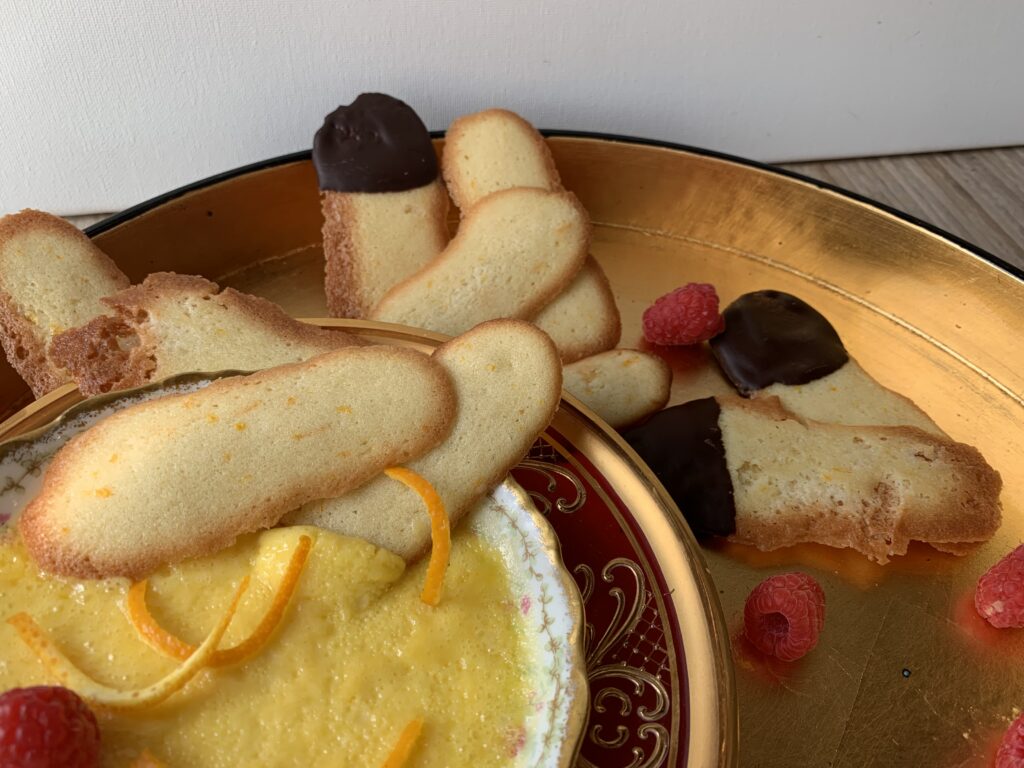
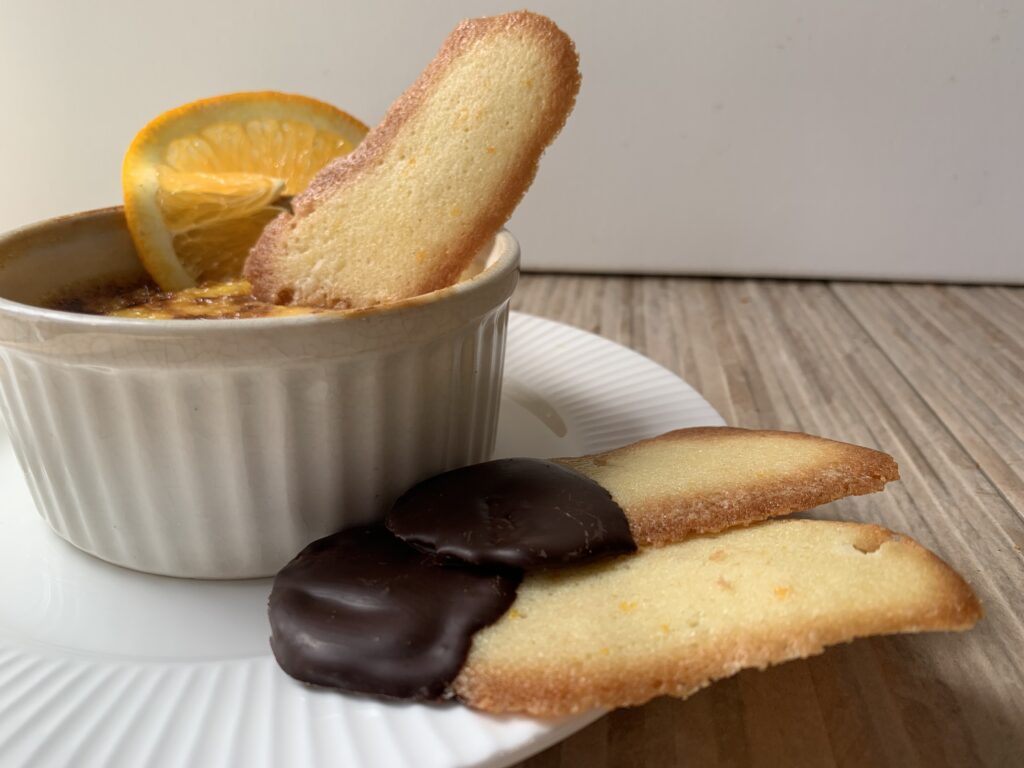
Cat Tongues do not compete with butter cookies, because they are not a standalone cookie to begin with. They are designed and intended to be served as an accompaniment to custard desserts like Jean-Marc’s crème brûlée, crème caramel, ice cream, etc. The cookies use up extra egg whites; the custards use up extra yolks; and both sides get enhanced when they reunite with the cookie being used in place of a spoon.
Aha! Gotcha! My expectations needed a sideways shift. Cat Tongues wouldn’t be lonely orphans on that tray, because they wouldn’t be there alone. They’d be sticking up out of a crème brûlée like the ultimate edible spoon, and that, my friends, would not be the last survivor. Langues de Chat are a co-star, not a lead; an elegant and efficient way for fine dining establishments to transform another dessert from delicious treat into memorable experience; and thus they stand in a category all their own.
That makes sense. It explains the hype, the romantic memories, and even the dunk-resistant texture. It also explains why keeping isn’t an issue, especially since they are easy to refresh with a quick pop in the oven prior to serving. And it made me much more excited than I’d been before. These are truly a Heritage Cookie.
But wait, there’s more. Jean-Marc had another casual bombshell to drop. “If the spreading gets too bad you can always cut back on the egg whites.”
I’m sorry, what? “But I thought the whole thing starts from that 1:1:1:1 ratio.”
“It does,” he said. “But it’s still just the start. The recipe still works if you’re a little short on the whites, and sometimes we did it on purpose when they were coming out too thin.”
Damn but that man is good. Consider me a swine who appreciates the pearls. So much for adding a fourth egg white and then spooning off the extra. Please don’t tell him that I was crazy enough to do such a thing. Jean-Marc shakes his head at our lack of sanity every time he sees those Christmas Snowflake Cookies. No need to reinforce the suspicion, right?
The Final Problem: Time And Temperature
Do the research and you’ll see two different approaches to the baking time for Langues de Chat. Either 375° for ≈ 10 minutes, with strict instructions to spin the tray halfway through, or else ≈ 15 minutes at 350°, with cautions to think about spinning the trays if your oven has hot spots.
I tested both, and found that it really comes down to elusive differences in the amount and depth of the browning around the edges. 375° gives faster and deeper browning with a slightly better array of colors, but the window between “brown” and “burnt” can grow kind of tight. That is why spinning the trays becomes vital, and why you also need to stand around for occasional checks as the cooking time comes to a close. 350° takes a little longer and produces more of a uniform brown than the intriguing range of dark-to-tan, but it also requires less in the way of babysitting. The choice is entirely up to you. The distinctions are subtle at best.
Just be aware that time and temperature aren’t the only factors. This is one of those recipes where the color of your cookie sheet can make a real difference.
Over the years we have amassed a collection of five different sheets, which now range from two that have gone black with years of use, one that is now blued steel, one that is gold-toned, and one that is still pure silver. The dark ones bake this cookie almost 3 minutes faster (at both temperatures) than the lightest one. That is a very significant difference! Account for that factor with your own baking sheets as you set forth on this journey.
Two Final Cautions – They Really Do Spread That Much, And Thus Your Piping Skills Will Matter
The photos in this post show cookies that may be as wide as 2″ across (5 cm) at their broadest spots. Every one of them started with an even ½” (125 mm) bead from the piping tip. Do the math… No. Don’t bother. Let me summarize.
Cat Tongues spread way more than you’d ever believe, they do it to all directions, and they are magnetically attracted to each other in a demon-powered effort to meet, marry, and merge into a single, good for nothing mega-cookie.
Plan accordingly. Keep them well and truly separated. If you can only fit nine or ten on a cookie sheet, so be it. You are the cookie chaperone! Keep those little, grasping, would-be elopers well and truly apart. There is no such thing as a chaste little kiss. The tongues will lock and entwine.
The only thing that really helps is good, even piping. Cookie gremlins view bumps or bulges as an open dare to see if there’s enough material to race off in some unexpected direction. My daughter Lee gets full credit for these clean-looking specimens because she possesses those skills. She got the piping bag because I do not possess those skills. The gremlins have my number. There’s nothing I can do beyond striking back at the evil, cookie destroying imps here, on paper. Vengeance is mine! Bwah-ha-ha-ha…
Extra Spice From Kate: These cookies really explode to their full potential when paired with custard, ice cream, or even a good yogurt with a bit of honey. For crème brûlée, follow your favorite recipe. After a bit of fussing, I found that an even mix of white and brown sugar, broiled for one minute, worked best. As for the chocolate, it’s a matter of taste. Scott says he would love the chocolate accent with the “right” custard, but I find I prefer the crisp cookie plain. I compared store-bought meltaways with our usual semisweet chocolate amended by a bit of cocoa butter, and in this application they performed comparably.)
…You have been warned. Jean Marc said the wicked things feed on extra egg whites, so the reduced amount may help, but I’m telling you: there’s something supernatural behind all this. You’ve got to be ready for their tricks!
CONCLUSION
Cat Tongues a/k/a Langues de Chat are a special purpose cookie designed and intended to be a sort of edible spoon for custards such as crème brûlée or a luscious homemade ice cream. Nothing on earth can match them for that targeted role. They’re also easy if you have some basic competence with a piping bag. Or a competent and draftable daughter.
Keep the flavors subtle, and by all means pair them up to match the accompanying dessert. And remember that the browned edges and bottoms are what you’re really after. If you keep that goal in mind, and follow those simple guidelines, you’ll be more than happy with the results. There really is something elevated and elegant about serving Langues de Chat alongside their companion treat.
Confession: I love crossword puzzles, and I’ve done enough to learn certain words that writers can’t seem to do without. Here are some examples of recent clues I’ve seen:
Clue: “Treat that is often twisted”
Clue: “Crispy, pull apart snack”
Clue: “Cookie eaten from the inside out”
Oreos! Duh. Everyone knows that, right? Yes… if you’re from the U.S.A. People who grew up in Ukraine, Russia, Poland, or other countries of central and eastern Europe might well stare at a clue like that with nothing but bewilderment that “Oreshki” doesn’t fit in the grid. What else could the writer possibly be thinking about?
Oreshki are a classic treat that are known and loved from Russia to the east, through Poland and the Czech Republic to the west, all the way down to the Crimean Sea. The formula is easy to describe: start with a very basic cookie dough, shape it into hollow nuts, and then fill the nuts with something gooey that children will love. Subtle? Bah. Sophisticated? Hah! Adult with a capital “A” like spice cookies or ginger snaps? Not in the slightest.
Nice, sweet, and simple. That’s your ticket. This is the cookie of childhood.
Working On The Cookie
If you’re here doing research, let me give you a tip as someone who’s actually read through and pondered several dozen online recipes. Don’t overthink it!
Your problem is easy to state: natives adore their Oreshki to the point that innumerable Eastern European families have now shared their “secret” methods to get them just, exactly right. There’s a lot to go through. The wonders of online translators, combined with a wife who can translate what those will not, allowed me to put together a humongous file of different trips, tips, options, and formulae. It was a true brain buster! But do you know what I found when I averaged things out, and then compared the results to other cookies?
Your target crust is a plain, light, crispy wafer that won’t fight with the filling. Period. Keep that in sight and you won’t have any problems.
Yes, you will be a little confused by how some of the common ingredients get used. I certainly was. But there is a pattern to the strangeness: those “touches” all add up to (i) a hint of acid, and (ii) a bit of “other” fat to supplement the butter. I don’t know why they do it. The amounts are so small that it’s hard to see how these additions could change the result. Nevertheless, it is a clear pattern, our work is about “heritage” just as much as “right,” and so I made a point of testing the variations.
The most common version marries a touch (½-1 tsp.) of vinegar with a tablespoon of mayonnaise, and then uses baking soda instead of powder. I ended up going with 1 tbsp. of sour cream paired with baking powder. Feel free to pursue either route as you wish. The differences will be subtle at best because you aren’t really supposed to notice the crust in the first place. It’s the filling that make Oreshki special.
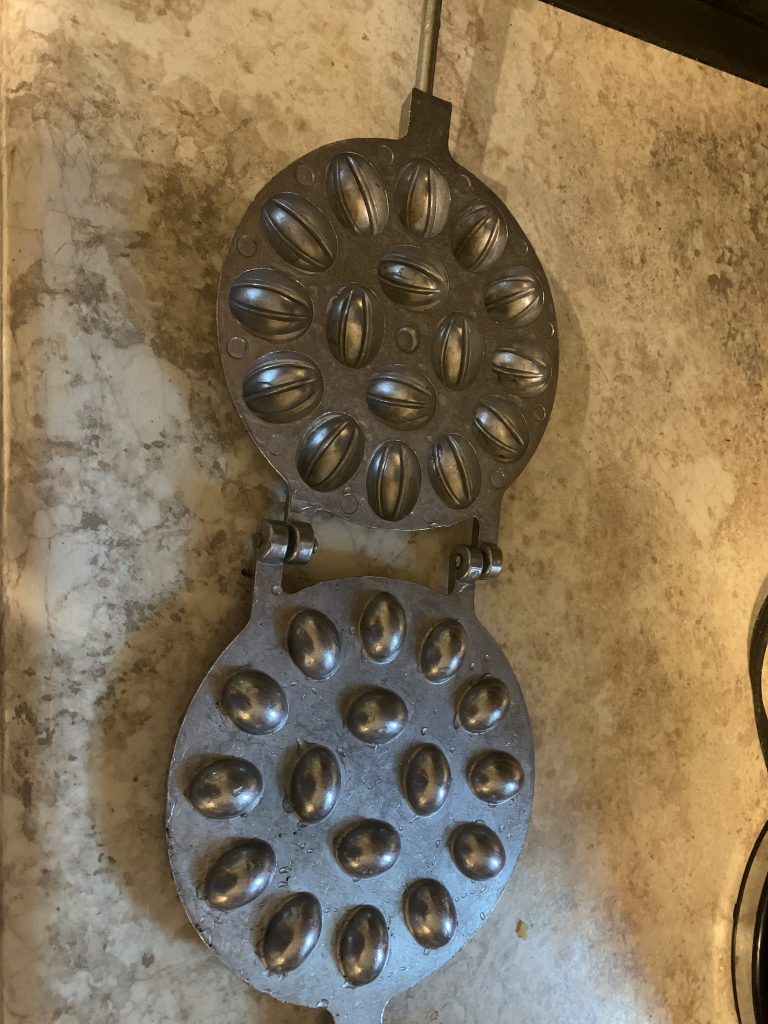
These crusts get cooked in a special stovetop mold (electric versions being available in some countries). Here is ours, which is made from aluminum and available for a very low price from various sources:
You’ll need to fidget a bit to get the timing right. We ended up at 65-70 seconds per side on our average-sized burner with the gas set to a “2” out of “9.” Don’t expect that to match up with your burner! We also noted that molds filled with fewer cookies toasted faster than ones which were completely full.
Make an effort to keep the inside cookie-tan, like a shortbread, rather than nut brown. That was the one critique we got from our taste testers, and when I went back to do the final batch with that correction all of us noted that the new and lighter-colored cookies were also a bit airier and crisper when eaten.
Finally, you’ll need to trim the shells when they come out of the mold. It’s impossible to get the sizes right every time! A sharp paring knife is the perfect tool. Just don’t throw those trimmings in the trash! Most people simply add them into the filling for a bit of texture. We prefer to recycle them into crumbs for a leftovers-cookie or pie crust (think of how many recipes you know that begin with the instruction, “Grind up some vanilla wafers and then use the crumbs for…”). Do as you will, but please don’t waste what ought to be used.
These shells are too dark. Don’t throw them out, of course. They’ll work well enough. It’s just that lighter colored shells will be crisper, airier, and that much better.
These are what you want. The outsides are darker, the insides are “light tan shortbread”. BTW, do you see that one untrimmed shell on the top right? That’s the norm, and where your extra crumbs come from.
Nailing Down The Filling
The all time classic Oreshki filing is a peculiarly addictive caramel made from dulce de leche. More on that below. But honestly, anything that’s sweet, sticky, and a little bit runny will do. Nutella® works like a charm. So does lemon curd. It’s hard to go wrong, and none of my native taste testers had anything bad to say about those variations. Playing with your filling is fair game. But there’s that ‘heritage’ thing again, so we really ought to discuss the original version that left so many millions of 8 year old addicts in its wake.
Let’s start with an overview. You’ve seen this flavor profile before! When push comes to shove, this is just another plain shortbread being paired with rich, gooey caramel. In South America that takes the form of Alfajores. In the U.S. it’s a Twix® bar. In the U.K. it’s Millionaire’s Shortbread. Western Europe has it’s Stroopwafel. Got it? There’s nothing complicated about it. We’re only going to tweak things a little to match the Eastern European palate.
You can start from a true caramel if you wish, but native recipes follow the South American approach by starting with tins of sweetened condensed milk, and then boiling them for a few hours.
After that it’s easy. Soften this up with a bit of butter, add some cream cheese for a mild sour tang, and you’re done. Most recipes suggest the addition of crumbs from the crust-trimmings, and some will also add ground nuts, but those are both optional steps. It really comes down to whether you’re after pure, luscious smoothness on the inside, or luscious smoothness offset by a little bit of crunch.
How To Fill Your Oreshki
It took a few tries, but I’ve now got the system down pat.
Take one shell. Top it off completely with your filling. Use a second shell to scrape that level. Set aside for the moment.
Add filling to the second shell, and scrape that level with a third shell.
Put shell half #1 on top of shell half #2, and then repeat the process until all your shells are done.
NOTE 1: It’s not a bad idea to overfill a bit, and then squeeze the halves together so the excess filling will squish out the sides. Wipe it off with a finger, and then set aside your perfectly filled nuts for further decoration as desired. [What do you do with your filling-dirtied finger? Come on. Really? Being the baker has its upside!]
NOTE 2: Oreshki with a runnier filling may want to go in the fridge to set up.
The only question left is, “to seal or not to seal.” These shortbread-and-caramel treats often come with a chocolate coating. Think of the aforementioned Twix® bars and Millionaire’s Shortbread. Heck, it’s common to coat Alfajores too in recipes that don’t add coconut. So it makes perfect sense to seal those two halves together with a bit of chocolate, right?
The answer is both yes and no. We liked the caramel ones better with a chocolate seal. No doubt about it. And every one of our native tasters expressed the same preference. “That’s a great touch!”
But then they’d add something like this: “My grandmother never did that. Of course, she didn’t have much access to chocolate back when I was a little girl.”
Again, it’s entirely up to you. A simple dusting with powdered sugar works just as well for chocolate-free versions, and better for those with an alternative filling.
With the ends sealed in chocolate. Very tasty, but not entirely traditional because chocolate was hard to obtain back in the day.
Conclusion
This is a really fun cookie so long as you don’t try to fight its basic core. Oreshki are designed for children, and adults who loved them as children. Sharing them with those children, old and young, is why American bakers will want to make them.
That said, you really, really do want to make them. I can pretty much guarantee a downright special reaction from the actual children in your life, and an even stronger one from adults who grew up in the Oreshki Zone. It’s like dropping a puppy in the lap of their inner child.
First comes the delighted grin. Then the delighted cry, “Oreshki!” Then some insight into a delighted childhood soul. Everyone who eats Oreshki has his/her own special technique. Some pop them in whole and crunch. Others twist them in half, and then crunch. There’s a twist-and-stretch school too; twist, scrape, and crunch; twist, stretch, and lick in midair… You get the idea. Pure, childish glee.
Think that’s going too far? Head on back to the beginning of this article, and the analogy to Oreos®. Imagine your typical American expat who has moved overseas and built a life somewhere that knows nothing about their childhood treats. Get him or her in a friendly environment, like visiting your home or receiving a tin as a gift. Now open it up and reveal a crispy, black-and-white, twist-apart cookie. What will happen? The exact same thing.
That memory is what Oreshki are really about. That, and creating a similar memory for future generations. It will work, I promise. There’s nothing that Littles enjoy more than something gooey, sweet, and crunchy that looks like something it isn’t. Oreshki are flat out fun at every level.