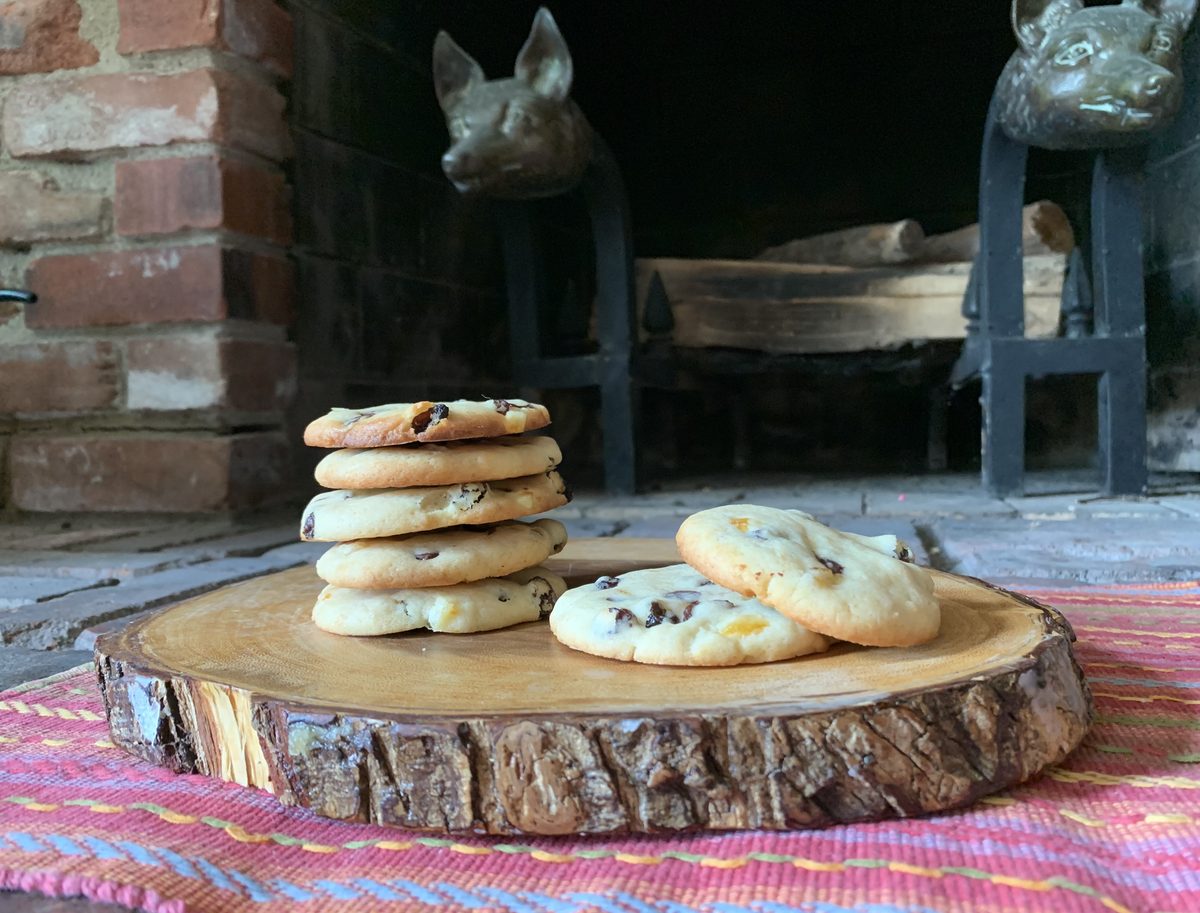
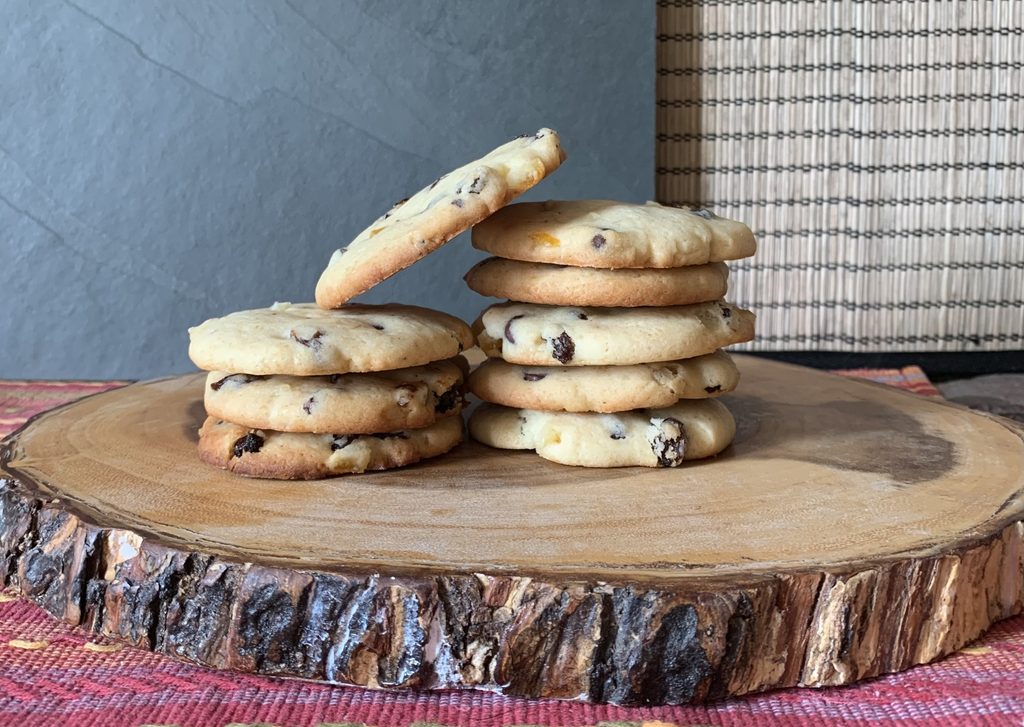
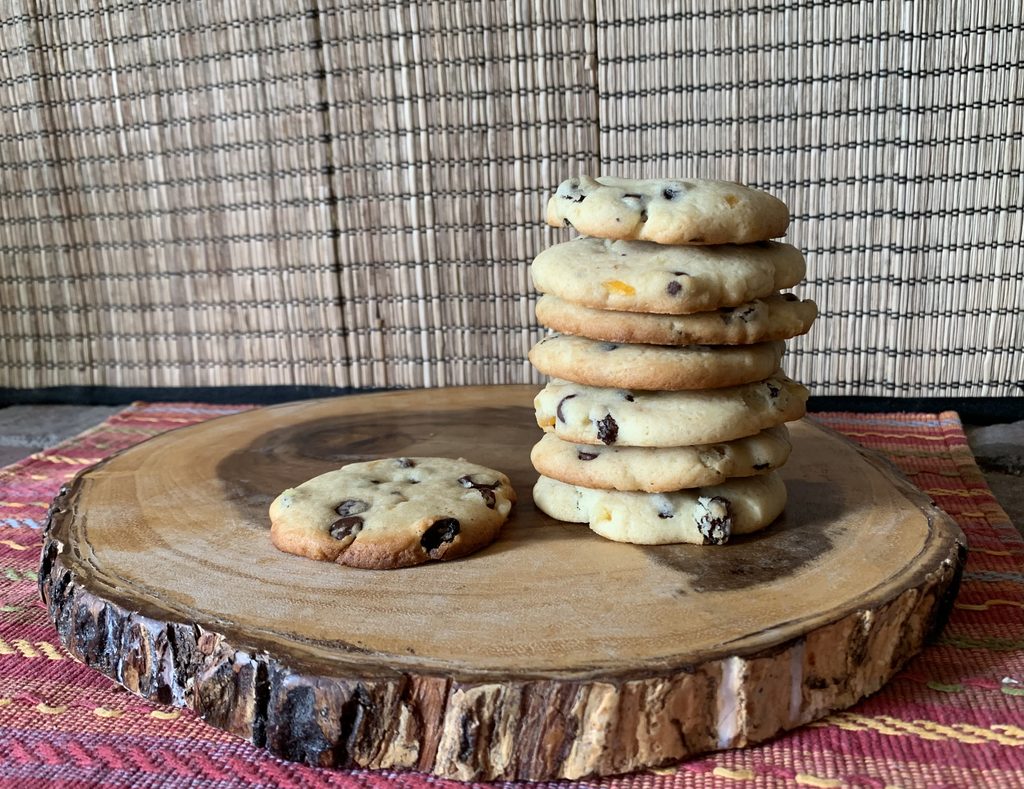
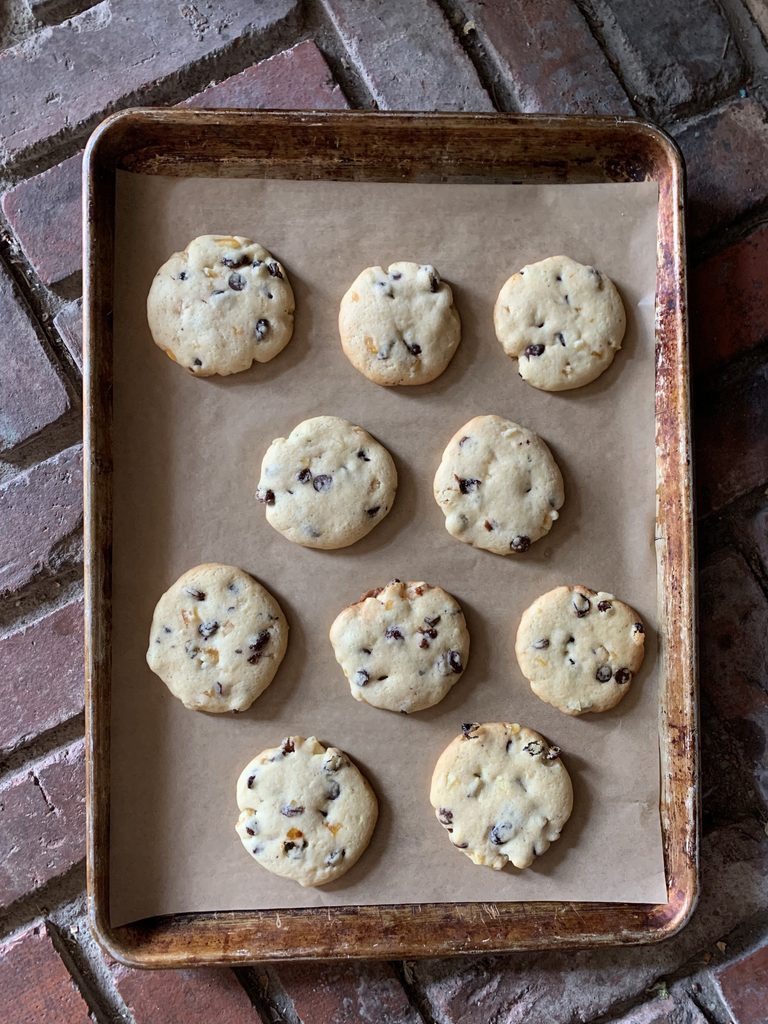
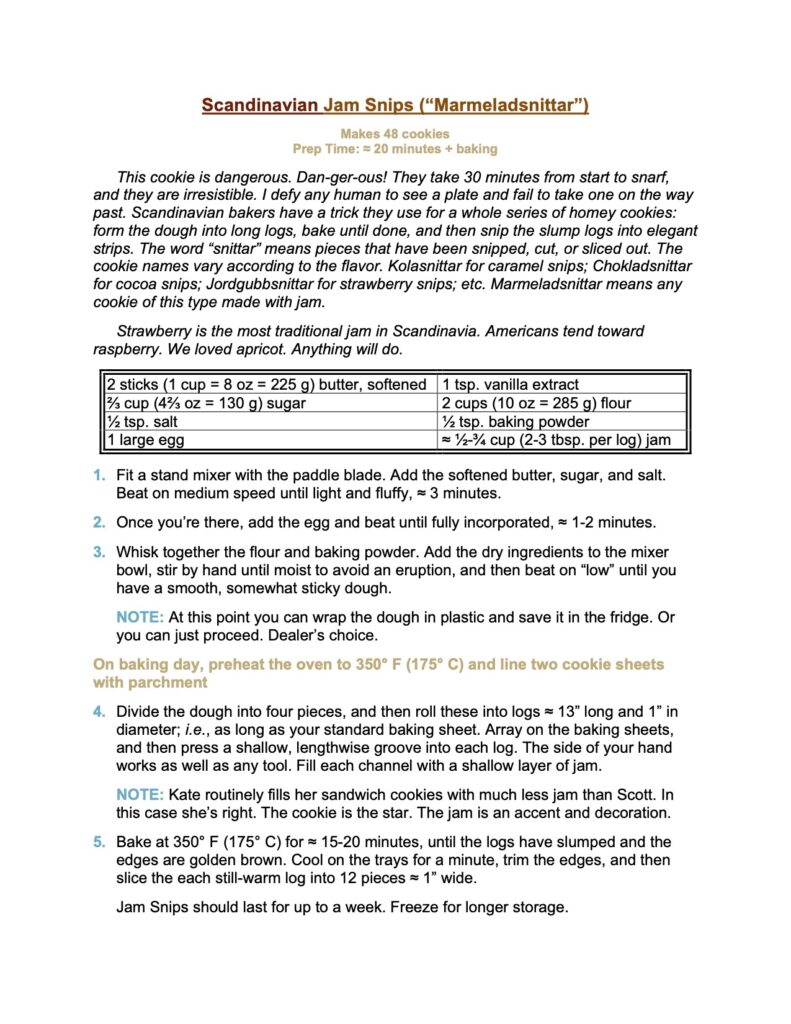
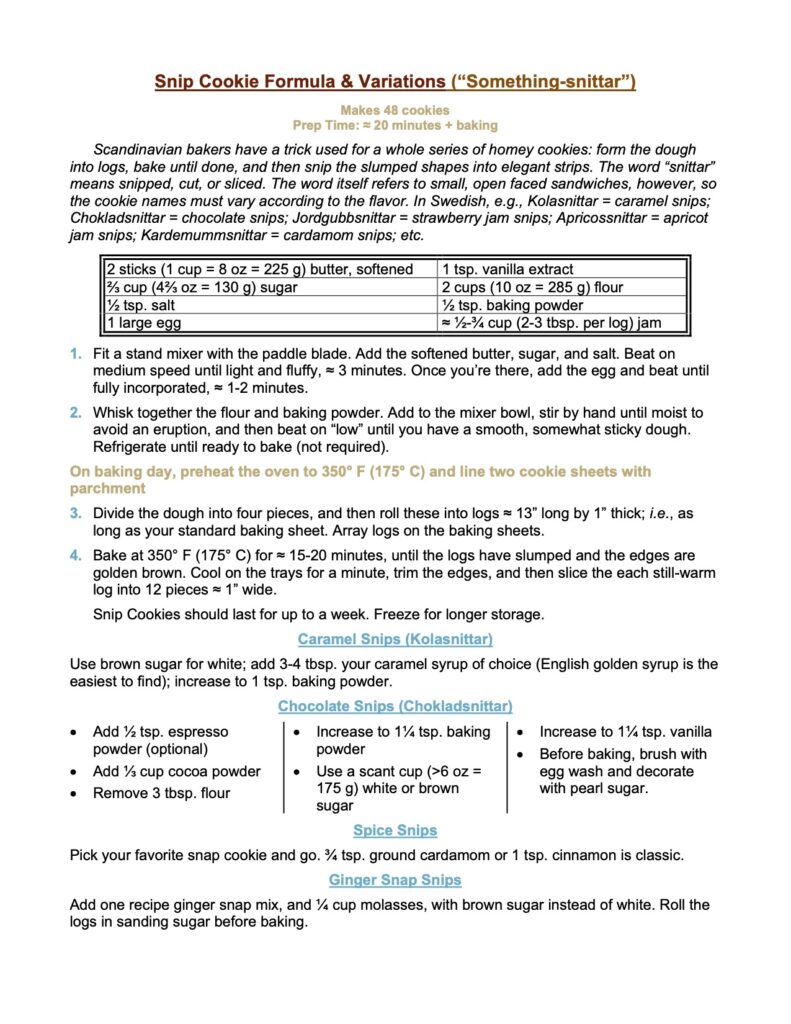
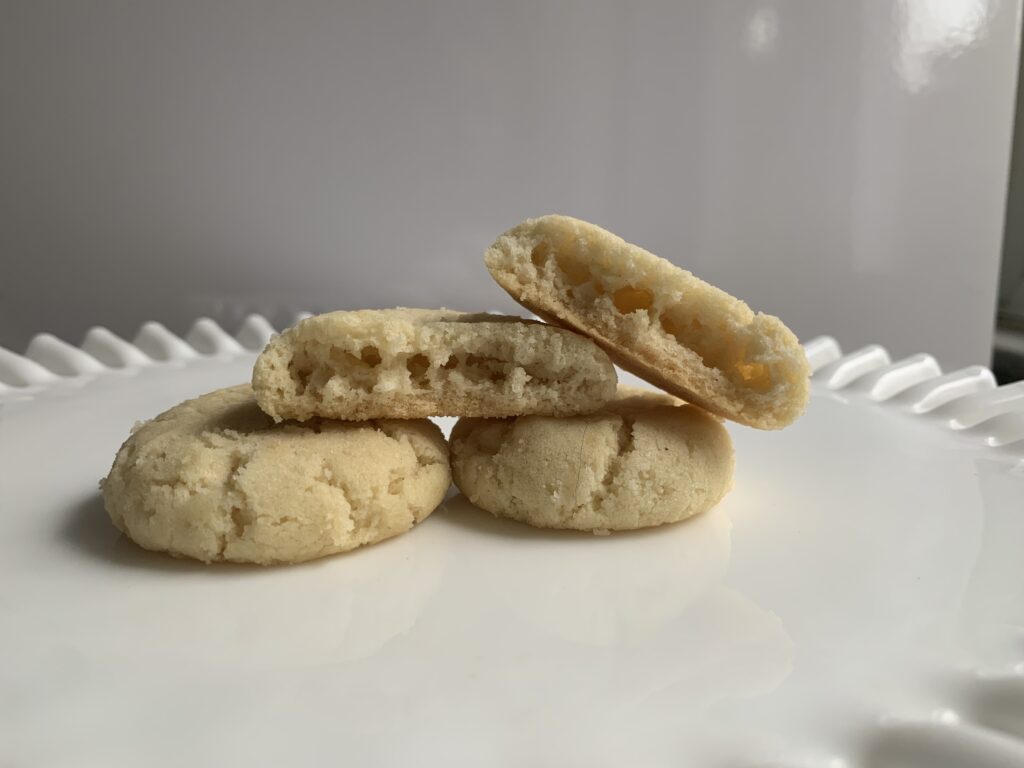
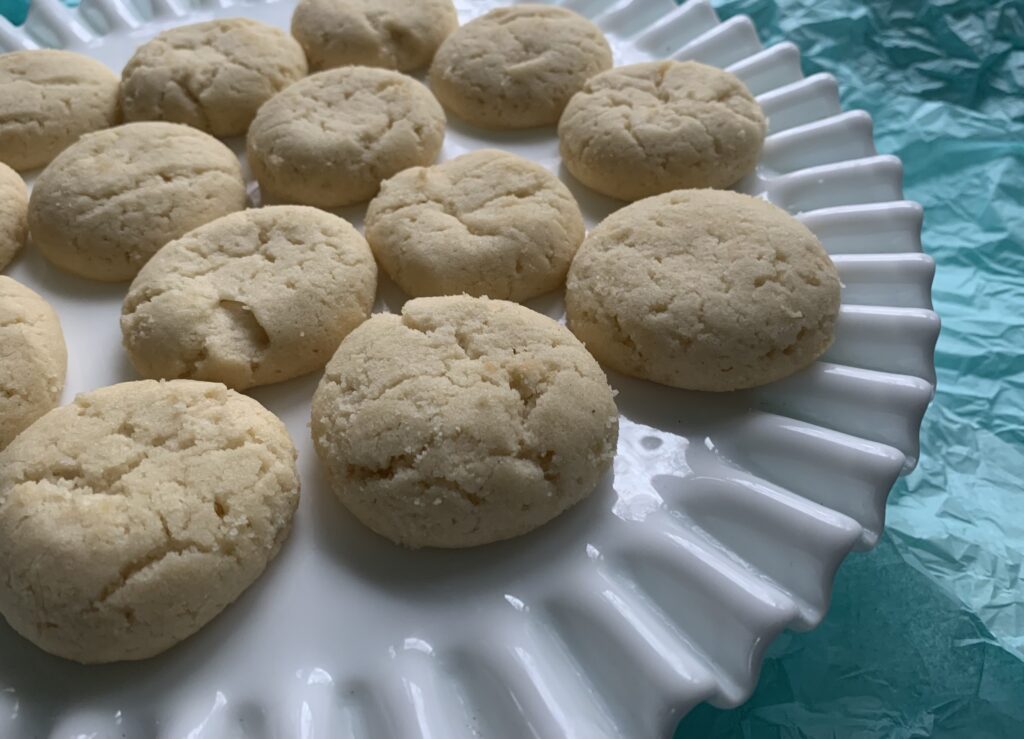
American bakers may view this as something fascinating and unique. Our Swedish friends would be stunned at the idea, because this is one of their most normal, halfway-to-boring bakes. Both are right. These are emphatically not another version of the famous Tollhouse recipe. What they are is simple, easy, and so very good that every baker in Sweden has them front in center in the recipe card box. They’re also a recipe you can and should tweak in whatever little ways you want to make a unique version belonging to you and you alone.
NOTE FROM KATE: I would call this cookie a halfway house between sugar and shortbread cookies, except they are leaner than shortbread, and they are leavened. I added a bit of cardamom to ours, it brings out the best out of both butter and candied orange peel. It’s fair to disclose that I baked three or four times the usual number of batches of this one, because we kept eating it! And our kids liked it (I baked a batch with einkorn flour for them, it works well but spreads a bit flatter.) Then we had some give-aways, and these are so easy, it was a natural go-to recipe that’s different enough to get our usual audience excited. I hope you love it as much as we do!
Do you make Chocolate Chip Cookies? If so, you can make these just as easily. It’s the same exact method with slightly different proportions.
Cream some softened butter and sugar (“Beat until light and fluffy”);
beat in two eggs, one at a time; fold in the solids (chocolate chips, plus orange peel and raisins for this one);
beat in the flour and baking powder, with due care to avoid an eruption;
chill to let it all combine and set up; and then
form into balls and bake.
NOTE FROM KATE: You will have to cut the orange peel with a chef knife. I tried both raisin-sized pieces and finely chopped pieces. They do provide a different experience. The small, chopped orange peel permeates the cookie better, the larger bits are like finding a piece of candy in a cookie. See what vibes with you, you may find a preference.
Bing, bang, boom, and you’re done. You know how to do this.
The Swedish cookie has a bit less sugar and a little more flour, but that only shows up in the final texture. The only other difference is in the flavor. Tollhouse Chocolate Chip Cookies are all about the chocolate, with some extra texture from chewy nuts if you so choose. These are about balancing the chocolate chips with chocolate-loving flavors like candied orange peel and raisins.
As noted above, it all comes together into a cookie that no human being can dislike, and every human child will vibrate in delight to see.
The Complications, Lessons, And Tricks
None. As in, “not a single one.” This is Cookie Baking 101.
NOTE FROM KATE: Normally I would obsessively wet my hands to form perfect balls of dough. These cookies don’t require it at all. They are virtually self-rounding and self-leveling. Once you find the perfect size, a two-spoon method is perfectly functional!
Please Do Customize
Tollhouse Cookies invite a literally endless series of variations. Lighter or darker chips; different additions, ranging from varies candies, to pretzel bits, marshmallows, caramel, etc.; and so forth, so on, and continuing out to the limits of the baker’s creativity.
This recipe is every bit as much of a blank slate. Maybe even moreso. We suggest a few ideas for variations, such as cocoa powder in the dough or a spice to accent the fruits, but those don’t even begin to explore how far you can go in customizing these results. And every version you come up with really, honestly will deserve its own name in your recipe box. One of those will become that cookie; the one that others describe as your special creation.
Start with the basic recipe, as written, for your first batch. Get a feel for the canvas. All bets are off after that!
Conclusion
You want this cookie in your recipe box. Trust us on this. It’s just plain good. Kate calls them “undemanding and delicious.” A 102-year old family friend, and daughter of a professional baker, called them one of her new all-time favorites.
It’s so basic, so good, and so easy to customize that we’re a little embarrassed to say we hadn’t dreamed it up all on our own.
An utterly delicious cookie from Scandinavia suitable for bakers of all skill levels.
There’s a cookie-baker archetype that goes like this: People are always popping in and out, and every time they do s/he whips up a quick batch of cookies and… And a secondary archetype for the young baker: S/he will get an urge, and vanish into the kitchen on his/her own to whip of a quick batch of…
In America those are almost always Chocolate Chip Cookies. In Australia and New Zealand it’s Anzac Cookies. In Scandinavia it’s these utterly addictive, 30 minute start-to-snarf treats that vary in infinite ways according to the jam in your fridge. I defy any human to see a plate and fail to take one on the way past.
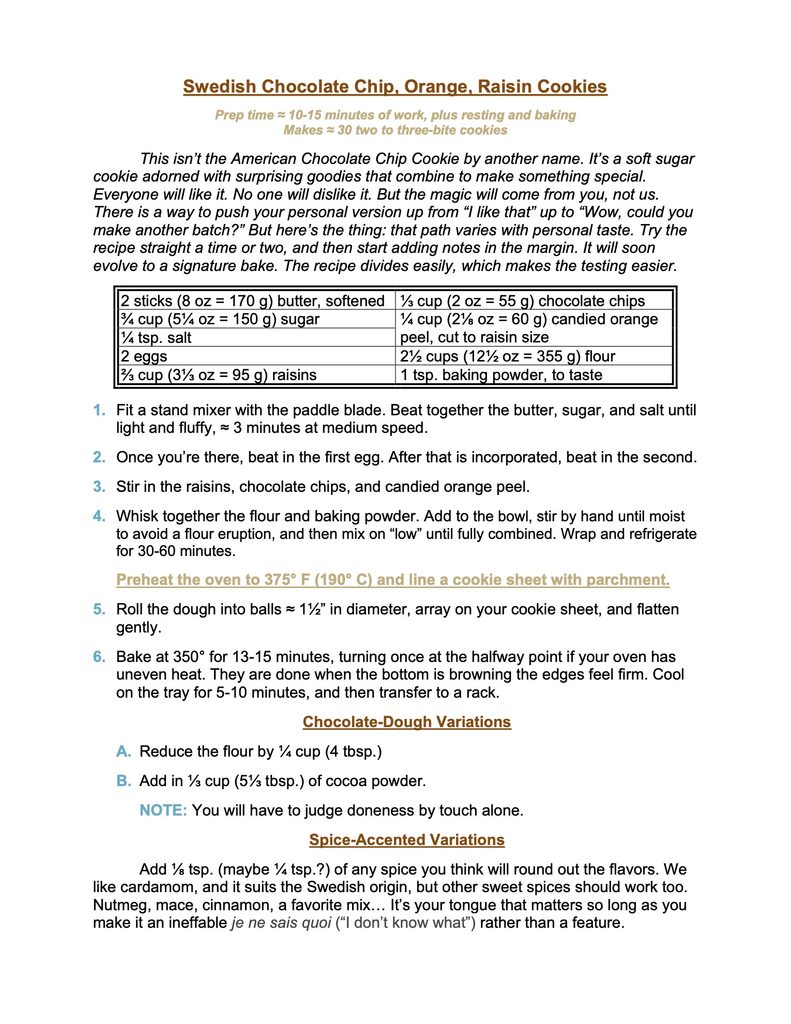
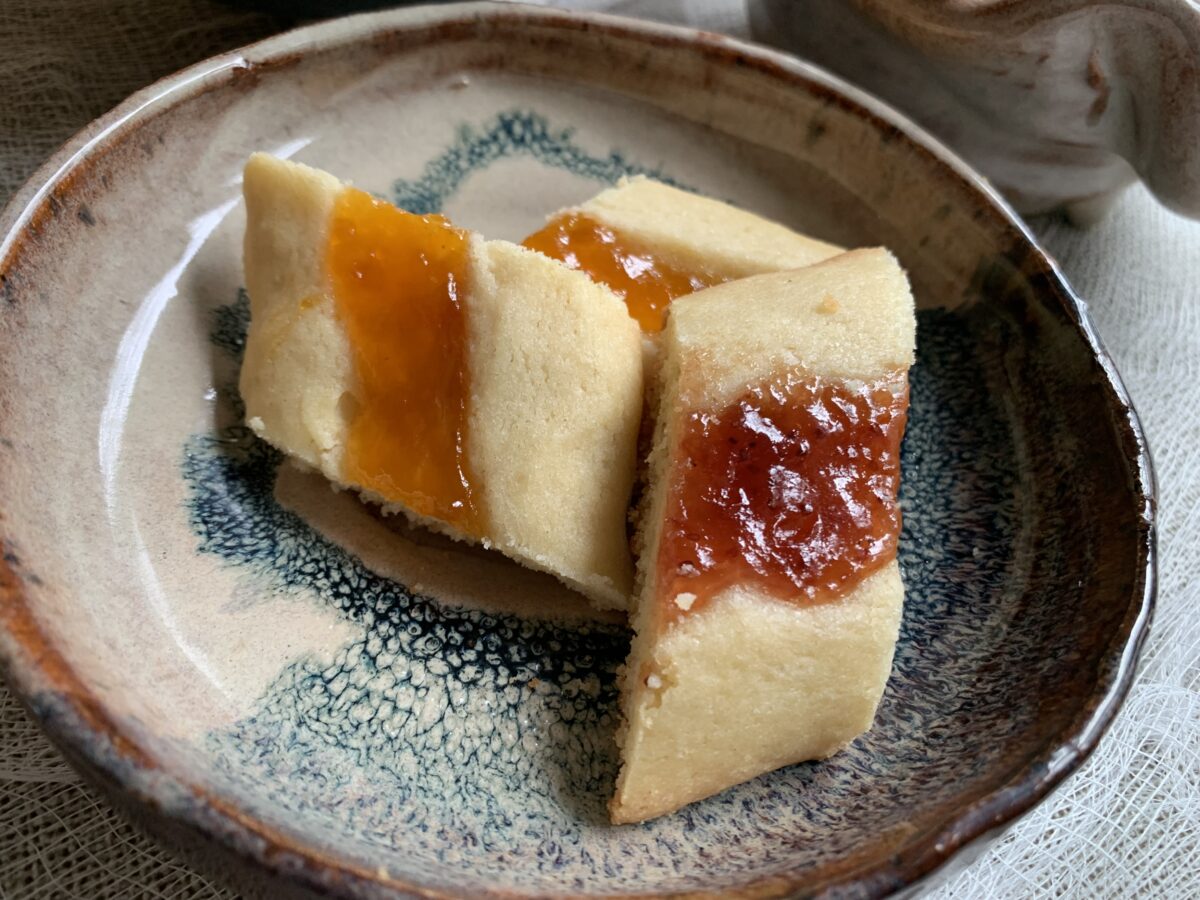
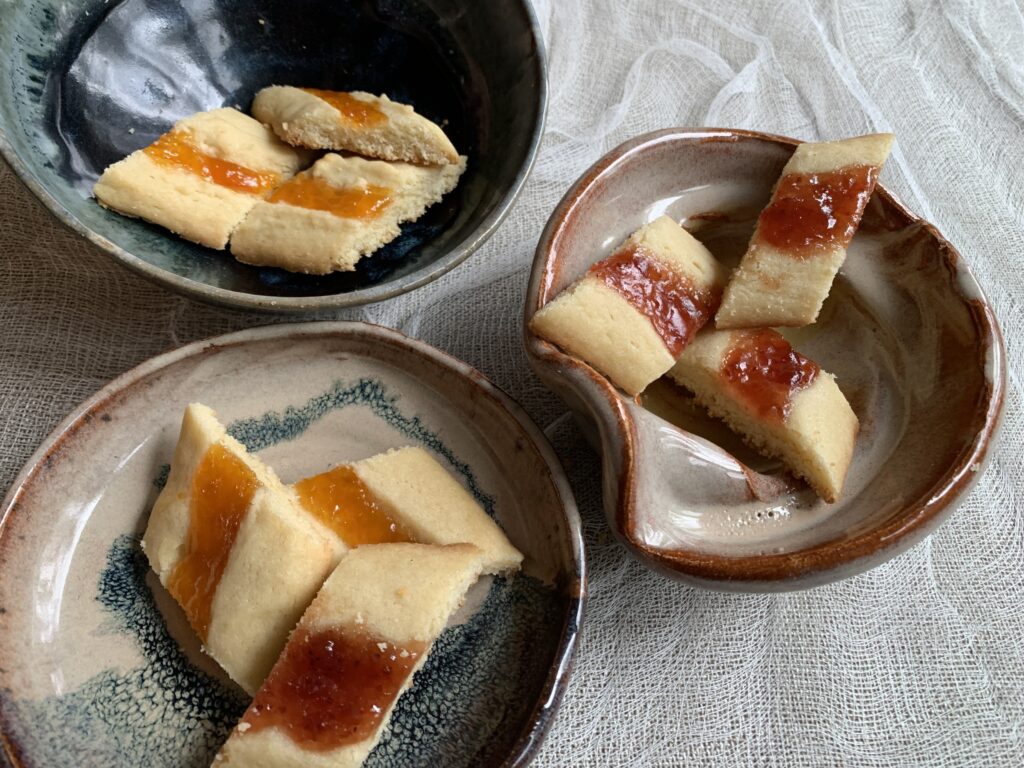
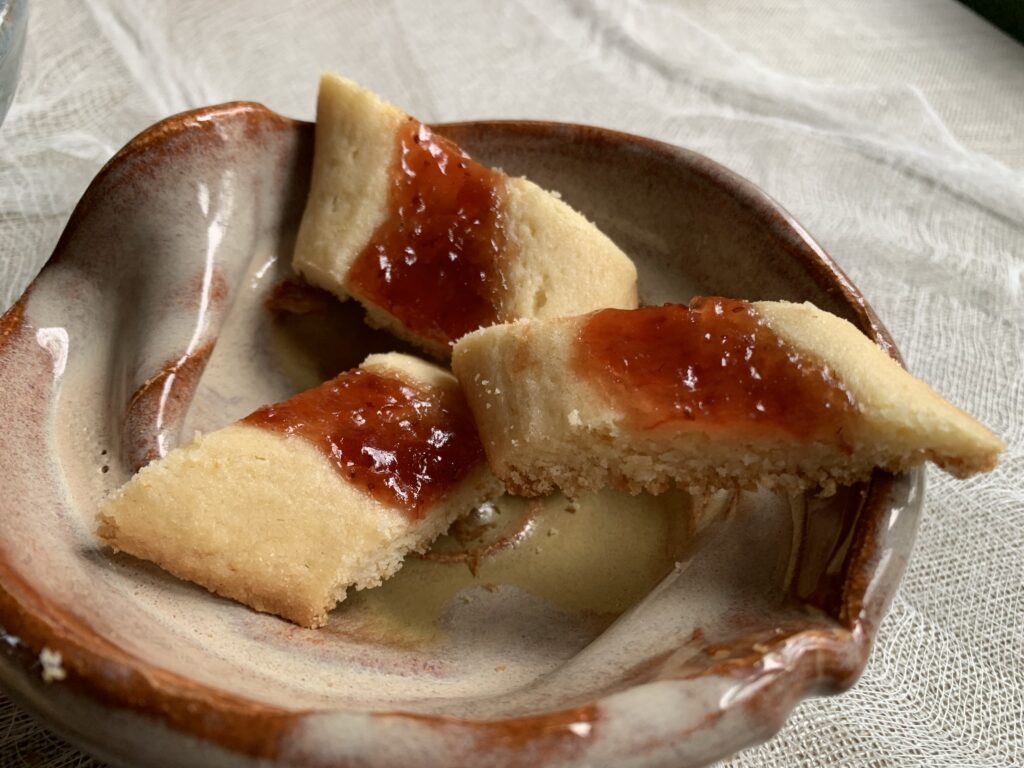
Scandinavian bakers have a trick they use for a whole series of homey cookies: form the dough into long logs, bake until done, and then snip the slump logs into elegant strips. The word “snittar” means pieces that have been snipped, cut, or sliced out. The cookie names vary according to the flavor. Kolasnittar for caramel snips; Chokladsnittar for cocoa snips; Jordgubbsnittar for strawberry snips; Kardemummasnittar for cardamom snips; etc. Marmeladsnittar would mean any cookie of this type made with jam. The online translations almost always use “cuts” or “slices,” but we thought “snips” captured the image best in colloquial English.
Strawberry is the most traditional jam in Scandinavia. Americans tend toward raspberry. We loved apricot. Anything will do. And best of all? Every variation earns its own name! So you can fill a book with “different” recipes simply by changing from one jam to another, or by adding an ingredient to the dough. Or you could in Sweden. We’re stuck with English. Drat.
This is the most basic recipe for all the “snittar” group; a light, vaguely crispy, addictively perfect butter cookie from which you can create all those thousands of variations.
Tricks Of The Trade
There really aren’t any, more’s the shame. I would feel much safer if there were. But here are a few observations to help explain the big picture.
Speaking Bakerese, this is a simple creaming method cookie. Cream the butter and sugar, beat in the egg, flavor, and then work in the flour and baking powder.
The recipe calls for slightly less flour than roll-and-cut cookies because it’s designed to slump and spread a bit in the oven. Which, of course, makes them taste extra light and buttery.
One recipe makes four logs the length of a standard baking tray. It’s hard to divide because of the single egg, but the dough can be wrapped and frozen for another day.
Do not press in a deep channel, or your cookies will be so thin in the middle that they’ll break in that spot. You want a nice, lengthwise dent to keep the jam oriented. No more.
Don’t use too much jam. Scott usually argues that more jam in cookie is that much more delicious. Kate prefers scarcity. In this case she’s right. The butter cookie is the star, and the jam is an accent.
Let the cookies set on the baking tray for a few minutes in order to set up, and then slice while warm. A bench scraper works every bit as well as a knife for this, and maybe better.
Diagonal slices look a little more elegant.
NOTE FROM KATE: regarding the jam amount, I applied the apricot jam using a piping bag, whilst Scott used a spoonfor the strawberry jam. [FROM SCOTT: My apologies. We’ve been watching too many British mysteries] You can see them both in the photo above. Honestly? I like his better. That thin line doesn’t spread as wildly, and makes it look like I tried too hard. Which I did. Go wild!
(The bowl below isn’t precision pottery, either. I made it, a beginner’s effort, and I allowed it to slump on the wheel to see what happens. If I can get away with making pottery that has “character,” the same goes for these cookies! ) And now I want to try them with a poppyseed filling. Poor Scott, that’s so not his thing.
Enjoy!
ONE FINAL NOTE: Please don’t blame us for what happens as these cookies migrate from house to hips, and platter to paunch. These are a Class One Addictive Substance! You have been warned!
The cookie made with hartshorn that defies all description except one: “OMG, these are so good!”
This is a great cookie.
You have never tasted anything like this cookie. Not ever. Anywhere.
If you ask 30 different people to help you find words that describe it, you will get this answer from well over 20, and the ones who don’t say it out loud will be thinking it: “What the heck…?!” Think. Think. Think. “No, I really can’t.”
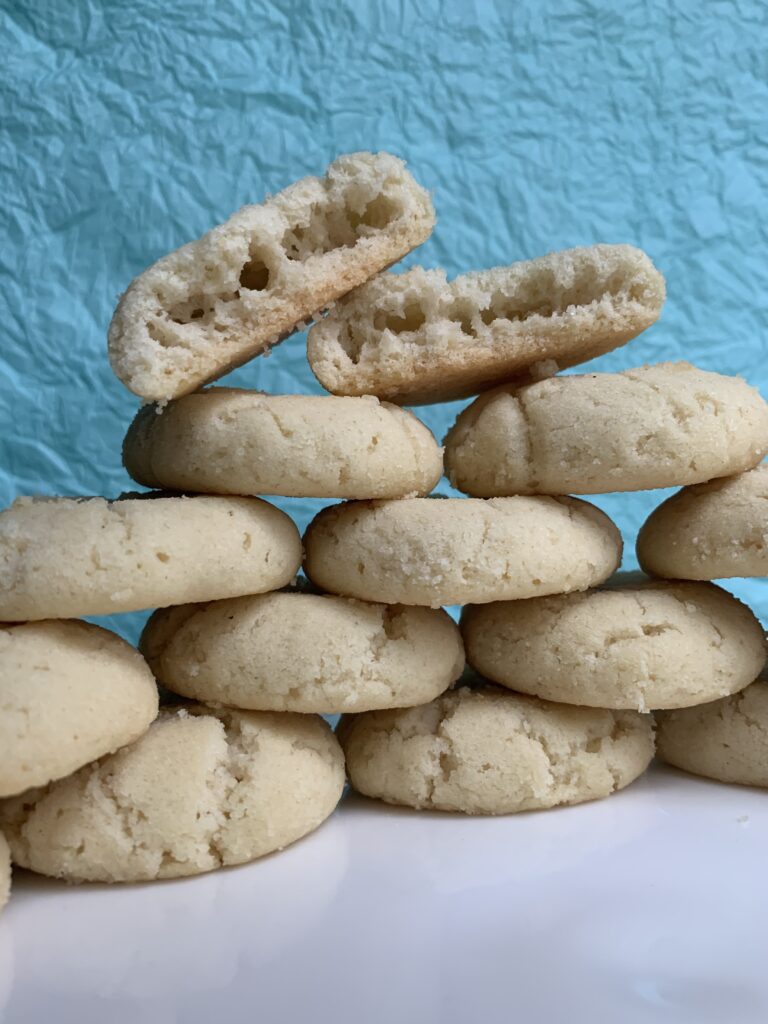
The flavor isn’t that hard. Remove the textural component and it’s a straight, generously sweet, vanilla cookie flavor. But that texture is wild! There are only two kinds of people in the world. Those who have eaten Drömmar before, and those who have not met anything remotely like it.
I have personally tested and (mostly) published more than 300 different cookies, each with multiple batches to get them right, and that’s without considering variations on the theme. I wouldn’t have believed it possible to create a cookie that reminded me of nothing. But there it is. Drömmar are unique.
NOTE FROM KATE: The only baked sweet remotely similar to Drömmar harkens back to a tea shop sweet I used to favor in Prague as a child. My grandpa would take me to a bakery where a display livened up the cooler case. He would order a cup of strong coffee, but never anything to eat. Instead, he enjoyed watching my pint-sized self sit up straight in a chair, fancy in my good dress and hair bows, drinking over-sweetened tea from a cup like a proper little lady. And I, of course, was the one who got to order a dessert.
This was often a confection called “rakvicka.” The English translation is a coffin or a casket. The not-quite-a-cookie mass was composed of whipped egg yolks and sugar, baked in rectangular, casket-like mold. The casket would puff up to leave a hollow interior. and was served with a squiggle of optional whipped cream.
Breaking a casket with a teaspoon and tasting a fragment was a fabulous sugar bomb experience, with the sugar converted into a friable structural element. It fell apart as soon as it hit the mouth. Eating the Drömmar is a messy proposition, but not as bad as the one time when I tried to bite off a corner of a casket and had the confection explode in my hand.
Enjoy this cookie – it’s unique, intriguing, and its playful nature will bring a smile to your face.
How Can We Describe That Which Can’t Be Described?
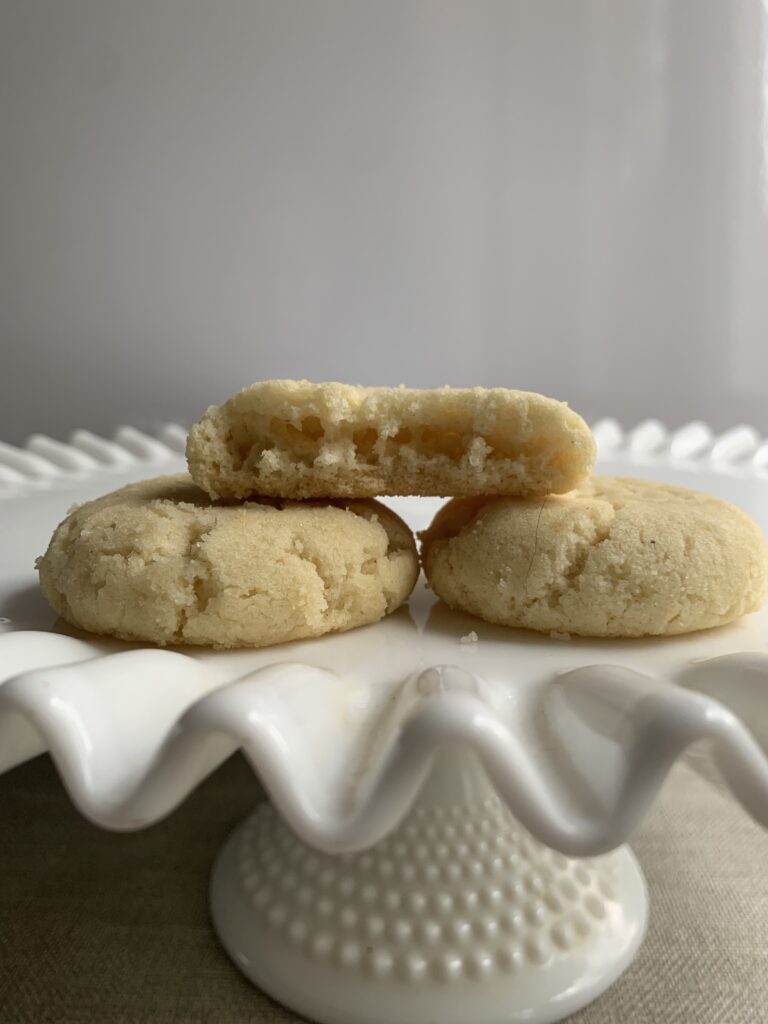
Just look at that texture!
Those 30 testers and I had a lot of fun coming up with “sort of like this except…” possibilities. It wouldn’t be fair to you if I left without even trying, right? Here are the best of the bunch:
“Imagine cotton candy that tastes like a sweet vanilla cookie, but is crispy, crunchy, and actually a little filling.”
“Sweet, ephemeral, crispy/crunchy goodness that vanishes inside your mouth.”
“Sugary air shaped into a cookie, but it doesn’t leave you empty.”
“You could call them ‘clouds’ just as easily as ‘dreams.’ If clouds were crunchy, crumbly, and delicious.”
“How about the child of a dried meringue who married a funnel cake?” To which came the answer: “No! I like meringues, but no meringue ever dreamed of being this crunchy, and these have too much substance even though they vanish in your mouth.”
“They taste like vanilla and sugar. After that?… Uhm… Errr… Well… How about…? Gee, this is hard!”
Do you know the story about six blind men who fought over how to describe an elephant? The one by the ear said, “An elephant is like a carpet!” The one by the leg said, “No, an elephant is like a tree!” The one by the tail insisted that both were wrong. “An elephant is like a rope!”“No, it’s like a wall!” said the one on the side. “You mean a great, big snake!” answered the sixth man feeling at the trunk.
So it is with all those descriptions of Drömmar. Every description is true, yet none capture the whole experience.
An Overview Of The Recipe
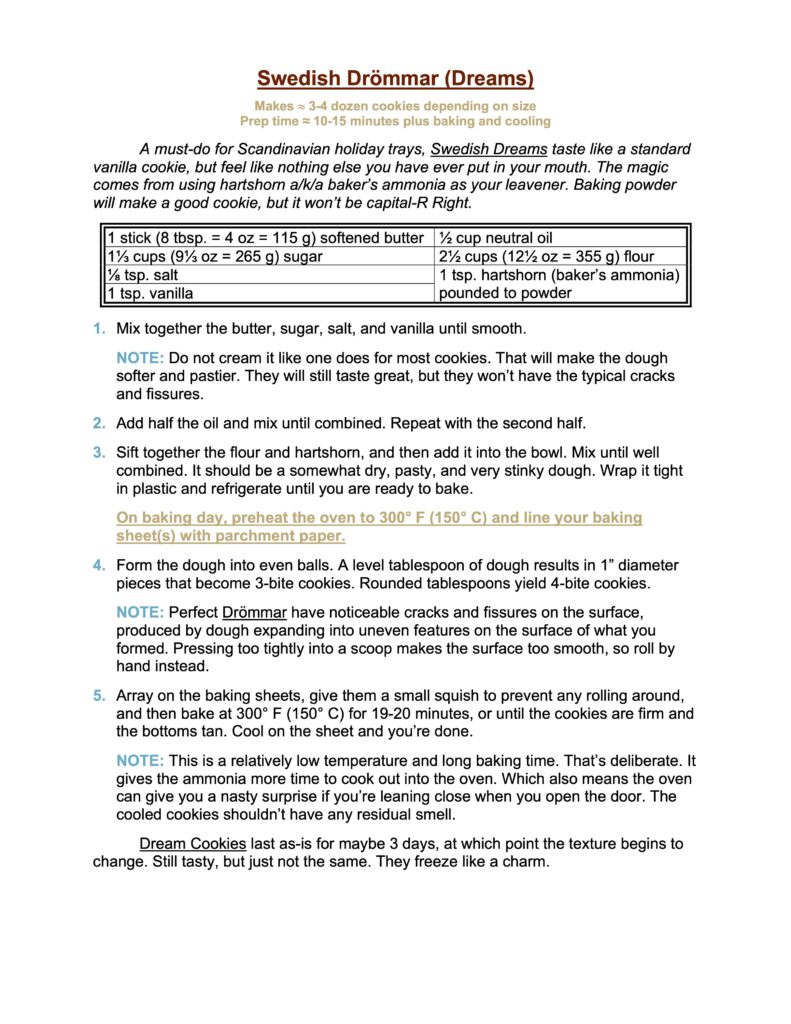
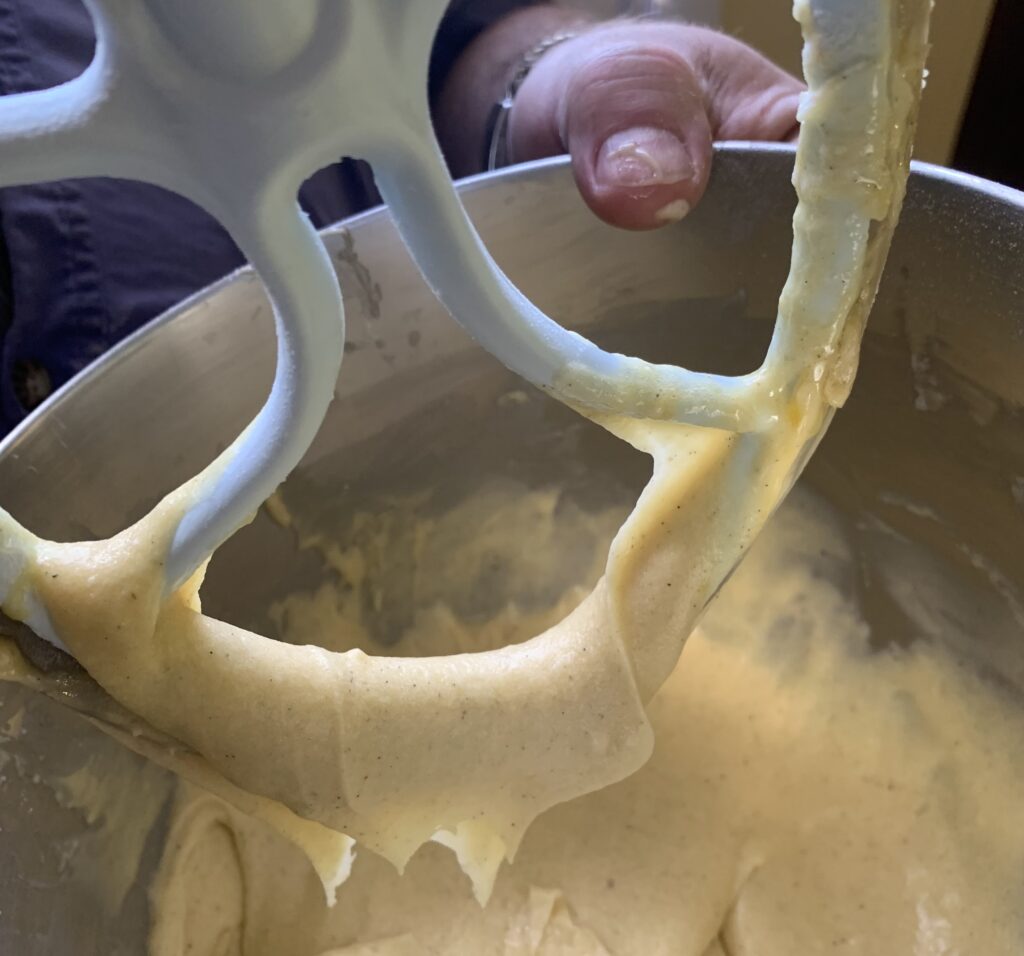
This is drop cookie, the easiest of them all to form, and the dough is so easy to make that traditionalists will simply pull out a mixing bowl and a fork. No kidding. I only used a mixer because my arm has been protesting the idea of typing on a laptop actually held in my lap. [Lesson learned. Don’t do it.] It adds up to this: First, mix the softened butter with sugar and vanilla sugar until it’s more or less smooth. No creaming required (see below). Second, mix in the oil (and vanilla extract if you go that route) bit by bit until you once again have an even texture (again, see below). Then mix in your dry sifted-together flour and hartshorn (see below). You are done. Go ahead and bake.
[A NOTE FROM SCOTT: True story about how bulletproof the formula really is. I started by normalizing 11 recipes I found online to a dough based on 1 stick of butter, and then targeting the average of those fairly consistent amounts. I must have gotten my math wrong, because the first batch produced more of a dough paste than a pasty dough. But here’s the thing. Other than leaving oil on the fingers, that first batch tasted crispy, sugary, vanilla-y, and altogether delicious. The current recipe has exactly twice as much flour as that first one. Can you name another recipe that will work even if you blunder by using half (half!) the amount of flour you should have?]
Taste one and you’ll know in an instant why they have the name “Dreams.”
A Water-Free Dough
This dough contains basically no water except the little bit that’s inside the butter, the microscopic amount that’s produced in the leavening process, and the equally microscopic level contained in dry flour. That changes things in a few key ways.
The dough is the next best thing to gluten free.
Wheat flour contains two proteins called glutenin and gliadin. Add water and those two will combine into gluten. Kneading hastens that process, and also makes the gluten bits combine into the long strands that bakers try to control. Remove the water and there’s no way to make any gluten.
Since this dough has no water, and the flour grains get coated in fat anyway, there is basically no gluten at all except at trace level. We can’t call it “gluten free” because a testing lab would definitely find some molecules here and there, but it’s entirely fair to say it’s the “next best thing to gluten free.” This cookies should be quite safe if you really are sensitive to gluten and not to other parts of the flour. Or not, if your reaction has more to do with the grain than the gluten.
Not an option for this recipe. You MUST use hartshorn, and NOT baking soda or powder.
Baking soda and baking powder (sodium bicarbonate products) will not work.I recently did a lot of research on this to figure out why. It comes down to the chemistry differences between the mechanism by which ammonium carbonate (hartshorn) breaks down versus the reaction chain for sodium bicarbonate (the active ingredient in baking soda and powder).
Hartshorn creates lift through “thermal decomposition” alone. Apply any level of heat above 96-99° F (36-37° C), basically the same as body temperature, and the ammonium carbonate will break down into two gases (ammonia and CO2) plus a molecule of water. The reaction continues and gets faster as the oven temperature rises, until there’s finally nothing left. Both gases contribute to lift as they expand out through the dough.
Sodium bicarbonate begins to break down at a significantly higher temperature (180° F = 80° C), and results in CO2 + water + a chemical called sodium carbonate (not bicarbonate). Sodium carbonate is a potent base, which is why goods containing high levels of baking soda can taste soapy and bitter. Recipes solve this by adding an acid into the dough to create a secondary reaction (chemical, not thermal decomposition) that produces yet more CO2 and water.
That’s all well and good except for one thing: that chemical reaction between base and acid will not occur in the absence of enough water for the two to travel around and find each other. This is why baking powder stays stable in your pantry. It may contain both a base and an acid, but they’re both bone dry.
Since this dough has no water to speak of, the sodium bicarbonate will go through thermal breakdown, but the sodium carbonate result will end up stranded in your final product, producing that nasty, soapy, aftertaste. Yes, there will be some dry acid too if you used baking powder, but they will be sitting there side by side instead of reacting.
That Makes Hartshorn An Essential Part Of The Recipe
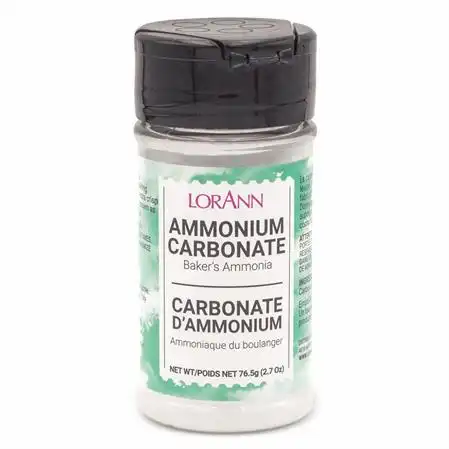
Hartshorn a/k/a baker’s ammonia a/k/a ammonium bicarbonate reacts where baking soda and powder won’t (in this cookie), and it’s also responsible for the unique, micro-honeycomb texture that makes these cookies so special. This ancient leavening agent has become an obscure ingredient for normal households, but it is readily available online, in bakery supply stores, and even in craft stores like Michael’s. [If you live in Pittsburgh we can recommend Make A Cake on Rochester Rd.]
We’ve always used the LorAnn brand but that’s only because it’s the most common one around. Ammonium bicarbonate is a pure chemical compound and thus identical regardless of source.
NOTE FROM KATE: Hartshorn, which used to be called sal ammoniac, has a long and twisted history. First imported by Venetian traders in 12th century, its Egyptian manufacturing process was a closely guarded secret. It took five hundred years before European alchemists and scientists figured out how to make the stuff from antlers (“hart” is an antique name for male deer).
Note that there are several ammonia salts with similar chemical properties. Deer antlers were preferred for baking use on the old belief that particular parts of the animal parts will provide a stronger medical benefit. Hooves, skin, etc. were used elsewhere. My research suggests that burning them n the presence of lime yielded what we now know as ordinary smelling salts (though hartshorn will serve just fine in that role too). The Egyptians actually used heated animal dung to extract their ammonia product.
Our vegetarian friends will be relieved to find that no animal parts need to be used. Modern ammonium salts are all factory made from commonly available chemicals. Although, knowing how the Egyptians made them inspires me to test the process, come Spring, in our fire pit. I am sure our neighbors won’t even notice… And there’s no way it could be as bad as when I tried to brain-tan a deer hide in a garbage can on our driveway.
Sifting is MANDATORY
Modern baking soda and baking powder products tend to be clump-free, which makes sifting much less important. Not so for hartshorn. Our little jar started out as a powder when we bought it last year, but as of today it’s such a solid block that I’m forced to chip pieces off. Heaven help any tongue that meets one of those chips! That makes it vital for any user to either grate/pound it back into a powder, or else dissolve it in water before use.
You don’t want to add water to this particular dough (see above), which leaves only the reduce-to-powder option. I have done this in two different ways: by pounding in our mortar and pestle, and by pressing/scraping it through our fine mesh strainer (a/k/a sieve). Both seem to work equally well.
Mixing Your Butter Does Not Mean You Should Cream It
“Creaming” is the process of beating butter for several minutes until it turns white and fluffy from tiny air bubbles you’ve mixed in. It’s probably the most common first step out there for cookie making. This recipe asks you to mix your butter and sugar, not cream them together. Remember, we’re trying to replicate mixing with a fork. Machines are just too convenient to bother with that, but that result is your target. Forks do not cream your butter. All they do is mix.
Another Trick: Add Your Oil Bit By Bit
There is just as much oil in the dough as butter. Add it in at least two stages. Pouring all the oil in at once makes it harder to get everything smooth.
Salt?
I added an unnoticeable bit of salt to the recipe sugar because experience has taught us that even sugar bomb cookies work better that way. Feel free to leave it out.
Vanilla Extract?
Every Swedish recipe I found specified the use of vanilla sugar, not extract. It seems to be a regularly available product over there, and it makes extra sense to use it because it adds no moisture (see above).
Vanilla sugar can be hard to find here in the U.S., but vanilla extract is everywhere. And while it is indeed wet, the recipe calls for only a teaspoon, and most of that liquid is alcohol rather than water. So if you have vanilla sugar, use it. Extract will work fine if you don’t.
CONCLUSION
Do you, like us, have a little bottle of baker’s ammonia tucked away in the pantry for the next time you want to make Springerle or crackers? If so, make this cookie! Add exclamation points as needed to make you believe me about that. Drömmar are unique. Drömmar are delicious. Drömmar are universally popular. And Drömmar will make you a better baker after you take the time to go back and figure out how such a weird, amazing, and awe inspiring cookie really works.
Enjoy!
AFTERWORD
I posted this recipe in our Facebook group. This follow up came a little later from a fine baker who was intrigued enough to give them a try:
I am not obsessed with Drömmar. LOL
But lying in bed thinking about the meltaway character of some favorite shortbread, I decided to try the secret ingredient in those in the Drömmar: rice flour.
I replaced just under a third of the flour with rice flour, or ⅔ cup of the total 2½ cup called for. This made a noticeable difference in the texture to enhance that lovely melt-in-your-mouth feeling.
Other adjustments: used almond oil instead of canola, baking them without refrigerating the dough since i had plenty of time, lowered baking temperature to 285°F, and extended baking time to about 28 minutes total (rotating pans).
This is such a lovely recipe, so easy, quick, and fun to play around with.
It ain’t just us, folks. Think of a straightforward, delicious, and buttery shortbread… and then twist it by creating this fantastically unique texture. How could it be anything but “lovely?”
Delicate, spice scented cones: a treat for all seasons
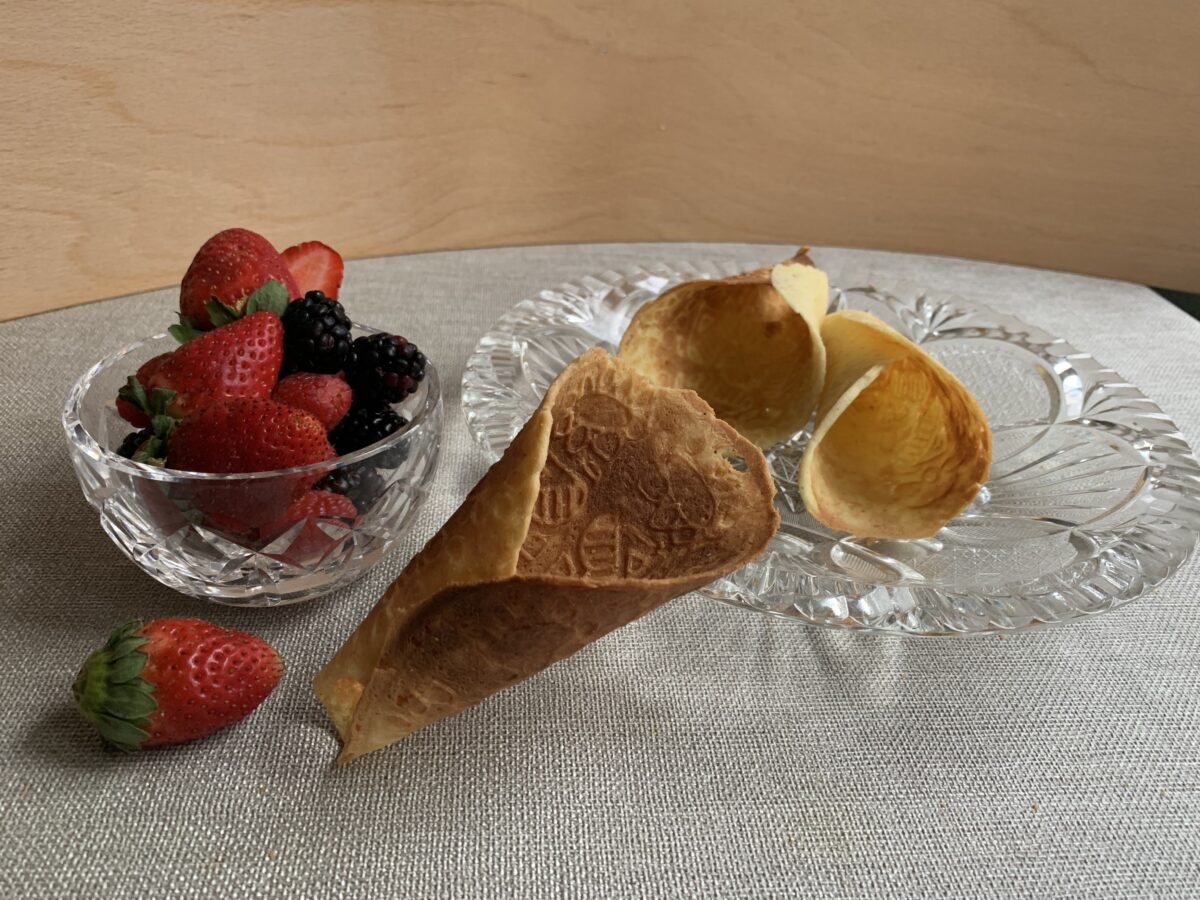
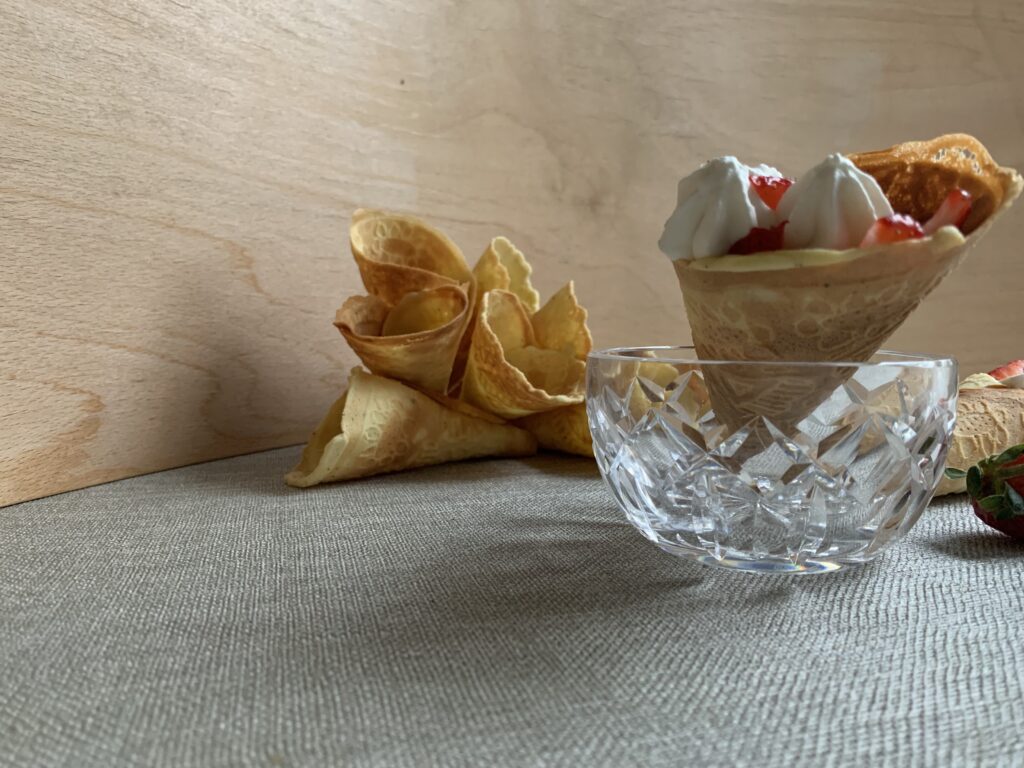
Krumkake are one of those cookies that keep improving with every new batch you try. I can’t honestly say we’ve mastered it yet – which is a little scary when you realize they’ve gotten nothing but rave reviews from guests, spouse, and even a certain stubborn daughter on a low sugar kick who only gave it a taste because Dad did a comic begging routine. (And who then had somewhere between two and several more in order to decide that strawberries were her favorite berry inside. And then had to be restrained to save some for her sister who was out of town. But admittedly had the good grace to only laugh and agree when confronted with this description).
In other words, the Krumkaker we’re already making are Good with a capital G and are still getting better as our skill improves. They are as much fun to serve and eat as any other cookie we know, and have the potential to be even better than all that once we start to explore all the ideas for a filling beyond berries and cream.
Yes Virginia, there is a Santa Claus who lives up by the North Pole, and travels south every year – making his first stop in Norway to get his allotment of Krumkake.
Krumkake (Krumkaker in the plural) is a light, crisp, Norwegian waffle cookie made as follows:
Start with an unleavened batter made from melted butter, eggs, flour, and sugar,
Season it with vanilla and cardamom,
Use a special waffle iron to make wafer thin cookies,
Form those wafers into cones or tubes while hot, and then
Serve with a filling such as the classic whipped cream and berries.
Whoever makes the thinnest, lightest, crispiest Krumkake wins. Sounds simple, right? And it is, except for hidden subtleties in every one of those five basic points.
About #1, why do they need to be unleavened? Especially when a bit of baking powder ought to make them that much lighter?
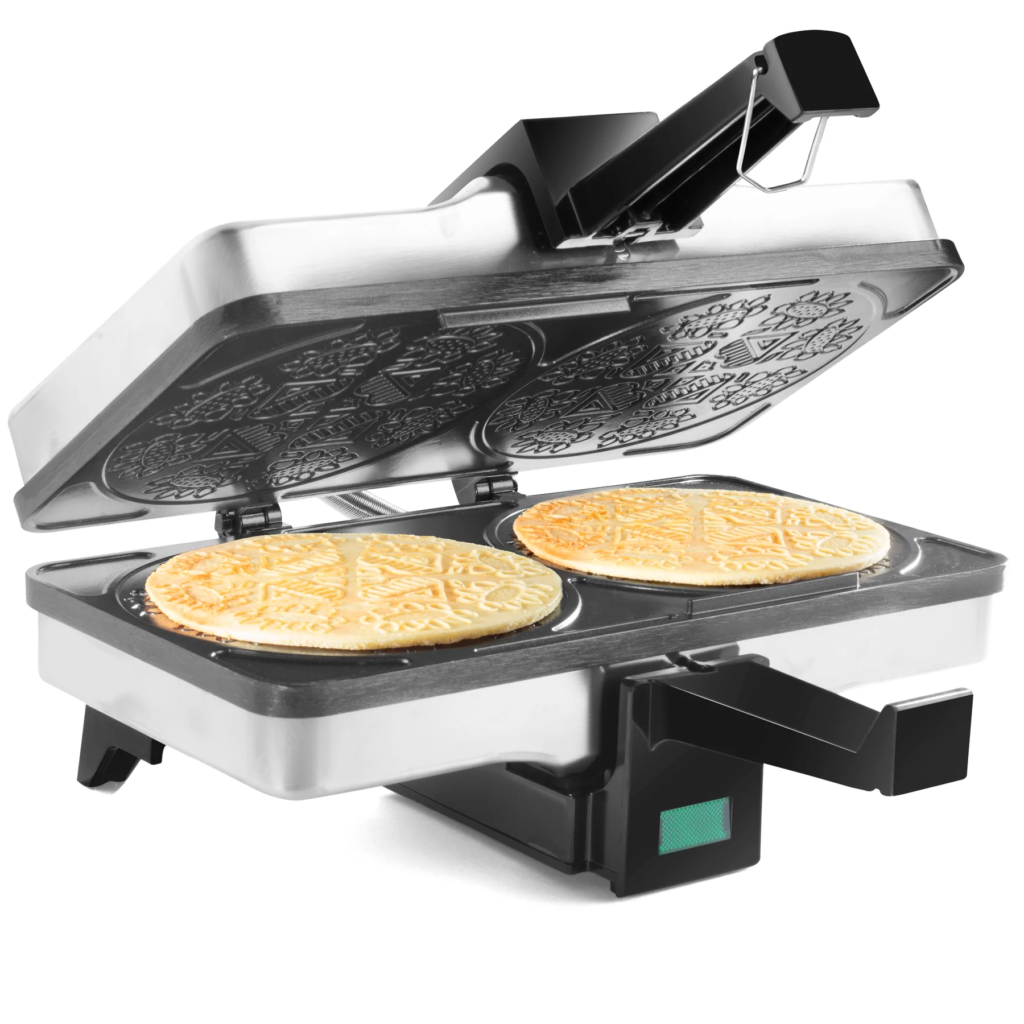
Krumkake irons aren’t quite the same as pizzelle irons. The space between the two halves is noticeably thinner; enough so that any puff from the baking powder would be squeezed out by the brute force of pressing the top and bottom. You’d think people would try it anyway, but I failed to find a single recipe that reinforced the batter with baking powder.
OTOH, every recipe requires a fairly generous portion of starch to lighten the flour, and that serves a similar purpose.
For #2, why be so specific about vanilla and cardamom?Aren’t people allowed to play around?
This is the one that’s going to get me in trouble. Our Internet friend Libby is the finest Krumkake baker we know – the culmination of at least three generations of tradition, with 30+ years of expertise. She has faced and conquered every challenge that Krumkake can present… and she makes her Krumkake with vanilla and almond extract alone. No cardamom in sight. [NOTE: She has subsequently admitted to using ground mace in half of her batter, which may perhaps be blamed on her roots being Swedish instead of Norwegian.]
I stand by my guns nevertheless for at least three reasons:
Every native Norwegian recipe I could find specified cardamom, usually with a grudging note that some people prefer nutmeg (or mace, I guess).
Scandinavian bakers are as free with their use of cardamom as Americans are with cinnamon. It’s a cultural trait, and I wanted to produce an Old Country recipe rather than an American adaptation.
My family really liked how that delicate, background spice enhanced the berries.
So cardamom it is. That is the norm, and doing without is the variation.
On #3, why do I need to spend extra money on a new device? Can’t I use my pizzelle iron instead?
Yeeessss… you can, so long as you understand that your final result won’t be as thin as it should be, won’t shape as cleanly, and will therefore be tasty but not “right.” FWIW, we tested this with a certain amount of diligence because (a) I am nothing if not cheap, and (b) my beloved wasn’t exactly fond of adding yet another large, single purpose tool. I wanted to find a different answer, but the darned wafers just wouldn’t cooperate. I ended up with tasty shards and crumbs, not pretty cones or tubes.
Thoroughly daunted, I went back to consult with Libby about this (consulted, not whined, no matter what she says). She replied with an electronic shrug. “I’m afraid you can’t get around it. Krumkake are supposed to be super thin, and pizzelle irons have too much space between the plates. I give them an extra squeeze even in my Krumkake iron just to be sure. But don’t worry about the extra machine. It won’t be a once-per-year waste. I use my Krumkake iron all year long to make crackers.”
Crackers? Okay, that works… And it’s hard to ignore the voice of experience when that’s why you’re asking for help in the first place. So I bit the bullet, searched around for a deal, and found one right away. Brand new irons retail for around $45.00 as of the end of 2022. That’s well within a household budget no matter what, but an hour of additional searching found me a technically used iron, still in its unopened box, for half that price even after accounting for the cost of shipping. $23.00. So I made the purchase, and discovered that Libby was 100% right. The Krumkake wafers really do come off the iron significantly thinner, and it really does make a difference in the final product.
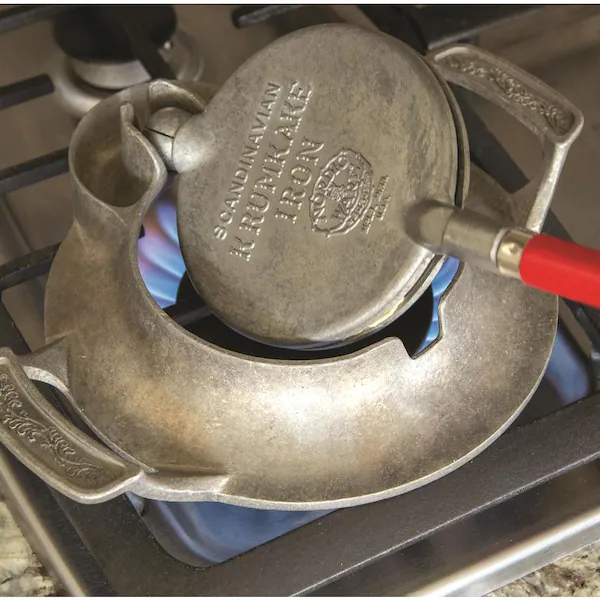
That search came with a side benefit too. We bought a standard electric iron, and it works great, but now I learned that traditional stovetop versions are still being sold as well! How cool is this?
An old fashioned stovetop Krumkake iron from Nordic Ware.
Krumkake recipes existed long before electrical power, and you can actually reproduce that experience if you choose. “Heritage” indeed!
For heaven’s sake, #4 has to be excessive. I like flat pizzelles just fine and I’m perfectly willing to have “topping” instead of “filling.” Why go to the hassle of burning my fingertips to form these into shapes?
Let’s start with the name. “Kake” means cake or cookie, and “krum” translates to ‘curved’ or ‘crooked’; so Krumkaker are by definition “curved cookies.” Cones are the most traditional shape, with tubes close behind, but I couldn’t find a single recipe where the author left them flat. Our casualties irregular results used for taste testing confirm that wafers taste just fine, but you won’t be getting the full experience, and it will matter once you get to the final touches. More on that below.
Okay, Let me have it. What’s the big deal behind requirement #5? I eat my pizzelles plain. Why not Krumkake?
This is actually the most important piece of the puzzle!
We had plenty of “irregular results” as Kate and I struggled with portioning, timing, shaping, and my desire to somehow make this work with a pizzelle machine. Casualties = nibbling. And the nibbling proved, beyond any doubt, that straight Krumkaker are… inoffensive. Nothing wrong with them, just ho hum. Uninspiring. Even disappointing, to be totally honest. Pizzelles have character. Stroopwafels incorporate a caramel filling the gods use to enhance their ambrosia. These Krumkake fragments had neither.
So you can imagine my surprise at the startled cries of delight that came from the other room as guests and family went in to try them out. “Well, they’re certainly pretty enough… Ssshhhhpritz! (From the can of whipped cream)… And oooh, berries. I think I’ll try… Oh. Good. Lord. Jim, you’ve got to come here! You’re missing out on the good stuff! These things are amazing!”
Maybe I ought to try one too… And yes, that was when the penny dropped.
Plain, unfilled Krumkaker are like a light, crispy, and extra fun version of that plain cake underneath a Strawberry Shortcake. [Yawn] Everything changes when you add the cream and berries. Hody hum to holy cow in one quick instant.
That, my friends, is the frame you need to complete the picture. Krumkaker, like Cat Tongues, are a platform rather than a standalone cookie. They aren’t complete until they are filled. But trust me on this. Once they are completed, you will be H.A.P.P.Y.
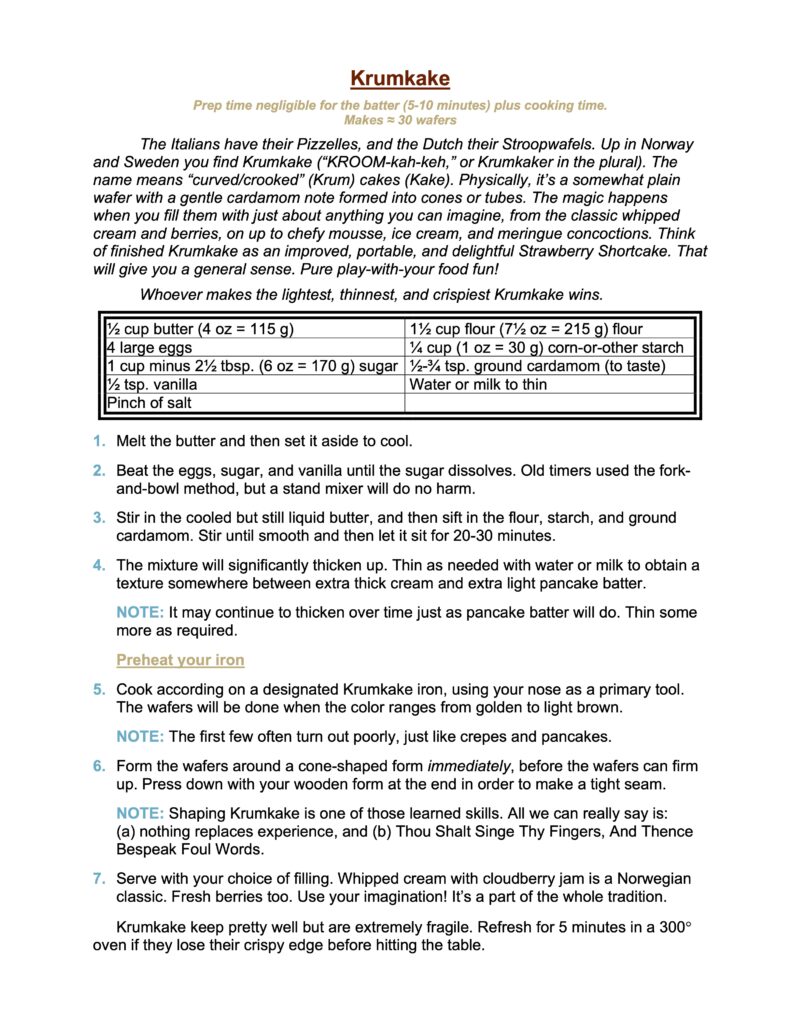
NAILING DOWN THE RECIPE
Recipes for the Krumkaker shells. I did a great deal of research for this recipe because it’s so well loved in Scandinavian tradition, and found that the recipes all followed the same basic pattern. First you mix together eggs and sugar until the sugar dissolves; then you add in melted (and cooled) butter; then you stir in some flour mixed with starch (potato, corn, etc.); and then you thin the batter as needed to get to a consistency somewhere between an extra-thick cream and an extra-light pancake batter. The recipes only differ in their proportion of eggs, sugar, butter, and shortened flour, and those group loosely into three basic categories:
Recipes made 1-2 eggs, standard flour, and a lot of whole milk, half and half, or cream.
Libby’s recipe, which uses 3 eggs, shortens the flour with a lot of starch (1 cup and ½ cup respectively), has a small amount of sugar (½ cup), and then thins the result with water.
The recipe that came with our machine (the most common by far), which starts with 4 eggs, flour with just a little bit of starch (1½ cups and 2 tbsp.), a full cup of sugar, and then thins the already looser result with your choice of water, milk, etc.
We tested all three. The first one disappointed. It came out as a nice, thick batter but cooked up a little tough. In the ideal world I would have gone back to test this again later on, because it probably suffered from both our lack of technique and my insistence on trying to a pizzelle iron. I never did, however, because the egg-heavy recipes ended up working so well. Thus I won’t call this approach a “failure,” just an alternative that got abandoned early on.
Libby’s 3-egg recipe worked, but had two issues I felt compelled to refine. First, it wasn’t quite sweet enough for our admittedly American taste, and second, it kept thickening up into something that could barely be called a batter at all. Adding water would thin it out for 10-20 minutes, and then it would thicken up yet again. Fixable issues, beyond any doubt, but first I wanted to try the 4-egg recipe since it promised to be both thinner and sweeter.
This one worked quite well. Yes, it was a little on the sweet side. And yes, it still needed some extra liquid. But it wasn’t over the top sweet, and it needed less liquid than Libby’s. A compromise between the 3- and 4-egg approaches looked like an obvious way to go. Or would have if my itch to experiment hadn’t intervened.
COOKIE NERD MOMENT
The Unwise Diversion
I know from general baking principles that egg yolks tend to add structure and cakiness to baked goods, while egg whites make things a little drier and crispier. Whipping the eggs/whites also makes things lighter and crispier. And weren’t “light” and “crispy” the very targets we were after? So logic said the path toward an Ultimate Krumkake might actually lie in separating the eggs and playing around with longer mixing times, rather than fussing with the ingredients alone. “Most innnterestink…” says he in a cartoon Dr. Freud voice.
But here’s the thing. Our work isn’t really about finding the Ultimate Version. We’re after the Best Traditional Version that can be made with standard U.S. ingredients and materials. All of which forbade something as radical as separating eggs… unless I could dig up traditional versions that followed the same logic.
Eyes aglow I went back to my research, and found [crickets]. The deeper I looked, the clearer it became. Krumkake is an ancient treat that Grandma’s grandmother made by whisking whole eggs and sugar with a fork until the sugar dissolved, adding shortened flour, and then thinning with liquid. That evolved over time to make use of better tools, but only because they achieve the same result a little quicker. Chefy variations and techniques? Not a one to be found.
The batter part came together quickly after that. I added some extra starch for tenderness, cut back on the sugar by a few tablespoons, et voila. This was the recipe that went out for an initial public test, and yielded all those rave reviews. Could I make it even better? What if I…
Sometimes it’s good to have a wife. (Okay, okay: most times.) Kate looked at me and said, “Perfection is overrated. These aren’t just ‘good enough,’ they are good enough that I want to call over company just to show them off, and get them out of the house where I won’t be tempted any more. Leave well enough alone.” So be it.
The recipe down below still tends to thicken up over time, but only by a little, and isn’t that just as true of pancake and crepe batters? It’s the nature of the beast. Consider it a trick of the trade.
Finding the ideal Krumkake filling.
There is no such thing. End of story.
The simplest, most basic filling is berries or preserves served with whipped cream. Lingonberries or cloudberries if you’re in Scandinavia; and something like fresh strawberries here in the U.S. But that is just the starting point.
Novel fillings are a significant part of the Krumkake tradition. Ice cream? Yes, and I can personally attest to how well they go with a little Häagen-Dazs coffee. Custards and thickened creams? Yes. Berries or jam alone? Yes. Other fruit, be it cooked, raw, preserved, fresh, northern, or tropical? All of the above. Pudding, mousse, caramel drizzles, chocolate dips, meringues, etc. ad infinitum? Ditto.
If tradition limits the shell to a basic approach, that same tradition says that only a baker who lacks inspiration (or has demanding family members) would trot out the same kind of filling every time. Krumkake must be filled with something. That’s a fact. But “something” is about as specific as it gets.
Just keep the fragility factor in mind as you ponder what to use. Super thin, crispy-but-tender shells are going to shatter in your hands somewhere between bites one and two. There’s no way around it. When (not if) that happens, there’s nothing to do but laugh, catch the crumbs, and then lick your fingers. We can’t recommend the use of any filling where that would present a problem. After that, anything goes.
FORMING KRUMKAKE CONES
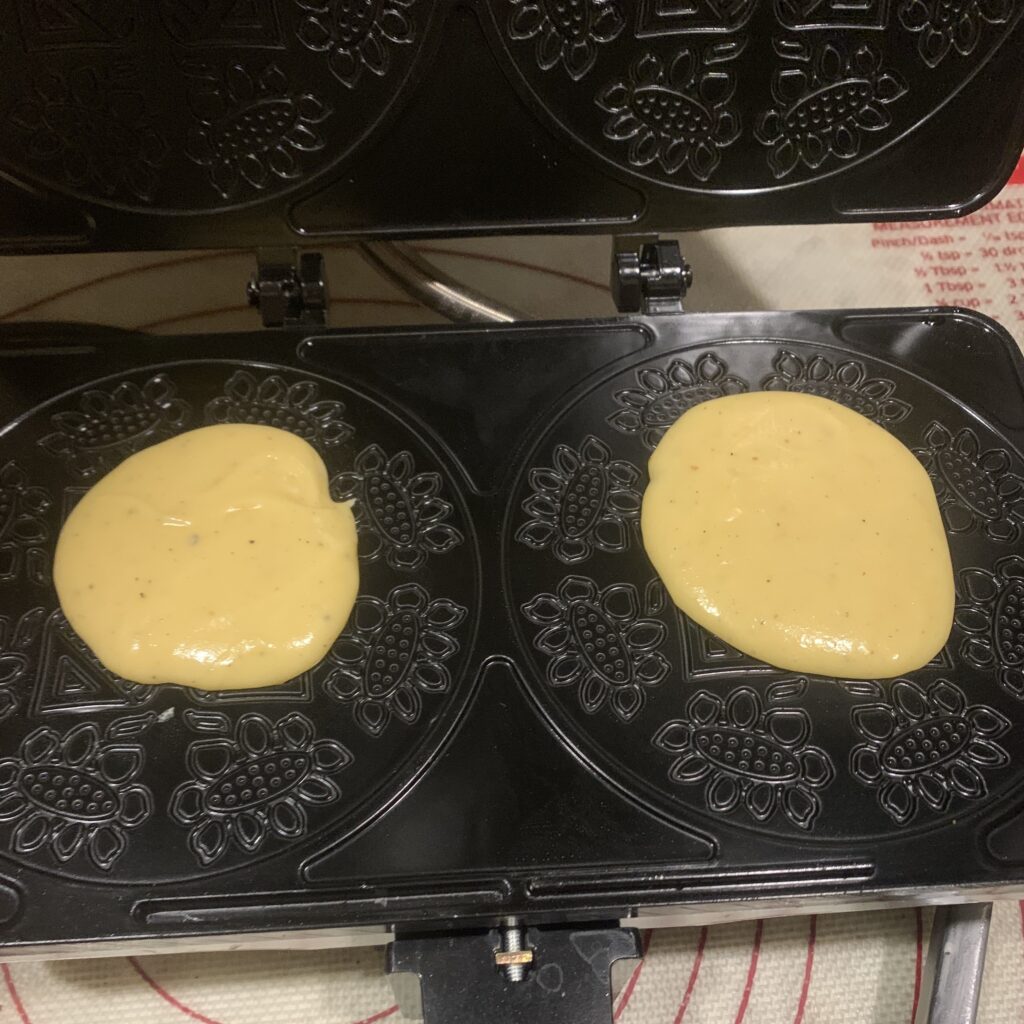
The batter before it gets thinned with water or milk
Thinned Krumkake batter at the right consistency
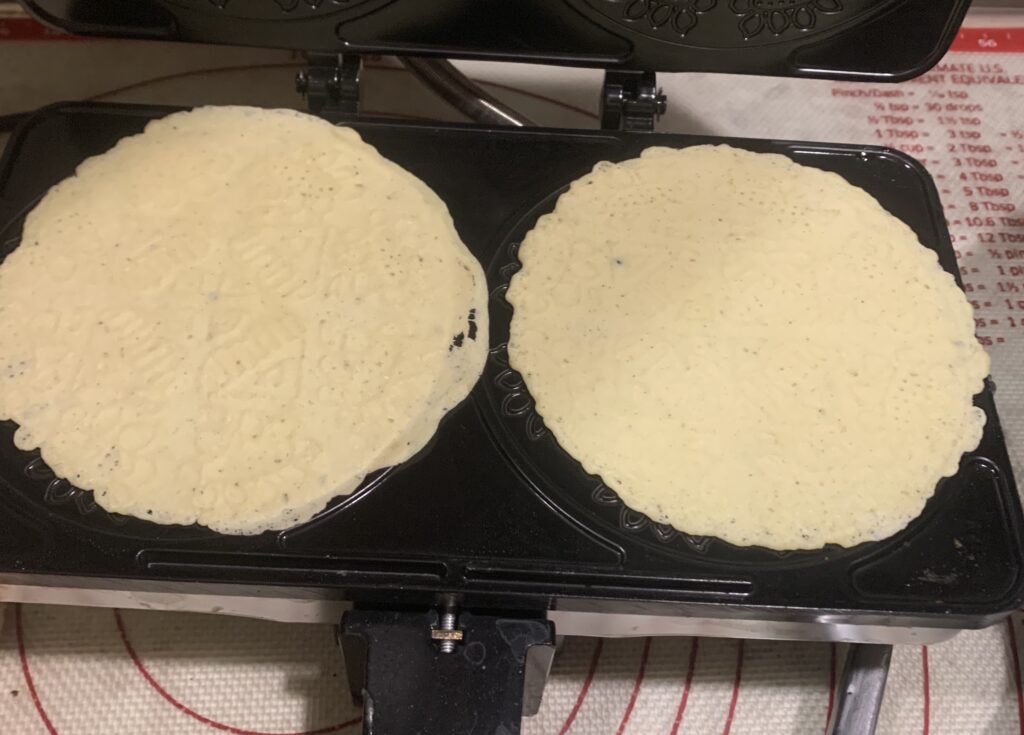
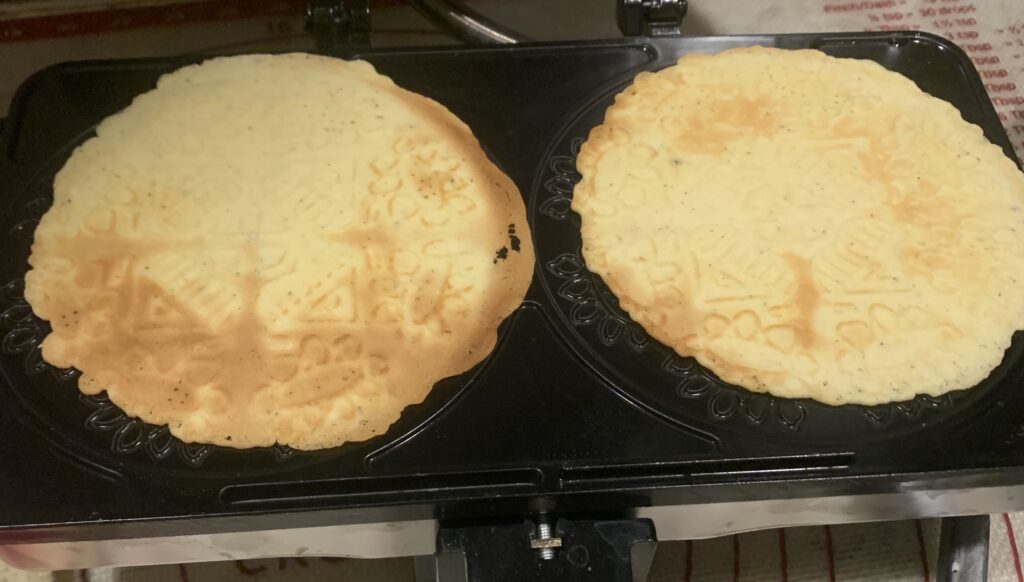
Not dark enough yet
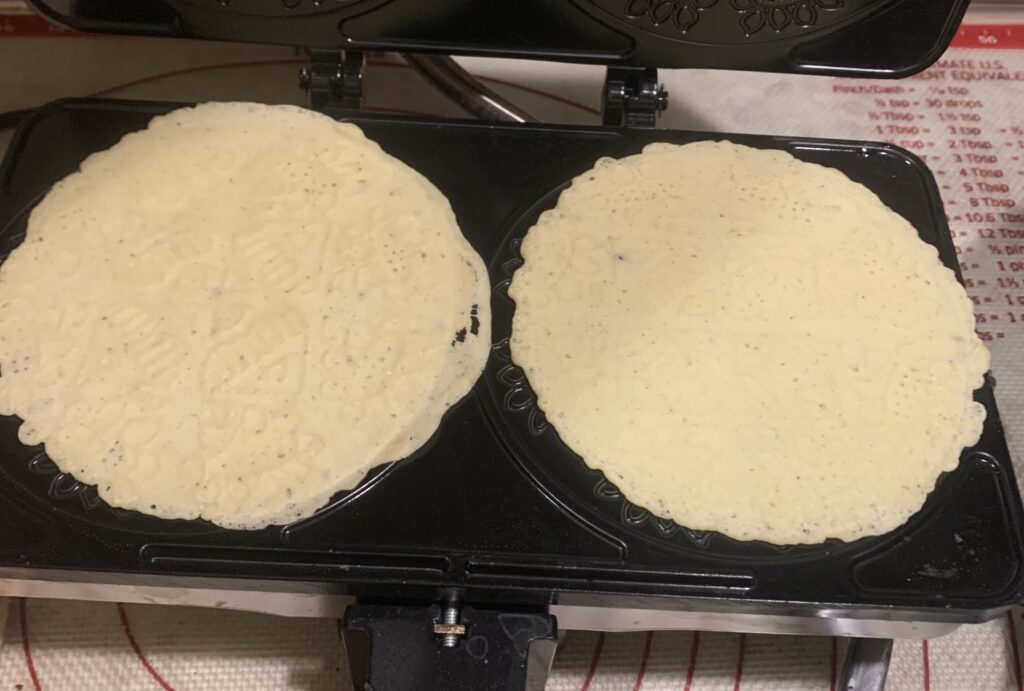
Still not dark enough
Ready to roll
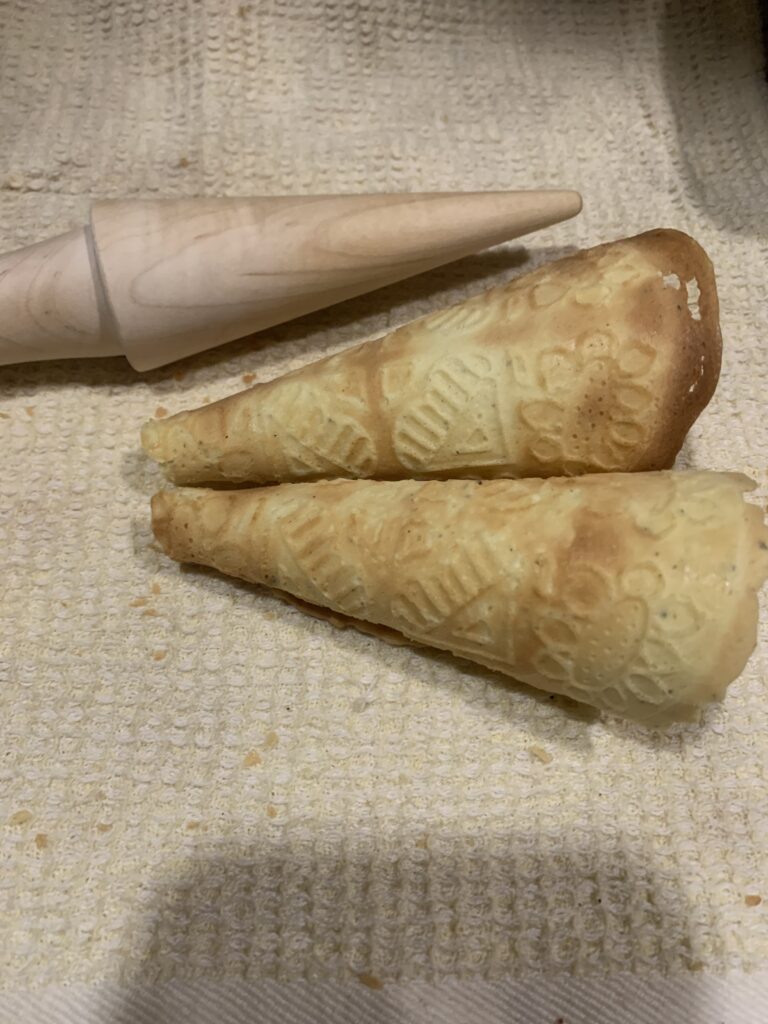
And now we’re done! The kitchen towel was used as a “glove” to cut down on singed fingertips. Note the wooden cone mold at the top.
I don’t know what to tell you. The only advice I can give is both obvious and doesn’t offer a whole lot of help.
Thy Fingers Shalt Get Singed. The wafers can only be shaped when they’re piping hot, which makes the ouchies are unavoidable.
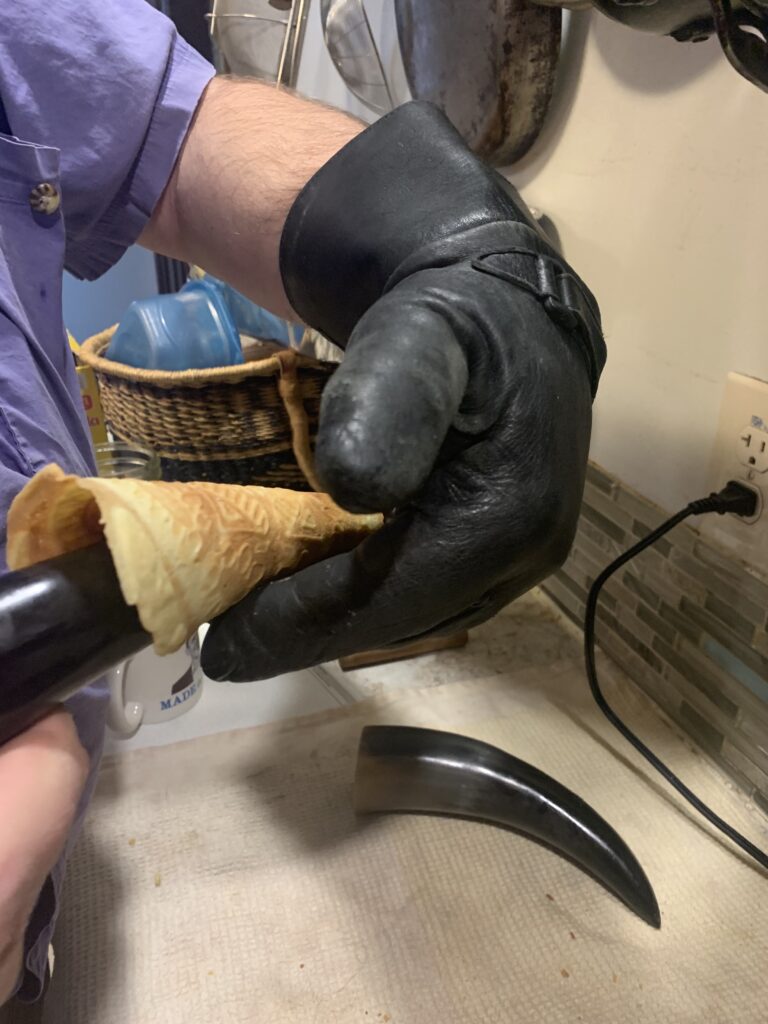
Wearing a glove will help. Same with rolling on a clean towel, which can double as a pseudo-glove for handling. But it’s going to happen. Just remember that you’re doing it for love, and be creative with how you curse.
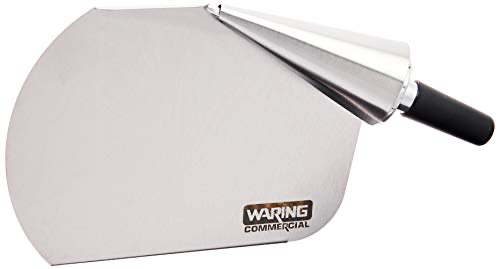
A good, solid cone mold makes everything easier. Those tools exist for a reason, and they work. There is a tool good enough to solve all problems (pictured below), but at that point you’re talking about something used for industrial production.
Kate likes to keep a bowl of cold water standing by to cool her fingertips. (NOTE FROM SCOTT: Being a big, tough, manly man I obviously scorn such sensible comforts).[NOTE FROM KATE: And use a manly biker glove instead].
But the bottom line is simple: nothing will ever replace experience. Experience makes you quicker and more efficient, and turns the race against ouchies into a private challenge rather than a looming threat. Nothing replaces experience.
All of which explains why war stories are so big a part of the Krumkake experience, both for the rueful memories and the times you cut loose with some [ahem] appropriate words, not realizing who was standing right behind you.
NOTE FROM KATE: We had a lot of fun with this recipe, and it’s easier than it sounds. In this, it reminds me of macarons: You end up learning a new technique, and you will make some misshapen, too-light, or too-dark pieces. But they will still taste pretty good, and by the end of your first batch, you’ll find you are making very respectable cones.
We engaged in all kinds of foolishness before Scott ordered that wooden cone shape. We tried a cardboard roll shaped into a horn and covered in aluminum foils (an epic fail – you really need to press on the ‘seam’ where the edges of your cone meet.) We tried bovine horns, carved and uncarved (a remnant of an old hobby – I don’t carve anymore.) That sparked a promise of how good it could be, if we only had a straight horn. Like, y’know, one made of wood for the purpose. The gloves were a massive overkill. You don’t need to touch the hot wafer except for that one edge, and you can do it through a clean tea towel. [SCOTT RESPECTFULLY DISAGREES. There is no such thing as overkill when it comes to tools. If you’re going to make a thing, why not make it from stainless steel?]
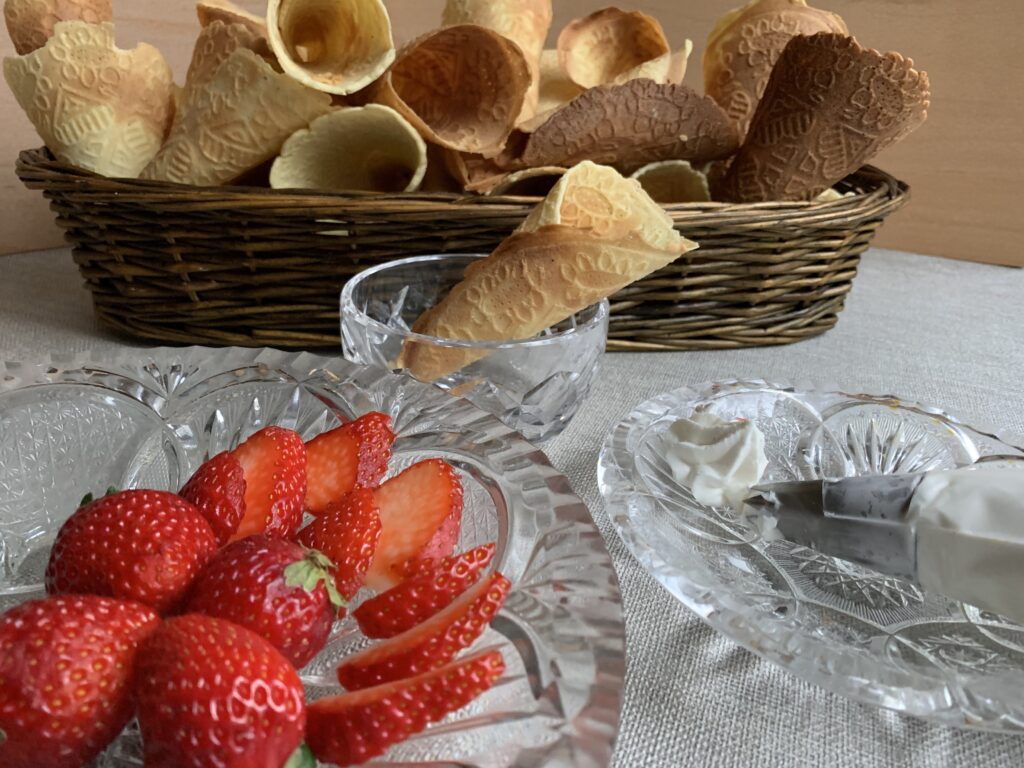
Filling the horns is a lot of fun. You will eventually want to start making your cream (or cream-based fillings) ahead to keep in the fridge. The spray cans are fun but inelegant. The higher end approach is to stabilize your cream with gelatin and powdered sugar. Here’s what I did, and it worked like a charm:
1 cup of cream
1 tsp. powdered gelatin
2-4 tbsp. hot water
1-4 tbsp powdered sugar.
Bloom the gelatin in hot water, let it cool, and then add it into half-whipped cream. Finish whipping until you get soft peaks.
We served this in disposable pastry bags, with jam and pre-sliced berries on the side. [Sigh] It was wonderful. Several berries, in fact, so people could create their own combinations. Every one was delicious, and our guests enjoyed competing for whose would be best. Oh yes – remember to serve with extra napkins on the side. Trust me on this.
Another view of the molding tool and some Krumkake I made using it. $8.00, and worth every penny
A commercial waffle forming tool. Ouchy free, but $40 instead of $8, and not so easy to store
Or you can get really traditional…
The glove was a great idea despite Kate’s rolling of the eyes. The natural horns? Not so much. The lack of a handle made them hard to, well, handle, and the curve made forming them slower, which increased the ouchy factor.
CONCLUSION
Enough with the ouchies! War stories, remember? They’re a part of the fun. But the best part of all is this:
Krumkake are so good, and so much fun, that they are going on our short list for favorite desserts to make whenever guests come by. Not just for the holidays either, but all year round. The whole experience adds up to a solid “10.” Your guests and loved ones even get to play with their food! What could be better than that?