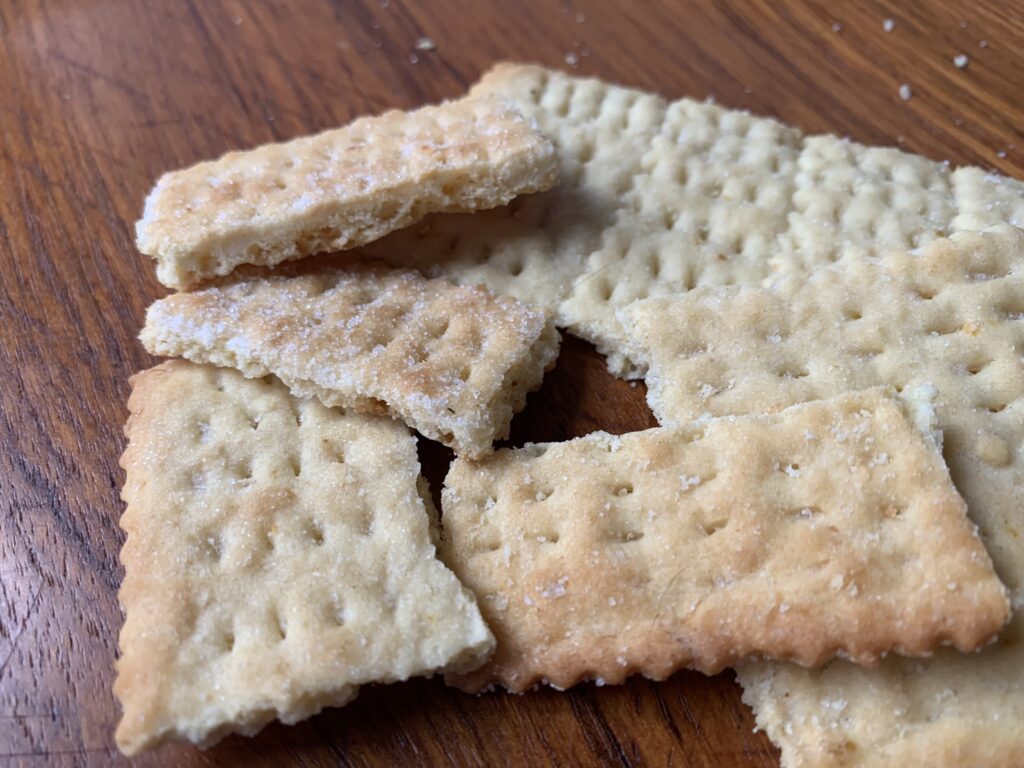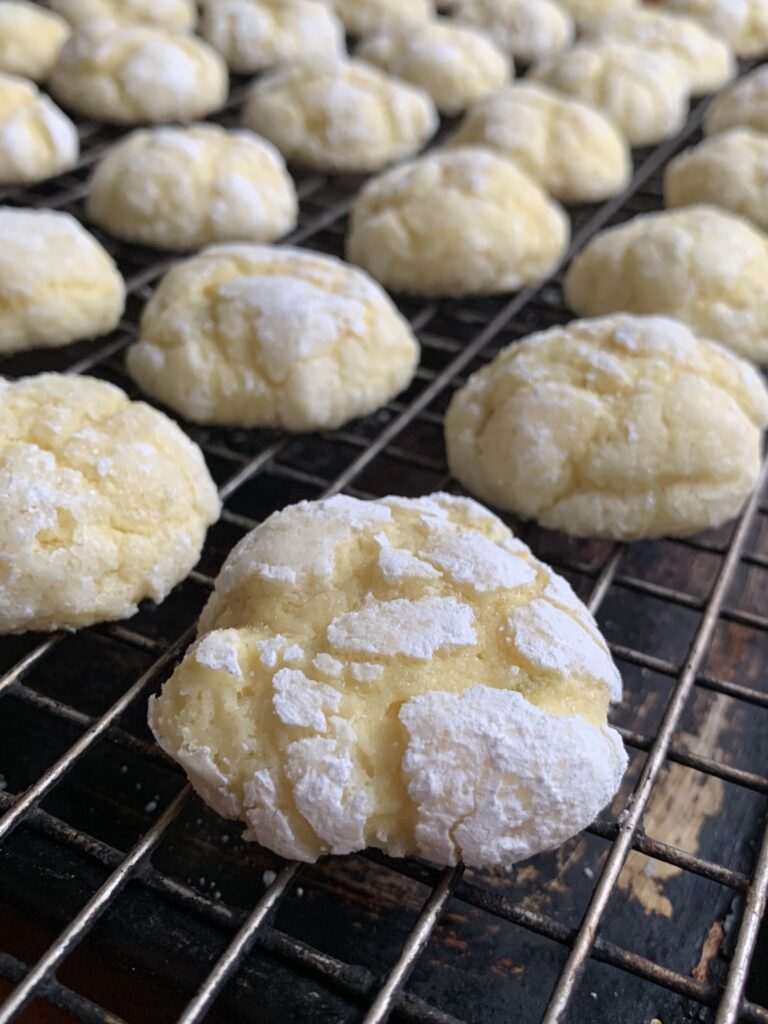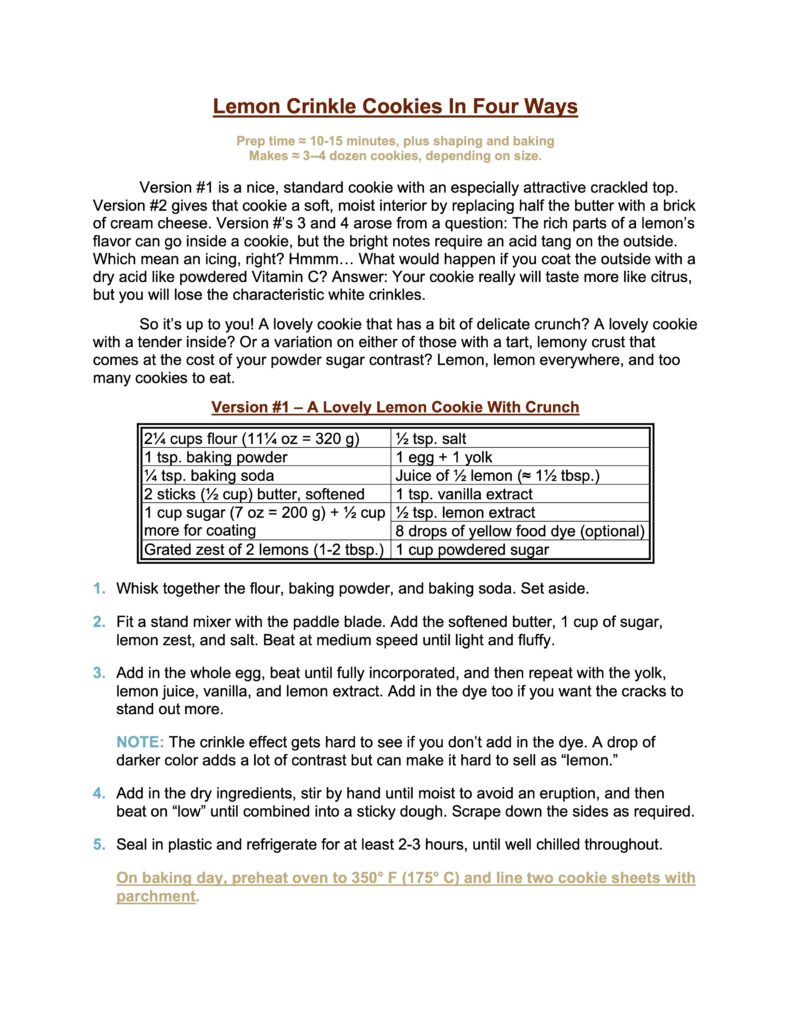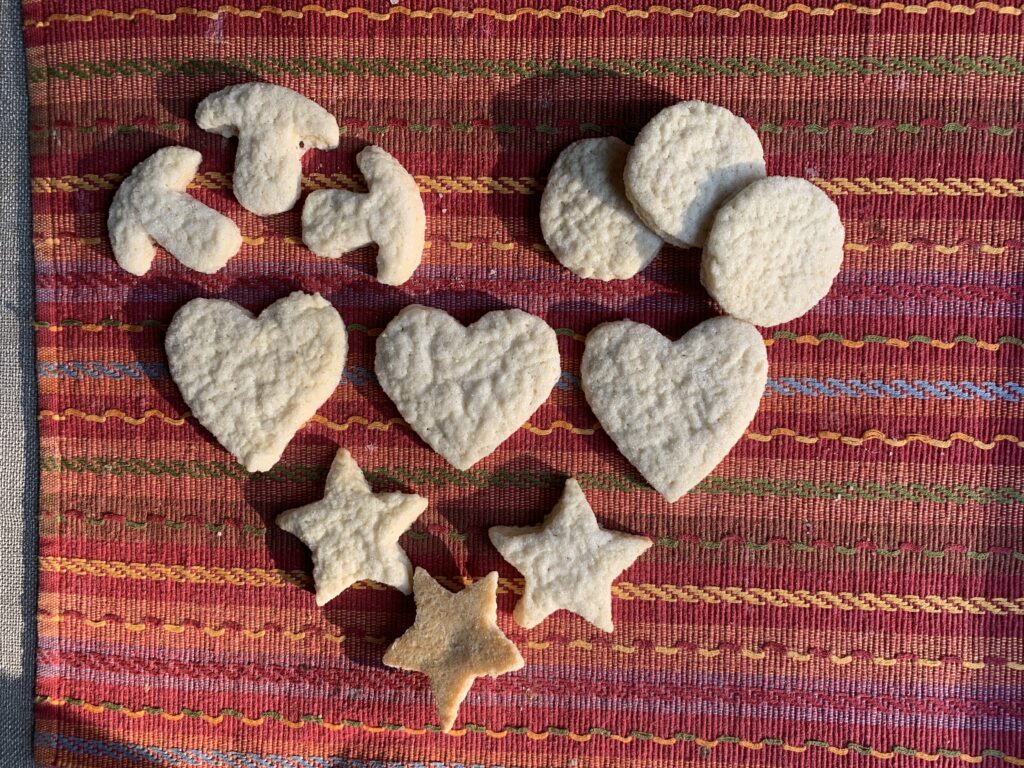
HARTSHORN CRACKERS, A Beautiful and Tasty Illusion Cookie

Appeance? Cracker. Texture? Cracker. Taste? Sugar cookie. Gotcha!

We often discover something new and exciting as we experiment when odd or exotic recipes appear on the radar. We expected no less with this one. “Crackers?” It had to be a European version of those crispy, crunchy Mediterranean tea cookies. Right?

Nope. These taste like a standard sugar cookie, and earned their name by mirroring the appearance and texture of a classic saltine a/k/a soda cracker. They are eminently snackable too. Dangerously so. Each piece is so small that you will find yourself innocently popping five or ten at a sitting, which actually adds up to more than that regular sized sugar cookie you would have been able to resist.

Unique, fascinating, and familiar all at once. How cool is that?

Click here if you only want the recipe without the discussion

Saltines, right? Gotcha!

The Things You Learn When You Do The Math…

The past few months have uncovered several new recipes that rely on baker’s ammonia, including a few that feature a crisp, crackery texture achieved through the use of an antique leavening agent called baker’s ammonia a/k/a hartshorn. See, e.g., Norwegian Pretzel Cookies (Kringla), Greek Olive Oil Cookies (Ladokouloura), and Lebanese Anise (Yansoon) Cookies. So we were kind of excited to try this one, which promised to be a more classic European version.

The Mediterranean recipes both start with oil. The older versions of this recipe start with lard or shortening. Seems like an obvious connection, right? The only unusual thing was the math. All the classic Ammonia a/k/a Hartshorn Cookie recipes ended up with a really odd amount of fat when normalized to a reasonable amount of flour. A bit more than three tablespoons. At the same time, the flour measurements got weird if we tried to normalize things from the fat or sugar point of view.

Version 1.0

I decided to plan out my first test recipe by weight since the numbers weren’t that far off. 100 grams of lard, 100 grams of sugar, and 250 grams of flour. 1 to 1 to 2½, spread over two baking sheets. The result? Extraordinarily thin crackers that tasted like a cookie, but with a very distinct flavor from the fat. They were also a little greasy.

NOTE FROM KATE: They were a fun kind of greasy! Sometimes, using an animal fat you already have saved from a roast can give this kind of a cookie a very interesting character. Flaky tenderness and a hint of other flavors add to the gustatory experience. I like knowing that you’re eating a natural product and not a highly processed shortening. Scott will disparage that from time to time as “virtue points,” but they matter to me.

Fair enough. 250 grams of flour equals 1¾ cups of flour. The next batch would increase the flour to an even two cups. That would take care of the greasiness. The sugar level was about right. But what about that very lard-heavy flavor? What could I do for people who prefer something less distinctive and more common? Shortening, yes… but the flavor wasn’t loud enough to do with a totally neutral fat. So why not clarified butter?

How much butter would I need? Butter is about 16-18% water… Assume that’s been cooked that off, and account for a little more weight from the milk solids… And you end up with…

Son. Of. A. [cough]! You end up with exactly 4 ounces, dead on the nose. And what is 4 ounces? Exactly one standard stick of butter, or and even ½ cup.

And was I wasting effort and cleaning time by assuming the recipe called for two baking sheets? I had carefully rotated the pans midway through because thin dough and high heat are a bad combination. But even so we ended up with one tray browned more on the top, and the other tray more on the bottom. Annoying. And there was an awful lot of room around the dough on each tray, so…

Version 2.0

(A) Clarified butter instead of lard. (B) A little more flour. (C) Roll it all out to fit on a single sheet pan, and see if it’s still thin enough to be a “cracker.” (D) Adjust the cooking time to account for the extra thickness, and having only one pan in the oven.

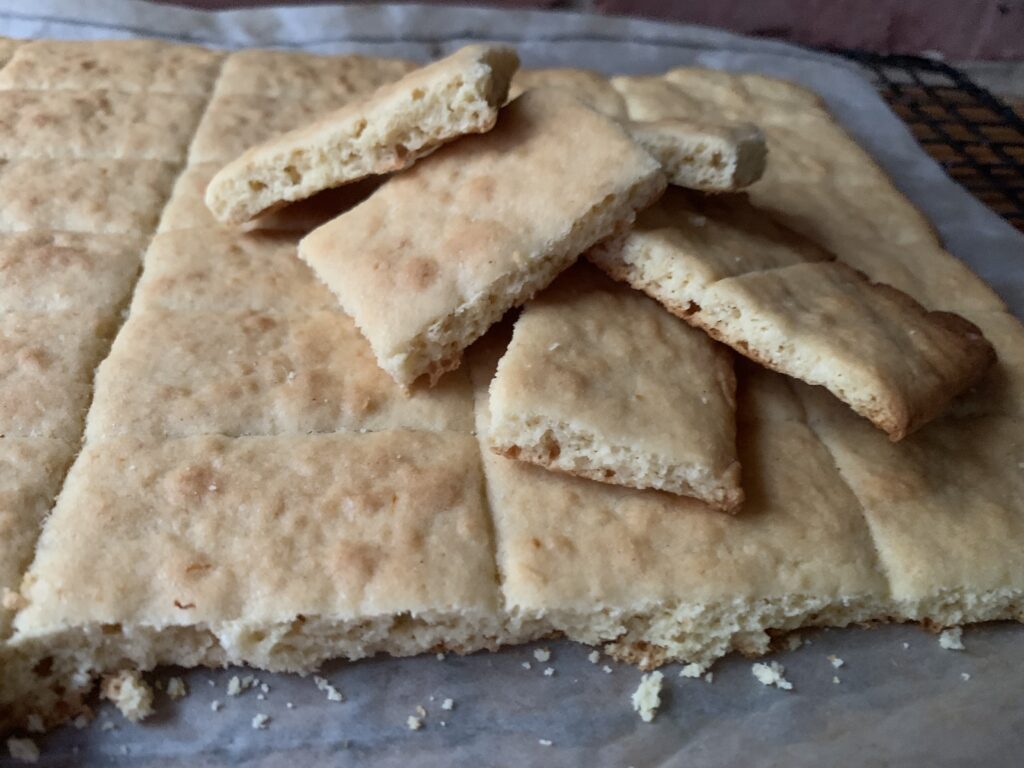
This is how they come out of the oven. See the uneven break by the bottom right? That’s what happens if you merely cut the lines without giving the wheel/blade a little wiggle to add an extra hint of separation.

This experiment told us (almost) everything we needed to know.

  1. I had the proportions nailed. The dough was easy to make, easy to handle, and just plain worked.
  2. This amount of dough rolls out thin – something on the order of ⅛” when all is said and done – but that’s still a big difference from “roll until you can roll no more.” The final result ended up being just under 3/16“, which definitely gave more of a cookie vibe than a cracker.
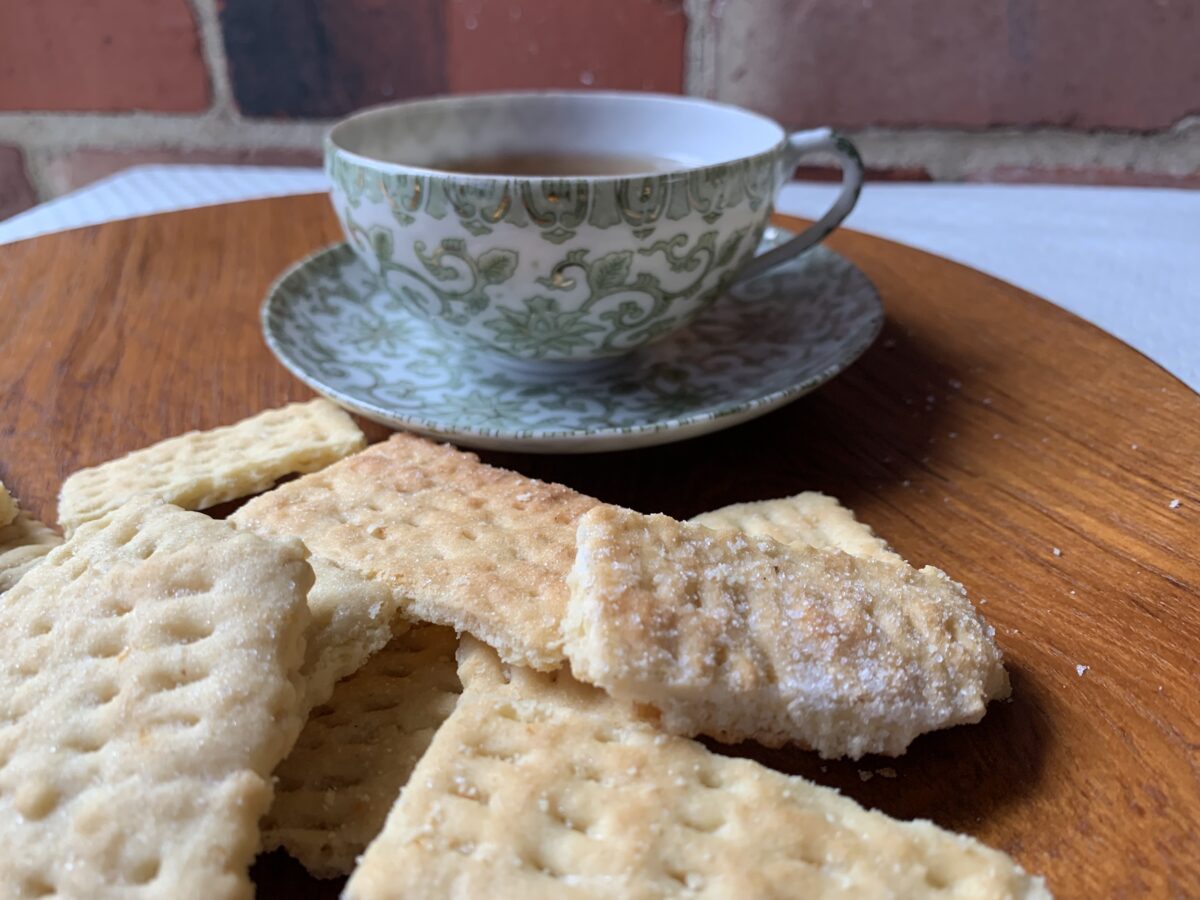
  3. The flavor changed radically. Lard notes versus butter notes were extremely clear when we tasted them side by side.
  4. The butter version does indeed taste standard. Just like a sugar cookie. But is there anything easier to vary than a sugar cookie? Tea, chai, cinnamon, other spices, herbs… This is clearly a cookie that bakers can play with to an all but infinite extent.
  5. Those darned lines aren’t always clean enough when the cookie comes out of the oven.
    Thick indeed! These come off as more “cookie” than “cracker.” Note how the lack of docking adds to that.

This cookie was, quite honestly, good enough to publish. But we weren’t done just yet! Could we customize this into a true illusion cookie with a taste that would complement a cookie tray instead of just fitting right in with so many other tastealikes?

Digression: Revisiting The Ratio Of Ingredients

Remember how odd the ingredient list seemed at the start of this project? And how the fat didn’t work out evenly until we figured out that it equaled a 4 oz. stick of butter that’s been clarified? But the overall ratios still didn’t work out to even numbers by weight, as experience taught they should in such an old recipe?

But now, with some extra flour and a more limited amount of fat… Aha! These changes created something very close to a 1:1:3 ratio of fat:sugar:flour. Gotcha!

Version 3.0 (see below) established our preference for a little less in the way of both fat and sugar, and that is what the recipe now says, but we have no doubt how Grandma taught the recipe by that ratio back in the day.

Version 3.0

  • Use the 1:1:3 ratio of ingredients;
  • Add some bacon fat in place of butter (we ended up with 2 tablespoons after I rendered four slices in a pan);
  • Roll out two trays as thin as possible, and only bake one at a time;
  • Dock the dough to make the final product look more like a saltine; and
  • Move some of the sugar from the inside to a sprinkling on top that would mimic the salt on an actual cracker.

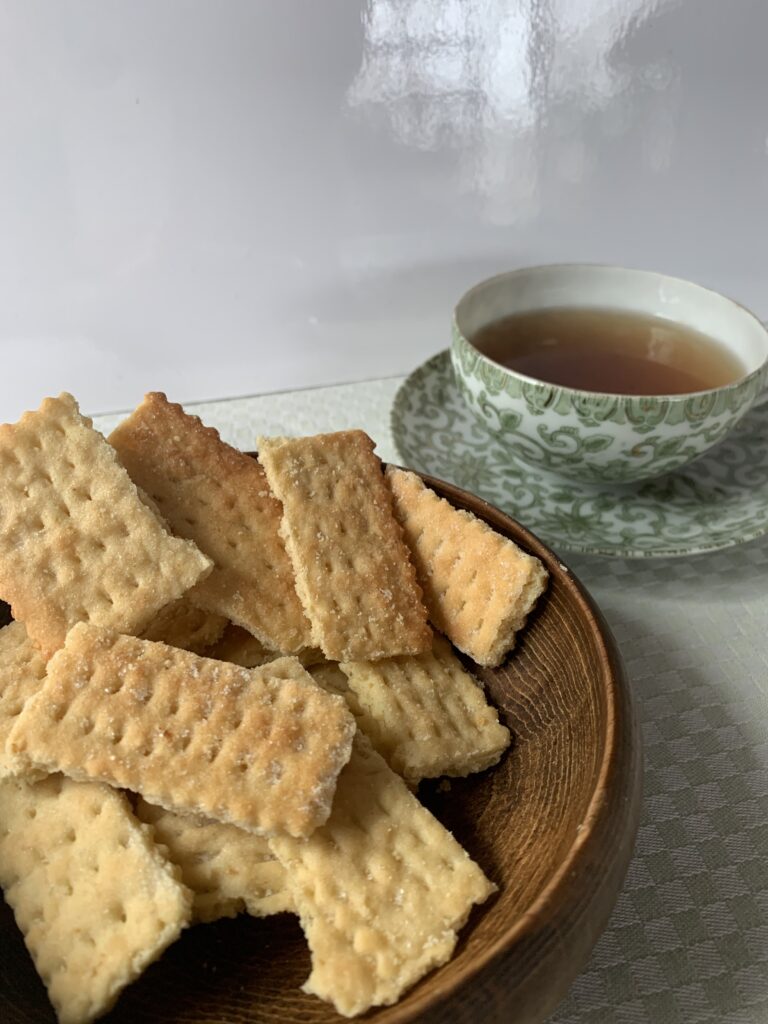
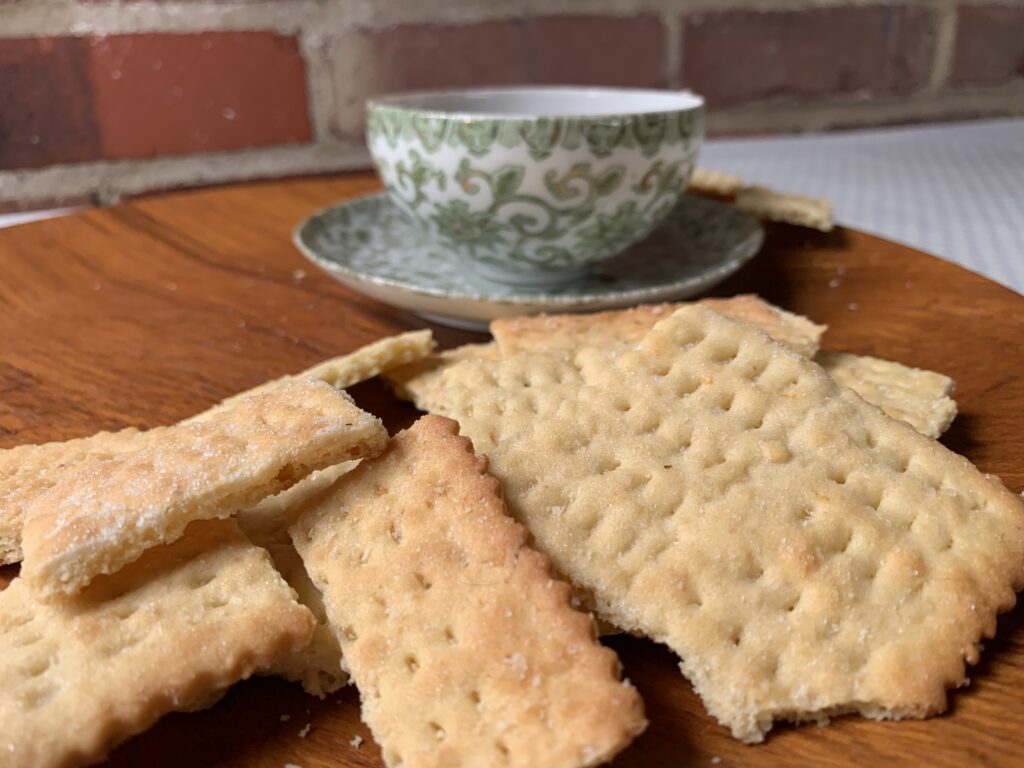
The result? Have a look!

[Shakes head]. I don’t know how I missed it, but this is a marvelous illusion cookie. It actually fooled our real life daughter when she stopped in to visit! That docking made a much bigger difference than I ever imagined.

We could taste the bacon, but only because we knew it was there. The bacon also added a healthy hit of extra salt that we both enjoyed – enough to bump the basic salt level in the recipe up from ¼ to ½ teaspoon (though we might revert to the reduced amount if we work with salty bacon fat again). I even enjoyed sprinkling the tops with a little bit of extra salt to enhance the effect. It now appears as an option in the recipe. Here, among friends, I will admit to recommending that option because it makes the cookie taste more distinctive. But that’s taste, not tradition.

IMPORTANT NOTE: We also learned, to our chagrin, that simply marking the lines with a fluted wheel isn’t enough. We lost several “crackers” because they baked together too firmly, and wouldn’t snap along the lines. Even more than we did with the thick cookie (see photo above).

LESSON LEARNED: Don’t just mark those lines; mark them clearly and emphatically, with a little wiggle of the wheel or blade to be on the safe side. You need the pieces to bake together in order to have that crackerish center show, but you also need the separations clean enough to be sure they will break evenly.

The only other adjustments came down to fine tuning the ratio. Hark! Can you hear your great-great Grandma speaking from the beyond? “It’s a simple ratio dear. Three parts flour, to one part sugar, and one part lard. But here’s the secret… They taste even better if you take back a spoonful of the sugar and fat.”

Grandma is great. Grandma is wise. Listen to your great-great Grandma.

Conclusion

This is one of those cookies where we started out thinking “A,” only to discover it was really a “B.” This is not one of those cracker-crisp Mediterranean tea cookies. It’s more like a good, cracker-crisp sugar cookie designed to create a convincing, extremely snackable illusion.

NOTE FROM KATE: Be careful with these – they are quite more-ish! The texture is a lot of fun. You will easily snack on five cookies when you would’ve said a “no, thank you” to a similar cookie in its one-piece form.

Here’s a summary of the lessons learned:

  1. The dough follows a 1:1:3 ratio of fat to sugar to flour, with a spoonful taken back from the first two.
  2. The cookie changes in wonderful ways if you mix and match different fats in place of the clarified butter. We tried them with lard alone, butter alone, and butter mixed with bacon fat. The last was the best, partly because we liked the extra salt.
  3. The illusion part matters, so roll the dough out super thin, take the time to dock them with a fork, and sprinkle on a bit of sugar to fully recreate the saltine look. Sprinkling on some kosher salt will also help the illusion, and has the side effect of making the cookie taste more distinctive.
  4. Maintain an even thickness. Smeared edges cook faster than rolled centers.
  5. Mark the dividing lines emphatically, with a little wiggle of the wheel/blade to add some room. The helps the “crackers” to separate cleanly.
  6. Just don’t separate them too much, because those broken-open sides show off the crackerish interior, which is both pretty and useful for the illusion.
  7. Bake only one tray at a time, and spin the tray just after the estimated halfway point. Two trays won’t cook evenly, and oven hot spots really show.
  8. The bake is done when the top turns cracker-tan brown. Go by that, not the designated baking time.
  9. Hartshorn is mandatory. Baking soda/powder yield a standard cookie texture.

All in all? A very successful experiment, and a cookie we will gladly add to the repertoire. Especially if we want something more on the snackable side than a proper dessert, or there’s someone coming over who’d be fun to fool…

Enjoy!

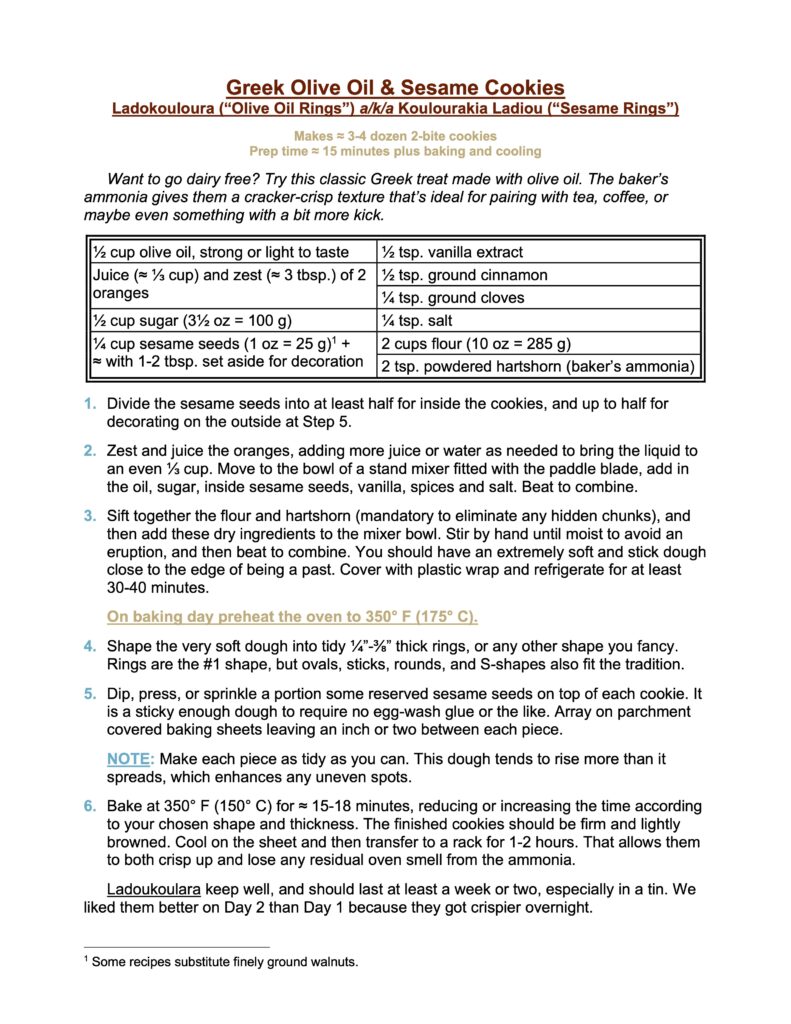
LADOKOULOURA, Greek Olive Oil Cookies

A crisp sesame-orange tea cookie made with olive oil and baker’s ammonia

Click here if you only want the recipe without the lessons we learned

Our Last Minute Discovery of Hartshorn Cookies

A funny thing happened on the way to Heritage Cookies Volume 1. The closer I got to the deadline, the more must-have cookies showed up to thrust their way into view. Typical, right?

Kate and I recently agreed that Volume 2 will come out sometime in 2024. And sure enough, a whole new set of cookies jumped onto the radar – much loved, irresistible, heritage recipes that rely on hartshorn a/k/a baker’s ammonia because baking powder and baking soda simply can’t duplicate its unique properties.

NOTE FROM KATE: At this rate, we will need to put our project management hats on and simply leave other cookies for later. As in, “There might be a slim pamphlet called Heritage Cookie Crumbs, or something equally silly! It’s true, though. As soon as you think you’re done with a project, new opportunities start to push their way through the door!

Northern Europe offered up two incredible Christmas treats, and two amazing illusion cookies: Swedish Drömmar and Polish Ammoniaczki (a/k/a “Vanilla Puffs”) taste as good as any other holiday cookies you know, but have textures that won’t resemble anything else on your tray. Kringla (Norwegian Pretzel Cookies) and Lemon Ammonia Crackers are simply spectacular. The first tastes like a super-crunchy ladyfinger but looks exactly like a salted pretzel. Go have a look if you don’t believe me. The “crackers” taste more like a standard sugar cookie, but their illusion is so good that a visiting daughter got legitimately fooled. She grabbed a few “saltines” to snack on, and got a surprise I will hold over her head for the next several years.

[NOTE FROM KATE: The same daughter then absconded with a large handful for her drive to see the cousins in Maryland, and to try and fool them in the exact same way. She can deny it all she wants, but we are the ones writing the history here.]

What a trove!

I discovered just as many unique recipes from the Mediterranean nations. There’s Croatian Cvite (Flowers), an illusion cookie we haven’t tested yet. There’s at least a pair of honeycentric biscuits out of Italy. Another from Spain. And then come the most common of them all: crispy, crackery “tea cookies” with powerful flavors offset against enough leavening to keep them airy and light. [NOTE: That’s “Tea,” as in actual tea, or coffee, or maybe something a little stronger.]

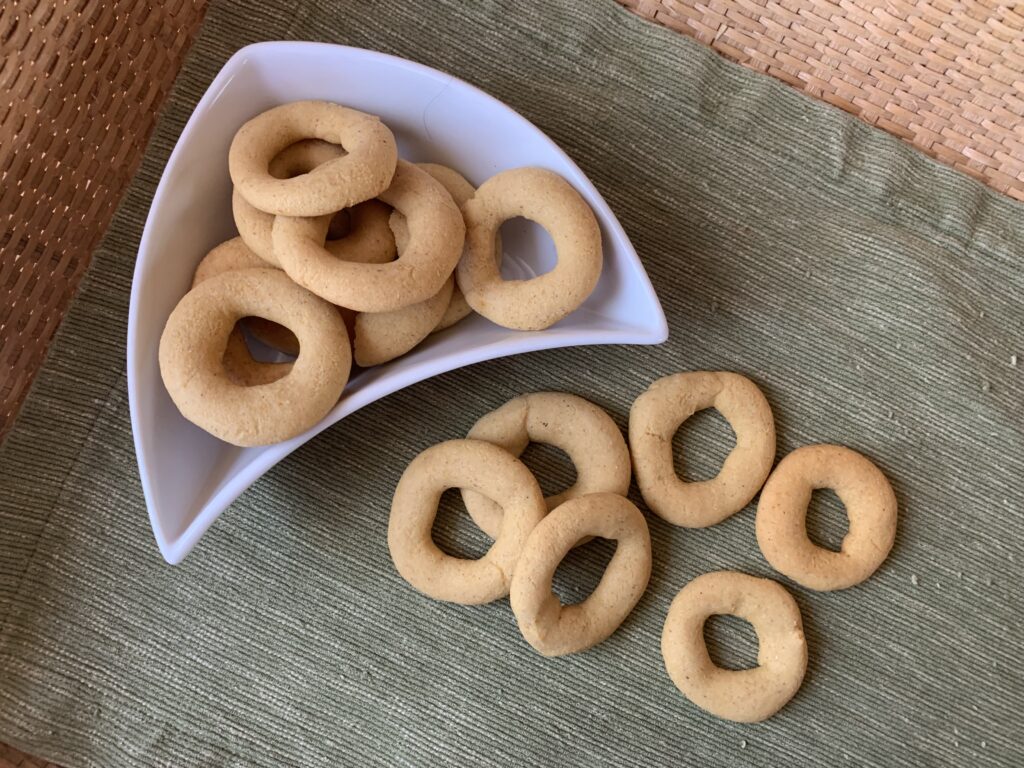
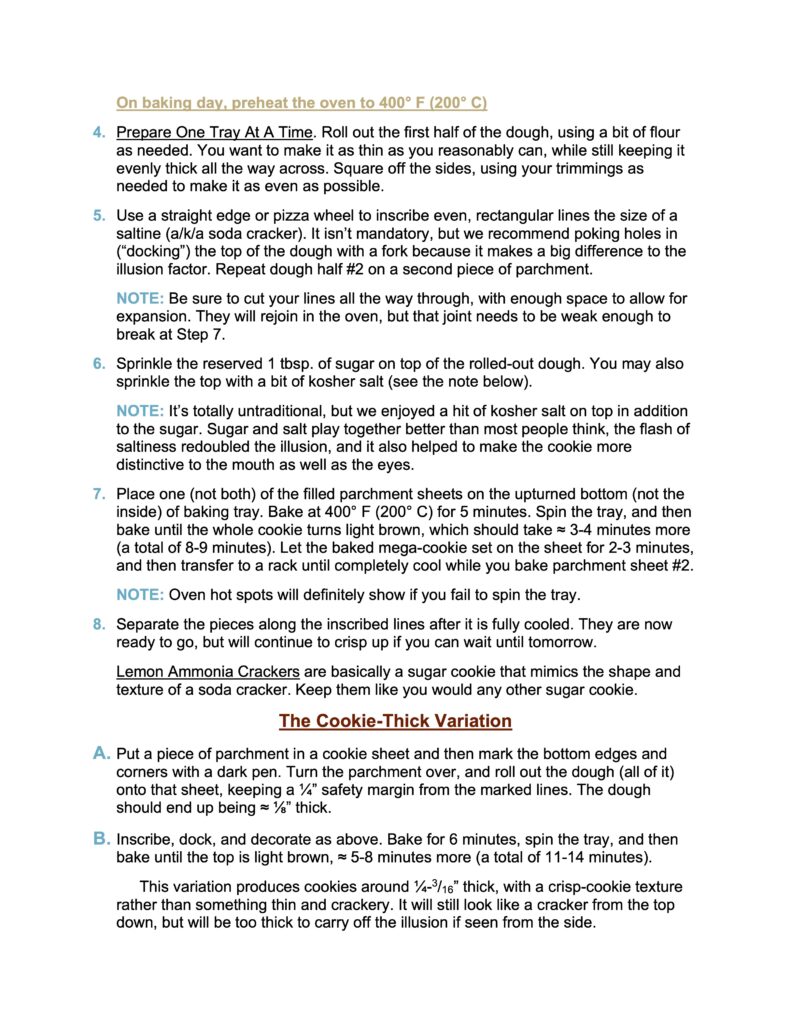
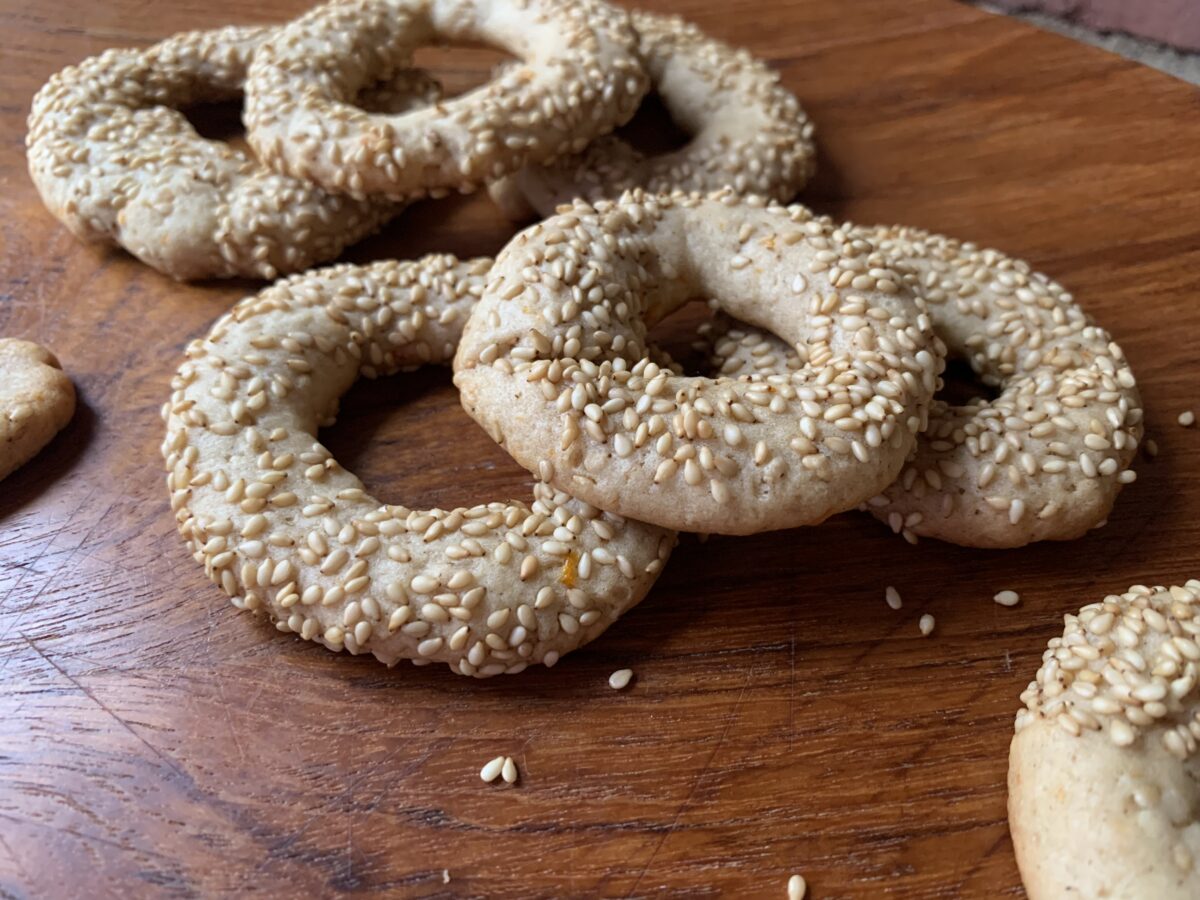
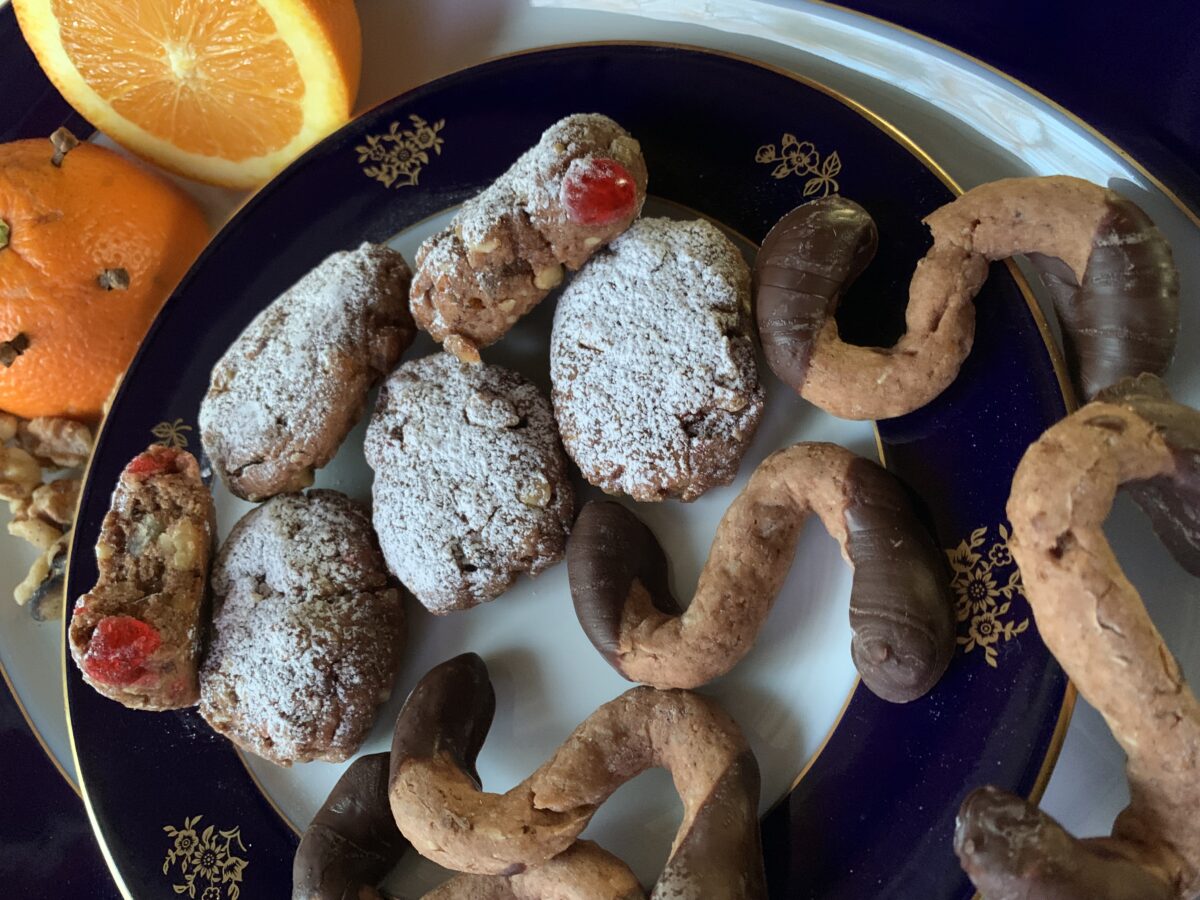
This is the Greek version, known interchangeably as Ladokouloura (“Olive Oil Rings”) and Koulourakia Ladiou (“Sesame Rings”). The names pretty much say it all. The main flavors are good olive oil (adjust the strength to your taste and tolerance), sesame seeds, and a solid hit of orange. Highlights come from delicate amounts of cinnamon and clove. A matching version, Lebanese Anise (Yansoon) Cookies, should be up in the next few weeks.

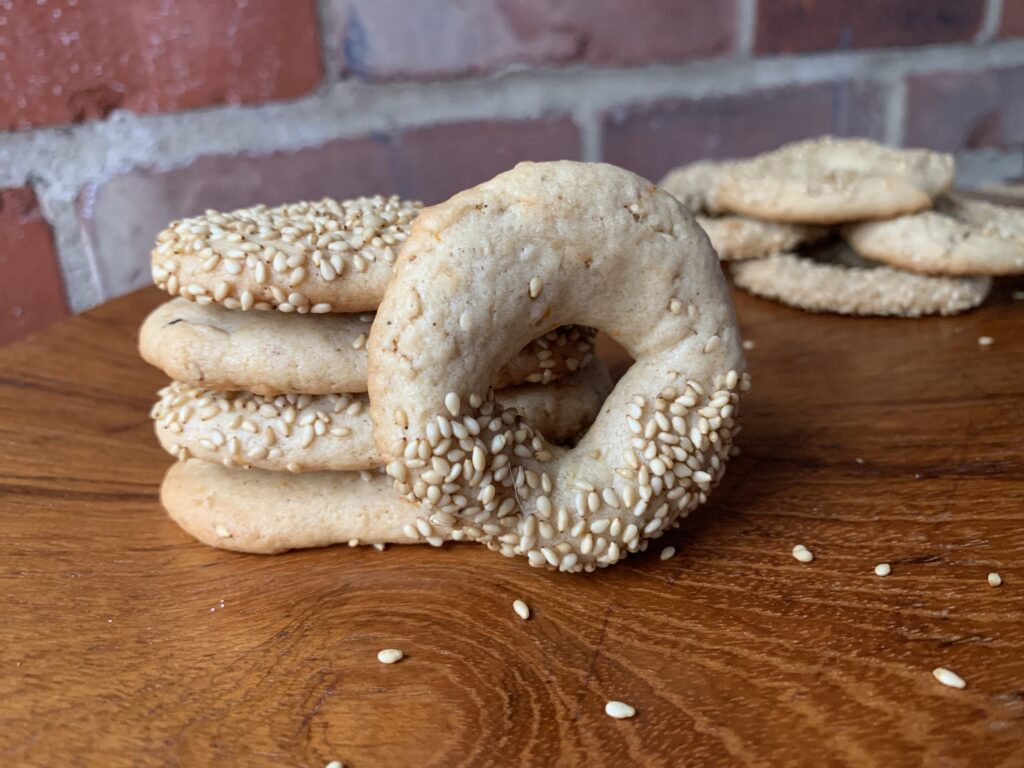
The rings on the right are the most classic form, but other shapes are almost as common.

NOTE FROM KATE: Back in Czechoslovakia when I was in elementary school, I used to walk instead of taking the bus and I saved my transportation allowance for various treats. Orange-oil scented tea biscuits were one of my favorites. Some of these cookies are the closest home-baked thing I have found to date.

Yes, You Must Use Hartshorn

The essence of these cookies lies in how they feel between your teeth: an extremely light center, a crispy crust, and a crunchy texture that baking soda and -powder simply can’t produce. The modern products make a cookie that tastes the same on your tongue. They’re nice. But you won’t “get it” until you taste them made with baker’s ammonia. The feel between your teeth is night and day.

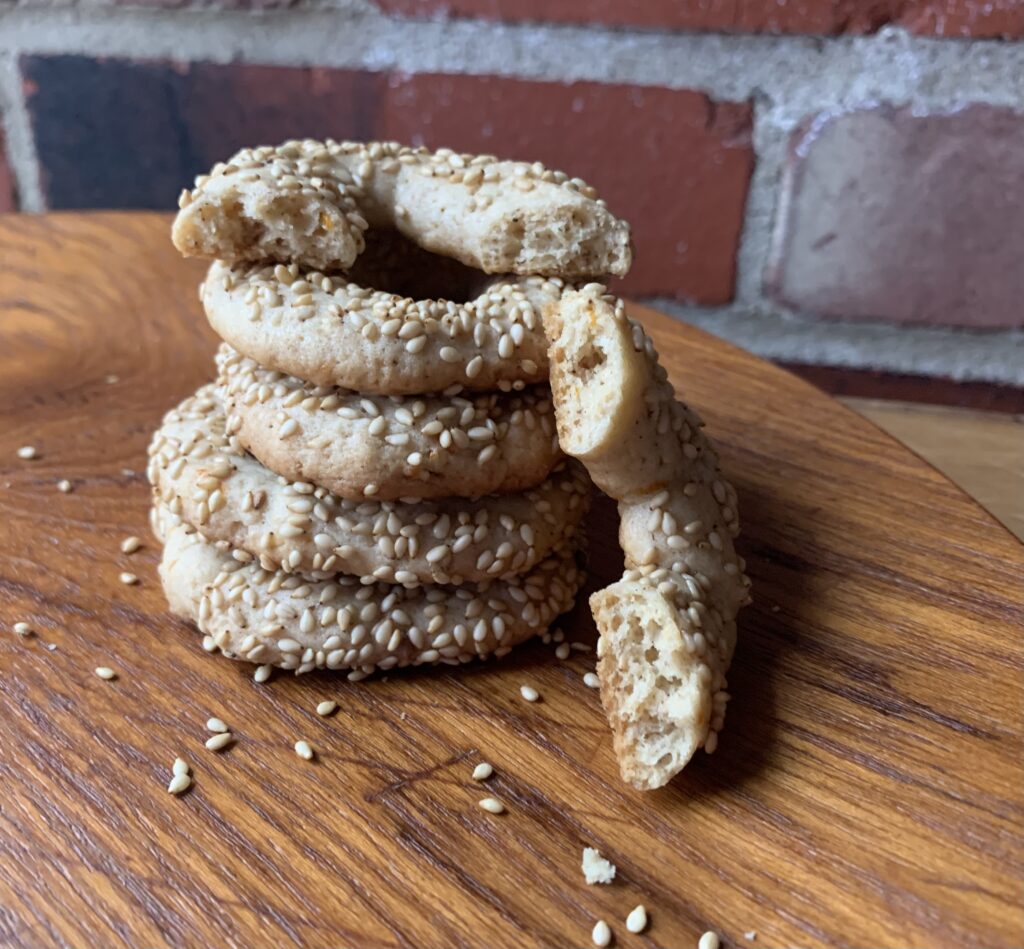
See that crisp, honeycomb core? That’s from the hartshorn.

Lessons In The Baking

Happily, we know several families of first generation immigrants who have been happy to help us with testing Greek cookies. It took only three bakes to get these nailed.

The first one earned raised eyebrows for the exceptional flavor. People really liked the fresh orange notes compared to commercial versions. It only lacked in the texture department.

For version #2 I increased the amount of hartshorn by 50%, and then decided to gild the lily by rolling them in sesame seeds to imitate the ones we were shown in the market. This batch had the right texture, and they looked amazing, but those extra sesame seeds dominated the flavor.

In batch #3 we kept the same level of hartshorn powder, but decided to decorate with some of the sesame seeds originally used inside the cookie. These were perfect according to all our native testers. Or to give a more accurate quote, “Crunch, crunch, mmmmm. Oh my yes.”

NOTE FROM KATE: I love sesame, just love it! To my surprise, however, I found that rolling the entire cookie in sesame went a bit too far. The seedy texture got in the way of the added flavors. For that reason, I tried dipping only the top part (which worked,) on only half of the top part (which produces an interesting effect in itself. Suit yourself – your sesame level is a matter of preference just as the level of orange and clove.

A Final Note On The Olive Oil

Kate loves the taste of olives. I, emphatically, do not. Thus we decided from the very beginning to split the oil 50/50 between powerful extra virgin oil of the sort used in salad dressings, and “light” olive oil of the sort that’s used in cooking.

That turned out to be a very wise choice because it fell exactly at the median opinion. But – BUT – I need to stress that almost everyone fell outside of this middle ground in one direction or the other. Olive aficionados loved the “little hint” of flavor, but would have preferred a little more. Olive doubters could have done without the “vaguely unpleasant note,” but agreed that it wasn’t strong enough to get in the way.

Which camp do you and yours fall into? As some old Greek dude once said, “To know thyself is the first step on the path to wisdom.” It’s pretty good advice for Ladokouloura as well. Though I cannot recommend following that gentleman’s advice for tea to drink alongside… [NOTE: That’s an inside joke for my fellow philosophy and history buffs. If you get it, you win.]

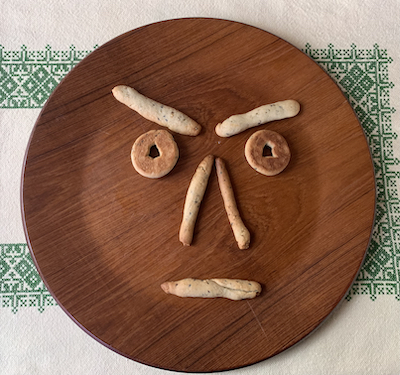
A PHOTOGRAPHY NOTE FROM KATE: This cookie caused me both humor and frustration. The combination of round cookies and the flat ones that look like rectangular teeth had me seeing faces in too many compositions – and once you start seeing faces, you can’t unsee them! I even tried to go with it and made a bunch of goofy, googly-eyed plates. If eating sentient food bothers you, I suggest you bake either circles or rectangles, but not both!

Conclusion

You simply cannot travel through the Greece or any of its neighbors without running into tray after tray of Ladokouloura. They are as ubiquitous as they are loved, which makes them as genuine a Heritage Cookie as anything else we have ever baked.

This is your puppy if you want a true taste of Athens, Santorini, or any of the lands that consider Greece to be a neighbor.

Enjoy!

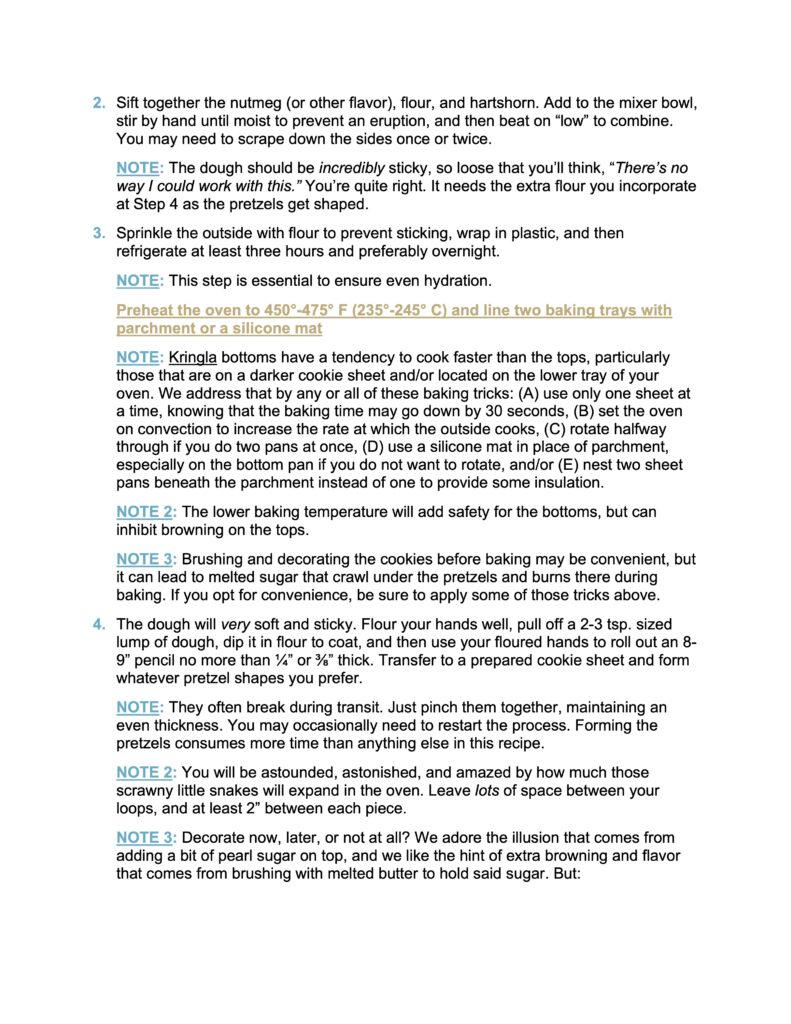
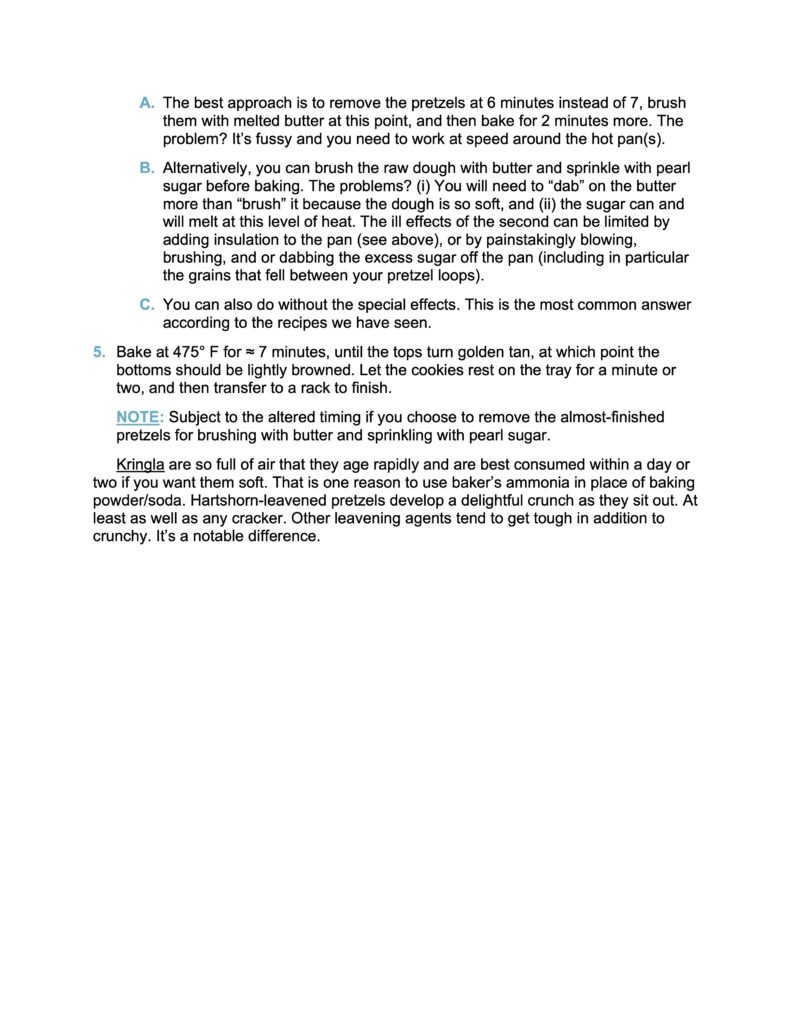
KRINGLA, Scandinavian Holiday Pretzel Cookies

Yummy and unique.

Happy New Year to all! This will be a relatively short article because all the tips and tricks were so important they’ve ended up in the recipe itself. Twenty of them! More or less. There isn’t a lot for me to add.

NOTE FROM KATE: This would be an absolutely wicked technical bake if they ever appear in the Great British Baking Show a/k/a Bakeoff! With their even, delightfully puffed-up loops toasted golden and their intriguing crunch, they are well worth the learning curve.

Here’s the bottom line: Kringla look exactly like a salted pretzel and have soft middles right after baking. From Day 2 on, they turn into an extremely light, ultra-crisp, crunchy sugar “cookie” with moderate sweetness and an innocent flavor that no one can dislike.

Yes, Hartshorn Makes A Difference

Kringle sorta-kinda work with baking powder or soda, but they turn into something special when you use baker’s ammonia a/k/a hartshorn instead. The texture changes from (A) absurdly puffy when fresh and a little tough as they age, into (B) puffy with a pleasant, crispy crust when fresh and wonderfully crunchy as they age. See this article for the underlying reasons. We can’t say they aren’t worth making if you use the more common leavening agents. The illusion still works, and there’s nothing wrong with the flavor. But they will definitely be better if you make them with hartshorn.

Shaping Pretzels Is A P.I.T.A. – If You Are Me

Kate had almost no problems, because she’s an artist with a good 3-D imagination. I end up staring at the darned things and trying to remember, “Was it one twist or two? And then the ends go where…?”

It’s all covered in the recipe itself, but aside from native talent (or lack thereof), the shaping hurdles are all pretty basic and built into the nature of the cookie:

  • It’s a very soft and sticky dough. But everything will work out fine if you roll each piece in flour before forming, and work with floured fingers.
  • Move the rolled out “snakes” onto your parchment before turning them into pretzel shapes. They’re so soft that scooping and moving will inevitably distort your work.
  • Use very skinny “snakes” and leave a huge amount of room in the loops – enough that they look sort of scrawny and pathetic before they hit the oven. Kringla expand by at least 400% percent as they bake, meaning each of those little arms will end up being four times (4x) as thick by the time they are done. Rest assured: all that empty space will vanish.
  • Keep the pretzels far apart on the trays for the same reason.

NOTE FROM KATE: If you’ve never made a pretzel, I recommend practicing with a piece of thick twine or shoe string. You will want to make a single shape while using up the entire length of 8- 10″. Try various shapes, and try to join the rope under an existing loop. If you can’t, pinch the dough together so that it’s the same thickness everywhere (Thinner portions will darken too much.) The final product is as solid as the dough is fussy. This dough would be suitable for making hearts, flowers, linear animal shapes, or whatever else you fancy.

The Final Touch Decorations Are Easy, But Have Some Sneaky Hazards

Kringla taste perfectly fine. They are friendly, inoffensive, mildly sweet, and basically pleasant to one and all. For a stronger impression, add more freshly ground nutmeg or cardamom. For an even safer flavor, add some extra lemon zest. Either way, this cookie isn’t really about the flavor. It’s the shape that makes them special. The shape, and the illusion of being a salted pretzel instead of a sweet treat.

NOTE FROM KATE: I could be wrong on this, but I perceive hartshorn-leavened cookies as less flavorful than their baking soda/baking powder equivalents. So far we aren’t sure whether it’s just me, or because the extra puff essentially dilutes the spice level per bite. Adjust spice level as you see fit.

That salted pretzel illusion comes from brushing the pretzels with melted butter and then sprinkling the tops with pearl sugar to imitate the salt. The recipe goes over it all in detail, but that process has two basic challenges to overcome. (A) The dough is so soft that brushing it with melted butter can distort those shapes you just spent so much work on; and (B), the oven temperature is hot enough to melt any loose sugar crystals, which can lead to black caramel tainting the bottom of your cookies.

You can fix both problems by baking the pretzels until they are almost done, pulling them out of the oven to be decorated, and then returning them to the oven to finish. That, alas, is both fussy and time consuming. Thus it makes sense to brush and decorate before baking… which means you need to compensate for those two problems.

There is no concrete, surefire answer. It’s just one of those things you need to know about, and do what you can to prevent. See the recipe for various tips, tricks, and hacks you might want to use.

The Pretzel Bottoms Try To Get Out Of Control

Start with an extremely light dough, rolled very thin, and heavily leavened so it will expand by four or even five times in the oven. Add in a very hot oven to brown the top and provide extra crispness to the crust.

What do you get? A cookie that can easily burn on the bottom before the tops are done, even without factoring in any caramel from melted sugar.

Knowing the problem gets you about 50% of the way toward fixing it. Again, please consult the recipe for our tips, tricks, and hacks to forestall that. But I may as well close this article by listing them here as well, because several are very clever if I do say so myself:

  • You can bake one sheet at a time, on a middle or upper rack of the oven. Oven heat comes from the bottom and collects toward the top, so this will make sure you have consistent air flow while maximizing the heat around your crust rather than on your bottoms. Just remember that one sheet in the oven tends to cook faster than two.
  • You can use the convection setting on your oven to achieve the same effect. Just remember to turn the oven down by 25° F (about 15° C).
  • If you use two pans, remember to rotate them halfway through. Bottom to top, while also spinning them back to front.
  • You can insulate the cookie bottoms by using a silicone mat instead of parchment paper.
  • You can also insulate the bottoms by using a doubled baking tray.

NOTE FROM KATE: We have a convection oven but we seldom turn the fan on because all our Volume 1 recipes started out in a previous one. Keeping a traditional oven setting helps us compare new recipes connected to our older bakes. If you use a convection oven, reduce the temperature by 25°F and keep an eye on your bake time. Every oven is different.

Conclusion

Please don’t let all the nits and notes discourage you from trying this fun and culturally important little cookie. Yes there are hurdles, but they’re more in the nature of “heads up” warnings about pitfalls to be avoided. They aren’t actual barriers, let alone walls, and the rewards are more than worth the effort. Kringla are fun! Just look at them:

Enjoy!

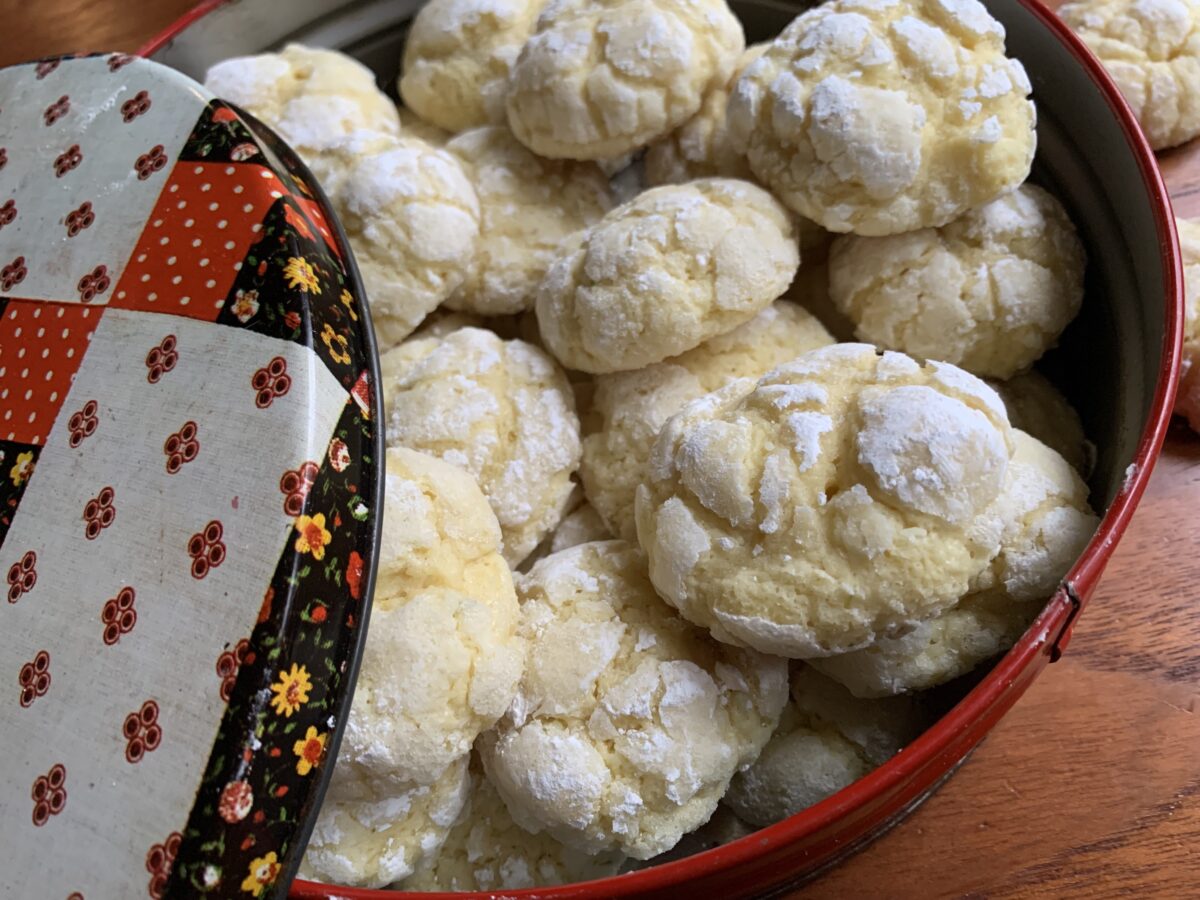
LEMON & EXTRA-LEMON CRINKLE COOKIES, Two Pretty Ways To Do Citrus

Crunchy and soft, with either a white crinkle crust or a tart and lemony crust. Options!

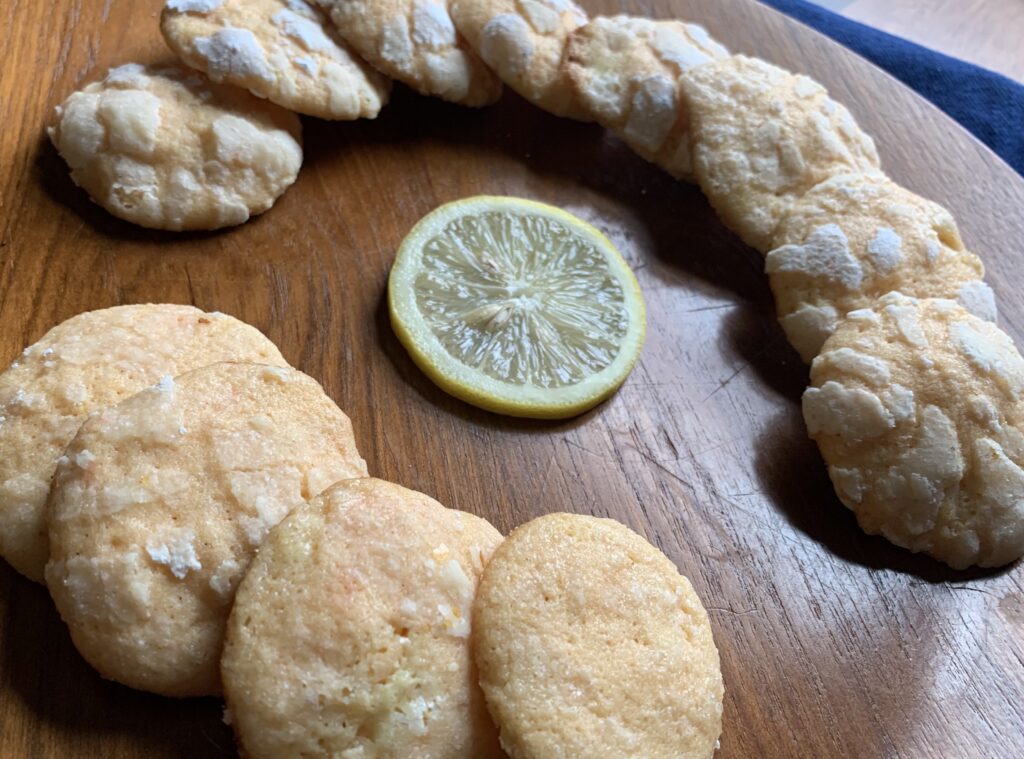
Do you like citrus cookies? If so, read on because we spent a massive amount of time trying a few tricks designed to enhance the lemon intensity. So much so that we ended up with four different recipes! Two for texture, each of which can be tailored for beauty or taste.

“Citrus Flavor” Usually Requires An Icing

Here’s an unpleasant fact about baking lemon, lime, and orange cookies: you can fill the dough with the gentle, round notes by stuffing it full of grated zest, and then fill them out by adding in some oil or extract. But you can’t get those lovely, sharp high notes without some kind of icing or other coating that’s full of fresh juice (or a trick as described below). Bright citrus flavors come from the acid in that juice, and that acid dims to nothing on the inside of a dough. Omit the coating and your cookie won’t – can’t – taste “lemony,” “limey,” or “orangey” any more than an yellow, green, or orange gummy bear really tastes like fruit.

In fact, gummy candies are a perfect way to make the point. The plain ones are nice enough, but they’re basically just sweet with some kind of flavor. The sour ones taste vastly more like actual fruit because that sour powder on the outside -usually citric acid – adds the missing high notes.

Heritage Cookies of the Old and New World (Volume 1) has a recipe for Lemon/Lime Sugar Cookies which has become all but mandatory in our annual holiday extravaganza. The cookie part is nice enough. It’s packed full of grated zest, and you can tell. But the magic part comes with the extra-tart icing that’s equally packed with fresh juice from the zested fruits.

But… does it really have to be an icing?

A Very Standard Recipe To Start

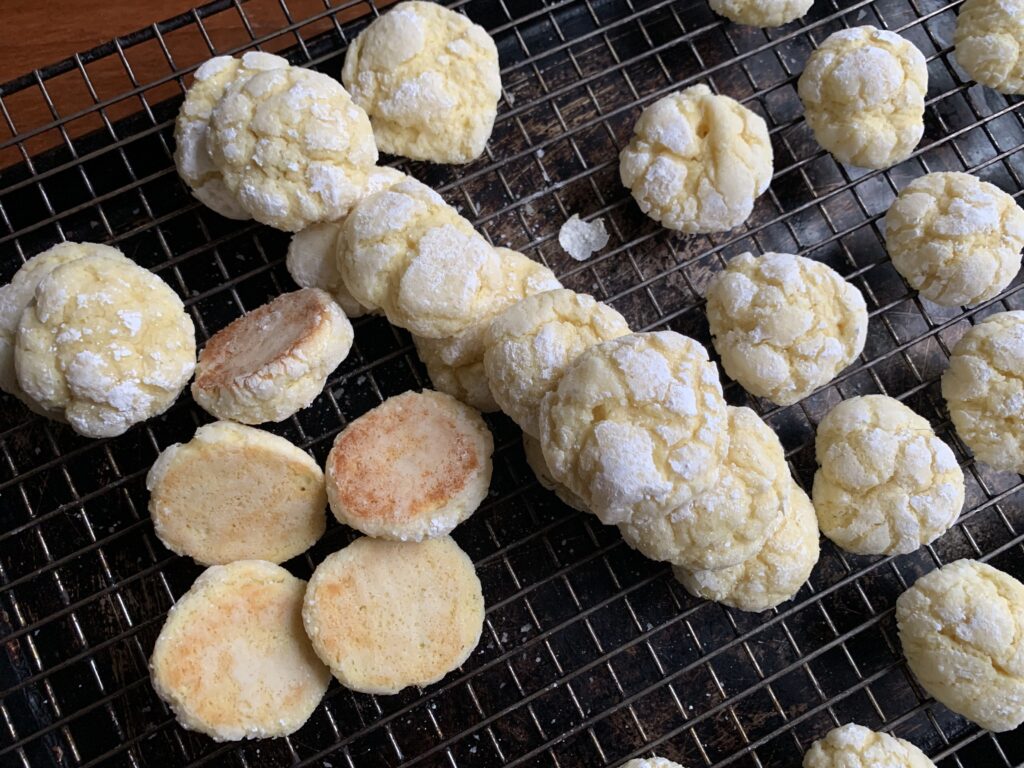
It took very little to develop a working recipe that would produce a nice crinkle effect. As you probably know already from Chocolate Crinkle Cookies, the magic trick is to (a) roll the balls of dough in granulated sugar, and then (b) roll them again in powdered sugar. The first layer insulates the second layer, which allows the cookie to expand in the oven leaving deep cracks of cookie-color surrounded by powdery white.

I initially wanted to make a lemon cookie that would imitate the ultra-gooey texture of Chocolate Crinkles, but that’s one I couldn’t figure out. The experiments did prove fruitful nevertheless, because we ended up with two variations for people to choose from. The first uses two sticks of butter and produces a fairly standard drop cookie texture with a gentle crunch. The second replaces one of those sticks of butter with an 8-ounce brick of cream cheese. These turn out soft and cakey on the inside. Not quite the ooey-gooey target, but in the same general arena.

The only hard part came from accepting the amount of yellow food dye required to make a sharp contrast between the cracks and the coating. We really wanted these to look startling and photogenic; a deep, lemony yellow that would really contrast against the bright white of the powdered sugar crust. Physics got in the way.

Are the cracks yellow? Yes. But it took a shocking amount of yellow dye to get there.

The dough is very yellow, especially with the added food dye. But it’s an inescapable fact that colors fade when you spread them out, and puffing cookies up to create a crackled exterior means the inside will end up dimmer, especially if you add in a bit of browning. C’est la vie.

Experiments With Powdered Vitamin C

We used to crush a Vitamin C pill or two in our mortar (uncoated, please) to boost the acid bite of some of our glazes. Now have one kilogram of powdered l-ascorbic acid (Vitamin C) in our pantry.

NOTE FROM KATE: My younger brother and I are both children of the Cold War. Back in Czechoslovakia, we learned how to use our personal gas masks in 1st grade, knew not to throw water on napalm by 6th grade, and shot our first AK-47 machine guns by 7th grade. Once our family came to America and the talk of intercontinental cruise missiles heated up the news, my brother made it his business to learn everything he could about nuclear disaster survival.

When the war in Ukraine broke out, he surprised me with a preventive care package which included, among other things, a 1 kilo package of granulated l-ascorbic acid, i.e. Vitamin C. (A lot of us former Easter European types got “triggered” by all this. When I told my Ukrainian friend over lunch, she offered some of her iodine pill stash without blinking an eye.) So: yes, you can buy powdered acids, and they will do wonders for your cookie and candy experiments!

Our experience with the need for an icing to enhance citrus flavors, together with my love of those sour gummy bears, provoked a genius idea: Since we need to roll the balls in sugar anyway, why not mix in some vitamin C at the same time?

[NOTE: We happened to have the powdered vitamin C handy, but it’s simple to make by grinding up some supplement tablets in a mortar and pestle.]

We tried it immediately, and it worked exactly as we’d hoped. The cookies had a brightly flavored crust that transformed them from “sweet and lemony” to “that tastes like good, tart lemonade!” Not a single one of that batch made it out of the house to our normal cadre of taste testers.

But there was a problem. I’d thought it would be easy to create the white-on-yellow crinkle crust, but these cookies showed now sign of it except for a few that had vague evidence of a pattern on top. [Sigh] So my wife was a flavor genius, while I was an incompetent boob. Par for the course.

I tweaked the recipe for batch #2. Same result. Grrr.

So I went back and researched every version I could find on the Internet, only to discover that every one was pretty darned close to my working recipe. The only difference? Others use a profligate amount of yellow food dye to make the crinkles stand out.

Okay, so batch #3 would include some food dye to enhance the contrast. Same result yet again, except the cookie was slightly yellower than the first two batches. Check. “It isn’t ‘some’ food dye, it’s an ‘are you kidding?!’ amount of food dye.”

Batch #4, I added the larger amount in, and added a single drop of red on the theory that it would help with the contrast. I can recommend this if you want a pink lemonade color, but learn from my disappointment if you’re after lemon-yellow. Oh yes… and there was next to no white left after baking even though I was now producing the exact level of surface crackling and fissuring we were aiming for. Aaaaaargh!

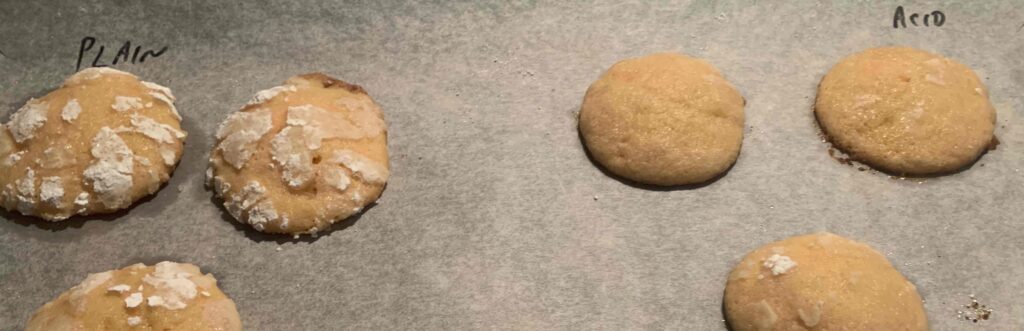
Only then did I begin to wonder if Kate’s beautiful flavor trick might be interfering with the whole crinkle creation process. We still had half of the batch #4 dough left, so I did a formal experiment: same baking sheet, but half with vitamin C in the sugar and half without. Behold!

This batch had a single drop of red food coloring along with 8(!) drops of yellow. You can see how big an effect it had.

Kate refused to believe it.

NOTE FROM KATE: Yep, I did. I kicked hard against leaving out our doomsday Vitamin-C ! With my chemistry background, I didn’t think there was enough time for the acid to mess with the leavening agents. The acid didn’t penetrate all the way through, after all. Oh, hubris! Oh, woe! Now I have egg on my face. (And a cookie in my mouth – these are seriously good!)

Scientific method to the rescue! I whipped up a half batch and repeated the experiment two more times. Yep. The plain half came out with deep crinkles every time, while the acidulated half had almost none.

Why? It’s obviously because… because… well, I’m not exactly sure. At this point I’ve done enough research to know that ascorbic acid will decay at oven temperatures, with two big leaps at 140° F (60° C) and at 170° F (77° C), and an even bigger leap as it passes 200° F (95° C). The degradation takes some time, which is why 10 minutes in the oven isn’t enough to destroy it completely. Thus the still-sour tang to the impregnated crust. Perhaps the byproducts are enough to wet the powdered sugar, and destroy it’s snowy whiteness? That’s my working theory, but it’s still no more than that.

The straight recipe (with that drop of red food dye) on top. Cookies with Vitamin C in the sugar crust underneath.

NOTE FROM KATE: I’d like to point out that despite being a lawyer, my beloved husband instinctively baked three test batches, with three comparison samples in each. That’s your standard Quality Control Protocol – any fewer and the result would lack statistical significance. He also varied only one variable at a time, so we’re golden. (Well, he is. He could have been an excellent engineer, too.)

Frustration set in until I changed my point of view. It wasn’t a flaw; it was a variation! Two cookies for the price of one. Or four if you look at it right! The first two, crunchy or cakey, will be targeted by everyone who grabs something pretty off the tray. Then you have the lemon-lover Versions #3 and #4, which will taste better to those who prefer to eat with their tongues rather than their eyes. Not that they’re ugly. Just plain when compared to the more lovely but shallower sister.

Opinions? Me? Never.

Enjoy!

Beautiful from tip to toe.

POLISH HARTSHORN COOKIES (“AMONIACZKI”), An Edible Hug

Hartshorn (baker’s ammonia) creates a crisp, sugary crust around a pillowy heart

Click here if you only want the recipe without the discussion

Hartshorn a/k/a baker’s ammonia a/k/a ammonium carbonate a/k/a smelling salts is an old frenemy we recently studied in more detail. This was the chemical leavening agent from antiquity through medieval times and on into the 19th century, when it got replaced in most recipes by baking soda and powder. Why? Because it’s also known as “smelling salts,” and smells so foul that you can’t even nibble on dough samples before they bake. Not that I would ever do such a thing, but rumor has reached my ears… [Ahem]. The smell disappears during baking, but still. Who wants a product like that in their pantry where a spill can make your cat box seem friendly?

NOTE FROM KATE: You will only taste-test this dough once. At which point you will also spit the dough into the sink and reach for a glass of water. Yuck! The baked cookies, though, are as lovely and welcoming as they are versatile. Even better, they hold a basic shape and provide a lily-white canvas for any decorating ambitions.

In today’s age hartshorn has become a specialty leavener. And yet it is still around because it produces a different kind of rise than baking soda/powder; a lighter, crispier, more even texture that’s essential to recipes like Springerle, Swedish Drömmar, fine-featured molded gingerbreads, and texture-first specialties like Hungarian Kvircedli and Ammonia Crackers. Hartshorn has its flaws, but the upside can be spectacular.

Enter this cookie: Polish Ammonia Cookies (“Ciasteczka Amoniaczki”), which I hereby rechristen as Vanilla Puffs to reflect the remarkable effect of their magic ingredient. Plus variations like Peppermint Puffs, Anise Puffs, Lemon Puffs, etc. “Puffs” being the key word because that’s the closest I can come to describing the texture: a shatteringly crisp, sugary crust around an inside so pillowy and puffy that they have a universal appeal. Most cookies will have a few, recalcitrant protesters who just don’t get it. Everybody likes Ammonia Cookies. They may only be your third-favorite on the tray, but I can 100% guarantee they’ll be gone at least as fast as the ones you would choose for yourself.

Try this cookie and you will never again wonder why serious bakers remain willing to put up with hartshorn’s challenges. The cost is worth the payoff.

The Dough is Rough-Puff Pastry (A Flaky Cookie) In Disguise!

Want a laugh? I went through the whole recipe testing process on these with the niggling feeling that I knew the recipe from somewhere, even though I’ve never made anything like it. The penny dropped around five minutes ago.

The niggling finally got bad enough for me to run back to Volume I for a scan of the ratio tables at the start of each chapter. And sure enough, there it was. The proportions of flour, butter, sour cream, and sugar are an all but perfect match to flaky cookies made from our Faux Puff Pastry recipe (a/k/a “rough puff”). The only real differences are the handling and the addition of a massive amount of hartshorn.

You make rough-puff dough by cutting butter into a combination of flour and a small amount of sugar, in order to achieve the “pebbly” texture of a piecrust with extra-large butter chunks. Then, instead of cutting it finer, as you would for that piecrust, you roll the dough out in a few “envelope turns” before finally rolling-and-cutting your cookie shapes. It’s a minor P.I.T.A., yes, but much easier than the major P.I.T.A. of traditional puff pastry.

This dough? Just cut the butter down to piecrust-texture in a food processor, include a generous amount of hartshorn, and presto! Something that tastes like puff pastry, and has a crispy outside, but has the pillowy interior you can only achieve with baker’s ammonia.

Peppermint trees. See the contrast of crispy crust to center puff?

The Sugar Crust

Stark white from the sugar crust, and just as good as they are pretty

There’s a pretty well established pattern for flaky cookies of all types:

  • Palmiers a/k/a Elephant Ears? Roll out some puff pastry (or other flaky-cookie dough), coat it generously with cinnamon sugar, roll it back into a tube like a jelly roll a/k/a roulade, and then slice-and-bake.
  • Dutch Krakelingen? Cut off strips of that same dough, roll in cinnamon sugar, and then shape them into pretzels before baking.
  • Rugelach? Do the jelly roll thing with a layer inside made from a fruit-and-nut filling, and then coat with cinnamon sugar before baking.
  • Goose Feet a/k/a “Gusine Tlapki”? Roll, sprinkle with spice-sugar (not necessarily cinnamon), and then cut out large circles which you fold into quarters.
  • Kolache? Roll, cut out squares, dab with fruit filling, fold up two corners, and then sprinkle with plain sugar.

Get it? Ammonia Cookies aren’t any different except you (a) can readily flavor the dough, and (b) can roll-and-cut any shape of cookie, and (c) should, not just can, coat the outside in sugar alone. The snowy, extra-crunchy outer crust is part of the experience.

We did test cinnamon sugar in case you’re wondering, and it works perfectly well, but it also standardizes the whole experience. Both Kate and I preferred these with sugar alone.

The Baking and Fumigation Times

The flaky cookies listed above typically bake at 350° F (175° C) for about 15 minutes, give or take according to thickness. Ammonia Cookies work a little better if you cook them at the same temperature for only 12-13 minutes. The shorter baking time helps to preserve that pillowy interior, whereas the flaky cookies want to emphasize their crispness.

The combination of a moist dough and a shorter baking time can cause a problem, however: a residual whiff of ammonia left over in the baked cookies, even after they cool. It usually isn’t all that strong, and it only happens about 75% of the time, but that’s still an issue you need to keep in mind.

The solution couldn’t be easier. Leave the baked cookies out for an hour or two. That should be all it takes for the dissolved ammonia gas to dissipate into the air. If they were really bad? Still simple. Wait a little longer.

Hartshorn giveth, and hartshorn taketh away.

The Cut Outs

Ammonia cookies work with almost any basic shape, but expand too much for anything with features. I tested stars, hearts, circles, a mushroom shape, fluted ovals, snowmen, and a Christmas ornament shape. Everything worked except the ornaments, snowman, and the fluted ovals. Those could still be recognized by someone who knew what they were supposed to be, but they lost the outside details that make them more than just shapes.

Anise hearts and peppermint trees. “High note” flavors show particularly well in this cookie.

Feel Free To Customize!

Do some research on cookies made with hartshorn and these basic proportions. You will quickly find several much loved variations. These include:

  • Peppermint Ammonia Cookies (add in peppermint oil), which are very popular in the American Midwest, and generally attributed to German immigrants;
  • Anise Ammonia Cookies (add in anise oil), same thing with what seems to be inspiration as much as tradition;
  • Ginger Ammonia Cookies (add in a generous amount of dried ginger), with some optional extras for those who want to try a popular Slovak variation.

We tested all of the above, and they all worked just as well as the standard vanilla version. I’ve no reason to believe other spices wouldn’t be just as good. These may be my new favorite when it comes to featuring one particular flavor.

FWIW, our 2024 Christmas tray is going to include the Peppermint version because we have nothing else even close to that flavor profile, and I may throw in a few vanilla ones too. Not that a spice version will find any protesters. Hmmm…

Can You Simply Put The Sugar In The Dough?

We tried it, and the answer is “Yes.” The cookie works fine. But we really like the showy, snowy white crust that comes from following the recipe, and it enhances that wonderful contrast between the inside and outside. The most I would actually recommend is the addition of something to show an inside flavor. Perhaps some anise seeds, or some bits of peppermint-green sugar.

Those flavored versions carry a significant odor, but who wants to eat the cookie I just sniffed and then put back on the tray?

Sour Cream? Is That Traditional?

Is it fair to answer that with a “Yes, but…?” Sour cream per se has been around for most of human history. After all, the root definition is nothing more than fermented cream. Some say it traces back to the Mongol hordes that made kumiss from mare’s milk, but I personally find that hard to believe. Not because the Mongols didn’t do just that, and helped to spread the idea. I just doubt that no one in human history came up with such an obvious idea before that. It certainly predates the arrival of Europeans in the new world.

I won’t speculate about the reasons, but research shows that sour cream has always been more common in central and Eastern Europe than over by the Atlantic. This enters into the history with the great migrations of Czechs, Poles, Slovaks, Germans, etc. into the U.S. from the mid 1800’s on. They brought sour cream with them, where it met the rising force of the Industrial Revolution and morphed.

What had been a hand crafted, fairly regional staple became an industrially produced, properly pasteurized dairy product sold in every market across the land. Dips made with sour cream became a capital-T Thing. Baked potatoes began to look naked without it. Mexicans used it every bit as much. And it became a common, if relatively minor ingredient in the baking repertoire of the North American continent. At which point it traveled back to Europe, and began to expand in the old world too.

You will note that we call this a Polish cookie (“amoniaczki”), because that seems to be ground central for where it is enjoyed in Europe, and was such a major part of the immigrant population that filled the American midwest, where this cookie centers in North America. So… did the original European version use sour cream, or was it a case of American ingenuity improving on the original, which then made its way back to Poland along with industrial production?

I cannot answer that. I can only confirm that European variants using eggs instead of sour cream are easy to find; that we tested them; and that sour cream is definitely the way to go. It just works better.

Can I use Baking Powder or Soda For Convenience?

We liked this cookie so much that I felt compelled to test this, and the answer is, “Only if you must.” Texture is major part of this cookie’s appeal. The baking powder ones looked okay, and tasted fine, but they simply weren’t the same. The almost-crispy crust diminished down to a mere sugar-crust, and the exciting fluff-honeycomb interior became a standard, soft one.

Would we make them in a pinch using baking powder or soda? Hmmm. I suppose we might. Particularly if we wanted a softer cookie with a distinctly clear peppermint or anise note. But to be honest, we would only do it as a giveaway cookie because now that we’ve had the real thing, they would be too disappointing for either of us to really enjoy.

Conclusion

This is a fun cookie. Kate got a bit old grin on her face at the first bite, and said “It tastes like a hug!” I had to agree. But it’s not a hug from your Grandma, or spouse, or parent, or child. Nor anyone else you deeply love. Those have too much emotional freight. Ammonia Cookies are a hug from that friend you’re meeting for lunch, or one of your daughter’s little playmates.

Simple, companionable, and yet somehow special at the same time – from both a baker’s perspective, and a human one. And that’s just the vanilla version. The cookie’s flexibility as a base for other and custom creations only makes it that much better.

Enjoy!

SWEDISH DRÖMMAR (DREAMS), Quite Possibly The Most Unique Cookie We Know

The cookie made with hartshorn that defies all description except one: “OMG, these are so good!”

This is a great cookie.

You have never tasted anything like this cookie. Not ever. Anywhere.

If you ask 30 different people to help you find words that describe it, you will get this answer from well over 20, and the ones who don’t say it out loud will be thinking it: “What the heck…?!” Think. Think. Think. “No, I really can’t.”

The flavor isn’t that hard. Remove the textural component and it’s a straight, generously sweet, vanilla cookie flavor. But that texture is wild! There are only two kinds of people in the world. Those who have eaten Drömmar before, and those who have not met anything remotely like it.

I have personally tested and (mostly) published more than 300 different cookies, each with multiple batches to get them right, and that’s without considering variations on the theme. I wouldn’t have believed it possible to create a cookie that reminded me of nothing. But there it is. Drömmar are unique.

NOTE FROM KATE: The only baked sweet remotely similar to Drömmar harkens back to a tea shop sweet I used to favor in Prague as a child. My grandpa would take me to a bakery where a display livened up the cooler case. He would order a cup of strong coffee, but never anything to eat. Instead, he enjoyed watching my pint-sized self sit up straight in a chair, fancy in my good dress and hair bows, drinking over-sweetened tea from a cup like a proper little lady. And I, of course, was the one who got to order a dessert.

This was often a confection called “rakvicka.” The English translation is a coffin or a casket. The not-quite-a-cookie mass was composed of whipped egg yolks and sugar, baked in rectangular, casket-like mold. The casket would puff up to leave a hollow interior. and was served with a squiggle of optional whipped cream.

Breaking a casket with a teaspoon and tasting a fragment was a fabulous sugar bomb experience, with the sugar converted into a friable structural element. It fell apart as soon as it hit the mouth. Eating the Drömmar is a messy proposition, but not as bad as the one time when I tried to bite off a corner of a casket and had the confection explode in my hand.

Enjoy this cookie – it’s unique, intriguing, and its playful nature will bring a smile to your face.

How Can We Describe That Which Can’t Be Described?

Just look at that texture!

Those 30 testers and I had a lot of fun coming up with “sort of like this except…” possibilities. It wouldn’t be fair to you if I left without even trying, right? Here are the best of the bunch:

  • “Imagine cotton candy that tastes like a sweet vanilla cookie, but is crispy, crunchy, and actually a little filling.”
  • “Sweet, ephemeral, crispy/crunchy goodness that vanishes inside your mouth.”
  • “Sugary air shaped into a cookie, but it doesn’t leave you empty.”
  • “You could call them ‘clouds’ just as easily as ‘dreams.’ If clouds were crunchy, crumbly, and delicious.”
  • “How about the child of a dried meringue who married a funnel cake?” To which came the answer: “No! I like meringues, but no meringue ever dreamed of being this crunchy, and these have too much substance even though they vanish in your mouth.”
  • “They taste like vanilla and sugar. After that?… Uhm… Errr… Well… How about…? Gee, this is hard!”

Do you know the story about six blind men who fought over how to describe an elephant? The one by the ear said, “An elephant is like a carpet!” The one by the leg said, “No, an elephant is like a tree!” The one by the tail insisted that both were wrong. “An elephant is like a rope!” “No, it’s like a wall!” said the one on the side. “You mean a great, big snake!” answered the sixth man feeling at the trunk.

So it is with all those descriptions of Drömmar. Every description is true, yet none capture the whole experience.

An Overview Of The Recipe

This is drop cookie, the easiest of them all to form, and the dough is so easy to make that traditionalists will simply pull out a mixing bowl and a fork. No kidding. I only used a mixer because my arm has been protesting the idea of typing on a laptop actually held in my lap. [Lesson learned. Don’t do it.] It adds up to this: First, mix the softened butter with sugar and vanilla sugar until it’s more or less smooth. No creaming required (see below). Second, mix in the oil (and vanilla extract if you go that route) bit by bit until you once again have an even texture (again, see below). Then mix in your dry sifted-together flour and hartshorn (see below). You are done. Go ahead and bake.

[A NOTE FROM SCOTT: True story about how bulletproof the formula really is. I started by normalizing 11 recipes I found online to a dough based on 1 stick of butter, and then targeting the average of those fairly consistent amounts. I must have gotten my math wrong, because the first batch produced more of a dough paste than a pasty dough. But here’s the thing. Other than leaving oil on the fingers, that first batch tasted crispy, sugary, vanilla-y, and altogether delicious. The current recipe has exactly twice as much flour as that first one. Can you name another recipe that will work even if you blunder by using half (half!) the amount of flour you should have?]

Taste one and you’ll know in an instant why they have the name “Dreams.”

A Water-Free Dough

This dough contains basically no water except the little bit that’s inside the butter, the microscopic amount that’s produced in the leavening process, and the equally microscopic level contained in dry flour. That changes things in a few key ways.

  • The dough is the next best thing to gluten free.

Wheat flour contains two proteins called glutenin and gliadin. Add water and those two will combine into gluten. Kneading hastens that process, and also makes the gluten bits combine into the long strands that bakers try to control. Remove the water and there’s no way to make any gluten.

Since this dough has no water, and the flour grains get coated in fat anyway, there is basically no gluten at all except at trace level. We can’t call it “gluten free” because a testing lab would definitely find some molecules here and there, but it’s entirely fair to say it’s the “next best thing to gluten free.” This cookies should be quite safe if you really are sensitive to gluten and not to other parts of the flour. Or not, if your reaction has more to do with the grain than the gluten.

Not an option for this recipe. You MUST use hartshorn, and NOT baking soda or powder.
  • Baking soda and baking powder (sodium bicarbonate products) will not work. I recently did a lot of research on this to figure out why. It comes down to the chemistry differences between the mechanism by which ammonium carbonate (hartshorn) breaks down versus the reaction chain for sodium bicarbonate (the active ingredient in baking soda and powder).

Hartshorn creates lift through “thermal decomposition” alone. Apply any level of heat above 96-99° F (36-37° C), basically the same as body temperature, and the ammonium carbonate will break down into two gases (ammonia and CO2) plus a molecule of water. The reaction continues and gets faster as the oven temperature rises, until there’s finally nothing left. Both gases contribute to lift as they expand out through the dough.

Sodium bicarbonate begins to break down at a significantly higher temperature (180° F = 80° C), and results in CO2 + water + a chemical called sodium carbonate (not bicarbonate). Sodium carbonate is a potent base, which is why goods containing high levels of baking soda can taste soapy and bitter. Recipes solve this by adding an acid into the dough to create a secondary reaction (chemical, not thermal decomposition) that produces yet more CO2 and water.

That’s all well and good except for one thing: that chemical reaction between base and acid will not occur in the absence of enough water for the two to travel around and find each other. This is why baking powder stays stable in your pantry. It may contain both a base and an acid, but they’re both bone dry.

Since this dough has no water to speak of, the sodium bicarbonate will go through thermal breakdown, but the sodium carbonate result will end up stranded in your final product, producing that nasty, soapy, aftertaste. Yes, there will be some dry acid too if you used baking powder, but they will be sitting there side by side instead of reacting.

That Makes Hartshorn An Essential Part Of The Recipe

Hartshorn a/k/a baker’s ammonia a/k/a ammonium bicarbonate reacts where baking soda and powder won’t (in this cookie), and it’s also responsible for the unique, micro-honeycomb texture that makes these cookies so special. This ancient leavening agent has become an obscure ingredient for normal households, but it is readily available online, in bakery supply stores, and even in craft stores like Michael’s. [If you live in Pittsburgh we can recommend Make A Cake on Rochester Rd.]

We’ve always used the LorAnn brand but that’s only because it’s the most common one around. Ammonium bicarbonate is a pure chemical compound and thus identical regardless of source.

NOTE FROM KATE: Hartshorn, which used to be called sal ammoniac, has a long and twisted history. First imported by Venetian traders in 12th century, its Egyptian manufacturing process was a closely guarded secret. It took five hundred years before European alchemists and scientists figured out how to make the stuff from antlers (“hart” is an antique name for male deer).

Note that there are several ammonia salts with similar chemical properties. Deer antlers were preferred for baking use on the old belief that particular parts of the animal parts will provide a stronger medical benefit. Hooves, skin, etc. were used elsewhere. My research suggests that burning them n the presence of lime yielded what we now know as ordinary smelling salts (though hartshorn will serve just fine in that role too). The Egyptians actually used heated animal dung to extract their ammonia product.

Our vegetarian friends will be relieved to find that no animal parts need to be used. Modern ammonium salts are all factory made from commonly available chemicals. Although, knowing how the Egyptians made them inspires me to test the process, come Spring, in our fire pit. I am sure our neighbors won’t even notice… And there’s no way it could be as bad as when I tried to brain-tan a deer hide in a garbage can on our driveway.

Sifting is MANDATORY

Modern baking soda and baking powder products tend to be clump-free, which makes sifting much less important. Not so for hartshorn. Our little jar started out as a powder when we bought it last year, but as of today it’s such a solid block that I’m forced to chip pieces off. Heaven help any tongue that meets one of those chips! That makes it vital for any user to either grate/pound it back into a powder, or else dissolve it in water before use.

You don’t want to add water to this particular dough (see above), which leaves only the reduce-to-powder option. I have done this in two different ways: by pounding in our mortar and pestle, and by pressing/scraping it through our fine mesh strainer (a/k/a sieve). Both seem to work equally well.

Mixing Your Butter Does Not Mean You Should Cream It

“Creaming” is the process of beating butter for several minutes until it turns white and fluffy from tiny air bubbles you’ve mixed in. It’s probably the most common first step out there for cookie making. This recipe asks you to mix your butter and sugar, not cream them together. Remember, we’re trying to replicate mixing with a fork. Machines are just too convenient to bother with that, but that result is your target. Forks do not cream your butter. All they do is mix.

Another Trick: Add Your Oil Bit By Bit

There is just as much oil in the dough as butter. Add it in at least two stages. Pouring all the oil in at once makes it harder to get everything smooth.

Salt?

I added an unnoticeable bit of salt to the recipe sugar because experience has taught us that even sugar bomb cookies work better that way. Feel free to leave it out.

Vanilla Extract?

Every Swedish recipe I found specified the use of vanilla sugar, not extract. It seems to be a regularly available product over there, and it makes extra sense to use it because it adds no moisture (see above).

Vanilla sugar can be hard to find here in the U.S., but vanilla extract is everywhere. And while it is indeed wet, the recipe calls for only a teaspoon, and most of that liquid is alcohol rather than water. So if you have vanilla sugar, use it. Extract will work fine if you don’t.

CONCLUSION

Do you, like us, have a little bottle of baker’s ammonia tucked away in the pantry for the next time you want to make Springerle or crackers? If so, make this cookie! Add exclamation points as needed to make you believe me about that. Drömmar are unique. Drömmar are delicious. Drömmar are universally popular. And Drömmar will make you a better baker after you take the time to go back and figure out how such a weird, amazing, and awe inspiring cookie really works.

Enjoy!

AFTERWORD

I posted this recipe in our Facebook group. This follow up came a little later from a fine baker who was intrigued enough to give them a try:

I am not obsessed with Drömmar. LOL

But lying in bed thinking about the meltaway character of some favorite shortbread, I decided to try the secret ingredient in those in the Drömmar: rice flour.

I replaced just under a third of the flour with rice flour, or ⅔ cup of the total 2½ cup called for. This made a noticeable difference in the texture to enhance that lovely melt-in-your-mouth feeling.

Other adjustments: used almond oil instead of canola, baking them without refrigerating the dough since i had plenty of time, lowered baking temperature to 285°F, and extended baking time to about 28 minutes total (rotating pans).

This is such a lovely recipe, so easy, quick, and fun to play around with.

It ain’t just us, folks. Think of a straightforward, delicious, and buttery shortbread… and then twist it by creating this fantastically unique texture. How could it be anything but “lovely?”

WELSH CURRANT COOKIES a/k/a CAKES, Fresh From The… Griddle?

Cookie, pancake or both? Who cares when they’re just plain good?

I’ve got some money to bet! You either (a) know and love Welsh Currant Cookies/Cakes, or (b) have only the vaguest impression that such a thing exists. We fell in the latter category. Yes, I have a number of friends who chimed in with, “Oh, you’ve got to research currant cookies!” So we knew they existed. But I’d honestly never tasted one until we got into the recipe testing.

You may now put us in category #1. They’re wonderful.

NOTE FROM KATE: When this intriguing cookie came up for trials, I was of two minds about it. First, leaves were falling and we were carving pumpkins. For most people, October 31st is just Halloween, cosumes, and candy bars. The holiday originated as Samhain, a Celtic New Year. One Samhain tradition is thanking the warm part of the year for its bounty, and greeting the cold hibernation with its hunting season. Traditional offerings include bannocks, biscuits, or, indeed, cookies. I was all in favor of this concept: we would try a recipe and I would have some genuine griddle cookies to share with the garden.

And yet… pan and griddle means oil. Have I mentioned that we fry have not researched a single fried cookie because I loathe even the idea of the cleanup? If you’re like me, fear not. The amount of butter or oil is minimal, and these curiously enticing cookies are well worth the effort.

The brits have a wonderful word that catches the essential appeal of Welsh Currant Cookies/Cakes: they are moreish. It means they’re one of those foods that don’t taste “special,” but trigger that mysterious need to just keep noshing until there is nothing left in range. Simple, tasty, accessible, and fun.

“But are they a cookie or a pancake?” That’s a whole other debate. They have one foot firmly planted on each side of the line. Thus their assignment into our category for Not Quite A Cookies. Another perfect description.

As always, click here to jump to the recipe without any discussion.

Currants?

Linguistically, yes. Biologically? No.

To a naturalist “currants” means one of two species in the genus Ribes, both of which produce small, round berries that look like itty bitty grapes (which are in the unrelated genus Vitus). There’s Ribes rubrum, which can be red, pink, or white (my favorites are the classic reds), and then there’s Ribes nigrum, the black currant species favored by our daughters. Kate’s favorite would be Ribes uva-crispa a/k/a Gooseberries.

Red currants have that classic sweet/tart flavor profile you find in currant jam. The black ones have a unique, musky flavor. Gooseberries are sort of like a sour blueberry with the size and texture of a very firm grape. All three are delicious once you acquire the taste. Heck, we grow them all in our yard! But they’re only good when eaten fresh or turned into some kind of jam, preserves, or compote.

HISTORICAL NOTE: America has a fascinating history of actively destroying these crops. It happened because currants and gooseberries are required species for the spread of blister rust, a fungal disease capable of wiping out entire forests of white pine. White pines were a major U.S. natural resource in the early 20th century, so both state and federal authorities felt compelled to fight it off. The easiest solution? Eradicate the vector. And so they did. Currants and gooseberries disappeared from American soil for many decades, and are only now making a comeback due to the fact that resistant white pines have evolved to take over the forests. Mostly. Ribes of all kinds are still illegal in Maine and several other states.

Getting back to the point, culinary “currants” are not currants at all. They are miniature grapes that dry into extra small raisins, which are then sold under names such as “Corinthian grapes,”Zante raisins,” and “Zante currants.”

ANOTHER HISTORICAL NOTE: Those names have their own history worth reading about. The grape varietal originated in Greece and became a significant export crop. The main shipping point was the city of Corinth, a major seaport in the country’s northeast. The actual farms were, and largely still are, located in the Greek southwest, on an island called Zakynthos f/k/a Zante. Hence the descriptive words Corinthian and Zante. The name “currants” gets used because the berries aren’t much bigger than actual currants.

Those miniature raisins are what the recipe refers to. We’ve never had a problem finding them in any large supermarket.

The supermarket brand works just fine

Getting at the “dough”

Research showed surprising consistency in the ingredients and amounts. The dough contains (by weight):

  • 3 parts flour;
  • 1½ parts butter, lard, or shortening (which you can stretch to 2 parts if you want);
  • 1 part sugar;
  • 1 part Zante currants (see above);
  • 1 part egg combined with dairy (buttermilk, soured milk, yogurt, whole milk, etc.); and
  • A surprising amount of baking powder, with some nutmeg and grated orange zest to tie it all together.

Yes, there are some bakers who view the orange zest as an option rather than a requirement, and I’m sure that most of them are perfectly nice people, but in this case they are wrong. You’ll see. ‘Nuff said.

Those proportions vary a bit from recipe to recipe, but never by enough to change the basic pattern in a fundamental way. It’s so consistent that I now believe old country Grandmas passed the recipe down more or less as follows: “Use these proportions and then vary according to taste.”

If it’s good enough for Grandma, it is good enough for you and me.

The method varies more than the ingredients. Our recipe adopts the most common, cut-in-the-butter approach. Almost as many recipes use a creaming method, and more than a few call for melted fat. We didn’t bother to try them all because the message is clear. Pick whatever method you want so long as it gives you a rollable dough.

Yes, that’s right: a dough. Pancake batter has much, much more liquid in it than what you use to make Welsh Currant Cookies. It really does feel and act like a cookie dough, albeit one with too much leavening to yield a normal cookie texture.

Roll to ¼” thick, and cut out rounds or other basic shapes

The dough holds its shape surprisingly well, but you want to stick with basic shapes nevertheless. We tried making a few animal shapes in addition to rounds, hearts, stars, and the like. The problems occurred halfway through the cooking process, when we had to flip each cookie/cake over. The animals inevitably lost their heads, tails, and/or legs. Feel free to try, but we will stick to the basics.

Cook on a skillet or griddle

Up to now we’ve had cookie technique in making the dough; cookie technique in the rolling; and more cookie technique in the cutting. From here on it looks much more like a pancake. Heat a skillet or griddle over a medium-low flame just like you would for pancakes, butter/oil it as you would for pancakes, and then cook the cut-outs as if they were miniature pancakes; i.e., until both sides are a light, golden brown. The exact timing will vary tremendously because of tiny factors ranging from the color and weight of your pan/griddle, to the thickness of your cookie and the fraction by which your flame leans toward medium- or low heat. You’ll be fine if you exercise a bit of touch and cooking experience, especially since (a) the ones that go too far will still taste great, and (b) a dusting of powdered sugar will cover all sins.

What you get will taste like a raisiny, not-too-sweet cookie with the texture of a pancake. Absolutely delicious, and incredibly moreish.

NOTE FROM KATE: Just like with pancakes and crepes, griddle cookies take its own bit of practice. A few of my observations are as follows:

  1. SIZE MATTERS: Both of the pan, and of the cookie. Every pan holds heat differently, and a larger and thicker cookie will require more time.
  2. CONTROL YOUR HEAT: A relative of the pie crust, the raw cookie will soften if left waiting in the hot kitchen for too long. Pop the sheet in the fridge between pan-batches in order to retain cookie shapes. As the cookies hit the pan, they will want to set, not burn. They will warm up and turn flaccid. For an easy and cooperative flip-over, use a tool the width of the cookie (offset spatula works well) and make sure its bottom is set. It will be darker than you think it should be.
  3. ENJOY THE PROCESS. This is a very zen, in-the-moment activity as compared to more precise baking. Imperfections happen. Eat them.
Note the inside texture. Just like a very firm pancake.

Shelf Life

Even moreish cookies end up having leftovers now that our nest is emptying out. We stored those leftovers in an open bowl, an airtight container on the counter, and an airtight container in the fridge. None were as good on Day 2 as they’d been on Day 1, but they didn’t actually go stale. They just went meh. And they stayed at that same level of meh day, after day, after day. More than that, meh turned right back into yum as soon as we refreshed the cookie/cakes on a pan/griddle or through a few seconds in the microwave.

LAB REPORT FROM KATE: Side-by-side testing has shown that a fresh-made and frozen cookie, when brought to room temperature, will taste just as good upon thawing as a fresh-made cookie cooled to room temperature. Furthermore, these cookies don’t go stale as much as they simply dry out. Older ones are just fine with coffee or tea as-is, or you can revive them with a judicious 5-15 second microwave burst.

So the moral of the story is this: Welsh Currant Cookies keep like pancakes. They change very quickly, but they also store extremely well, especially when frozen, and will taste basically as good as new once you get them warm again.

Conclusion

How good is this “cookie?” We have a local diner near our house called Pamela’s (one of a Pittsburgh chain). They are famous for their hotcakes. The owners were even invited to the White House to make brunch for the first family! They are also good people we like enough to treat as our go-to place for a diner breakfast.

I’ve already stopped by with samples and a recipe, and will almost be surprised if they don’t leap at the chance to add Welsh Currant Cakes to the menu after doing some testing of their own. So my bottom line answer is this. They are good enough that some of you readers will bless this article for a great many years to come, and your heirs for that much longer.

Enjoy!

CANADIAN ARMY MOLASSES COOKIES, A Classic WWII Recipe

The Canadian soldier’s secret trading weapon

Who’da thunk it? Soldiers like to trade amongst themselves, particularly when different groups have different supplies. In World War II the U.S. GI’s were the source for chocolate and smokes. The English always had tea. And the Canadians? They marched into the trading wars armed with cookies that no one else could match – the ones you’ll see below.

Click Here if you only want the recipe without the discussion

The basic recipe comes from the 1946 Canadian Army Cook’s Manual, as published in the Canadian Government website. All we did was test it, which turned out to matter because the volume-to-weight ratios on that page are a little bit off. Following the weights yields a thick drop cookie dough, while the volume measurements (cups) give you a very soft slice-and-bake result. We went with the second one because the instructions specifically mention slicing off pieces before baking. Our version below has corrected weights according to our tried and true conversion tables. Please note, however, that some ingredients (particularly flour) can vary a lot depending on both grind and protein content.

NOTE FROM KATE: When I tested this recipe, I used the scale with an expectation of tidy, slice-and-bake logs. I got a goopy mess of a drop cookie dough, and a discussion ensued along the lines of “You know, this cookie has a HUGE proportion of molasses!” Scott did some recalculating, et voila! The next try yielded slice and bake logs. The cookies bake and taste the same, but I prefer the tidy handling of the logs. It makes for an easier cleanup.

We made only two changes aside from that tweak. (1) The original recipe calls for sour milk, which we successfully replaced with both buttermilk and with fresh milk soured in the kitchen by adding some vinegar/lemon (a standard workaround). Yogurt ought to work too, though we haven’t tested it. And (2) We added raisins and extra spices as optional ingredients. Those might be too expensive for army-level production, but they do yield a tastier result for home cooks making dozens instead of thousands.

So what does it taste like? We found a few dozen tasters for this recipe and got a pretty standard reaction: “Entirely inoffensive with a finger on the scale toward good.” Call it a universal 6 out of 10, with no one going higher than an 8 or lower than a 4. They’d also be a 6 if you had a 1-10 scale from savory to sweet. Add the optional raisins and both scores go up by a notch. Extra spices push it up another.

NOTE FROM KATE: I admit to being spoiled by molasses cookies that bite back. You know, the memorable ones, loaded with spices from the obvious cinnamon to the expensive cardamom, with pepper and ginger for good measure. This is not that kind of a cookie. This is like a mild dish from a famously spicy cuisine. It’s still delicious but it defies your expectations.

People who like spicy cookies will notice a certain lack in this one, while mild food eaters should be thrilled to have a cookie that goes well with both coffee and tea. The restraint on the spice end of things was likely a result of not only preference, but also economy. Spices are expensive, and that matters once you multiply their cost by making enough for the entire Canadian army!

Soft or crunchy?

It’s entirely a matter of baking time and personal taste. Kate prefers these with a bit of residual chew. Scott likes them better when crispy. Choose for yourself. 15-20 minutes gives you one or the other, with all the stages in between.

NOTE FROM KATE: Despite my chew preference, I find that even dry cookies, which sat out for a few days, tasted good! Surprisingly, they didn’t go stale, and they had a nice crisp. Even though the low spice level took me aback at first, this eminently practical cookie grew on me and has now become a part of my “easy and travels well” repertoire!

Enjoy!

MAPLE SANDWICH COOKIES, Pure Autumnal Goodness

Maple shortbread sandwiched around a not-too-sweet maple buttercream.

Alfajores: the legendary South American cookie of childhood formed from two tender, shortbread wafers that sandwich a rich caramel (dulce de leche) filling. Add a bit of maple flavor to the shortbread part, replace the filling with a rich maple buttercream, and you get a cookie that’s just as good, and almost equally loved across its range in North America.

Exceptionally pretty, and featuring a deep sweetness that hovers right on the line of “children adore it” and “adults can too,” this regional specialty is going to find its way into your repertoire and simply won’t leave once you see the children in your life squealing with glee. Just be aware that no child on the planet can resist snitching a few from a low lying jar, which means you’ll have to carefully be looking in another direct.

Perhaps with a plate of your while sipping nice cup of tee or coffee.

A NOTE FROM KATE: The cookie itself isn’t particularly sweet without the filling, which is a bit too sweet for my personal taste. Now, to be fair, this filling grew on me with every tweak. Still, my European alter-ego would like to point out that you don’t have to use all the sugar in the buttercream recipe.

I do agree that Maple Sandwich Cookies are a lovely addition to the fall repertoire, sans “pumpkin spice,” and make an enticing visual statement for both kids, and kids at heart.

Click here if you only want the recipe without the discussion

A few years back we published a wonderful recipe for easy Maple Drop Cookies. This is the upscale, extra pretty version: tender, maple flavored cookies sandwiched around an intensely maple filling. What could go wrong?

The answer proved to be nothing, though it did take a little bit of fidgeting to get the details just, exactly right.

The Cookie Part

Shortbread cookies a/k/a butter cookies mostly follow a standard set of proportions. Here’s a alphabetical list of examples normalized to the same two sticks of butter in this recipe:

Testing showed that we liked this cookie just a bit more tender than a standard Butter Jelly, but it was a close call. Feel free to substitute the specified mix of flour (2½ cups) and starch (½ cup) for a straight 2¾ cups of flour.

As to thickness, keep them thin if you want to make sandwich cookies and a little more robust if you want to skip the filling. Just remember to increase the baking time too! Thicker cookies need to bake longer, especially with doughs like this with a decent amount of starch. Starches stay pasty on the tongue until the inside gets hot enough to break down. The magic temperatures are about 130° for tapioca, 140° for potato starch, and 145° for cornstarch. We prefer tapioca because you can’t exactly probe your cookies with an instant read thermometer. The lower degradation temperature to provides an extra safety margin against pastiness. Note: We have no trouble finding affordable tapioca starch at any good Asian grocery.

The cookies are done when the edges begin to brown, which also means the bottoms will be what the pros call GBD (Golden Brown & Delicious). Those toasty notes pair exceptionally well with the maple and vanilla flavors inside the cookie itself.

NOTE FROM KATE: The GBD bottoms work just fine for thin-rolled cookies. IMHO, I wouldn’t mind getting the thicker, molded-pattern ones a bit toastier. Giving them an extra minute or two will make sure that all the starch is properly degraded by heat. This is especially important when you place a tray of molded cookies in the fridge. In fact, I think a slight hint of darker, well-toasted edge would play well against the sweet buttercream filling.

NOTE FROM SCOTT: I completely agree. And for those who don’t know, refrigerating molded cookies can help to keep the pictures clear.

Next up: fancy touches, which turned out to be a lot of fun. This kind of shortbread holds its shape exceptionally well. They’re perfect for really fine cutouts on the sandwich caps, and even for patterns stamped into the dough. Have a look!

FWIW, we had more success stamping the dough first and then cutting it out. It would have been an ideal situation for using a patterned pin if we had one.

NOTE FROM KATE: This cookie holds its stamp well, but it didn’t do as well with very deep, molded cavities. It won’t be as forgiving as gingerbread, so make sure the dough is at a pleasantly cool temperature. You will also want to clean your molds between every stamping (we have a bowl of oil with a toothbrush, a bowl of starch with a powder brush, and a skewer on duty between each stamping.) For this cookie, it worked well to lightly dust the dough as well as the lightly-oiled mold. The type of your mold will also make a difference. Unlike with a hand-carved wooden mold or stamp, a laser-cut mold with sharp-angled features tends to cut all the way through the dough when pressed too hard. Use a gentle hand. In a larger production situation, I would roll the dough directly on the parchment, stamp the shapes, cut the rounds, and then remove the excess for reuse.

The Filling

Our standard buttercream filling uses half a stick of butter to three cups of powdered sugar, with whatever flavors you want added in. It’s dead reliable, thick enough to hold its shape, easy to thin as desired with a bit of milk or other liquid, and the heat characteristics are easy to understand. Butter gets soft at around 65° F (18° C), and so do these fillings.

In this case we started by simply adding in some maple syrup as the liquid. The texture was spot on, but the syrup made the filling a lot too sweet and a little too loose . Solution for the first: reduce the amount of syrup and add in some maple extract. [See Note below] This came close, but still edged over the line into the too-sweet-for-grownups realm.

Have three standard solutions for something that’s a bit too sweet: add salt, add acid, or add something bitter. Salt came first. I upped the amount from a healthy pinch all the way to ¾ tsp. That did the trick for me, but Kate said she could taste it. ⅔ tsp. proved to be the [ahem] sweet spot.

But the filling was still awfully sweet, and toed right up to the children-only line! It needed some extra help. Lemon didn’t seem to fit, so I decided to whisk in a tablespoon of cream cheese. Perfect! The extra mass tightened the filling that essential bit, and the mild acidity was enough to bring the sweetness under control.

TECHNICAL NOTE: Our go-to means of adding bitterness are molasses (also acidic), coffee, and chocolate. The molasses was tempting, but in the end we worried that it would have tried to steal the scene instead of playing a supporting role. [Additional Note: That observation all but demands a comment about molasses being a ham, but three decades of marital wisdom suggests that I might not get away with it. So never mind.]

NOTE FROM KATE: He thought he got away with it. That’s…kind of adorable, and really sweet! Just like these cookies!

Concerning Maple Syrup

“Pancake syrup” is basically corn syrup with coloring and maple extract. I have nothing against that on some philosophical level, but it would substitute for extract rather than syrup in baked goods. All the cookies we make use real maple syrup.

But that doesn’t end the story, because real maple syrup comes in several grades that basically correspond to the time of year it’s tapped out of the tree. Think of it as analogous to the change from veal to beef, or lamb to mutton: the syrup becomes progressively darker and more intense as the season moves on. We would have loved to try some extra-dark syrup in these cookies, with less extract, but simply don’t have access. If you do, please do, and let us know the results.

Note that syrup “grades” don’t really help because it is an industry term. The only law on point comes from the USDA’s Grade A vs. Processing Grade vs. Substandard. You and I never see anything but Grade A according to that definition.

The industry used to divide the color/flavor lines using the same letter grades with different meanings, going from lightest (Grade A) to darkest (Grade C), but that made consumers perceive the darker colors as inferior. As of this writing the industry has adopted color descriptions instead of grades. Vermont’s industry page describes them like this:

  • Golden color with delicate taste
  • Amber color with rich taste
  • Dark color with robust taste [used in this testing]; and
  • Very Dark color with strong taste.

The Canadians follow suit, though they often grade by “colour” instead of “color;” except when marketing to the U.S.

Storage

Unfilled cookies should keep for a solid week in a cookie tin or other airtight container. Freeze for longer storage.

Filled cookies, and unused filling, will start to get soft if kept above 60° F (18° C), which equates to a chilly room. We prefer to use the refrigerator for convenience, but take extra air to have an airtight container lest the filling absorb flavor from some garlicky pasta in the bowl next door.

I believe the filled cookies can also be frozen, but haven’t tested it yet.

CONCLUSION

That’s a lot of detail, but it all adds up to common sense for any experienced baker. The recipe is for a simple, maple flavored shortbread, and an even simpler maple buttercream. Put the two together and you have maple nirvana. There’s a whole lot worse you can find in this world of ours. And very little that tastes a whole lot better.

P.S. We had some filling left over from the photo shoot, and a few Gingerbread cookies from another project. I combined the two on a lark and… Goodness Gracious and My Oh My! This maple filling loves, Loves, LOVES to be paired with spice cookies! It’s so good that I may well sneak some onto this year’s extravaganza tray. Make an extra batch of Ginger Snaps without the sugar crust, combine with the maple filling… Oh yes. This could definitely be a thing.

Enjoy!

ANZAC BISCUITS (a/k/a COOKIES), The Down Under Cookie Of Home

The national cookie of Australia and New Zealand; a perfect combination of oatmeal cookie with just the right amount of coconut

Anzac Day is the Down Under holiday of remembrance to honor “the contribution and suffering of all who have served or died in wars, conflicts, and peacekeeping operations” as part of the Australia New Zealand Army Corps (ANZAC). Squish the U.S. Veterans and Memorial Days into one and you’ll have something close to the importance of Anzac Day: a big deal when every school will close, but not quite up to the 4th of July.

The holiday occurs every April 25th in honor of the men lost in the disastrous WWI invasion of Gallipoli, an event also tied to both of the cookie’s [ahem] biscuit’s contending origin stories. The first goes like this: “These were the cookies that mothers and wives tinned up and mailed to their soldier in the field. Isn’t that romantic?” The second says, “These were the cookies sold by the million at post-war fundraisers to raise money for the boys who came home. Could anything be a better symbol of the love and loyalty that isn’t romantic?” I personally suspect the true answer is “both. The recipe predates the war and was indeed sent overseas, but it boomed in the aftermath when something – anything! – just had to be done.

NOTE FROM KATE: The mention of “our boys” may sound old-fashioned in a world where women comprise close to a fifth of enlisted personnel – the number depends on the country (I checked only US, Australia, New Zealand, and Ukraine.) However, did you know that in WW1, well over 2,000 Australian women served overseas? These biscuits didn’t go out only to our boys but to our girls too, and the holiday expressly covers everyone who served, not only those who saw combat. Cheers!

Origins aside, Anzac Biscuits (the British Commonwealth word for “cookies”) have become more firmly entrenched as an Anzac Day treat than they ever were as one for the actual troops, and by now have stretched far beyond the bounds of a single holiday. This is the national biscuit of both the Aussies and the Kiwis, and the “why” couldn’t be any more clear. They’re flat out delicious. They’re simple. They are an ideal treat to make with kids. The proportions multiply like a charm if you want to feed a whole corps instead of the neighborhood bake sale. And the recipe is as close to bulletproof as we’ve ever seen, as witnessed by the fact that even an unfortunate testing mistake turned out so well that we’ve made it an official variation down at the end.

How to describe them… Take a good, solid oatmeal cookie and then give it an elusive hint of coconut that macaroon lovers will adore, and even I (a notorious hater of Demon Hair) can enjoy.

It’s one ace biscuit mate. That’s “a darned good cookie” to you Yanks.

Click here if you only want the recipe without the discussion.

First things first. This cookie is simple, tasty, friendly, lasts well, and is both easy and fun even for bakers who can barely see over the counter. It’s an easy, everyday cookie, not an elegant one, and certainly not extravagant. Don’t lose sight of that essence as I go down all the niggling little details and questions we had to address.

  • “Lyle’s Golden Syrup” does not mean “Go and buy a special ingredient”

Golden syrup is a product used across the British Commonwealth in much the same way as Karo corn syrup here in the U.S. They behave exactly the same in baking. The only difference is taste. Corn syrup has an all but invisible, vaguely vanilla flavor, while the British product has a pronounced butterscotch/caramel vibe. We ordered a bottle online as part of our research, for something like twice the cost of cheap, supermarket corn syrup. We enjoyed it too, much more than we expected. It’s a fun thing to try if you want to recreate the genuine Australian flavor. But only if authenticity is your goal.

The true spirit of the cookie has more to do with the flavor of childhood than the flavor of golden syrup, and that memory changes with where you grew up. So ask yourself this. What would remind my boy in the army of Home? Honey? Molasses? Maple Syrup? That taste will give your lad (and your little helpers) the true experience of an Anzac cookie even if it would seem a little off for your visiting friend from Sydney. Still good, but not quite right.

The substitution is simple. A 50/50 mix of corn syrup and maple syrup produces a very similar intensity of flavor. Just add them to the melting butter in place of the Lyle’s, and proceed.

  • “Rolled Oats” is all you need to know.

Do some online research and you will find recipes that stress the importance of using “quick oats” versus “old fashioned oats.” We’re here to tell you it makes no material difference. Use what you have on hand.

The two products aren’t all that different in any event. Rolled oats are made by steaming whole oat seeds (“groats”) and then rolling them flat between two steel cylinders while they are soft. They are then dried, packaged, shipped, and sold. Quick oats are made the exact same way but with cylinders aligned a little closer together to squish the groats that much flatter. It reduces the cooking time on a stovetop. It matters not at all in a cookie. Or at least not in this one.

The amount of oats is as flexible as the rest of this recipe. The basic formula here is 1 cup flour to 1 cup sweetened flake coconut, to 1 cup sugar, to slightly more than ½ cup of melted butter, to X cups of rolled oats. X varies from 1 cup to 2 cups depending on who you ask. We settled on 1½ cups. Do as ye will, they all worked fine and were not very easy to distinguish.

NOTE: “Steel cut oats” a/k/a “pinhead oats” are toasted groats cut into thirds to provide a nicer mouthfeel. I love eating them, but it’s a much bigger production that requires you to put them up to soak on the night before cooking. Steel cut oats would not work as a substitute in this recipe.

  • There is one weird instruction we still don’t understand

Every recipe we found included a fairly hefty amount of baking soda that has all its lift removed before it goes into the cookie. Some of the recipes mix it with boiling water, which makes it foam up before you add it into with the melted butter and syrup. Others mix it in cold water, and then add the slurry into the pot of still-hot butter and syrup, which makes that foam up instead. [We went with the second because it’s just spectacular enough to delight everyone’s inner child]. Either way, this initial treatment means the baking soda adds basically nothing in terms of lift. So what’s going on?

Theory one was an old trick of using water to dissolve any potential clumps of leavening agent that sifting couldn’t handle, and also ensure the most even distribution possible. But even distribution can’t be the answer in this case because (a) modern baking soda products do not clump, (b) every recipe writer in the world knows enough to specify cold water if you want to make a slurry, and (c) even those who don’t know that rule in advance would get the idea pretty darned quickly once they watched their leavening power fizzle away before the dough ever had a chance to come together.

Could it be a typo, with some particular writer making a mistake? Nope. The same instruction appears in every recipe, including the most up to date ones.

Our current theory has to do with the fact that more alkaline doughs brown a bit better and deeper. And it’s true that Anzac Biscuits have a particularly GBD (chef speak for “golden brown and delicious”) bottom. But even that has some issues, because why go to all that effort for such a relatively minor result?

So it’s still a question without an answer. But do it anyway. It really is fun to watch, and there’s probably a reason even if we haven’t figured it out yet.

  • The cookies have an amazing flavor balance that works just as well if you play around with the basic concept.

I made a mistake in my first test run. I doubled the amount of butter. Doh! Rookie blunder. The result is the cookie you see on the left:

I think I like them even better. It’s basically a lace cookie with lovely bits of oatmeal, scented by a perfect amount of coconut. #Yum.

We added the salt

We’ve yet to see salt in any recipe from a native Aussie or Kiwi. That said, we greatly preferred the cookies with an invisible bit of seasoning to bring the other flavors out. It’s a modern trick, but one so good that we could not leave it out of the actual recipe

The baking temperatures and times vary a lot, but even this seems to make very little difference

Do some reading and you’ll find many recipes that carefully specify a “medium” oven (350° F = 175° C) for 10-12 minutes. Others are just as clear about using a “moderately low” oven (325° F = 163° C) for 15-20 minutes, with a third group insisting on a “gentle” oven (300° F = 150° C) for 20-25 minutes.

We tested all three. The differences among the three were subtle to say the least. We made a careful side by side comparison of the fresh, same-day cookies and found that (a) the 350° result was hint more crispy, (b) the 325° cookies were right in the middle, and (c) the 300° oven made something that was a little more chewy if you squinted real hard and insisted on finding a difference. All those distinctions more or less vanished overnight. What can I say? Bulletproof.

NOTE FROM KATE: This is a very “moreish” cookie, so when I wanted to nibble the next day, I went after the “ruined” batch that mistakenly cooked at 300° for only 18 minutes. They were, after all, too tender to ship on the day of baking. An obvious failure… right? Not so. Their texture came together overnight into a wonderful, chewy texture. Two days later, even these were hard to tell apart from all the others.

P.S. A gentle hint: try nibbling your cookie with a square of dark chocolate in your other hand.

And if you want a truly authentic recipe:

It took some searching, but we did find a native Australian to use as a sounding board. An extremely generous native, who spent way more time on the back and forth than she probably expected, and even shared her favorite, classic recipe from Australian Women’s Weekly. You can recreate that recipe by using ours with only 1 cup of rolled oats, no salt, and applying a baking time of 20 minutes in a “moderately low” oven (325° F = 163° C). But you want to hear something funny? The magazine’s most current, “best ever” recipe has tweaked the recipe in a couple of ways, and now uses a baking time of 12 minutes at 180° C (355° F).

Why be consistent when you’re already bulletproof?

CONCLUSION:

We get asked for recipe recommendations on a fairly regular basis. It always follows the same general pattern. “We have XYZ going on next [date], and I’d like to bake some cookies. What would you suggest?”

We now have more than 300 carefully tested cookie recipes from all over the world, so it’s not that easy to give a straightforward answer, and we end up asking a series of questions in return. “What are your favorite flavors?” “Who is your audience, and what would he/she/they like best?” “What kind of vibe are you looking for?” “How much time/expertise do you have to put into the project?”

The most common scenario looks something like this. “Oh, I just like plain old cookies. Same for [audience]. I’m just looking for something easy, that we wouldn’t already know. And I’d love to bake them with my [child of choice] when we meet next [date].” I’d be hard pressed at this point to recommend anything other than Anzac Biscuits. They are all of that, and have a great story as well.

Enjoy!