POPPY SEED FILLING – with a few examples of cookies and other desserts

“Caviar!” chorus Kate and Daughter #1. “How nice,” say Scott and Daughter #2.

Part 1 of this extra long article addressed Poppy Seed Drop Cookies and Roll-Outs. This article covers our work on a Heritage Poppy Seed Filling worthy of the name, and a number of other heritage treats that don’t quite make it as “cookies.”

As always, skip to the bottom if you only want the recipe. Or to the middle if you want a couple of great cookie recipes to use as a vehicle.

POPPY SEED FILLING

NOTE FROM KATE: We took a while ironing the kinks out of this one because I have some serious opinions about poppy seed. It’s fabulous! In fact, I started eating poppy young. My paternal grandparents had a summer farm house well outside of Prague. The crops grown around it varied every year, depending on what the state farm’s agronomer decided to grow. One year we had peas (which the kids plundered, using the dry peas in spit guns to devastating effect.) The field next to it grew poppies. The frothy sea of white blossoms faded into blue-green marbles, which soon turned into poppy heads. We kids liked to pick them. We would take our poppy heads into the hay loft, pull out our pocket knives, dig out the white seeds in their slightly bitter white sap, and eat it.

When our grandparents found out, they just shook their heads. Grandma Stoy said, “Don’t eat that. It will make you sleepy, and if you eat too much you’ll grow stupid.”

“That’s how opium is made,” Grandpa Stoy said. “And morphine, for surgeries.” We got a whole lecture on the pharmacological importance of poppies. We were also warned not to make opium (addictive, illegal) while Grandma let it slip that she had seen it used to pacify teething babies. “They used to simmer green poppy heads in milk,” she said. “Then they’d wrap soft bread in a linen handkerchief, tie it off, and soak it in the poppy milk. The baby would suck on it, and go to sleep.”

And here you thought I wouldn’t share any heritage information. This is first-hand research!

The drop cookies came together quickly even though I (we’re back to Scott) had to start with some creative baking. This Poppy Seed Filling? Not so much.

You’d think otherwise, because it is incredibly popular and used in inumerable ways. This is the stuff that goes inside Poppy Seed Hamantaschen, Poppy Seed Kolache, Hungarian Poppy Seed Rolls, the swirls inside of Poppy Seed Cakes and Poppy Seed Breads… and on, and on, and on. There should be recipes out there by the dozen. And there are. But in the end it took both experience, failure, and some understanding of the basic chemistry before we could get it capital-R Right.

  • Problem #1: Poppy Seeds have a bitter edge that’s part of their appeal. But old poppy seeds get bitter in an unpleasant way, and the bitter edge becomes a stabbing blade if you go from “ground” to “pulverized.” I now believe this happens because the seeds, like many other seeds and nuts, are full of oil. Let the oil age, and it goes rancid; i.e., becomes unpleasant. Pulverize the seeds too far in a blender, and the increased surface area of the particles gives the oil a greater opportunity to oxidize, turning harsh in the same way you see with extra virgin olive oil.

Solution 1a: Buy your poppy seeds fresh, and store them in the freezer until you’re ready to use them. This goes double for ground poppy seeds, where the oils are no longer protected by the hulls. [NOTE FROM KATE: A week at room temperature is enough to render ground poppy seeds “less than fresh.” Double that and they will turn bitter. Grandma Kandler always ground them fresh right before use. If you buy them ground to order, as we do, I suggest you make your filling right away, label it, and freeze it.]

Solution 1b: Keep the blender problem in mind, and don’t blithely turn it on for a minute or two. There is “not enough,” but there is also “too much.” The baker’s job is to find the perfect compromise. Mixing whole and ground can also help. [See below].

Solution 1c: If poppy seed flavor lies in the oils, then one should be able to extract those oils into either dairy products or alcohol. And you can! Include some cooking/soaking-in-milk time as part of the recipe. This will even out the flavor, prevent it from going rancid anywhere near as fast, and will also hydrate the whole seeds [see below].
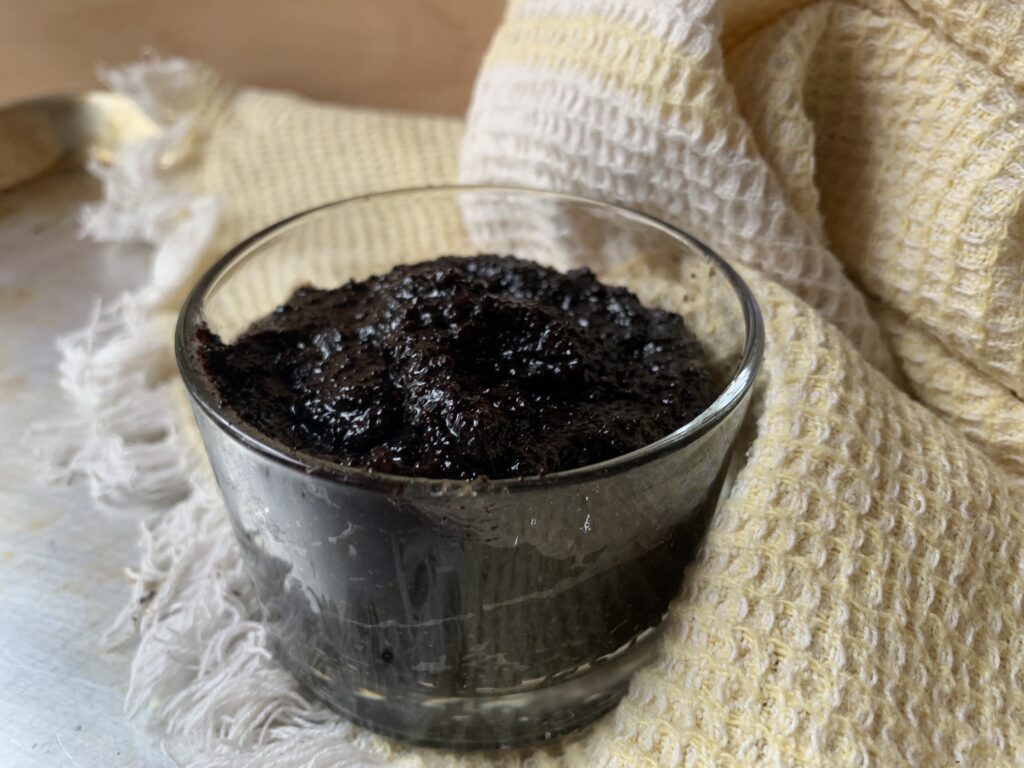
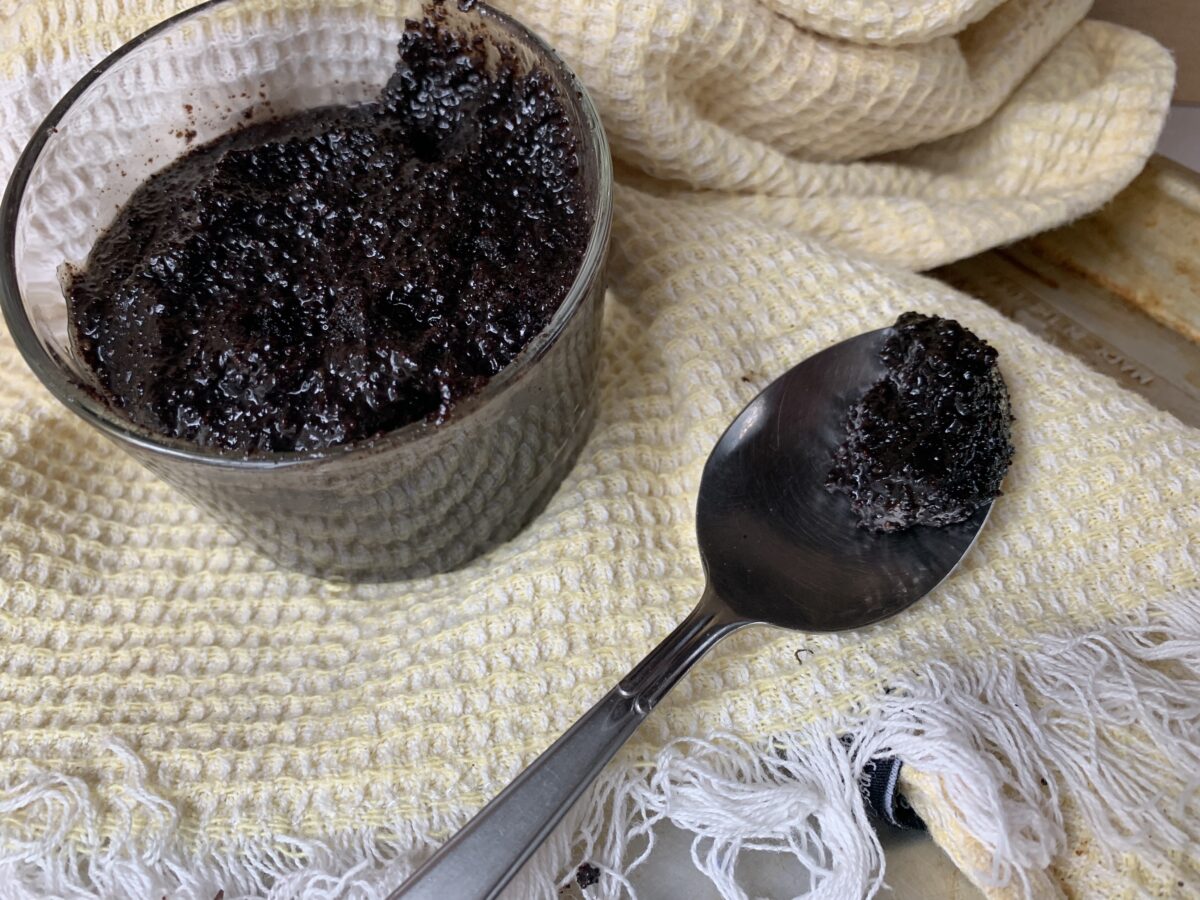
Caviar for Kate
  • Problem #2: Many sources argue that whole poppy seeds provide some desirable pop in a filling. On the other hand, they can get annoying very fast when you end up with a mouthful of grit; and they get extra gritty when a little dried out. Turning it around, ground poppy seeds release more flavor and also smooth things out, but can make the filling a little too dense, shorten its shelf life, and remove all the pop instead of just some. [NOTE FROM KATE: YMMV on cooking them whole, and I have been as open-minded about it as I could be. Yes, they do soften over time, but even the 50/50 ground:whole compromise left me irritated about the whole seeds’ texture. Let your preference be your guide.]

Solution 2a: Start from a mix of ground and whole. Fact is, blenders are not the best tool for grinding poppy seeds. There are actual mills you can buy for just that specialized purpose.
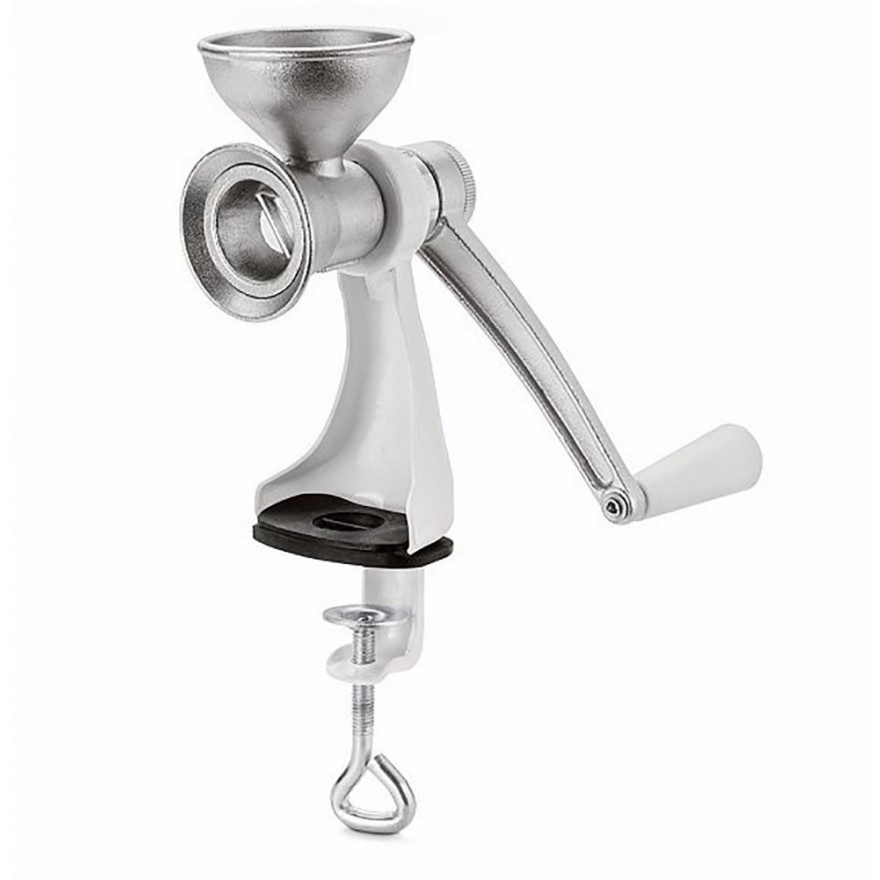
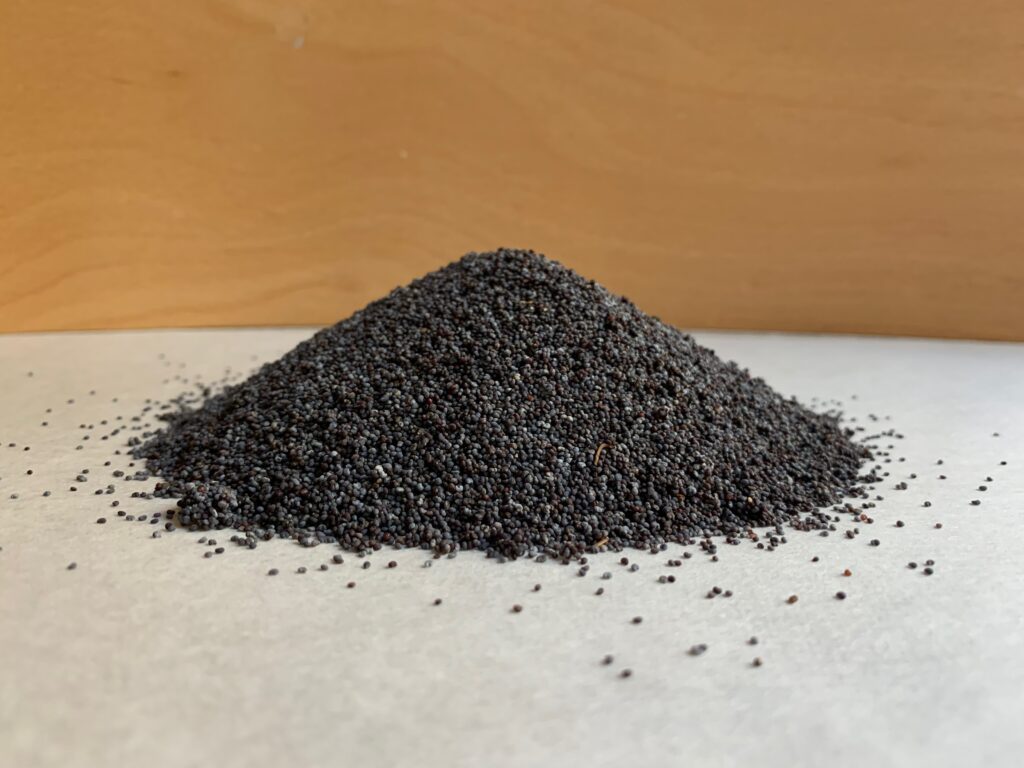
We buy our poppy seeds in bulk from our inestimably awesome local coffee roaster. They have just such a tool, and will grind on site as requested. Thus it takes us exactly zero effort to order two half bags instead of one big one, with the first half ground and the second half whole. Highly recommended.
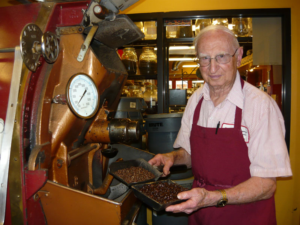
The founder, Mr. John Prestogeorge. A gentleman through and through.

Solution 2b: In theory, poppy seeds swell as you cook them in a liquid, and eventually will swell enough to burst. Think of rice, or some other grain like quinoa. They do just the same. Cooking a little longer will make them swell that much more. The technical challenge here is not allowing the mixture go above the barest of a simmer for more than a few minutes. Boiling will turn them bitter for sure. And with a mixture as viscous as a poppy seed filling, reaching a boil is almost a foregone conclusion. You could put the whole mix into a sous vide for a few hours, and that might work quite well, but we haven’t tried it.

Solution 2c: If you go through the whole process and the filling still feels gritty, swirl a pat or two of softened butter into the warm filling. It’s just like finishing a sauce. The butter adds mouthfeel way out of proportion to the amount you use.
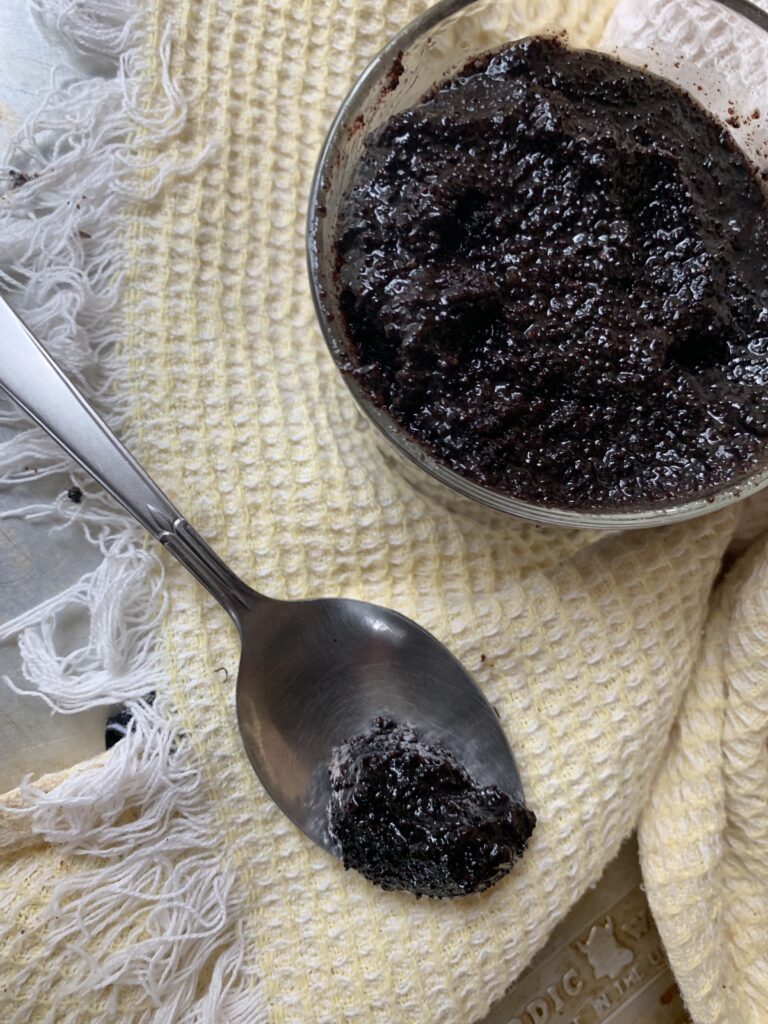
Caviar for Miranda, the eldest daughter
  • Problem #3: Poppy seeds alone are… meh. They come into their own when mixed with some kind of fruit. This is why you almost always see lemon-poppy goods rather than poppy playing a solo tune.

Solution 3a: Include some concentrated fruit flavor (a/k/a honey, jam, preserves, and the like) as one of the sweeteners. This isn’t some secret trick! At least 90% of the recipes out there will include both honey and some kind of jam. The most common ones are povidla (prune butter/filling) and its apricot equivalent lekvar. [N.B. The names are from different languages, and actually mean the same thing: cooked, jam-like fruit filling used in baked goods. Thus the Czechs have both prune povidla and apricot povidla, just as the Hungarians have both apricot and prune lekvar. I use the one name for a prune version and the other for apricot for the sake of reader clarity despite the fact that I know it is linguistically misleading.] But any good fruit preserve will do if that’s the flavor you want to pair! Strawberry, blueberry, raspberry, grape… they’ll all work well and give you a customized “other” to claim as your own.

[NOTE FROM KATE: If you don’t have a jar of prune butter handy, soak two or three prunes with your liquid of choice. The flavor will spread and even out when you the blend the two into filling.]

Solution 3b: I know, I know. ‘But fruit preserves usually include undesirable seeds and/or lumpy bits of pulp! What do I do about those?’ Simple enough. Heat the “jam” until it’s thin, and then push it through a sieve by pressing down hard with a rubber spatula or spoon. The seeds and irredeemable pulp will be left behind, while the rest will get broken down to the point where it no longer matters.

Solution 3c: And yes, mixing sweeteners even more will only increase the complexity. Our recipe uses plain sugar (to ensure the poppy seeds stay front and center), honey (to round everything out), and also choice-of-jam to transform it from ordinary into special.

Solution 3d: Poppy seeds adore fruits of all kinds, but their One True Love is lemon. Don’t fight it. We add some zest into our filling just because it’s part of what everyone thinks of as “poppy seed flavor.” Vanilla also works but we consider that to be more of an optional extra touch.
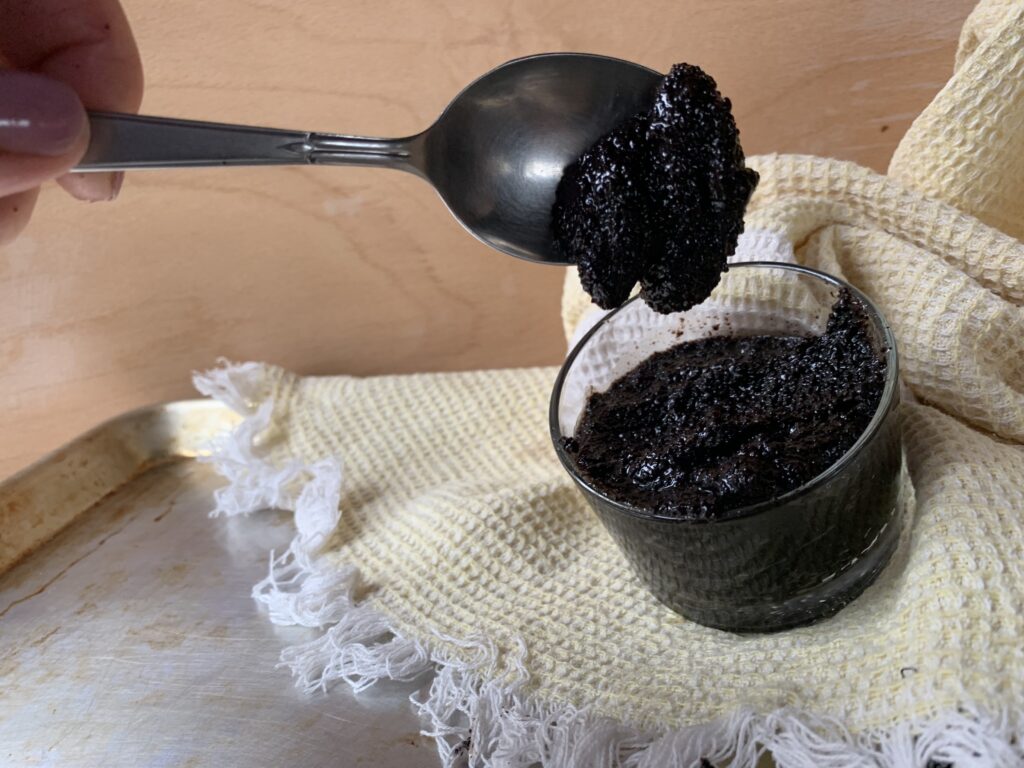
“Poppy seeds? How nice. Couldn’t we do something with chocolate?” At least according to Scott and Lee (daughter #2)

Final problem: How do you use this wonderful filling now that it’s made and waiting?

THE LAST AND FINAL NOTE FROM KATE: My feelings run strong about this one! I view whole poppy seeds in my filling much like Scott’s opinion on coconut (remember how he called it “Demon Hair” in our Heritage Cookies Alfajores recipe?) Poppy seed filling should be smooth enough not to feel gritty, and should never leave dark seeds between your teeth. If you’re baking for me, use only ground seeds OR blend it after cooking. Remember that, as a rule of thumb, every 10 degrees Centigrade will double the rate of a chemical reaction. Oxidation of the popp yseed oil is just another chemical reaction. Thus, the bitterness will be directly proportional to the combination of time and temperature in the presence of oxygen. (Since the size of our kitchen excludes the installation of a temperature-controlled, nitrogen-atmosphere reaction kettle, we need to plod on like it was 1899.) ANYHOW, you can use fresh-ground poppy seed and gently simmer it, and freeze it. OR, you can pre-soak whole poppy seeds overnight in warm water, strain, gently simmer them, and then blend it till smooth; but only once it has cooled some. (Remember: every degree you shave off helps to slow down the oxidative process.)

And don’t forget the balance flavors? Yes about lemon zest and juice. And yes about some jam. But dry spices have a place too. Clove is lovely in moderation and, not coincidentally, rounds out the flavor in a way that keeps the bitter notes under control.

MY FAVORITE QUICK USE: Eat 3 spoonfuls in the morning while waiting for your coffee to brew. [Note From Scott: I support this. See above for Grandma’s wisdom about teething babies. It works just as well for other dispositions. And now I will run…]

FILLED POPPY SEED COOKIES

Start with a classic filled cookie from any nation starting with Turkey, Greece, and the Balkan states in the south, on up through Germany, Poland, and Scandinavia in the north. Poppy Seed Filling gets used every bit as often as fruit fillings, nut fillings, and sweet cheese fillings. Here are two examples from our original Heritage Cookies of the Old and new World collection.
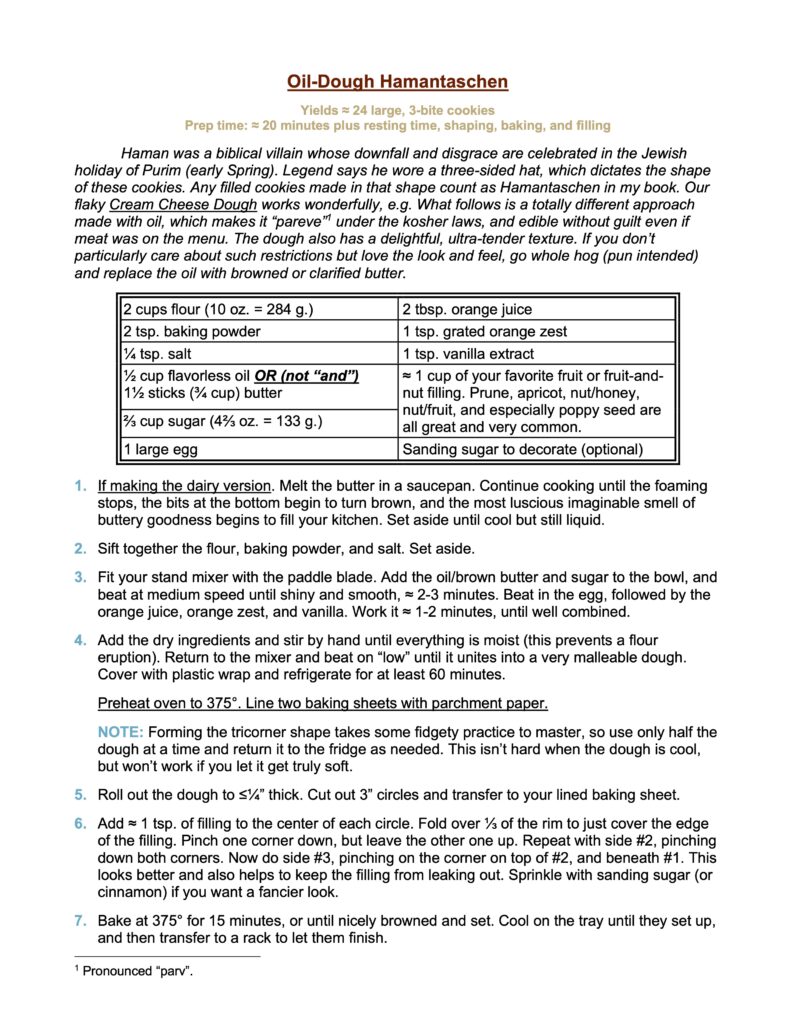
Served at every Purim feast, Hamantaschen are even more common than
Queen Esther Cookies. They are actually named for Haman,
the villain of that holiday story.
That’s just two examples. Poppy Seed Filling has as much versatility as anything else in the repertoire.

OTHER POPPY SEED DESSERTS

But that isn’t the end of the story. Poppy-centric desserts abound, and several deserve some special mention. No, they aren’t “cookies,” nor even Not-Quite-A-Cookies. So why talk about them at all? Because the treats I’m about to describe are immensely popular, carry great cultural significance, and often fill the same role as a cookie on many a holiday table. No actual recipes, because that would be a step too far, but honorable and honored mention? Absolutely.

Hungarian Poppy Seed Rolls. These look a bit like jelly rolls or roulades, but those are made by rolling up filling inside a yellow cake or meringue layer. Poppy- and Nut Rolls start with a soft, well sweetened, yeast bread dough. After that it’s just the same. Roll the dough out into a rectangle, let it rise, then spread it all over with a thick layer of Poppy Seed (or Sweet Walnut) Filling, leaving only enough room on the sides to account for the filling that’s bound to squish out. Roll the dough up around the filling very, very gently to make a giant roll, and then bake. When it’s done, cut into slices for both easy eating and to display the spiral pattern on the inside.

Lithuanian Poppy-Bread Holiday Nuggets (“Kūčiukai”). There are websites out there that characterize Kūčiukai and its derivatives, as a “cookie”. It isn’t. Kūčiukai are a straightforward, moderately sweet yeast bread stuffed to the gills with whole and/or ground poppy seeds. Roll the dough out into a thin sausages maybe ½” (1-1½ cm) thick; cut them into ¾” (2 cm) pieces; bake until fully done and even a little crispy; and then serve them in a big bowl for the Christmas feast.

Ancient baltic tradition uses Kūčiukai in several ways, ranging from something like cereal floated in a bowl of sweet poppy seed milk, to croutons in a bowl of thickened fruit soup (the most common name is “Kissel”). And, of course, as the object of snitch-and-snack raids by both the young and the young at heart.

That’s why some people call this a “cookie” to begin with? Consider this:

  • Kūčiukai served in sweet poppy milk or Kissel serve as sweet endings to the feast… just like cookies in the more western nations.
  • Kūčiukai are bait for tiny hands… just like western “cookies.”
  • And Kūčiukai are all but mandatory for the holiday gathering… again, just like the things we’d all describe as “proper” cookies.
  • Plus there is no other category in which you could put Kūčiukai from the pure translation point of view, because other cultures have no equivalent.

So Kūčiukai may not be a “cookie” for our purposes, but they 100% deserve to be mentioned in the same breath.

Poppy Seed Cakes, like the Czech “Makovec”. This is an extremely popular dessert often served on a cookie tray during the holidays, but it’s actually a moderately dense cake cut into 3-bite pieces. Recipes vary from a Yellow Cake base, to a White Cake base, oftentimes a Pound Cake base, and sometimes even an Angel Cake base; but cake it is. Fill that batter with an absurd amount of poppy seeds (whole and/or ground), and you’re pretty much done except for gilding-the-lily touches like a sharp lemon icing.

CONCLUSION

There are two types of people in the world: those who adore poppy seeds, and those who barely give them a second thought. That’s a pretty good average. People all over the world make cookies out of them too. But if you are a true devotee, the filling is where it’s at. This is the recipe that hooks ’em in and keeps ’em coming back.

Enjoy!

POPPY SEED COOKIES – An Array From Central and Eastern Europe

The first of two articles on Poppy Seed Cookies. This one contains a roll-and-cut cookie (Queen Esther Cookies) and a drop Cookie (Poppy Seed Sour Cream Cookies)

Admission: poppy seeds are not my thing. They don’t offend me or anything, but my world would be no worse if poppy seed desserts simply disappeared. Kate? For Kate that would be a disaster on the same level as a plague to destroy the worldwide apple crop. My beloved wife adores poppy seeds, to the point where that’s one of her favorite bagels. [Shakes head].

NOTE FROM KATE: Poppy seeds! Oh my, they are…well…strangely addictive. I’ve loved them since childhood.

It turns out she’s not alone. Poppy seeds are one of those flavors that some people put at the very top of the food pyramid. My guess would be somewhere between one in five or one in ten based on recent conversations. Calling them “devoted” barely scratches the surface! And you know what? Almost everyone else is like me. We don’t dislike the flavor, it’s just the sort of thing we’re happy to leave to those who care.

Common? Check. Beloved by a lot of people? Check. A significant part of the culture from the Baltic States down through Turkey? Absolutely.

Sounds like the sort of thing we need to discuss.

But here’s the thing: poppy seeds are an ingredient more than a concept. They’re used in almost endless ways. So this article is going to focus sharply on cookies where poppy seeds are the central theme. I count four basic categories, plus a few that fall outside our scope:

  1. Poppy seed roll-and-cut cookies, like the Queen Esther Cookies down below; and
  2. Poppy seed drop cookies, like Poppy-Lemon Cookies.

Those are the subject of this article. Then there’s

  1. Poppy Seed Filling;
  2. Cookies made with Poppy Seed Filling, like Hamantaschen and Kolachy; and
  3. Other beloved treats that cannot be called a “cookie”.

Those will get addressed in Part 2 of The Great Poppy Seed Adventure.

As always, skip to the bottom if you’re only after the recipes.

ROLL-AND-CUT-COOKIES

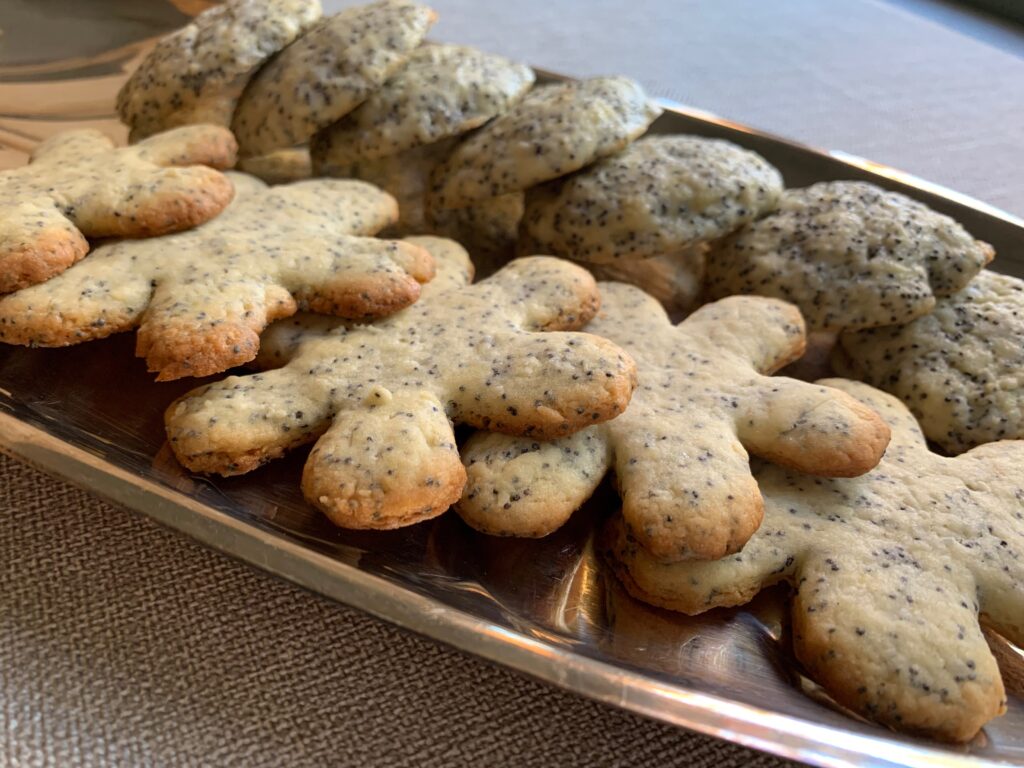
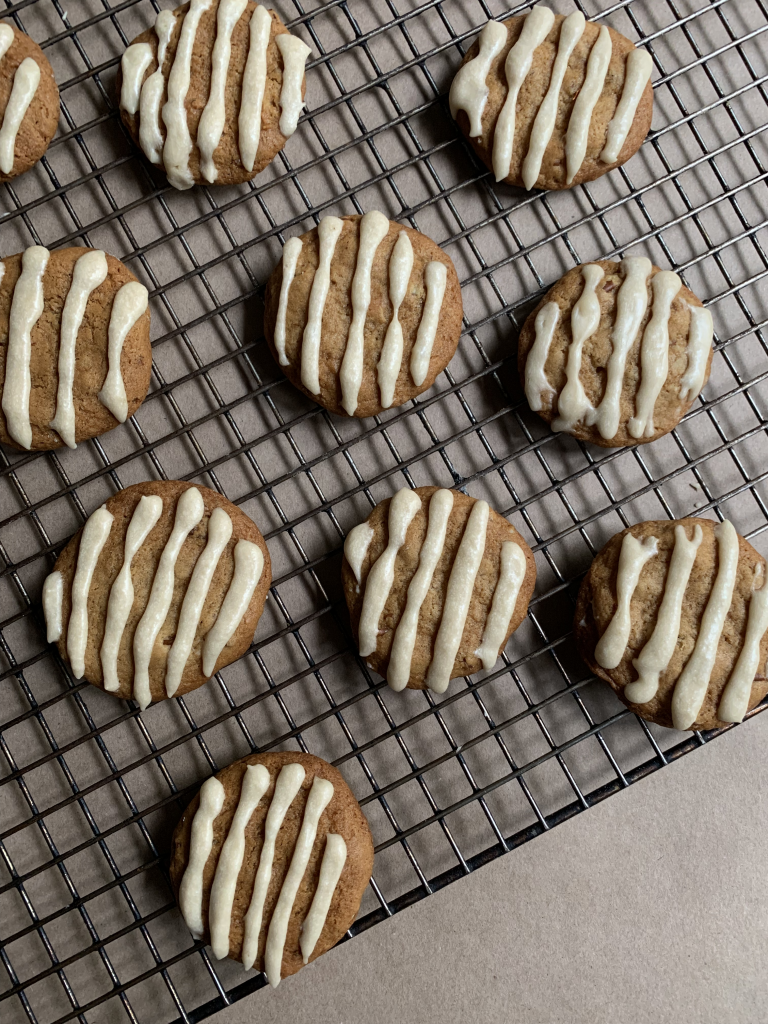
See that toasty bottom? It’s a secret key to getting these just…exactly…right. The bottoms add both texture and a flavor that neatly ties together the poppy seed and lemon elements.

I’m going to ignore the infinite versions that use poppy as an ingredient (Poppy Snaps, Lemon-Poppy Icings, etc.), and get to the meat of the question. What is the best fancy-looking cookie to make for friends and family who are [ahem] addicted to the flavor of poppy seeds?

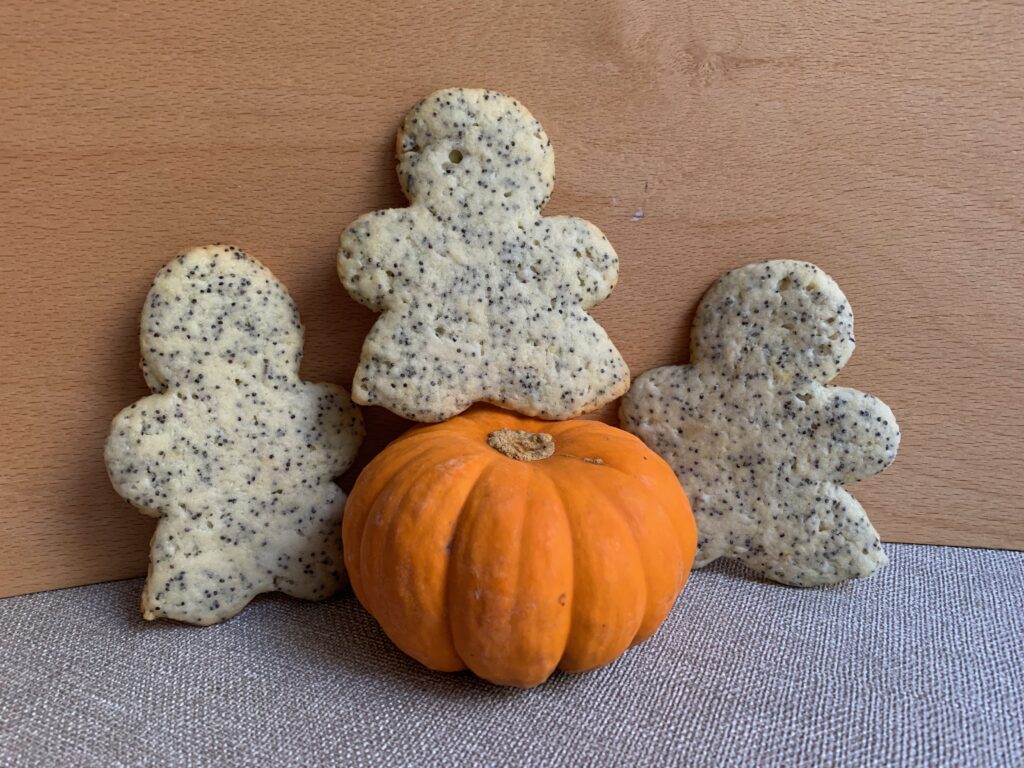
The best answer we have found are Queen Esther Cookies, a treat from the Jewish tradition that’s often paired with Poppy Seed Hamantaschen.

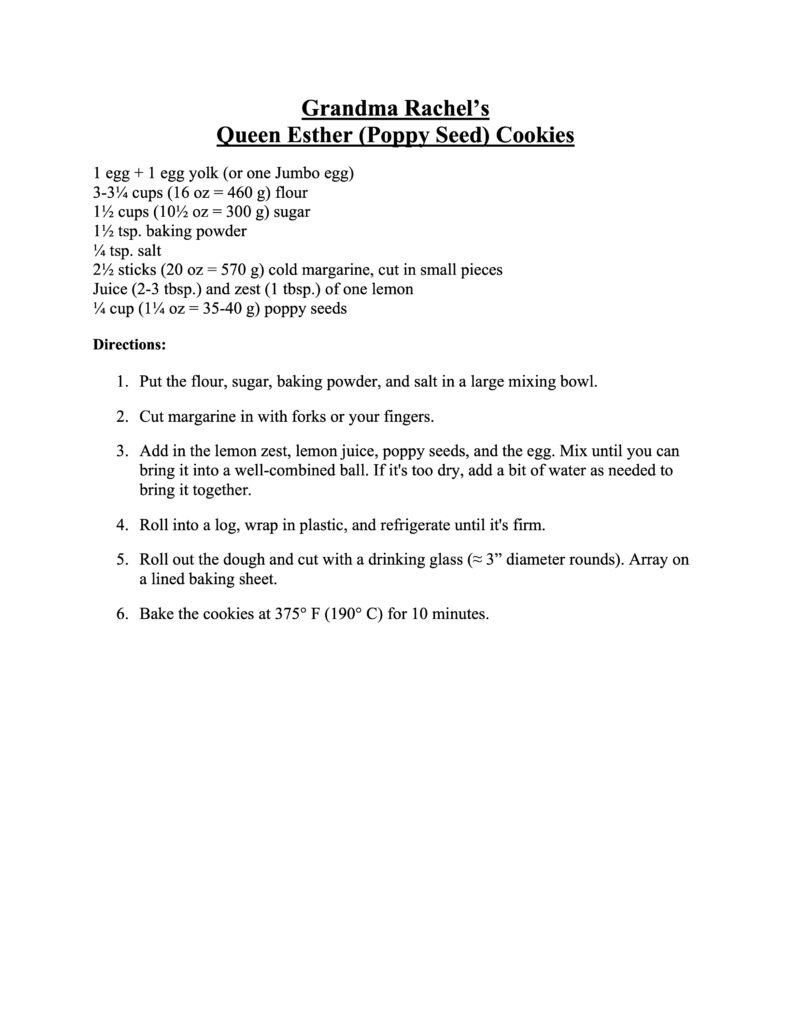
It’s an easy cookie to make, and the development process was even easier because we started from a century-old family recipe. Not our family. This one comes from our online friend Carolyn, an estimable baker, who received it in turn from her grandmother. Here’s the original recipe for the sake of full disclosure and free giveaways:

Grandma made these for Purim, the Jewish early-spring holiday, and used margarine to avoid any potential issues with the kosher laws on a holiday. We have specified butter instead, and normalized the recipe to an even 2 sticks of butter. We also increased the amount of poppy seeds because, well, Kate. [NOTE: My beloved even wanted to try a full ½ cup! I put my foot down, but you might too if you fall in that camp.] (NOTE FROM KATE: It would’ve worked. While experimenting with a Lithuanian recipe, I baked up cookies the color of asphalt. Yum! Usually, we give away our trial runs. Not this time-these are bagged in the freezer for “emergencies.”)

Two flavor notes: First, we found over and over again that the best cookies were the ones with the browner bottoms. That little bit of toastiness enhanced both the lemon and the poppy seed flavors.

We also choose to go with baking powder instead of soda, because we enjoyed the bright hit of lemon as a counterpoint to the cookie. If you want it more restrained (and Carolyn did say the lemon flavor should be subtle), try using baking soda instead. It’s an easy 3:1 conversion; exchange ½ tsp. baking soda for the designated 1½ tsp. baking powder. That will remove some of the extra acid from the lemon juice? [N.B. You can make baking powder at home by using two parts cream of tartar to one part baking soda. Thus baking soda makes up one-third of the designated 1½ teaspoons of powder; or to put it another way, is 3x as strong]

As you might expect, the recipe was nigh unto perfect. We did play around a bit, and found that the standard creaming method in a mixer works as well as cutting the butter in with a food processor. Does it work as well as doing it by hand? Try it and let us know. We are children of the machine age.

We also tested ground poppy seeds versus whole. The first has slightly more flavor and is a lot less gritty, but makes for a gray cookie with darker specks. The whole seeds make a vastly more attractive cookie that’s black-on-pale, but you do end up with seeds between the teeth. I’d go with the whole because I’m not eating them anyway, but She Who Snarfs [Ow! That hurt!] thinks it is a much closer call. (NOTE FROM KATE: I won’t kick whole-poppy seed cookies out of bed, but I prefer the more developed bitter edge of ground seeds. They may look a bit modern and abstract, but the flavor is superb. Also, there’s no danger of getting seeds stuck between your teeth.)

So that’s the first. Queen Esther’s Roll and Cut Poppy Seed Cookies. Check.

POPPY SEED DROP COOKIES

For good or ill, this is a cookie where I had to get a bit creative. We had just finished developing our version of the roll-and-cut Queen Esther cookies, and wanted to do a parallel, poppy-heavy drop cookie. Online recipes are all over the place; cutting back on the amount of flour would have been too easy; and I wanted to use the basic Queen Esther flavor balance while creating something with a very different, more pillow-like texture. So I started by noodling around in the world of online drop cookie formulae until I happened across a recipe for Sour Cream Cookies. Aha!

We haven’t written that recipe up because they’re heartlessly plain, and aren’t common enough to demand a spot on the list. But I have baked them, and knew they would perfectly match the target texture. Besides that, the flavor of sour cream would enhance both the lemon and the poppy flavor, while shifting the focus just sideways enough to really distinguish them from the roll-and-bake recipe. So I set to work, did a sample batch, and [Insert Proud Daddy Preening].

It’s a similar lemon-poppy flavor profile, but with sour cream as well to broaden the edges. Note the toasty bottom. Same thing here as with the Queen Esther cookies. We liked them distinctly better when the bottoms were properly browned. Our dark cookie sheet worked significantly better than the lighter one in this regard.

Are you a married man? If so, you know that moment when your wife gets that look of surprised, big-eyed delight, and then looks at you with pride and admiration. It’s rare. It’s precious. And I got just such a look when my beloved gave the test run a sample. “OMG Scott. You’re goooood. [Munch, munch, reach].”

I don’t know what else to tell you. Is it a “heritage” recipe? Debatable. The two halves are, but the combination is original. But as they say in Paris, c’est la vie. And who cares? They’re goooood!

NOTE FROM KATE: Unlike the Queen Esther cookies, which soften in the tin, the drop cookies tend to harden overnight. Adding a slice of bread in the morning restored them by mid afternoon.

NOTE: We haven’t tried it, but this should be a cookie where you can replace the actual poppy seeds with a commercial poppy seed filling. Our homemade filling (see below) is somewhere close to 65% poppy seed, 20% milk, and 15% sweetener if you measure by volume. Assuming a comparable proportion in the canned versions… [click, click, click]… the math says one should get an almost identical product by replacing the ⅓ cup of poppy seeds with ½ cup of filling, and then reducing both the sour cream and the sugar by 2 tbsp. each. It won’t be perfect (experiments never are), but it should be close enough for the second batch to be just about right if you keep good notes.

CONCLUSION

So much for Part 1 of our poppy seed adventure. Part 2 will cover the tips, tricks, and secrets to making the world’s best Poppy Seed Filling, along with a couple of sample recipes for how to use it, and some discussion of the poppy desserts world beyond just cookies.

Enjoy!
GRIBOCHKY – Eastern European Molded Mushroom Cookies

Spectacular eastern European mushroom cookies made with a stove top mold

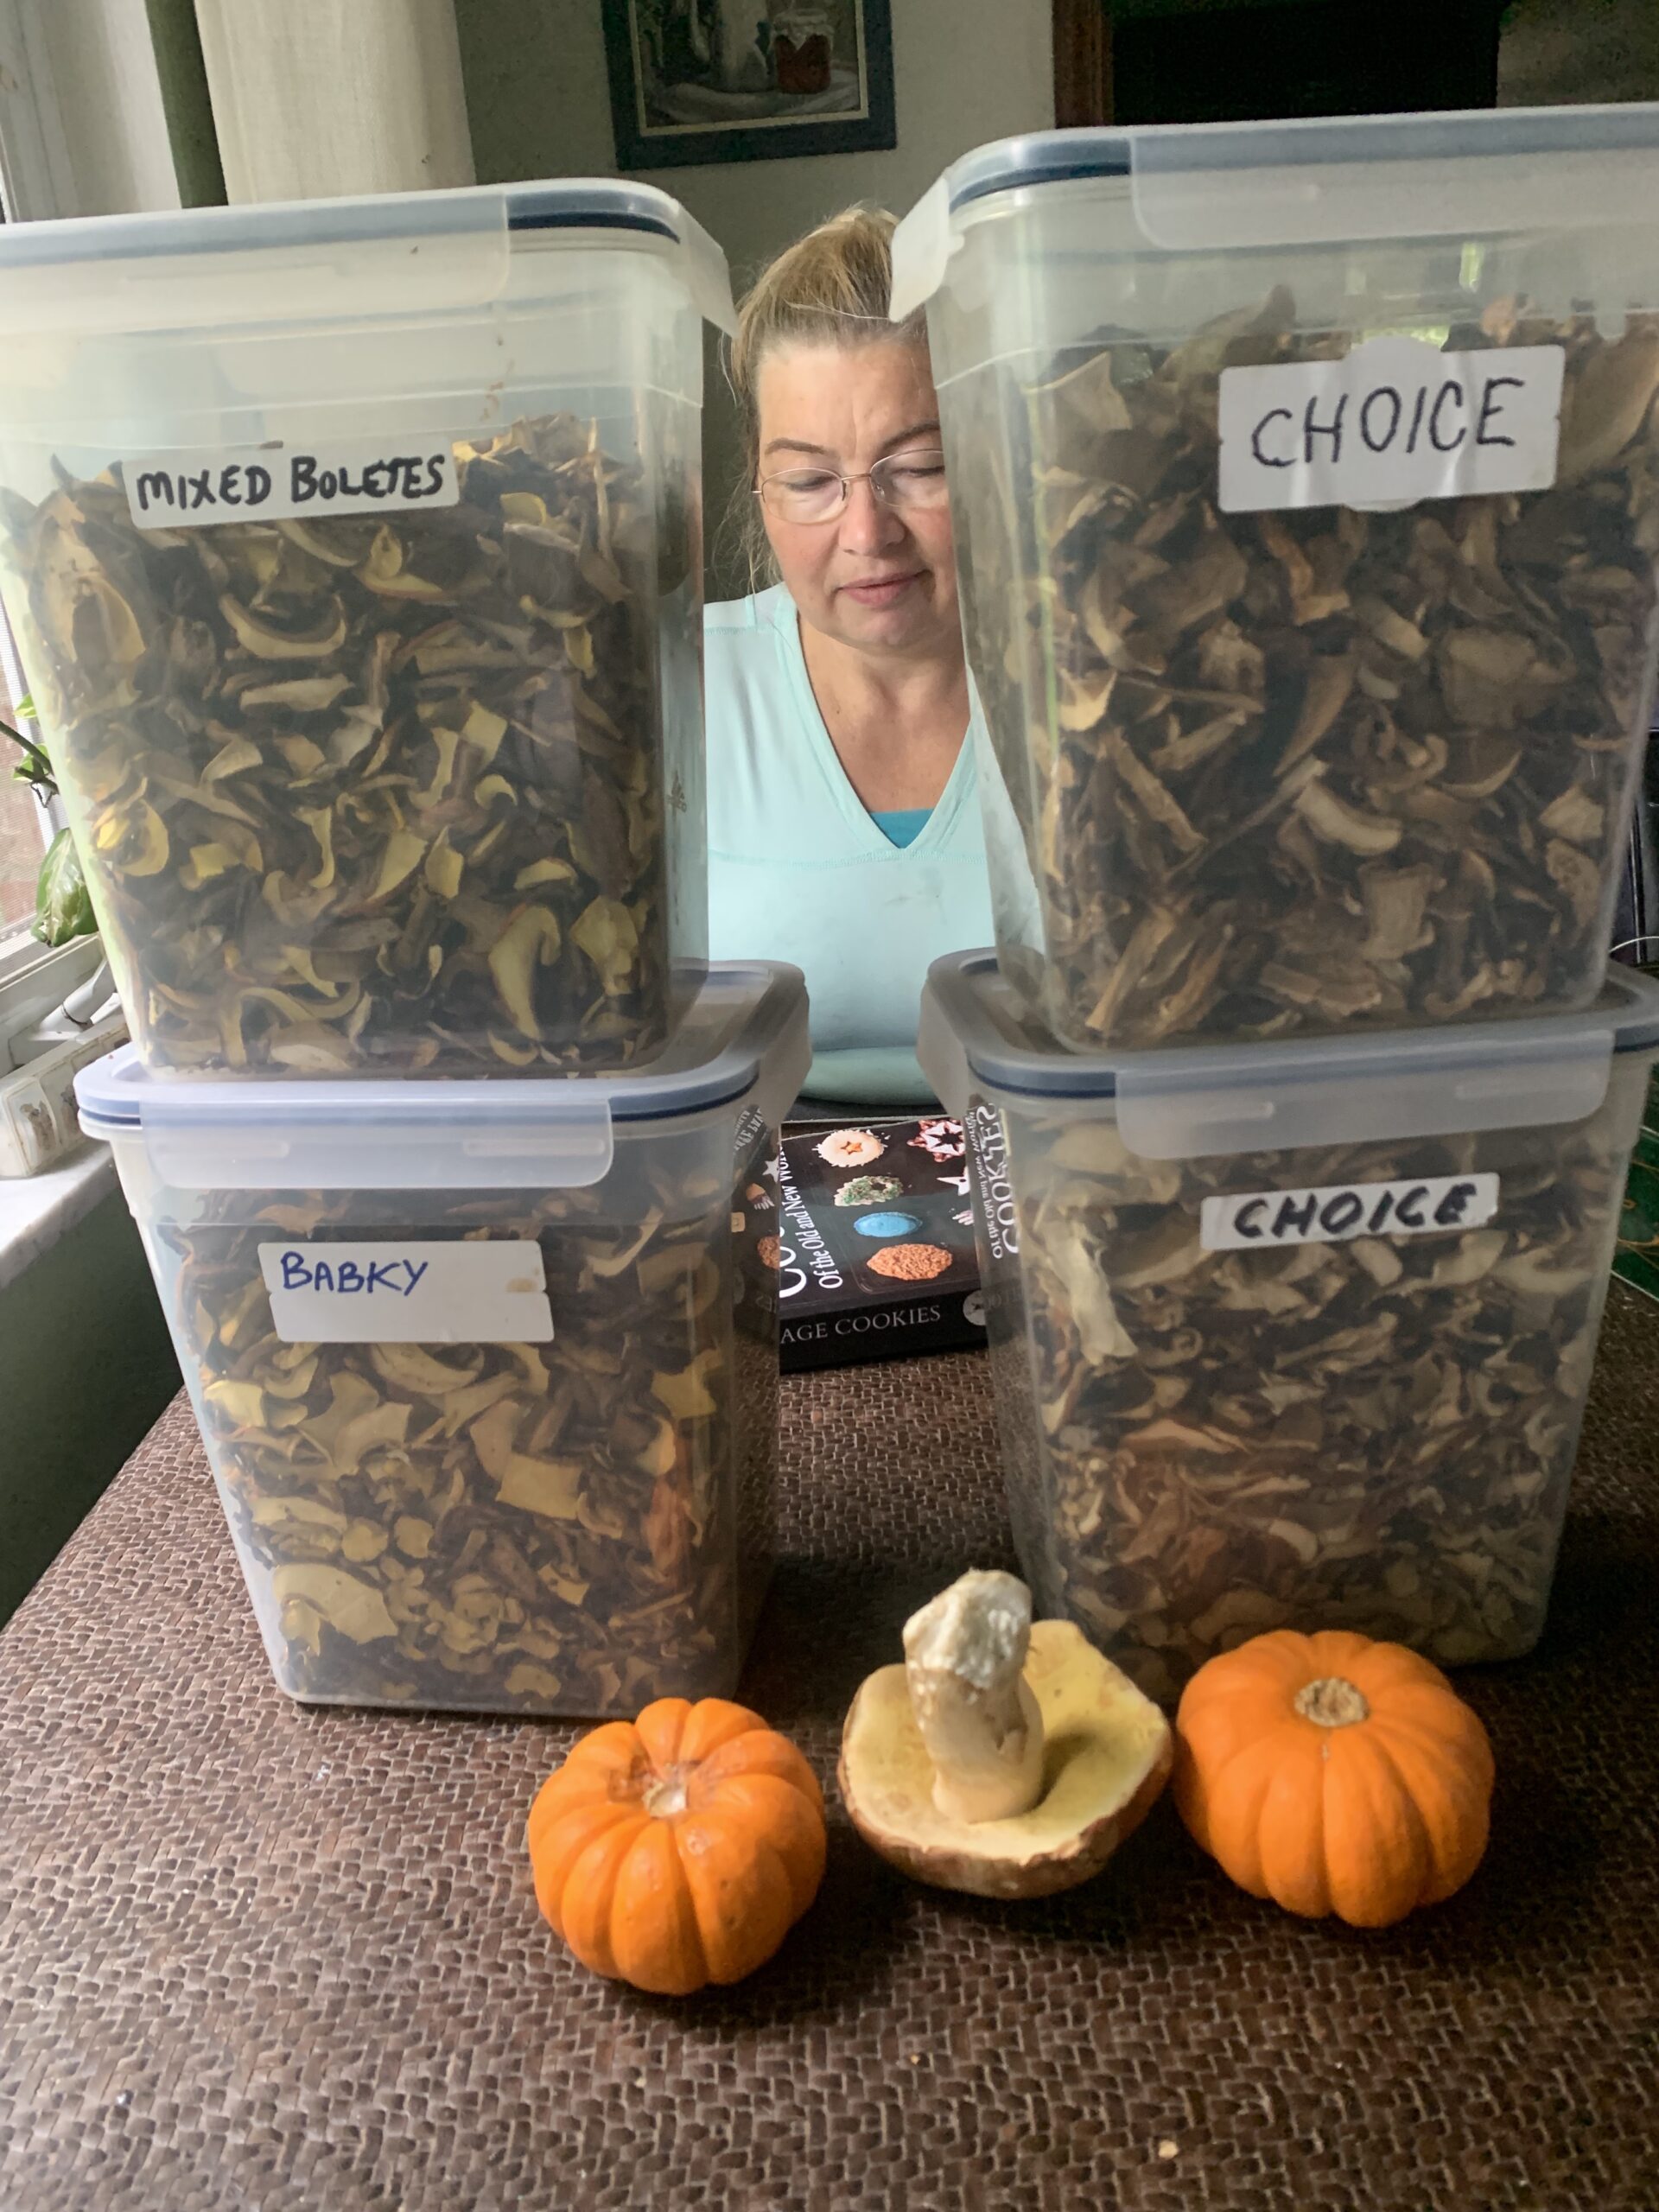
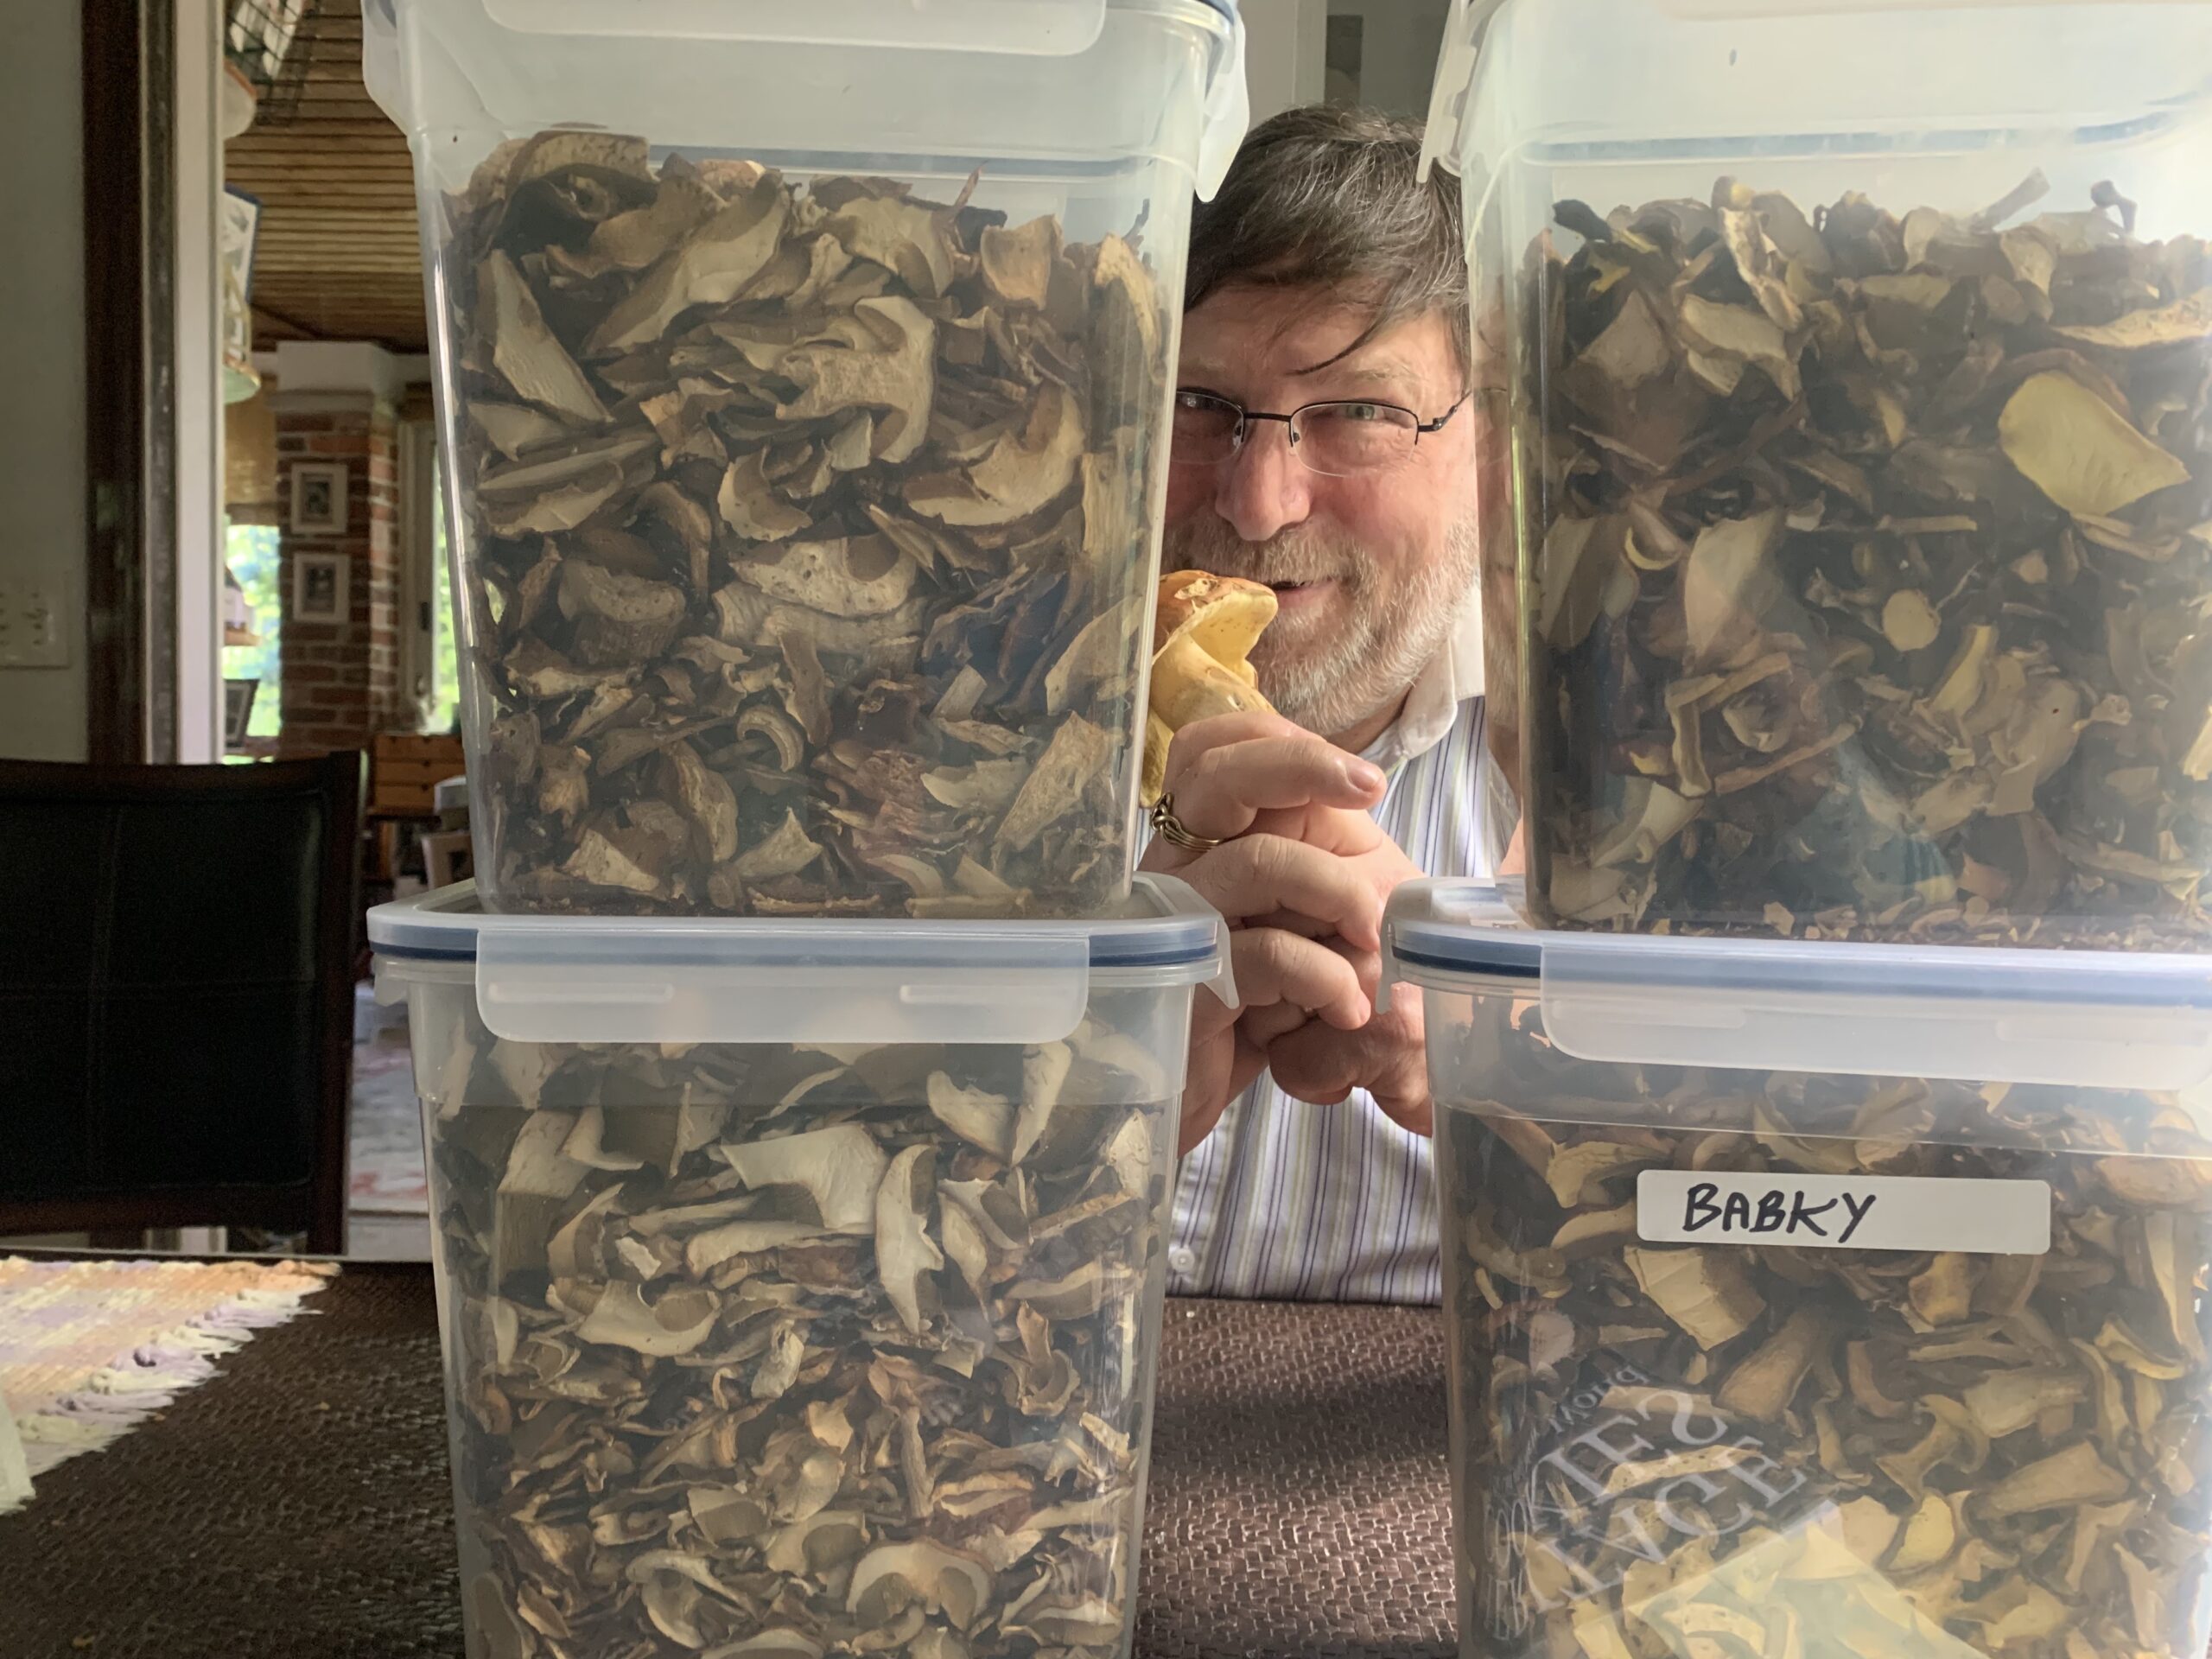
Kate and I are avid foragers who spend a lot of time in the woods hunting for local chanterelles, morels, boletes, maitake, and other species. We do okay.

Every September the local mushroom club hosts a large foray that features a gigantic set of potluck meals supplied by the different members. What did we contribute for 2022? What do you think?

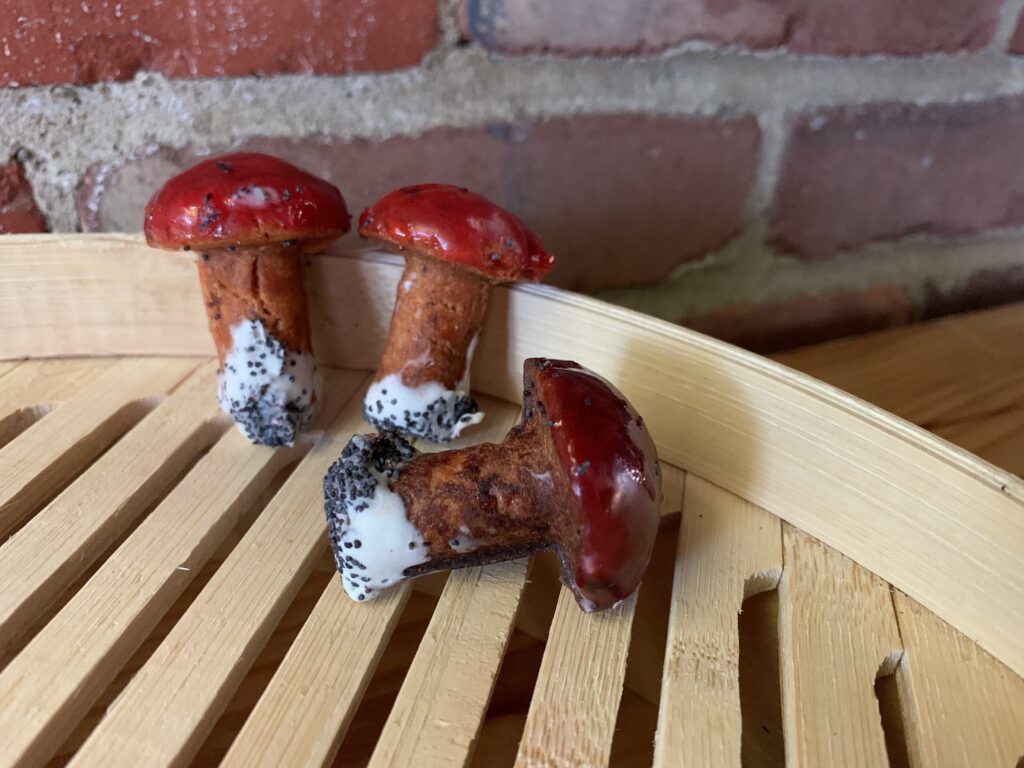
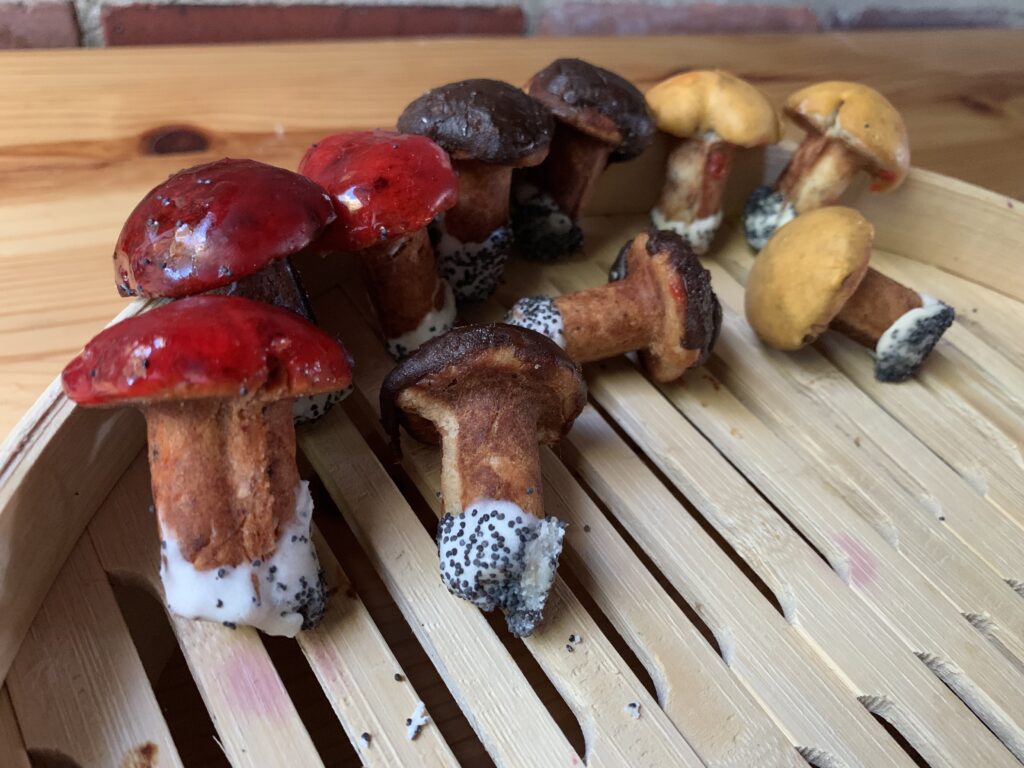
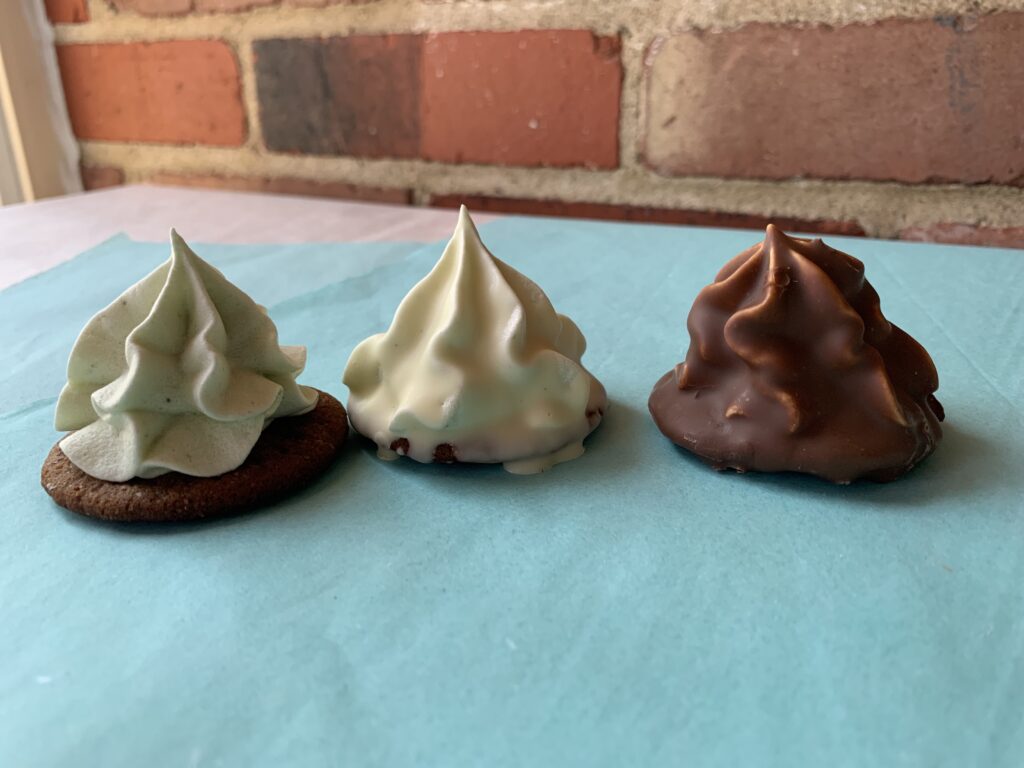
LEFT: poppy seed mushrooms. UPPER LEFT: scottish shortbread leaves. LEFT CENTER: caramel, raspberry, and butterscotch gribochky. CENTER: faux button mushroom caps. BOTTOM: roll and cut mushrooms. RIGHT: laskonky (walnut meringue) mushroom caps. UPPER RIGHT: The insane display made with structural gingerbread trees, poured sugar backdrop, Marshmallo Crispy treat landscape and gingerbread crumb dirt, and two large meringue Lepiotas (or Amanitas, as you wish). NOTE FROM KATE: Oh, definitely Lepiotas!

This article covers our experiments with Gribochky, those colorful little mushroom gems you can see scattered around the display and piled on the bright blue plate. Time permitting, we’ll do another on the other ways to create faux-mushroom illusion cookies. It takes a little fussing, but they’re great fun for baker and eater alike once you get them finished.

As always, skip to the bottom if you are only here for the recipe

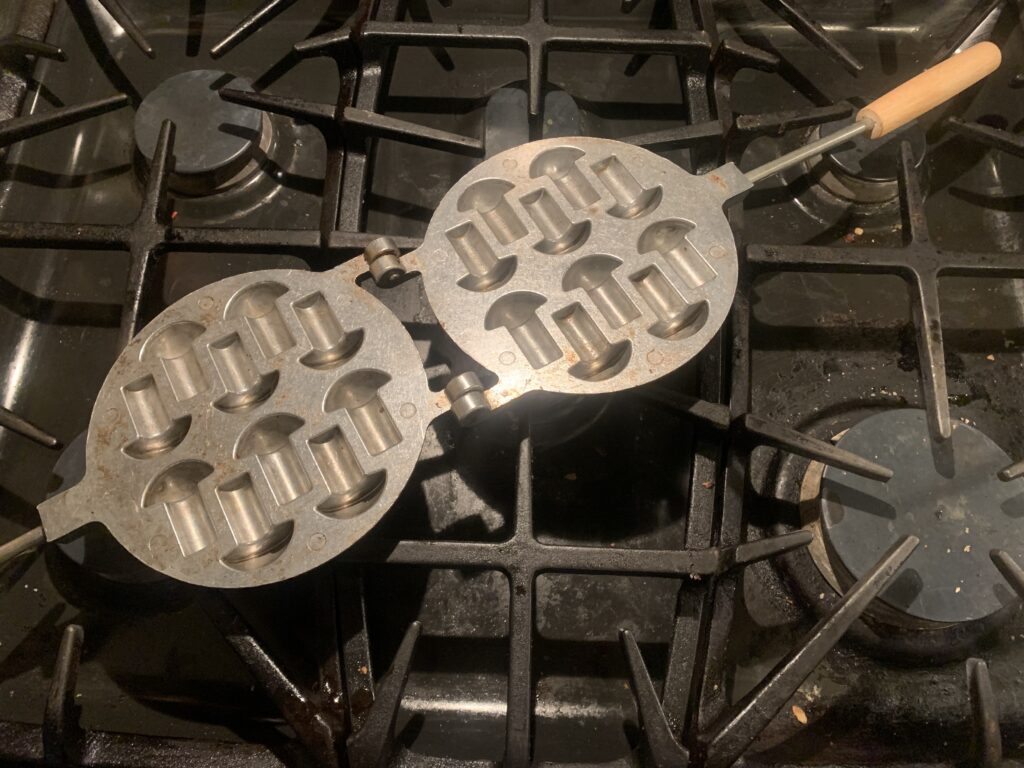
We purchased this specialty mold online. It’s the same company that made our walnut (oreshki) molds
Put a small ball of dough in each hole, close, and then cook on the stovetop until done. Both sides of course.

Gribochky is a slavic word that means “mushrooms”, just as the very similar Oreshki means “nuts.” Both are made from a dough so soft that it could even be called a super-thick batter, and both use a unique stovetop mold as shown above. But where Oreshki come out as stamped halves waiting to be filled with a rich and milky caramel, Gribochky come out as solid, 3-dimensional pieces waiting to be decorated. That’s the point when they turn special.

Amp Up The Flavor. We know at least one excellent baker who tried to make Gribochky and came away disappointed. We can’t blame her. The online recipes, which are very similar, produce a cookie so plain that it isn’t worth eating. Boooooring. We solved that by treating the base recipe as a platform rather than an end point. It worked like a charm.

We made two versions for the foray and both came out great. The first had a 1.2 oz package of freeze dried raspberries (crushed into fine dust), with an extra tablespoon or two of butter/other fat for moisture. Delicious, and a perfect way to mimic the sour tang of candy apple boletes that grow under out local oaks. The second included a tablespoon of our Pardubice honey-gingerbread spice mix. Just as good in a totally different way. And it was obvious that any comparable ‘fix’ would have worked just as well. From “yawwwwwn” to “how interesting…” in one easy step! And it’s a step you can take in any direction that suits the spices in your cabinet, the extracts in your drawer, the freeze dried fruit in your local market, and the whims in your heart.

Trust In Tradition. Many will be surprised to see sour cream or mayonnaise listed as an ingredient. Don’t be. It’s quite common in Eastern European recipes, adds tenderness, and provides a certain complicated je ne sais quoi. I may well try some Greek yogurt for our next batch.

Shorten The Flour By A Lot. Those who know us may be surprised to see such a healthy amount of cornstarch. The reason comes down to simple physics. Gribochky would be amazingly thick if treated as a regular cookie, and the gluten from pure flour would make them prohibitively tough. The starch backs that down into plain old crunchy. Yes, we usually prefer to use rice, tapioca, or potato starch. They avoid the danger of a pasty aftertaste, which can happen when you use cornstarch in flat cookies because it breaks down at a higher temperature than the others. The internal temperature of Gribochky gets high enough to remove that fear. Use whatever starch is cheap and convenient.

Cooking Time Varies. The stove top time varies with burner size, flame height, how often you flip, how often you turn, the underlying color of the dough, and probably the moods of your local household gremlin. Heck, sometimes you want a better cooked specimen, and sometimes a blonder one, so the target changes too. The only universal guidelines I can provide are these:

  • We never got the cookies done in less than 4-5 minutes (2-2½ minutes per side), and usually wanted to add a little bit of time after peeking inside to check for doneness.
  • It helps to make regular turns to change the angle, which avoids hot spots caused by an uneven flame.
  • It also helps to flip them over as they cook in order to to equalize the cooking on both sides. Look closely at the photos and you’ll see one batch that looks a little odd because I cooked them first on Side A, and then on Side B. The first side cooked more, leaving a distinct stripe. No one will notice a thing like that in the decorated cookies unless you point it out, but we knew, and so it nettled.
  • NOTE FROM KATE: I found that preheating the mold gets too heat-dangerous and fussy for me. I made as many balls as we had holes to fill, and rolled them into a conical shape. I placed the wide part of the cone into the cap of the mold in each cavity (both sides, please!) The mold was warm but not too hot, so I could use my fingers to push the dough all the way in. I closed the mold and popped it over the flame. Time it, flip it, go again, and repeat until done. The lack of preheating doesn’t hurt the cookie (you can vary the time or the flame height) and it avoids “casualties.” Also, you don’t burn your fingertips!

DECORATIONS; a/k/a TURNING ON THE MAGIC

There are four parts you can pay attention to on each cookie: (1) the cap, (2) the base, (3) the stem, and (4) the pore/gill layer. The first two matter most, but you can certainly gild the lily by playing with #’s 3 and 4 as well.

Decorating The Caps: We’ve tested two basic techniques for the cap coating. Both worked, and playing with either approach yields a vast number of options. It’s a no lose situation.

The first method centers on melted chocolate. Dark, milk, white, food-dyed-white, and even commercial candy melts – each and every one of them will work. We like to thin them out with a bit of cream, but your mileage may vary.

The best approach is to hold each piece by the stem, dip it into the coating at an angle, and then roll the cookie to cover the entire surface of the cap. Remove, let the excess drip off, and then set them cap up in a place where they can dry without flattening one part of your coating. Egg cartons worked great, with ice cube trays a very close second.

Dark chocolate, textured by accident because I melted it without any cream, cocoa butter, or other fat to make it thinner and smoother. I love the contrast created by painting the “pores” bright yellow.

We also tested chocolate chips, but they didn’t work nearly as well. Chips are carefully designed to not melt, and overcoming that is like fighting the tide. First you must add cream to help them melt evenly. Then you find that they harden, curdle, and/or to harden in inconvenient ways despite the cream. And then they’ll suddenly discolor if you try to keep them warm on the stove top. I can’t recommend chips except for something odd like butterscotch chips, which do double duty as a coating and a unique flavor addition.

NOTE FROM KATE: instead of cream, I prefer using cocoa butter melts. They help your chips or chocolate melt, loosening the mix and helping with dipping properties, but they also yield in a nice and solid surface with none of the tackiness that cream can cause. We winged it with the chips here. For exact instructions, kindly refer to our “Chocolate coverture” recipes associated with chocolate-dipped marshmallow treats.

Butterscotch chips for the cap. It was a PITA but we made it work! White chocolate base, with poppy seed dirt. BTW… did you notice the stripe on the left hand cookie? That’s the one where I forgot to flip them as I cooked.
Butterscotch chips cooked into a dark caramel. Still usable and edible, but it came at the cost of frayed tempers and a few choice words that cannot be shared in public. They looked pretty good anyway, and could have been great if we had enough time and energy to paint the underside of the cap.

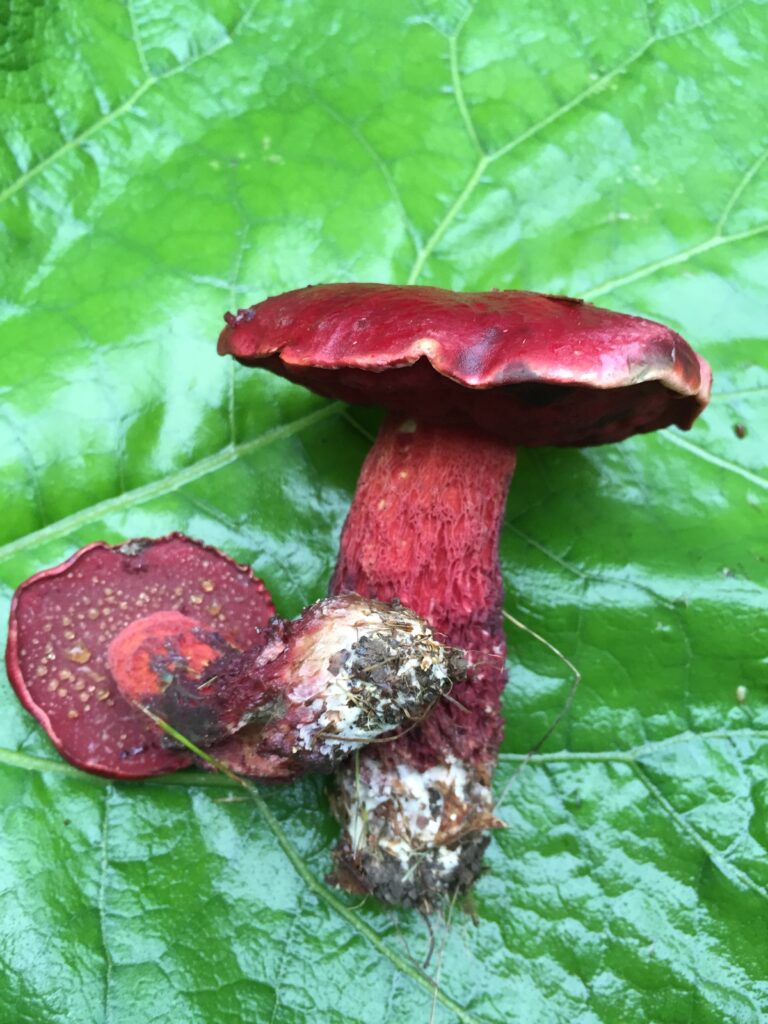
The other cap technique uses molten sugar. The prettiest of them all is a candy apple coating made from “hard crack” sugar syrup mixed with some bright red food dye. Your target is 300°-310° F (149°-154° C). Caramel works well for light and dark browns.

The problem here comes down to safety. 310° sugar syrup can burn you badly enough to leave obvious scars. No bueno. We came up with a workaround, but it requires three hands. Hand #1 steadies the pot. Hand #2 holds the cookie stem in a pair of tongs, dips it into the hot syrup, rolls it around to get even coverage, and then lets the excess drip back into the pot. Hand #3 then takes the cookie out of the tongs with a pair of chopsticks, inverts it, and lays it out in an ice cube tray (cap up) to dry. NOTE: The sugar is so hot and so sticky that it will melt a styrofoam egg carton, and pull off shreds of a cardboard one. Yes, the cardboard easily peels away from the cooled cookie, but better to avoid the issue in the first place. NOTE FROM KATE: peel cardboard bits off the sugar with fingers, then moisten a small brush and work the surface over a bit. When in doubt, remember that you are making the cookies healthier by incorporating an extra microdose of fiber!

The upside? Behold!

Candy Apple Gribochky
Gotcha! These aren’t cookies. They are the real life Candy Apple Bolete, Exsudoporus frostii. Nature’s pretty cool, isn’t it?

Decorating the Base: This step is easier because there aren’t many options, all of them are easy, and the shape can be handled with fingers alone. Did you know that mushrooms are actually the fruit of the fungus and not the main entity? The apple of the tree? ‘Struth! The main body is called “mycelium” and will be spread in a mat over a relatively vast area in and around the soil or the nearby wood. This is what you’re seeing at the bottom of mushrooms poked fresh out of the ground.

Mycelium is almost always some shade of white or pale yellow, and is easy to replicate with white chocolate or a tinted candy melt. Add poppy seeds or cookie crumbs for “dirt” and presto! Your illusion is complete on both top and bottom.

The Underside Of The Cap: Mushrooms with this shape will have either gills or pores on the underside of the cap. Adding this layer is a special touch that true mushroom geeks will appreciate, but it’s very hard to see unless you make it a bright, contrasting color like the yellow-on-dark specimen up above.

Gills can be any color of the rainbow, but most people will want to make them white, pink, or cocoa brown to imitate the best known species. Lilac will make the mushroom hunters happy. Mushroom pores will be white, yellow, pink, or red at this spot in the vast majority of cases, sometimes with blue or brown bruising on the surface.

Decorating the Stem. Stem features, ironically enough, are often the most useful part of a mushroom for field identification. For Gribochky? They’re an afterthought, because the features are impossibly subtle to duplicate. The only time it’s worth an effort is something along the lines of painting/dipping the stem to make it white, and that only makes sense when you’re trying to model an Amanita or Agaricus (see below). OTOH, adding berries or food dye to the actual dough can be a fantastic trick for species like the red Candy Apple Boletes. That, and cooking the Gribochky to a lighter or darker shade of brown, is almost always enough to complete a high quality illusion.

A Few Common Mushrooms To Mimic.

The so-called “toadstools” with white spots on top are in the genus Amanita. These can have caps ranging from bone white through basically any color, have white gills, almost always have a white stem with a ring of extra tissue about 2/3 of the way up.

Supermarket button mushrooms are in the genus Agaricus. They have white caps with white stems, and gills that start off pink before aging into brown. These will also have a ring on the stipe. Oh! And the answer is “yes.” Store bought mushrooms are all the same species, Agaricus bisporus. The little buttons are babies, cremini are teenagers, and portabellas are full sized grownups.

White chocolate “agaricus” with chocolate “gills.” This was our very first effort, and the illusion is as poor as any version you’ll ever made. And it doesn’t exactly suck even so, does it? Gribochky are show stoppers, plain and simple.

The pored mushrooms, a/k/a boletes, are my personal specialty and it pains me intensely to mention some but not others. You can find a list of every North American species at The Bolete Filter, written by yours truly under a different hat. The true “porcini,” a/k/a Boletus edulis and its close cousins, will have a yellow, orange, light red, or light brown cap with a white or yellow pore surface.

CONCLUSION

Gribochky are a perfectly acceptable eating cookie once you kick up the flavor with berries or spices, in the same way as Vanilla Snaps and the like, but their real glory lies in the illusion. There are other techniques one can use to create the illusion of a mushroom out of different kinds of cookies. They work too, particularly as part of a scene. But none allow for this level of absurd creativity, let alone the chance to customize things toward a copy of real life species. Fun, fun, fun!

Yes, the cookies require a special mold, and can definitely qualify as “fussy” on the decorations side if you try to copy real life. But the results can be shockingly beautiful, especially if you take the relatively easy step of dipping the bottom to mimic the mycelium, and then adding in poppy seeds or cookie crumbs to mimic the dirt. They start at “Cool!” and work their way up to “Spectacular.”

If pure, visual fun is your thing – or mushrooms! – this is a cookie that needs to be in your repertoire.

Raspberry candy apple, dark caramel-spice, and butterscotch-spice Gribochky

CHOCOLATE COVERED MARSHMALLOW TREATS – Part 1, An Overview

Part 1 of a 5-part series about those chocolate coated treats you adored as a child. This is the overview.

This is by far the most challenging recipe we’ve undertaken even though the basic instructions for all of the 73,000 variations could not be simpler:

  1. Make a simple, basic cookie base.
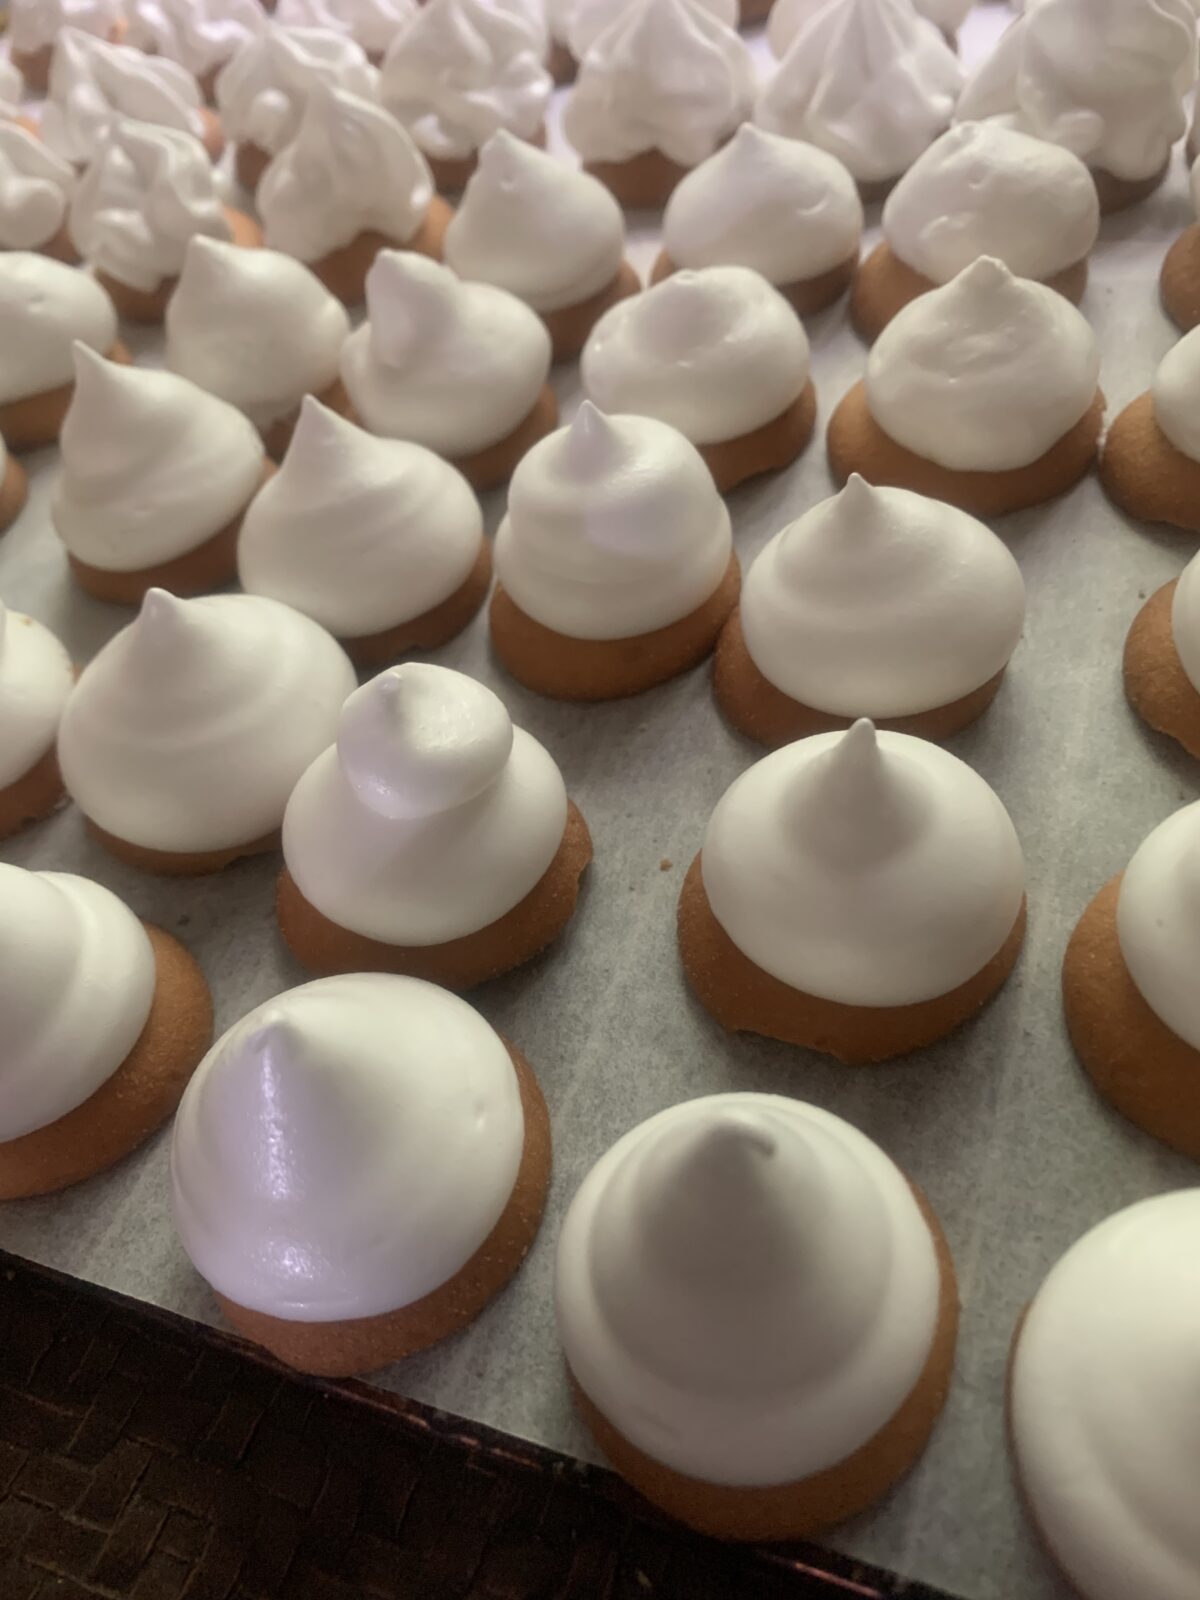
  2. Make a marshmallow filling and pipe it on top of the base.
  3. Cover with a thin coat of snappy chocolate.

Easy, right?

Well, maybe the cookie part… until you account for the infinite variations and my obsessive need to test each and every one. But that’s just volume of work, not difficulty, and I can sum it up quickly. (A) any plain cookie of the proper size will work, and we took great delight in playing around. It’s almost shocking at how big a difference you can create by shifting to a cardamom, cinnamon, or gingerbread flavored base in lieu of the classic Vanilla or Graham Wafer. (2) Straightforward shortbreads like your favorite butter cookie will also work. But (3) It is vital to keep the intensity under control, so the base to be a partner in the enterprise, and not a dominator. If you’re starting from a standard spice cookie (a/k/a “snap”), cut the amount of featured flavor in half.

The marshmallow fillings posed a bigger problem. We are bakers, not candy makers, which created a learning curve issue before we could start narrowing down toward the perfect version. I discovered there are two basic approaches to making a homemade marshmallow: the U.S. gelatin-only version, and the European Italian-meringue version. Both recipes work… if you want to make a marshmallow to eat out of hand. They emphatically do not work when you’re after an ultra-light, not too sweet marshmallow filling!

The solution came down to food chemistry in action, as discussed in this online grade school experiment. All marshmallows have a certain proportion of corn syrup (glucose) in addition to regular sugar (sucrose). They must, because at these concentrations you need to combine the two sweeteners in order to prevent crystallization. If you do the experiment, you’ll learn that a higher percentage of corn syrup yields a fluffier but less sweet product. Ding ding! That was exactly what I wanted! The two marshmallow fillings have different proportions, but raising the level of glucose pretty much solved the problem. More than solved. Taste testers actually stopped to ask, “how did you get this texture?”

Then came the third kind of marshmallow… but that’s the tale of Part 5.

The chocolate coatings drove poor Kate nigh unto madness. [NOTE FROM KATE: Ahem! “To a level of high frustration.” Husbands.] Here’s the problem in a nutshell: you’re trying to duplicate cheap, commercial, pseudo-chocolate shells using quality products in a homemade environment. So how the devil could you create that thin, snappy shell at room temperature without all the apparatus of industry?

Back to the food chemistry research I went, where I discovered that the answer lies in the kind of fat you use to thin out the chocolate. Think of it this way. You’re really trying to create a version of the “magic shell” liquid used to coat ice cream. That is nothing more than melted chocolate thinned with coconut oil. It works because the cold ice cream hardens the oil to create a shell. Leave your finger on that shell, and the spot you’re touching will turn soft and gooey because the heat of your body is higher than the melting point of coconut oil.

What we needed for Chocolate Marshmallow treats was a fat that would harden/soften at body temperature rather than room temperature. Industry uses palm oil, which does just that and is also cheap. But palm oil is evil. The combination of slave labor and environmental havoc behind that industry means that we won’t have anything to do with it. Palm oil was out. Cocoa butter was in.

For what it’s worth, our taste runs toward a classic dark chocolate coating, but white and milk versions will also work, and sprinkles, sparkles, or stripes, ground nuts, espresso powder, & etc. could be used to guild the lily. Oh yes! You can also flavor the chocolate with a touch of coffee or liqueur.

Permutations Multiplied By Possibilities; And Again; and Again; and Again.

Look at the options we had at this point in time. Start with cookie bases limited only by your imagination; multiply by two marshmallow fillings that can be piped in any shape; multiply again by literally any extract buried away in your spice cabinet; multiply a fourth time all the different forms of chocolate; multiply a final time for the ways you can flavor that chocolate; and then consider all the ways you could decorate those final products.

You could fill an entire bakery with that many variations, and still have ones you left out. Macarons 2.0, done and ready to publish. Right? Not exactly. It turns out there is a third kind of marshmallow, which will blow your mind unless you grew up in Eastern Europe.

Zefir, named after the gentle southern wind,is a marshmallow that starts from a base of concentrated fruit. But that doesn’t do it justice. They don’t taste of “fruit” so much as FRUIT!!!! The level of pure flavor is almost hard to believe, especially when you factor in the distinctly sour tang that no extract could even begin to imitate. It’s like nothing else we’ve ever come across.

Zefir are usually sold on their own, with neither a cookie base nor a chocolate coating. But both variations exist on store shelves in every country from Poland and the Czech Republic eastward into Central Asia, and no study centered on marshmallow fillings would be complete without at least mentioning Zefir as a potential variation.

Alas, but Zefir are also a maddening puzzle we still haven’t cracked! The basic method could be the simplest one of all, and it has worked spectacularly for both sour apple and raspberry versions. But it’s also failed completely with some other fruits, and we’ve yet to understand why. So part five of this series is a work in progress. We can promise results for the apple and raspberry versions, but things get inconsistent after that.

CONCLUSION

Macarons are a very elegant, grownup treat. Chocolate Marshmallow Treats make your inner child jump up and down like a vibrating six year old. But the two cookies share something in common: they can be made in endless, high-end variations that deserve to be tucked into elegant little boxes for a nifty markup. If you’re a bakery owner, take me at my word and do a few “Why not?” experiments of your own. It could be the start a whole new trend, and it’s as simple as 1, 2, 3:

  1. Cookie Base, flavored with anything you want;
  2. Marshmallow Filling, flavored with anything you want; and
  3. Chocolate coating, flavored with anything you want, and decorated as you desire.

It took us forever to get each of those pieces capital-R Right, but none of them is hard on its own once you have the recipe. So don’t be daunted! People across the world will bow at your feet once you master the simple tricks that let you make these for gifts, parties, and sales. Wait a sec… Let me lodge the protest on your behalf:

“Across the world?” Come on Scott. Why the exaggeration? We all know this treat from childhood. It’s hardly the sort of thing that would make people all over the world go wild!

Think not? Let me leave you with this:

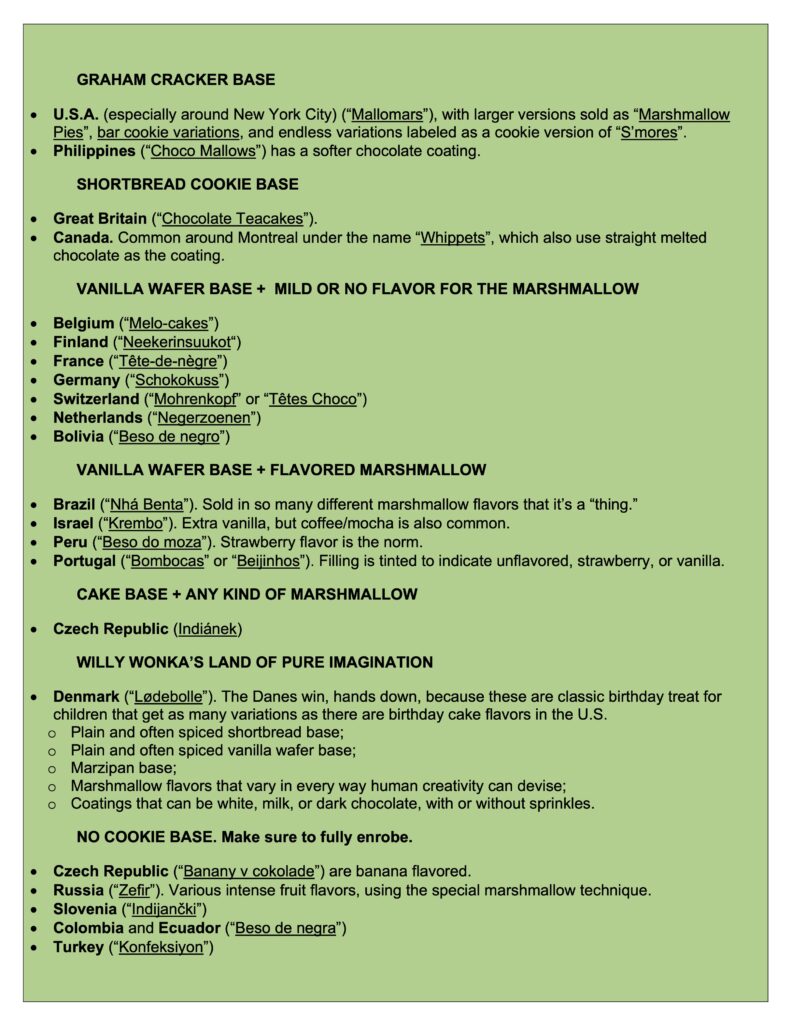
A LIST OF INTERNATIONAL VERSIONS, VARIATIONS, AND NAMES (drawn from perhaps the best Wikipedia article ever)

THE CHOCOLATE MARSHMALLOW TREATS SERIES

Part 1, The Chocolate Marshmallow Treat Overview

Part 2, The Cookie Base Options

Part 3, The Marshmallow Filling Options

Part 4, The Chocolate Coating and Finishing Options

Part 5, Experiments With Fruit-Based Zefir Marshmallows

CHOCOLATE COVERED MARSHMALLOW TREATS – Part 2, The Cookie Base Options

Part 2 of a 5-part series about those chocolate coated treats you adored as a child. This examines the cookie base.

This should be a short post because it has a relatively simple, if far-reaching, message. Most of us grew up with a single version of Chocolate Marshmallow Treats. That’s the one that will feel “right,” while everything else is an experiment. But that version is not “right” to the rest of the world. There are almost infinite ways to customize these cookies, and a great many of those variations have been popular in some part of the world even if they were unknown in yours. So when you look at the different options for the cookie base, start by considering the options and possibilities.

As always, skip to the bottom if you are only here for the recipe

Chocolate Marshmallow Treats can build on almost any kind of cookie base, and shifting that part up will completely change the effect for the loved ones who are privileged to share your bounty. We really did test this, and the distinctions aren’t exactly subtle. Indeed, the best advice we can give is this: keep the amount of flavor in your cookie base down to a hint rather than a dominant feature. You want the cookie part to mesh with the marshmallow and the chocolate, not fight them for dominance.

The recipes we tested include:

  • Commercial Vanilla “Wafers” – on the smaller side, but absolutely delicious as a plain, almost invisible foundation. The marshmallow filling will soften them in the beginning, but time will help them to crisp back up a little.
Homemade Vanilla Snaps
  • Homemade Vanilla Snaps – Step up your game from “plain” to “elegant” with a homemade version.
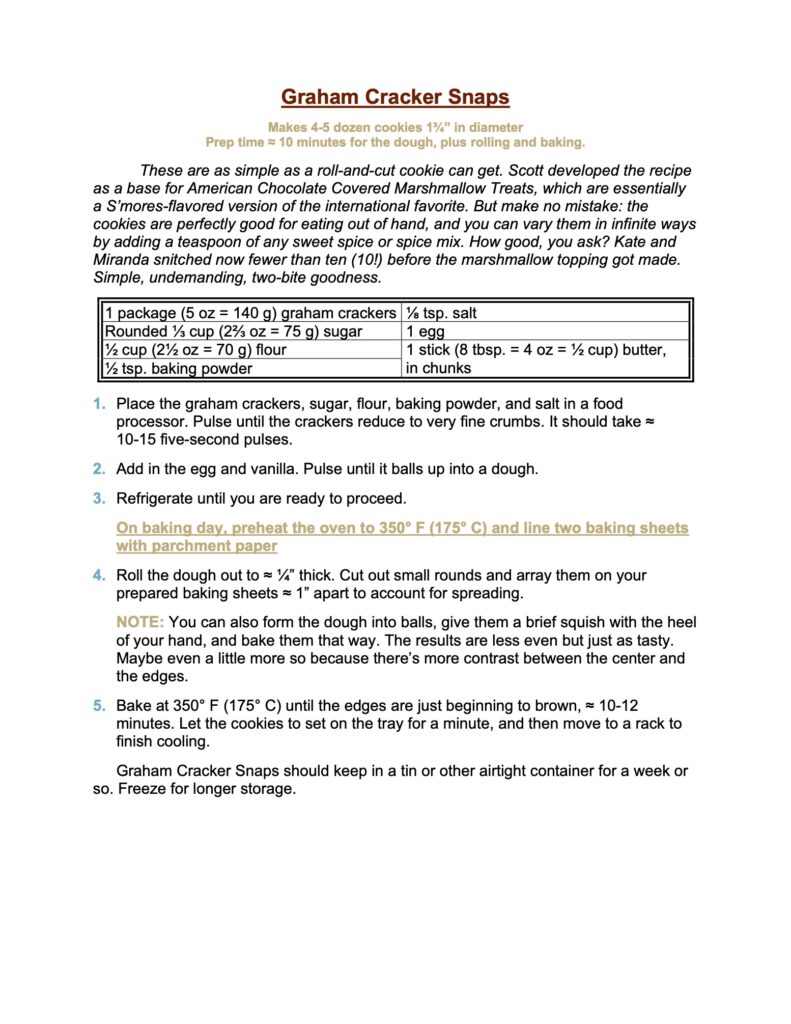
  • Graham Cracker Snaps – I grew up with MallomarsTM as my personal norm. Those come with a graham cracker base that evokes a S’more. See below for an elegant homemade version that’s worth eating out of hand as well as inside a cookie.
  • Spice Snaps – See the master recipe below, or use your personal favorite with about half as much spice as you’d use for a free standing cookie. Full-flavored snaps aren’t partners so much as pushy, wannabe overlords.
Cocoa Spice Snaps with marshmallow only, white chocolate, and dark chocolate
  • Shortbread Wafers (Commercial or Homemade) – You just can’t lose when buttery goodness comes to town.
  • Miniature Cake Rounds (No Recipe Provided) – This is as common as can be among the commercial versions, but you won’t see a recipe here. We do cookies, thank you very much, not cake. (I might also be just about done with experimenting by now…)
  • No Cookie Base – Omit the base and you get a candy rather than a cookie. Same issue as the cake base. Besides, I have zero doubt that anyone who reads this will be able to figure this one out on their own.
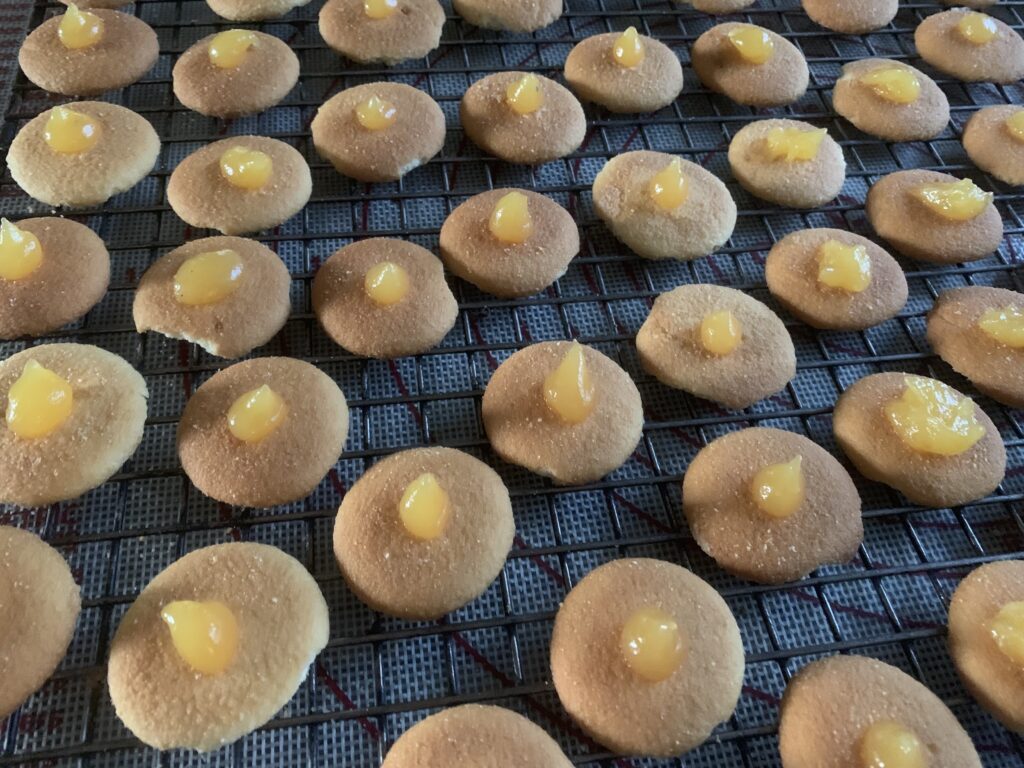
Want to play? Lemon curd dots to go inside the marshmallow!

CONCLUSION

That covers it folks. Expand out from here. But please pause for a moment and look at how we’re already multiplying out! So many choices for just the cookie part. And believe me, there are just as many options when it comes to the marshmallow filling.

THE CHOCOLATE MARSHMALLOW TREATS SERIES

Part 1, The Chocolate Marshmallow Treat Overview

Part 2, The Cookie Base Options

Part 3, The Marshmallow Filling Options

Part 4, The Chocolate Coating and Finishing Options

Part 5, The Strange New World of Fruit-Based Zefir Marshmallows

NOTE: You can also use the Vanilla Snap/Wafer recipe as your base. Cut the vanilla in half and then add in the Spice Option.

CHOCOLATE COVERED MARSHMALLOW TREATS – Part 4, The Sticky Problem of Chocolate Dip

Today you get a big, fat note from Kate, because I’ve somehow become the family chocolate dipper.

Oh, we’ve all tried it, and we all have our tricks. I’m the one who gets to share the final results with you, though, because I strongly believe in the Power of Chocolate. It is, after all, its own separate food group!

[NOTE FROM SCOTT: It also has magic powers. I know this from long experience with both a wife and two daughters. “Just stand back and throw some chocolate at her” isn’t a joke, it’s a survival mechanism. The masculine life expectancy in America soared in the late 1890’s and early 1900’s. Hershey’s went into business in 1894. Coincidence? You lay your bets, and I’ll lay mine.]

As always, you can skip to the bottom if you’re only here for the recipe

We’ve been dipping various cookies in chocolate for years, as evidenced by the recipes in Volume I of the Heritage Cookies Cookbook. A careful observer may notice that the quality of our chocolate dip in some of those photos isn’t nearly as smooth and shiny as commercially made products. There is a reason for that. First, we are home bakers, not chocolatiers.

Sure, I could invest into (a few more) additional pieces of equipment. Then, because tempering chocolate is best done at volumes larger than we usually use, I could sink an inordinate amount of money into ingredients only to learn how to temper chocolate properly. But… really?

Friends, chocolate ain’t cheap. Never was. And neither is time. Therefore, I am forever grateful for every little trick, as well as for those immense bricks of good-enough, affordable chocolate from Trader Joe’s. They do a pretty good job for most our applications. For fussier cookies we’ll buy Callebaut or Valrhona, and for convenience, Scott is willing to use those commercially available chocolate melts. But that doesn’t get us into the main point of this article.

Why is high-quality, commercially produced chocolate so pretty and shiny, and how can one do that at home? I’m not a chocolate expert so I’ll give you the shorthand as I understand it.

Cocoa butter, the off-white fat that forms the bulk of the chocolate we eat, crystallizes into several different forms. Of those, the beta-crystals are the ones that produce a smooth and shiny surface. If you melt your chocolate under exacting, well-controlled conditions, working the softened product under controlled humidity, concentration, temperatures, and timing, you will end up with tempered chocolate. Such conditions can be achieved for the home baker, but they require low air humidity, a large marble or granite board, and a certain minimum volume.

Plus, of course, practice.

But there is a shortcut! Properly tempered chocolate is chock-full of beta-crystals. It snaps upon breaking, and the break is smooth instead of crumbly. The chocolate’s surface shines with that undeniable gleam of quality and good taste.

Commercial chocolate makers, who process tons of material, have their processes tightly in check. The less-expensive brands also stretch their batches with extra fillers (powdered milk and lots of extra sugar), flavorings, emulsifiers, and various fats to act as melt conditioners. You will notice that cheap chocolate has a list of ingredients as long as Twinkies, whereas high-quality chocolate will have fewer than you can count on your fingers.

Technically speaking, the final product requires only cocoa butter, cocoa, and sugar. But there is an inexpensive, readily available product that works even better if you are willing to turn a blind eye toward certain other factors.

To Palm Oil Or Not To Palm Oil, That Is The Question

Palm oil is entirely edible, tasteless, inert, and has a combination of high molecular weight and melting characteristics that allow you to easily thin chocolate enough to produce a hard, thin layer at room temperature. These properties, its low cost, and its ability to substitute the more expensive cocoa butter, makes it ideal for a whole slew of commercial applications.

NOTE FROM SCOTT: Wilton, the maker of Candy Melts™ sells a product called “EZ Thin Dipping Aid.” That is the product to use if you’re willing to go the palm oil route. It works like a charm and is the perfect solution used across the board by the baking industry. So why do we go to all this effort to avoid it? Well…

Coatings, fillings, cakes – even tortillas! Palm is an incredibly useful product for a host of culinary purposes; so useful that human greed has gotten involved to change the calculus. Entire tropical rain forests were cut down to make space for palm plantations, where brutal working conditions approaching slavery are routinely employed. And there is absolutely no way to source palm oil from only the “good actors.”

Understand: palm oil is no worse than anything else from the chemistry and biology points of view. It is a fat, with all the pluses and minuses that entails, and a particularly desirable one because of its unique characteristics. But our family will not willingly contribute toward either environmental devastation nor human degradation, and so palm oil has now become a product that we actively avoid whenever possible. You will not find it in any of our recipes until we’ve been convinced that the problems were solved.

If Palm Oil Is Out, What Then?

So what do you do when you’ve ruled out the cheap, convenient, and chemically ideal ingredient as your melting aid? We ended up resorting to the more expensive, natural and equally ideal cocoa butter. You know, the stuff that actually belongs in chocolate!

A quick online search revealed that cocoa butter is available in convenient melt discs. A purchase under $20 lasted us through great many chocolate projects, so a little goes a long way. Make sure to get the food-grade, as many less-expensive brands are intended for cosmetic use only.

What did we try before cocoa butter?

“Everything.”

It feels like it, anyway. Butter, cream, and various oils all got a whirl in our kitchen. Our younger daughter is a great fan of coconut oil as the magic ingredient for the “magic shell” used to coat ice cream. That texture is exactly what you want for Chocolate Marshmallow Treats too, but it just doesn’t work at room temperature. The coating stays solid when it’s down at ice cream temperatures, but it turns tacky on cookies and becomes downright runny if your room turns warm.

Butter and cream will also lower viscosity (i.e., the chocolate melt is thinner) but they won’t give you that shiny surface and can also remain sticky. Vegetable oil works to thin the result and it helps the melting process, but the chocolate remains even runnier because the melting point is that much lower.

We found that cocoa butter was the only alternative that really worked. It has the right combination of both melting point and melt properties to help soften the chocolate thin it for a good dip – but also gets hard enough to avoid being sticky at room temperature. Think of every other chocolate! They melt in the mouth, not on the plate.

But What About The Pretty, Shiny Part?

Aha! You want to grow beta-crystals.

Think back to that sugar crystallization experiment from elementary school. You coated a wet string in sugar crystals, put it into the saturated liquid, and then watched the crystals grow over the next few days. Those initial crystals were key to giving a platform for the crystals to form. You had to seed the string.

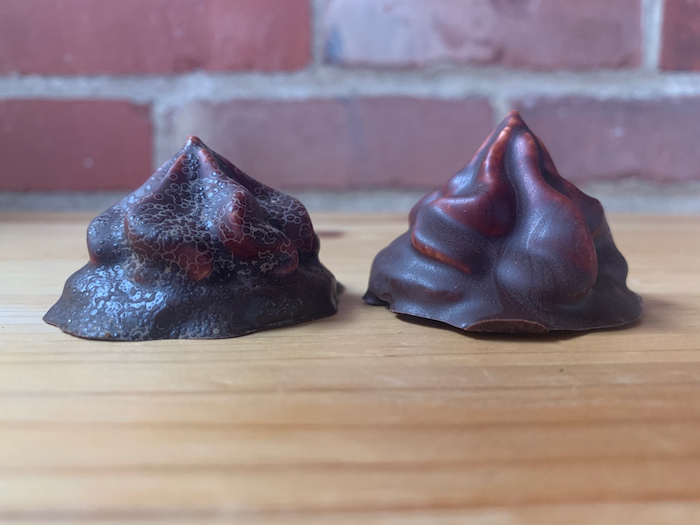
In exactly the same way, you can seed your microwave-melted chocolate with beta-crystals by adding solid grating of an expensive, shiny, properly tempered chocolate you bought at the store. If you fail to do that, the chocolate won’t look shiny after it sets. A day or five later, depending on how humid it is, you’ll notice the chocolate’s surface breaking into light and dark structures. The chocolate is blooming with the growth of unwanted, non-beta crystals.

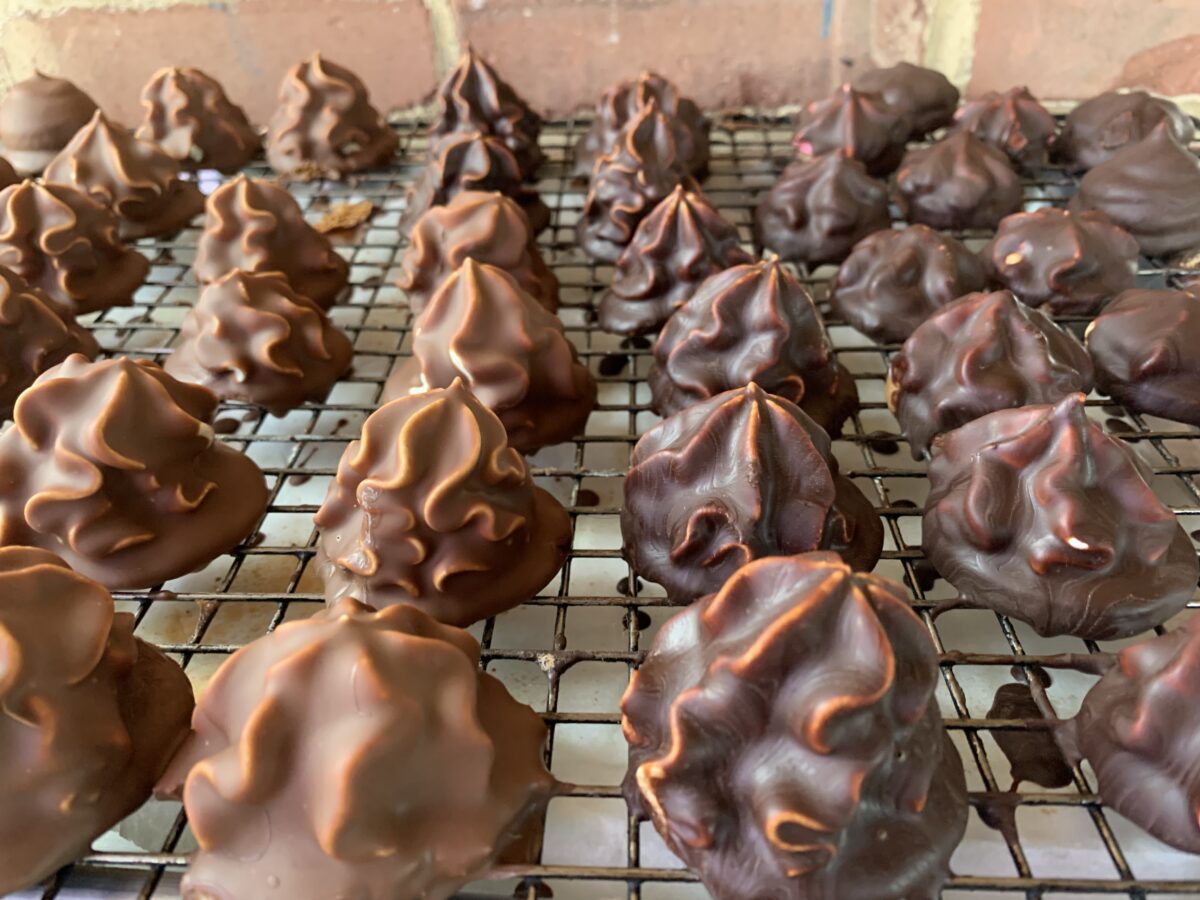
Compare the two enrobed treats in the photo below:

So here you have it. You will find that white chocolate melts differently from all other chocolates, because it has a slew of various other ingredients. I had to add more cocoa butter to help it melt and got a thin coating as a result. Milk chocolate is the best-behaved and least likely to seize. Which brings us to a sticky situation:

What If Your Chocolate Seizes?

Seizing refers to a phenomenon where you are melting chocolate, stirring it, and it suddenly thickens into a grainy, thick, clay-like mass. Seizing occurs when a droplet of water accidentally splashes into your melt. A steamy kitchen has been reported as a culprit in cookbooks. The cocoa butter crystallizes into the “wrong” crystals, locking its structure into something you can’t easily use.

Overheating your chocolate will make it more prone to seizing. The darker the chocolate, the easier it is for it to seize, too.

But there is a fix: Add boiling water one tablespoon at a time, stirring vigorously. The water will dissolve the structure of the crystals, and give you a chance to melt-and-seed as described above.

This being said, I have not tried to make chocolate coverture with a melt that has seized and been rescued. I don’t know how the final product would set, and whether it would bloom or not. However, this chocolate can be used for any other melted chocolate application. If you make ganache, you can save it for a cake filling, brownies, or truffles you’ll probably be making down the line.

I hope this helps. Keep playing with it and expect to have a ruined batch every so often. Since no chocolate is wasted unless you burn it, this experimentation is a low-stakes learning curve. Let us know how this worked for you, and please share tips of your own!

NOTE FROM SCOTT: As you might expect, we made a lot of coated treats in the process of recipe development over the past several months. A lot of them looked perfect when made, and perfect the next day, but mysteriously bloomed after a few days out on the table by the window (we being too lazy to store them properly). Poor Kate was beside herself, figuring that all her careful work had gone wrong. (NOTE FROM KATE: Not “beside myself.” I am entirely too cool a cat for that. More like, pissed off and frustrated. This might have something to do with the fact that I dejunked our excess storage containers 😉

Then, one late morning, en route to a work-break bit of snitching, I noticed that the cookies were positively glowing in the sunlight; and made my fingers sticky in an extremely tattle-tale way. Aha! The penny dropped. The chocolate coating was heating past the critical stage and then re-hardening in a random way without the benefit of beta crystals to guide the process! The result? A coating that bloomed with big white splotches after it rehardened.

It tasted just as good before and after. I assure you; I tested that feature thoroughly, and with great attention to detail. But it is a lesson to remember. Leave your chocolate out in the sun, and it will lose its temper, have a tantrum, and go all white in the face.

To Mold Or To Pour?

The neatest solution is to spend a few bucks on a silicone chocolate mold. Paint the inside of that with your chocolate coating, set it aside to harden, and then fill it with your marshmallow. Top that with your cookie, or some complementary jam and then your cookie. Chill a little more, and then unmold.

Perfect every time unless your coating somehow sticks to the silicone.

THE CHOCOLATE MARSHMALLOW TREATS SERIES

Part 1, The Chocolate Marshmallow Treat Overview

Part 2, The Cookie Base Options

Part 3, The Marshmallow Filling Options

Part 4, The Chocolate Coating and Finishing Options

Part 5, The Strange New World of Fruit-Based Zefir Marshmallows

CHOCOLATE COVERED MARSHMALLOW TREATS – Part 3, The Marshmallow Filling Options

Part 3 of a 5-part series about those chocolate coated treats you adored as a child. This examines the marshmallow fillings.

Part 1 of this series provided an overview of this massive project, with some notes about the problems we ran into.

Part 2 listed several recipes we developed for different cookie bases: Vanilla, Spice, Graham Cracker, and Shortbread. You can also use a thin cake round, but we left that one out because this is, after all, a project devoted to heritage cookies.

This Part 3 examines the two main approaches to creating a marshmallow filling. There is a third approach too, for fruit-based Zefir marshmallows, but I’ve moved that discussion over to its own Part 5.

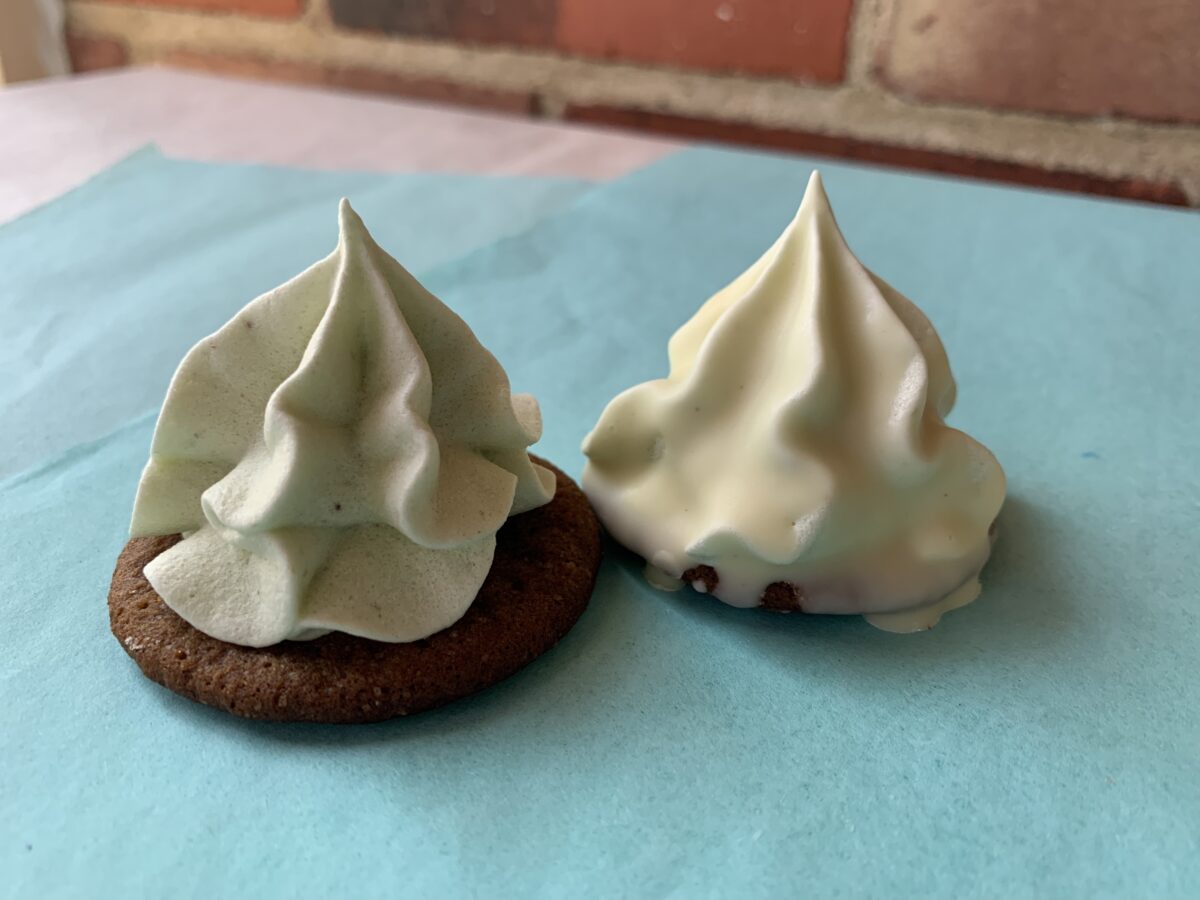
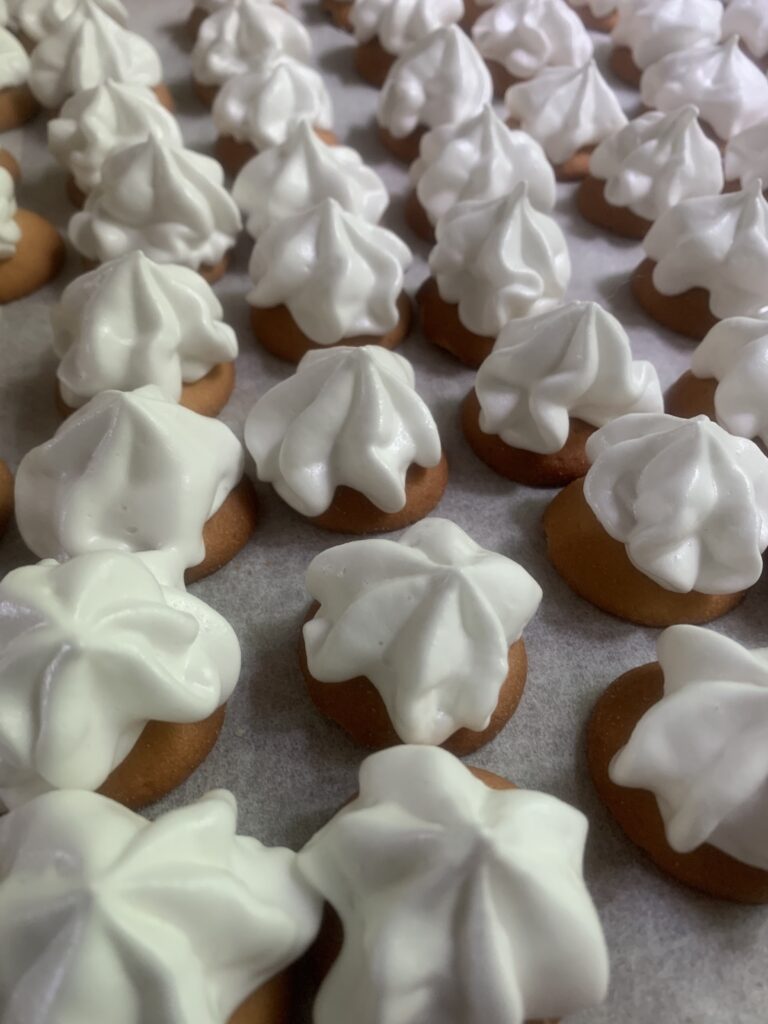
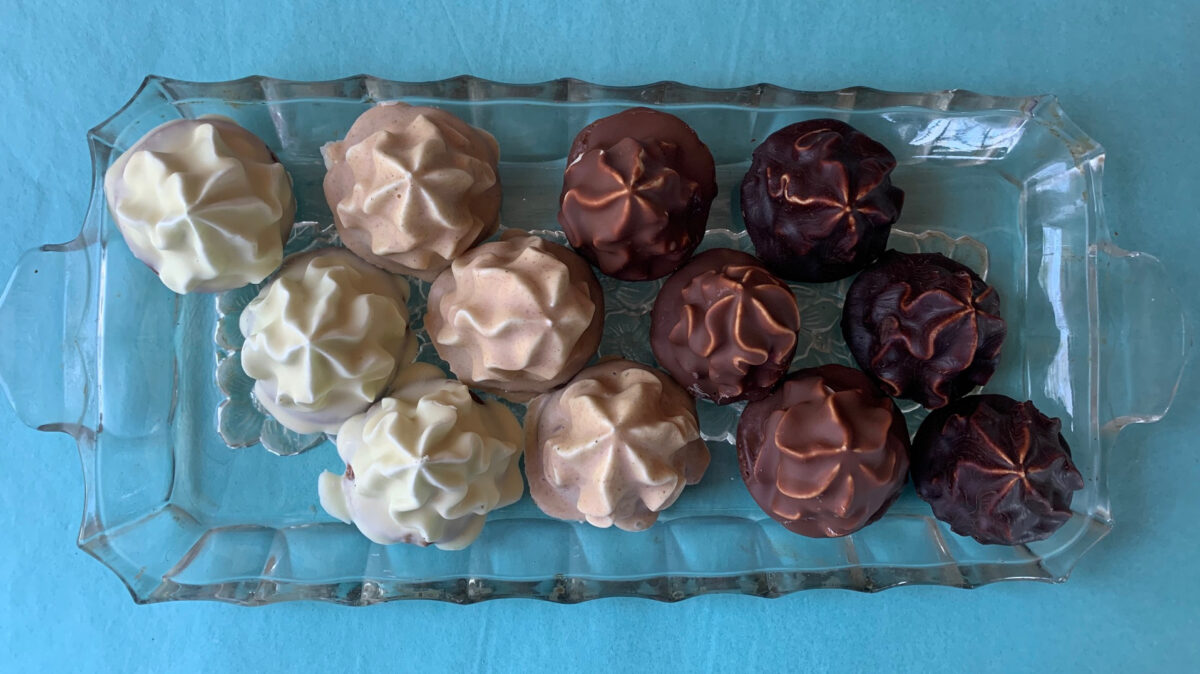
Piped with a round tip onto commercial wafers
Piped with a star tip onto commercial wafers
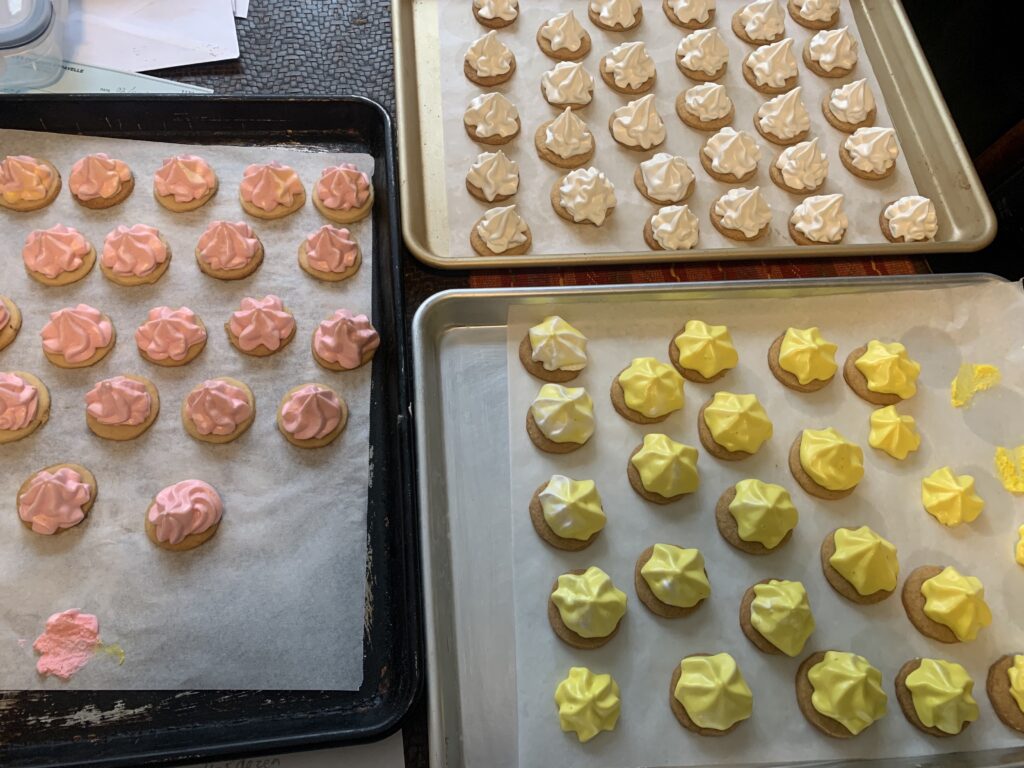
Rose, Vanilla, and Banana on homemade Vanilla Snaps. Color coded with a few drops of food dye.

As always, skip to the bottom if you only want the recipes. The rest of this article digs into the process behind those final results.

The Internet offers a metric ton of recipes for homemade marshmallows, most of which work pretty well. They’re the world’s easiest candy. Basically:

  1. Start with a thick and sticky substrate (made from the marshmallow plant in antiquity);
  2. Heat a sugar syrup to the soft ball stage (235‑240 °F a/k/a 112-115 °C), using a combination of table sugar (sucrose) and corn syrup (glucose) syrup to prevent crystallization; and then
  3. Whip the sugar syrup into the substrate until it balloons up to create fluffy marshmallows. These can be piped while warm, or else cooled in a pan to make cut-out eating marshmallows.

The American version uses a lot of gelatin to make that sticky substrate. The European version uses whipped egg whites with less gelatin; i.e., is a gelatin-strengthened Italian Meringue. NOTE: French meringue is egg white whipped with sugar; Italian meringue is egg white whipped with hot sugar syrup; and Swiss meringue is egg white heated to around 170-175 °F (76-79 °C) before being whipped. Swiss is stiffer and more stable than Italian, which is stiffer and more stable than French.

Problem #1: The filling was denser and sweeter than we wanted.

Think of a classic marshmallow you eat out of hand. They have a distinct chew to them, right? It’s part of the appeal. Now think of that chocolate covered marshmallow treat you grew up with. Much less chewy! And a bit less sweet, because flavor also comes from the cookie base and the chocolate topping. The The cookie would not be perfect until we got a handle on the problem.
Fair enough, but how do you change a marshmallow recipe to achieve those targets? It can obviously be done – the commercial products prove that – but we had to figure out how. And that was a major pain in the whosis, because our expertise on the baking side did not extend into this kind of candy making and sugar work.

The first and most obvious solution (cutting cut back on the amount of gelatin) proved to be impossible. Cut back too far and the structure dissolves rather than getting lighter, and I could not fidget my way into a perfect balance because kitchen scales only have so much precision. Plus the marshmallows were far too sweet for this use, and cutting back on the sugar too created other textural issues. I fought this problem for months, and ended up with a pair of solutions that work hand in hand.

Kate gets 100% of the credit for the first. She noticed that our trusty stand mixer began to really strain as the marshmallow mix cooled down. Part of this came from how the filling thickened as it cooled, but the overflowing bowl factored in too. Her solution? Shrink the recipe by a third. Huge difference. The lower volume resulted in a fluffier marshmallow because the machine wasn’t slowing down, and also because the bowl had extra room to accommodate it.

I claim credit for the second solution. I posted the question on some Internet groups/boards, and no one seemed able to help. All I got were suggestions for vegan substitutes that could be used instead of gelatin. That wasn’t the issue! Vegan shmegan; I just wanted to know what was going on in the chemistry, and how to adjust it. One long-suffering volunteer finally burst out with, “maybe you should take a food science class or two.”
Ding ding! For some reason I’d done all my Internet searches using the words “chemistry,” “physics,” and descriptions like “fluffier” and “denser.” I’d never done one using the term “food science.” Why not try? I did, and up popped this lovely article on a project for grade school science teachers: “Sweet Science – Making Marshmallows.” I urge you to read it, but here’s a quick summary in case you want to save some time. Loosely translated, the project reads as follows:

“Have your students make marshmallows with different proportions of sugar to corn syrup, and then measure the characteristics. They’ll find out that more sugar equals a denser and sweeter product, while a higher ratio of corn syrup reverses that. Then you can let the kids eat their experiment, and send the sugared-up darlings off to some class with a colleague you don’t like.”

Okay, I added that last last sentence on my own. But look at what it says! Lighter, and less sweet. Exactly what I wanted. We did the experiment; it worked just as predicted; and the results now appear in the recipes below.

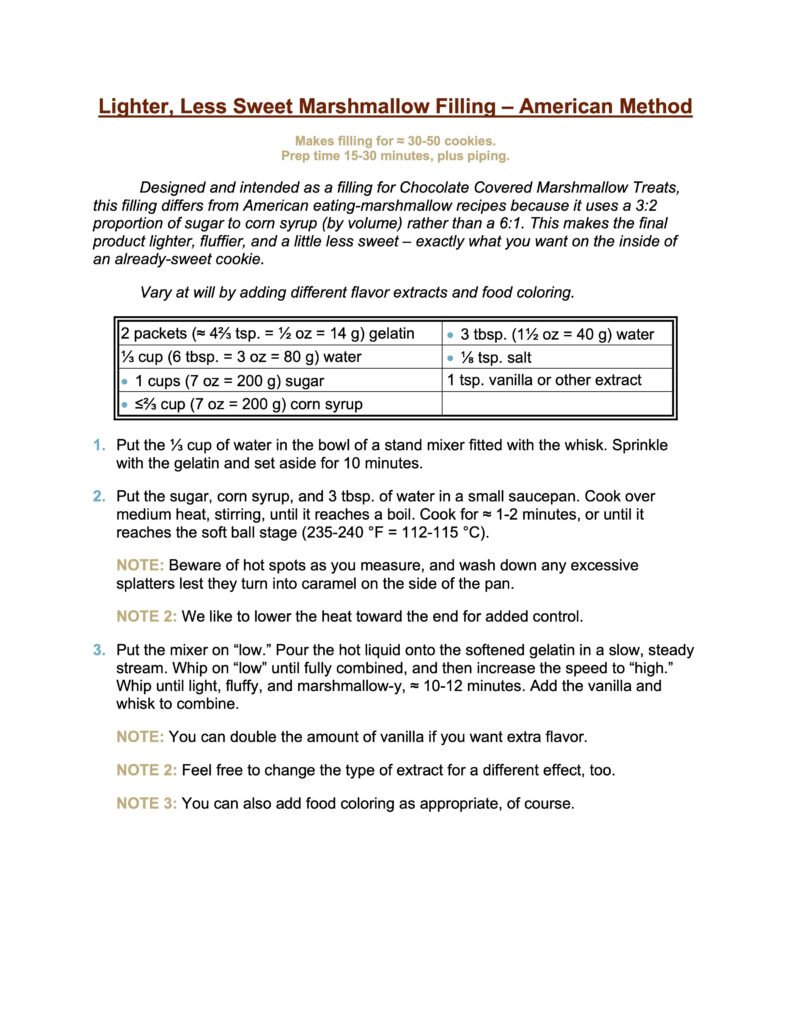
Plus there’s this: Now you have the power too! By way of reference, American eating marshmallows have a sugar:syrup ratio of 6:1 by volume. That’s now at 3:2 for the cookie filling, which coincidentally works out to just about 1:1 by weight. This is just about perfect for us, but you can fuss with it to your heart’s content to find the proportion that’s perfect for you. Tastes differ. Though it must be said that we achieved a texture so “right” that our testers actually singled it out for special compliments! Yes, you really can tell.

Problem #2: Piping the Marshmallow was a P.I.T.A.

There’s no easy way to say this. I suck at piping. And that is a problem because this is a recipe where you need to work quickly. Cooled marshmallow filling stiffens, is harder to pipe, and tends to mound up unevenly instead of covering the whole cookie in a pretty layer. Nor does it help that our biggest piping bags are “mediums” on anyone else’s scale. Even the reduced recipe required us to refill the bag two or three times, which led to the filling cooling off that much faster, and becoming that much… You get the idea.

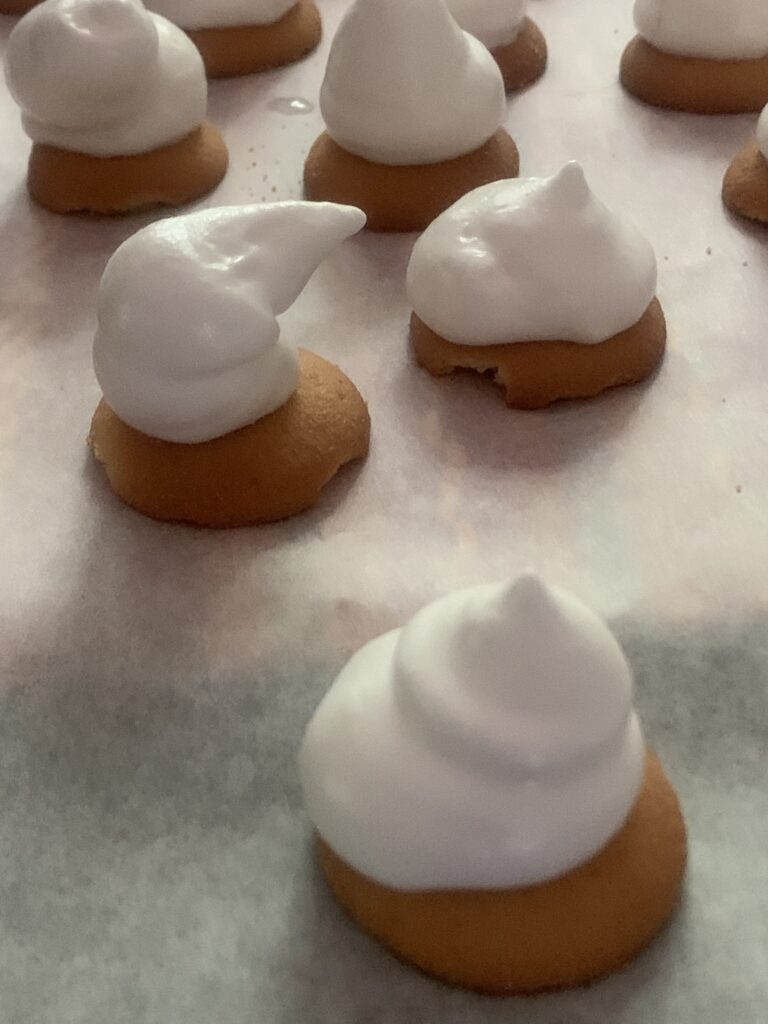
Marshmallow gets stiffer as it cools, and won’t pipe out cleanly.

In the end I found three solutions that worked pretty well.

  • Scott’s Solution. Rope in Kate or a daughter to cover for my sorry efforts. This works perfectly, and I recommend it highly.
  • The Doh! Solution. Buy a bigger bag. Maybe next time. They aren’t as easy to find as you’d think.
  • Solution #3. Prepare two or three of the medium-sized bags before you start to pipe the cookies out. This saves a few critical minutes, and also lets you use more than one tip.

Yes, I am overselling the difficulty a bit. Anyone with the right tools and some basic skills won’t find it as challenging as I did. The multiple-bags approach also solves a lot of the problem, and the cookies taste just as good even if the marshmallow cools enough to come out lopsided. Still, forewarned is forearmed. Be ready to pipe as quickly and efficiently as you can; and/or to laugh at your funky shapes.

Problem #3: The Infinite Variations

Continuing the theme from Parts 1 and 2, the marshmallow filling can also be varied in as many ways as your imagination permits. And it’s super simple to do!

So-called “plain” marshmallows are flavored with vanilla extract. An even teaspoon works perfectly at these amounts. “Flavored” marshmallows replace the vanilla with with any extract and/or food color that’s buried in your spice cabinet, and that same 1 tsp. will do the job just as well. Lemon, rose, rum, banana, coffee, mint, almond… there is some place in the world where that flavor of marshmallow is a beloved favorite sold in stores. I recommend some color coding to avoid frowns of confusion, but it really is that easy.

Spices work too but we found that spiced cookie bases were easier to control. Marshmallows have a ton of air, and adding enough spice to provide solid flavor can make them a little gritty.

Fruit flavors are a little different. The extracts work fine for a properly artificial flavor reminiscent of commercial products, but you can also get The Real Thing by making Zefir instead of a classic marshmallow. Talk about intense essence of fruit…! But that’s getting ahead of myself. I moved that discussion to Part 5 for very good reason, and you’ll simply have to wait.

CONCLUSION

It took some serious work and research to nail down the filling part of this cookie, but that really came down to exploring things at the food science level. [It had nothing to do with me being obsessive, no matter what my piping assistants may say!] If you follow the recipe below – either one – you will find it quick, easy, and effective. You’ve got your wheel, and there’s no need to recreate it.

So where are we at?

  1. Make a simple cookie base, flavored in any way you can imagine.
  2. Pick your choice of marshmallow approach, and flavor it with any extract or liqueur in your cabinet by substituting 1:1 for the designated vanilla, and color coding with a touch of food dye.
  3. Pipe your marshmallow creation onto your choice of cookie, using your choice of piping tip.

Bing, bang, boom. You’ve got these Chocolate Covered Marshmallow Treats 70% done. All that remains is coating them in everyone’s favorite darkest-brown food of the gods.

THE CHOCOLATE MARSHMALLOW TREATS SERIES

Part 1, The Chocolate Marshmallow Treat Overview

Part 2, The Cookie Base Options

Part 3, The Marshmallow Filling Options

Part 4, The Chocolate Coating and Finishing Options

Part 5, The Strange New World of Fruit-Based Zefir Marshmallows

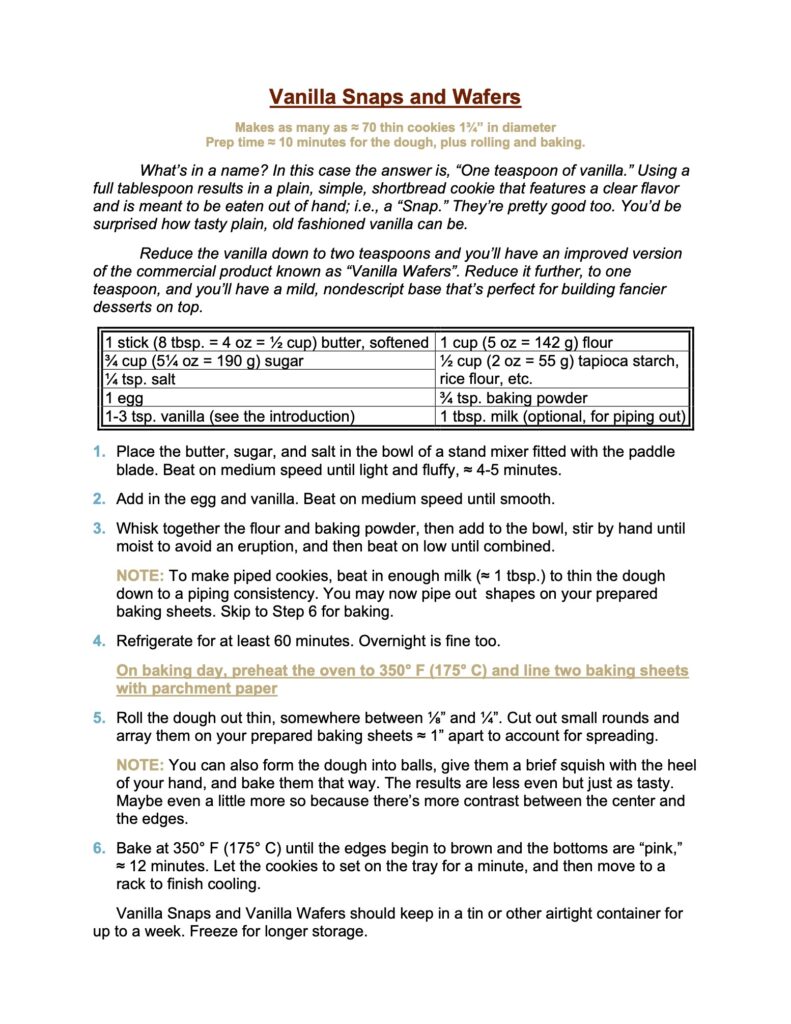
VANILLA SNAPS AND WAFERS – a classic cookie and ingredient

The classic, with versions for eating out of hand or for using in other recipes

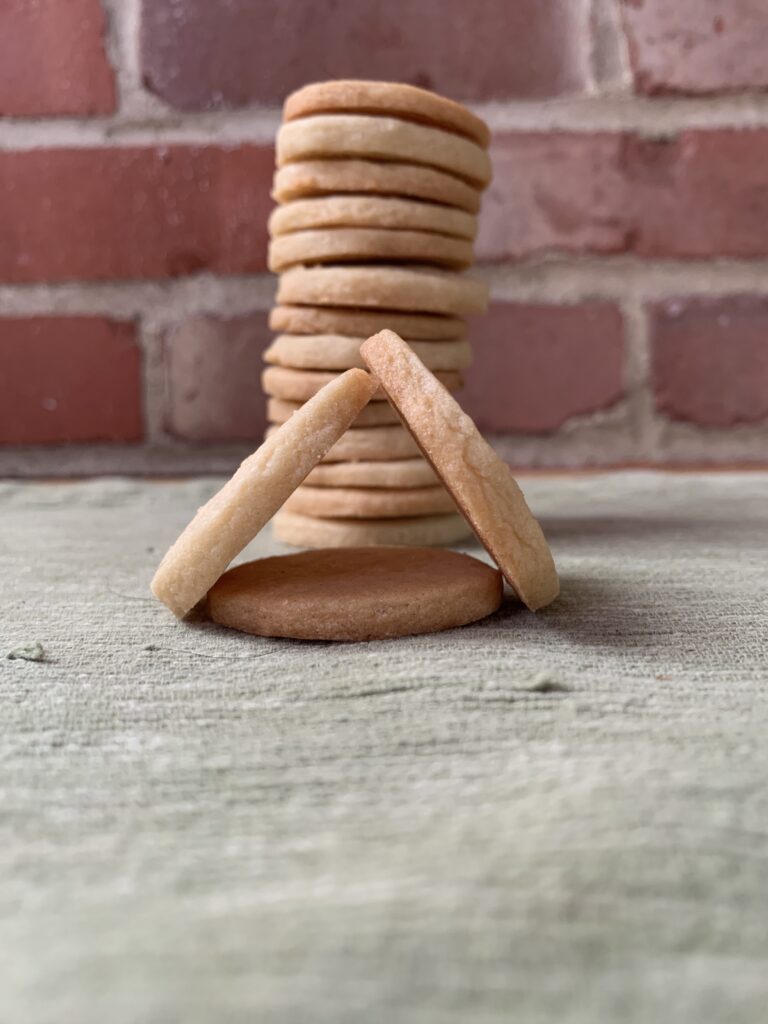
Here’s another head smacker cookie really should have gone into Volume I but somehow escaped our notice. It came up now in a sideways fashion. We’ve finally gotten around to working on Chocolate Covered Marshmallow Treats. You know that cookie. Everyone does. It’s the one you loved as a child, with a simple cookie base that has marshmallow on top, and is then coated with a thin chocolate shell.

That cookie has scores and scores of different version around the world, but the most common uses some equivalent to a Nilla Wafer® base. So that meant I should start by making… Doh! I’ve never actually worked up a homemade version of Vanilla Wafers. [Sigh]

The result was all we could have hoped for and more. In fact, we discovered that it isn’t a single cookie. It’s actually three.

  1. Use the full amount of flavor and you’ll get a very pleasant cookie to eat out of hand, that adults will enjoy as much as children.
  2. Use a moderate amount of vanilla, and you’ll make something very close to the commercial product. Just better in every way. Real butter and real love make a real difference. Kate says that toddlers in Prague were fed a similar cookie whenever treats were earned.
  3. Reduce the amount of flavor all the way, and you will get the plain, invisible cookie that’s perfect for all the “other” uses these get purchased for. Banana Pudding; El Cheapo Tiramisu; Chocolate Marshmallow Treats; etc., etc., on and on, and suchforth and suchlike.

As always, skip to the bottom if you only want the recipe

This is a simple cookie, and it’s meant to be a simple cookie, so I’m going to try to keep the discussion brief. There weren’t many issues that needed to be addressed. It was really a matter of focusing on what we wanted the cookie to be.

First the Eggs

I wanted this to be a light, crispy cookie with a fair amount of air, that would taste a little buttery without coming off as rich. Most recipes in our books and online resources called for one whole egg to go with each stick of butter. I tested that, along with one egg white, and one egg yolk.

The whole egg won handily, both for ease and flavor. Yes, you can make a good cookie with both egg white and egg yolk, but the whole egg is simpler and, for this use, better.

Wait; Haven’t We Made This Before?

For crying out loud! Butter cookies. Sugar cookies. Shortbread. Alfajories. Spritz Cookies. Snaps. They’re all pretty much the same, right? Just butter, sugar, flour, starch, and egg in slightly different proportions, plus a hit of flavor. Was this one really different, or just a variation on one of our existing and already-tested recipes?

Well… no. I went back and crunched the numbers. These are in the same family but the proportions are distinct enough to earn their own name. Same for the classic French cookies we plan to work up someday, such as Langue du Chat (“Cat’s Tongues” a/k/a Homemade Milanos®), and Tuiles. Those use several egg whites to create a different species within the same genus.

What’s In A Name?

All that recipe comparison work did clarify one thing that was bugging me. These are not a “wafer”!

I am a lawyer in my real life, and have been for 30 years. So I can speak for my profession when I tell you that virtually every non-criminal problem I see comes down to a variation on the theme of frustrated expectations. Person X thought s/he deserved or would get an “A,” ended up with a “B”, and grew angry at that result. So Person X goes back to Person Y to complain, “where is my A?”, and the situation then grows worse because Person Y insists that s/he meant “B” all along. And most of the time both interpretations fit the actual words.

The solution? Define your bloody terms so you can at least know where you really disagree! Try it the next time someone wants to argue about politics. “Exactly what do you mean when you use that word?” You’ll be shocked at how much of your fight disappears, or at least settles down to the amicable question of how words ought to be used.

In any case, I have spent a lot of years getting frustrated over that stupidity, in both my profession and in politics, so I get a little [ahem] picky about calling things by their proper names. A “wafer” is an extremely thin, usually broad cookie like our different Snowflake variations, Tuilles, or Lace Cookies. You can get to that result in many different ways, but that’s the definition.

This cookie does not meet that definition, and thus it isn’t a “wafer.” This cookie is a “Snap”. Harrumph.

We define Snaps as any plain, simple, round cookie that features a clear and focused flavor. Cardamom, Anise, and Black Pepper Snaps feature a single spice. Ginger snaps feature a spice mix with a touch of molasses. But that is the family group, and that is where this cookie belongs. Harrumph I say again! And harrumph for good measure. Harrumph. Harrumph. Harrumph!

Alas, but the outside world does foolish things on occasion. Sometimes it will even [gasp!] ignore it when some large company mislabels what ought to be a Snap as a Wafer. And a wise man has to know his limits. So let us agree on a simple formula, okay?

First, I am in the right. Harrumph. And that means the world is wrong. And thus equity, justice, and fair play are unanimously on my side.

Next, I am not being petty no matter what certain females in my household may choose to imply. Nor childish. Not, not, not!

And no, this isn’t a fight I’m going to win. So how about a compromise?

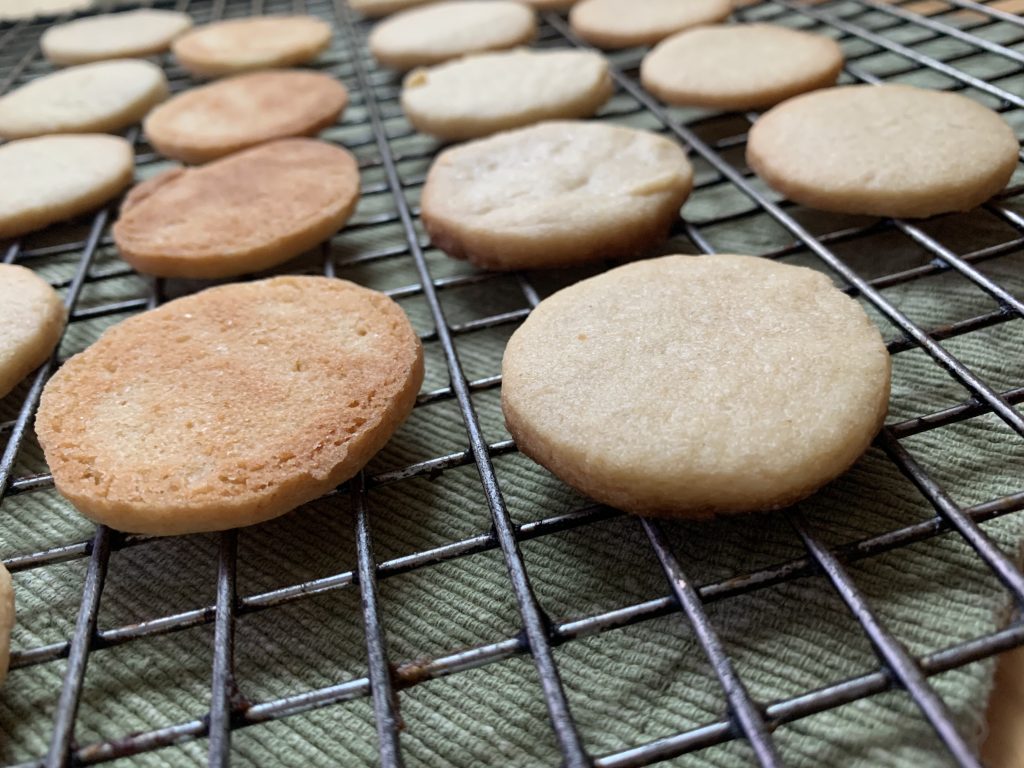
Let’s agree to call the eating version of this cookie a Vanilla Snap. That’s the tasty one with a full tablespoon of vanilla, which is going to make people sit up and say, “I never thought I’d say it, but these things are capital-G Good.” The weaker versions, which are intended for use in other recipes anyway, can be called by that other name for the sake of allowing the rest of the world to save some face.

Back to your regularly scheduled programming.

Confirmed Again: “Other” Starches Work Better Than Corn Starch

Is the cookie better with a bit of gluten-free starch to supplement the flour? Yes, it is. Cake flour might work too, but we didn’t test it.

Would corn starch work? Yes… but it isn’t as reliable as rice flour, tapioca flour, arrowroot, etc., because you’ll occasionally get a less-done piece that leaves a gummy sensation in your mouth. It’s an effect we wrote about in our book Heritage Cookies of the Old and New World. Corn starch breaks down at a higher temperature than those others, and thus cookies made with corn starch are more likely to have leftover “uncooked starch” in the final product. That’s the underlying problem; it was confirmed again in these experiments; and there’s simply no reason to fight the science. Vanilla Snaps cook until the bottoms brown, which gives a margin of error, but why make use of that margin if you don’t have to?

We usually bake with tapioca starch because it is cheap and readily available in large quantities at our local oriental market. We have tested rice flour and arrowroot too, and found them to be identical. We have read that potato starch fits in too. Corn starch is the only one that requires a higher baking temperature.

Would A Drop Cookie Work?

We always prefer to write up drop cookie recipes when possible, just because they’re so much easier for new people. Refrigerator slice-and-bakes come in second, followed by roll-and-cut cookies, and then by ones you pipe out. What was the best way to go for this one?

The answer depended on what we wanted to do with them. Drop cookies worked fine from the baking perspective, but I simply couldn’t get them to come out even enough to use as a consistent base for the other project. So here is my verdict:

  • If you’re after the eat-out-of-hand Vanilla Snap version, make a simple drop cookie and be done with it. You don’t need to do it that way, but you can. Kate swears that they also came out a little lighter and crispier than the rolled-and-cut version, though I couldn’t tell the difference.
  • If you’re after a cookie to use in some other role (like the base of a Chocolate Marshmallow Treat), roll them out and use a cookie cutter. These are dead consistent and thus better as an ingredient. The dough is a little on the sticky side, but works fine if you simply dust with flour as needed.
  • If you’re trying to jazz things up, add a bit of milk to thin the dough out to a batter, and then pipe out something fancy. You could even sprinkle it with a bit of sanding sugar. It ought to work with a spritz gun as well.

Bake Until The Bottoms Are Good And Tan

Part of the flavor in this cookie comes from actual browning on the bottom. Most cookies want to come out of the oven when they’re still pale, and the edges feel barely set. Leave these in for the full 12 minutes, or until you can see browning around the edges.

CONCLUSION

That’s about it. One forgets that plain old vanilla isn’t that plain at all. It’s a really delicious spice, and it fully deserves to be just as celebrated in a Snap Cookie of its very own. They are as “heritage” as you can get, and well worth making.

PITTSBURGH (KAUFMANN’S) THUMBPRINTS

Pittsburgh’s famous Thumbprint Cookies, originally from Kaufmann’s Arcade Bakery

We’ve documented a lot of different cookies tied to particular European cities, and have more on tap. But that happens in the U.S. too. This one is a specialty of our native city: Pittsburgh, PA. It is a thumbprint cookie with an odd, very tender, but almost chewy texture that is topped with a great pile of dense frosting. The cookie part always has sprinkles (known locally as “jimmies”), which are color coded to match the frosting. Chocolate and vanilla are the most common flavors, but it’s actually traditional to create something unique.

As always, skip to the bottom if you want the recipe without the background

The story in this case begins in the 1890’s when Kaufmann’s Department Store opened it’s showcase location “Dahntahn.” New York had Macy’s and Gimbel’s; Pittsburgh had branches of both stores, but Kaufmann’s reigned supreme. People took the trolley into the Golden Triangle just for the privilege of wandering its twelve enormous floors of retail glory.

The Arcade Bakery was located in a single, small room tucked into a nook off the entrance on 5th Avenue. I remember it well. They sold baked goods of all kinds, but these Thumbprints were the specialty of the house from the 1980’s on. Nowadays you find some version or another in every supermarket and bakery that tries to catch the essence of the city.

What Makes These So Distinct?

In a word, this is the cookie designed for people who home in on the corner pieces of a square cake because they have a touch more frosting per bit. The cookies themselves are plain, pleasant, and maybe a little bland. They’re topped with as much as two inches (2″!) of sweet American frosting.

That’s it in a nutshell.

The Cookie Part

This dough is a joy. The resulting cookie is a nice, simple shortbread with that unique texture, and is handy for many different uses. Just form the dough into a ball, roll it in something showy like chopped nuts or sprinkles, and then press in the thumbprint. Bake in a medium (350 F) oven for 15 minutes. One recipe makes two dozen (24) 3-bite cookies.

The frosting gets added on once they cool, obviously. But I meant what I said about this being a really handy recipe to keep in the files! Jam thumbprints work with this dough too. Put your jam in a microwave-safe bowl and zap it until it foams up with large bubbles. Let it cool, and then spread that on the top before baking. (The pre-cooking prevents it from bubbling over onto your tray).

Or you can combine things, like a jam heart under a frosting or meringue cap. Or you could use a ganache. Or bake the cookies with no filling, add a jam/filling on top, and then choose whether to coat the result.

On and on it goes, with no real stopping point. The master recipe for this shortbread is one of the best and most generally useful that you’re ever likely to find.

The Frosting Is U.S.-Level Sweet

Consider this a warning to our European friends and relatives. The U.S. sweet tooth goes way beyond anything that’s found overseas, or even in other parts of the western hemisphere. You’ve probably heard the stereotype. Maybe even a few jokes to go along with it. I, a native born son, am here to tell you that it’s neither a joke nor untrue. We Americans don’t oversweeten everything we eat; it’s just that we can – and we will when that suits the particular treat. Like this one.

Let me put it another way. I am a notorious chili head. I eat and enjoy peppers so spicy that more than one person will leave the room when I decide to make a real sinus clearer just for myself. I don’t do it for show, nor to prove my manhood. I just like that feeling of sweat breaking out on the forehead, and several decades of pushing that line have created a tolerance that few others possess. As some people from Thailand once told me, “They wouldn’t think you were strange in Bangkok, they’d just say that you like your food really hot.”

The U.S. tolerance and taste for sugar is like the Thai, Indian, Mexican, or my view on spicy peppers. If you have that tolerance and taste, you enjoy foods that push that line just as much as you appreciate normal, human-level foods that do not. If you don’t have that tolerance, you gape in some combination of awe and horror at what others are willing to consume.

The frostings in the recipe below are what Americans will call “good and sweet.” That means (A) they are exactly on point with what you’d buy in a Pittsburgh bakery, and (B) far too sweet for non-natives. We strongly recommend that those in the “B” category should cut the amount of sugar back by a solid 20-40% for the vanilla, and 50% for the chocolate. It will not have any significant effect on the overall volumes.

Part Of The Heritage Is Creating Your Own Versions

All accounts say that Kaufmann’s eventually sold as many as 70 different versions of this cookie. Bakers who’d ‘made their bones’ were encouraged to practice their creative chops on this recipe before branching out into something more artsy. The shop put them all out, and then quietly dropped the ones that didn’t sell.

Strawberry, caramel, cinnamon, spice… the list is endless. And that means that you should play around to create your own version if the basic recipe appeals to you! Want an example? The Kaufmann family seat was the Frank Lloyd Wright masterpiece called Fallingwater, which is now a sort of architectural museum. The Fallingwater chef created this unique Peanut Butter Thumbprint as his homage to the cookie (which can also be made with a dab of grape jelly in the middle). It may be unique, but it’s also entirely traditional, because one-of-a-kind experiments are part of this cookie’s tradition.

CONCLUSION

If you are a native Pittsburgher, or especially a former Pittsburgher, this is a recipe to save and treasure. It’s a smell and taste of home.

Other American natives will enjoy it too. It’s a damned fine cookie with its festive sprinkles (“Jimmies” in Pittsburghese); one that’s absolutely perfect for bake sales; and one that can and should be varied to your individual taste.

If you hail from some other nation, you’ll enjoy the cookie too… if and only if you take some care to adapt the frosting to your own taste and tolerance for sugar. Your target is something that children will love, but many of their parents will roll their eyes about. That is the experience of the Kaufmann’s Thumbprint Cookie, even if the recipe will need some tweaking for your particular group of raucous, waiting-to-be-sugared-up school kids.

MAPLE DROP COOKIES – Americana at its finest

This is the cookie you see in every high end farmer’s market and orchard store across the country. Which is only proper! No one should ever buy a Halloween pumpkin without facing a maple cookie temptation. Alas, but many of those versions aren’t up to par and sometimes (gasp!) they aren’t even available. So here you go.

It is a simple enough recipe, but one that takes a lot of fidgeting to nail down just… exactly… right. This one’s nailed. Is it ever. The only thing to add are the nuggets of experience you’ll want for making your own adjustments.

1. Pecans and maple really do love each other as much as we always think. I tried the cookie with walnuts, and it worked, but it just wasn’t the same. A “7” instead of a “10”.

2. There’s no getting around the maple extract because syrup alone won’t provide the requisite oomph. I’d be curious to try a recipe with maple sugar, and even more curious to use the darker Grade B syrup, but neither are easy to find in my part of the country.

NOTE: We only use natural maple syrup in our house, and that is what we used in the testing. I have no idea how the cookie would work with the flavored corn syrup “artificial” version. Let us know if you do the experiment.

3. That final hit of maple high notes in the glaze/icing/frosting are what send this up to the next level. Don’t leave it out. These photos show a frosting, i.e. the thickest version, but that’s really just a matter of what you want.

NOTE: Give it 24 hours and the topping will dry out enough to pack in a tin without real worry.

4. We’ve gone back and forth on the salt level. My personal preference would be an extra quarter-teaspoon (call it a full 1 tsp. of kosher salt), but Kate thought that gave the cookies a little too much edge, especially before you add the topping.

5. Molasses really helps the flavor by broadening the base of the pyramid. Don’t be tempted to skip it. This amount translates to basically the same thing you’d get from using (a) dark brown sugar in place of the specified white, or (b) light brown sugar plus a single tablespoon of molasses.

That’s about it. Simple cookie, great flavor, with almost no fuss, muss, or bother. Enjoy!