CHOCOLATE COVERED MARSHMALLOW TREATS – Part 3, The Marshmallow Filling Options

Part 3 of a 5-part series about those chocolate coated treats you adored as a child. This examines the marshmallow fillings.

Part 1 of this series provided an overview of this massive project, with some notes about the problems we ran into.

Part 2 listed several recipes we developed for different cookie bases: Vanilla, Spice, Graham Cracker, and Shortbread. You can also use a thin cake round, but we left that one out because this is, after all, a project devoted to heritage cookies.

This Part 3 examines the two main approaches to creating a marshmallow filling. There is a third approach too, for fruit-based Zefir marshmallows, but I’ve moved that discussion over to its own Part 5.

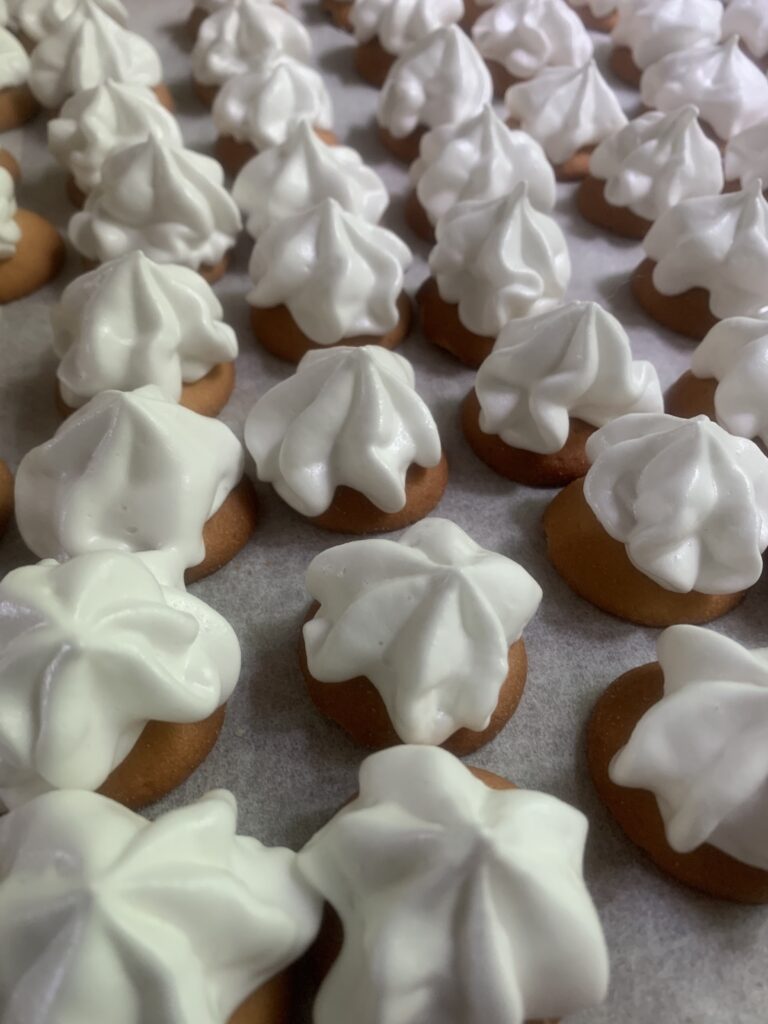
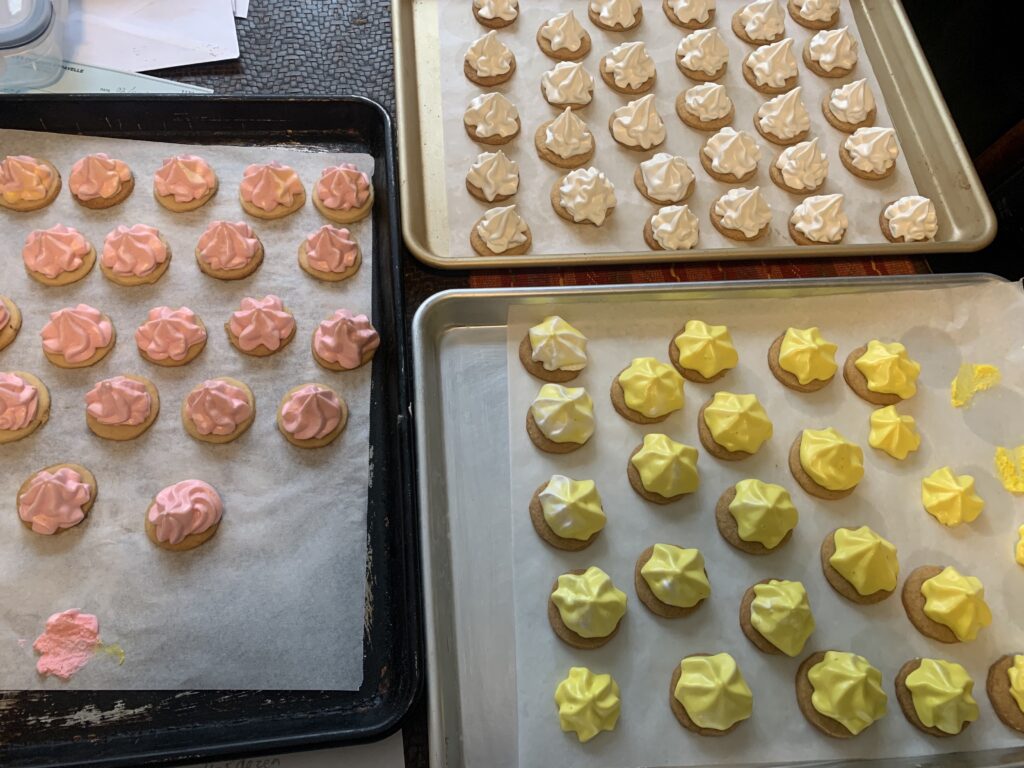
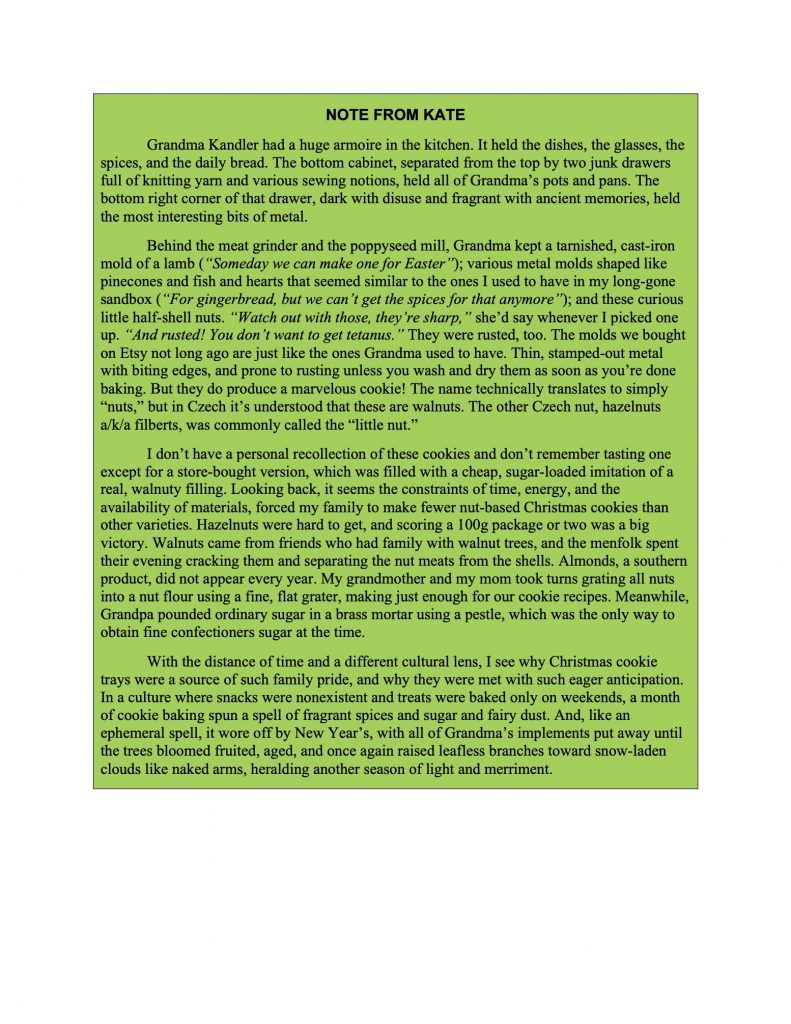
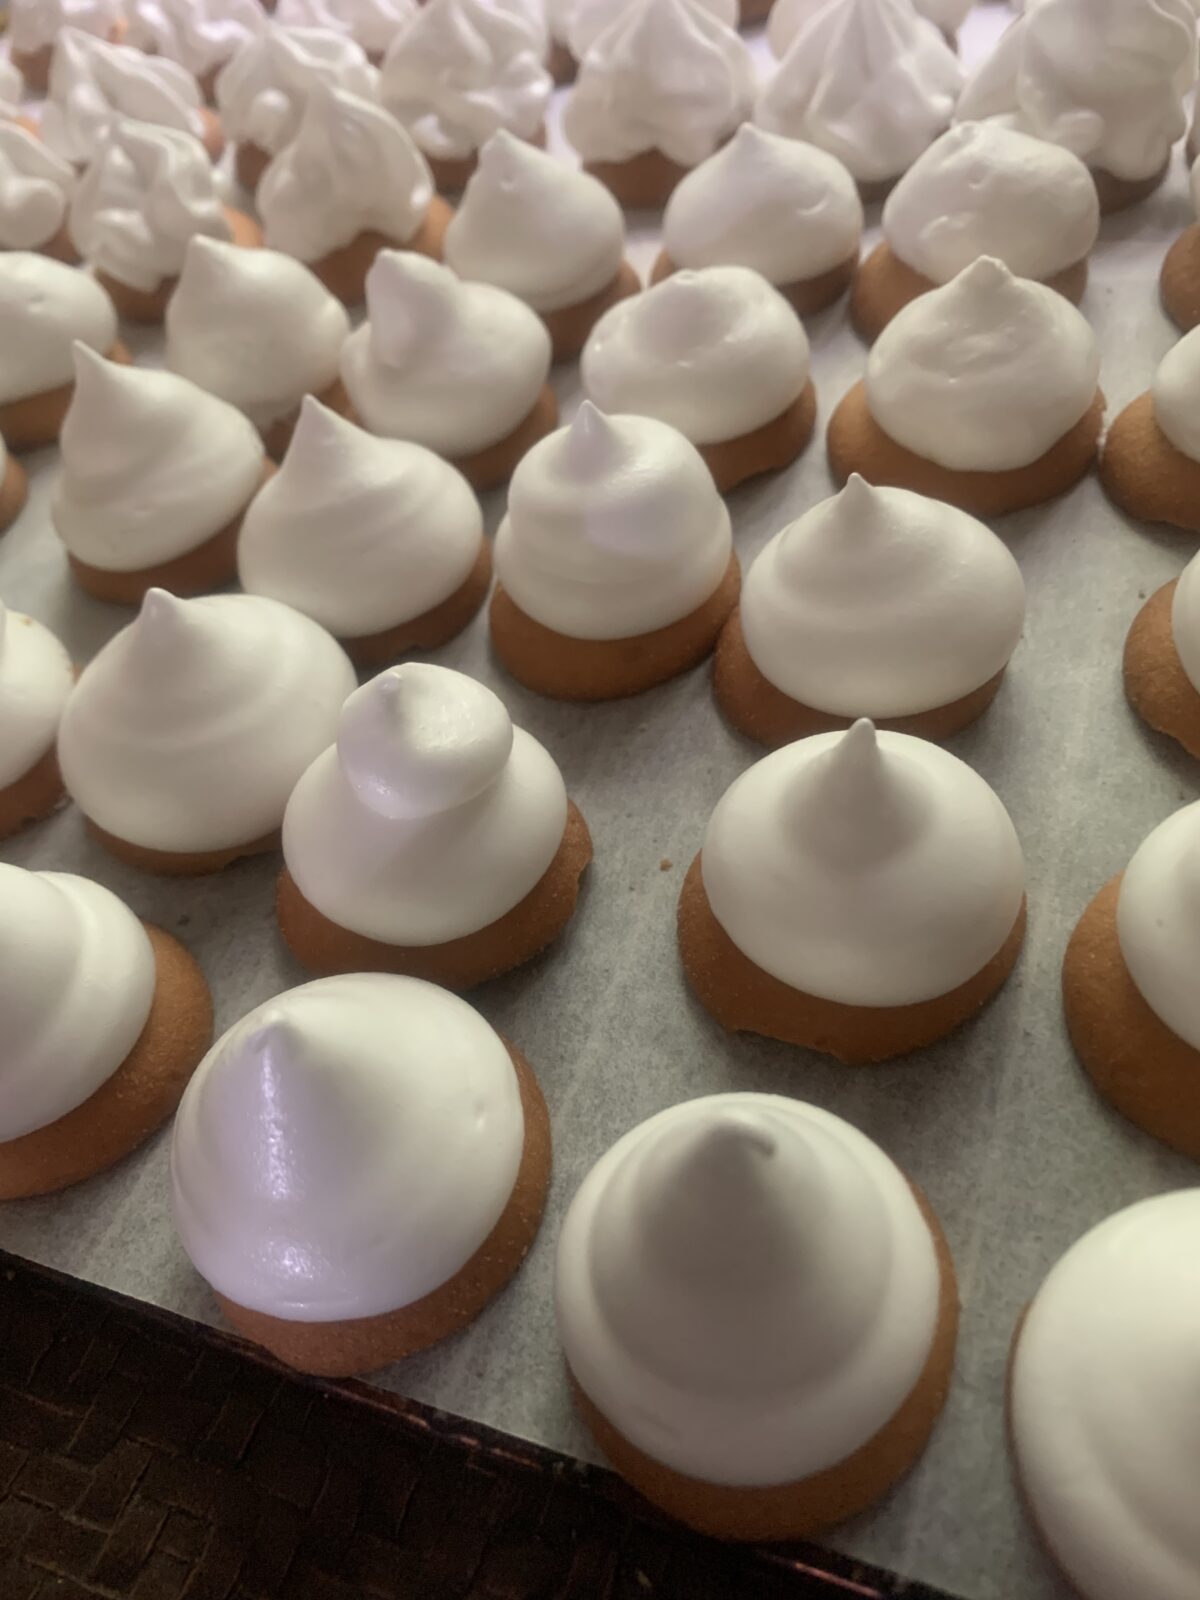
Piped with a round tip onto commercial wafers
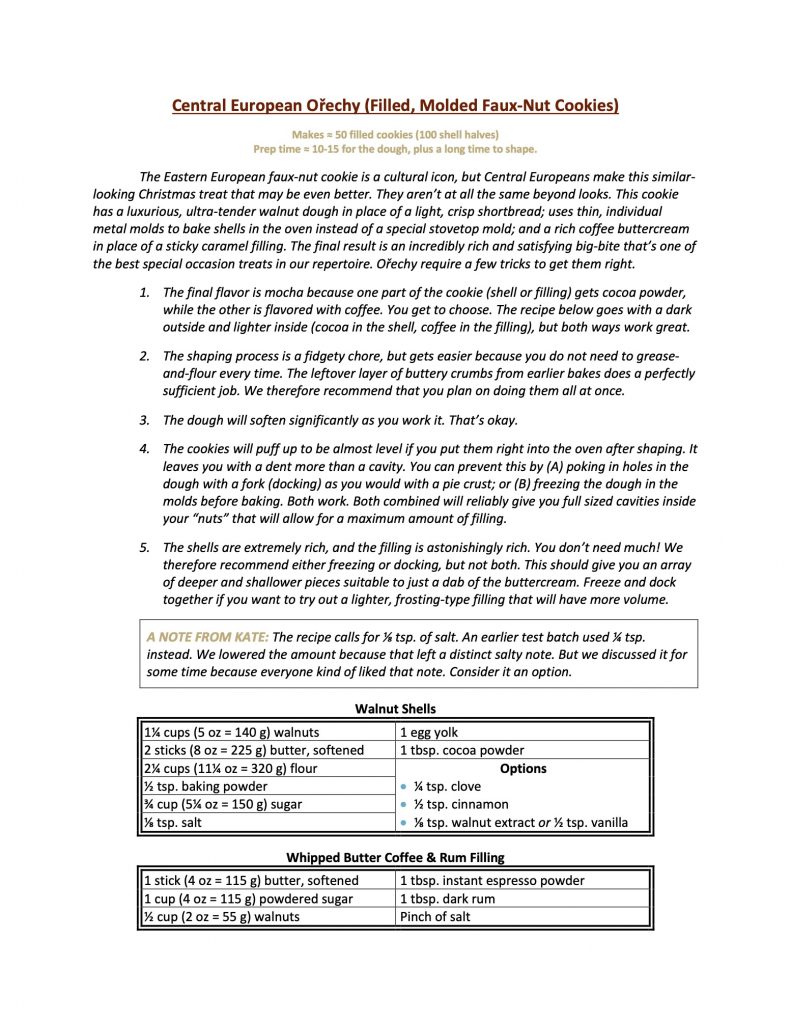
Piped with a star tip onto commercial wafers
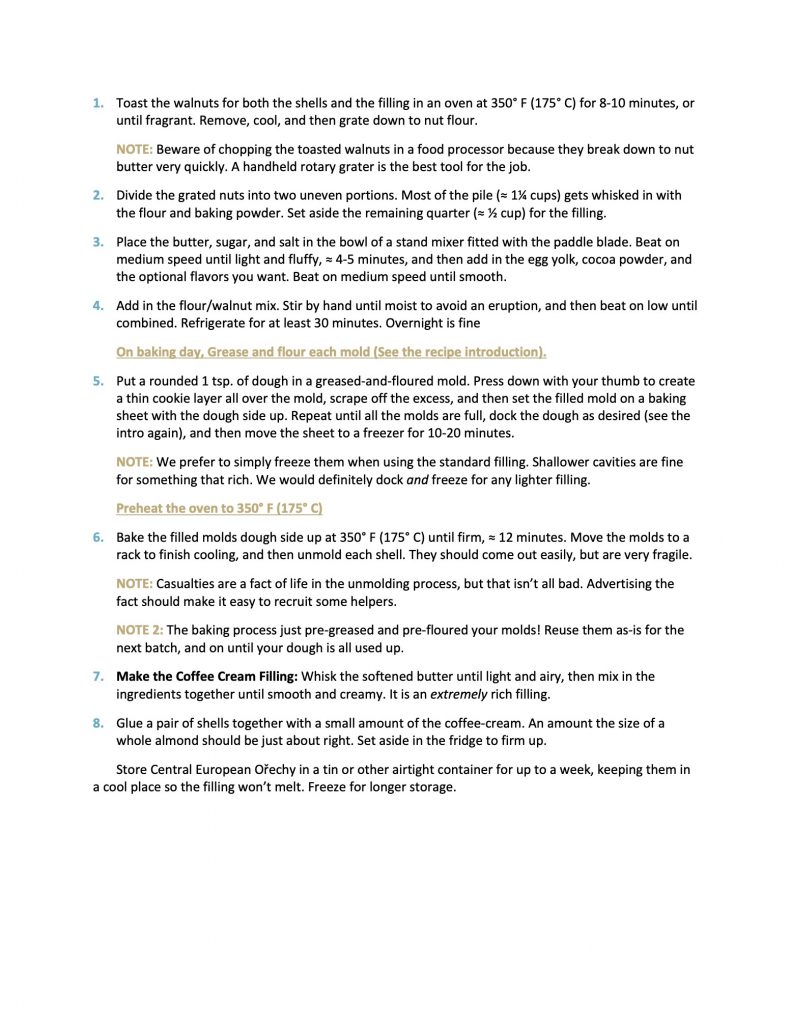
Rose, Vanilla, and Banana on homemade Vanilla Snaps. Color coded with a few drops of food dye.

As always, skip to the bottom if you only want the recipes. The rest of this article digs into the process behind those final results.

The Internet offers a metric ton of recipes for homemade marshmallows, most of which work pretty well. They’re the world’s easiest candy. Basically:

  1. Start with a thick and sticky substrate (made from the marshmallow plant in antiquity);
  2. Heat a sugar syrup to the soft ball stage (235‑240 °F a/k/a 112-115 °C), using a combination of table sugar (sucrose) and corn syrup (glucose) syrup to prevent crystallization; and then
  3. Whip the sugar syrup into the substrate until it balloons up to create fluffy marshmallows. These can be piped while warm, or else cooled in a pan to make cut-out eating marshmallows.

The American version uses a lot of gelatin to make that sticky substrate. The European version uses whipped egg whites with less gelatin; i.e., is a gelatin-strengthened Italian Meringue. NOTE: French meringue is egg white whipped with sugar; Italian meringue is egg white whipped with hot sugar syrup; and Swiss meringue is egg white heated to around 170-175 °F (76-79 °C) before being whipped. Swiss is stiffer and more stable than Italian, which is stiffer and more stable than French.

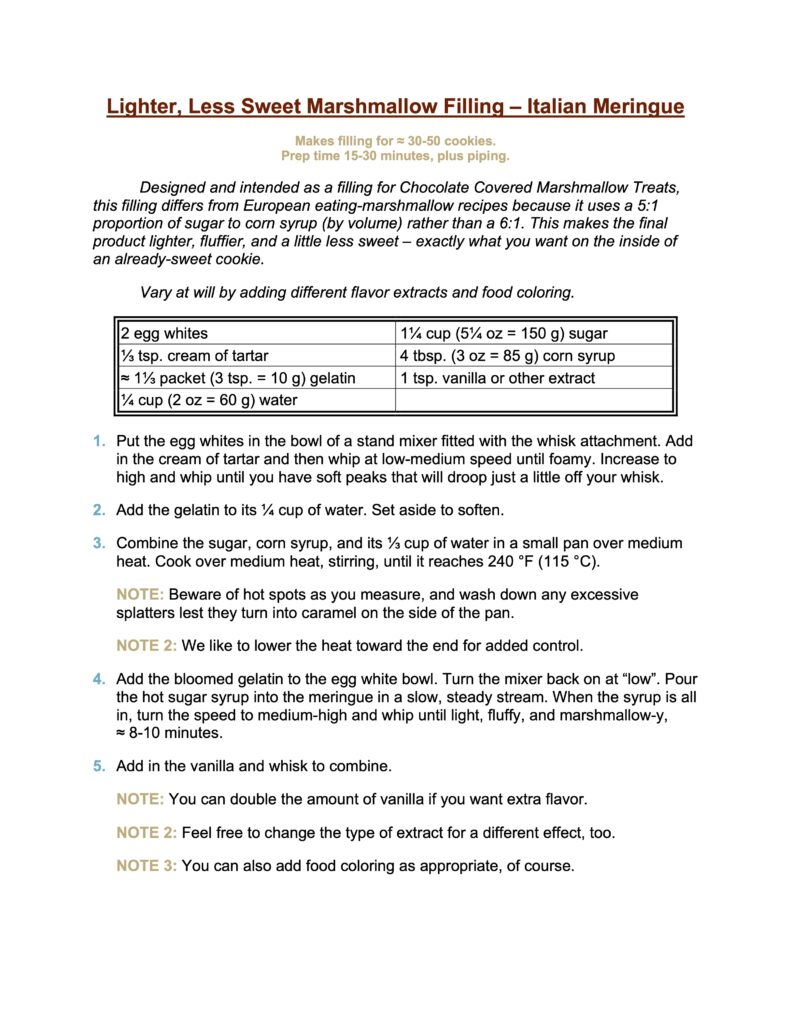
Problem #1: The filling was denser and sweeter than we wanted.

Think of a classic marshmallow you eat out of hand. They have a distinct chew to them, right? It’s part of the appeal. Now think of that chocolate covered marshmallow treat you grew up with. Much less chewy! And a bit less sweet, because flavor also comes from the cookie base and the chocolate topping. The The cookie would not be perfect until we got a handle on the problem.

Fair enough, but how do you change a marshmallow recipe to achieve those targets? It can obviously be done – the commercial products prove that – but we had to figure out how. And that was a major pain in the whosis, because our expertise on the baking side did not extend into this kind of candy making and sugar work.

The first and most obvious solution (cutting cut back on the amount of gelatin) proved to be impossible. Cut back too far and the structure dissolves rather than getting lighter, and I could not fidget my way into a perfect balance because kitchen scales only have so much precision. Plus the marshmallows were far too sweet for this use, and cutting back on the sugar too created other textural issues. I fought this problem for months, and ended up with a pair of solutions that work hand in hand.

Kate gets 100% of the credit for the first. She noticed that our trusty stand mixer began to really strain as the marshmallow mix cooled down. Part of this came from how the filling thickened as it cooled, but the overflowing bowl factored in too. Her solution? Shrink the recipe by a third. Huge difference. The lower volume resulted in a fluffier marshmallow because the machine wasn’t slowing down, and also because the bowl had extra room to accommodate it.

I claim credit for the second solution. I posted the question on some Internet groups/boards, and no one seemed able to help. All I got were suggestions for vegan substitutes that could be used instead of gelatin. That wasn’t the issue! Vegan shmegan; I just wanted to know what was going on in the chemistry, and how to adjust it. One long-suffering volunteer finally burst out with, “maybe you should take a food science class or two.”

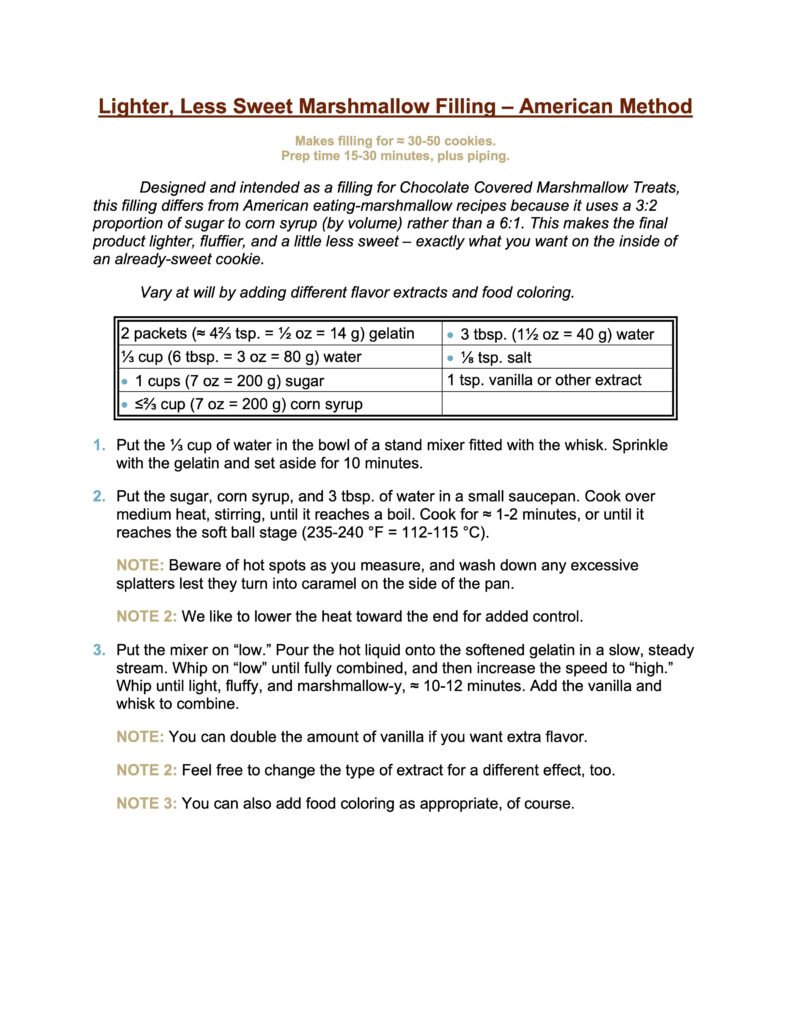
Ding ding! For some reason I’d done all my Internet searches using the words “chemistry,” “physics,” and descriptions like “fluffier” and “denser.” I’d never done one using the term “food science.” Why not try? I did, and up popped this lovely article on a project for grade school science teachers: “Sweet Science – Making Marshmallows.” I urge you to read it, but here’s a quick summary in case you want to save some time. Loosely translated, the project reads as follows:

“Have your students make marshmallows with different proportions of sugar to corn syrup, and then measure the characteristics. They’ll find out that more sugar equals a denser and sweeter product, while a higher ratio of corn syrup reverses that. Then you can let the kids eat their experiment, and send the sugared-up darlings off to some class with a colleague you don’t like.”

Okay, I added that last last sentence on my own. But look at what it says! Lighter, and less sweet. Exactly what I wanted. We did the experiment; it worked just as predicted; and the results now appear in the recipes below.

Plus there’s this: Now you have the power too! By way of reference, American eating marshmallows have a sugar:syrup ratio of 6:1 by volume. That’s now at 3:2 for the cookie filling, which coincidentally works out to just about 1:1 by weight. This is just about perfect for us, but you can fuss with it to your heart’s content to find the proportion that’s perfect for you. Tastes differ. Though it must be said that we achieved a texture so “right” that our testers actually singled it out for special compliments! Yes, you really can tell.

Problem #2: Piping the Marshmallow was a P.I.T.A.

There’s no easy way to say this. I suck at piping. And that is a problem because this is a recipe where you need to work quickly. Cooled marshmallow filling stiffens, is harder to pipe, and tends to mound up unevenly instead of covering the whole cookie in a pretty layer. Nor does it help that our biggest piping bags are “mediums” on anyone else’s scale. Even the reduced recipe required us to refill the bag two or three times, which led to the filling cooling off that much faster, and becoming that much… You get the idea.
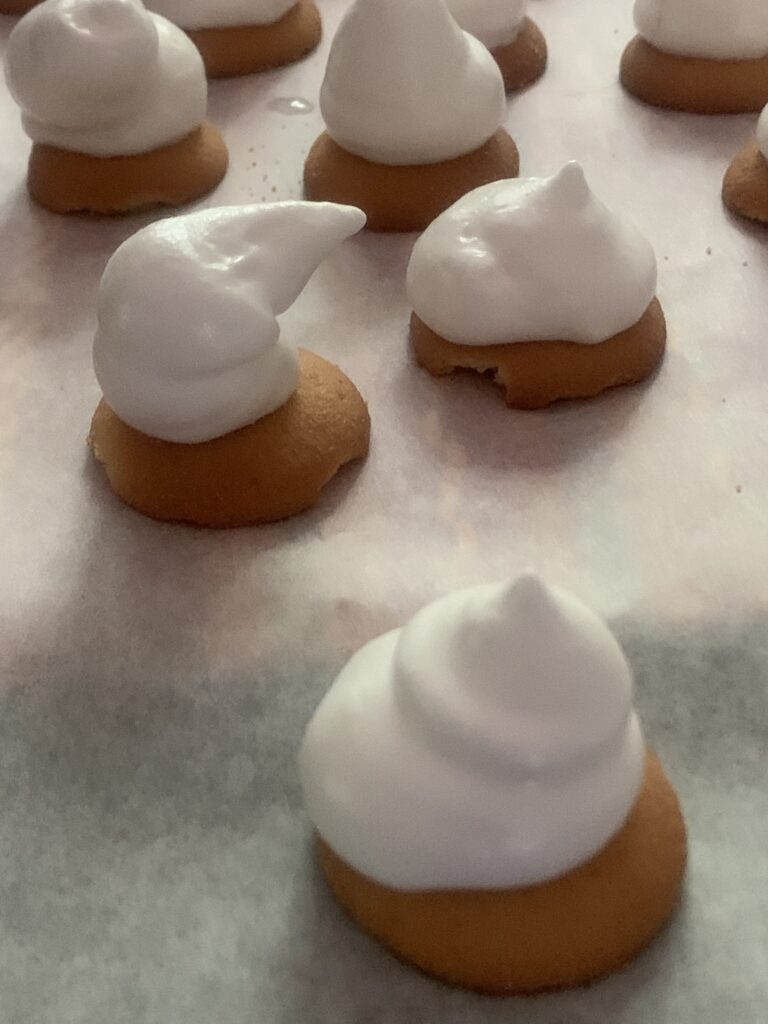
Marshmallow gets stiffer as it cools, and won’t pipe out cleanly.

In the end I found three solutions that worked pretty well.

  • Scott’s Solution. Rope in Kate or a daughter to cover for my sorry efforts. This works perfectly, and I recommend it highly.
  • The Doh! Solution. Buy a bigger bag. Maybe next time. They aren’t as easy to find as you’d think.
  • Solution #3. Prepare two or three of the medium-sized bags before you start to pipe the cookies out. This saves a few critical minutes, and also lets you use more than one tip.

Yes, I am overselling the difficulty a bit. Anyone with the right tools and some basic skills won’t find it as challenging as I did. The multiple-bags approach also solves a lot of the problem, and the cookies taste just as good even if the marshmallow cools enough to come out lopsided. Still, forewarned is forearmed. Be ready to pipe as quickly and efficiently as you can; and/or to laugh at your funky shapes.

Problem #3: The Infinite Variations

Continuing the theme from Parts 1 and 2, the marshmallow filling can also be varied in as many ways as your imagination permits. And it’s super simple to do!

So-called “plain” marshmallows are flavored with vanilla extract. An even teaspoon works perfectly at these amounts. “Flavored” marshmallows replace the vanilla with with any extract and/or food color that’s buried in your spice cabinet, and that same 1 tsp. will do the job just as well. Lemon, rose, rum, banana, coffee, mint, almond… there is some place in the world where that flavor of marshmallow is a beloved favorite sold in stores. I recommend some color coding to avoid frowns of confusion, but it really is that easy.

Spices work too but we found that spiced cookie bases were easier to control. Marshmallows have a ton of air, and adding enough spice to provide solid flavor can make them a little gritty.

Fruit flavors are a little different. The extracts work fine for a properly artificial flavor reminiscent of commercial products, but you can also get The Real Thing by making Zefir instead of a classic marshmallow. Talk about intense essence of fruit…! But that’s getting ahead of myself. I moved that discussion to Part 5 for very good reason, and you’ll simply have to wait.

CONCLUSION

It took some serious work and research to nail down the filling part of this cookie, but that really came down to exploring things at the food science level. [It had nothing to do with me being obsessive, no matter what my piping assistants may say!] If you follow the recipe below – either one – you will find it quick, easy, and effective. You’ve got your wheel, and there’s no need to recreate it.

So where are we at?

  1. Make a simple cookie base, flavored in any way you can imagine.
  2. Pick your choice of marshmallow approach, and flavor it with any extract or liqueur in your cabinet by substituting 1:1 for the designated vanilla, and color coding with a touch of food dye.
  3. Pipe your marshmallow creation onto your choice of cookie, using your choice of piping tip.

Bing, bang, boom. You’ve got these Chocolate Covered Marshmallow Treats 70% done. All that remains is coating them in everyone’s favorite darkest-brown food of the gods.

THE CHOCOLATE MARSHMALLOW TREATS SERIES

Part 1, The Chocolate Marshmallow Treat Overview

Part 2, The Cookie Base Options

Part 3, The Marshmallow Filling Options

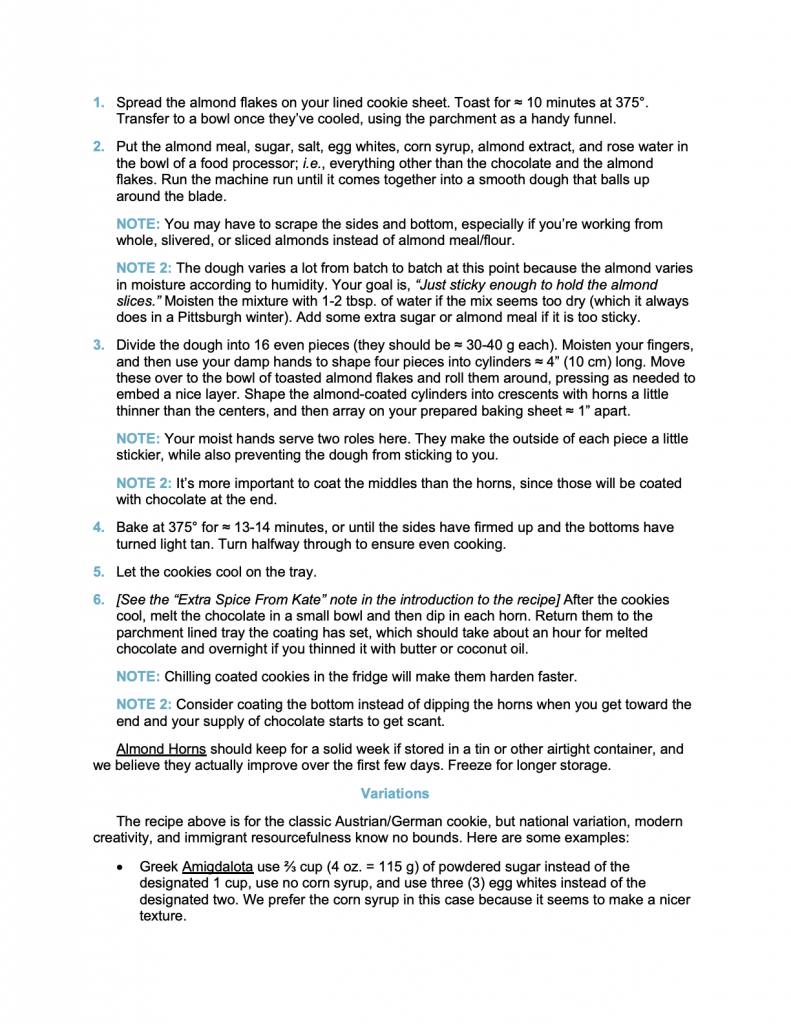
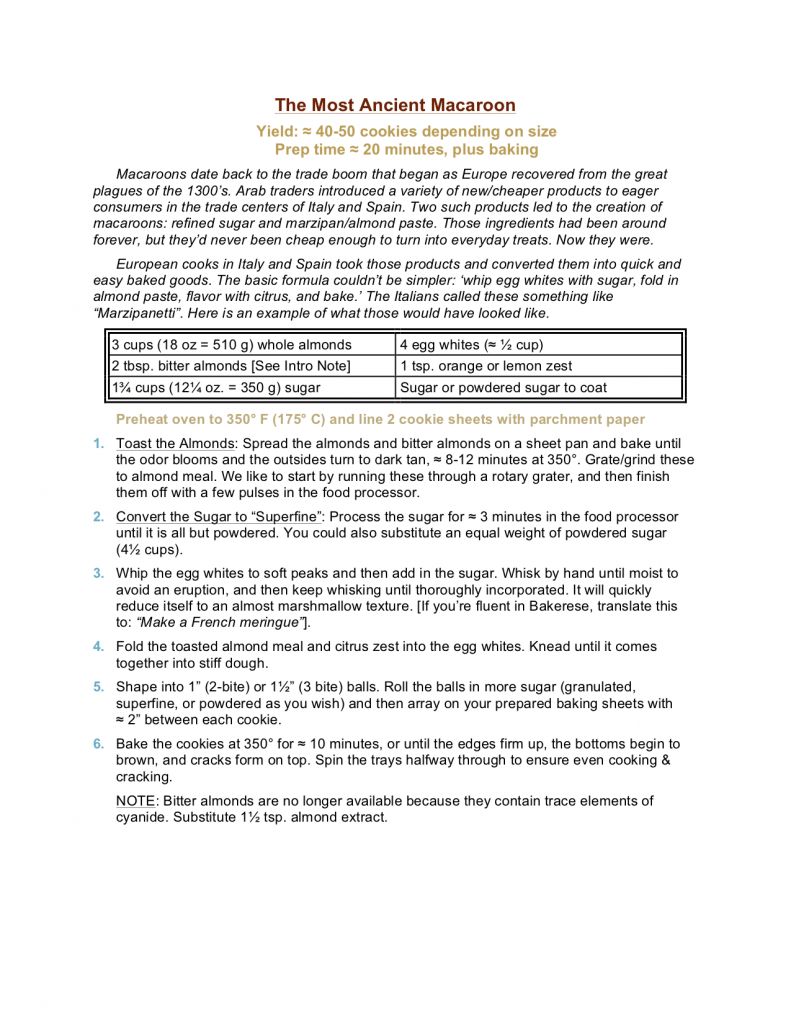
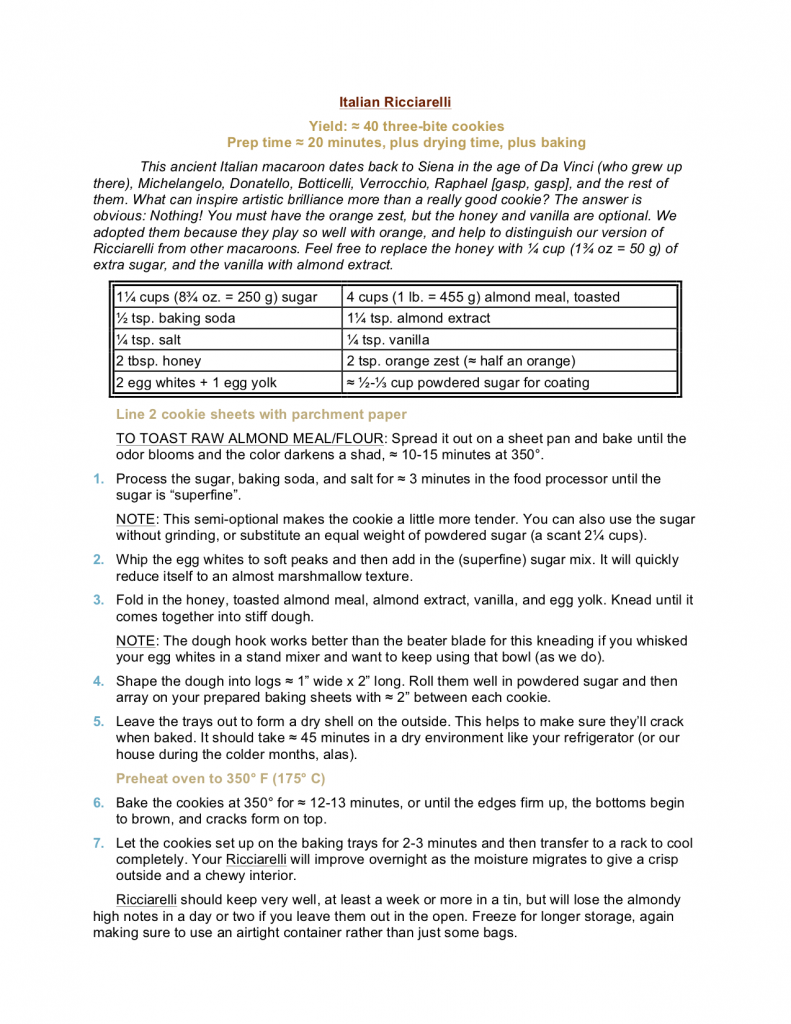
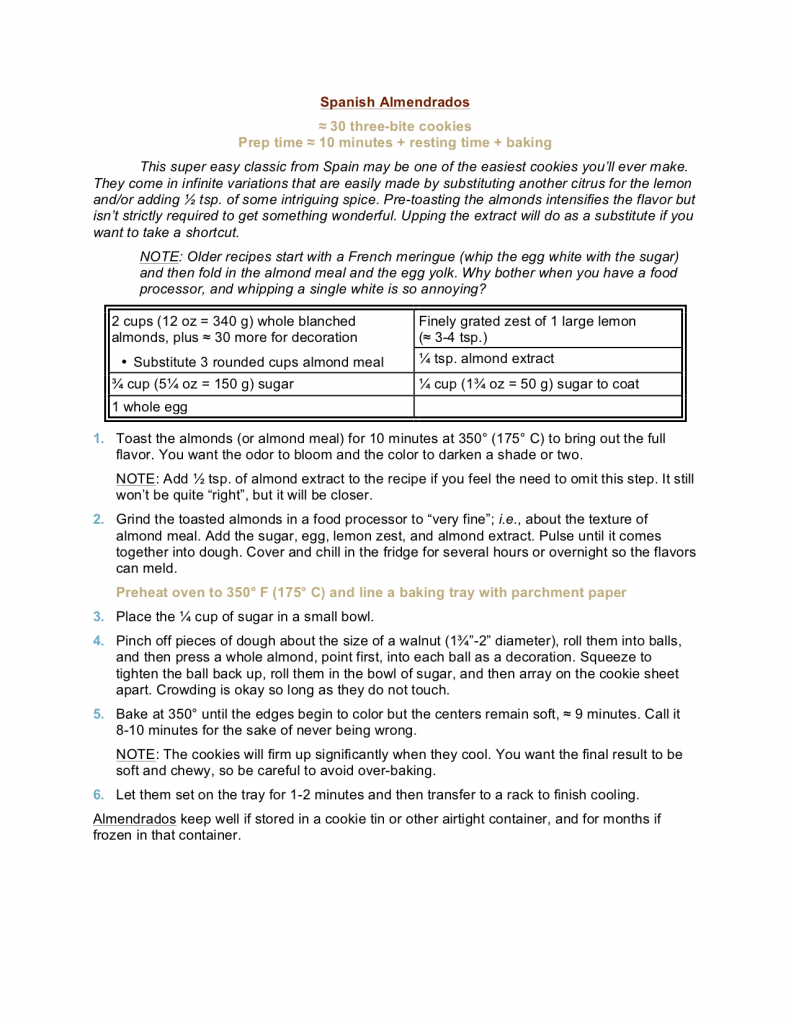
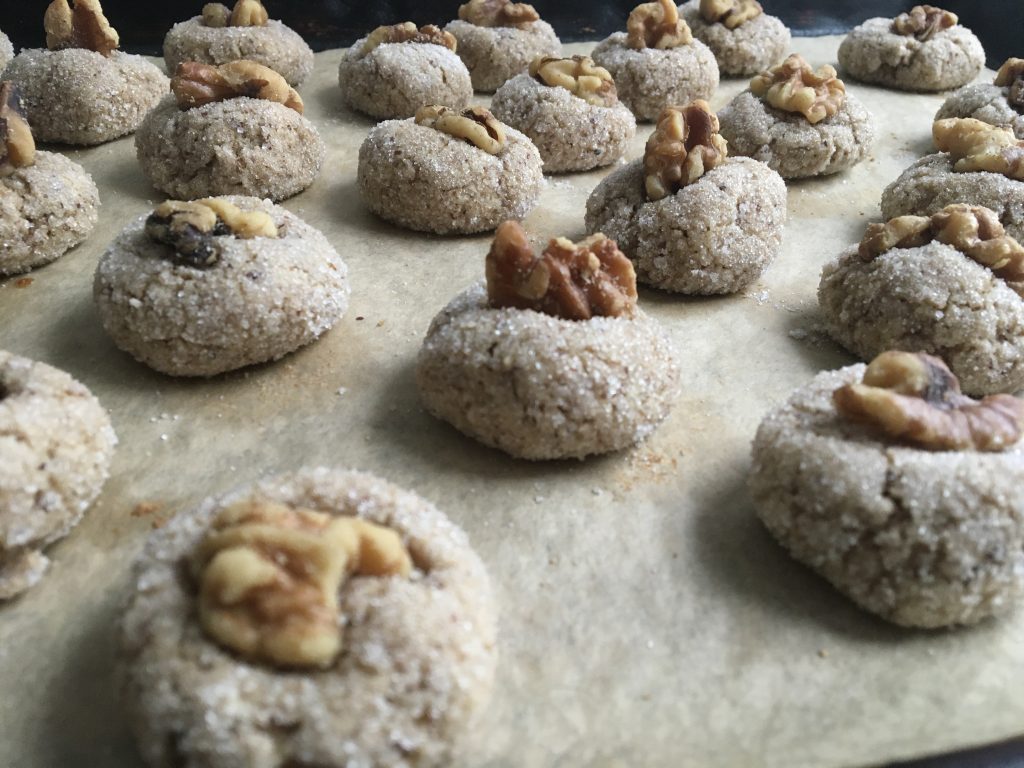
Part 4, The Chocolate Coating and Finishing Options

Part 5, The Strange New World of Fruit-Based Zefir Marshmallows
VANILLA SNAPS AND WAFERS – a classic cookie and ingredient

The classic, with versions for eating out of hand or for using in other recipes

Here’s another head smacker cookie really should have gone into Volume I but somehow escaped our notice. It came up now in a sideways fashion. We’ve finally gotten around to working on Chocolate Covered Marshmallow Treats. You know that cookie. Everyone does. It’s the one you loved as a child, with a simple cookie base that has marshmallow on top, and is then coated with a thin chocolate shell.

That cookie has scores and scores of different version around the world, but the most common uses some equivalent to a Nilla Wafer® base. So that meant I should start by making… Doh! I’ve never actually worked up a homemade version of Vanilla Wafers. [Sigh]

The result was all we could have hoped for and more. In fact, we discovered that it isn’t a single cookie. It’s actually three.

  1. Use the full amount of flavor and you’ll get a very pleasant cookie to eat out of hand, that adults will enjoy as much as children.
  2. Use a moderate amount of vanilla, and you’ll make something very close to the commercial product. Just better in every way. Real butter and real love make a real difference. Kate says that toddlers in Prague were fed a similar cookie whenever treats were earned.
  3. Reduce the amount of flavor all the way, and you will get the plain, invisible cookie that’s perfect for all the “other” uses these get purchased for. Banana Pudding; El Cheapo Tiramisu; Chocolate Marshmallow Treats; etc., etc., on and on, and suchforth and suchlike.

As always, skip to the bottom if you only want the recipe

This is a simple cookie, and it’s meant to be a simple cookie, so I’m going to try to keep the discussion brief. There weren’t many issues that needed to be addressed. It was really a matter of focusing on what we wanted the cookie to be.

First the Eggs

I wanted this to be a light, crispy cookie with a fair amount of air, that would taste a little buttery without coming off as rich. Most recipes in our books and online resources called for one whole egg to go with each stick of butter. I tested that, along with one egg white, and one egg yolk.

The whole egg won handily, both for ease and flavor. Yes, you can make a good cookie with both egg white and egg yolk, but the whole egg is simpler and, for this use, better.

Wait; Haven’t We Made This Before?

For crying out loud! Butter cookies. Sugar cookies. Shortbread. Alfajories. Spritz Cookies. Snaps. They’re all pretty much the same, right? Just butter, sugar, flour, starch, and egg in slightly different proportions, plus a hit of flavor. Was this one really different, or just a variation on one of our existing and already-tested recipes?

Well… no. I went back and crunched the numbers. These are in the same family but the proportions are distinct enough to earn their own name. Same for the classic French cookies we plan to work up someday, such as Langue du Chat (“Cat’s Tongues” a/k/a Homemade Milanos®), and Tuiles. Those use several egg whites to create a different species within the same genus.

What’s In A Name?

All that recipe comparison work did clarify one thing that was bugging me. These are not a “wafer”!

I am a lawyer in my real life, and have been for 30 years. So I can speak for my profession when I tell you that virtually every non-criminal problem I see comes down to a variation on the theme of frustrated expectations. Person X thought s/he deserved or would get an “A,” ended up with a “B”, and grew angry at that result. So Person X goes back to Person Y to complain, “where is my A?”, and the situation then grows worse because Person Y insists that s/he meant “B” all along. And most of the time both interpretations fit the actual words.
The solution? Define your bloody terms so you can at least know where you really disagree! Try it the next time someone wants to argue about politics. “Exactly what do you mean when you use that word?” You’ll be shocked at how much of your fight disappears, or at least settles down to the amicable question of how words ought to be used.

In any case, I have spent a lot of years getting frustrated over that stupidity, in both my profession and in politics, so I get a little [ahem] picky about calling things by their proper names. A “wafer” is an extremely thin, usually broad cookie like our different Snowflake variations, Tuilles, or Lace Cookies. You can get to that result in many different ways, but that’s the definition.

This cookie does not meet that definition, and thus it isn’t a “wafer.” This cookie is a “Snap”. Harrumph.

We define Snaps as any plain, simple, round cookie that features a clear and focused flavor. Cardamom, Anise, and Black Pepper Snaps feature a single spice. Ginger snaps feature a spice mix with a touch of molasses. But that is the family group, and that is where this cookie belongs. Harrumph I say again! And harrumph for good measure. Harrumph. Harrumph. Harrumph!

Alas, but the outside world does foolish things on occasion. Sometimes it will even [gasp!] ignore it when some large company mislabels what ought to be a Snap as a Wafer. And a wise man has to know his limits. So let us agree on a simple formula, okay?

First, I am in the right. Harrumph. And that means the world is wrong. And thus equity, justice, and fair play are unanimously on my side.

Next, I am not being petty no matter what certain females in my household may choose to imply. Nor childish. Not, not, not!

And no, this isn’t a fight I’m going to win. So how about a compromise?

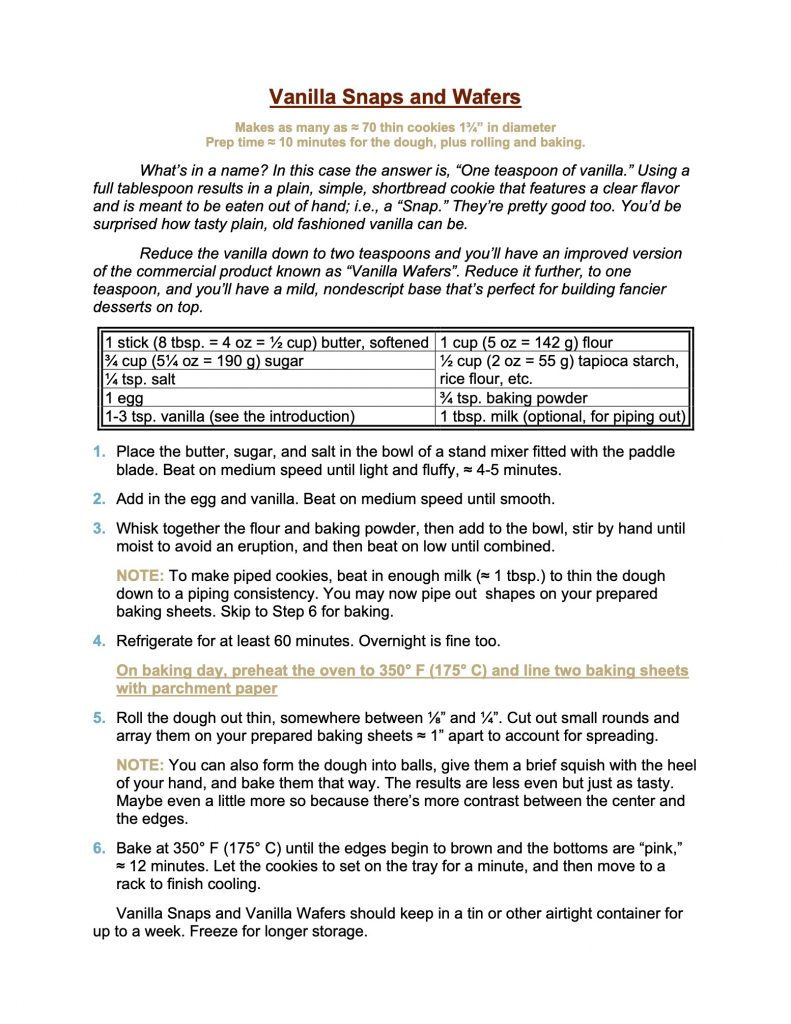
Let’s agree to call the eating version of this cookie a Vanilla Snap. That’s the tasty one with a full tablespoon of vanilla, which is going to make people sit up and say, “I never thought I’d say it, but these things are capital-G Good.” The weaker versions, which are intended for use in other recipes anyway, can be called by that other name for the sake of allowing the rest of the world to save some face.

Back to your regularly scheduled programming.

Confirmed Again: “Other” Starches Work Better Than Corn Starch

Is the cookie better with a bit of gluten-free starch to supplement the flour? Yes, it is. Cake flour might work too, but we didn’t test it.

Would corn starch work? Yes… but it isn’t as reliable as rice flour, tapioca flour, arrowroot, etc., because you’ll occasionally get a less-done piece that leaves a gummy sensation in your mouth. It’s an effect we wrote about in our book Heritage Cookies of the Old and New World. Corn starch breaks down at a higher temperature than those others, and thus cookies made with corn starch are more likely to have leftover “uncooked starch” in the final product. That’s the underlying problem; it was confirmed again in these experiments; and there’s simply no reason to fight the science. Vanilla Snaps cook until the bottoms brown, which gives a margin of error, but why make use of that margin if you don’t have to?

We usually bake with tapioca starch because it is cheap and readily available in large quantities at our local oriental market. We have tested rice flour and arrowroot too, and found them to be identical. We have read that potato starch fits in too. Corn starch is the only one that requires a higher baking temperature.

Would A Drop Cookie Work?

We always prefer to write up drop cookie recipes when possible, just because they’re so much easier for new people. Refrigerator slice-and-bakes come in second, followed by roll-and-cut cookies, and then by ones you pipe out. What was the best way to go for this one?

The answer depended on what we wanted to do with them. Drop cookies worked fine from the baking perspective, but I simply couldn’t get them to come out even enough to use as a consistent base for the other project. So here is my verdict:

  • If you’re after the eat-out-of-hand Vanilla Snap version, make a simple drop cookie and be done with it. You don’t need to do it that way, but you can. Kate swears that they also came out a little lighter and crispier than the rolled-and-cut version, though I couldn’t tell the difference.
  • If you’re after a cookie to use in some other role (like the base of a Chocolate Marshmallow Treat), roll them out and use a cookie cutter. These are dead consistent and thus better as an ingredient. The dough is a little on the sticky side, but works fine if you simply dust with flour as needed.
  • If you’re trying to jazz things up, add a bit of milk to thin the dough out to a batter, and then pipe out something fancy. You could even sprinkle it with a bit of sanding sugar. It ought to work with a spritz gun as well.

Bake Until The Bottoms Are Good And Tan

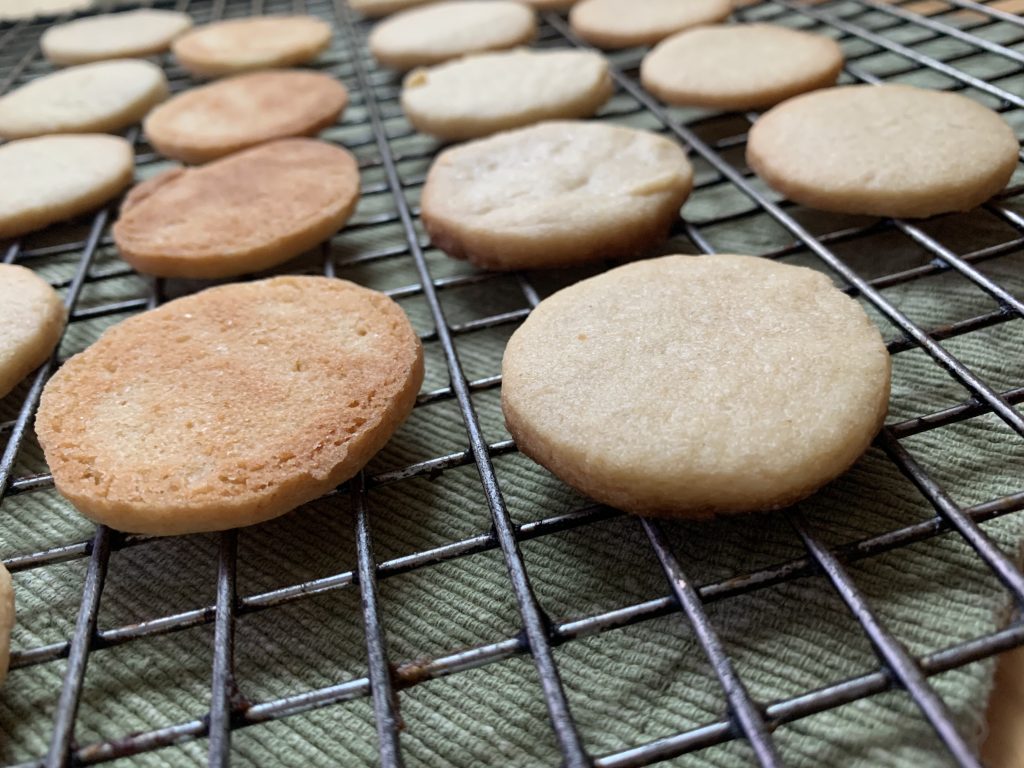
Part of the flavor in this cookie comes from actual browning on the bottom. Most cookies want to come out of the oven when they’re still pale, and the edges feel barely set. Leave these in for the full 12 minutes, or until you can see browning around the edges.

CONCLUSION

That’s about it. One forgets that plain old vanilla isn’t that plain at all. It’s a really delicious spice, and it fully deserves to be just as celebrated in a Snap Cookie of its very own. They are as “heritage” as you can get, and well worth making.

CENTRAL EUROPEAN OŘECHY (Filled, Molded faux-Nut Cookies)

A traditional Central European Christmas treat. They require some patience because the special molds need to be filled one by one, but they are unbelievably rich, unbelievably good, and unbelievably charming.

Two things happened right after I published our recipe for Oreshki, the Eastern European faux-nut cookie made with a light, crispy shortbread crust and a luscious dulce de leche filling. First, all our Ukrainian, Russian, and other Eastern European friends descended like a pack of starving hyenas on a fat old antelope with a limp. Don’t worry, we got out of the way in time to avoid injury. The show was magnificent!

Second, our Czech, Polish, and other Central European friends said, “Those are really cool, but it’s not the ‘Molded Nut’ cookies I grew up with. You should work on those too!”

Oh? Kate had only a vague memory of Ořechy from her childhood. Grandma Kandler had the molds, but never made the cookies. “Too much hassle.” So I set to researching and uncovered four – only four! – fairly consistent recipes. It took some tweaking to get them right, but Oh…My…Heavens! We will not have a Christmas tray again that does not feature these ridiculously rich, tender, and flavor filled nutty-mocha treats. They are a hassle, yes. But they are also unique, and unbelievably good.

As always, skip to the bottom if you only want the recipe. But this might not be the best article to do that with. It contains some extremely useful tricks.

First, Know Your Target

NOTE ABOUT THE NAME: The Eastern and Central European faux-nut cookies have the same name, languages and spelling aside. It’s pronounced “OH-RZHE-ch-ee”, more or less, with a rolling “r” and the “zh” combined into a single sound that English doesn’t possess, and the “ch” being that guttural, back of the throat sound like the Yiddish name Chaim. English doesn’t have that sound either. The “ee” sound at the end denotes a plural, like putting an “s” at the end of an English word. It technically translates as plain old “nuts”, but in context it’s understood to mean “walnuts;” and that is the shape of the mold. You’ll get it wrong if you try to pronounce it properly, especially since there are small variations between the different Slavic tongues. But who cares? You’ll get credit for trying, and everyone will know what you mean.

The name is the same; but the two cookies could not be more different. The Eastern European one is plain, crunchy, and child friendly. It rings the same chimes as Alfajores in South America, Millionaire’s Shortbread in England, and Stroopwafels in the Low Countries.

The Central European cookie (this one) is a sophisticated flavor bomb aimed at knocking adults on the seat of their pants in rapture. The shell is a walnut cookie so tender you have no choice but to eat them in one big bite. They’ll crumble under your teeth if you try to stretch it to two. The filling is less “buttercream” than a “whipped, flavored butter” redolent with coffee and rum. It’s so rich that we include an instruction to use it sparingly!

The final flavor becomes mocha because the cocoa in one part and the coffee in the other combine into a single unit in your mouth. It doesn’t matter which part (shell or filling) gets the cocoa powder, and which one gets the coffee, so long as each side is only half the final flavor. The recipe below goes with cocoa in the shell and coffee in the filling, but both ways work great.

The Dough Is Easy; The Molding Takes Patience

The dough is simple to make; a straightforward creaming method approach. Beat together the butter and sugar until light and fluffy, beat in an egg with an optional touch of extract and/or spice, and then mix in the dry ingredients. The only complication is that one of those ingredients is a large amount of grated walnuts. We’ve yet to see walnut meal in a market, but it’s easy enough to make. Toast whole walnuts for 8-10 minutes in a 350° F (175° C) oven until they’re fragrant. Remove, cool, and then grate down to meal.

NOTE: A rotary hand grater is by far the best tool for this task. Food processors get dicey because walnuts go from “chopped” to “nut butter” in a heartbeat, much faster than almonds or even peanuts. On the plus side, it doesn’t need to be flour-fine. Grating them is plenty good enough.

Then comes the filling of the molds, which is indeed a fidgety chore. Where the Eastern European version is baked in a unique stovetop mold, Central European Ořechy get formed in thin, individual metal molds that go in the oven so the cookies will keep their shape. It isn’t hard, just time consuming because you need to go one by one.

This image has an empty alt attribute; its file name is Molds-to-reuse-pre-buttered-768x1024.jpg
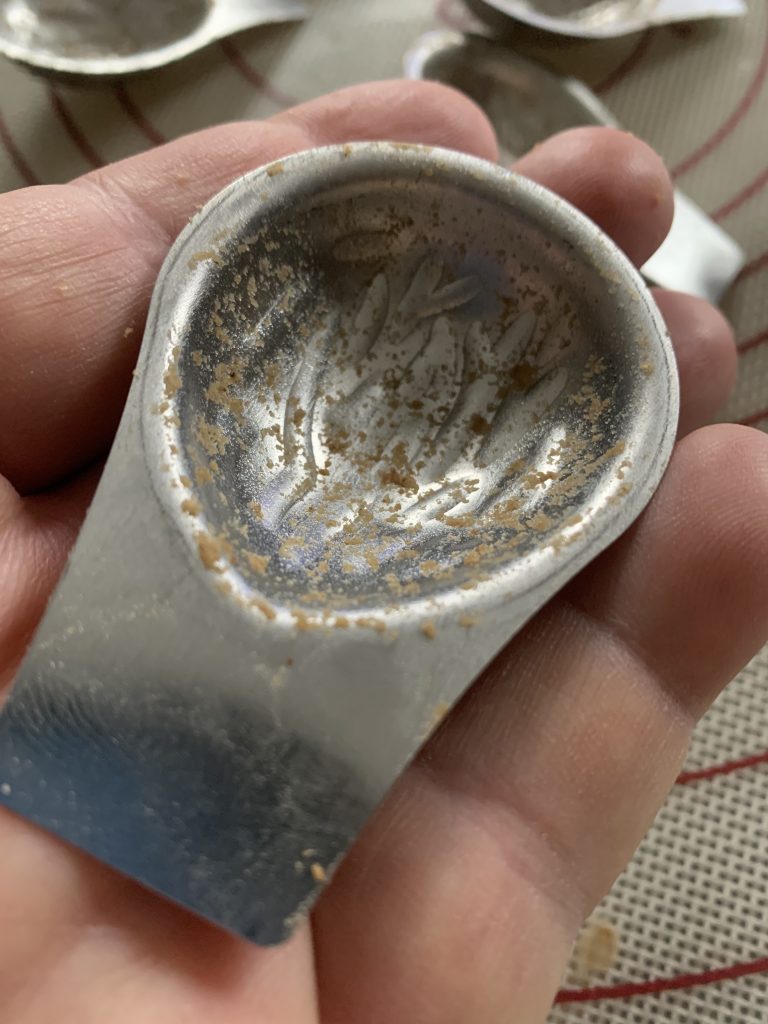
This is the Central European mold. Notice those crumbs? Don’t clean them off until you are done! That residue from earlier bakes saves you from needing to butter and flour the molds every time you fill them.

First you coat the inside with a bit of butter, then you dust it with flour, and then you press the dough in with your thumbs until it coats the entire inside of the mold with a layer that’s maybe 1/8″ thick. [NOTE: You only need to butter-and-flour on the first batch. The remaining crumbs from that batch will be enough to prevent sticking on the second, the second for the third, and so on.] Then you scrape off the excess with a flat tool like a metal spatula or bench scraper, and then move onto the next one.

The dough will soften significantly as you work it. That makes the molding easier, and causes no issues. Incredibly tender doughs will do that. The process isn’t hard, just time consuming.

But you aren’t ready to bake just yet!

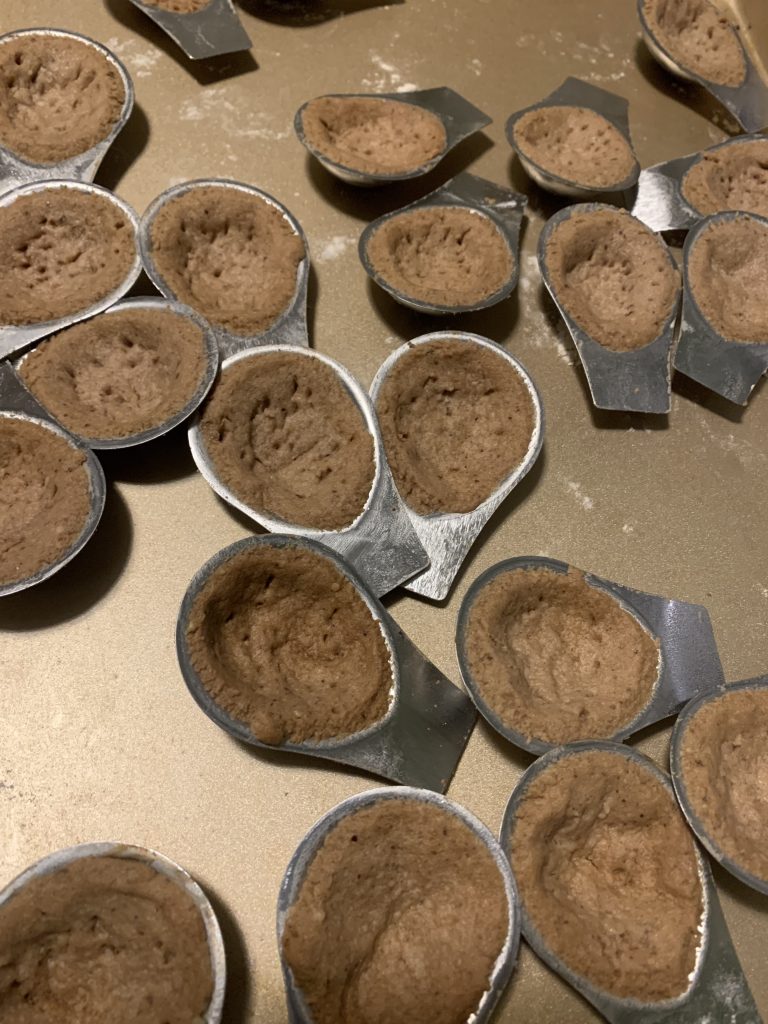
Trick #1. Freeze or dock the dough baking. We learned the hard way that Ořechy will puff up to be almost level if you put them right into the oven after shaping. It leaves you with a dent more than a cavity.

This image has an empty alt attribute; its file name is Version-1-puffed-up-coming-out-of-the-oven-768x1024.jpg
Our first batch came out of the oven with no room for the filling!

You can prevent this by (A) poking in holes in the dough with a fork (“docking”) as you would with a pie crust; or (B) freezing the dough in the molds before baking. Both work, and both leave plenty of room in the final product for your incredibly rich filling.

This image has an empty alt attribute; its file name is Version-2-Docked-and-frozen-flattens-much-less-768x1024.jpg
Docked and frozen before baking = generous cavities for filling. Too much room if you use the traditional whipped-butter filling.
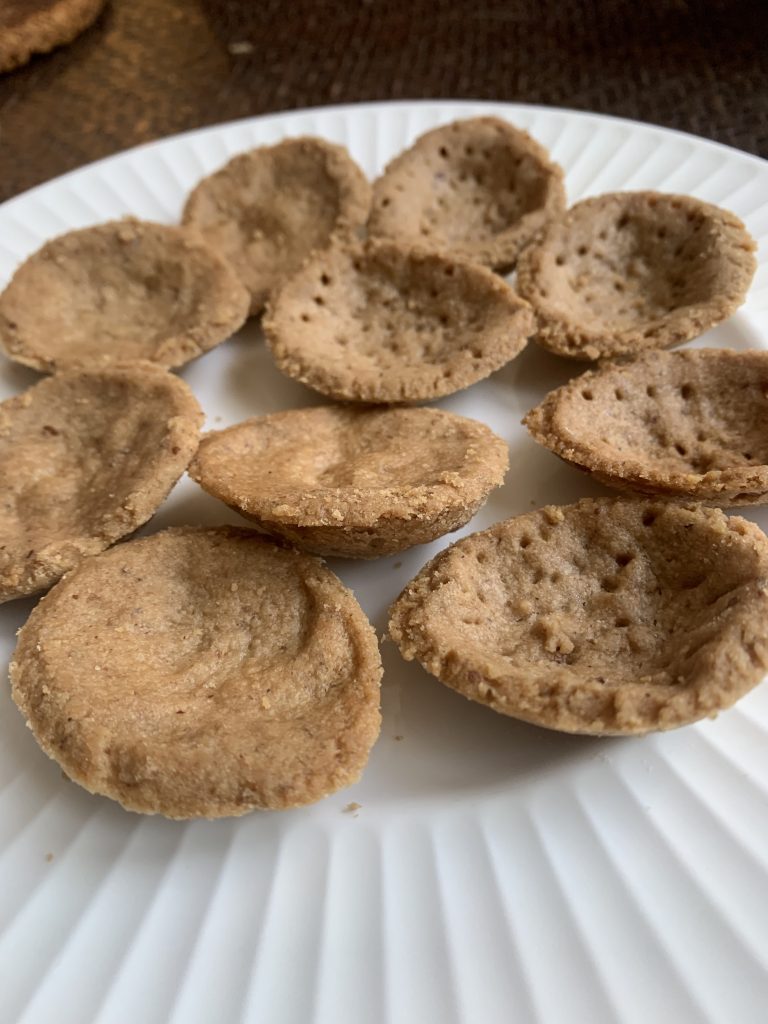
This image has an empty alt attribute; its file name is Comparison-of-plain-and-frozen-docked-on-white-plate-768x1024.jpg
Version 1 versus Version 2. Either too little room, or too much!

Trick #2. Freeze or dock, but don’t do both. Docking combined with freezing will give you full sized cavities inside your “nuts,” suitable for a normal buttercream, frosting, caramel product, or any other typical filling. Bit the traditional filling for this cookie? A half-teaspoon or so is all you want. As one baker friend said, “a knob the size and shape of an almond.” That’s just about the amount of room that’s left over if you freeze the shells before baking and so nothing else. Docking creates a little bit of extra room. The combination creates too much.

Extra room won’t kill you, of course, The cookies taste just fine with a cavity that’s got some empty space.

This image has an empty alt attribute; its file name is Frozen-but-not-docked-middling-puff-768x1024.jpg
Fresh out of the oven. These were frozen but not docked. A nice, noticeable cavity that has just the right amount of room for a super-rich filling. [P.S. I feel your pain if you’re groaning at that poor sheet pan! It was recently used for roasting bones, and then vegetables right after. A few more trips through the elbow grease sink with Barkeeper’s Friend ought to help.]

Trick #3. Ignore both #1 and #2, and then press a hole in to the flat cookies when they are warm from the oven. So you have molded cookies that puffed up in the oven. You pull them out and say, “Oh no! They have no room for filling!”

Not a disaster. Simply press the warm and still-soft center with your asbestos thumb, and you’ll have a dent you can work with. Yes, it is hot, and yes, you can get a minor burn if you have human skin instead of baker’s asbestos. But beauty can be expensive. Even when it’s only beautiful cookies.

On To the Whipped Butter Filling. This couldn’t be any simpler. Whisk the butter until it’s soft and fluffy, and then whisk in the other ingredients: powdered sugar, more grated walnuts, instant espresso/coffee powder, and a good hit of dark rum. That’s it. What you get is a flavor bomb that carries the essence of Prague. If America is the land of cinnamon and sugar, and Scandinavia of cardamom, Prague’s heart belongs to a mix of mocha, nuts, and rum. Utterly scrumptious. Just use it with care because we aren’t kidding about how rich it really is!

Place an almond-sized piece of whipped butter filling between two shells. Close carefully so you don’t shatter the tender pieces. Dust with powdered sugar to complete the illusion, and enjoy. They will improve overnight, hit their peak on Day 3, and be good for another two days after that.

Be prepared for “Wow!”

This image has an empty alt attribute; its file name is Orechi-half-filled-side-view-with-real-nut-pretty-1024x768.jpg

CONCLUSION

Ořechy require some patience because the special molds need to be filled one by one, and they only last for a week or so after they get filled. That makes them a special occasion treat. But you know what? They are also spectacular enough to be a star entry on famous dessert trays in any top coffee house of Prague, Warsaw, Vienna, Budapest, or any of the other great cities of central Europe. They’re the sort of food that tourists taste, gape at, and then go home to tell stories about.

We won’t be making them on any kind of a regular basis. Not even for guests. But you’d better believe we’ll be making them for the holiday tray! They’re just too cute and too fantastically delicious to pass by. The whole family would pine at the loss now that they know what we’d be missing.

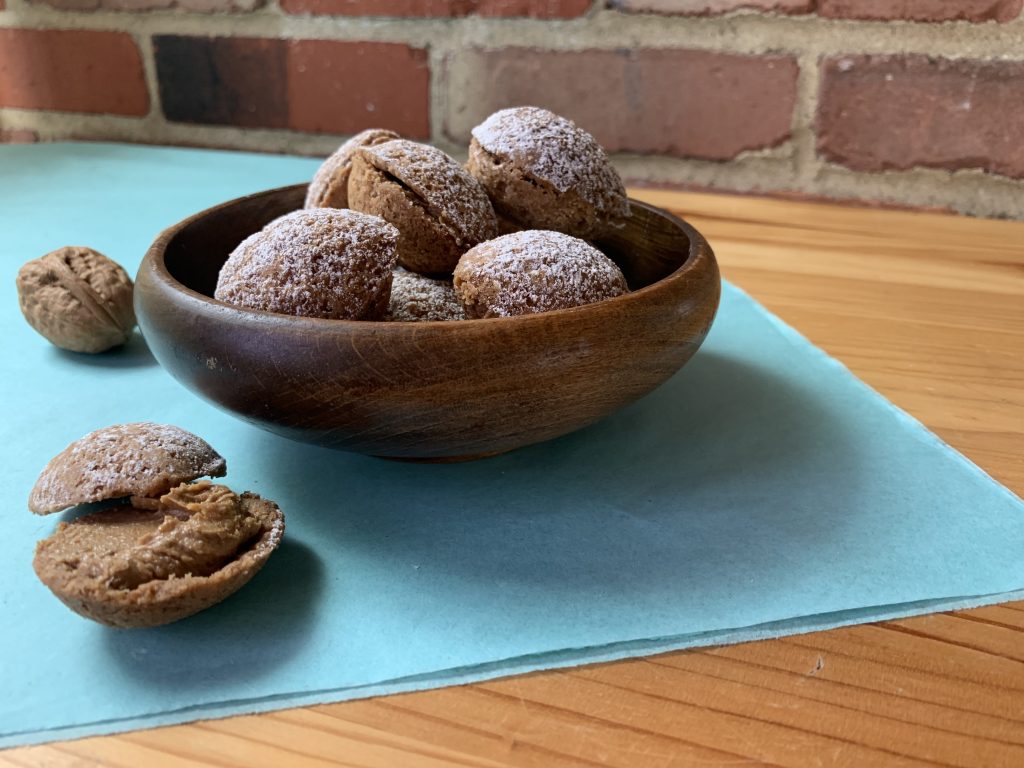
Yes, they are that good. And cute, too. Wouldn’t you agree?

This image has an empty alt attribute; its file name is Orechi-in-a-wooden-bowl-side-view-cute-1024x768.jpg
This image has an empty alt attribute; its file name is Orechi-recipe-page-2-Central-European-Nut-Dough-Walnuts-791x1024.jpg

ORESHKI (FAUX WALNUTS) – Eastern Europe’s Cookie Of Childhood

Confession: I love crossword puzzles, and I’ve done enough to learn certain words that writers can’t seem to do without. Here are some examples of recent clues I’ve seen:

  • Clue: “Treat that is often twisted”
  • Clue: “Crispy, pull apart snack”
  • Clue: “Cookie eaten from the inside out”

Oreos! Duh. Everyone knows that, right? Yes… if you’re from the U.S.A. People who grew up in Ukraine, Russia, Poland, or other countries of central and eastern Europe might well stare at a clue like that with nothing but bewilderment that “Oreshki” doesn’t fit in the grid. What else could the writer possibly be thinking about?
As always, skip to the bottom if you only want to read the recipe. And what the heck. This link will take you to the Dulce de Leche recipe in the middle.

Oreshki are a classic treat that are known and loved from Russia to the east, through Poland and the Czech Republic to the west, all the way down to the Crimean Sea. The formula is easy to describe: start with a very basic cookie dough, shape it into hollow nuts, and then fill the nuts with something gooey that children will love. Subtle? Bah. Sophisticated? Hah! Adult with a capital “A” like spice cookies or ginger snaps? Not in the slightest.

Nice, sweet, and simple. That’s your ticket. This is the cookie of childhood.

Working On The Cookie

If you’re here doing research, let me give you a tip as someone who’s actually read through and pondered several dozen online recipes. Don’t overthink it!

Your problem is easy to state: natives adore their Oreshki to the point that innumerable Eastern European families have now shared their “secret” methods to get them just, exactly right. There’s a lot to go through. The wonders of online translators, combined with a wife who can translate what those will not, allowed me to put together a humongous file of different trips, tips, options, and formulae. It was a true brain buster! But do you know what I found when I averaged things out, and then compared the results to other cookies?

Your target crust is a plain, light, crispy wafer that won’t fight with the filling. Period. Keep that in sight and you won’t have any problems.

Yes, you will be a little confused by how some of the common ingredients get used. I certainly was. But there is a pattern to the strangeness: those “touches” all add up to (i) a hint of acid, and (ii) a bit of “other” fat to supplement the butter. I don’t know why they do it. The amounts are so small that it’s hard to see how these additions could change the result. Nevertheless, it is a clear pattern, our work is about “heritage” just as much as “right,” and so I made a point of testing the variations.

The most common version marries a touch (½-1 tsp.) of vinegar with a tablespoon of mayonnaise, and then uses baking soda instead of powder. I ended up going with 1 tbsp. of sour cream paired with baking powder. Feel free to pursue either route as you wish. The differences will be subtle at best because you aren’t really supposed to notice the crust in the first place. It’s the filling that make Oreshki special.

These crusts get cooked in a special stovetop mold (electric versions being available in some countries). Here is ours, which is made from aluminum and available for a very low price from various sources:

You’ll need to fidget a bit to get the timing right. We ended up at 65-70 seconds per side on our average-sized burner with the gas set to a “2” out of “9.” Don’t expect that to match up with your burner! We also noted that molds filled with fewer cookies toasted faster than ones which were completely full.

Make an effort to keep the inside cookie-tan, like a shortbread, rather than nut brown. That was the one critique we got from our taste testers, and when I went back to do the final batch with that correction all of us noted that the new and lighter-colored cookies were also a bit airier and crisper when eaten.

Finally, you’ll need to trim the shells when they come out of the mold. It’s impossible to get the sizes right every time! A sharp paring knife is the perfect tool. Just don’t throw those trimmings in the trash! Most people simply add them into the filling for a bit of texture. We prefer to recycle them into crumbs for a leftovers-cookie or pie crust (think of how many recipes you know that begin with the instruction, “Grind up some vanilla wafers and then use the crumbs for…”). Do as you will, but please don’t waste what ought to be used.

These shells are too dark. Don’t throw them out, of course. They’ll work well enough. It’s just that lighter colored shells will be crisper, airier, and that much better.
These are what you want. The outsides are darker, the insides are “light tan shortbread”. BTW, do you see that one untrimmed shell on the top right? That’s the norm, and where your extra crumbs come from.

Nailing Down The Filling

The all time classic Oreshki filing is a peculiarly addictive caramel made from dulce de leche. More on that below. But honestly, anything that’s sweet, sticky, and a little bit runny will do. Nutella® works like a charm. So does lemon curd. It’s hard to go wrong, and none of my native taste testers had anything bad to say about those variations. Playing with your filling is fair game. But there’s that ‘heritage’ thing again, so we really ought to discuss the original version that left so many millions of 8 year old addicts in its wake.

Let’s start with an overview. You’ve seen this flavor profile before! When push comes to shove, this is just another plain shortbread being paired with rich, gooey caramel. In South America that takes the form of Alfajores. In the U.S. it’s a Twix® bar. In the U.K. it’s Millionaire’s Shortbread. Western Europe has it’s Stroopwafel. Got it? There’s nothing complicated about it. We’re only going to tweak things a little to match the Eastern European palate.

You can start from a true caramel if you wish, but native recipes follow the South American approach by starting with tins of sweetened condensed milk, and then boiling them for a few hours.

After that it’s easy. Soften this up with a bit of butter, add some cream cheese for a mild sour tang, and you’re done. Most recipes suggest the addition of crumbs from the crust-trimmings, and some will also add ground nuts, but those are both optional steps. It really comes down to whether you’re after pure, luscious smoothness on the inside, or luscious smoothness offset by a little bit of crunch.

How To Fill Your Oreshki

It took a few tries, but I’ve now got the system down pat.

  1. Take one shell. Top it off completely with your filling. Use a second shell to scrape that level. Set aside for the moment.
  2. Add filling to the second shell, and scrape that level with a third shell.
  3. Put shell half #1 on top of shell half #2, and then repeat the process until all your shells are done.
  4. NOTE 1: It’s not a bad idea to overfill a bit, and then squeeze the halves together so the excess filling will squish out the sides. Wipe it off with a finger, and then set aside your perfectly filled nuts for further decoration as desired. [What do you do with your filling-dirtied finger? Come on. Really? Being the baker has its upside!]
  5. NOTE 2: Oreshki with a runnier filling may want to go in the fridge to set up.

The only question left is, “to seal or not to seal.” These shortbread-and-caramel treats often come with a chocolate coating. Think of the aforementioned Twix® bars and Millionaire’s Shortbread. Heck, it’s common to coat Alfajores too in recipes that don’t add coconut. So it makes perfect sense to seal those two halves together with a bit of chocolate, right?

The answer is both yes and no. We liked the caramel ones better with a chocolate seal. No doubt about it. And every one of our native tasters expressed the same preference. “That’s a great touch!”

But then they’d add something like this: “My grandmother never did that. Of course, she didn’t have much access to chocolate back when I was a little girl.”

Again, it’s entirely up to you. A simple dusting with powdered sugar works just as well for chocolate-free versions, and better for those with an alternative filling.

With the ends sealed in chocolate. Very tasty, but not entirely traditional because chocolate was hard to obtain back in the day.

Conclusion

This is a really fun cookie so long as you don’t try to fight its basic core. Oreshki are designed for children, and adults who loved them as children. Sharing them with those children, old and young, is why American bakers will want to make them.

That said, you really, really do want to make them. I can pretty much guarantee a downright special reaction from the actual children in your life, and an even stronger one from adults who grew up in the Oreshki Zone. It’s like dropping a puppy in the lap of their inner child.

First comes the delighted grin. Then the delighted cry, “Oreshki!” Then some insight into a delighted childhood soul. Everyone who eats Oreshki has his/her own special technique. Some pop them in whole and crunch. Others twist them in half, and then crunch. There’s a twist-and-stretch school too; twist, scrape, and crunch; twist, stretch, and lick in midair… You get the idea. Pure, childish glee.

Think that’s going too far? Head on back to the beginning of this article, and the analogy to Oreos®. Imagine your typical American expat who has moved overseas and built a life somewhere that knows nothing about their childhood treats. Get him or her in a friendly environment, like visiting your home or receiving a tin as a gift. Now open it up and reveal a crispy, black-and-white, twist-apart cookie. What will happen? The exact same thing.

That memory is what Oreshki are really about. That, and creating a similar memory for future generations. It will work, I promise. There’s nothing that Littles enjoy more than something gooey, sweet, and crunchy that looks like something it isn’t. Oreshki are flat out fun at every level.

Enjoy!

NUT HORNS (a/k/a Kipferl a/k/a Hornchen a/k/a Mexican Wedding Cookies, Russian Wedding Cookies, Italian Wedding Cookies, Greek Kourambiedes, etc.)

This is a sample drawn directly from our book Heritage Cookies of the Old and New World. The first part is our favorate “Cookie Nerd Moment” of the entire tome. This is where we stop and take the time to discuss particular tricks, tips, and historical bits that provide a lot of the “why” behind the recipe’s “what.”

You can skip to the bottom if you really want only the recipe, but this is one case where I need to recommend the full read even if you know what you’re doing. The refresher course on Tips and Tricks never loses its value.

Enjoy,

Scott Pavelle

COOKIE NERD MOMENT

Anyone who makes 20 or 30 different cookies each Christmas gets used to two common questions: “What are your favorite cookies” and “What is the favorite cookie in general?” There is no answer. Everyone has his or her own favorite and there isn’t a single cookie that would touch the 10% mark if we kept track of who voted for what.

You probably could have guessed those two if you’d given it a bit of thought. But the third most common question might surprise you: “Do you know how to make [Nut Horns]?” We put that in brackets because the same basic cookie is loved with fervor and devotion across a huge part of the world with very minor changes. In Central Europe the cookie’s known by some word that translates as either Nut Horns or Nut Crescents (Kipferl in Austria and Hörnchen in Germany are two examples). Eastern European bakers shape them into balls, often with a heavier percentage of walnuts, and call them Russian Tea- or Wedding Cookies. Move south and west and the name turns into Italian Wedding Cookies, also ball shaped but with a tilt toward almonds. The south and east features ball-shaped Greek Kourambiedes, which have slightly fewer nuts but include some brandy. The New World knows them best as Mexican Wedding Cookies, which usually feature pecans. We could go on.

Simplicity plays a big part in the cookie’s charm. It’s all about the nuts, with vanilla to heighten their impact. Powdered sugar goes on top – a heavy coat that may also have a hit of vanilla. The Greeks stand out by adding a single whole clove for decoration.

There’s also a common structural theme: you’re after a cookie so tender that it will shatter to fragments at the slightest excuse, and will dissolve in your mouth with a burst of buttery, nutty goodness. That’s the hard part – getting them just tough enough to wait for an excuse without losing that meltiness.

We spent many years fidgeting and playing with this recipe to get it just right. The final product incorporates a number of subtle tricks that will add up to make the best [Nut Horns] you’ve ever eaten. Better even than Grandma’s!

  • TRICK #1 (for flavor): Toast the nuts in advance. It gives you a longer, deeper flavor.
  • TRICK #2 (for texture): The textures from your nuts matter as much as the flavors. We strongly prefer to mix that texture up to give the full experience from meltingly soft in most parts to recognizable bits sprinkled here and there. We always start by using a rotary grater to reduce at least half the nuts to a point just short of where you’d start calling them “nut flour.” Maybe even a little short of “nut meal.” The other half should be a mix of textures ranging from “finely ground” to “finely chopped”. If push comes to shove we suggest a 50/50 mix of nut flour for the first half and ground nuts for the second. Grandma may have ground all the nuts for convenience but even she would agree that mixing the textures adds something extra.
  • TRICK #3 (for flavor and texture): We also favor a mix of nuts. This particular trick may cause Grandma to start muttering about upstarts and heretics when you mention it, but trust us: a little hint of walnut will make your pecans taste more “pecany”, just as some almond and hazelnuts will make your walnuts more “walnutty.”
  • TRICK #4 (for flavor): A hefty pinch of salt also enhances the nut flavors. Just make sure to use so little that no one can tell it’s there.
  • TRICKS #5.a to 5.c (to counter fragility): Our recipe hovers right on the edge of falling apart into a 50% casualty rate from being too tender. There are several tricks and options designed to pull it back from that horizon. You’re going to need at least one of them:
    • A spoonful of water in the flour adds just enough gluten to hold it together. This trick doubles as a way to customize for your particular kitchen and flour.
    • An egg yolk in the dough works too and is more traditional, but can make the cookies caky if it goes too far. This was the “cheat” that Grandma used in secret because her best friend, the one she wanted to bake like, didn’t need to.
    • Working the dough as you form the crescents can also add a little gluten, but it comes with a real warning: the heat of your hands can melt the butter in your dough, which turns the cookies oily and guarantees they’ll be too tender.
  • TRICKS #6.a to 6.c (to counter toughness): Our recipe uses so many nuts that fragility tends to be the bigger problem, but sometimes you have to go the opposite way. We ran into this when we lived in Boston and used the high protein King Arthur as our house default. Here are some techniques that will add tenderness without changing the basic formula:
    • Remove any extra water or flour from your dough.
    • Refrigerate the cookies on their tray for 30 minutes before baking. This will relax any built-up gluten.
    • Remove a tablespoon of flour from the recipe.
  • TRICK #7 (for flavor): It’s a little counterintuitive but this particular cookie actually tastes better if you narrow the “horns” of your crescents toward the ends. Yes, the easiest way to make a crescent is to form the dough into a rope and then bend it in the middle. Yes, that is a typical way to ensure even baking by creating an even thickness. Yes, you can even treat this as a roll-and-cut cookie with fine results. But this isn’t a typical cookie. Having some parts toastier and others tenderer will only add to the sense that you’re eating something made from [nuts!!!].
  • TRICK #8 (the post-oven danger zone): You must cool these cookies on the tray until they are only warm. They are ridiculously fragile when hot from the oven and will fall apart if you even stare too hard.
  • TRICK #9 (for a final touch): We aren’t big believers in fancy chancy “touches” like scenting the powdered sugar for a few days with a more-expensive-than-gold vanilla bean bought for the purpose. This is the one recipe where we sometimes make an exception. Not always… but sometimes. There’s something about the wafting smell of vanilla that seems to stimulate a person’s specialized nut detector taste buds. [What, you never heard of those? Try a proper Nut Horn and you’ll see the proof for yourself!]
  • TRICK #10 (coating with enough powdered sugar): Warm cookies are fragile cookies, but nevertheless you must coat them with the powdered sugar while they are warm because the outgassing steam helps the sugar to stick. Kate likes to move the whole sheet of parchment onto a cooling rack, dust them there, wait 5 minutes, and then turn them over to dust what had been the bottoms.

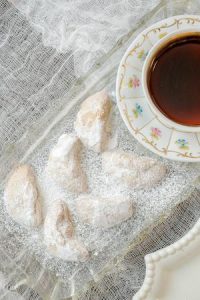
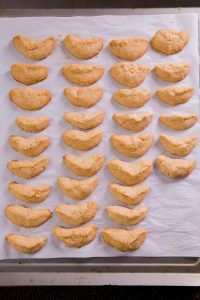
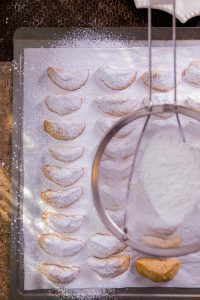
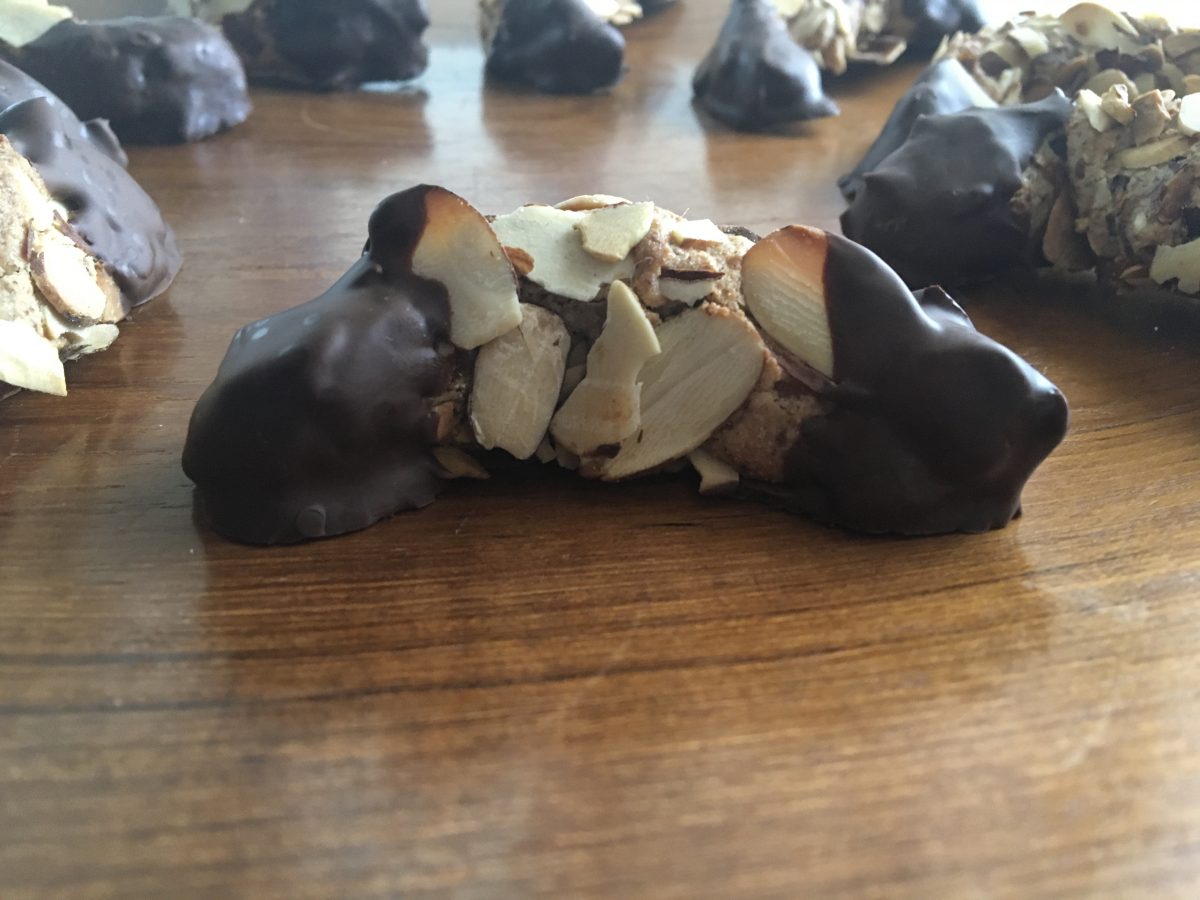
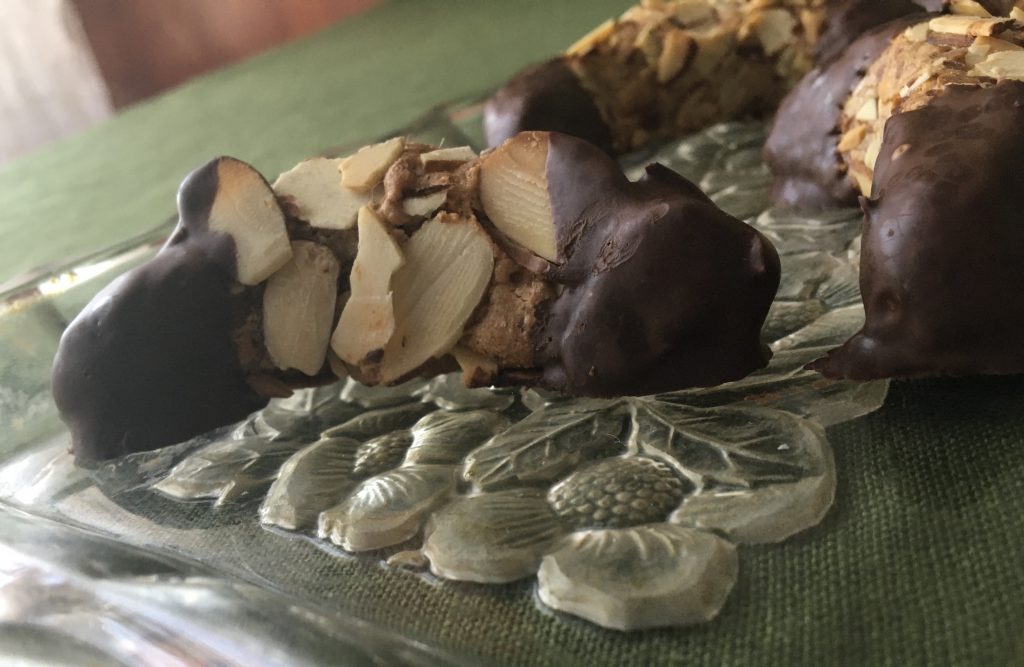
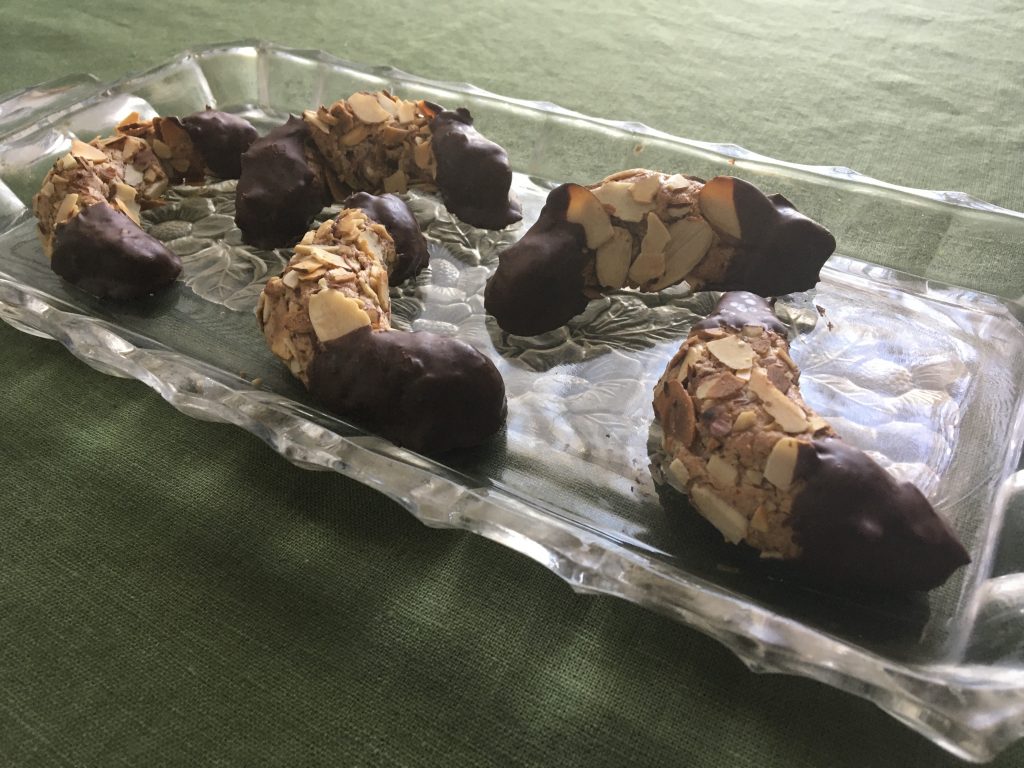
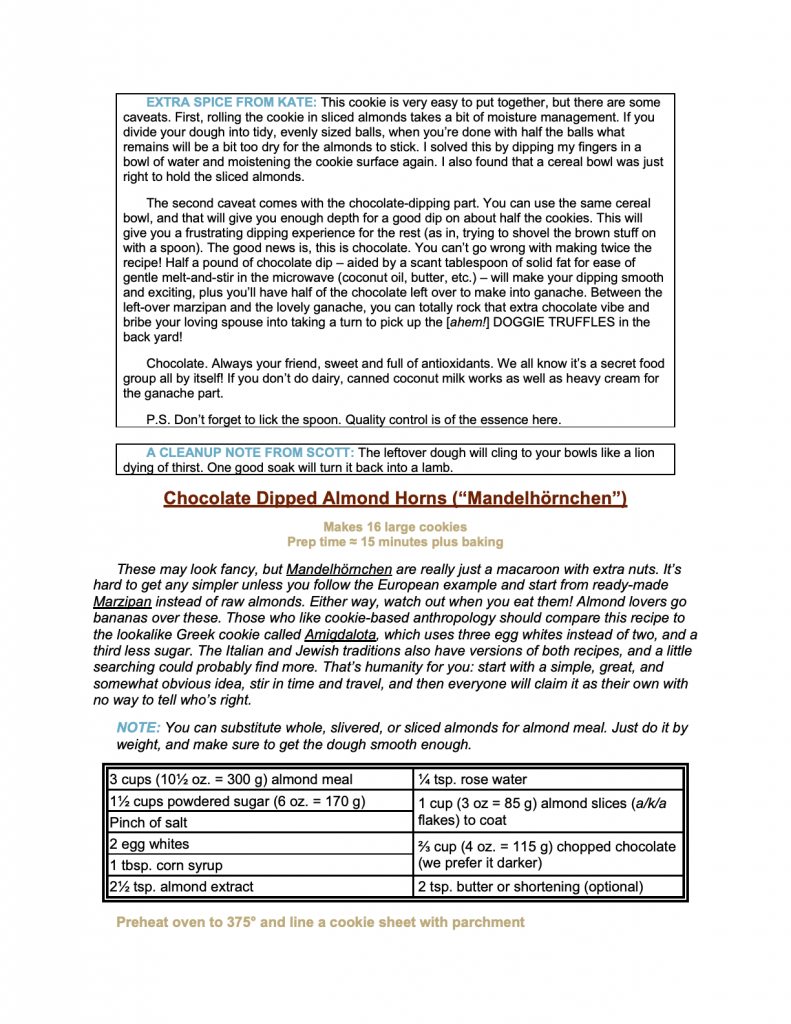
MANDELHORNCHEN a/k/a “Almond Horns”

Here’s a recipe that many readers will know because they’re very popular at certain upscale supermarkets. They have a lot going for them, starting with a very pure hit of almond and chocolate (two flavors that love each other), and continuing through the fact that they’re naturally gluten- and dairy-free, which suits a lot of people with allergy problems. They’re also very generous and fairly dense, which means that anyone who’s willing to eat baked goods for breakfast can get by with 2-3 “cookies” and a nice cup of Joe. (A meal that Scott has admittedly enjoyed as he writes this article).

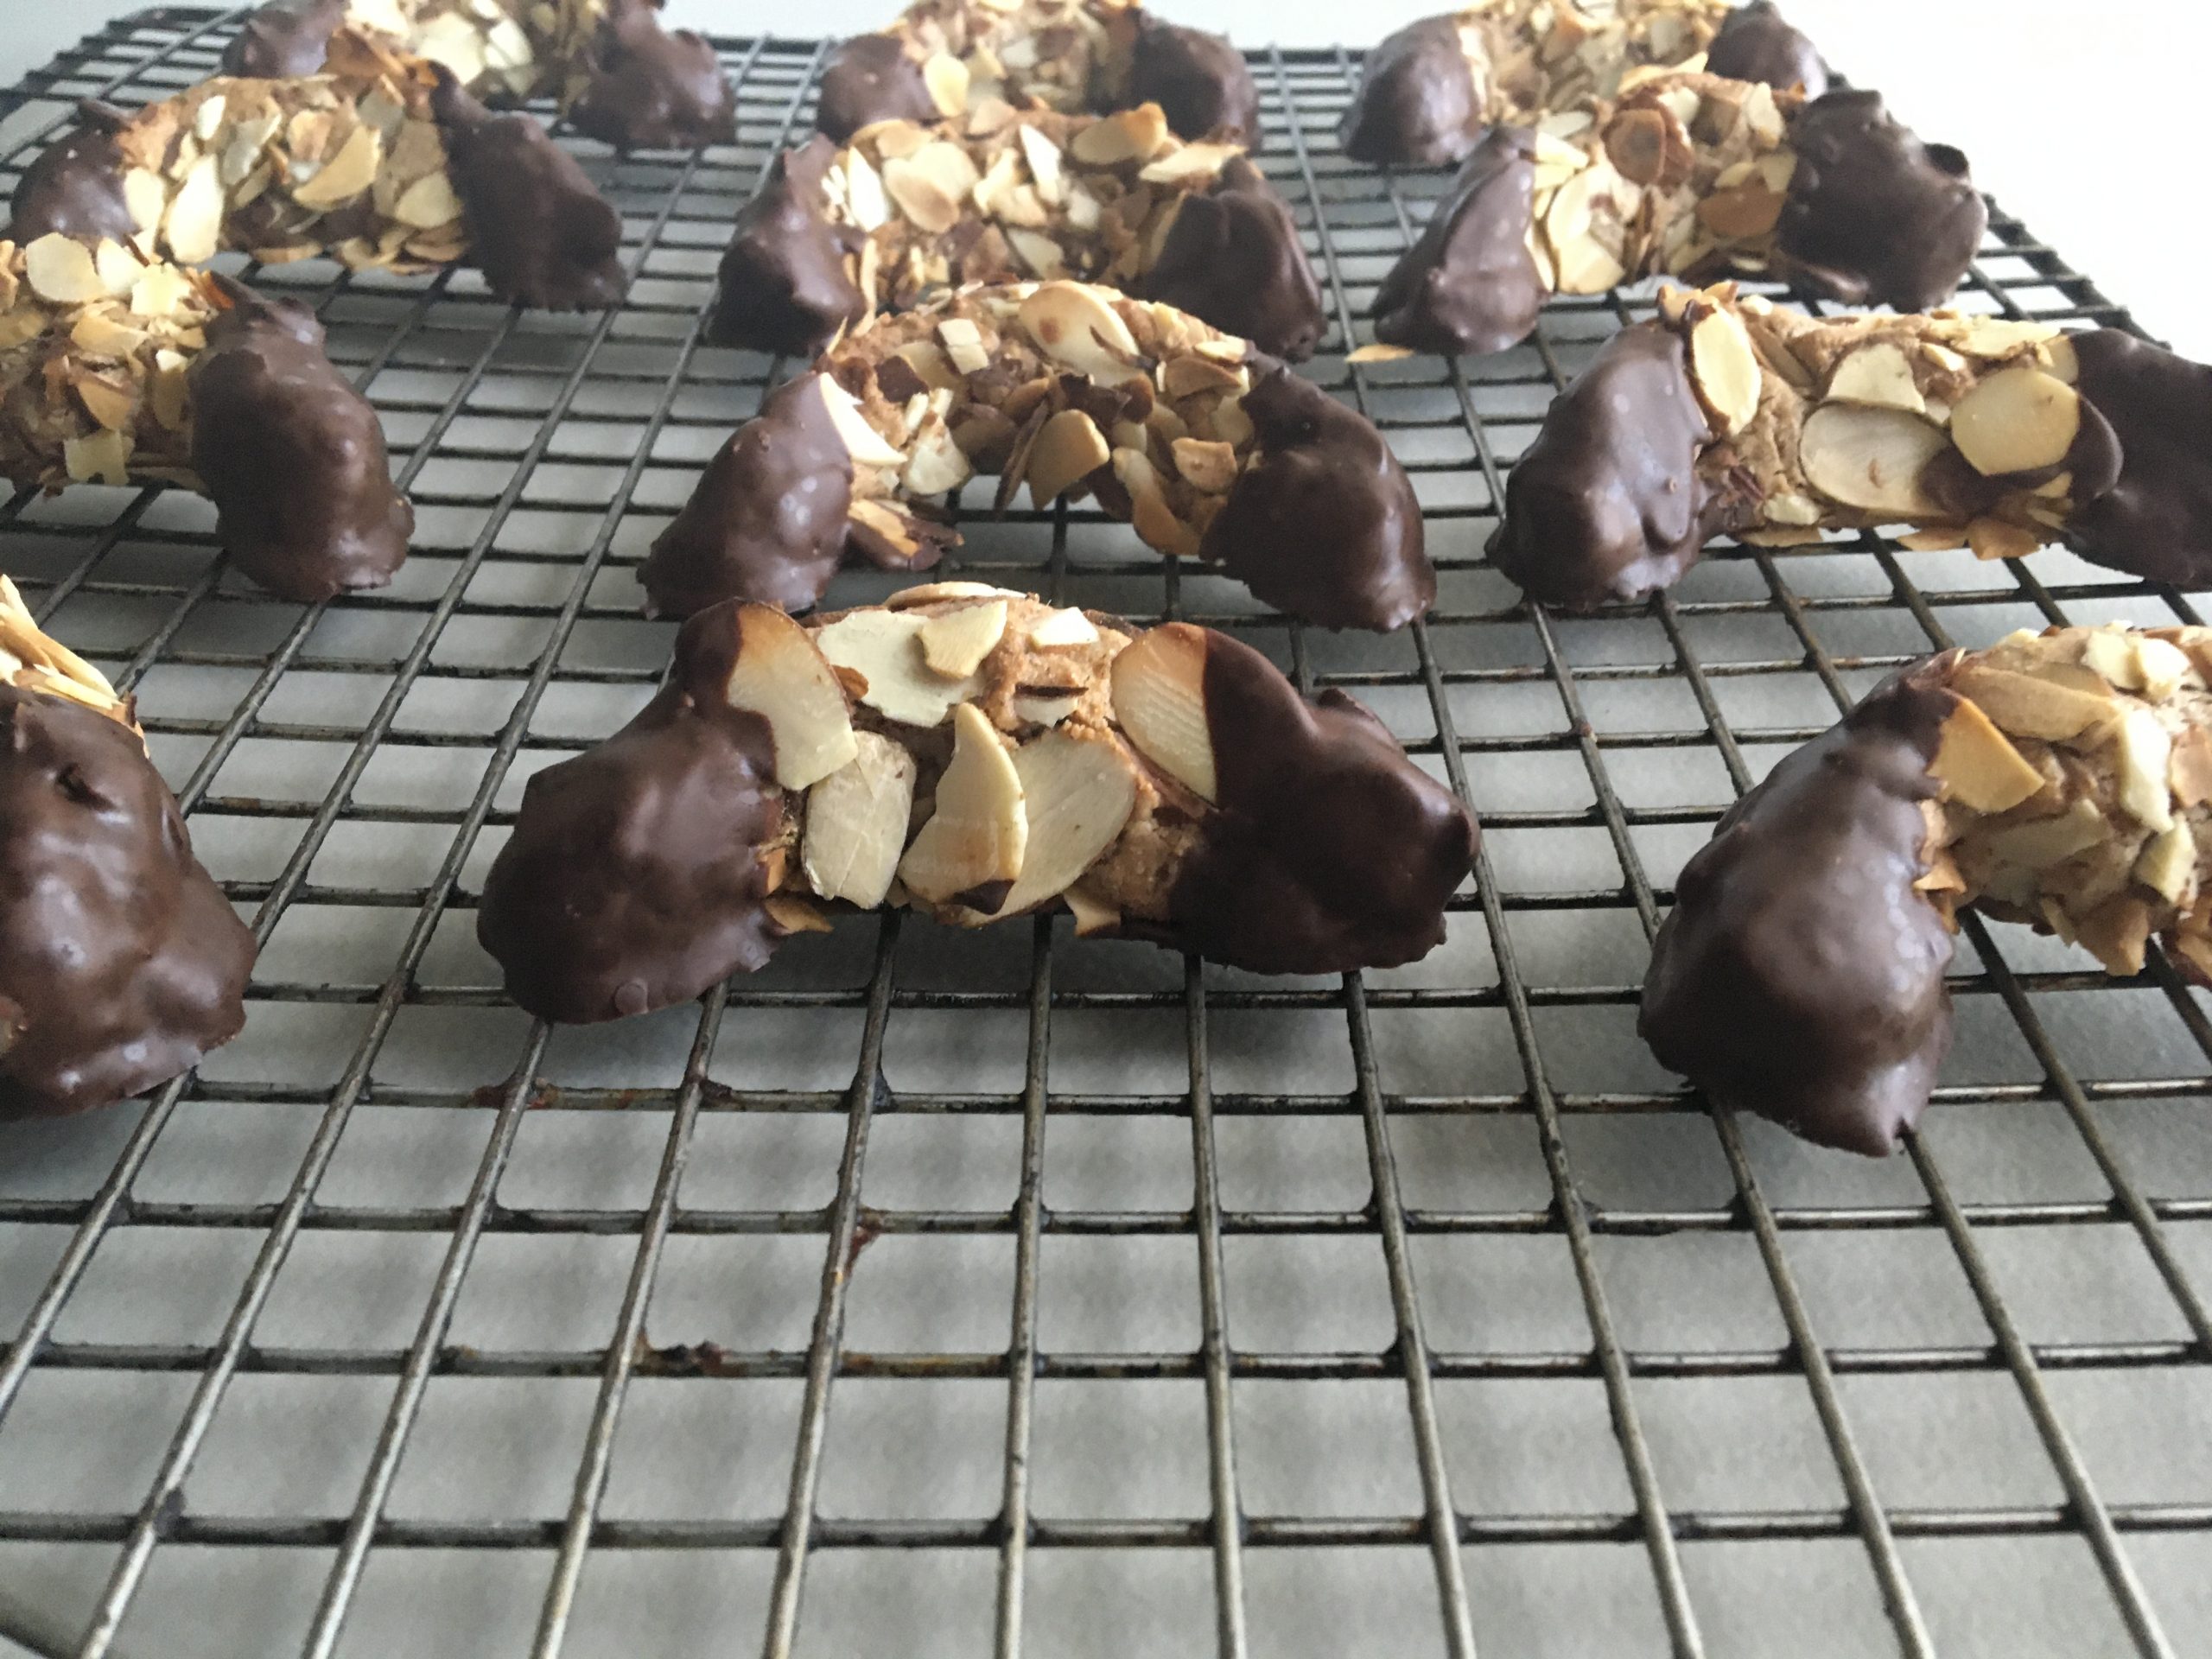
The other benefit? Almond Horns are incredibly easy to make. The basic recipe couldn’t be simpler: (1) put everything in a food processor; (2) grind until it’s smooth and begins to ball up; (3) roll each piece in almond flakes; (4) bake; and (5) coat the horns or bottom with chocolate. The issues come up with the little details that avoid problems in each of those steps.

As always, please skip to the bottom if you are only here for the recipe.

 Step 1 – Choices About Ingredients

Classic European recipes typically start from Marzipan rather than working from scratch. Take Marzipan, blend with egg white(s) to loosen it up, and you’re basically there. Convenience cookies!

Marzipan isn’t as common in the U.S., costs more, and the different brands vary in their dedication to the cult of sugar and the abuse of almond extract. We’re also a nation of people who take food processors for granted. That tool converts Marzipan from a painstaking process into a walk in the park. If cooking from scratch is cheaper, just as easy, more reliable, easier to customize, and lets you use a little less sugar… well, cook from scratch.

We recommend that you start from almond meal because it’s become easy to obtain and ensures an even result. In the ideal world you’d start from whole or slivered almonds, toast them to enhance the natural flavor, and then reduce that to meal during the grinding stage. It’s really up to you. But from one obsessive purist to another? We just get the almond meal. There’s so much extract that the toasted flavors get lost anyway.

Step 2 – Grind It All Together

No kidding. That’s all you do. Put everything in the machine except your coatings (toasted almond flakes and chocolate). Process, scraping down the sides from time to time, until it comes together into a smooth dough that balls up around the blade. Done.

That couldn’t be any easier, but there are a couple of tricks because the dough changes with (a) your kitchen’s level of humidity, and (b) whether your Size Large egg whites are closer to mediums or closer to XL’s. They do vary within each range you know. It isn’t a problem if you keep the target in mind: “Dough that is just sticky enough to hold on to toasted almond flakes.” Too sticky and it will be hard to work with. Not sticky enough, and your coating will fall off.

  • If the mixture seems too dry, add in a tablespoon or two of water. This happens every time in a Pittsburgh winter, and almost never in our summers.
  • If the mixture seems too sticky, add a tablespoon or two of extra almond meal. Extra sugar works too.

For what it’s worth, we actually get a kick out of these little customizing steps. They make you feel like a Real Expert who knows the secret cheat codes.

Step 3 – Form the Cookies

A few of those secret codes make this step just as easy.

  • First, remember that most people make these into large, 4-5 bite treats. One recipe makes enough for 16.

That’s not a coincidental number because you get there by cutting the dough in half, then each half in half four more times. If you want smaller cookies, cut the initial piece into thirds and then proceed to halve them over and over. This will get you to 24.

  • Second, moisten your fingers and palms before you form each cookie. That will keep the dough from sticking to your hands, and also make the surface extra sticky for holding on to the almond flakes.

Better for you, and better for the cookies. You’ll need to wet your hands several times before all the pieces are done.

  • Third, form each dough piece into a short, fat sausage as thick as you want the middle of your cookie to be. Roll this cylinder in the toasted almond flakes, and then pinch/curve the ends to form your crescents.

Cylinders are much easier to work with at the rolling stage, and you do not need as many almonds on the ends anyway because they will get coated in chocolate. Yes, you can just make a longer, thinner sausage, roll that, and bend it into a “C”. And yes, it is a little easier. We prefer the result from crescents; they have a texture that changes as you nibble through each treat.

Step 4 – Bake

375° is just hot enough to get a few of the almond edges extra toasty. A nice touch. As always, you want to pay more attention to the aroma and texture than the actual time. They are done when the sides firm up and the bottoms have turned light tan. It’s taken a consistent 13-14 minutes during winter testing in Pittsburgh with our oven. Please let us know if your results vary.

We also encourage you to spin these trays halfway through to ensure even cooking. We usually don’t bother with that step unless we’re dealing with wafers, but for some reason this particular cookie has been sensitive to hot spots.

Step 5 – Coat The Ends With Chocolate

This is the one step in the recipe that creates some frustration. It comes from two problems. First, the chocolate will harden as you work. And second, you won’t have enough chocolate in your bowl to dip the ends when you get to the final few pieces.

You can solve the chocolate problem by either keeping it warm, or mixing in a small amount of fat. Scott prefers to use plain chocolate, and to keep zapping it in the microwave for very short bursts as needed. Kate, who did most of the chocolate work, suggests adulteration – with the proviso that you must use a fat hardens at room temperature. Coconut oil works but can add some flavor. Palm oil has the perfect characteristics but is evil. She recommends butter or shortening, whisked into carefully melted chocolate. The resulting chocolate dip can be extra sticky at room temperature and takes a while to harden, but it is easy to work with. Your mileage may vary.

The problem of what to do toward the end takes more thought, and there is no really good answer. If you want the chocolate supply to end on the final cookie, you won’t have a deep enough pool to actually dip the horns of the last two pieces. Careful work with a spoon can help, but it only goes so far. Either you need to make/waste extra chocolate dip, or you need a cheat code.

Scott offers this workaround: Don’t try to dip the horns on your final piece. Coat the entire bottom with your leftover chocolate instead. It creates a more uniform treat that’s a little less intriguing to look at, and has less contrast when you eat it, but it does have the benefit of giving every bite a little bit of chocolate. Brush all the bottoms with chocolate if you want every piece to be the same.

Kate rolls her eyes at that, and says you should simply make enough chocolate to do the dipping and be done with it. Leftover chocolate makes a wonderful ganache for truffles, or at worst a special treat for the first lucky passerby who can find a spoon. You, of course, are a mature, fully grown person with the control to inflict those treats on someone else.

Cool and Consume – The End… Until Next Time

Mandelhörnchen are one of those treats that become a baker’s signature offering to guests, grandchildren, and drama club bake sales alike. They’re so very big! Physically, in taste, in texture, and in ways that combine to be more than the sum of their parts. They also show off familiar flavors, and they taste exactly like people think they will, except more so. There’s a huge bang for the buck factor.

Plus they’re fun and easy to make once you internalize those little tricks: keep your hands moist when shaping, and accept that there’s only so much chocolate to go around.

This is a marvelous recipe that you’re really going to treasure. We Promise. Enjoy!

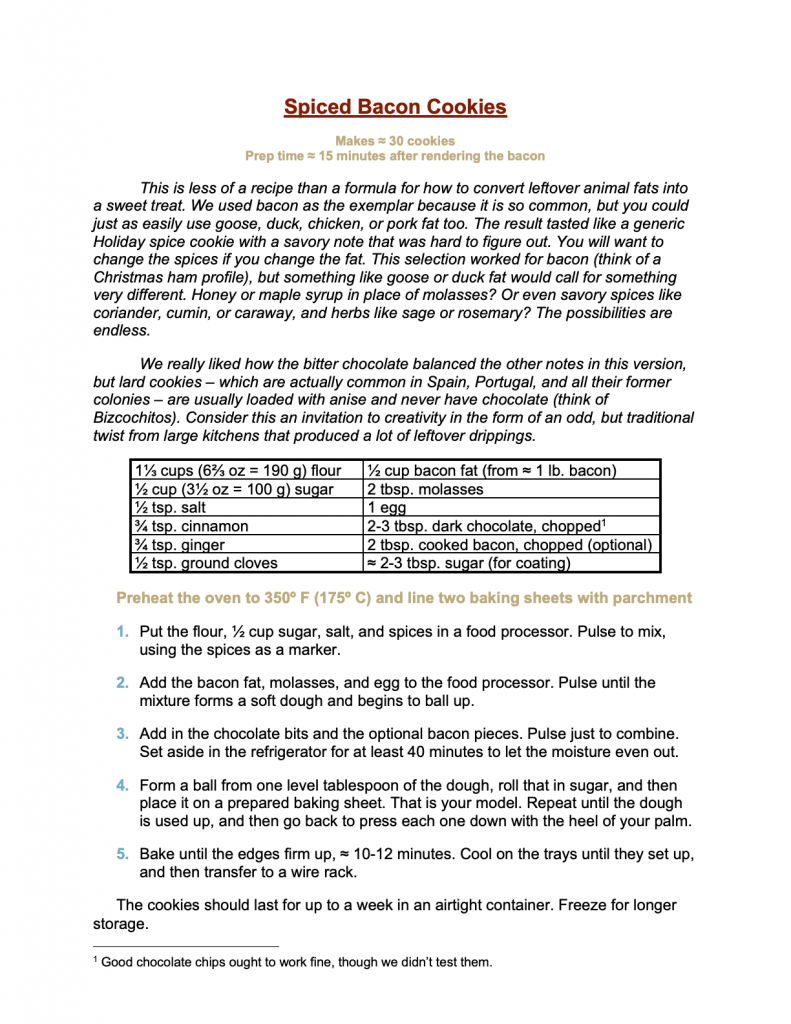
SPICED BACON COOKIES – Not so strange after all!

Dairy free and delicious, what’s not to like? This cookie offers a unique flavor profile with a familiar texture somewhere in the slice-and-bake or sugar cookie range. The only unusual part is that title ingredient, and it’s hard to say if that’s really as unusual as people might think.

As always, skip to the bottom if you only want the recipe.

EXTRA SPICE FROM KATE: Okay, hold the phone a sec. My husband’s version of “health consciousness” can sometimes cross that invisible line into “health denial”. Before he continues with his ode to pork, we want to point out that butter, lard, shortening, and all other saturated fats – even bacon [gasp!] – are not good for you. That is why cookies are a treat, not a staple. No, bacon fat is not really any worse than any of those others. Granted. And he’s 100% right that using it in a cookie is “heritage”, not “weird.” But keep the enthusiasm within bounds. This is not a physics-optional cartoon. You may proceed now.

Animal fat cookies are rare in the U.S. for sure, but that is only because we tend to be wastrels and spendthrifts when it comes to leftover fats and drippings. Americans are taught to reach for purified, store-bought fats like butter, shortening, or oil when we cook. But that isn’t how things used to be, and it still isn’t true in professional kitchens, or in any part of the world where people pinch their pennies a little harder. In all those situations the leftover fat, such as drippings from a roast, are treasures to be saved, not waste to be discarded.

That isn’t to say we are holier than thou. Here is our standard method for cooking a few slices of bacon for breakfast: place some slices between several layers of paper towel, put it on a plate, and then microwave for 3-5 minutes until it gets as crispy as you desire. Discard the dirty paper with all that nasty fat.

What could be better? Well… how about not wasting all that fat, which qualifies as “delicious” rather than “nasty” in any other time and place the world has ever known? Sorry to sound all rant-y. We really do use that paper towel trick, and it really does work. But it is sort of embarrassing when you consider the historical perspective.

Try this method instead if you have any plans to use the fat: Place your slices on a rack over a sheet pan (spiced as you desire) and then cook at 375° for 15-25 minutes, depending on thickness. Remove it from the oven when it hits the level of crispy you want. Flip it over with tongs to let any pooled fat drain into the pan, give it a minute, and then dab off any excess with paper towels. Super easy, super reliable, and nothing wasted. Use 350° for chewier bacon and 400° if you like more char and you’re willing to tolerate the smaller safety window before it burns.

FWIW, this recipe calls for ½ cup of fat, which is almost exactly what you ought to get from rendering a pound (16 oz = 450 g) of bacon. A perfect and thrifty method for whenever you cook large amounts of the Mighty Meat.

Comparison Recipes

Lard (pork fat) has to be the most common cooking fat after butter, shortening, and oil. U.S. bakers adore it for pie crusts and biscuits, but lard is also a common cookie ingredient; particularly in Spain and its colonies. Bizcochitos, the official state cookie of New Mexico, are the best known variation (see Heritage Cookies Volume I for a recipe). Spanish Mantecados are a more tender example, with less flour and a little olive oil added to create a shortbread effect. Look for it in a future blog post.

Bacon fat is nothing more than lard with extra flavor, if you look at it sideways. We’ve found many more savory recipes than sweet ones in the world of baking. There is a German side dish called Speckkuchen (“Bacon Cakes”) that’s definitely worth your attention if this interests you. But this article is about the sweet-treat, cookie versions and they are far from unknown.

Tricks From The Testing

This turned out to be a pretty easy recipe to perfect because the U.S. went through a bacon craze in the early 2000’s that hasn’t quite ended yet. People put bacon into everything! And it kept working, and working, and working again. As we write this in 2021 there’s still a common catchphrase that, “Bacon makes anything better.” Okay, that probably isn’t true in the literal sense. Spend some skull sweat and you’ll probably come up with a few exceptions. But the basic point stands: savory, sweet, smoky bacon goes very well with many, many flavors.

We chose a classic Christmas Ham profile for this recipe, using cinnamon, ginger, cloves, and molasses. Feel free to substitute any spice combination you prefer. Just think of it as something to go with bacon rather than something meant for a cookie. Scott is halfway toward eager in his plans to make an extra-smoky version the next time we have a big, multifamily brunch to cook for.

The cookie itself was just as easy. The proportions fell dead center into the classic sugar cookie and drop cookie range. All those charts in the book before each section? This is where they come in handy.

The only complication came with narrowing things down to the final version. The two of us went back and forth on whether the cookie wanted a bit of crispy texture inside. Translation: should we add in some of the bacon we had lying around from rendering the required fat? In the end we left that as an option. Somewhere around two slices (≈ 2 tbsp. when chopped) is the right amount if you have any extra.

But it still wanted… something. That turned out to be bits of dark chocolate.

You’re in good company if that sounds wrong. Kate almost blanched at the idea, and Scott has to agree that chocolate-dipped bacon was one of the less appealing excesses of that bacon-with-everything craze we described above. But this is the exception that proves the rule. The chocolate sort of widened the flavor, while the textural contrast rounded things out.

CONCLUSION

Bacon tastes good. Everyone agrees on that, and we waste never a crumb.

Bacon fat also tastes good. Everyone agrees there as well, but we waste it all the time. There’s no good reason to do so, and people never did until we grew wealthy enough to value convenience over thrift and flavor. This is just one example of the many, many ways in which you can use this overlooked treasure to make treats that will make you sound like a genius. We’ve seen, tasted, and enjoyed Bacon Ice Cream! If that can work, and we assure you it does, then cookies should be taken in stride.

Enjoy! Here’s the recipe:

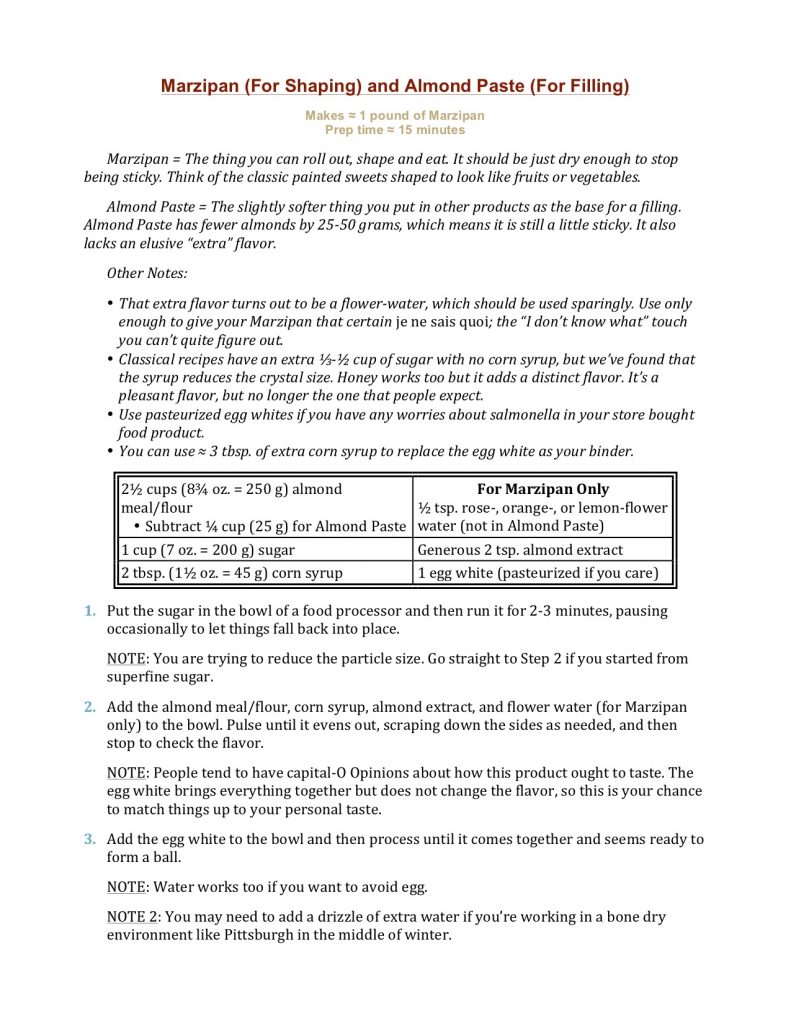
MARZIPAN & ALMOND PASTE – the recipe beneath the recipes

A few weeks ago we put up recipes for a set of Five macaroon recipes we’ve come to love – which could be described as marzipan suspended in an egg white meringue. And I am now working busily on a special Croatian treat called “Rafioli”, which is basically an exotically flavored almond paste wrapped inside a baked pasta shell. [Watch for it!]

German Mandelhörnchen and a Greek equivalent are also on our “to do” list after Kate took an initial whack that wasn’t too far from being right. Those amount to a flavored marzipan or almond paste lightened with fewer egg whites than you’d use for macaroons, formed into crescents, and then dipped in chocolate.

EXTRA SPICE FROM KATE: We have no photos of the Mandelhörnchen because a mysterious cookie gremlin raided our kitchen before anyone could add the chocolate part. Skeptical spouses have wondered if “doppelganger” would be a more accurate than “gremlin,” but I admit nothing. He only suggests such an outrageous thing because they are one of my all time favorites, both tasty and toothsome.

And then… Hmm, a pattern seems to have formed! There are dozens, if not hundreds of baked goods that start with a base of finely ground almonds, mixed with sugar and then bound by egg whites. That ingredient is called “Almond Paste” when left loose and a little sticky, or “Marzipan” when you add enough extra almonds to make it solid. We wouldn’t call either one a “cookie” all on its own. Commercial marzipan is actually marketed more like a not-so-sweet candy (with U.S. and English versions tending to be sweeter), and almond paste as an ingredient. But the basic concept gets used in so many true cookies, and cookie fillings, that it’s only fair to give our version.

Besides, Valentines Day is coming next month and you can earn some major brownie points by making Marzipan treats and forming them into something romantic. And double-besides, the recipe for Marzipan contains a couple of surprises that many people don’t know about, such as a tiny bit of rosewater used as everyone’s not-so-secret ingredient.

Anyway, here is our version for your education, edification, and delight.

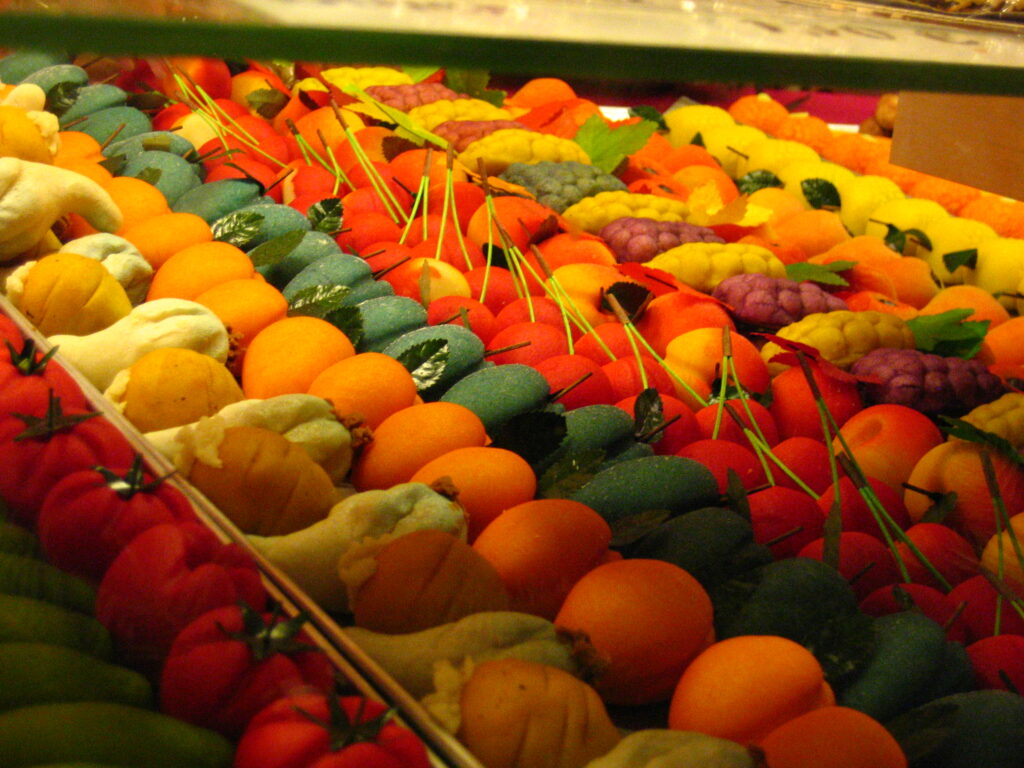
This lovely photo of Marzipan Fruits at the Nuremberg Christmas Market is available under a Creative Commons Attribution-Share alike 2.0 Generic license at the linked website. Many thanks to the author for his or her generosity.

FIVE (5!) MACAROONS – Renaissance recipes for the modern world

It’s hard to get more “heritage” than the early Renaissance, and that’s what we have here: four famous cookies that grew into maturity along with the likes of Leonardo, Michelangelo, Donatello, Botticelli (with whom Leonardo supposedly founded a restaurant), Verrocchio, Raphael, and the rest of them. And Columbus for that matter. What can inspire artistic brilliance more than a really good cookie? The answer is obvious: Nothing!

We’re talking about classic macaroons, a cookie dating back to the trade boom that followed the Black Death’s destruction of medieval civilization. Arab traders introduced a variety of products to eager consumers in the trade centers of Italy and Spain. Two main ones in turn led to the creation of macaroons: refined sugar and marzipan a/k/a almond paste. Yes, those ingredients had been around forever, but they’d never been cheap enough to turn into everyday treats. Now they suddenly were, and Renaissance Europe was ready to adopt new ideas their grandparents would have scorned.

Italian and Spanish cooks started the process by incorporating the new ingredients into quick and easy baked goods using methods known since antiquity. The basic formula couldn’t be simpler. First whip some egg whites with sugar to make a meringue, using a more generous amount of sugar than before since it was now more affordable. Fold in some imported almond paste, and then bake. And there you have it! The first macaroons, commonly known as “Marzipanetti in Italy.

Matters evolved from there, with bakers slowly adopting the regional variations that eventually hardened into recipes. We have now worked up four versions of that basic recipe, distinguished by relatively small changes in the way they’re flavored and presented. Here is a table to more-or-less compare the four recipes, normalized to an even one pound of almonds. [NOTE: The different egg sizes occur because those recipes start from a different amount of almonds].

Most Ancient Macaroons

* 450 g almond meal

* 300 g sugar

* 3 XL egg whites

* No zest

* ½-1 tsp. almond extract

* 350° for ≈ 10 minutes
Ricciarelli


* 450 g almond meal

* 300 g sugar or 150 g honey
* 2 egg whites + 1 yolk
* Orange zest

* 2 tsp. almond & vanilla

* 350° for ≈ 12-13 minutes
Alemandrados


* 450 g almond meal

* 265 g sugar

* 1 jumbo egg

* Lemon zest

* ½ tsp. almond extract

* 350° for 8-10 minutes
Amaretti


* 450 g almond meal

* 290 g sugar

* 4 egg whites

* No zest

* 9 tsp. almond extract

* 350° for ≈ 12 minutes
See also the Walnut Macaroon Orehovki

Not a lot of differences, are there?

  • The Most Ancient Macaroon included a hefty amount of sugar and some bitter almonds. We were forced to substitute almond extract for the latter. Bitter almond extract would be even better if you can find it. This cookie is super simple, focused on those new imports, and consistent with the oldest macaroon recipes we could find after a week or two of search. NOTE: Scott believes it may be even more authentic to replace the sugar and almonds with premade almond paste, because that product would have been easier to ship back in the day.
  • Italian Ricciarelli, a specialty of Siena, must have orange zest but vary from there. We reviewed more than a dozen variations before settling on a version that includes an elusive hint of vanilla, some honey to enhance the sugar, and a single egg yolk to give them some richer chew. The cookies would still be Ricciarelli without those additions, but they help to distinguish this cookie from its macaroon peers. And they’re good. We also adopted the trick of adding some baking soda into the dough, because it creates attractive cracks in the powdered sugar crust.
  • Spanish Almendrados add lemon zest instead of orange, use whole eggs, and ignore the initial meringue step. Throw it all in a food processor and go! This methodology, combined with the shorter baking time, gives the cookie a fabulous chew you’ll particularly enjoy. They come with a classic almond-on-top decoration, and a granulated sugar crust.
  • You can find Amaretti in our cookbook, Heritage Cookies of the Old and New World. The recipe looks very similar to the Most Ancient Macaroon except for a monstrous hit of almond extract, and the candied cherry on top. Our reference to “Rudolph’s Nose Cookies” wouldn’t have made much sense in 15th century Italy. Neither would reindeer if you think about it.

Continue your travels around the Mediterranean and you’ll see extremely similar cookies such as those flavored with rose water (a favorite in Turkey), or with walnuts and walnut extract in place of almonds. Move north and things begin to differ more, with roll-and-cut meringues such as Basler Brunsli (mix of almonds and hazelnuts, cocoa powder, and cherry liqueur) or German Zimtsterne (mix of almonds and hazelnuts, cinnamon, other spices, and lemon icing).

But here’s the bottom line. Macaroons go so deep into the roots of modern Europe that there’s really nothing older except the extant waybread recipes. They’re also simple to make and easy to modify into infinite variations. It’s an invitation to play, and we encourage all you creative people to do so!

Here are our recipes for all four, plus a bonus recipe from the Balkans: a terrific macaroon based on walnuts instead of almonds.

Enjoy!

Ricciarelli, the ancient macaroon of Sienna, Italy that Leonardo and the rest grew up on
Spanish Alemandrados
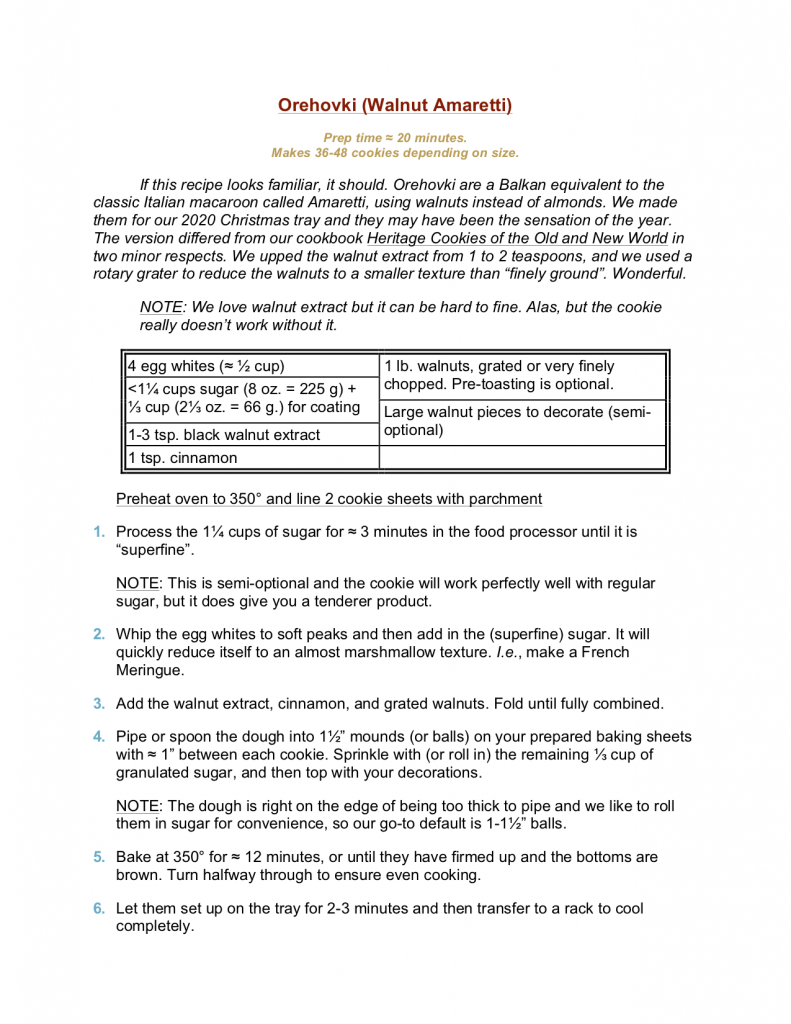
Orehovki, a/k/a Walnut Amaretti from the Balkans

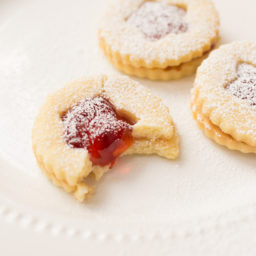
BUTTER JELLIES, SPITZBUBEN, & MAILANDERLI – The one that everyone loves

When you make as many high quality cookies as we do, you get used to a couple of standard questions. The top two have to be, “What are your favorite cookies?” and “What is the favorite cookie overall?” The answer always disappoints: there are no real, statistical favorites because individual tastes end up dominating. But one thing we can say for sure is this:

People adore filled cookies.

There’s just something very “extra” about treats inside a treat. And that’s extra “extra” for Butter Jellies, because the jam in the middle (a) makes them spectacularly pretty, and (b) adds a series of bright berry flavors that cannot be baked into a dough. Yes, you can now find freeze dried berries in a lot of supermarkets. And yes, they add a bit of true berry flavor into your dough that people can taste even through all the butter and other ingredients. But it isn’t the same because the full berry flavor includes a lot of things that don’t come through, such as all the bright high notes.

Those require either an icing or, as in this case, a filling. The combination of tart/sweet jam and buttery cookie is irresistible. If these aren’t the #1 favorite on our annual tray, they probably count in the top three for a vast majority.

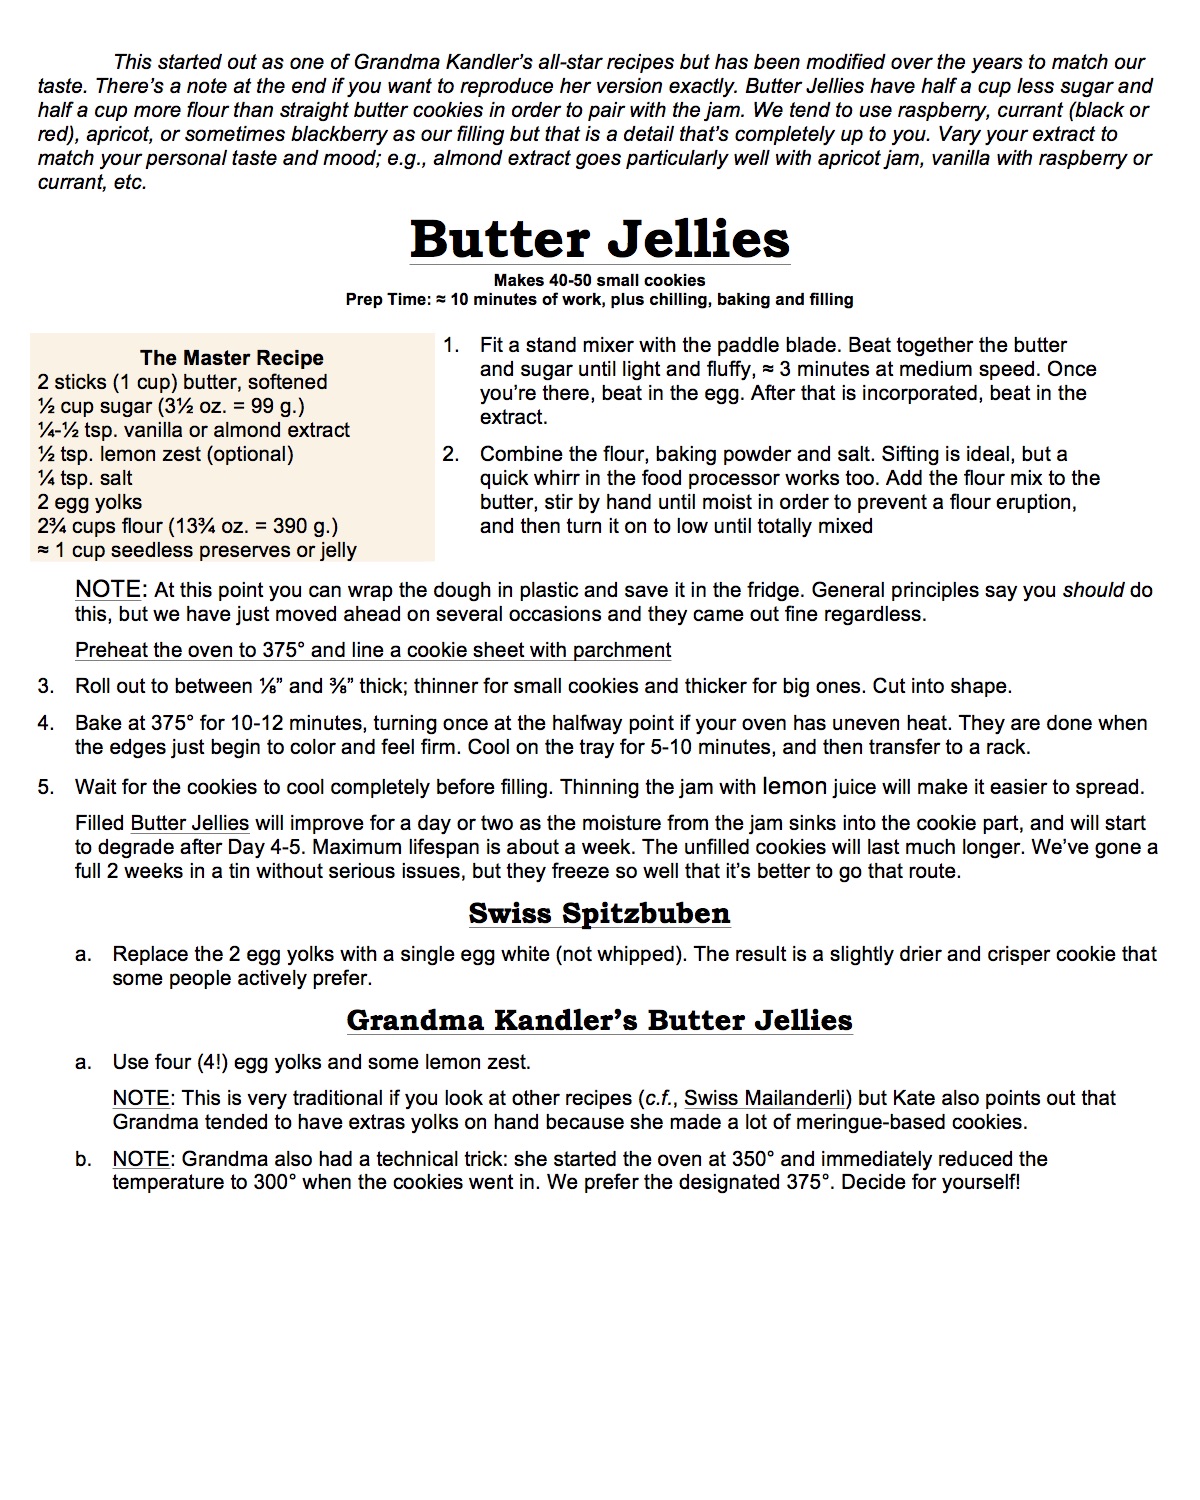
It’s really a simple cookie. Butter Jellies and their variations are a basic, roll-and-cut, shortbread/butter cookie with just enough flour to hold together for a few days after they’re sandwiched around liquidy jam. The variations are subtle, and amount to either more egg yolks (Grandma Kandler’s version, which is known in Switzerland as star shaped Mailanderli), or the use of egg whites instead of yolks for a drier mouthfeel (Swiss Spitzbuben). What about whole eggs? We tested it of course, and they work fine from the sturdiness point of view, but we ended up preferring either the rich chew of yolks alone or the dry counterpoint from using only whites. Your mileage may vary.

The jam is up to you. We used to adore rose hip jam, but it became unavailable 5-10 years ago. Nowadays it’s currant jam or blackberry because we reserve raspberry for Linzer Tarts.

And no! These are not Linzer Tarts! That is a name that comes from a classic, pie-sized Austrian Torte made from a fragrant hazelnut/lemon piecrust. No nuts, no Linzer. Thus Sayeth The Lord! So do not blaspheme. These are Butter Jellies.

Make Linzers too. That’s our solution, and if it’s good enough for our family, it’s good enough for yours!

BONUS FREEBIE! To convert Grandma’s version into true Mailanderli:

  1. Use 3-4 yolks in the dough.
  2. Increase the amount of lemon zest to a full 1-1/2 tsp.
  3. Increase the amount of vanilla to a full 1-1/2 tsp.
  4. Cut the dough into stars
  5. Coat the top before baking with an egg wash made from 1 whole egg thinned with a bit of water.

You can follow Grandma’s cooking technique but we’ve had equal success with a constant 325.° Either way, they will want to cook longer because of the lower temperature. 20-25 minutes should be about right.