FRISIAN THUMB COOKIES (Fryske Dúmkes)

A buttery, hazelnutty, spice cookie dunker from the Netherlands’ Viking province that has become our new favorite to pair with a cup of good coffee.

It’s been a busy few weeks and that’s cut into cookie testing, but to be entirely honest the delay also comes from my perpetual fidgeting with a new recipe for the Ultimate Butter Cookie. Another batch or two and I’ll have it out… but all of that is just an explanation for why I’m now publishing something totally different. [Talk about a teaser!]

That butter cookie comes from the Middle East, so I wanted to go back to Europe for a break. Clearing my head for the final assault on the ramparts, as it were. I keep an ongoing “cookies to test” list, so I pulled that out and asked Kate to choose one that caught her eye. She marked off a few possibilities and then paused.

“Frisian Thumbs? What in the world?”

I smiled. “Top 10 on the great names list, right? It’s a Kate Cookie too – they describe it as a dunker made with a lot of hazelnuts and some spice. Butter too, I’m afraid.”

She asked to see the initial recipe I’d downloaded, approved both the idea and the incursion into her monthly butter allowance, and then waved me away to work some magic. Magic done; mischief managed. This is a good one.
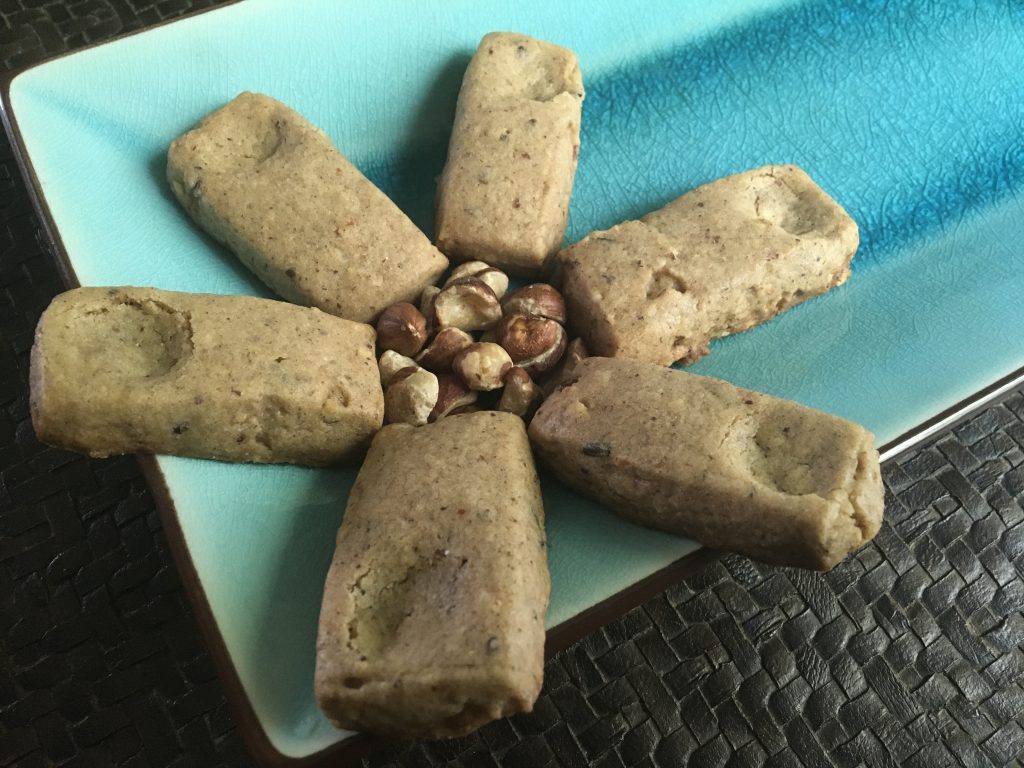
As usual, I’m about to run long with the full description of the whys, wherefores, and what-abouts. Skip to the bottom if you’re only here for the recipe.

Getting the process started

By this point I have a pretty well established pattern for working on new cookies. I usually find them in the first place by wandering through the Wide World of Google doing searches like, “regional cookies of [This Place]” or “local baking traditions of [That One].” E-tourism, cookie style. Potential targets pop up in various locations: regional promotion sites, historians looking through an oddball lens, memoirs from tourists, émigré groups sharing memories, other bakers, etc. I mark down the names, look up the recipes, pick an example for the files, and then put it on the “cookies to test” list with a brief description for later.

When it’s time to look deeper – now, in the case of Frisian Thumbs – I go to the next level in two different ways. First there’s the recipe. I start on that by searching out every possible version the Internet contains. This gives a firm idea of the parameters, from which I’ll write something up using round figures and my experience with other projects.

Then there’s the heritage part. That also begins with the Internet, but then moves on to a search for actual humans who know the cookie, and can provide some context. Those two steps provide the raw ingredients: a recipe to work from, and a heritage to explore. And the follow up question: How did these two meet and marry? Which is where the test batches come in, followed by gifts for my sources to sample, and adjustments to account for both my reactions and theirs.

ASIDE: There are few things more satisfying than developing my version of a beloved childhood treat for someone who knew it back in the Old Country. Life doesn’t have many perfect moments. Two strangers exploring a cookie together, on truly neutral ground? That is one.

STEP 1: Creating the initial test recipe

So, off I went and found no less than eleven (11) different recipes, most with photos and descriptions. These taught me a lot about the underlying issues. Here are my notes:

  • Almost every recipe centered on anise, supported by a background of cinnamon and ginger in roughly equal amounts. What an odd combination! But it works. Taste it in your head and you’ll see.
  • The hazelnuts bring it all together. Remember to toast them first. No two ways about it.
  • The cookies bake low and long. 325° for 20 minutes. Interesting.
  • The recipes are pretty close together after normalizing…

“Are you done yet?” I stop and look up. It’s Kate, back from her writing lair. “Those thumb cookies sounded really good, and I’m going to make a pot of coffee. Any chance you’ll have some ready for me to try?”

My friends, this never happens! Don’t get me wrong. Kate is a certified cookieholic. She’s at least as bad as I am. But her addiction gets triggered by proximity. See cookie; snitch cookie; savor cookie; repeat. I’m the one who gets entranced by recipes alone. But not this time, apparently. I wasn’t the only one getting hit in the, Oh that sounds good! spot.

I promised to get her something in the next day or two and then went back to my research.

  • … normalizing to a single stick of butter (½ cup = 115 grams). Which is a surprisingly small amount; most cookies start with two sticks. Hmmm. One stick of butter yields three dozen cookies? Definitely on the small side.
  • The big difference between the recipes comes down to the amount of flour. Anywhere from 130 grams all the way up to 250. What’s going on? Aha! The ones with more flour have some baking powder added, and the ones with very little look slumped in the photos.
  • The flour also ties in with eggs. Most of the recipes include an egg on the inside, excluding only the ones with very little flour. The recipes with both an egg and some milk have the most flour. Got it.
  • But there is not a lot of flour in any of these by the standard of other dunkers! Corsican Canistrelli have a good 50% more in the flour to fat ratio, plus a cup of chestnut flour to push the ratio even further. The hazelnuts in this recipe are chopped, not ground. They won’t act the same. So Frisian Thumbs may be dense, but they shouldn’t be hard, dry, or crispy.
  • And that flavor profile! Hazelnut, hazelnut, spice, and hazelnut. That’s what we’re after here! No extract, either. Very elegant even if they are kind of plain to look at. One for bakers rather than bakeries.

Time to check in on the heritage part of the equation.

STEP 2: What’s the story behind all this?

I knew going in that the Frisians were a big deal back in the Viking Age. Why would someone name a cookie after their thumbs? It turns out there’s a string of small islands off that coastline called – look at that! – the Frisian Islands, with the modern Netherlands province of Friesland right in the sheltered area behind them. The name “Frisia” goes back to Roman times, but modern Frisians descended from a Viking tribe who settled in the region after a series of environmental disasters had emptied out most of the original inhabitants. These new Frisians (they adopted the name) were closely related to the Angles and the Saxons who settled in England, only to be conquered in 1066 by the even fiercer Norman Vikings who had settled 400 miles further south.

The Frisians who didn’t travel to England with their Anglo-Saxon cousins settled down and became famous for breeding the finest warhorses on the continent. Including, ironically, the mount used by William the Conqueror. Cool! Their descendants maintain a fierce pride about their particular roots, with a regional dialect that is sort of like ancient English mixed with Dutch and German.

There’s no way I was going to find a group of Frisian émigrés here in Pittsburgh! But as it happens, I do know several Dutch bakers through a Facebook group devoted to the molded cookie Speculaas. Thanks go out to one and all. And to Google Translate, since the recipes they pointed me to were written in Dutch, with notes on particular Frisian words.

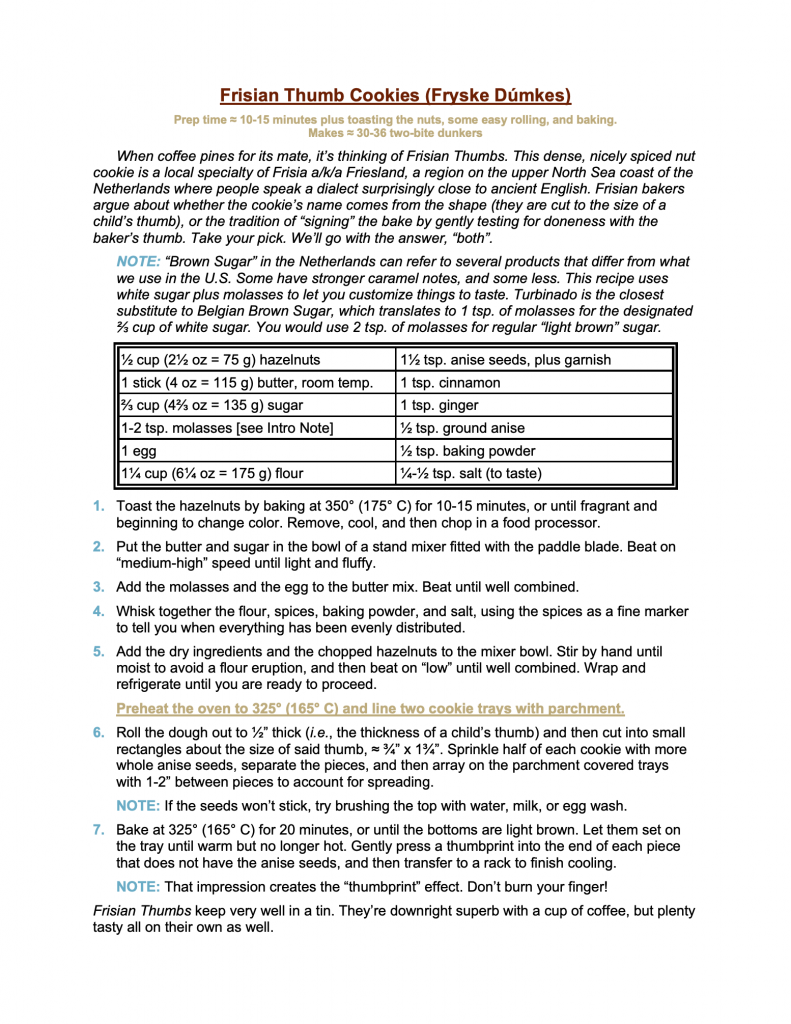
The material from my online friends brought me up to 14 versions, which led to a modified master recipe while also answering a lot of questions. First, Frisian Thumbs are a true specialty of modern day Friesland, and little known outside its borders. They are not an extension of other Dutch cookies. Second, Frisians are a lot more culturally distinct than Americans would tend to assume. So much so that road signs in the province appear in both Dutch and Fries. Thus it may be inevitable that Frisian bakers will start from normal Dutch ingredients when it comes to flour and sugar (see below), but they wouldn’t be caught dead using a standard spice mix from the store with some extra anise.

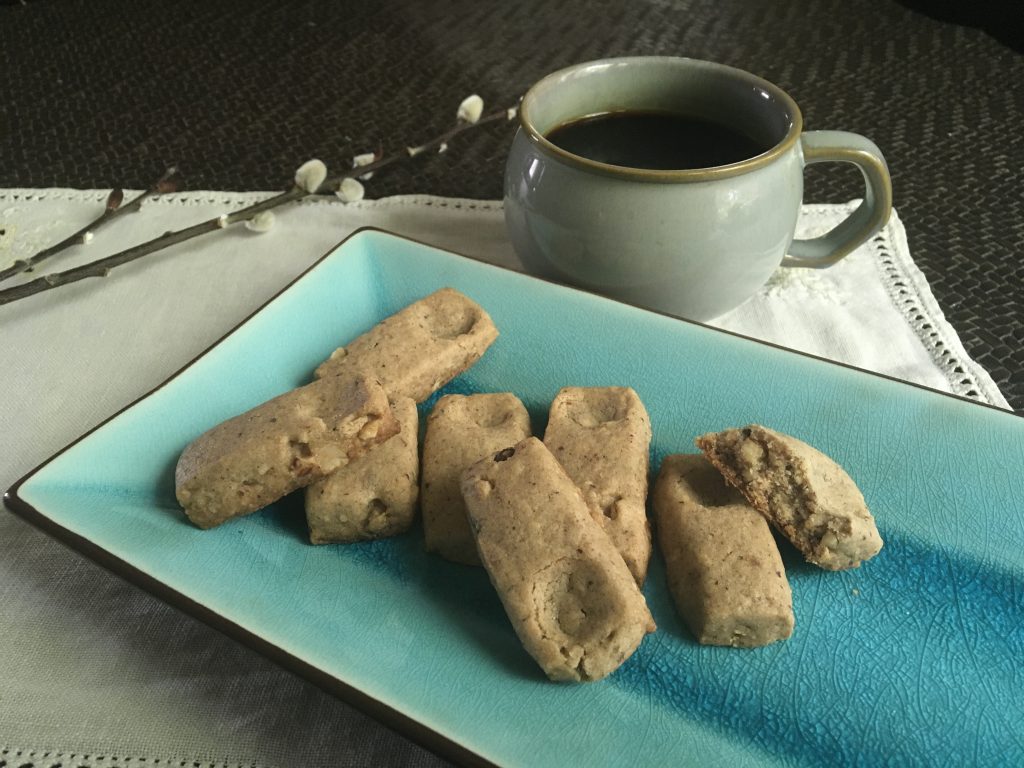
Third, the photos make it clear that these cookies are supposed to be small, thick rectangles, not oblong drop cookies. They must have enough flour to more or less hold their initial shape. That evocative description about, “the size of a child’s thumb” actually makes a good deal of sense. Pull out the ruler and… ½” thick x ¾” wide x 1¾” long.
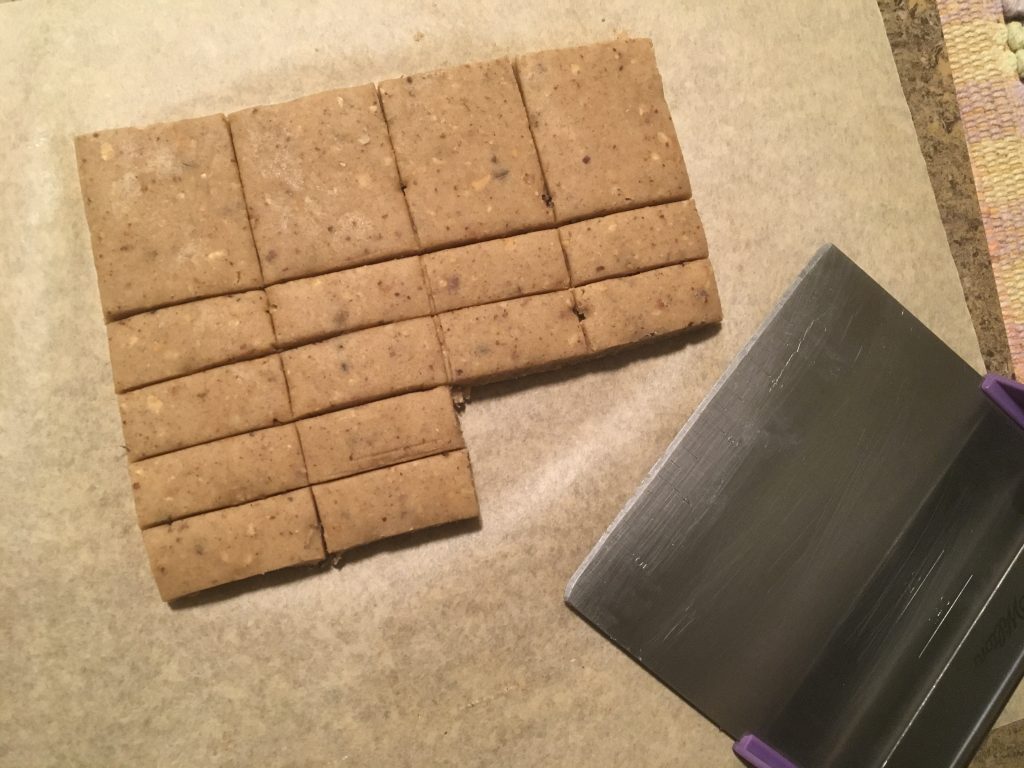
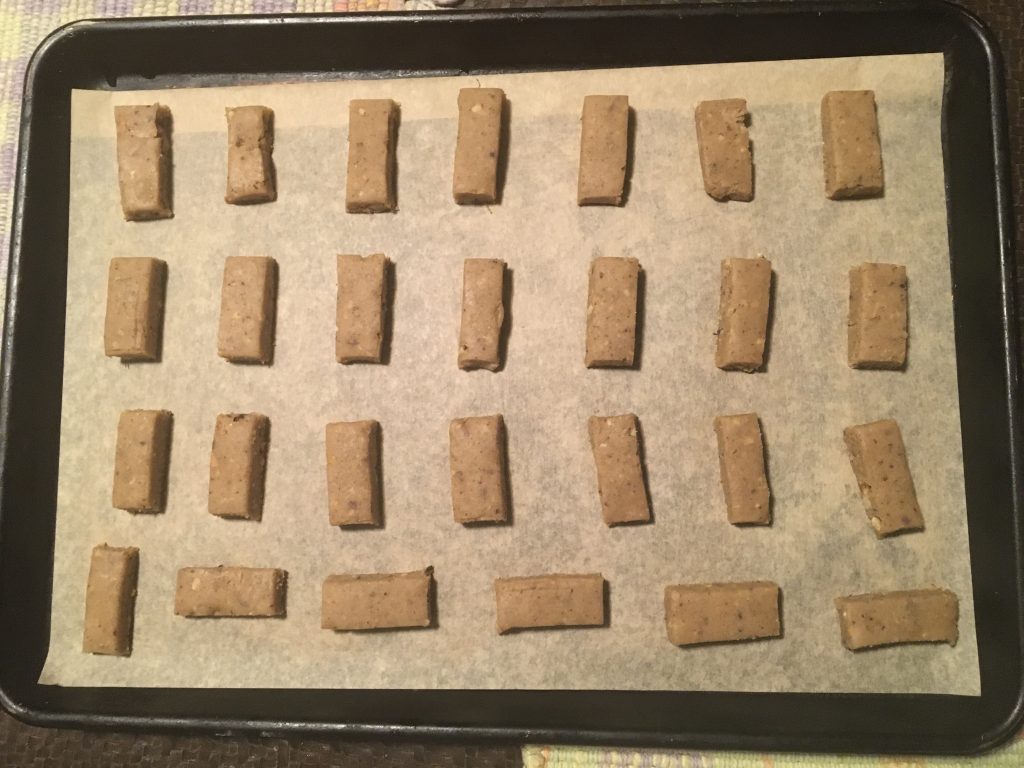
Just roll out a slab and slice to shape. Nothing fancy. This would be the point to put anise seeds on top as fair warning. They are all buried inside this particular dough.

Fourth, not a single one of the Dutch photos contain the thumbprint mark. They’re all plain old rectangles. But I did see several others that had the dent, and you know what? It creates an effect that looks a lot like a thumbnail! I like it.

What’s a thumb without its nail? They are just as tasty plain as they are with the decoration, but it does add a certain distinction. Press the shape in when they are warm and fresh from the oven. I was too eager and got a little burn. Next time I will press in using the tip of a spoon.

Next, I wanted a chewy and somewhat dense texture, but not excessively so. Too much flour, especially with no leavening, would make little bricks. Balance is everything.

Speaking of which, those websites convinced me that balancing the spices had to be job one. Spice cookies are normal for the Netherlands, and don’t raise eyebrows over there like they often do in the U.S. On the other hand, Dutch cooking incorporates a very particular sense of poise and restraint. It shows up on the savory side too. Any cookie that Amsterdam writers would praise as “well rounded” had to be exactly that. So my target was clear: a nut cookie enhanced by anise, rounded out with cinnamon and ginger, chewy but not dense, and ideal when paired with a cup of coffee.

DIGRESSION: A primer on Dutch ingredients

Dutch ingredients can differ a bit from their counterparts here in America. To start with, bakers in the Netherlands have a different type of flour than you find in the U.S. Here in America we grade our flour according to protein content, going from low protein cake flour all the way up to high protein bread flour. On the Continent they grade their flour more by grind size. The best Speculaas, e.g., use something called TIP-00 flour, an Italian product that is ground to a spectacularly fine level “similar to baby powder.” That doesn’t matter for the recipe at hand, but it makes a real difference for a molded cookie where the features are a key difference between good and better.

In this case we need to look at the sugar. U.S. sugar is made by grinding sugar cane to a pulp, extracting the sweet syrup, and then removing the impurities to leave only pure sucrose. Those impurities are sold separately as “molasses.” Mix a generous tablespoon of molasses back into a cup of white sugar, and you get “light brown sugar.” Mix in two tablespoons and you’ll have “dark brown sugar.” Half a tablespoon yields “turbinado sugar.” [NOTE: you technically want to add a little bit more than just 1 tbsp. Hence the word “generous.”]

Not so in the Netherlands. Their basic ingredient comes from sugar beets rather than sugar cane, which creates some differences you’d notice if the two were used side by side. Speculaas use something called “Belgian Brown Sugar,” which is made by taking regular sugar, gently caramelizing a small portion, and then mixing it back in with the white kind. Stella Parks published a great essay and recipe on this at SeriousEats.com if you want to learn more. This goes to the second part. Then there’s a “brown sugar” made by mixing some actual cane molasses into beet sugar; and another “brown sugar” that’s made by mixing in a cooked sugar syrup that Dutch families use on pancakes instead of the U.S. maple syrup. And…

You get the point. The recipes all used “brown sugar,” but those words don’t mean the same thing in the Netherlands as they do in America. Fortunately enough, I’m told by people who have lived on both sides of the pond that these differences are real, but subtle, and not enough to alter the cookie’s character. The recipe you’ll find below starts with white sugar and adds just enough molasses to turn it into turbinado (i.e., identical to splitting the total 50/50 between white sugar and light brown sugar). Add more molasses to taste. That’s a great spot to customize.
STEP 3: Putting it all together to reveal a Heritage Cookie

After all that research, and a second “are we there yet?” episode from my beloved, the final test recipe came together quickly. I stayed up late to make a batch for the morning coffee, went out of the kitchen to head upstairs… and discovered She Who Must Be Obeyed waiting on her reading chair, drawn from her aerie by aromas of cooking hazelnuts, butter, and spice.

“They smell fantastic. Are they ready for testing?”

“It’s a dunker. They’ll be all soft and warm fresh out of the oven. It won’t be a fair way to judge.”

She cocked her head and gave me a look. “How many are there in a recipe?”

“Almost 40 for this batch. They’re actually kind of small.”

“Then there will be plenty left for tomorrow, won’t there?”

“I don’t know. My photographer gets awfully picky…”

“I’m the photographer! If you want to see picky, keep standing there in the way and you’ll learn about picky!”

I am a man. A mere man. I can’t even translate that sentence. I certainly didn’t want to experience it. So I stepped aside. But I spoke up even as I deferred. “I do want to press in the thumbprints, at least on some. Then we can sample any ugly ones.”

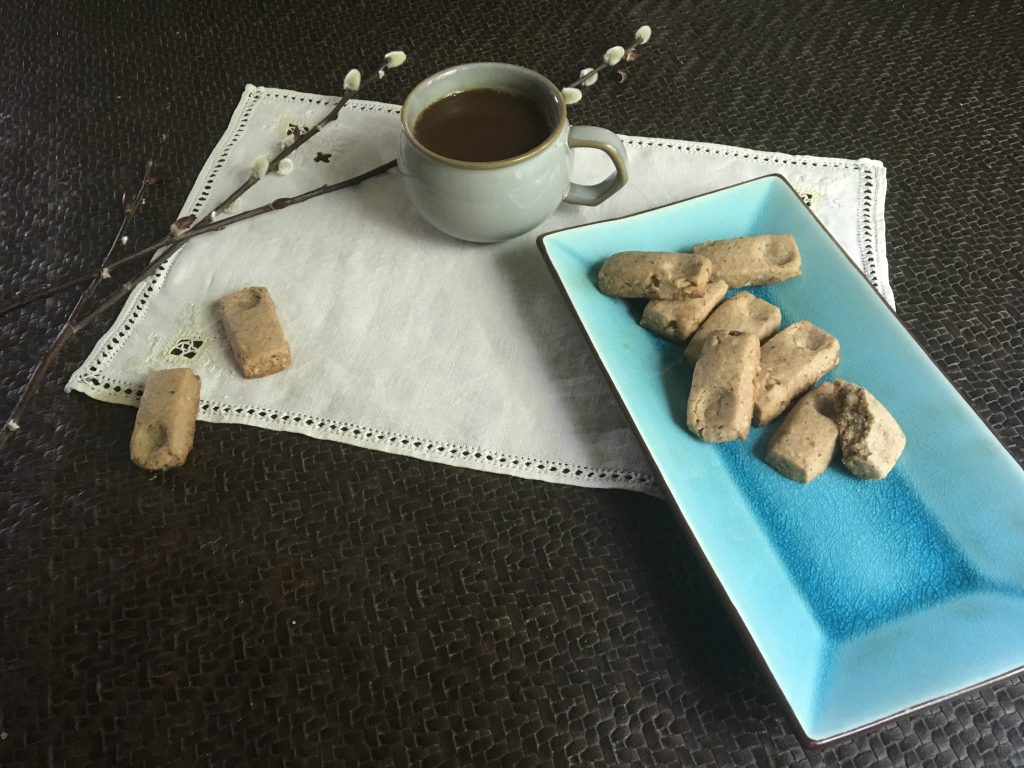
And so we did. I burned my thumb. She did not. I will make my thumbprints with the tip of a spoon next time. She will laugh when I do. We both think it’s a great look. And yes, we both had a taste. And then another. They were goooooood.

FOLLOW UP NOTE: This batch produced 39 cookies. We ate two that evening, and Kate put ten aside for the photography. There were exactly 20 left when I put them in a tin for my “get thee out of the house” sharing trip. Cookie gremlins are a thing in this house, and I can’t exactly blame them. Frisian Thumbs are goooooood.

NOTE FROM KATE: Scott is a talented writer of fiction. I categorically deny all of the above. Except the part about Frisian Thumbs being good. No one can deny that.
Final touches

Some cookies take a ton of fidgeting. Others just slide together all on their own. This was one of the latter. They were great warm, and the ones that survived our gremlins were even better the next morning. I’m noshing on some of the rapidly vanishing leftovers even as I type. So there weren’t a lot of changes in this one. But there are a few decision points beyond the recipe that our readers should know about in advance. Knowledge is power, and this way so you can make your own choices.

  1. About the flavor. The first thing you taste is a combination of butter and hazelnut, which changes as the ground spices kick in, and then changes again when you crunch through one of the whole anise seeds. It’s definitely a spice cookie, and definitely a hazelnut cookie, and definitely unique, but at the same time there’s nothing here that is “strange”. We’d have no problem serving this to kids of all ages with no warning other than, “Here’s a cookie you’ve never had before…”
  2. About the anise. No warning unless you dislike anise, that is. Some people don’t. My Dad hated licorice flavor, and our younger daughter is lukewarm at best. This isn’t a cookie for them. No, it isn’t an “anise cookie.” Anise is just a component flavor. But it is a clear and distinct component.
  3. About the whole anise seeds. Whole seeds can get annoying when a hull gets caught in your teeth. It isn’t a big issue, and the whole seeds add a late-hitting pop of flavor that both of us enjoy. Kate would keep them buried inside the dough for the sake of simplicity, but you’ll see that I wrote the recipe in a way that sets half of the seeds aside to be placed on top. I only did it to remind people that the seeds are there, and to expect the occasional chewy bit. Don’t bother if you don’t care.
  4. About the salt. Using the full ½ teaspoon of salt gives this cookie a noticeable kick that I enjoyed, but I also prefer salted nuts over plain for eating out of hand. The salt level might have been a tad too much on some other day. The cookie definitely wants some salt to bring out the nutty flavors, but we recommend that you start at the ¼ teaspoon level and then add more as desired. Make a note of your preference on the recipe.
  5. About the coffee, and the dunking. I have never come across a cookie that pairs better with a cup of coffee. Not ever, anywhere, in any form. It’s almost stunning to write those words, but they are true. At the same time, it really is a “pairing” rather than a case where one side needs the other. Together, they are more than the sum of their parts. But separated they’re still darned good on their own. Frisian Thumbs have enough texture to hold up well as a dunker, but they also have enough moisture and suppleness to eat out of hand. Frisian Thumbs are goooooood.

That’s about it. Sorry to run on so long. This is an easy cookie to fall in love with, and both of us have. Head over heels. Let us know if you feel the same.

Enjoy!
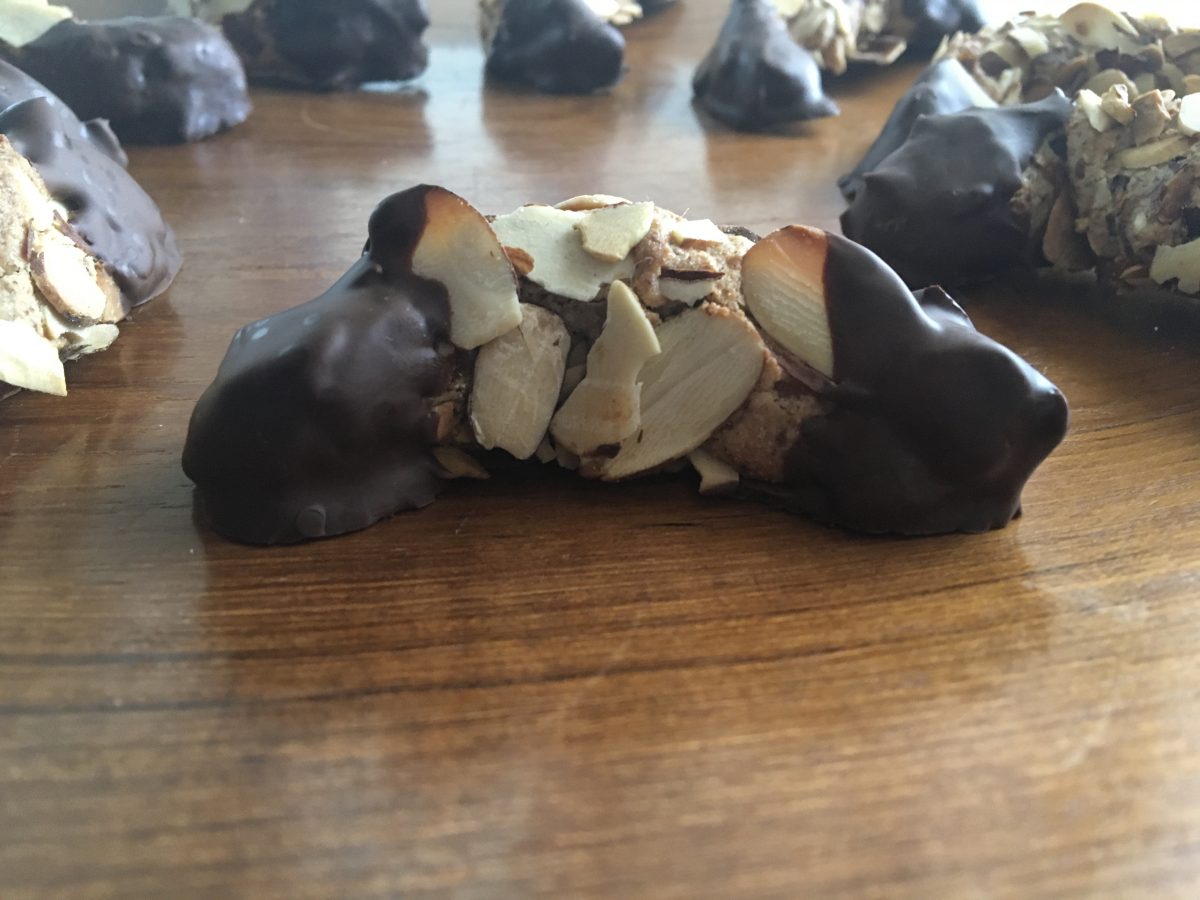
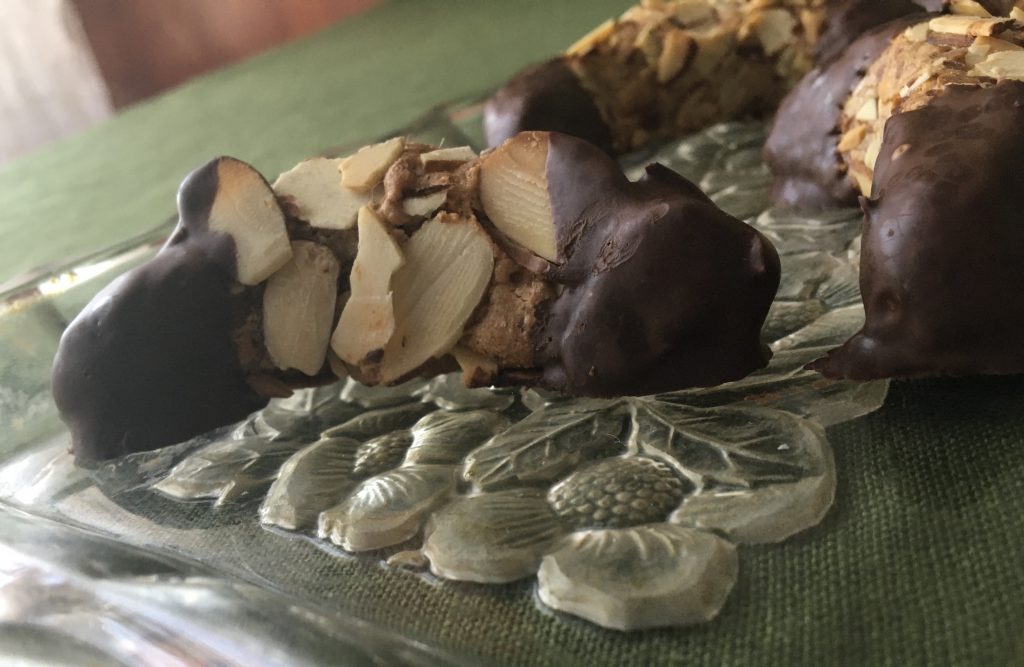
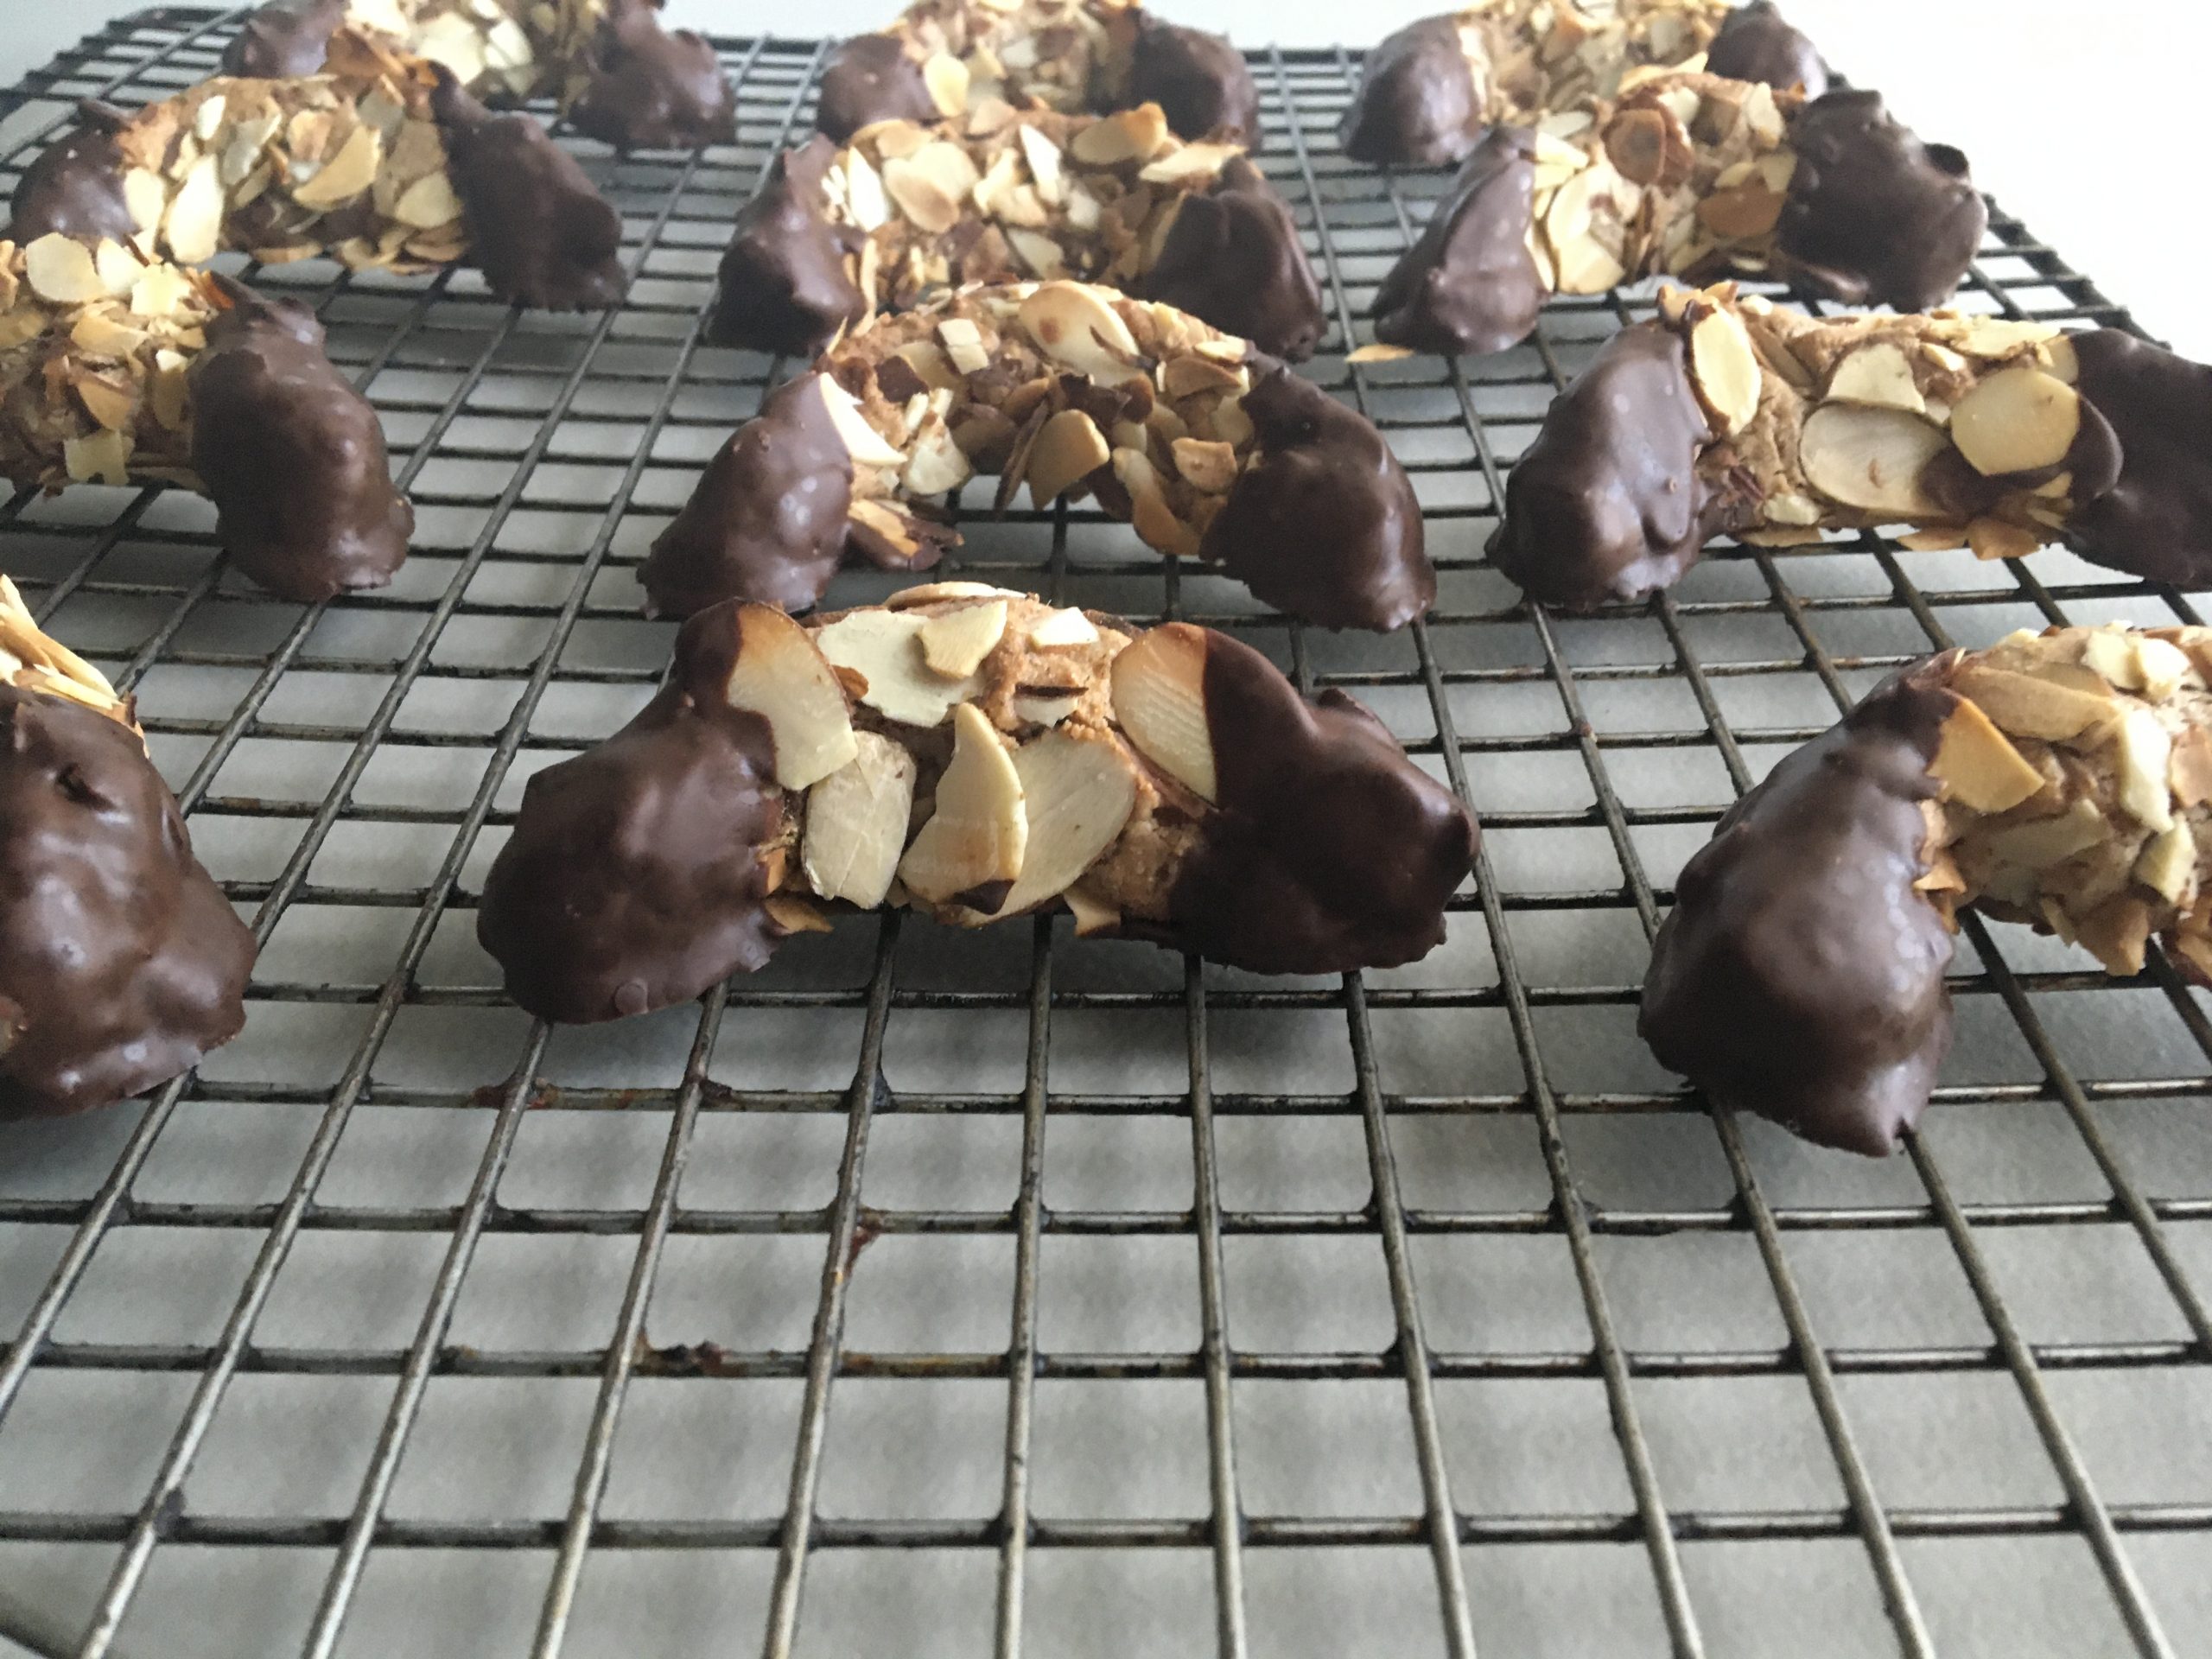
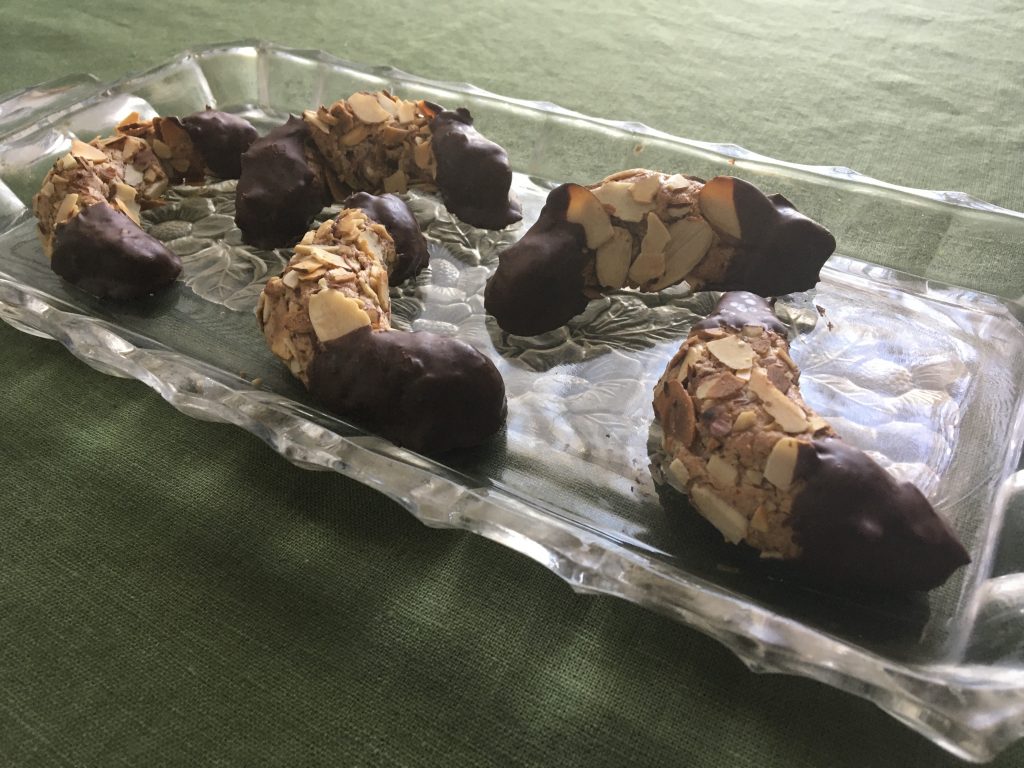
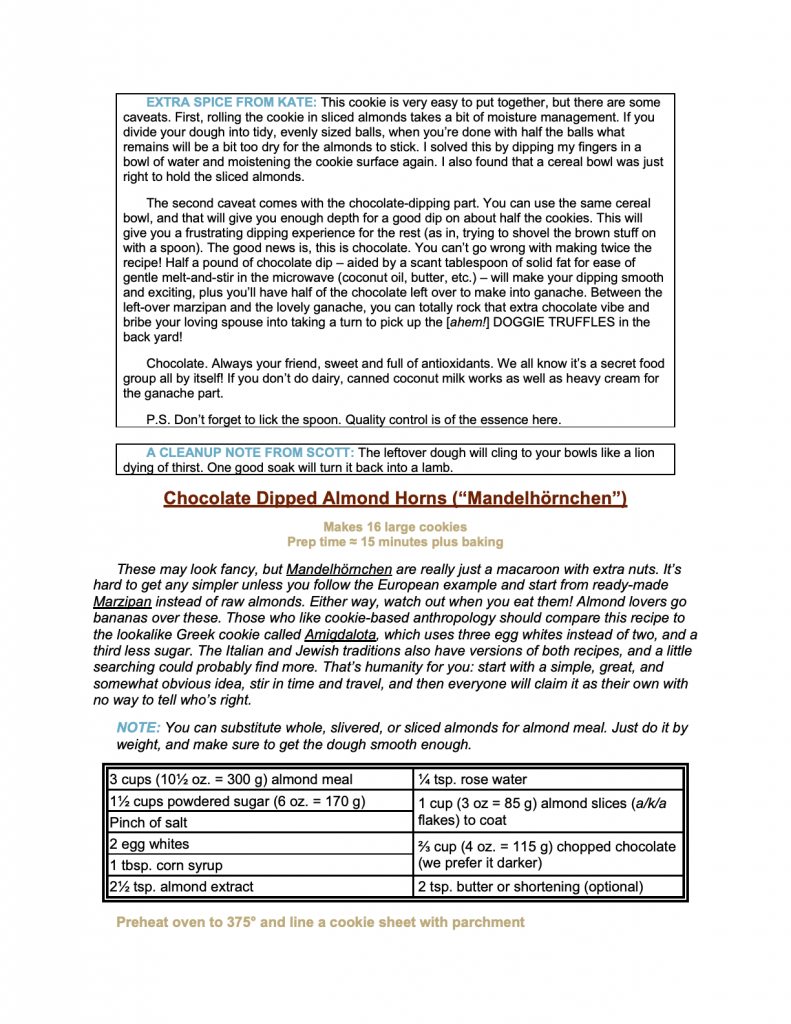
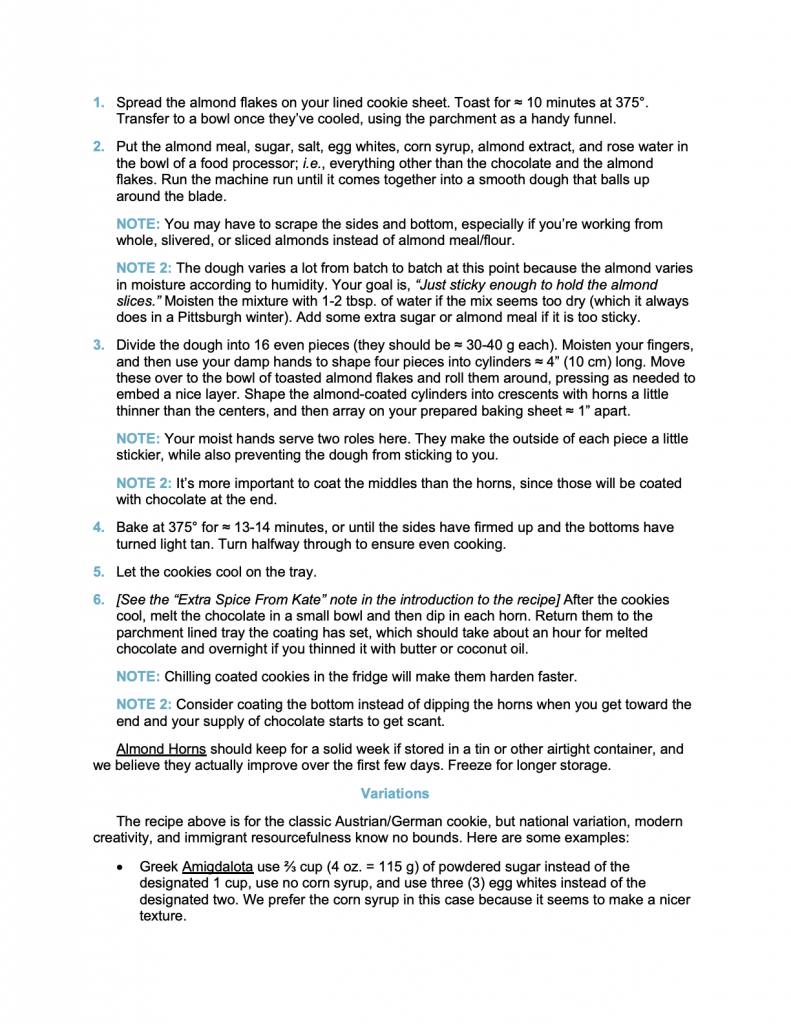
MANDELHORNCHEN a/k/a “Almond Horns”

Here’s a recipe that many readers will know because they’re very popular at certain upscale supermarkets. They have a lot going for them, starting with a very pure hit of almond and chocolate (two flavors that love each other), and continuing through the fact that they’re naturally gluten- and dairy-free, which suits a lot of people with allergy problems. They’re also very generous and fairly dense, which means that anyone who’s willing to eat baked goods for breakfast can get by with 2-3 “cookies” and a nice cup of Joe. (A meal that Scott has admittedly enjoyed as he writes this article).

The other benefit? Almond Horns are incredibly easy to make. The basic recipe couldn’t be simpler: (1) put everything in a food processor; (2) grind until it’s smooth and begins to ball up; (3) roll each piece in almond flakes; (4) bake; and (5) coat the horns or bottom with chocolate. The issues come up with the little details that avoid problems in each of those steps.

As always, please skip to the bottom if you are only here for the recipe.

 Step 1 – Choices About Ingredients

Classic European recipes typically start from Marzipan rather than working from scratch. Take Marzipan, blend with egg white(s) to loosen it up, and you’re basically there. Convenience cookies!

Marzipan isn’t as common in the U.S., costs more, and the different brands vary in their dedication to the cult of sugar and the abuse of almond extract. We’re also a nation of people who take food processors for granted. That tool converts Marzipan from a painstaking process into a walk in the park. If cooking from scratch is cheaper, just as easy, more reliable, easier to customize, and lets you use a little less sugar… well, cook from scratch.

We recommend that you start from almond meal because it’s become easy to obtain and ensures an even result. In the ideal world you’d start from whole or slivered almonds, toast them to enhance the natural flavor, and then reduce that to meal during the grinding stage. It’s really up to you. But from one obsessive purist to another? We just get the almond meal. There’s so much extract that the toasted flavors get lost anyway.

Step 2 – Grind It All Together

No kidding. That’s all you do. Put everything in the machine except your coatings (toasted almond flakes and chocolate). Process, scraping down the sides from time to time, until it comes together into a smooth dough that balls up around the blade. Done.

That couldn’t be any easier, but there are a couple of tricks because the dough changes with (a) your kitchen’s level of humidity, and (b) whether your Size Large egg whites are closer to mediums or closer to XL’s. They do vary within each range you know. It isn’t a problem if you keep the target in mind: “Dough that is just sticky enough to hold on to toasted almond flakes.” Too sticky and it will be hard to work with. Not sticky enough, and your coating will fall off.

  • If the mixture seems too dry, add in a tablespoon or two of water. This happens every time in a Pittsburgh winter, and almost never in our summers.
  • If the mixture seems too sticky, add a tablespoon or two of extra almond meal. Extra sugar works too.

For what it’s worth, we actually get a kick out of these little customizing steps. They make you feel like a Real Expert who knows the secret cheat codes.

Step 3 – Form the Cookies

A few of those secret codes make this step just as easy.

  • First, remember that most people make these into large, 4-5 bite treats. One recipe makes enough for 16.

That’s not a coincidental number because you get there by cutting the dough in half, then each half in half four more times. If you want smaller cookies, cut the initial piece into thirds and then proceed to halve them over and over. This will get you to 24.

  • Second, moisten your fingers and palms before you form each cookie. That will keep the dough from sticking to your hands, and also make the surface extra sticky for holding on to the almond flakes.

Better for you, and better for the cookies. You’ll need to wet your hands several times before all the pieces are done.

  • Third, form each dough piece into a short, fat sausage as thick as you want the middle of your cookie to be. Roll this cylinder in the toasted almond flakes, and then pinch/curve the ends to form your crescents.

Cylinders are much easier to work with at the rolling stage, and you do not need as many almonds on the ends anyway because they will get coated in chocolate. Yes, you can just make a longer, thinner sausage, roll that, and bend it into a “C”. And yes, it is a little easier. We prefer the result from crescents; they have a texture that changes as you nibble through each treat.

Step 4 – Bake

375° is just hot enough to get a few of the almond edges extra toasty. A nice touch. As always, you want to pay more attention to the aroma and texture than the actual time. They are done when the sides firm up and the bottoms have turned light tan. It’s taken a consistent 13-14 minutes during winter testing in Pittsburgh with our oven. Please let us know if your results vary.

We also encourage you to spin these trays halfway through to ensure even cooking. We usually don’t bother with that step unless we’re dealing with wafers, but for some reason this particular cookie has been sensitive to hot spots.

Step 5 – Coat The Ends With Chocolate

This is the one step in the recipe that creates some frustration. It comes from two problems. First, the chocolate will harden as you work. And second, you won’t have enough chocolate in your bowl to dip the ends when you get to the final few pieces.

You can solve the chocolate problem by either keeping it warm, or mixing in a small amount of fat. Scott prefers to use plain chocolate, and to keep zapping it in the microwave for very short bursts as needed. Kate, who did most of the chocolate work, suggests adulteration – with the proviso that you must use a fat hardens at room temperature. Coconut oil works but can add some flavor. Palm oil has the perfect characteristics but is evil. She recommends butter or shortening, whisked into carefully melted chocolate. The resulting chocolate dip can be extra sticky at room temperature and takes a while to harden, but it is easy to work with. Your mileage may vary.

The problem of what to do toward the end takes more thought, and there is no really good answer. If you want the chocolate supply to end on the final cookie, you won’t have a deep enough pool to actually dip the horns of the last two pieces. Careful work with a spoon can help, but it only goes so far. Either you need to make/waste extra chocolate dip, or you need a cheat code.

Scott offers this workaround: Don’t try to dip the horns on your final piece. Coat the entire bottom with your leftover chocolate instead. It creates a more uniform treat that’s a little less intriguing to look at, and has less contrast when you eat it, but it does have the benefit of giving every bite a little bit of chocolate. Brush all the bottoms with chocolate if you want every piece to be the same.

Kate rolls her eyes at that, and says you should simply make enough chocolate to do the dipping and be done with it. Leftover chocolate makes a wonderful ganache for truffles, or at worst a special treat for the first lucky passerby who can find a spoon. You, of course, are a mature, fully grown person with the control to inflict those treats on someone else.

Cool and Consume – The End… Until Next Time

Mandelhörnchen are one of those treats that become a baker’s signature offering to guests, grandchildren, and drama club bake sales alike. They’re so very big! Physically, in taste, in texture, and in ways that combine to be more than the sum of their parts. They also show off familiar flavors, and they taste exactly like people think they will, except more so. There’s a huge bang for the buck factor.

Plus they’re fun and easy to make once you internalize those little tricks: keep your hands moist when shaping, and accept that there’s only so much chocolate to go around.

This is a marvelous recipe that you’re really going to treasure. We Promise. Enjoy!

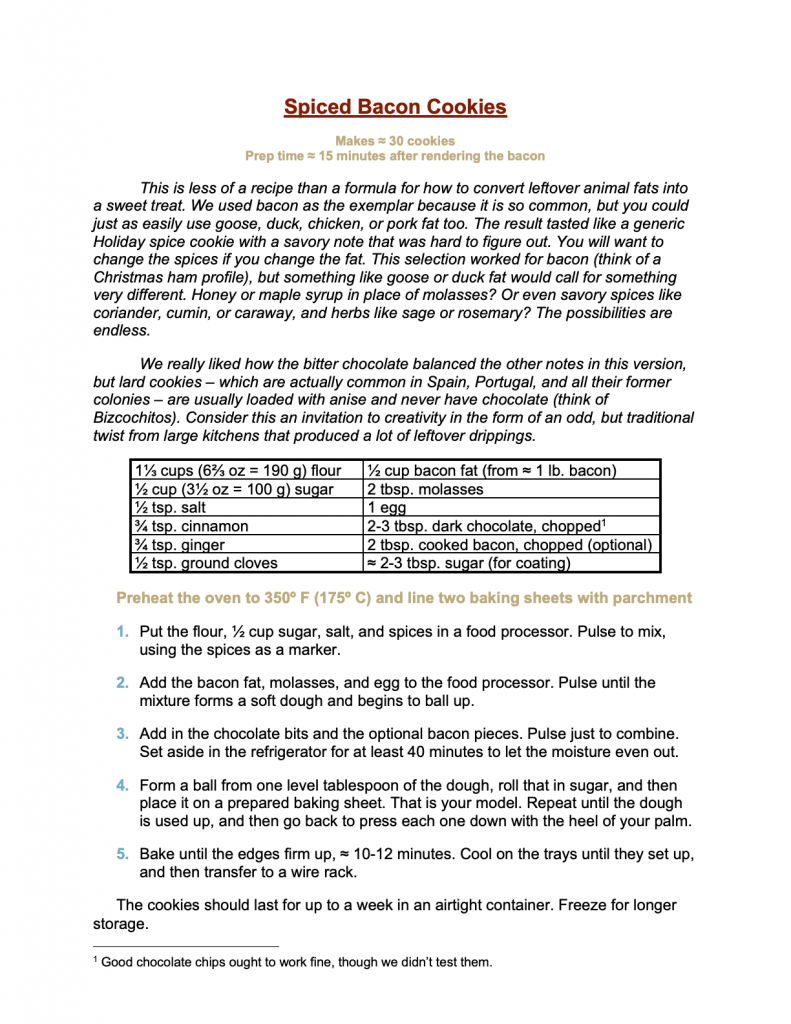
SPICED BACON COOKIES – Not so strange after all!

Dairy free and delicious, what’s not to like? This cookie offers a unique flavor profile with a familiar texture somewhere in the slice-and-bake or sugar cookie range. The only unusual part is that title ingredient, and it’s hard to say if that’s really as unusual as people might think.

As always, skip to the bottom if you only want the recipe.

EXTRA SPICE FROM KATE: Okay, hold the phone a sec. My husband’s version of “health consciousness” can sometimes cross that invisible line into “health denial”. Before he continues with his ode to pork, we want to point out that butter, lard, shortening, and all other saturated fats – even bacon [gasp!] – are not good for you. That is why cookies are a treat, not a staple. No, bacon fat is not really any worse than any of those others. Granted. And he’s 100% right that using it in a cookie is “heritage”, not “weird.” But keep the enthusiasm within bounds. This is not a physics-optional cartoon. You may proceed now.

Animal fat cookies are rare in the U.S. for sure, but that is only because we tend to be wastrels and spendthrifts when it comes to leftover fats and drippings. Americans are taught to reach for purified, store-bought fats like butter, shortening, or oil when we cook. But that isn’t how things used to be, and it still isn’t true in professional kitchens, or in any part of the world where people pinch their pennies a little harder. In all those situations the leftover fat, such as drippings from a roast, are treasures to be saved, not waste to be discarded.

That isn’t to say we are holier than thou. Here is our standard method for cooking a few slices of bacon for breakfast: place some slices between several layers of paper towel, put it on a plate, and then microwave for 3-5 minutes until it gets as crispy as you desire. Discard the dirty paper with all that nasty fat.

What could be better? Well… how about not wasting all that fat, which qualifies as “delicious” rather than “nasty” in any other time and place the world has ever known? Sorry to sound all rant-y. We really do use that paper towel trick, and it really does work. But it is sort of embarrassing when you consider the historical perspective.

Try this method instead if you have any plans to use the fat: Place your slices on a rack over a sheet pan (spiced as you desire) and then cook at 375° for 15-25 minutes, depending on thickness. Remove it from the oven when it hits the level of crispy you want. Flip it over with tongs to let any pooled fat drain into the pan, give it a minute, and then dab off any excess with paper towels. Super easy, super reliable, and nothing wasted. Use 350° for chewier bacon and 400° if you like more char and you’re willing to tolerate the smaller safety window before it burns.

FWIW, this recipe calls for ½ cup of fat, which is almost exactly what you ought to get from rendering a pound (16 oz = 450 g) of bacon. A perfect and thrifty method for whenever you cook large amounts of the Mighty Meat.

Comparison Recipes

Lard (pork fat) has to be the most common cooking fat after butter, shortening, and oil. U.S. bakers adore it for pie crusts and biscuits, but lard is also a common cookie ingredient; particularly in Spain and its colonies. Bizcochitos, the official state cookie of New Mexico, are the best known variation (see Heritage Cookies Volume I for a recipe). Spanish Mantecados are a more tender example, with less flour and a little olive oil added to create a shortbread effect. Look for it in a future blog post.

Bacon fat is nothing more than lard with extra flavor, if you look at it sideways. We’ve found many more savory recipes than sweet ones in the world of baking. There is a German side dish called Speckkuchen (“Bacon Cakes”) that’s definitely worth your attention if this interests you. But this article is about the sweet-treat, cookie versions and they are far from unknown.

Tricks From The Testing

This turned out to be a pretty easy recipe to perfect because the U.S. went through a bacon craze in the early 2000’s that hasn’t quite ended yet. People put bacon into everything! And it kept working, and working, and working again. As we write this in 2021 there’s still a common catchphrase that, “Bacon makes anything better.” Okay, that probably isn’t true in the literal sense. Spend some skull sweat and you’ll probably come up with a few exceptions. But the basic point stands: savory, sweet, smoky bacon goes very well with many, many flavors.

We chose a classic Christmas Ham profile for this recipe, using cinnamon, ginger, cloves, and molasses. Feel free to substitute any spice combination you prefer. Just think of it as something to go with bacon rather than something meant for a cookie. Scott is halfway toward eager in his plans to make an extra-smoky version the next time we have a big, multifamily brunch to cook for.

The cookie itself was just as easy. The proportions fell dead center into the classic sugar cookie and drop cookie range. All those charts in the book before each section? This is where they come in handy.

The only complication came with narrowing things down to the final version. The two of us went back and forth on whether the cookie wanted a bit of crispy texture inside. Translation: should we add in some of the bacon we had lying around from rendering the required fat? In the end we left that as an option. Somewhere around two slices (≈ 2 tbsp. when chopped) is the right amount if you have any extra.

But it still wanted… something. That turned out to be bits of dark chocolate.

You’re in good company if that sounds wrong. Kate almost blanched at the idea, and Scott has to agree that chocolate-dipped bacon was one of the less appealing excesses of that bacon-with-everything craze we described above. But this is the exception that proves the rule. The chocolate sort of widened the flavor, while the textural contrast rounded things out.

CONCLUSION

Bacon tastes good. Everyone agrees on that, and we waste never a crumb.

Bacon fat also tastes good. Everyone agrees there as well, but we waste it all the time. There’s no good reason to do so, and people never did until we grew wealthy enough to value convenience over thrift and flavor. This is just one example of the many, many ways in which you can use this overlooked treasure to make treats that will make you sound like a genius. We’ve seen, tasted, and enjoyed Bacon Ice Cream! If that can work, and we assure you it does, then cookies should be taken in stride.

Enjoy! Here’s the recipe:

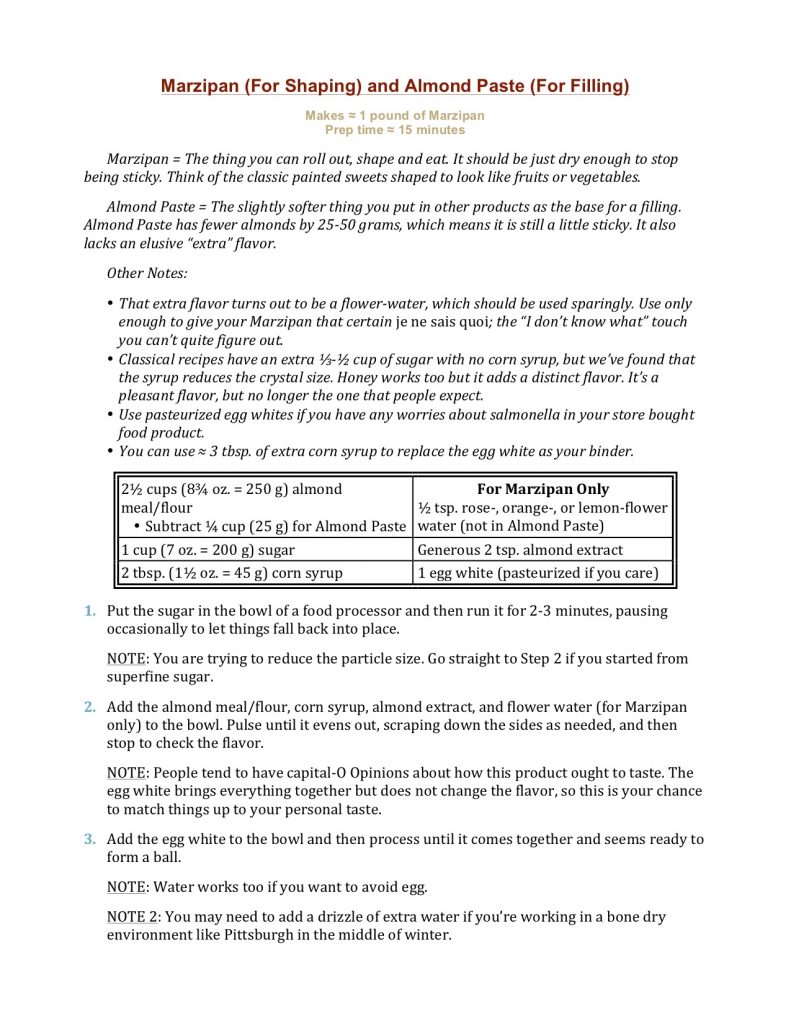
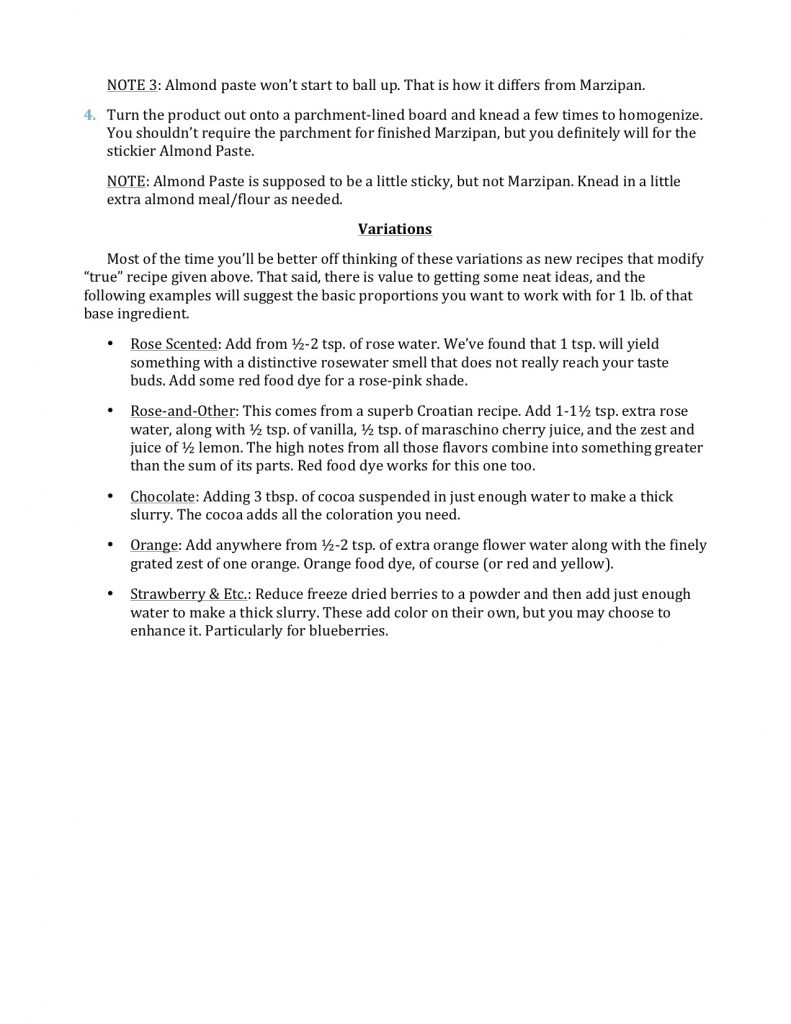
MARZIPAN & ALMOND PASTE – the recipe beneath the recipes

A few weeks ago we put up recipes for a set of Five macaroon recipes we’ve come to love – which could be described as marzipan suspended in an egg white meringue. And I am now working busily on a special Croatian treat called “Rafioli”, which is basically an exotically flavored almond paste wrapped inside a baked pasta shell. [Watch for it!]

German Mandelhörnchen and a Greek equivalent are also on our “to do” list after Kate took an initial whack that wasn’t too far from being right. Those amount to a flavored marzipan or almond paste lightened with fewer egg whites than you’d use for macaroons, formed into crescents, and then dipped in chocolate.

EXTRA SPICE FROM KATE: We have no photos of the Mandelhörnchen because a mysterious cookie gremlin raided our kitchen before anyone could add the chocolate part. Skeptical spouses have wondered if “doppelganger” would be a more accurate than “gremlin,” but I admit nothing. He only suggests such an outrageous thing because they are one of my all time favorites, both tasty and toothsome.

And then… Hmm, a pattern seems to have formed! There are dozens, if not hundreds of baked goods that start with a base of finely ground almonds, mixed with sugar and then bound by egg whites. That ingredient is called “Almond Paste” when left loose and a little sticky, or “Marzipan” when you add enough extra almonds to make it solid. We wouldn’t call either one a “cookie” all on its own. Commercial marzipan is actually marketed more like a not-so-sweet candy (with U.S. and English versions tending to be sweeter), and almond paste as an ingredient. But the basic concept gets used in so many true cookies, and cookie fillings, that it’s only fair to give our version.

Besides, Valentines Day is coming next month and you can earn some major brownie points by making Marzipan treats and forming them into something romantic. And double-besides, the recipe for Marzipan contains a couple of surprises that many people don’t know about, such as a tiny bit of rosewater used as everyone’s not-so-secret ingredient.

Anyway, here is our version for your education, edification, and delight.

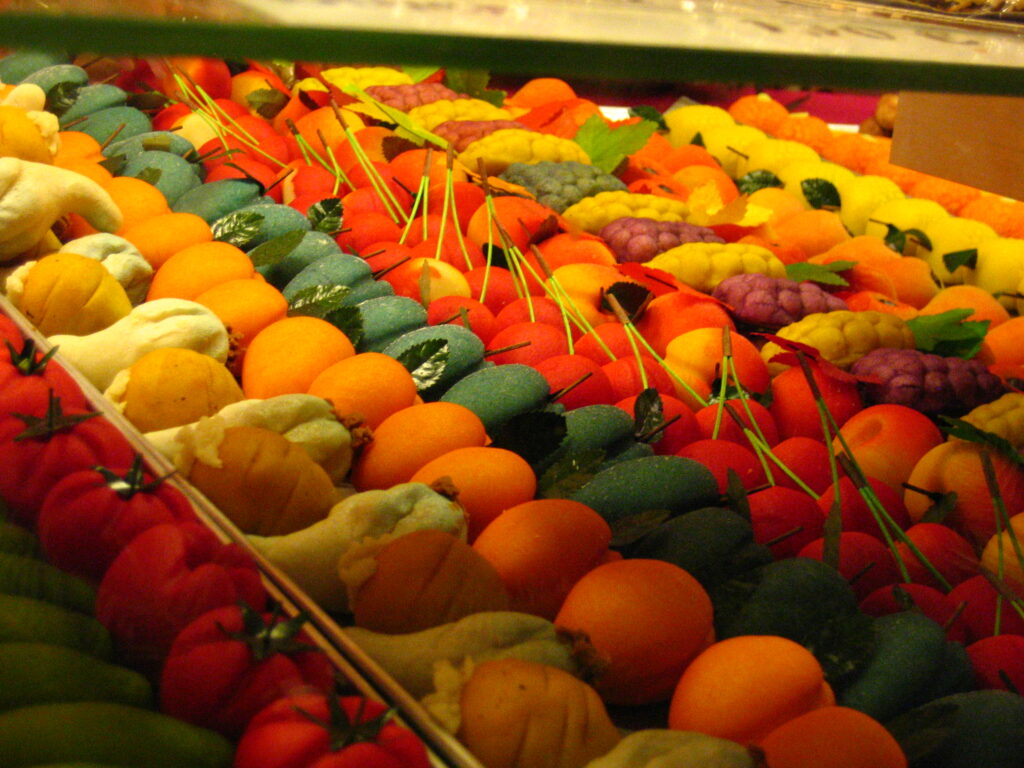
This lovely photo of Marzipan Fruits at the Nuremberg Christmas Market is available under a Creative Commons Attribution-Share alike 2.0 Generic license at the linked website. Many thanks to the author for his or her generosity.

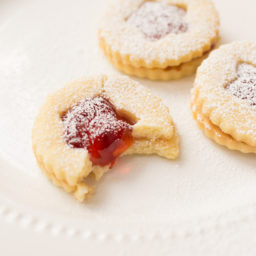
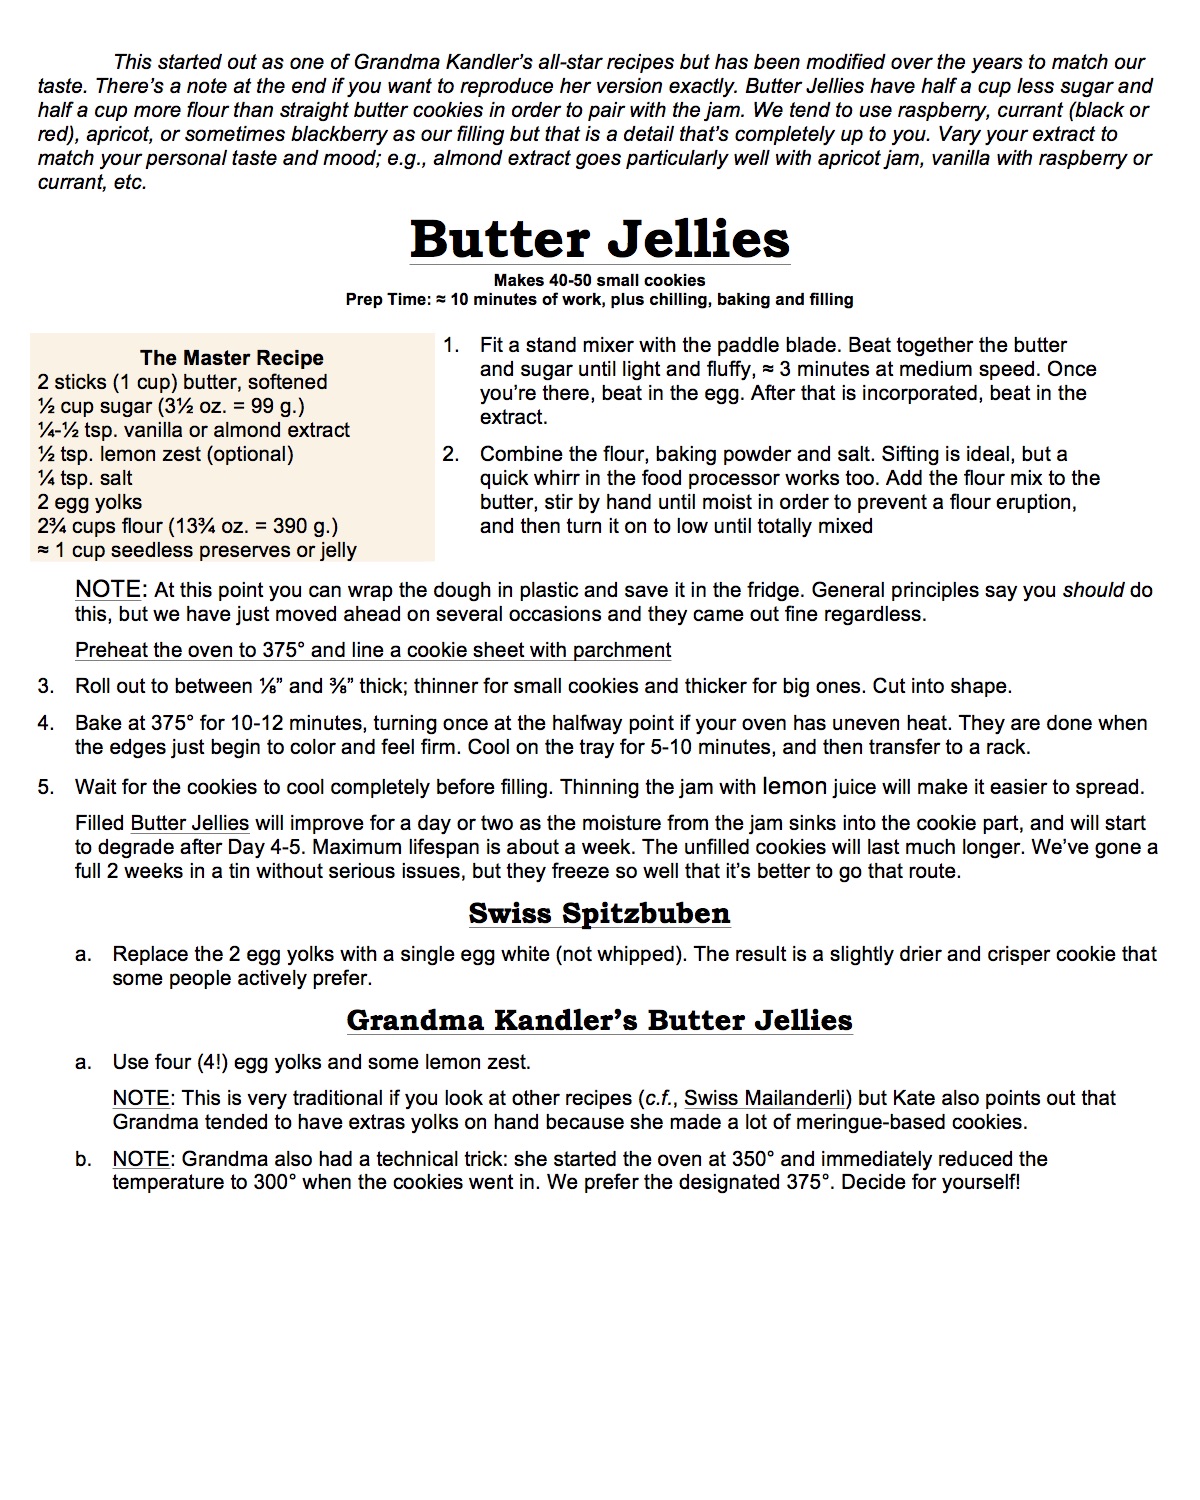
BUTTER JELLIES, SPITZBUBEN, & MAILANDERLI – The one that everyone loves

When you make as many high quality cookies as we do, you get used to a couple of standard questions. The top two have to be, “What are your favorite cookies?” and “What is the favorite cookie overall?” The answer always disappoints: there are no real, statistical favorites because individual tastes end up dominating. But one thing we can say for sure is this:

People adore filled cookies.

There’s just something very “extra” about treats inside a treat. And that’s extra “extra” for Butter Jellies, because the jam in the middle (a) makes them spectacularly pretty, and (b) adds a series of bright berry flavors that cannot be baked into a dough. Yes, you can now find freeze dried berries in a lot of supermarkets. And yes, they add a bit of true berry flavor into your dough that people can taste even through all the butter and other ingredients. But it isn’t the same because the full berry flavor includes a lot of things that don’t come through, such as all the bright high notes.

Those require either an icing or, as in this case, a filling. The combination of tart/sweet jam and buttery cookie is irresistible. If these aren’t the #1 favorite on our annual tray, they probably count in the top three for a vast majority.

It’s really a simple cookie. Butter Jellies and their variations are a basic, roll-and-cut, shortbread/butter cookie with just enough flour to hold together for a few days after they’re sandwiched around liquidy jam. The variations are subtle, and amount to either more egg yolks (Grandma Kandler’s version, which is known in Switzerland as star shaped Mailanderli), or the use of egg whites instead of yolks for a drier mouthfeel (Swiss Spitzbuben). What about whole eggs? We tested it of course, and they work fine from the sturdiness point of view, but we ended up preferring either the rich chew of yolks alone or the dry counterpoint from using only whites. Your mileage may vary.

The jam is up to you. We used to adore rose hip jam, but it became unavailable 5-10 years ago. Nowadays it’s currant jam or blackberry because we reserve raspberry for Linzer Tarts.

And no! These are not Linzer Tarts! That is a name that comes from a classic, pie-sized Austrian Torte made from a fragrant hazelnut/lemon piecrust. No nuts, no Linzer. Thus Sayeth The Lord! So do not blaspheme. These are Butter Jellies.

Make Linzers too. That’s our solution, and if it’s good enough for our family, it’s good enough for yours!

BONUS FREEBIE! To convert Grandma’s version into true Mailanderli:

  1. Use 3-4 yolks in the dough.
  2. Increase the amount of lemon zest to a full 1-1/2 tsp.
  3. Increase the amount of vanilla to a full 1-1/2 tsp.
  4. Cut the dough into stars
  5. Coat the top before baking with an egg wash made from 1 whole egg thinned with a bit of water.

You can follow Grandma’s cooking technique but we’ve had equal success with a constant 325.° Either way, they will want to cook longer because of the lower temperature. 20-25 minutes should be about right.

MOLDED GINGERBREAD – How about a special treat?

Greetings from Kate!

One of my favorite bakes is gingerbread, and I especially like the way it comes out of the mold. I know that Scott gave you got a molded cookie in a recent blog, but we tend to start with the hardest ones first. We also start our baking with cookies that need to sit for a while and soften naturally.

Behold the soft plentitude of molasses and spices! The glaze is optional – I like to mix rum or brandy with powdered sugar until it’s thin enough to paint on with a soft, clean paintbrush.

These beauties are raw, the way they come out of the carved wooden mold. Their features dull a little upon baking, but the glaze will bring them back out. Stay tuned for more images later.

[Two Tricks From Scott:

  1.  For finer features, replace the baking soda in your recipe with Hartshorn a/k/a baker’s ammonia a/k/a ammonium carbonate a/k/a smelling salts. This 19th-century leavener creates smaller, more even bubbles that in turn create a finer, better refined texture.
  2. Leave the formed cookies out to dry overnight, preferably in the fridge or under a fan. This will create a surface that’s just a little firmer than the bottoms that were resting on your parchment or tray. When the cookies rise during baking, Boyle’s Law says they will tend to have that surface rise up instead of spreading out with the moister, underneath part of the dough.

These are the two main tricks that allow for the creation of super-fine features on Springerle, the smooth caps on Macarons, and all the other cookies that feature a “foot” on the bottom..

And now I’m off to order our special, “we’re releasing our cookbook” tins! We’re not scouring local dollar stores this time. I want all the tins to have a nice, streamlined design and a custom-made label that will echo the branding of the cookbook cover – something I hope to show you next week.

Till then, happy baking!

~Kate